Windows 11 and 10 allow you to set different network profile types with specific settings that help you improve security or share files, printers, and other resources in the network. There are three types of network profiles on Windows: Private, Public, and Domain. You can find Private and Public profiles on all computers, while the Domain is only available when a computer is joined to a domain.
The Private profile is the most trusted option for home or work. This profile enables the computer to be discoverable, allowing you to share files, printers, and other resources with people you trust.
While the Public profile makes the device invisible in the local network, this option is recommended when you don’t trust nearby networks such as public places.
As said above, the last one, Domain profile, activates automatically on your computer when it is connected to an Active Directory domain.
In most cases, you will not need a Domain profile as your network administrator maintains it.
In this gearupwindows article, we will guide you on changing the network profile type on Windows 11 and 10. Here is how to do it.
How to Change Network Profile to Public or Private on Windows 11?
On a Windows 11 PC, you can change the network profile type, but the instructions may slightly differ depending on whether you are using an Ethernet or Wi-Fi network adapter.
Step 1. First, open the Settings app.
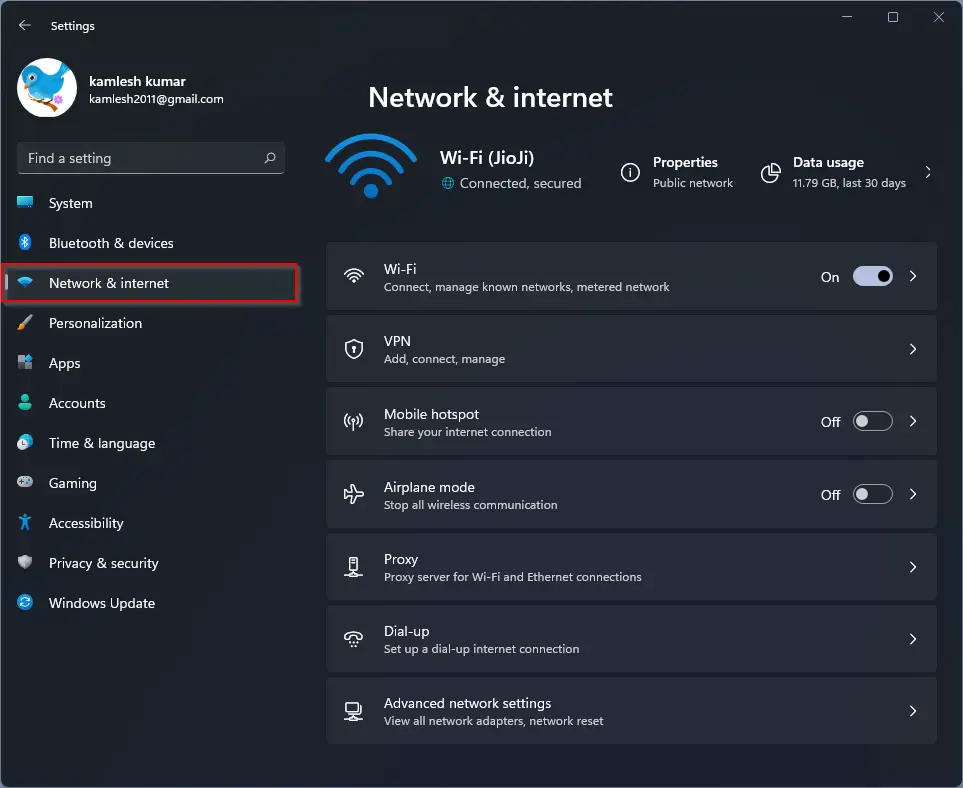
Step 2. Then, select Network & internet in the left sidebar.
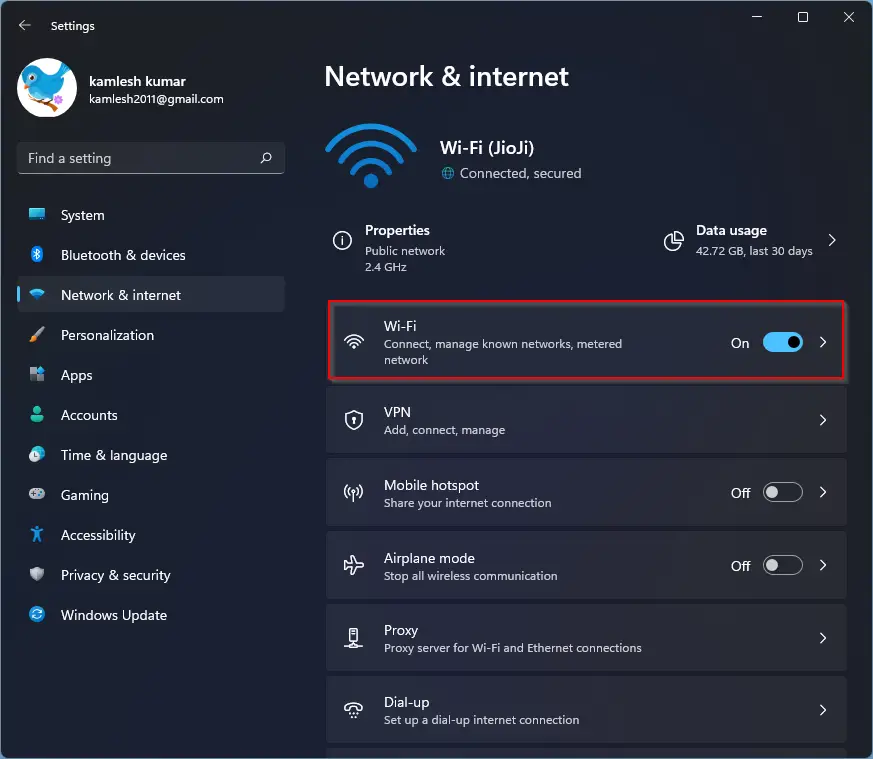
Step 3. Next, select Wi-Fi or Ethernet tile on the right side that you want to configure.
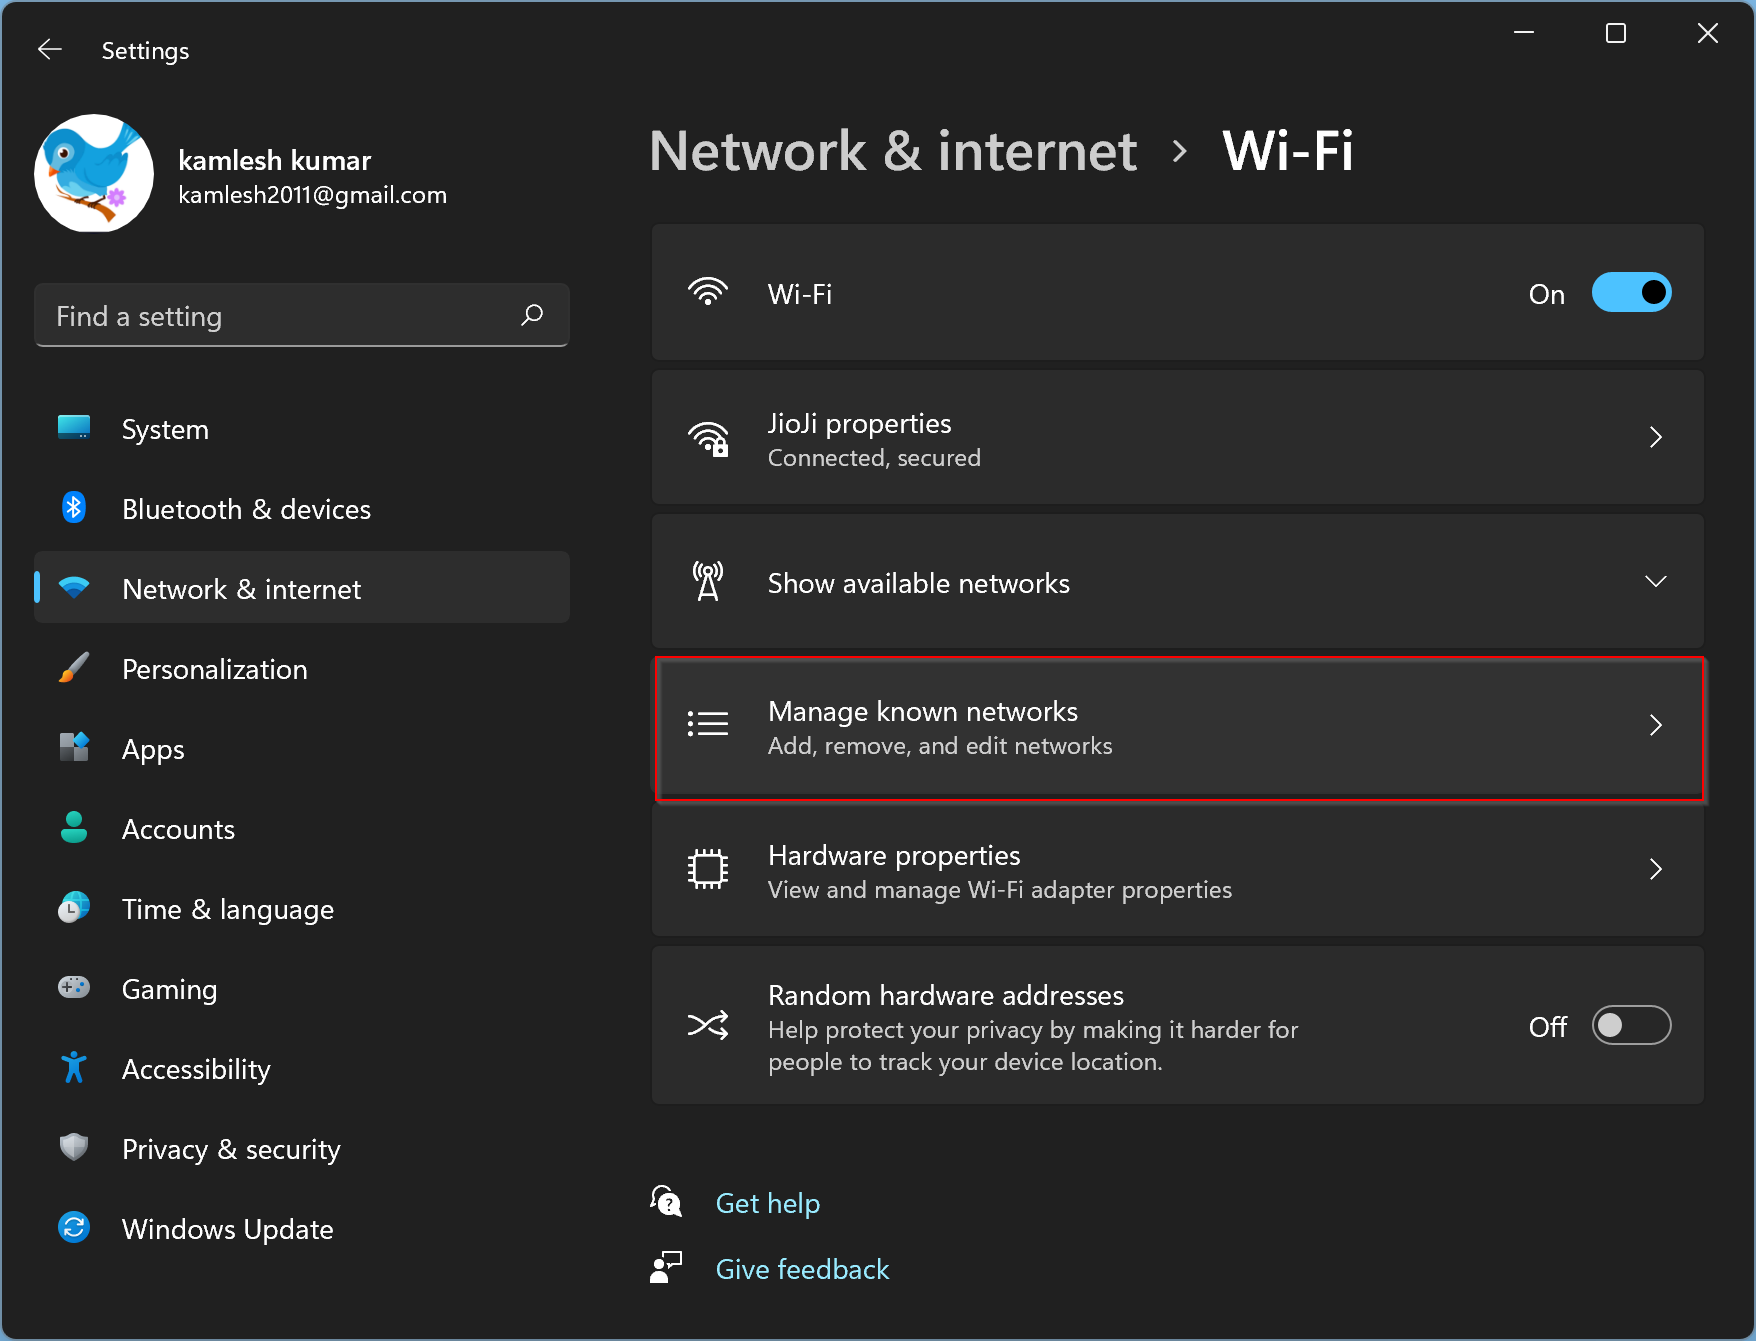
Step 4. After that, click the Manage known networks setting.
Step 5. Select the active wireless connection.
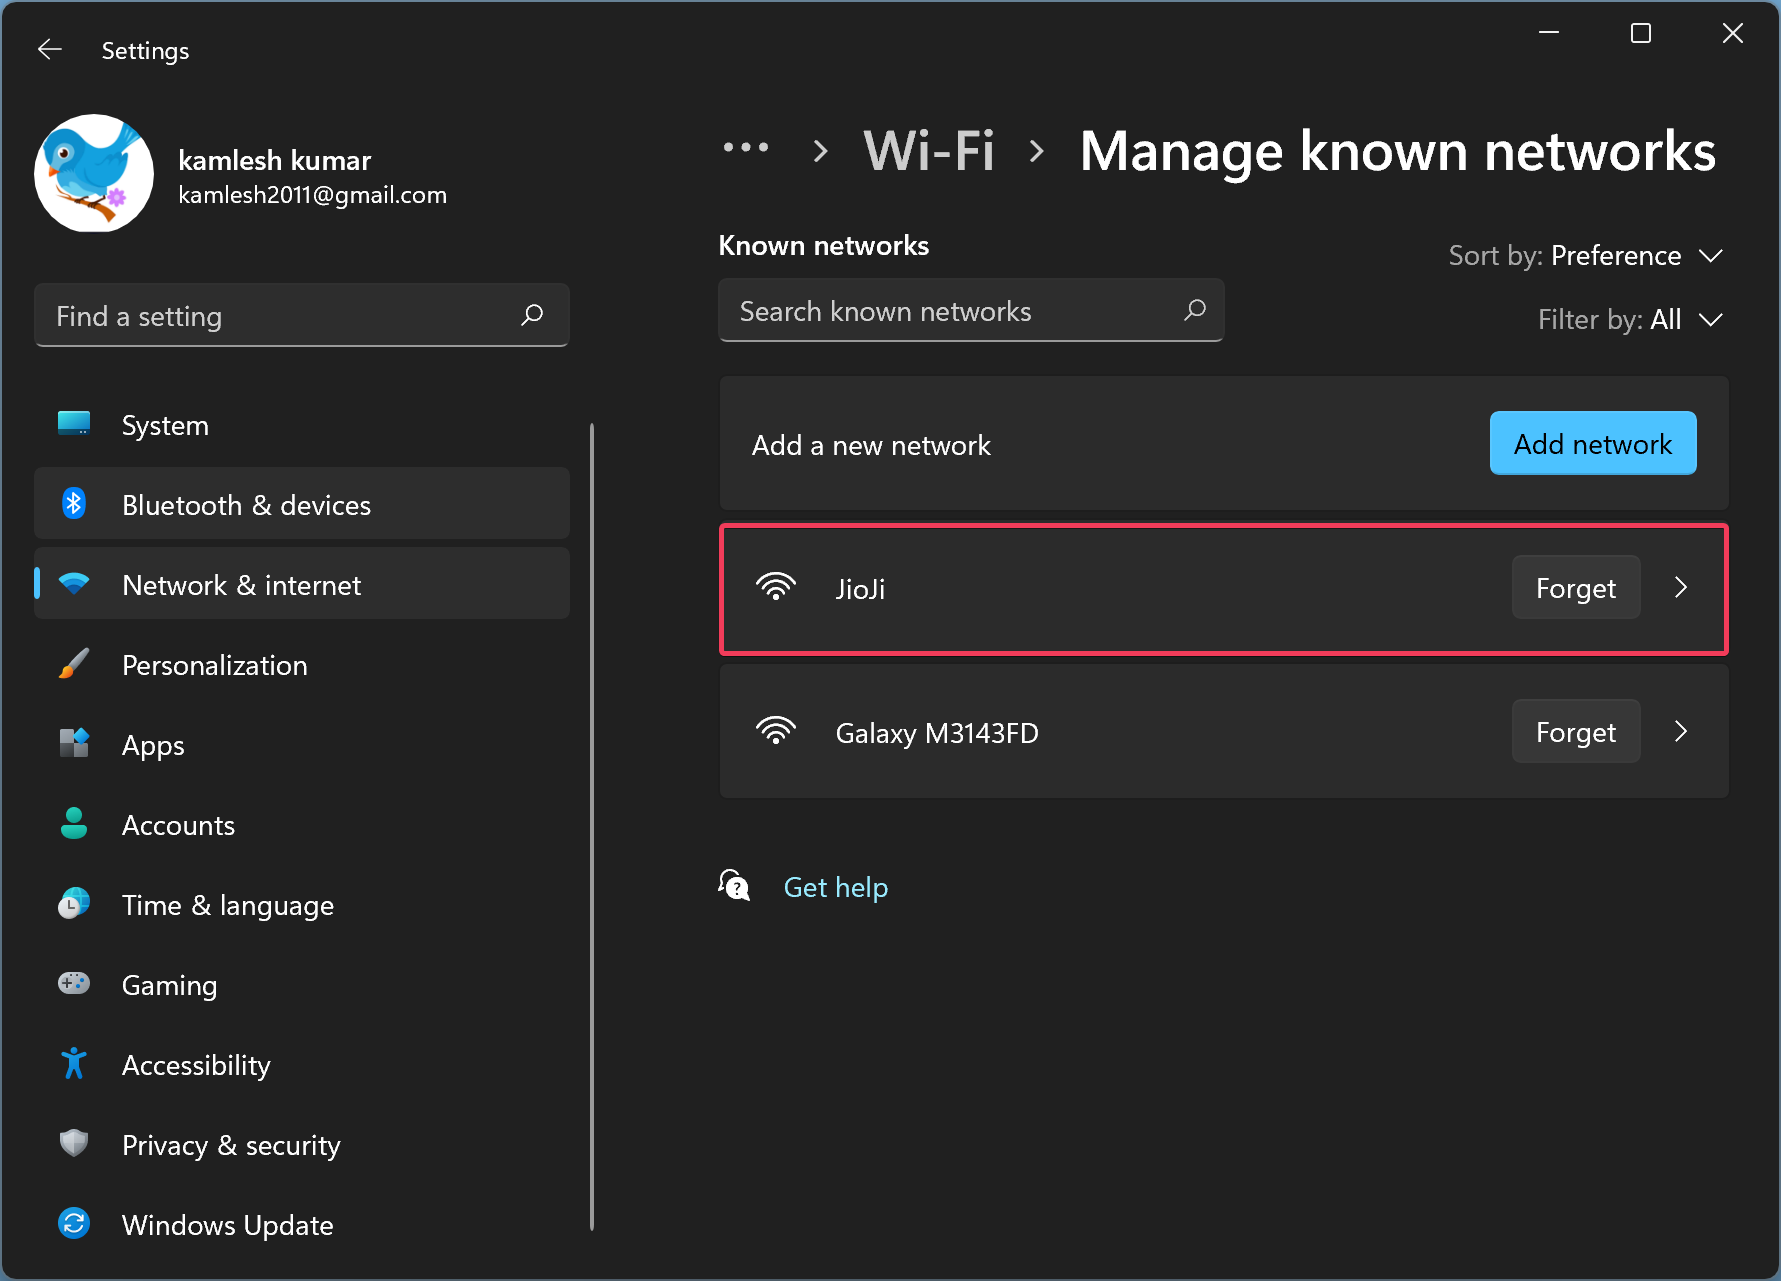
Step 6. Under the “Network profile type” section, you can select a Public network or Private network.
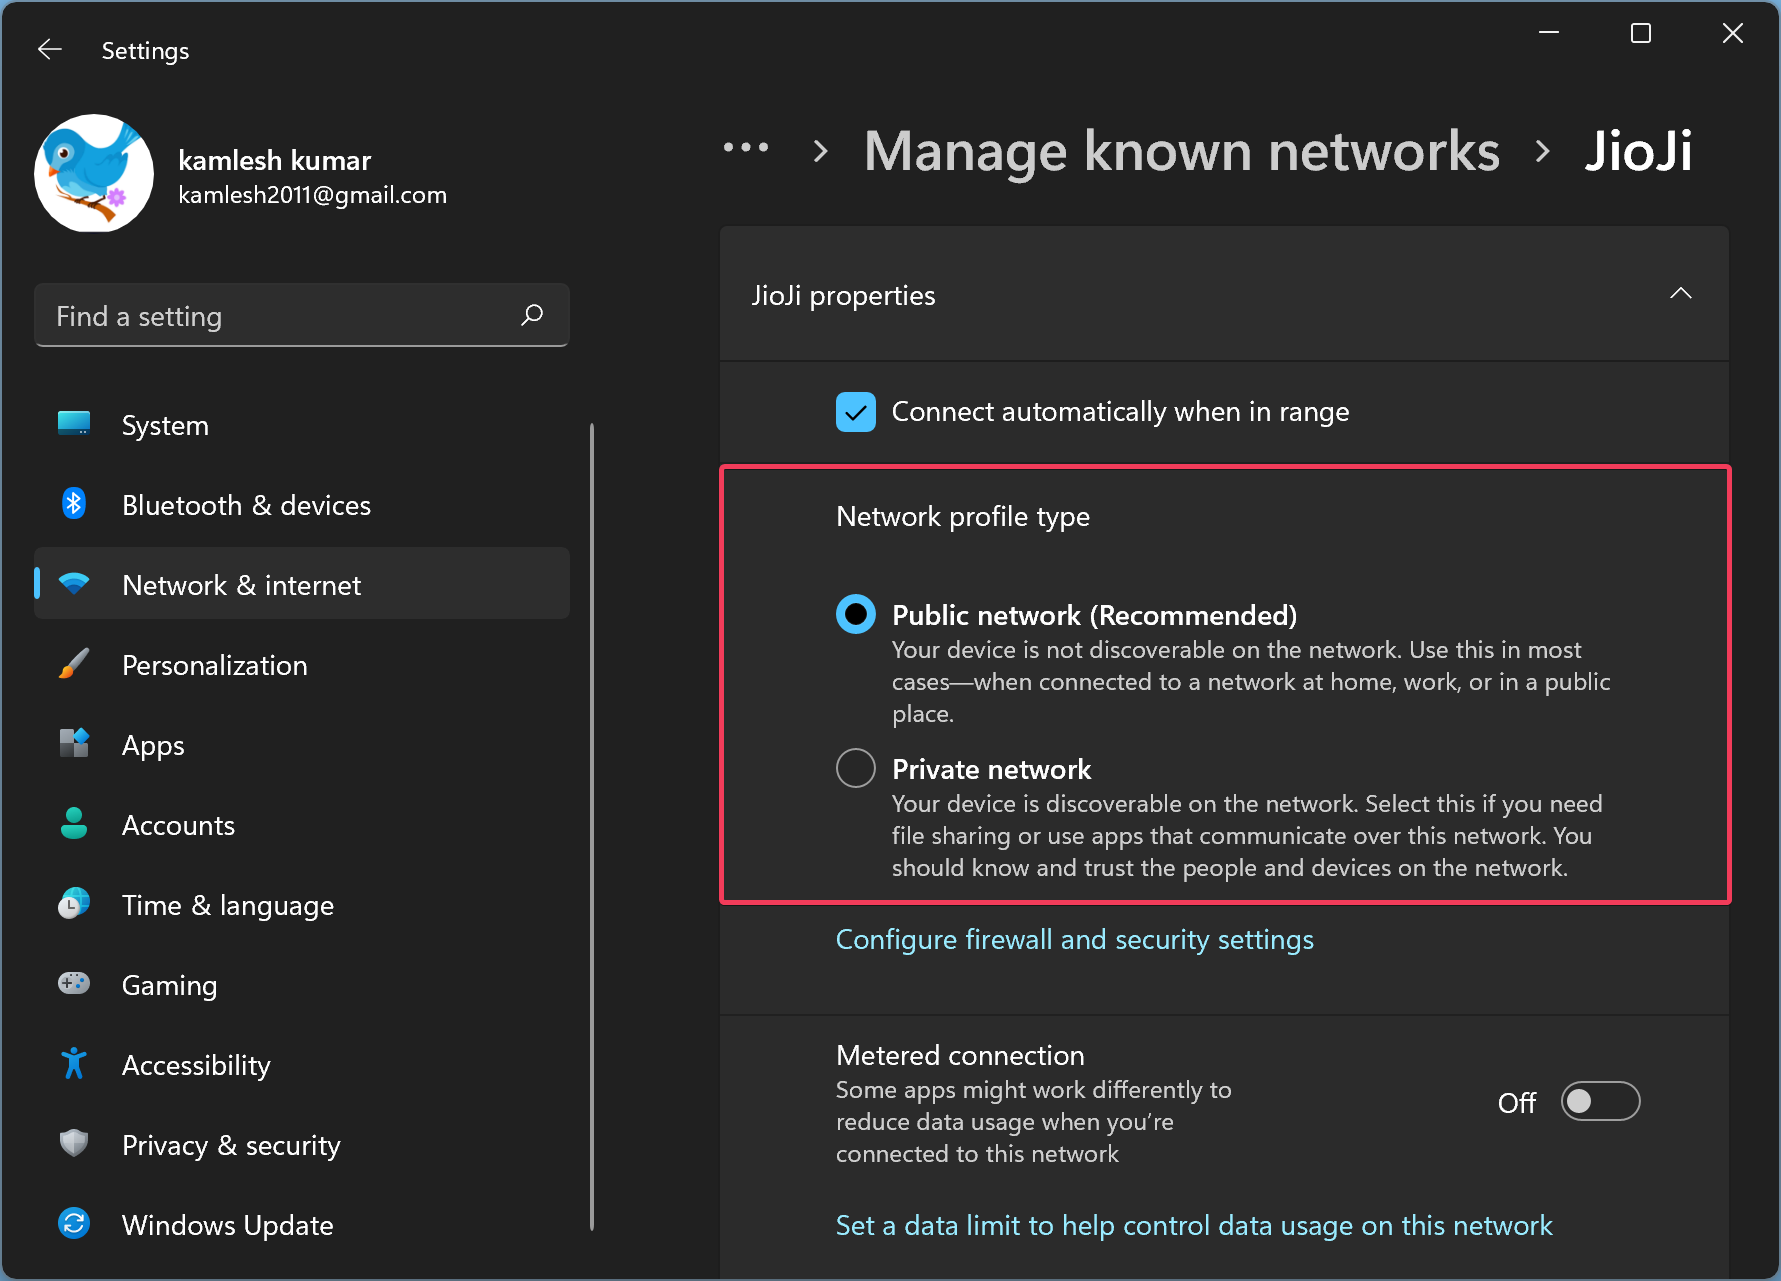
It is important to note that the settings only apply to the active connection. That means if you connect another network to your PC, you’ll need to repeat the above steps.
How to Change the Windows 10 Network Connection to Private or Public?
To change the Windows 10 Network connection to Private or Public, do the following:-
Step 1. Open the Settings app.
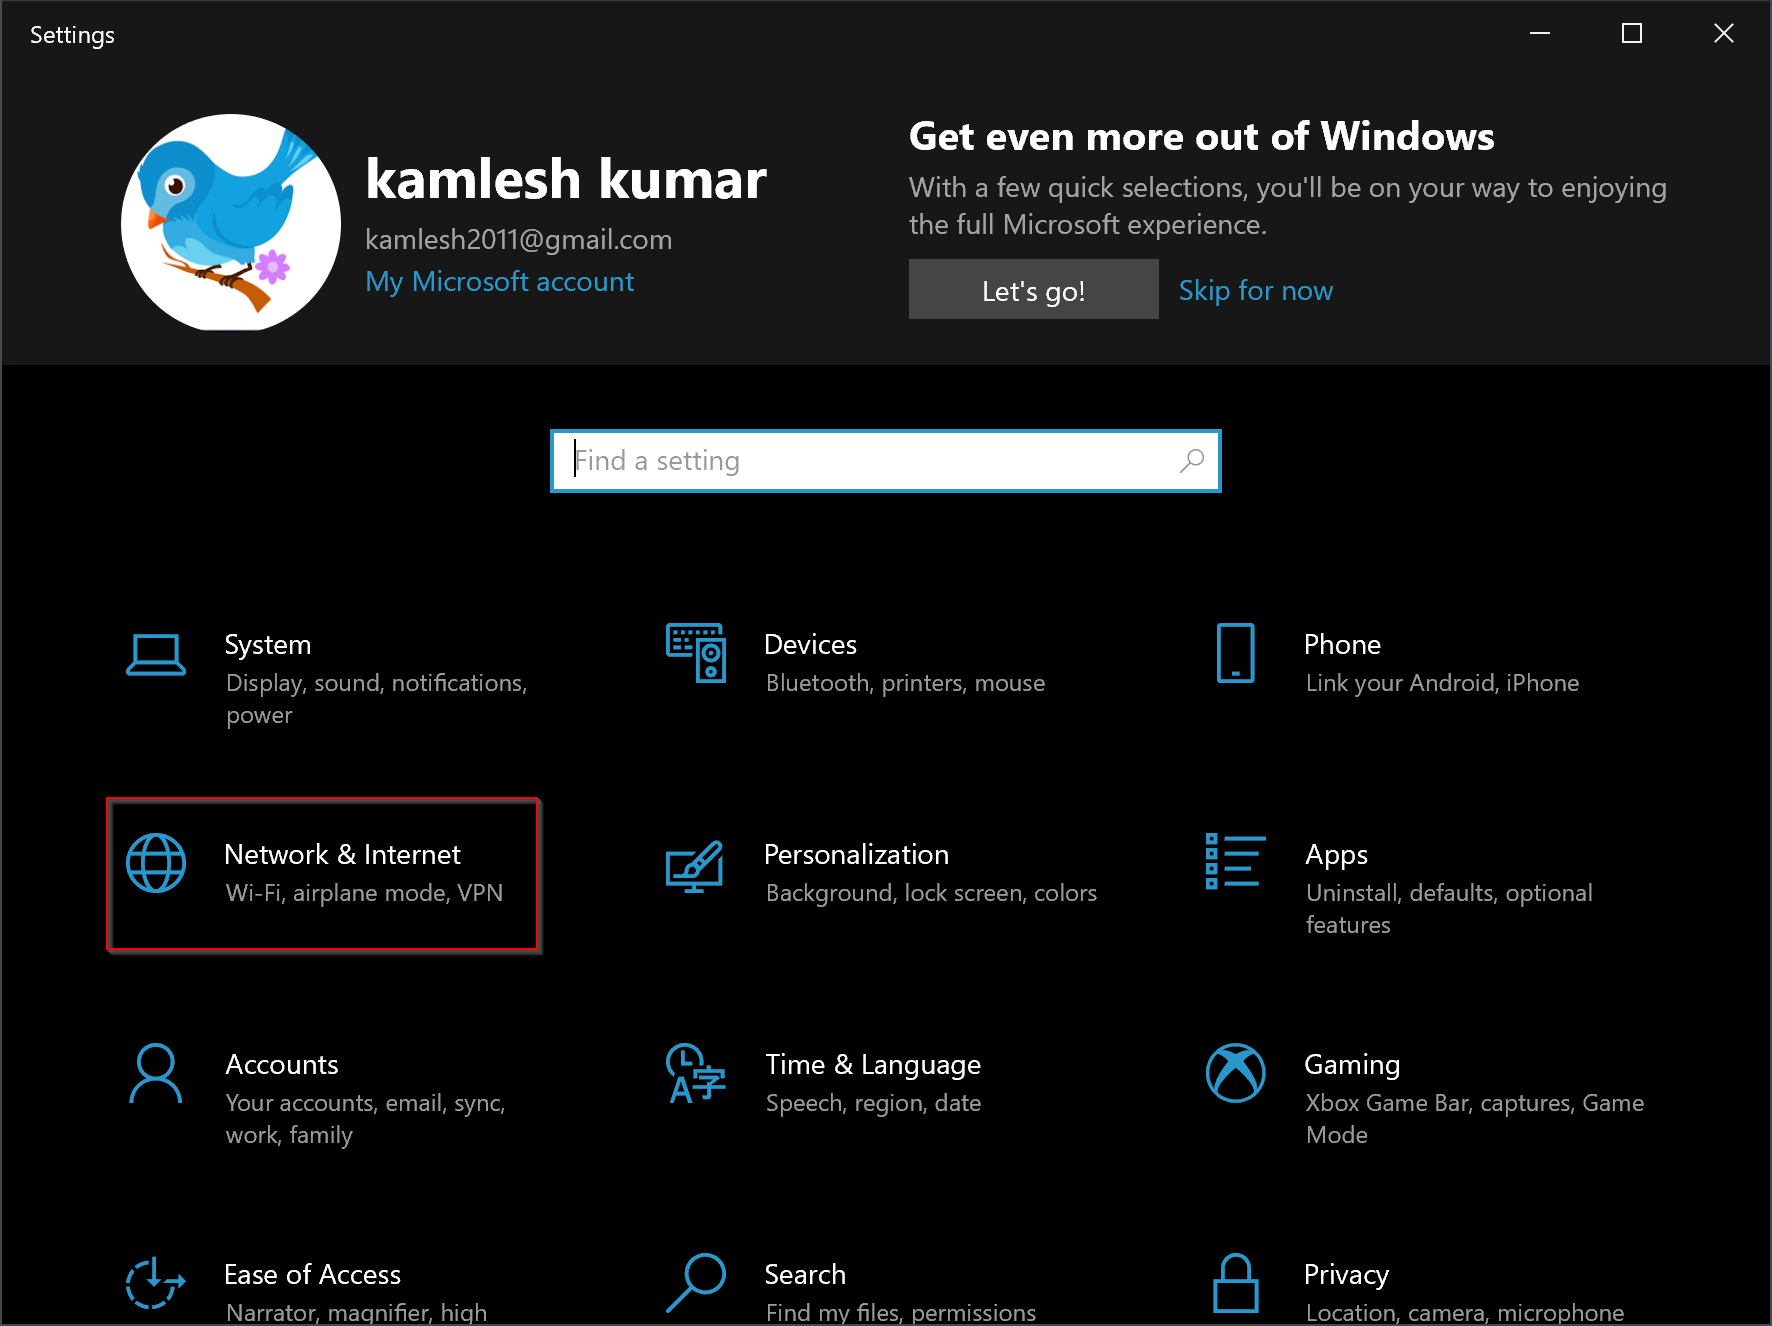
Step 2. Click on Network & Internet.
Step 3. Then, select Status in the left side pane.
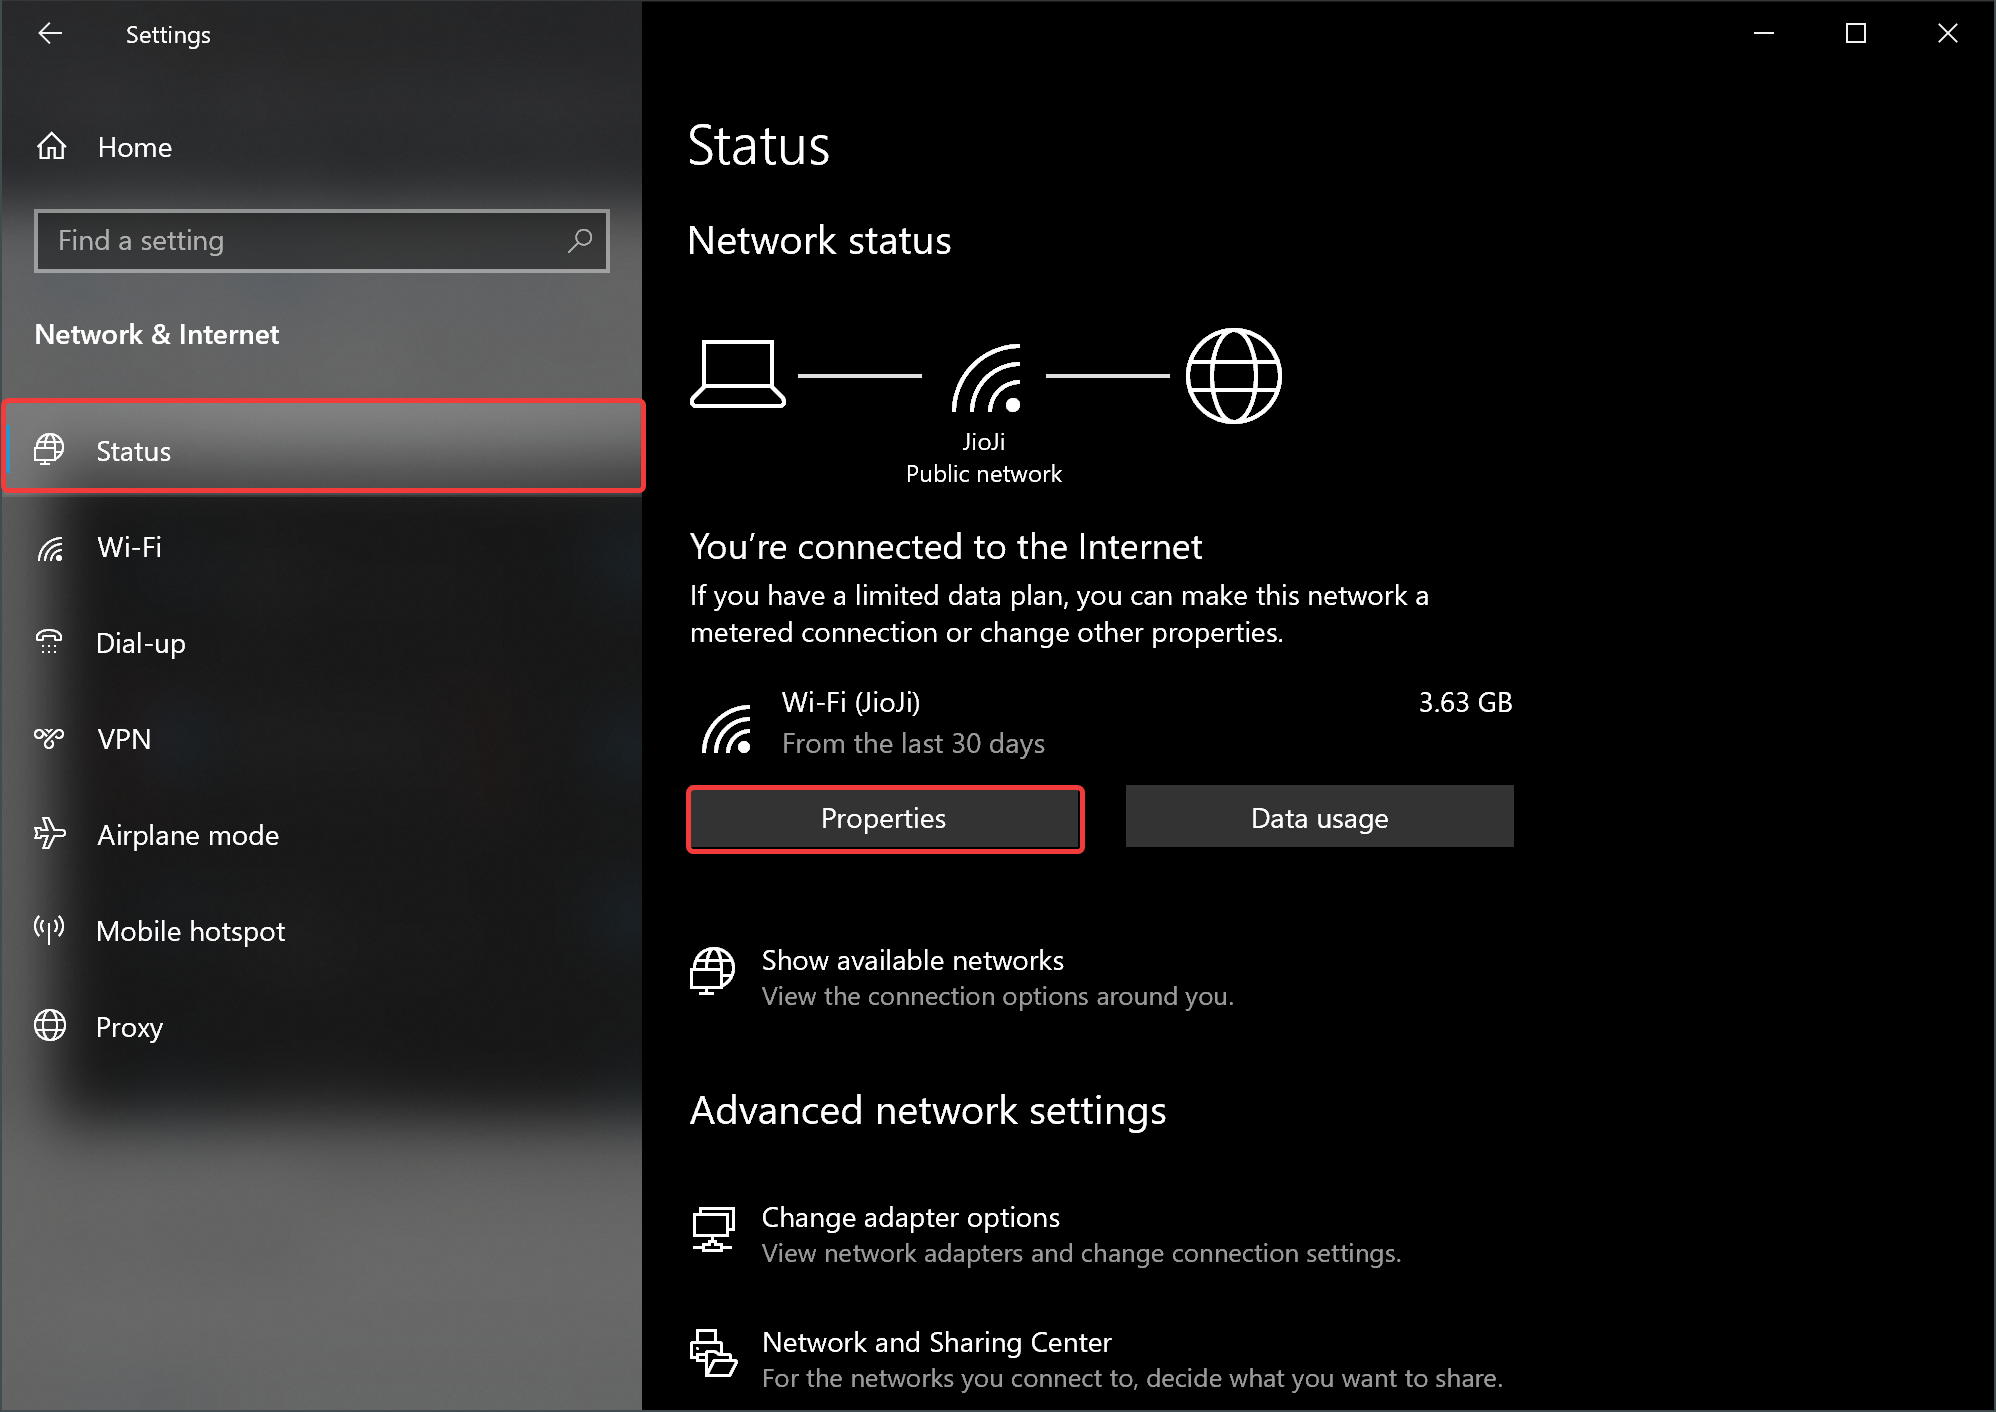
Step 4. On the right side, click on the Properties button of the active connection.
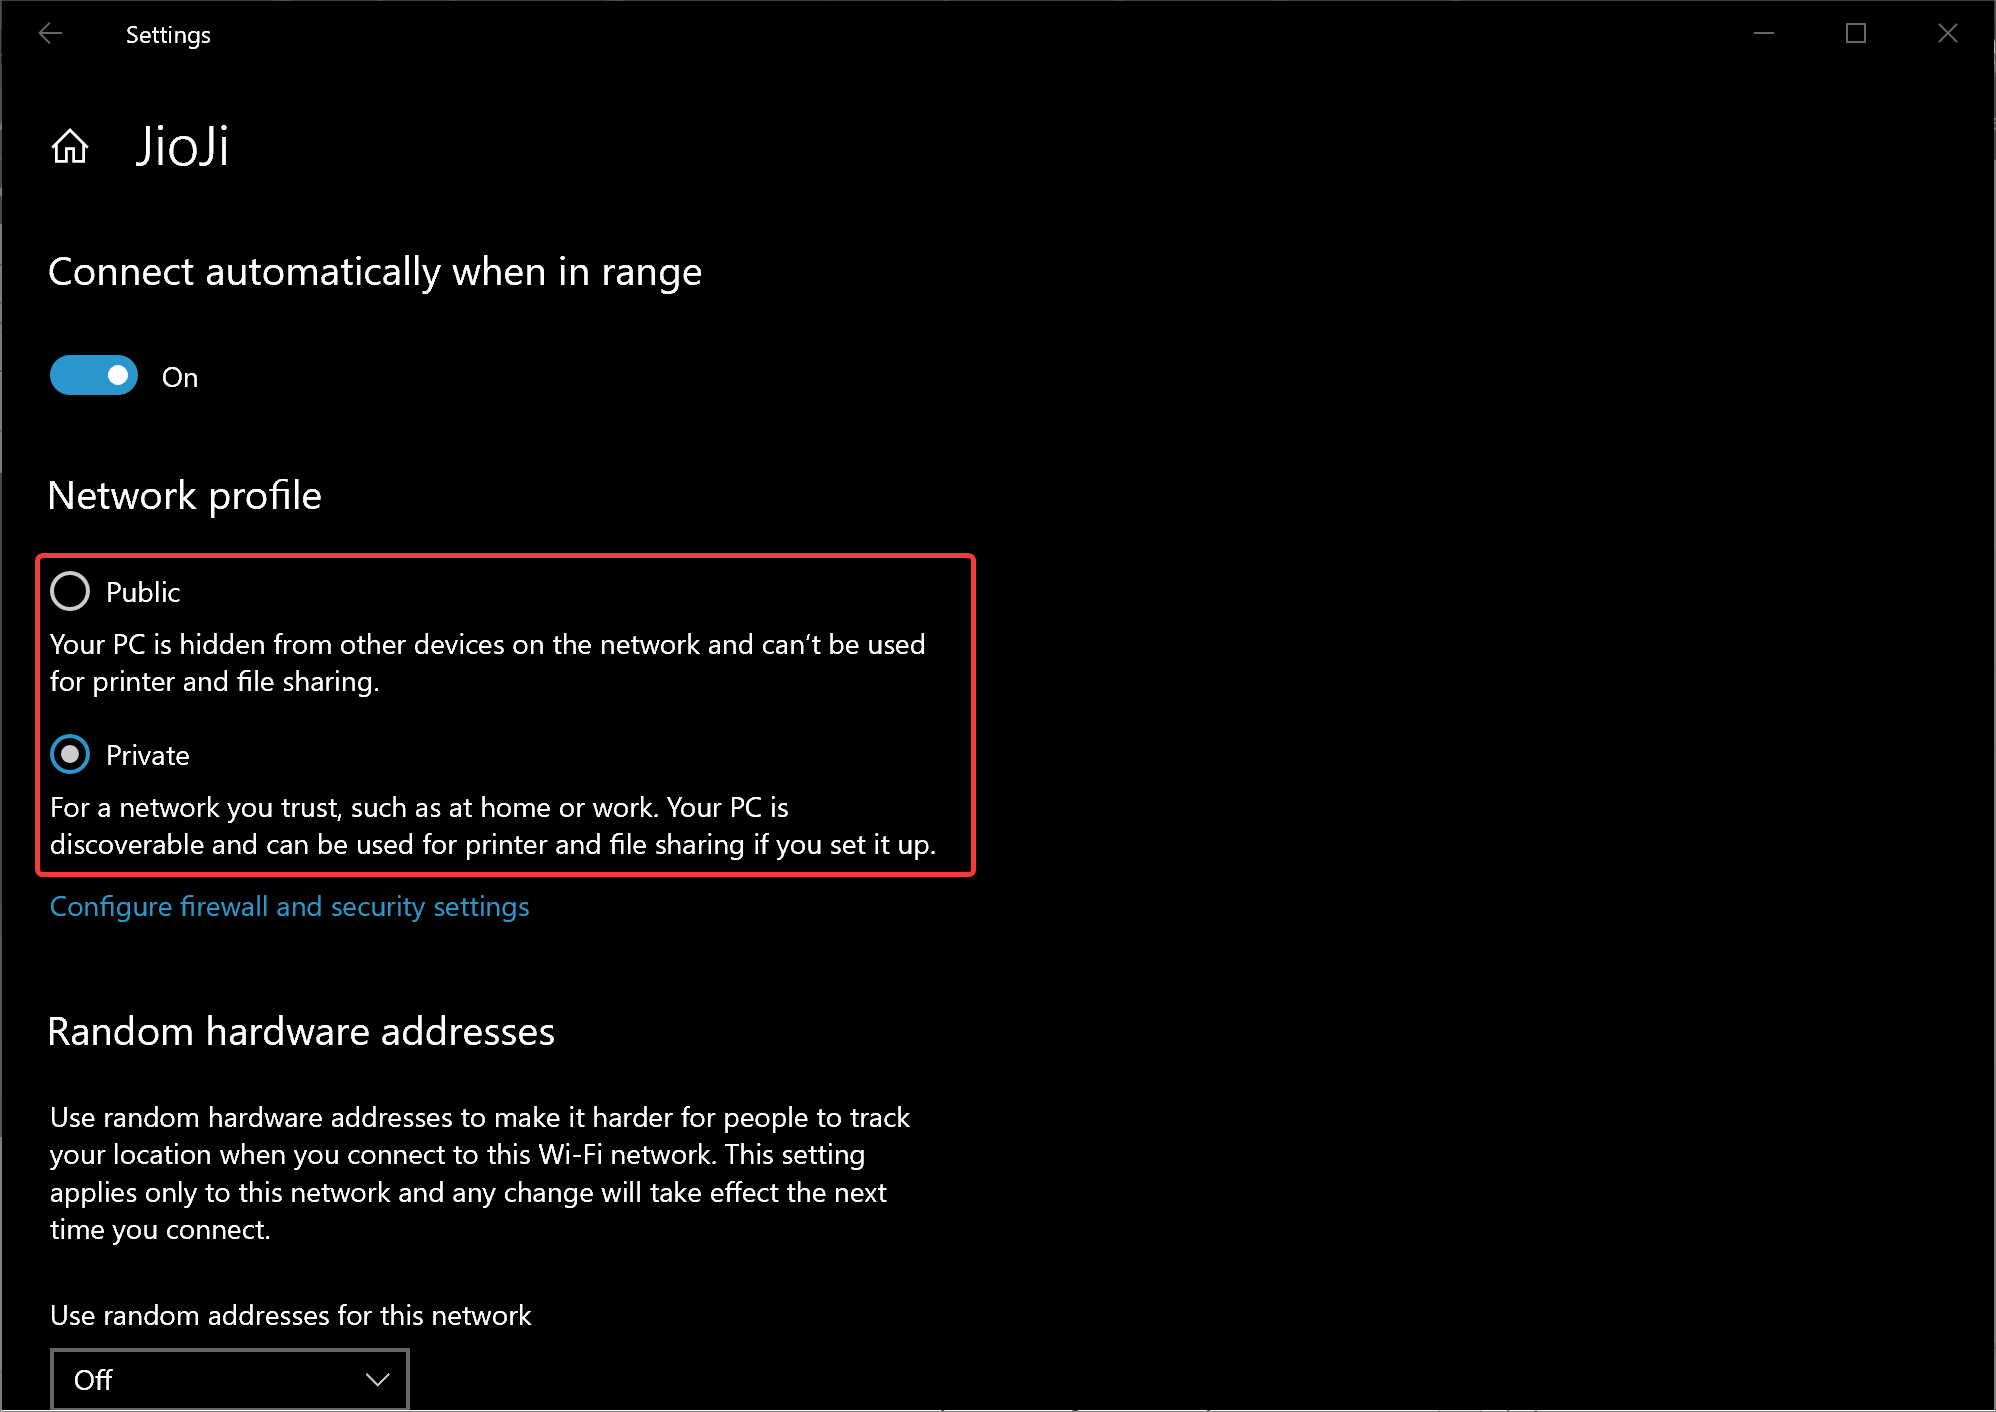
Step 5. Finally, select the Public or Private option under the “Network profile” section.
Conclusion
In conclusion, changing the network profile type on Windows 11 and 10 is an essential step to ensure the security and privacy of your computer. Windows 11 and 10 provide three types of network profiles: Private, Public, and Domain, each with specific settings that help you improve security or share files, printers, and other resources in the network. By following the simple steps outlined in this gearupwindows article, you can easily change your network profile type from Public to Private or vice versa on your Windows 11 and 10 computers. It is always recommended to choose the most appropriate network profile based on your trust level with nearby networks.