Windows 11 comes with a password-protected sharing feature that remains turned on by default. That means if you share a file or folder from your computer, all users on the network can not access them until they have a valid username and password for your computer.
The password-protected sharing feature of Windows 11 disallows unauthorized users to access shared files/folders, printers, etc. However, you can turn this off, so that anyone connected to the same network can access shared folders and resources.
In this gearupwindows article, we will guide you on enabling and disabling password-protected sharing on Windows 11.
How to Enable or Disable Password Protected Sharing in Windows 11?
To provide access to shared resources to all users on your network, you need to turn off password-protected sharing. Here is how to do it.
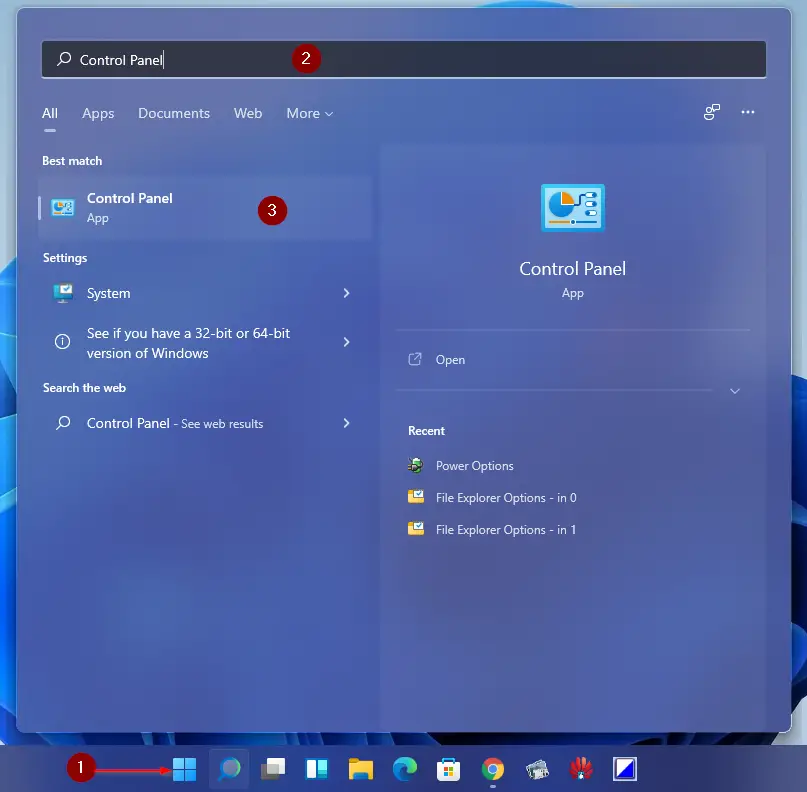
Step 1. Open Control Panel.
To do so, click the Search or Start button on the taskbar and then search for Control Panel. From the available search results, click on the relevant entry.
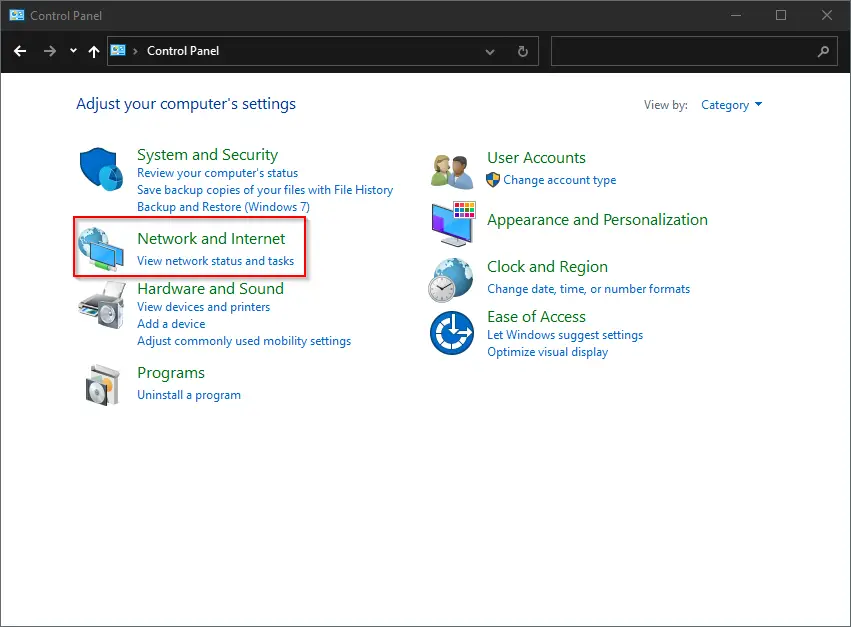
Step 2. When Control Panel opens, click on the Network and Internet category.
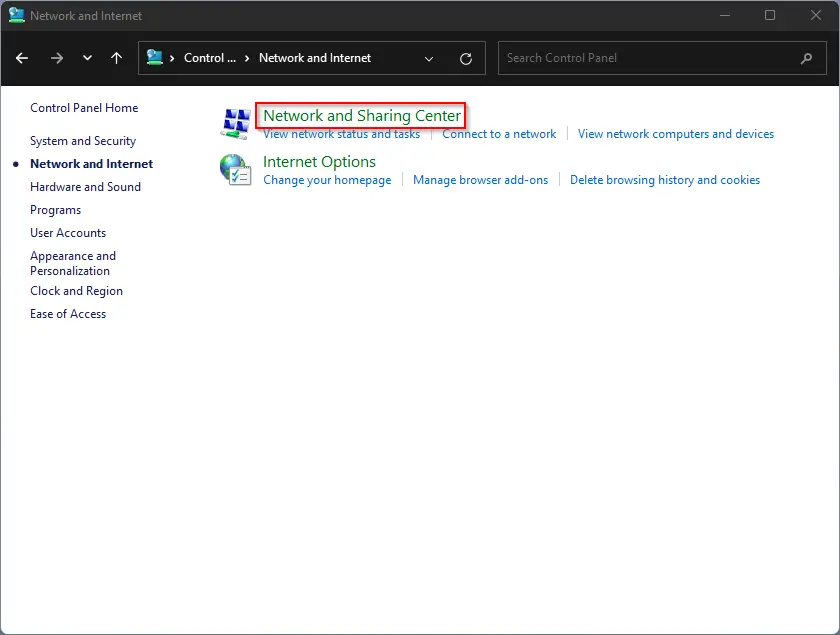
Step 3. On the right sidebar, select Network and Sharing Center.
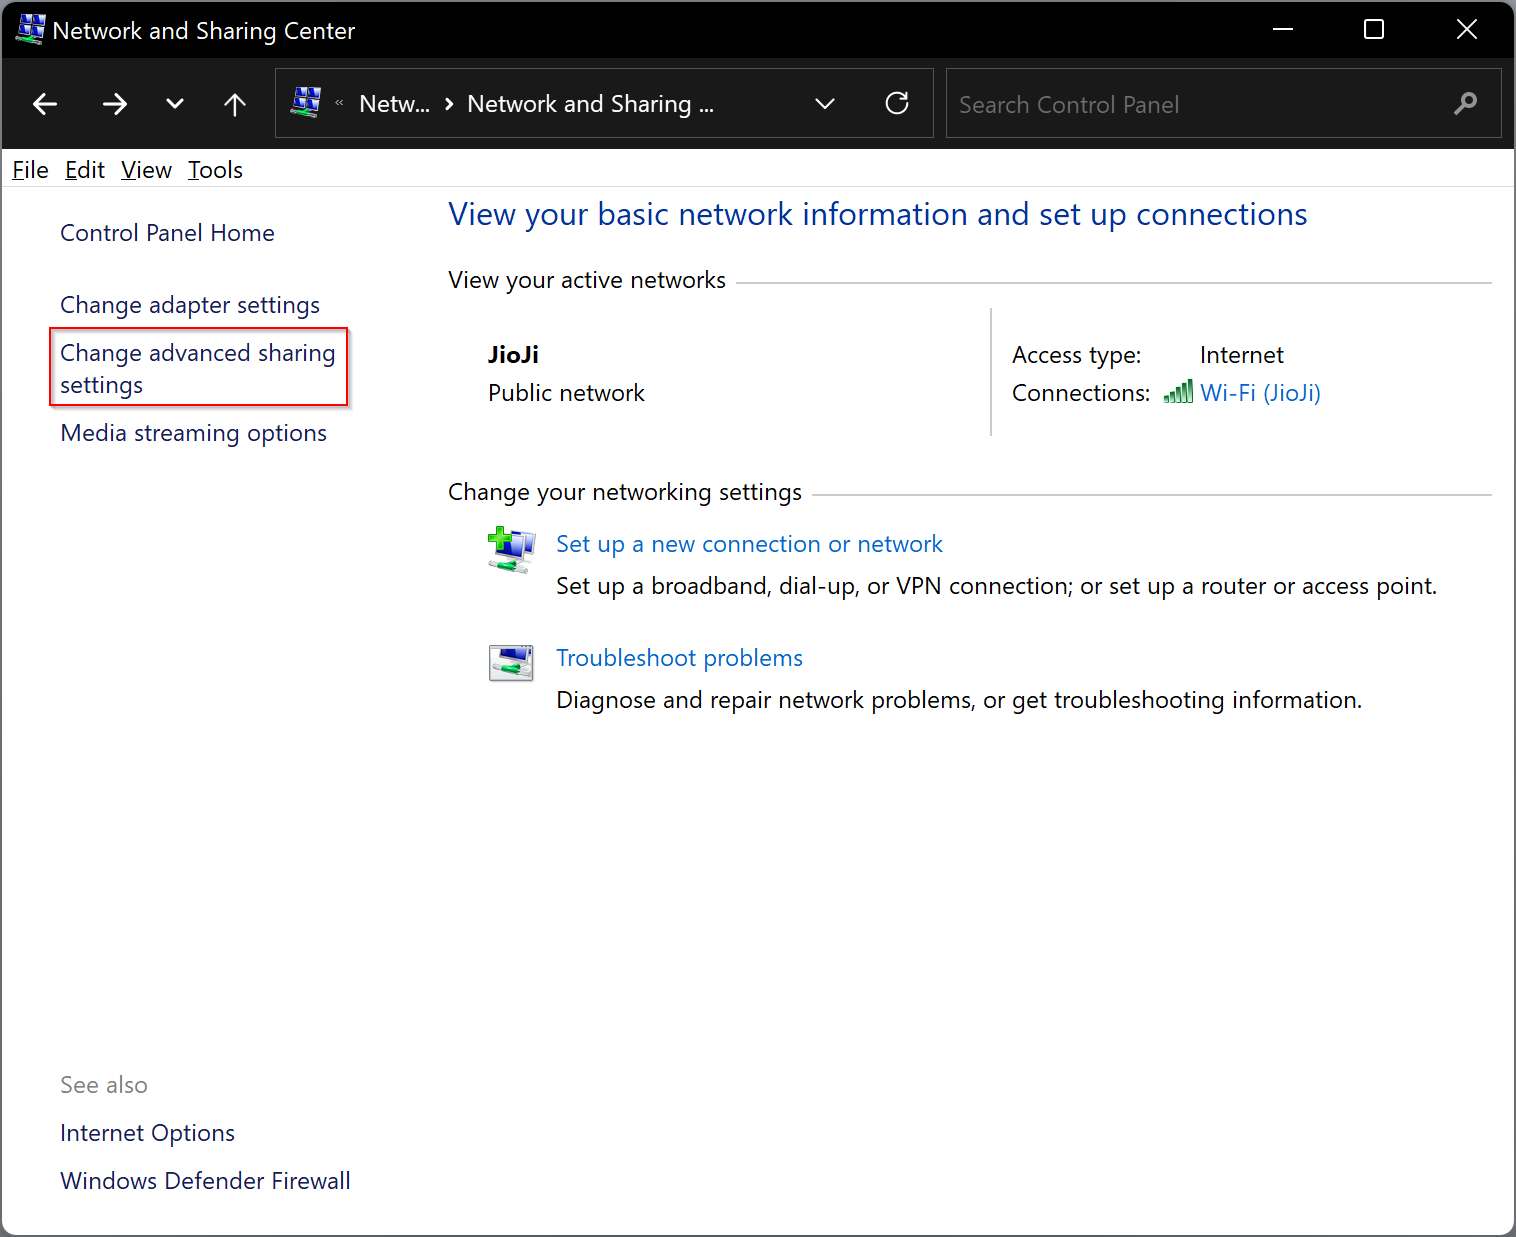
Step 4. From the left sidebar, click the Change advanced sharing settings.
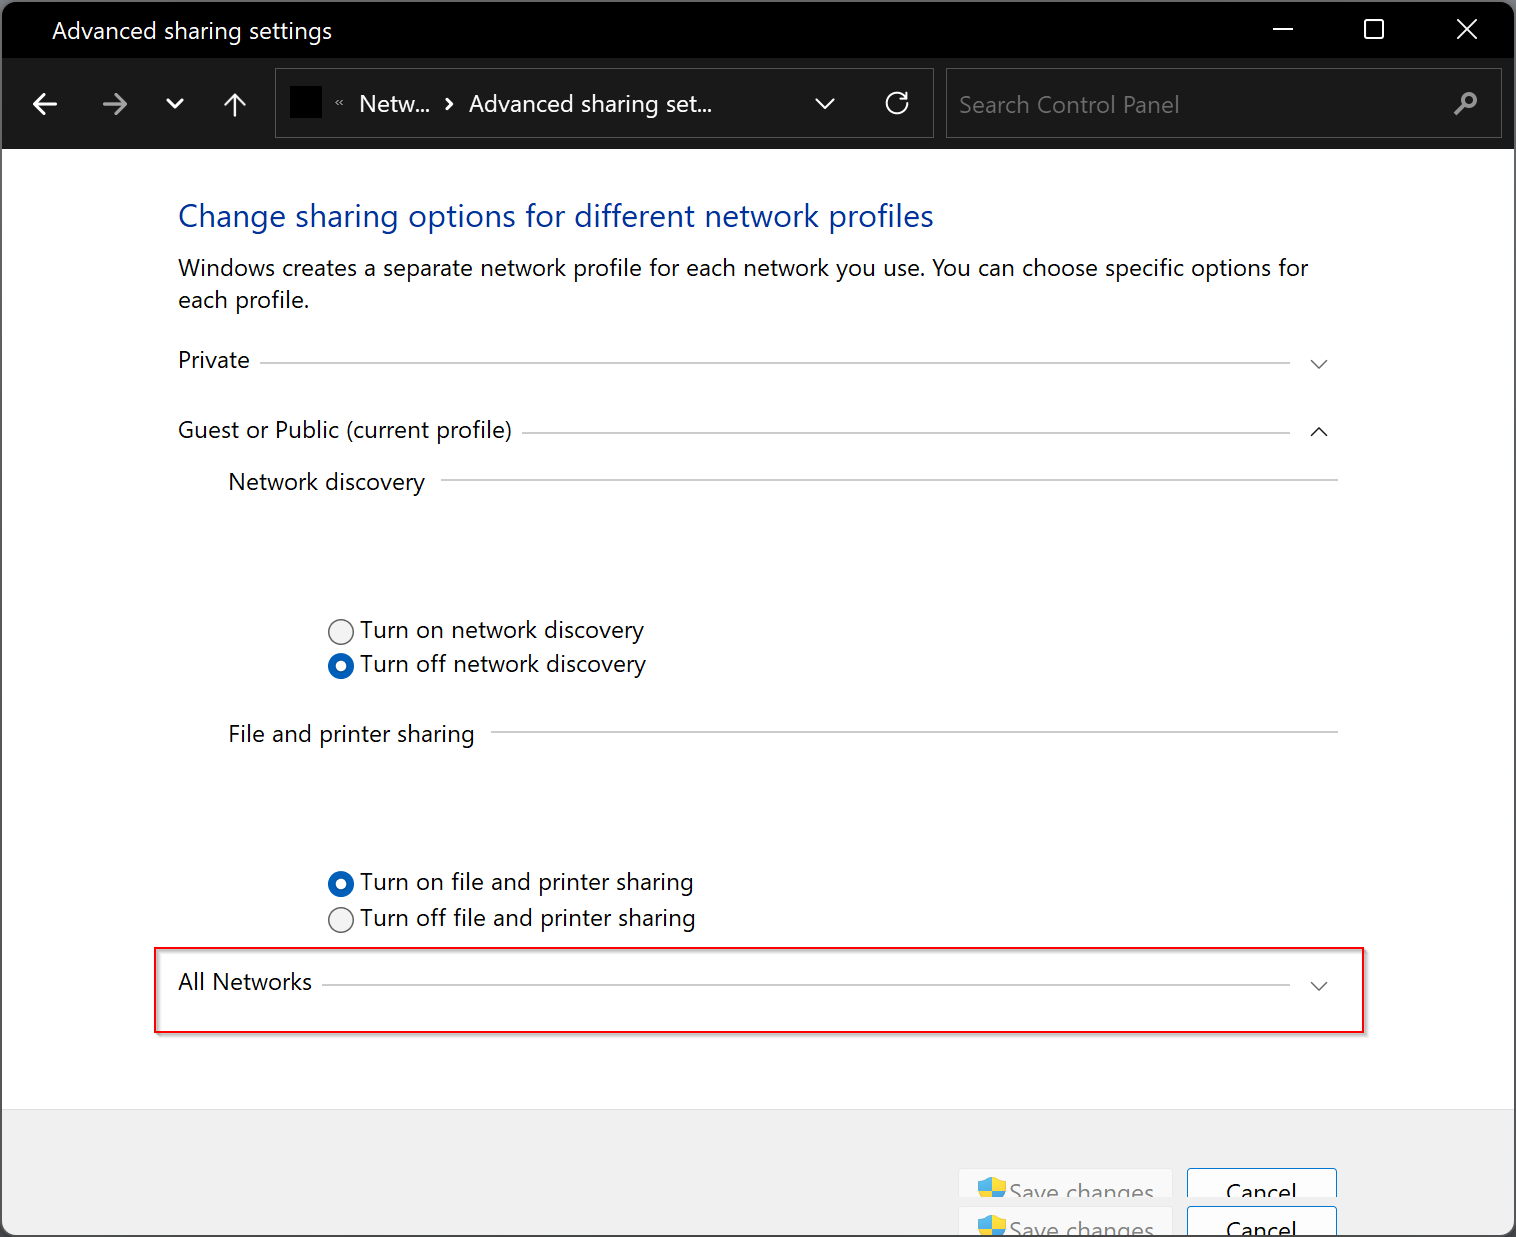
Step 5. Now, click the arrow to expand All networks.
Step 6. Now, scroll down to the bottom to see the “Password protected sharing” section. Here, select “Turn off password protected sharing” or “Turn off password protected sharing” to disable or enable the password sharing.
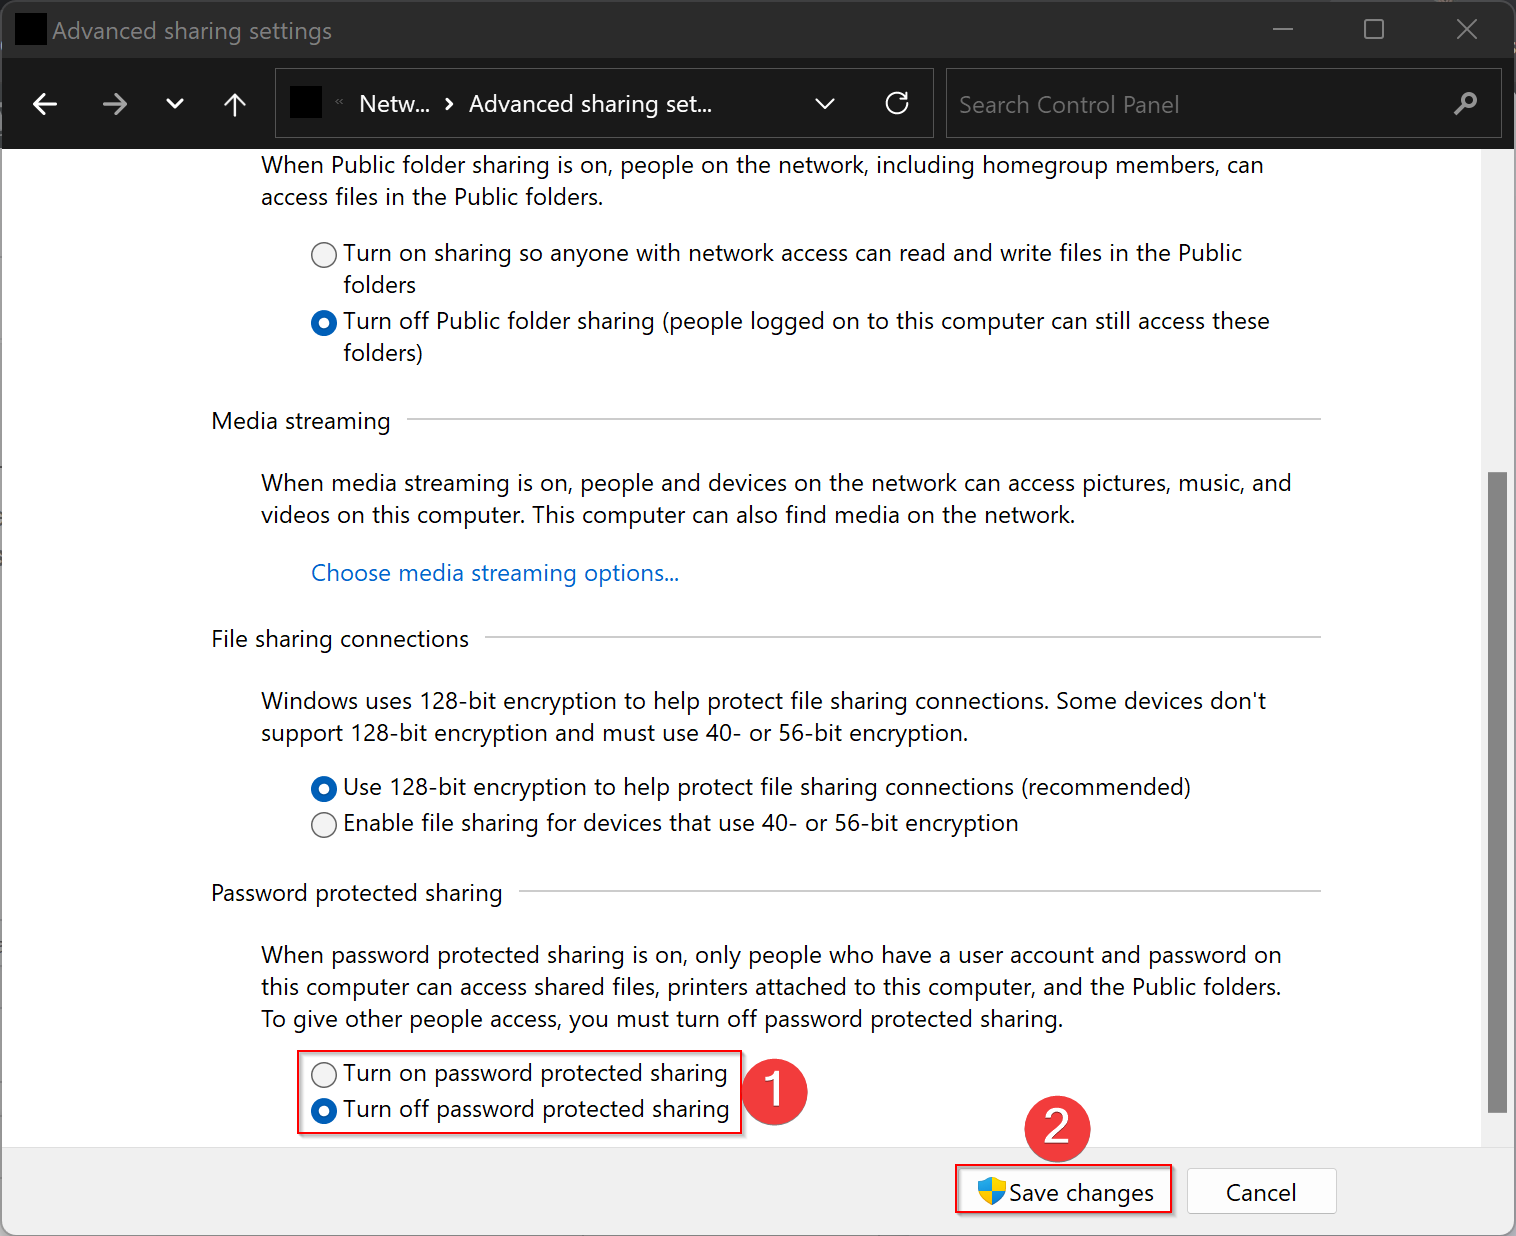
Step 7. Finally, click the Save changes button.
That’s it!
Conclusion
In conclusion, password-protected sharing is a useful security feature that comes enabled by default in Windows 11. It prevents unauthorized access to shared files and folders. However, if you want to provide access to shared resources to all users on your network, you can disable password-protected sharing. The process to enable or disable this feature is straightforward and can be done through the Control Panel.