By default, Windows 11 plays sound through stereo mode. However, if you need, you can enable mono audio if you have difficulty hearing sounds from your computer. The feature allows your computer to convert stereo sound into a single channel to help you hear everything.
In this gearupwindows article, we will guide you on enabling and disabling mono audio in Windows 11. It is possible to turn on or off mono audio using the Settings app and also Registry Editor. Here is how to do it.
How to Enable Mono Audio in Windows 11?
Windows supports the mono audio feature that combines left and right channels. Use the following steps to turn on mono audio in Windows 11:-
Step 1. First, open the Settings app.
To do that, press Windows + I keys on the keyboard.

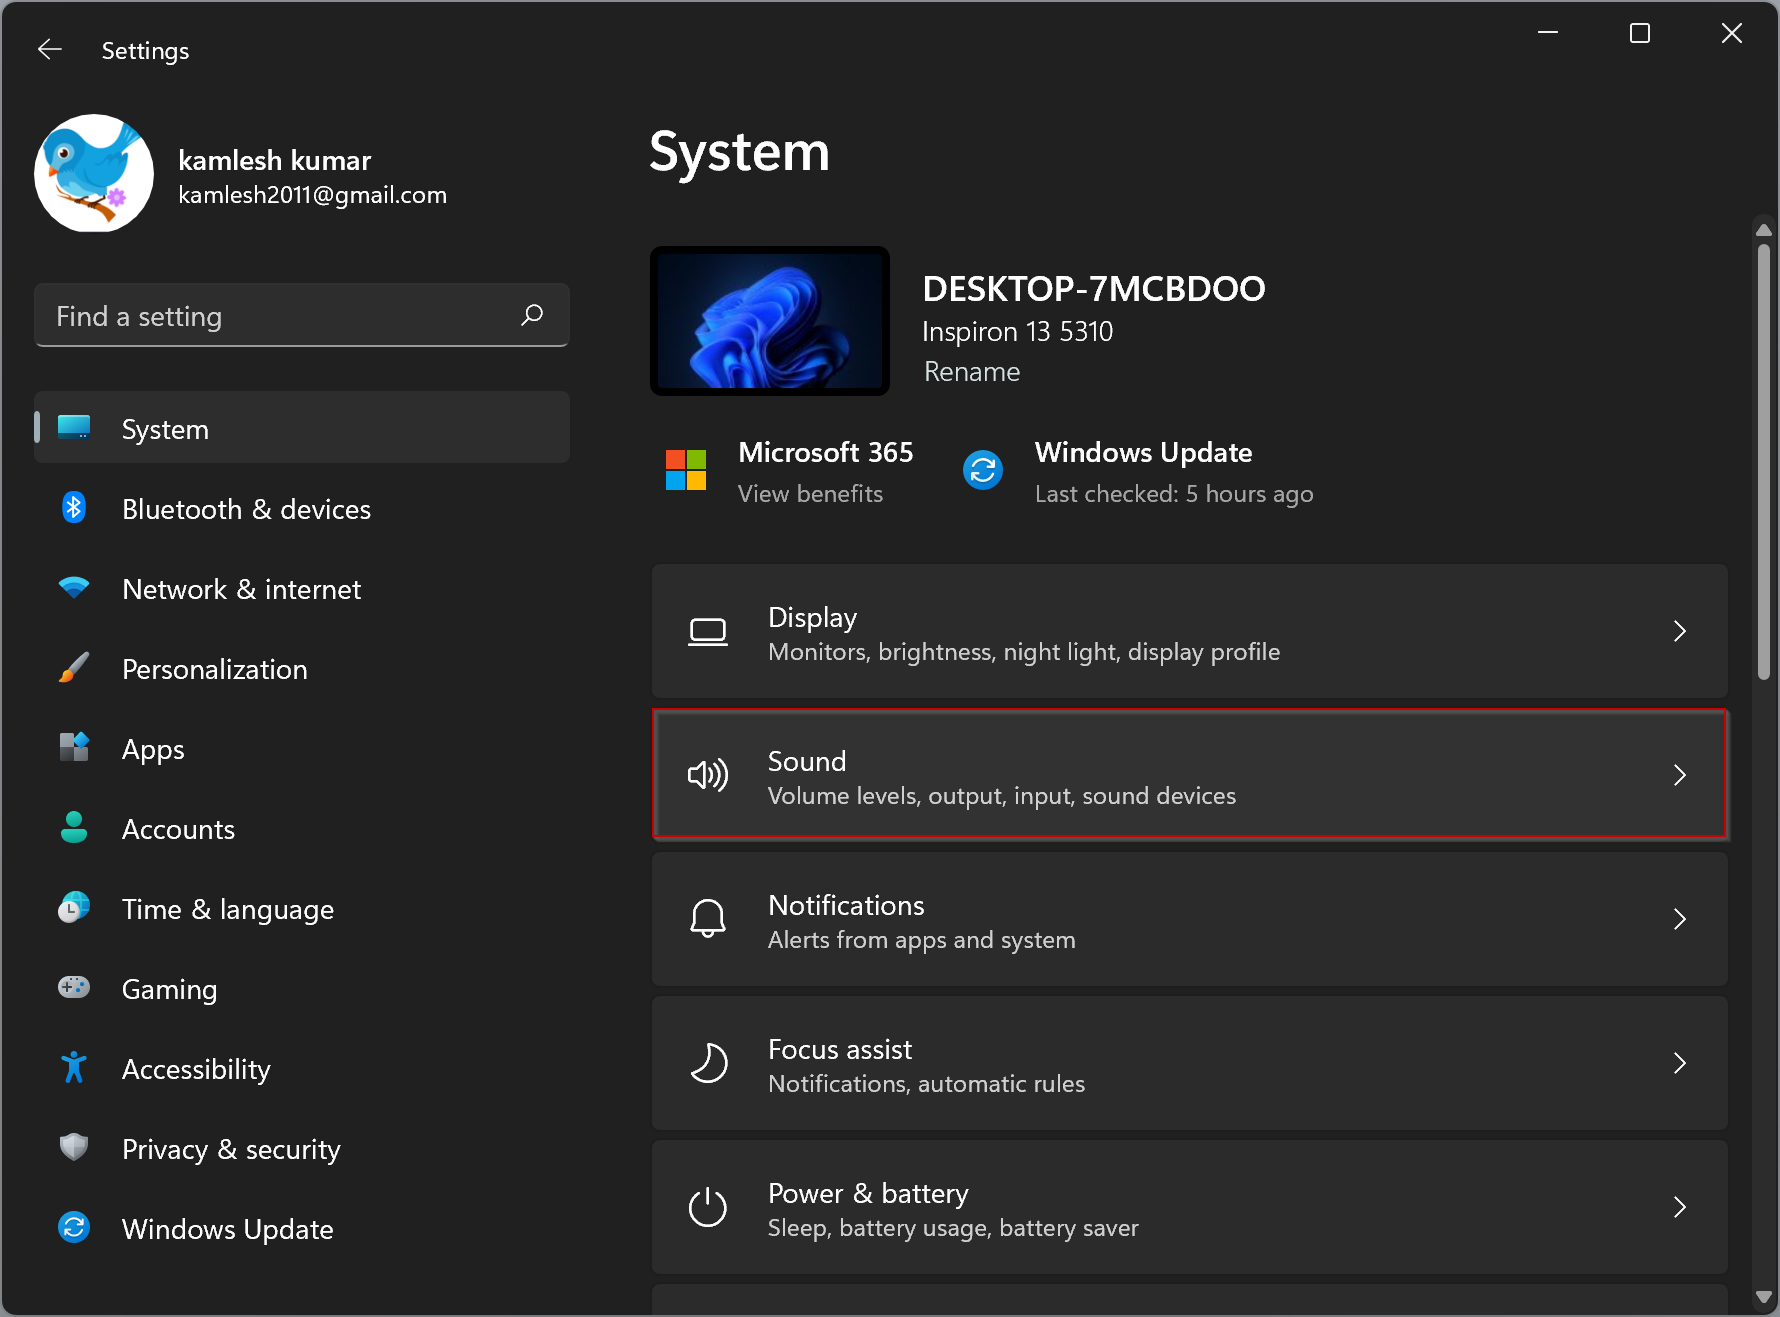
Step 2. When Windows Settings opens, select the System category in the left sidebar.
Step 3. After that, click the Sound tile on the right sidebar.
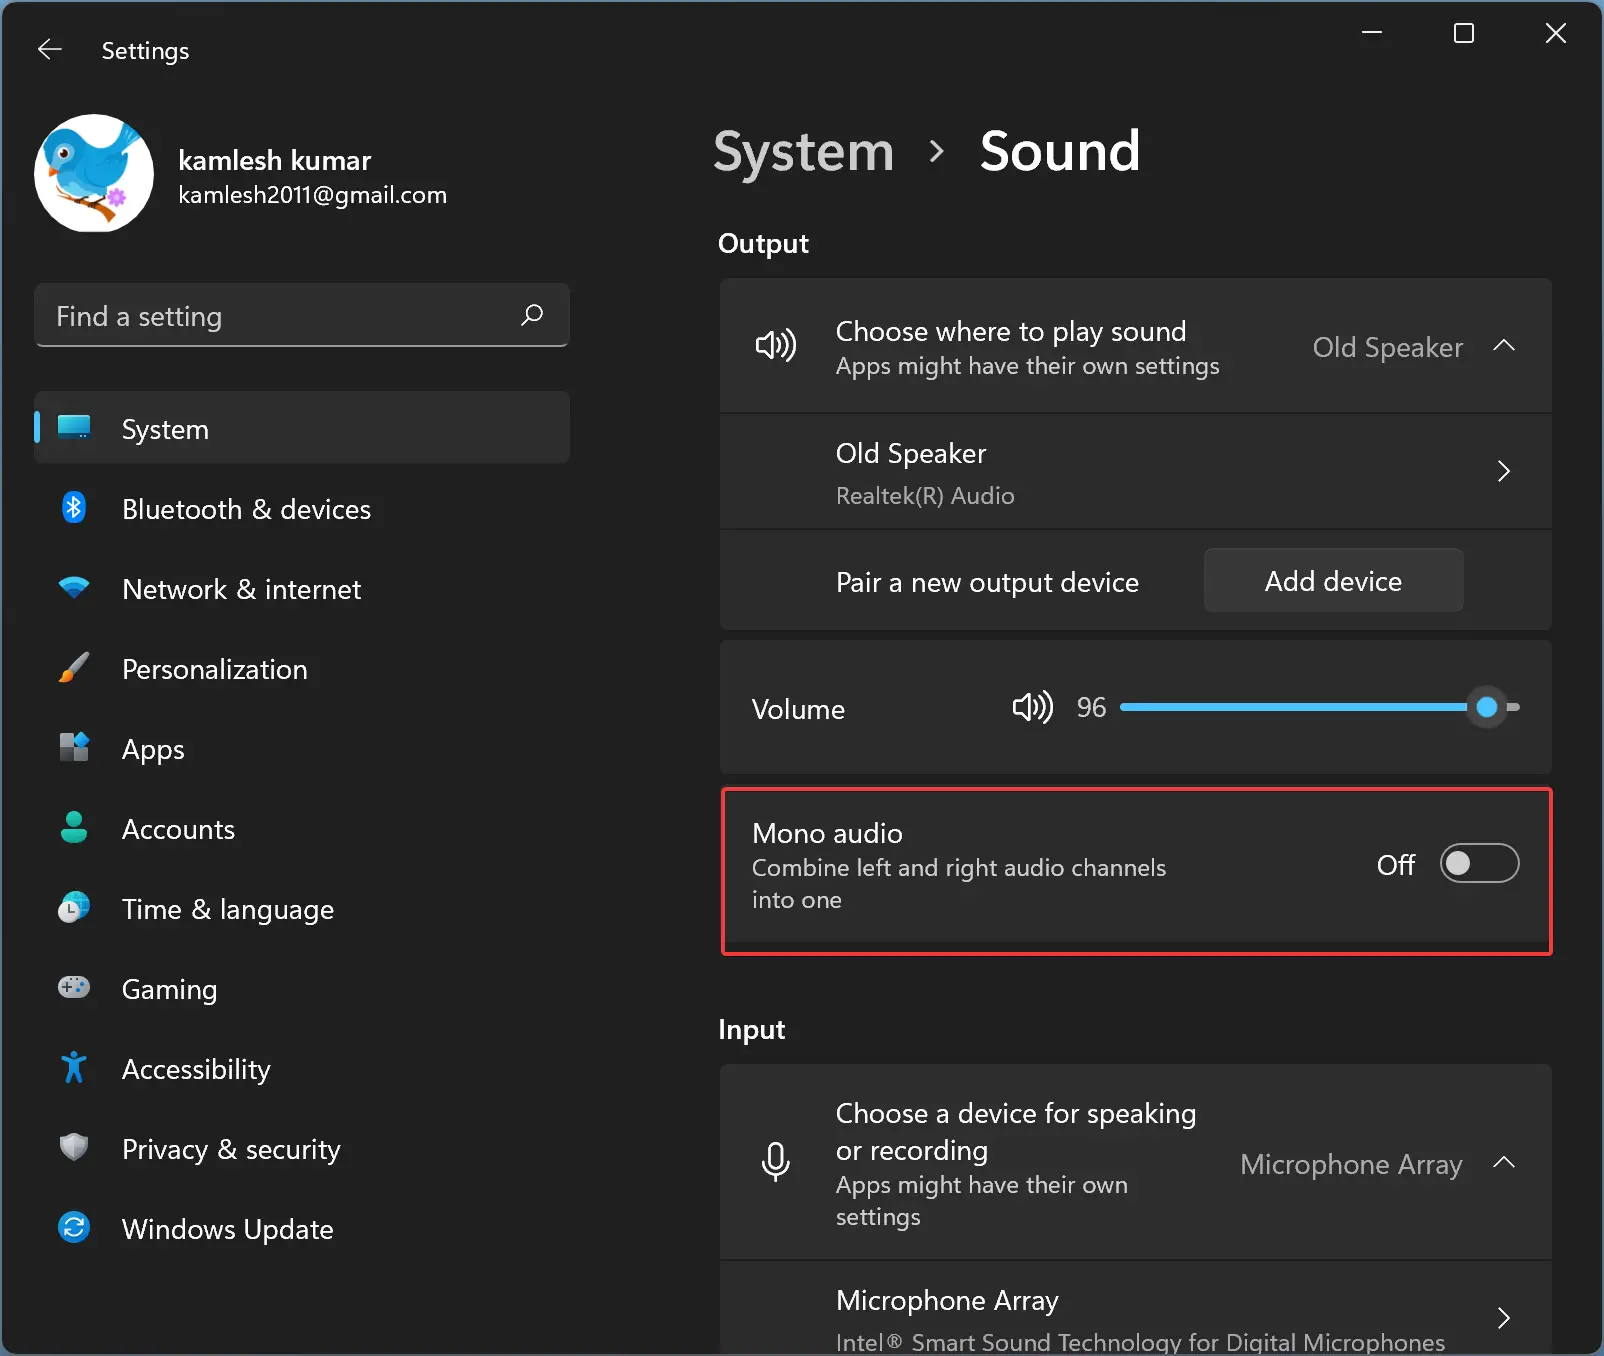
Step 4. Once you’re on the Sound settings page, turn on the Mono audio toggle switch to enable mono audio on your Windows 11 machine.

How to Disable Mono Audio in Windows 11?
Windows supports both mono and stereo sounds. Use the following steps to turn on the stereo and turn off the mono sound in Windows 11:-
Step 1. First, open the Settings app.
To do that, press Windows + I keys on the keyboard.
Step 2. When Windows Settings opens, select the System category in the left sidebar.
Step 3. After that, click the Sound tile on the right sidebar.
Step 4. Once you are on the Sound settings page, turn off the Mono audio toggle switch to disable mono audio and enable stereo sound on your Windows 11 system.
How to Turn On or Off Mono Audio Using Registry Editor?
To enable or disable Mono Audio in Windows 11 through Registry Editor, do these steps:-
Step 1. Open Registry Editor.
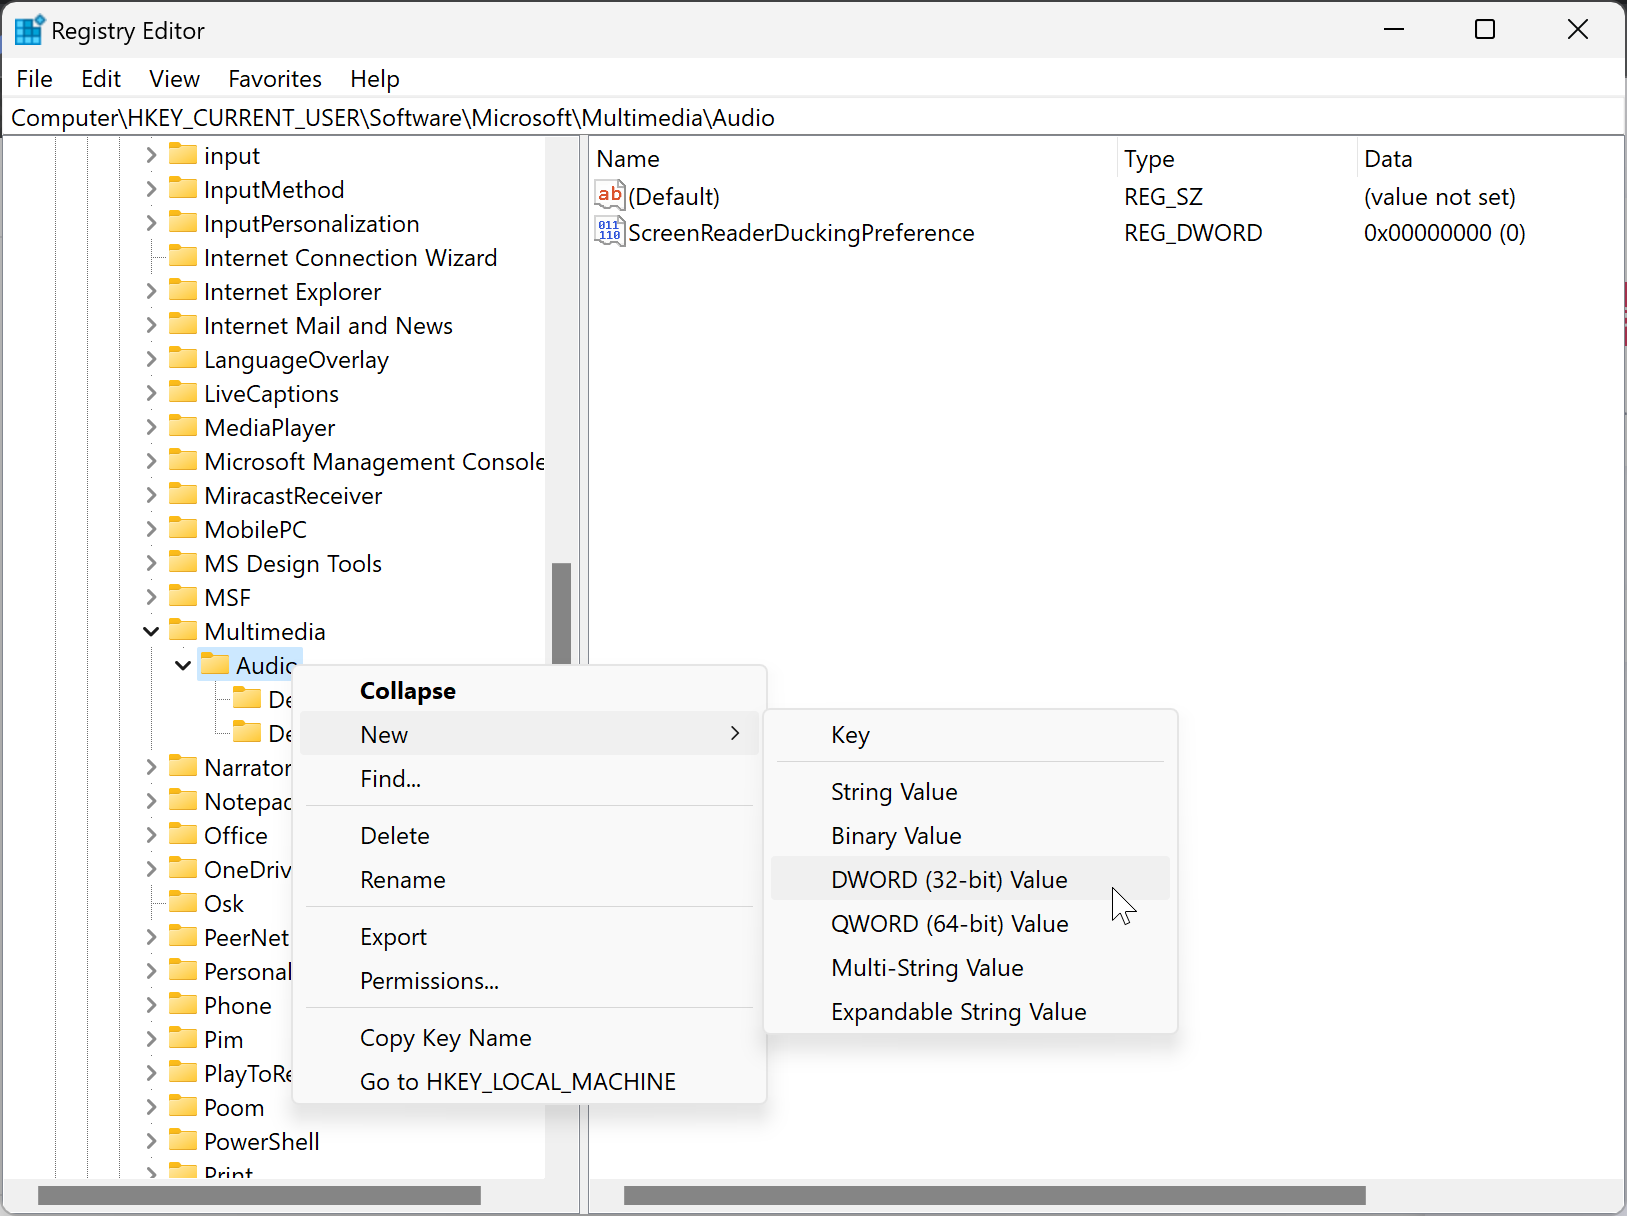
Step 2. Then, browse or navigate to the following key in the left sidebar of Registry Editor:-
HKEY_CURRENT_USER\Software\Microsoft\Multimedia\Audio

Step 3. Now, right-click on the Audio folder in the left sidebar and select New > DWORD (32-bit) Value.
Step 4. Name the newly created REG_DWORD to AccessibilityMonoMixState.
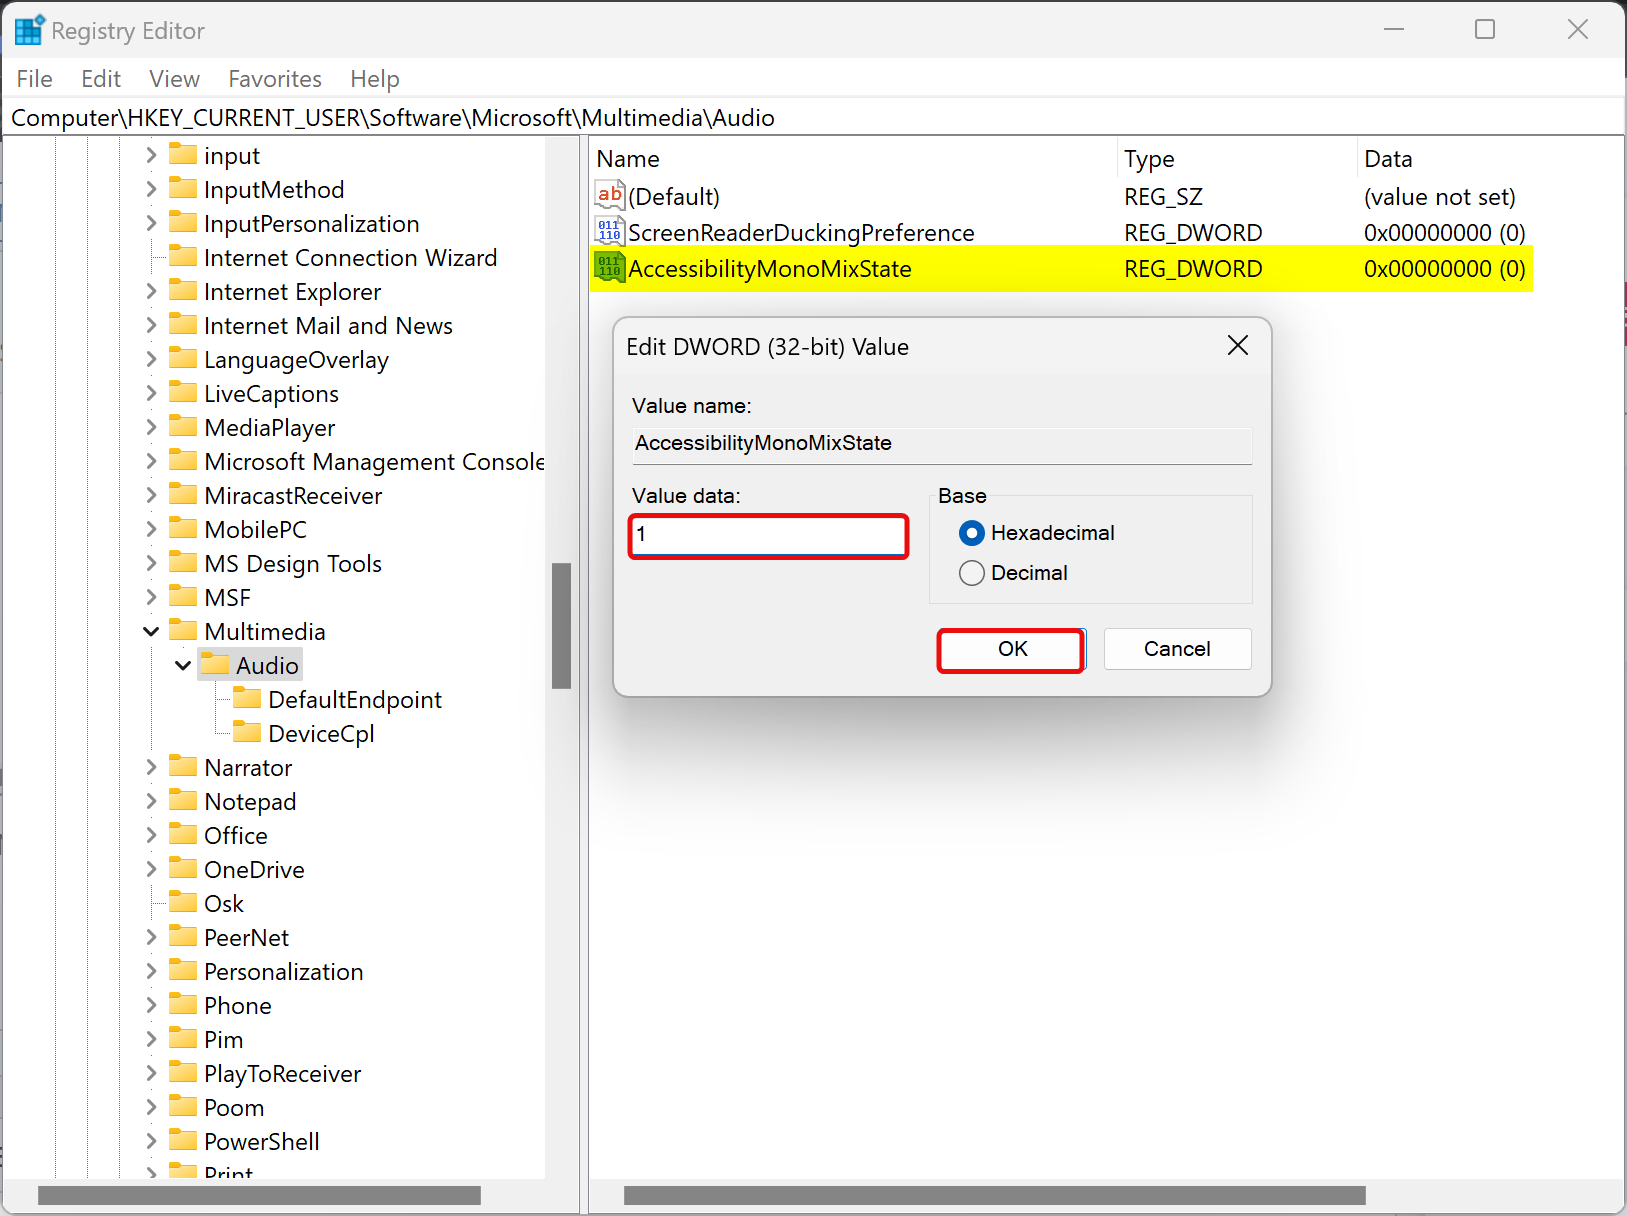
Step 5. After that, double-click on the AccessibilityMonoMixState REG_DWORD and set its “Value data” to 1.
Step 6. Click OK.
Step 7. Reboot your computer to apply the changes.
Once you complete the above steps, Mono Audio is enabled on your Windows 11 machine.
To disable the Mono Audio on your PC, right-click on the AccessibilityMonoMixState REG_DWORD and select the Delete option. Click the Yes button when prompted.
Conclusion
In conclusion, Windows 11 has a useful feature called mono audio that can be enabled or disabled depending on your audio preferences. Enabling mono audio can be especially helpful for individuals who have difficulty hearing sounds from their computers. The feature combines left and right channels into a single channel, making it easier to hear all the audio. This article has provided step-by-step instructions on how to enable or disable mono audio in Windows 11 using both the Settings app and Registry Editor. By following these instructions, users can quickly switch between mono and stereo sound on their Windows 11 machine.