Microsoft Excel is a powerful tool for organizing and analyzing data, and one of its many features that can help you effectively manage and filter data is the Advanced Filter. Advanced Filter allows you to refine your data by specifying complex criteria, making it a valuable asset for tasks like data analysis, report generation, and data extraction. In this article, we’ll guide you through the process of using an Advanced Filter in Microsoft Excel.
What is an Advanced Filter?
An Advanced Filter is a feature in Excel that enables you to extract specific data from a dataset based on complex criteria. Unlike AutoFilter, which is more suitable for simple filtering tasks, Advanced Filter allows you to define multiple conditions and filter data across different columns. This makes it a versatile tool for creating custom views of your data and performing more advanced data analysis.
How to Use Advanced Filter in Microsoft Excel?
To use Advanced Filter in Excel, follow these steps:-
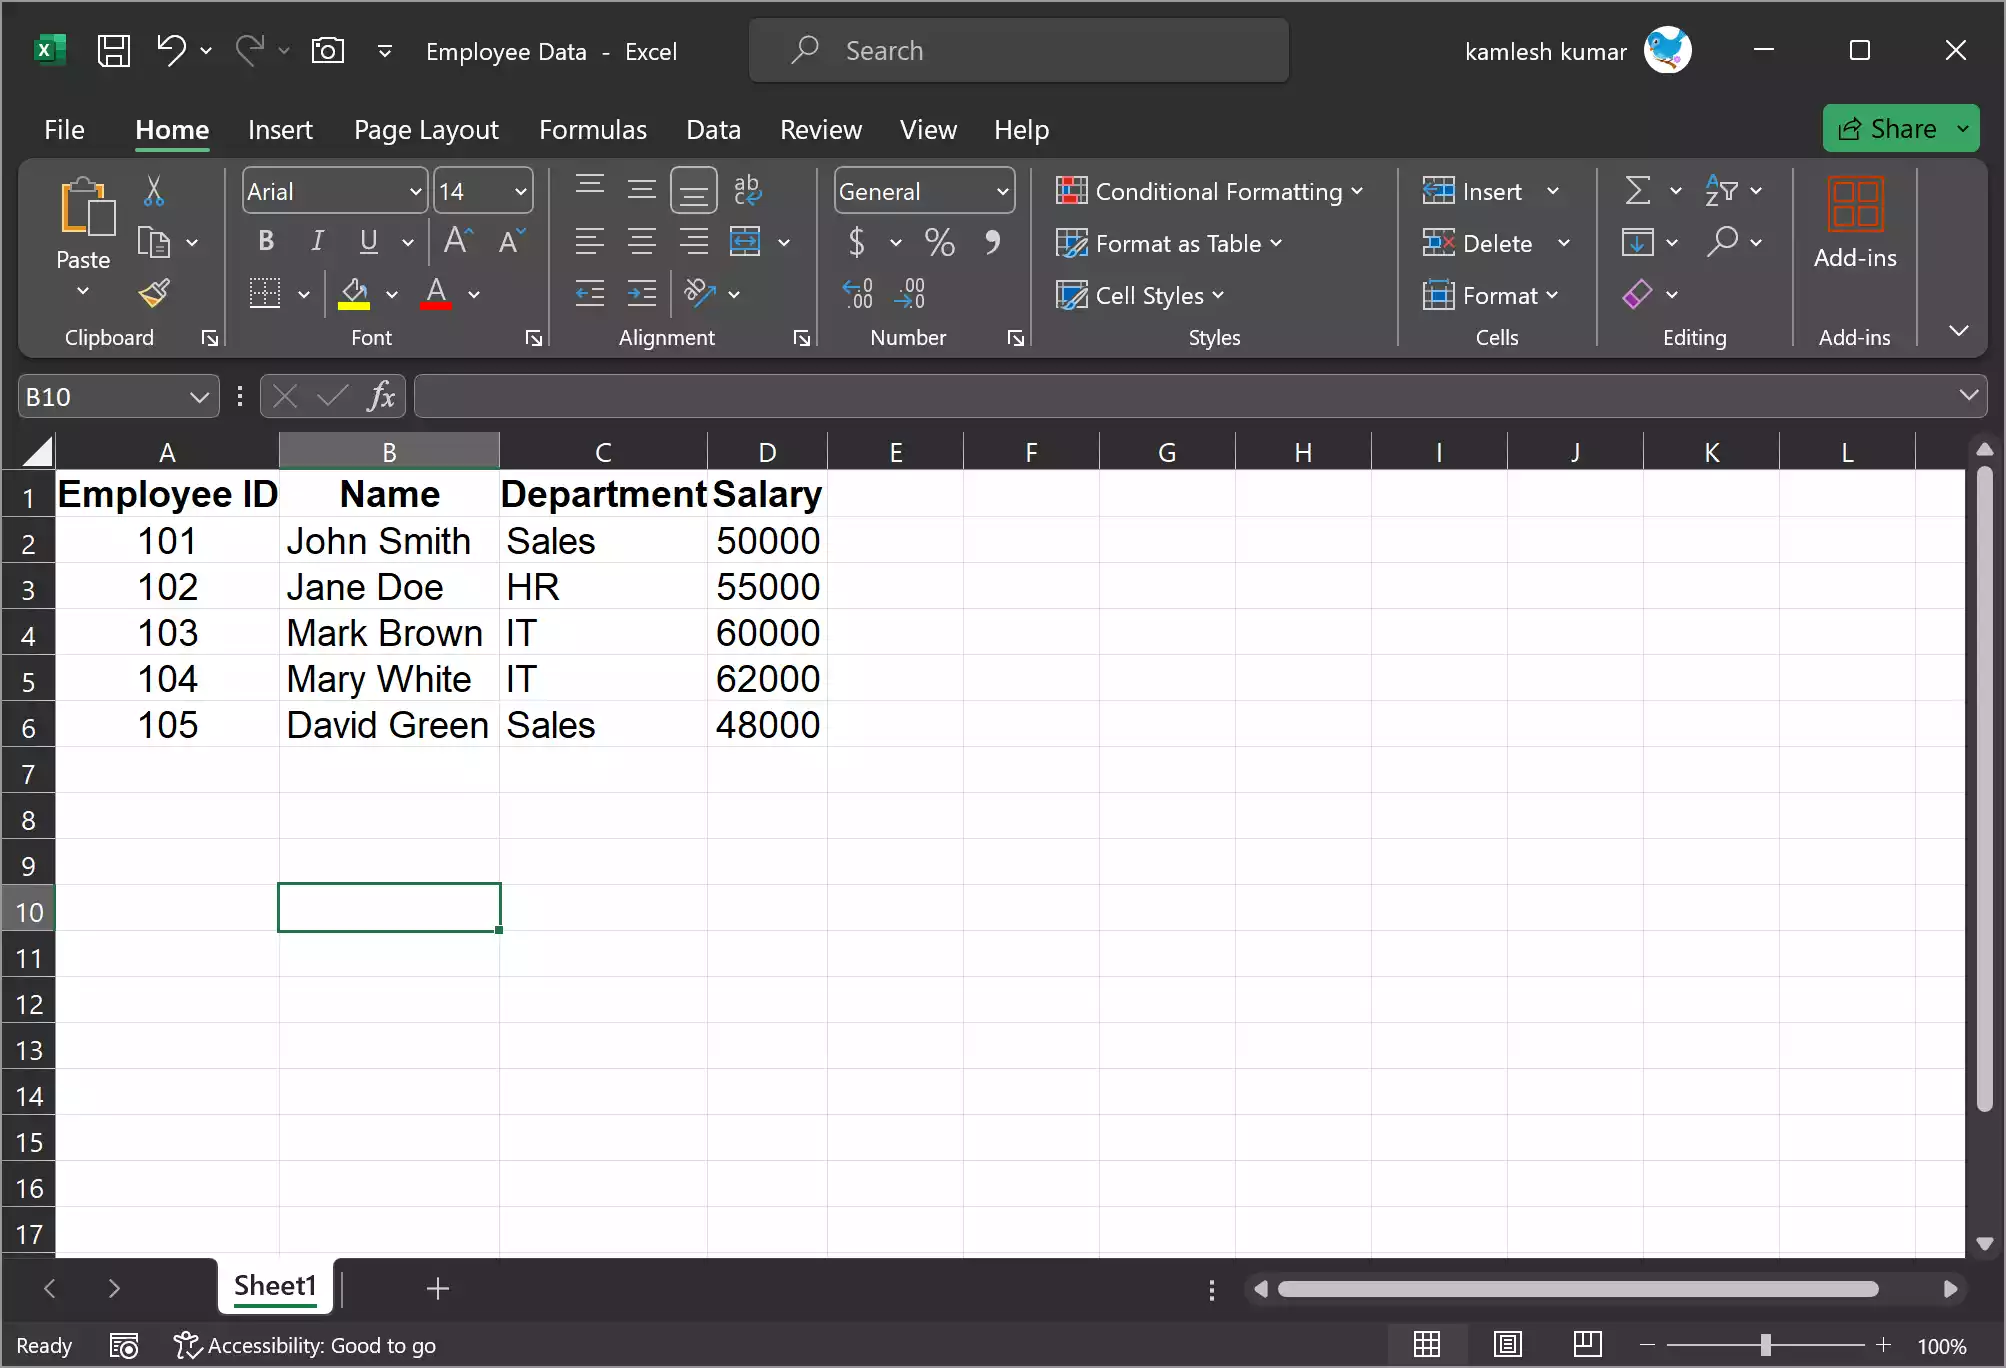
Step 1. Before you can use Advanced Filter, you need to make sure your data is well-organized. This typically means that you have a header row with field names and rows of data beneath it. Advanced Filter works best with structured data.
Let’s say you have a dataset with employee information, and it looks something like this:
Step 2. To use the Advanced Filter, you need to define criteria that will help Excel filter your data. These criteria are typically placed in a separate area of your worksheet. Follow these steps to define your criteria:-
- Create a range for your criteria above your data or in a different part of your worksheet. Each column in this range represents a field you want to filter by, and each row defines a criterion.
- Enter the criteria for each column. You can use comparison operators like equals (=), greater than (>), less than (<), or text criteria.
- You can use logical operators like AND and OR to combine criteria for a single column or multiple columns.
Now, let’s say you want to filter this data to only show employees in the IT department with a salary greater than $60,000. To do this, create a separate area in your worksheet to define your criteria:-
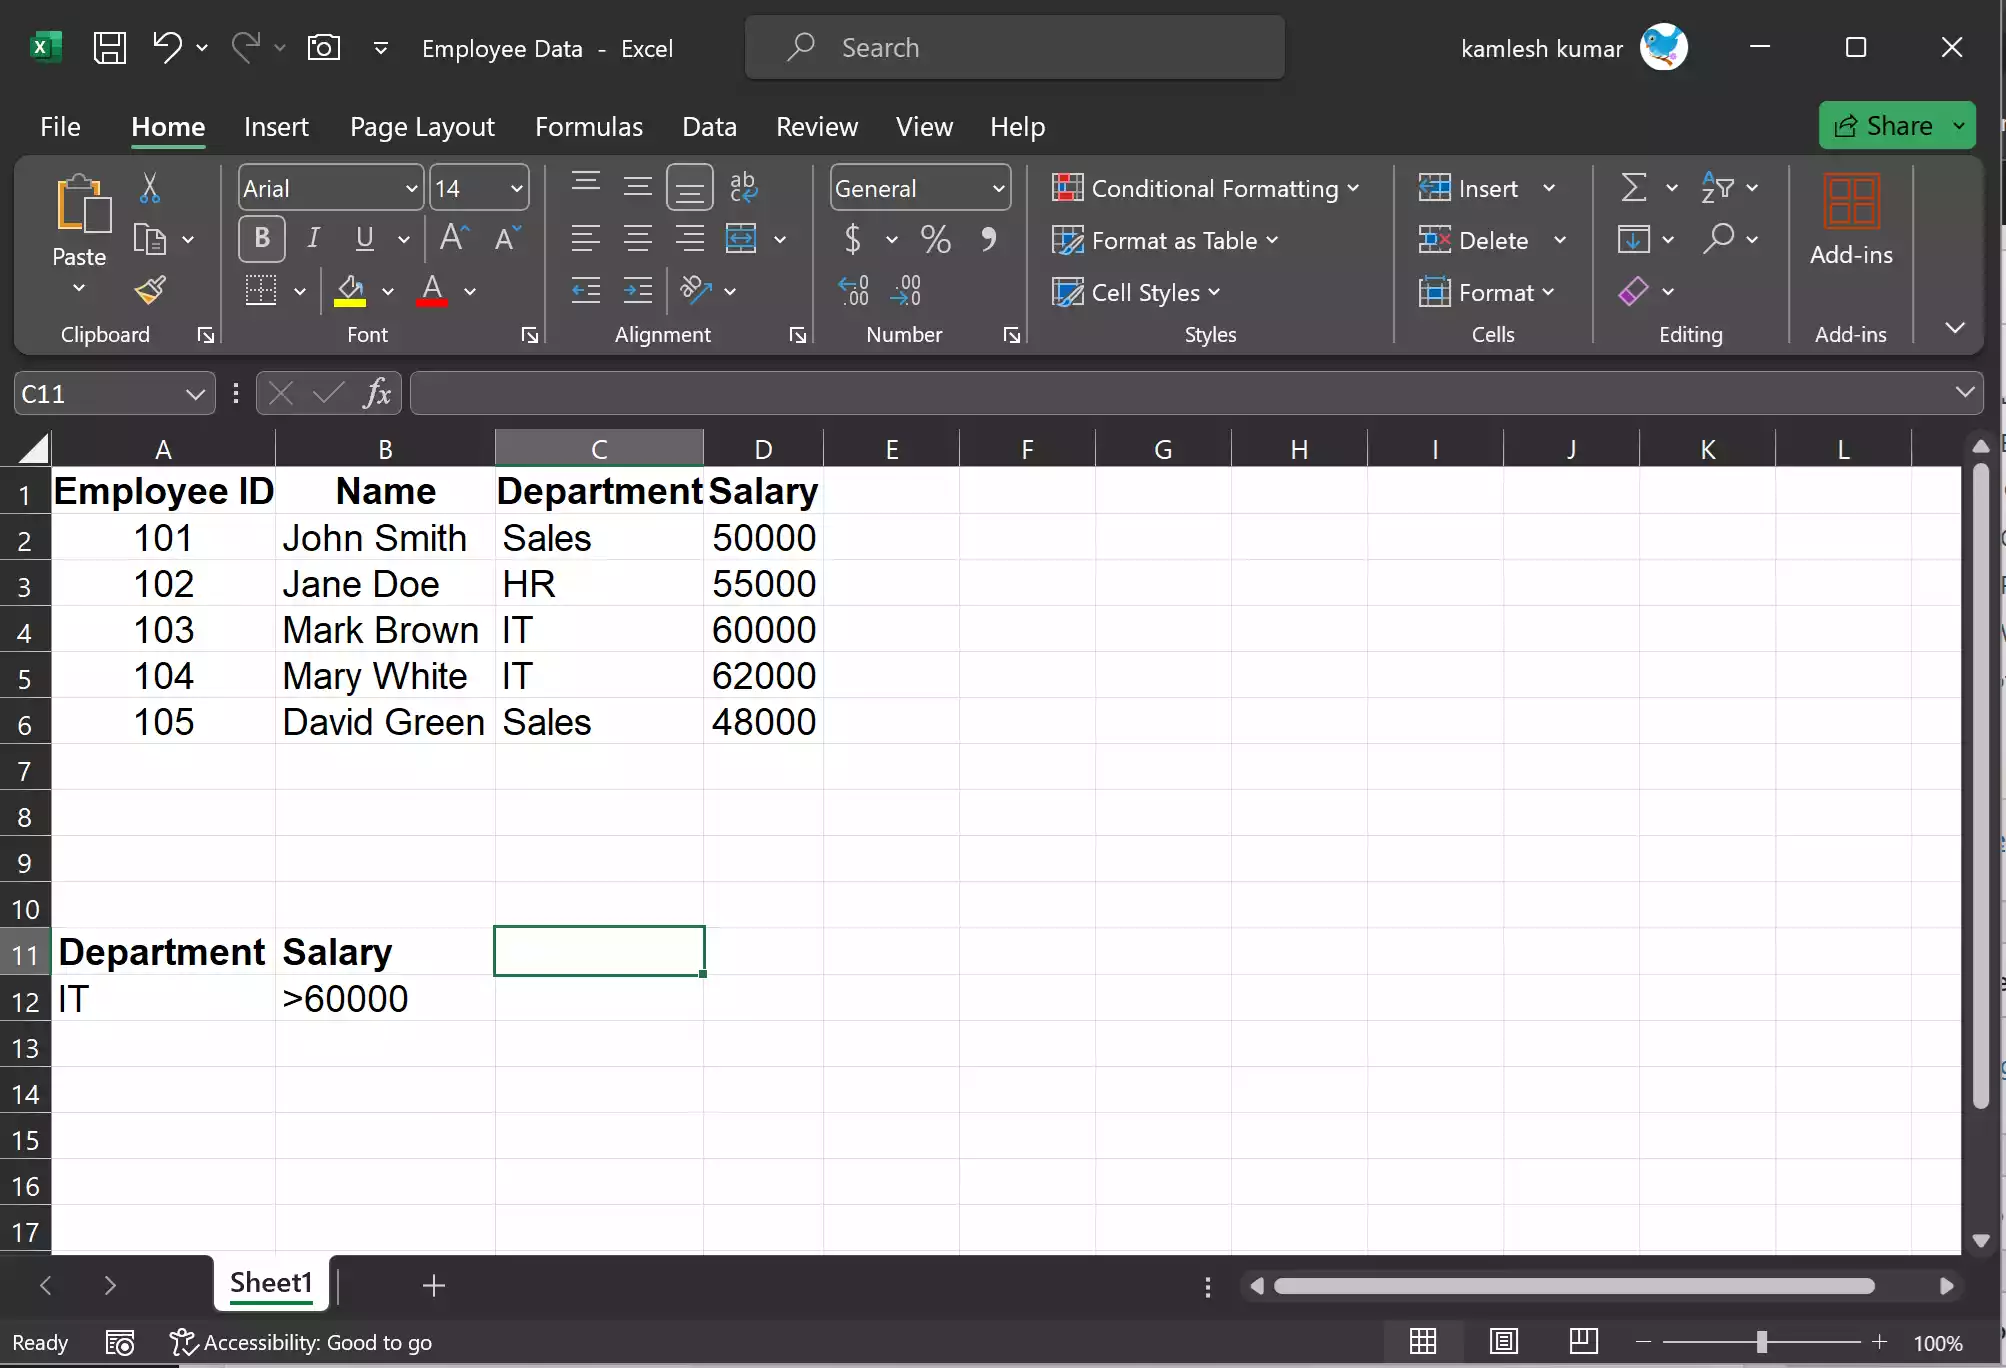
Here, we’ve defined your filter criteria: “Department” should be “IT,” and “Salary” should be greater than 60,000.
Step 3. Now that you have your criteria ready, follow these steps to start the Advanced Filter:-
- Select the data range (for instance, A1:D6) you want to filter. Make sure it includes the header row.
- Go to the “Data” tab on the Excel ribbon.
- In the “Sort & Filter” group, click on “Advanced.”
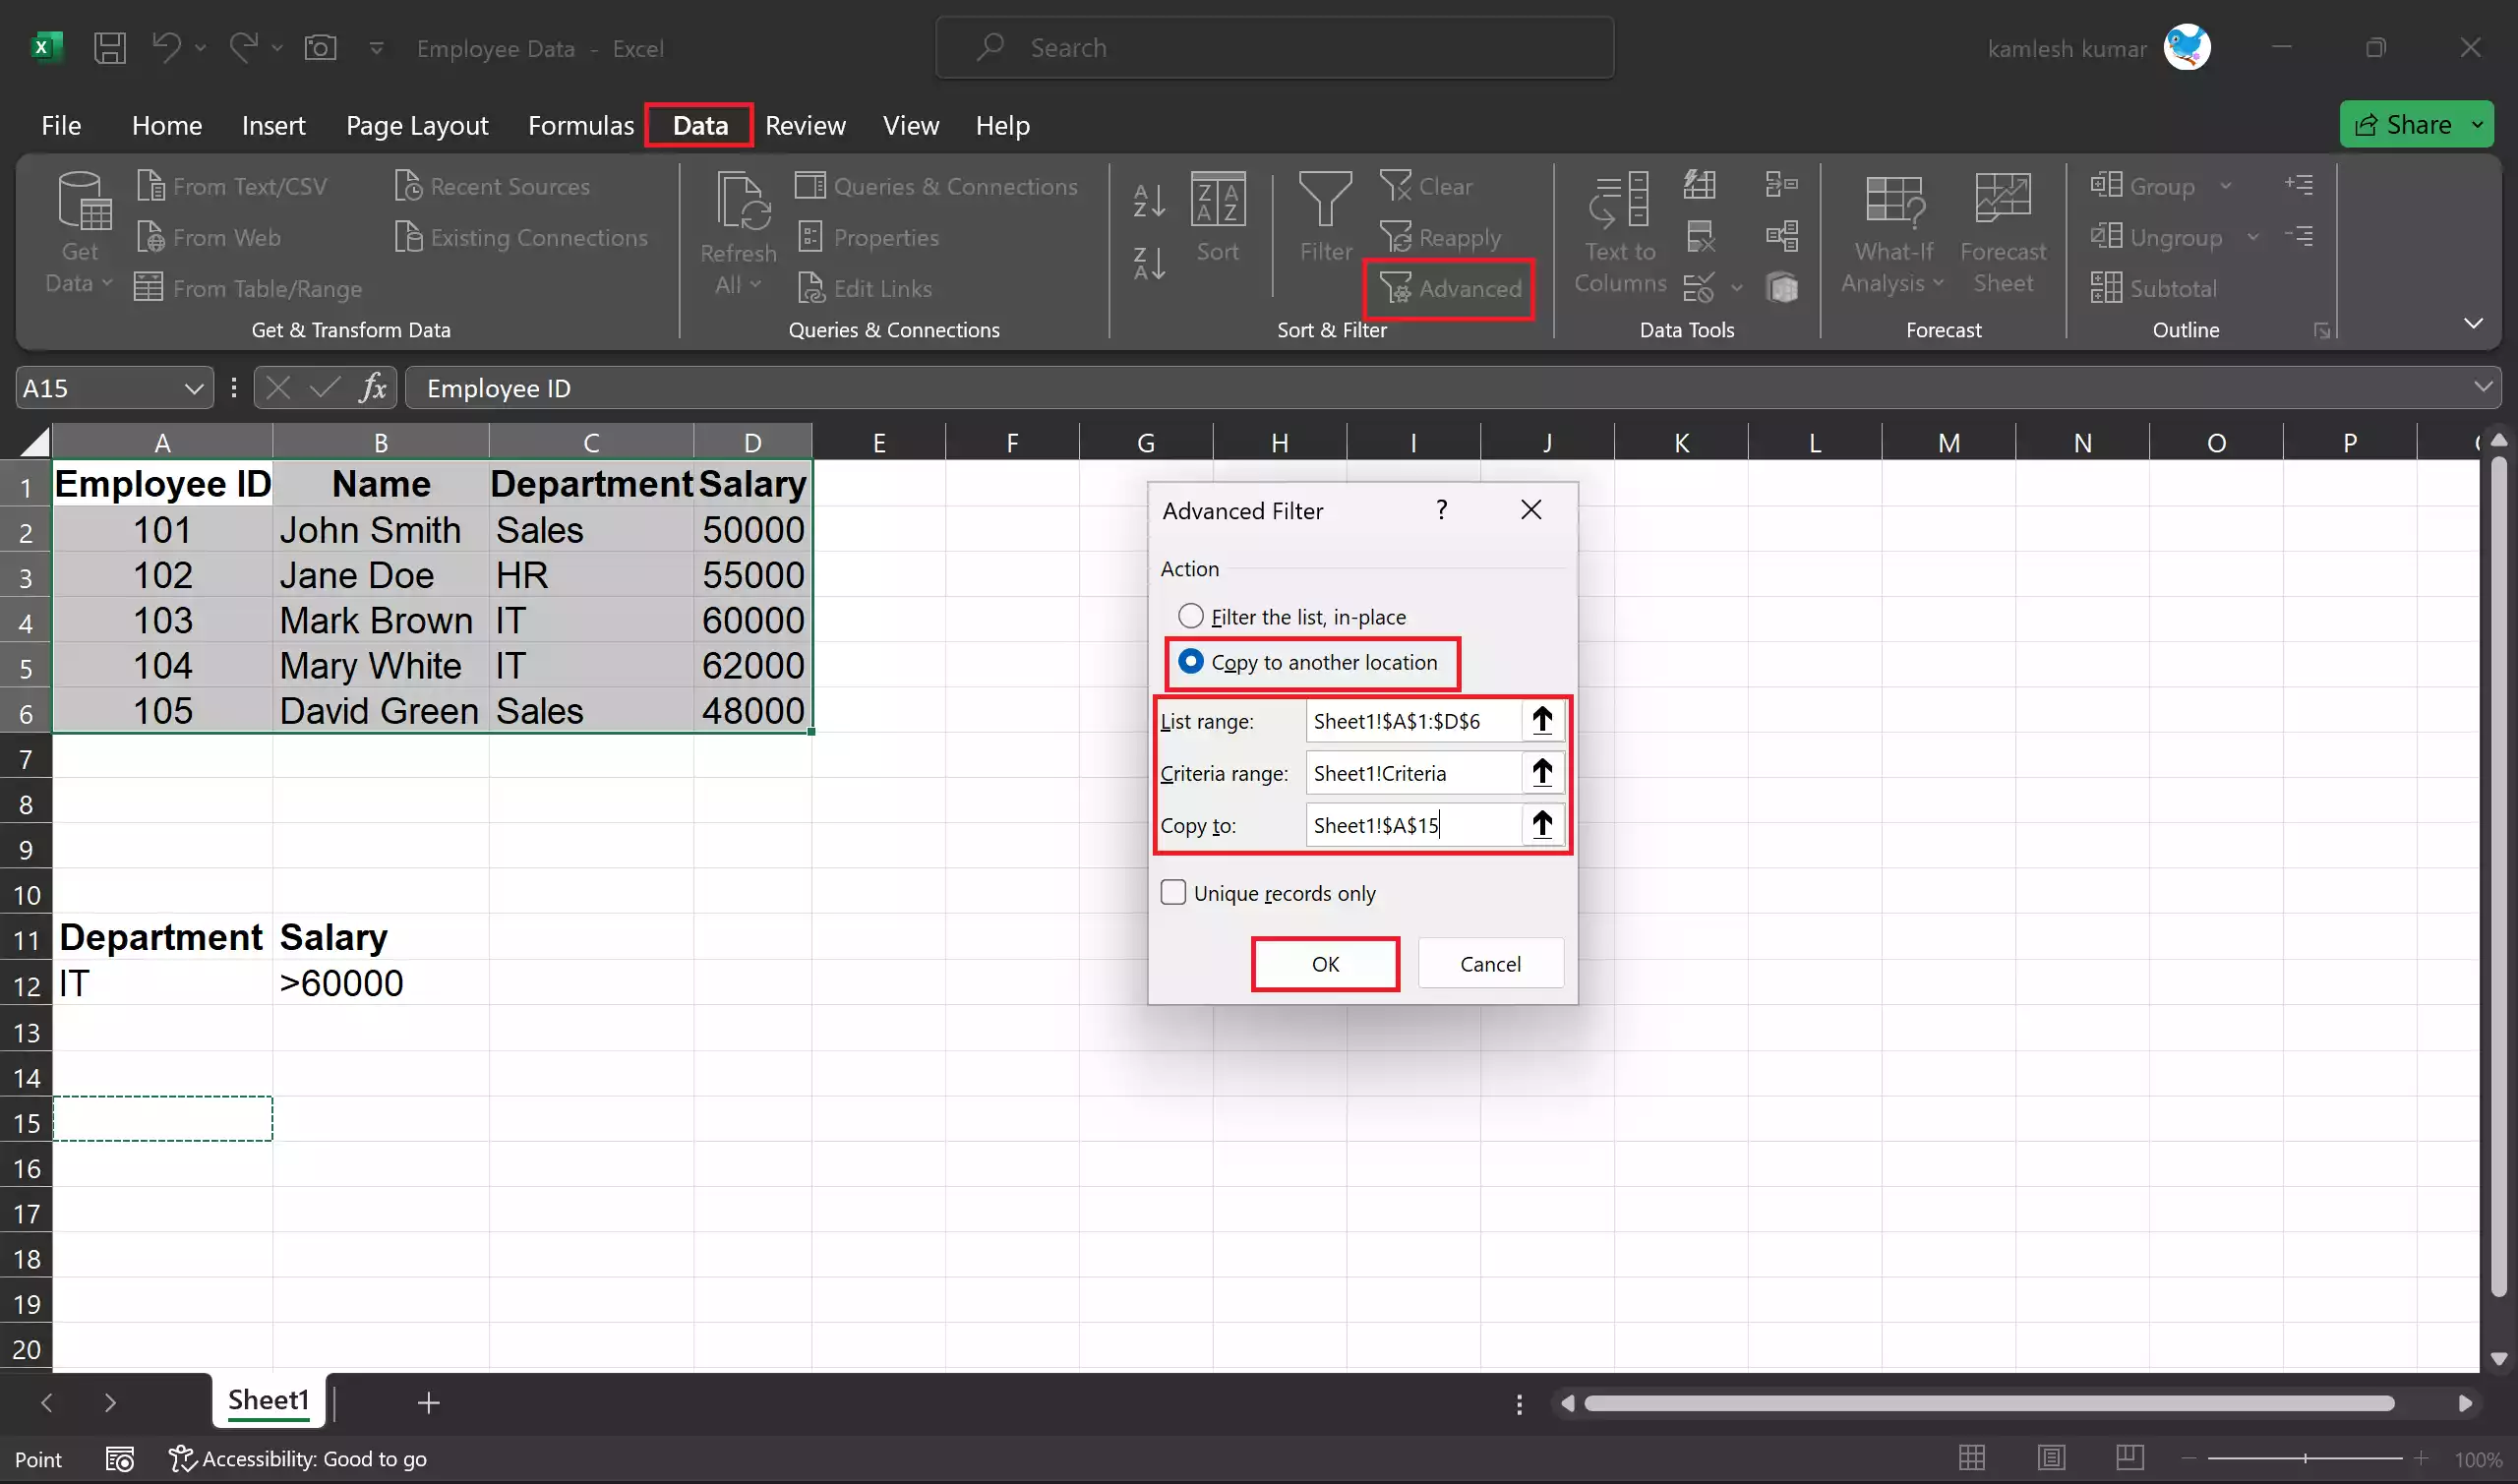
Step 4. Once the Advanced Filter dialog box opens, follow these steps to configure your filter:-
- In the “Advanced Filter” dialog box, set the “List range” to the range of your data, including the header. For example, A1:D6 (the range of your data, including the header.
- Set the “Criteria range” to the range where you defined your filter criteria—for example, A11:B12 (the range where you defined your filter criteria).
- If you want to copy the filtered data to a different location in your worksheet, specify the “Copy to” range.
- Ensure that the “Unique records only” checkbox is unchecked, unless you specifically want to filter unique records.
- Click “OK.”
Step 5. After you click “OK,” Excel will apply the Advanced Filter based on your criteria. The filtered data will either replace the original data or be copied to the specified location, depending on your settings.
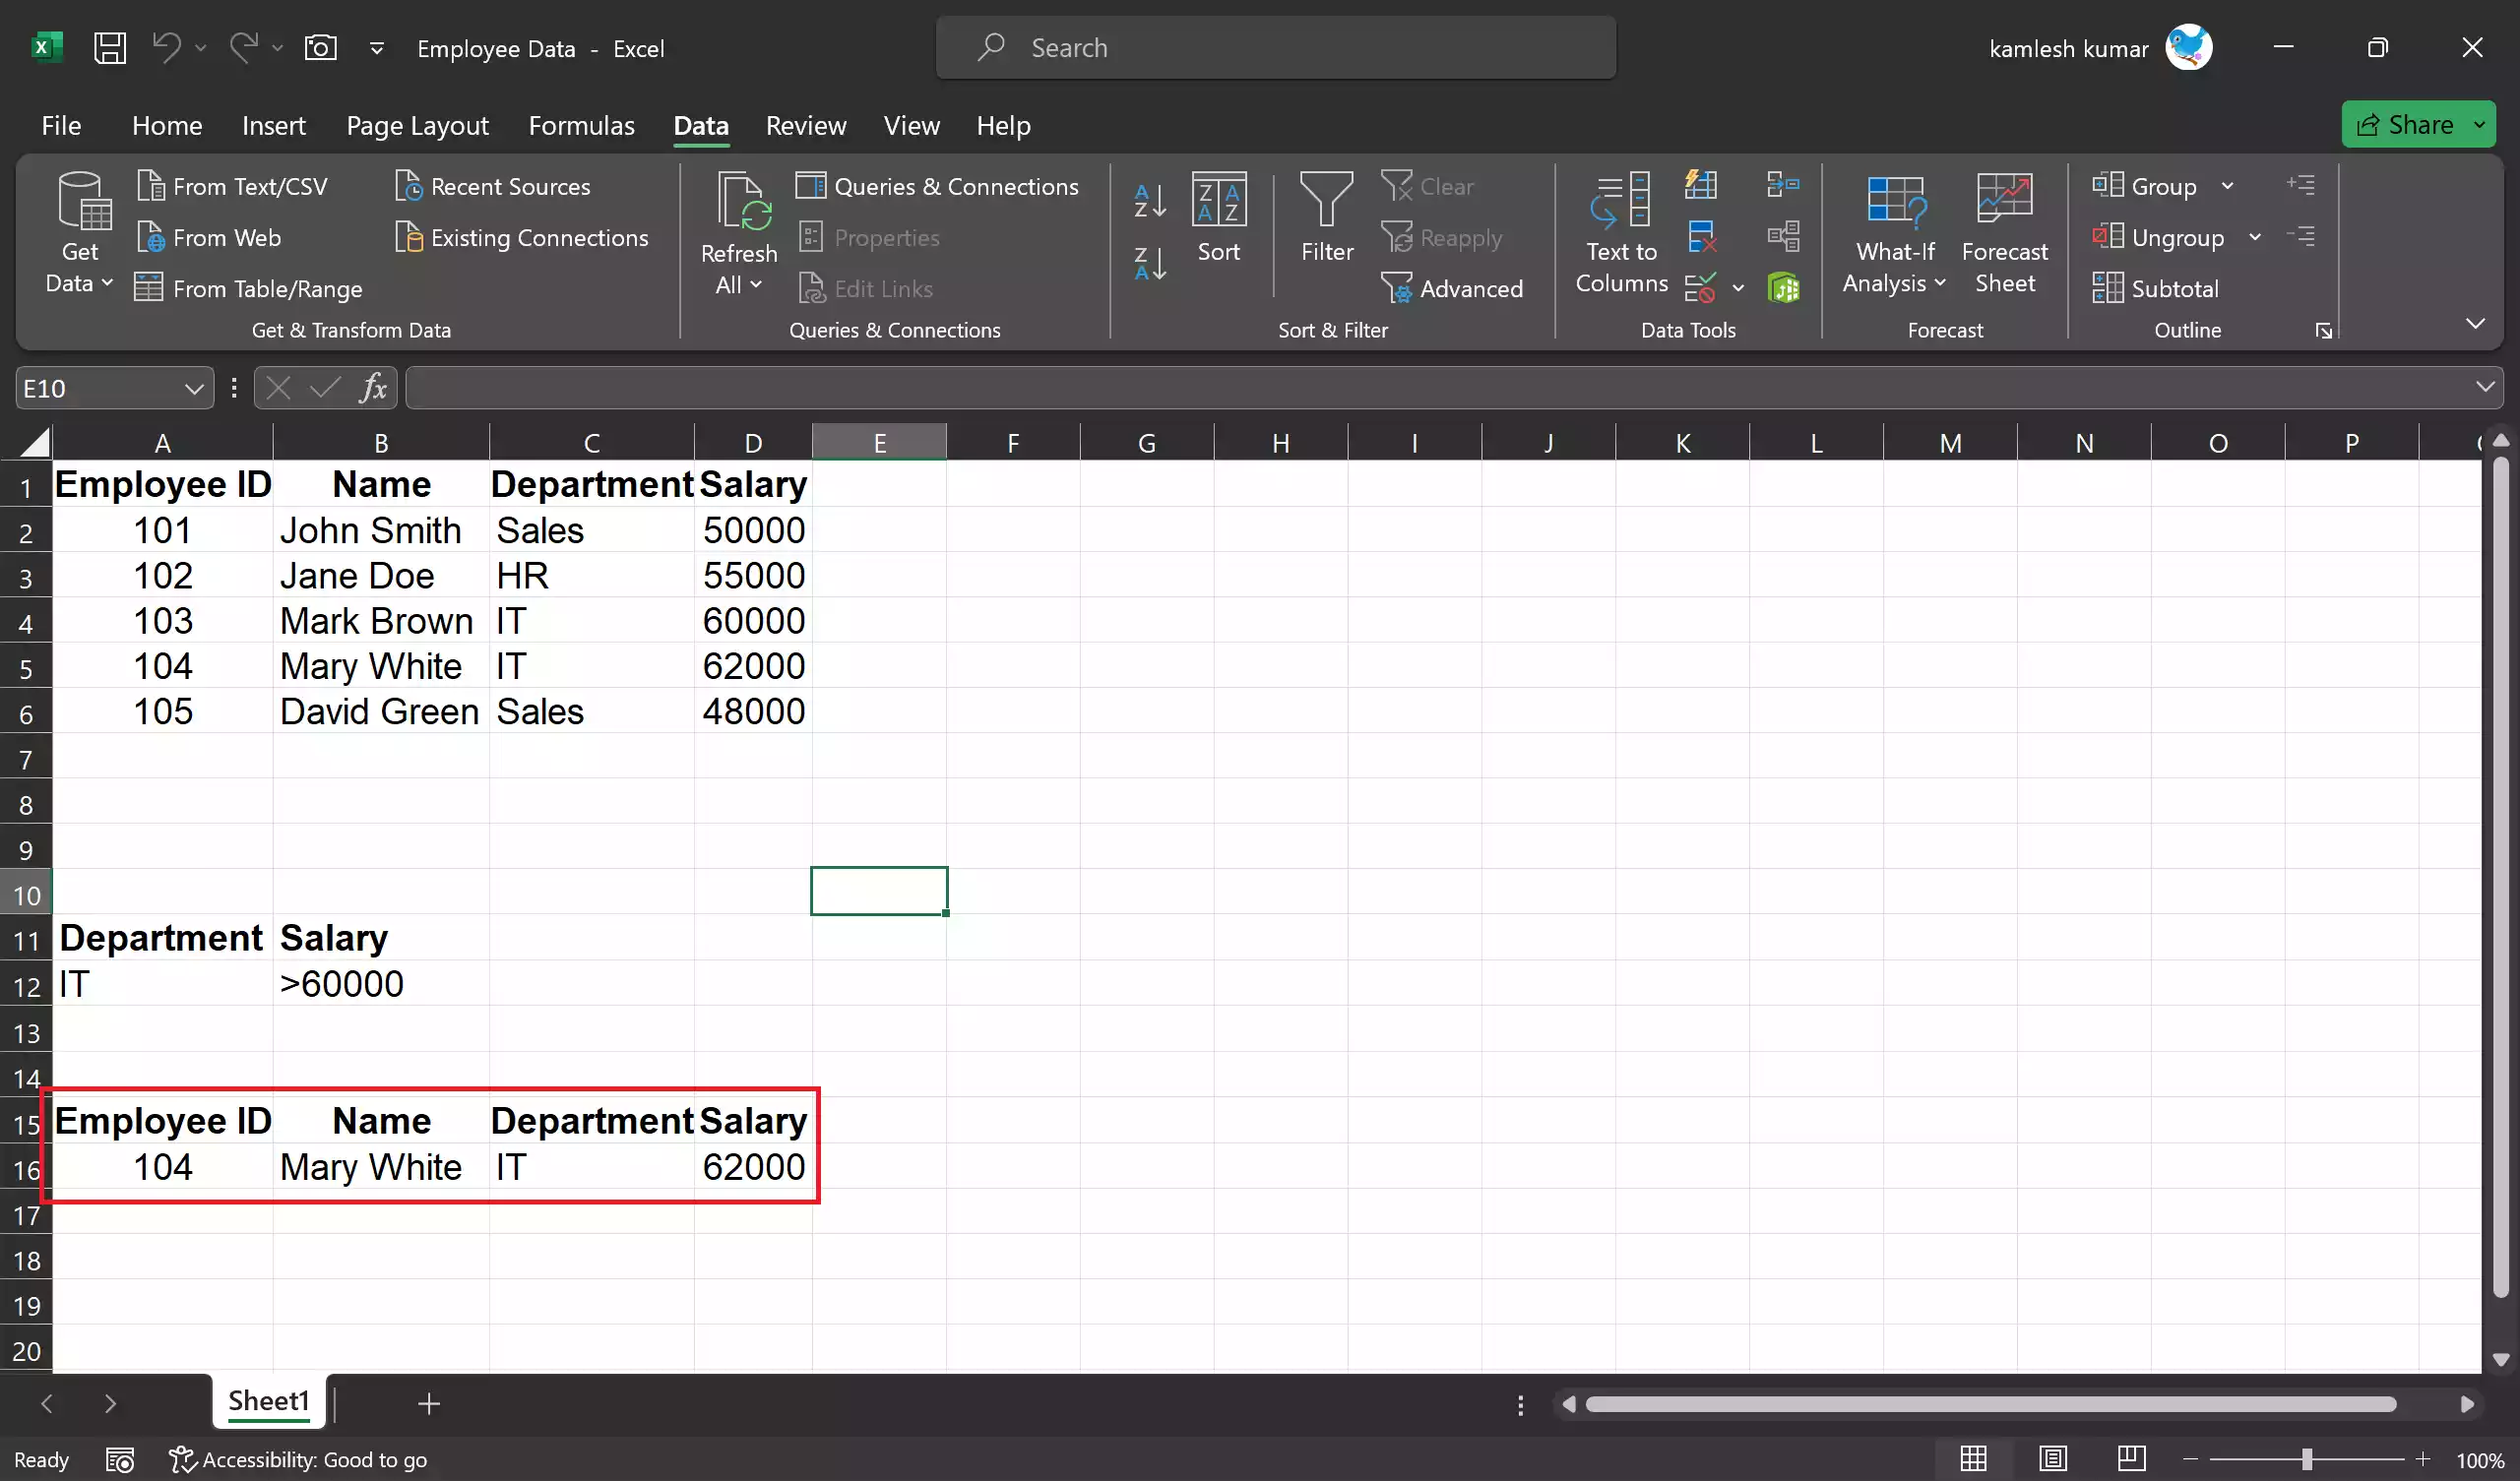
This is the result of applying the filter criteria “Department” equals “IT” and “Salary” greater than 60,000.
Step 6. If you want to change your filter criteria or clear the filter, you can do so by following these steps:-
- Select the filtered data or the entire dataset (A1:D6).
- Go back to the “Data” tab.
- Click “Advanced” in the “Sort & Filter” group again.
- In the “Advanced Filter” dialog box, you can either modify the criteria or clear the existing criteria.
- Click OK.
Tips and Tricks
Here are some additional tips and tricks to help you make the most of the Advanced Filter feature in Excel:-
Wildcard Characters: You can use wildcard characters like asterisk (*) and question mark (?) in your text criteria to make your filtering more flexible.
Dynamic Criteria: You can create dynamic criteria by referencing cells in your criteria range. This allows you to change your filter criteria without editing the Advanced Filter dialog box each time.
Complex Filtering: Advanced Filter allows for complex criteria, including combining multiple conditions using logical operators.
Unique Records: You can use Advanced Filter to extract unique records from your dataset by checking the “Unique records only” option.
Sorting: If you need to sort the filtered data, you can do so by selecting the filtered range and using the “Sort” feature under the “Data” tab.
Conclusion
The Advanced Filter feature in Microsoft Excel is a powerful tool for precise and complex data filtering. By following the steps outlined in this article, you can efficiently extract, analyze, and manipulate data based on your specific criteria. Whether you’re working with a large dataset, generating reports, or performing detailed data analysis, mastering the Advanced Filter can significantly enhance your productivity and accuracy in Excel.
