Microsoft Excel comes with a lot of features. In this post, we will explain what is is AutoSum and how to use it. With this post’s help, you will learn to automatically sum columns or rows with the Sum shortcut, sum-only visible cells, sum selected range vertically and horizontally in one go, and the common reason for Excel AutoSum not working.
Since the AutoSum is vast, hence we will see it topic-wise. We will cover the following in this tutorial:-
- Where is AutoSum in Excel?
- How to do AutoSum in Excel?
- Excel Sum shortcut.
- How to use AutoSum with other functions?
- How to AutoSum only visible cells?
- Excel AutoSum tips and tricks.
Where is AutoSum in Excel?
For easiness, the AutoSum button is available in 2 locations on the Microsoft Excel ribbon:-
Home > Editing > AutoSum, and

Formulas > Function Library > AutoSum.

How to do AutoSum in Excel?
If you have to do the sum of a single range of cells, columns, or rows, or several adjacent columns or rows, here the Excel AutoSum feature comes in handy, to sum up automatically.
To use the AutoSum feature of Excel, follow these 5 easy steps:-
Step 1. Select a blank cell next to the numbers where you want to store the sum’s values.
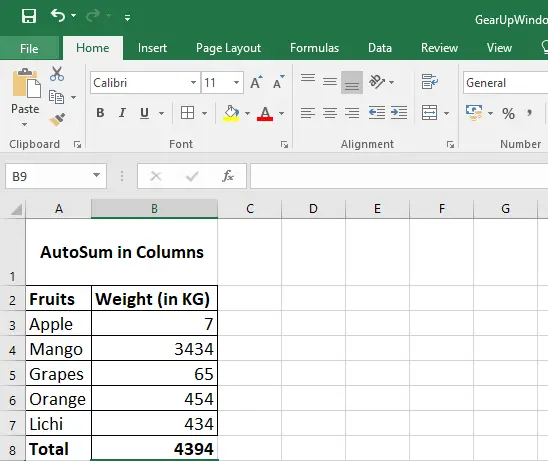
Step 2. To sum a column, select the blank cell immediately below the column’s last value. Click on the AutoSum button from the Home or Formulas tab. The sum formula will automatically be entered in the selected blank cell, and the cell’s values will be added, which will be highlighted.
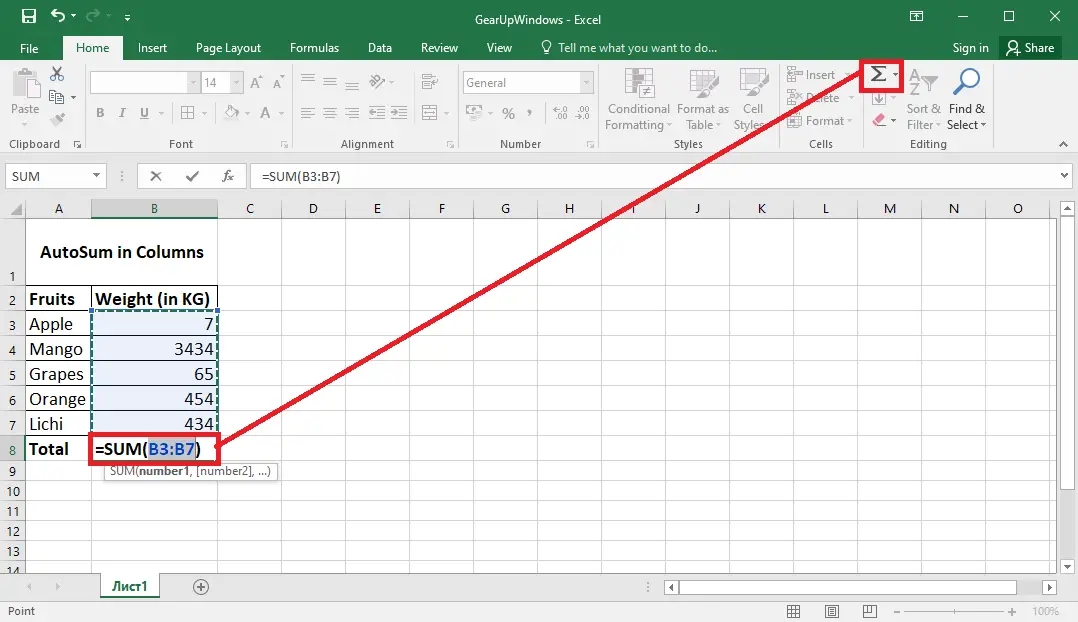
Step 3. Now, press the Enter key from the keyboard to get the sum of the selected columns.
Note: By default, it will select all columns upward if there is no blank cell available in between.
Step 4. In similar ways, to sum a row, select the blank cell to the right of the row’s last number. Click on the AutoSum button from the Home or Formulas tab. The sum formula will automatically be entered in the selected blank cell, and the cell’s values will be added, which will be highlighted.
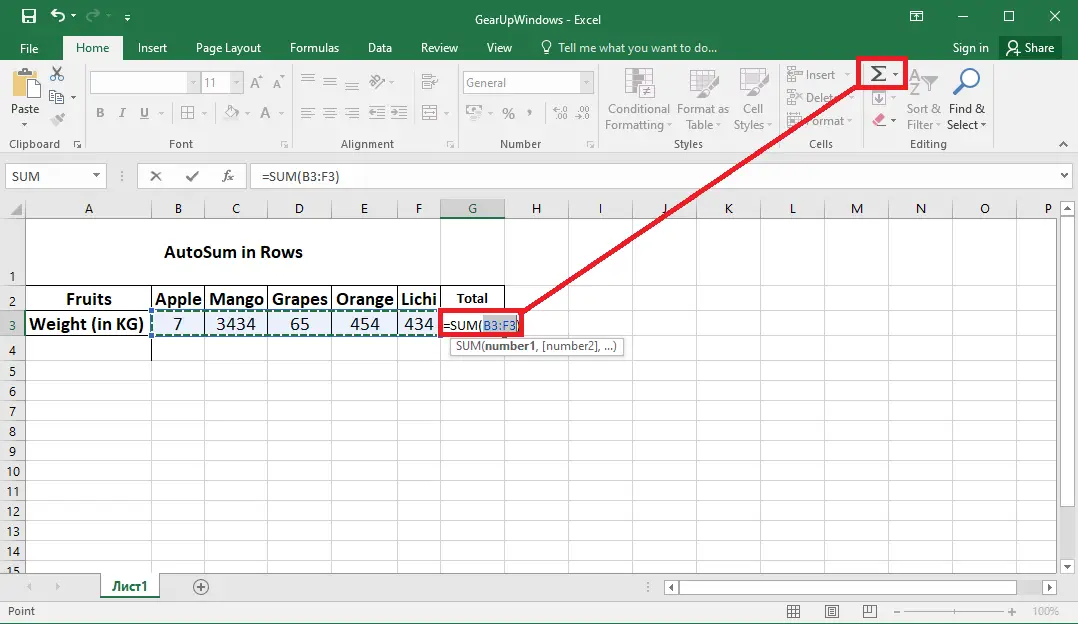
Step 5. Now, press the Enter key from the keyboard to get the sum of the selected rows.
Note: By default, it will select all rows to the left side of the selected cell if there is no blank cell available in between.
Bonus Tips: If there is a blank cell and Microsoft Excel does not select the desired rows or columns by default, after pressing the AutoSum button, you can select the desired cell to sum it.
Excel Sum shortcut
How to use AutoSum with other functions?
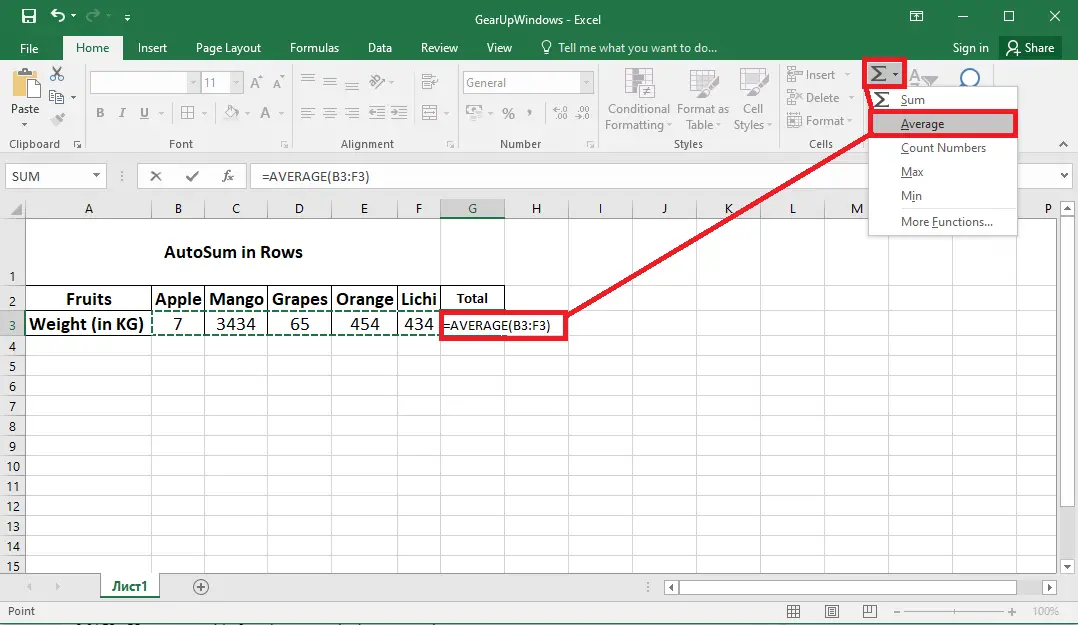
Apart from adding cells, Excel’s AutoSum button can be used to insert other functions:-
AVERAGE – You can use this function to return the average (arithmetic mean) of numbers.
COUNT NUMBERS– You can use this function to count cells with numbers.
MAX – You can use this function to get the largest number.
MIN – You can use this function to get the smallest value.
To get the desired results from the above function, as usual, click on the blank cell where you want to get the desired result, click the AutoSum drop-down arrow, and choose the desired function from the list.
How to AutoSum only visible cells?
Till now, you have learned to AutoSum the values of rows or columns. But what will you do if you want to sum only visible cells from the filtered list?
You can always organize the tables in an Excel sheet by pressing the Ctrl + T shortcut. Once you organize the data and press AutoSum, instead of the SUM function, it will insert the SUBTOTAL function by default. Only visible cells will be added in the SUBTOTAL function, and those cells hidden by using the filter method will be ignored.

Excel AutoSum tips and tricks
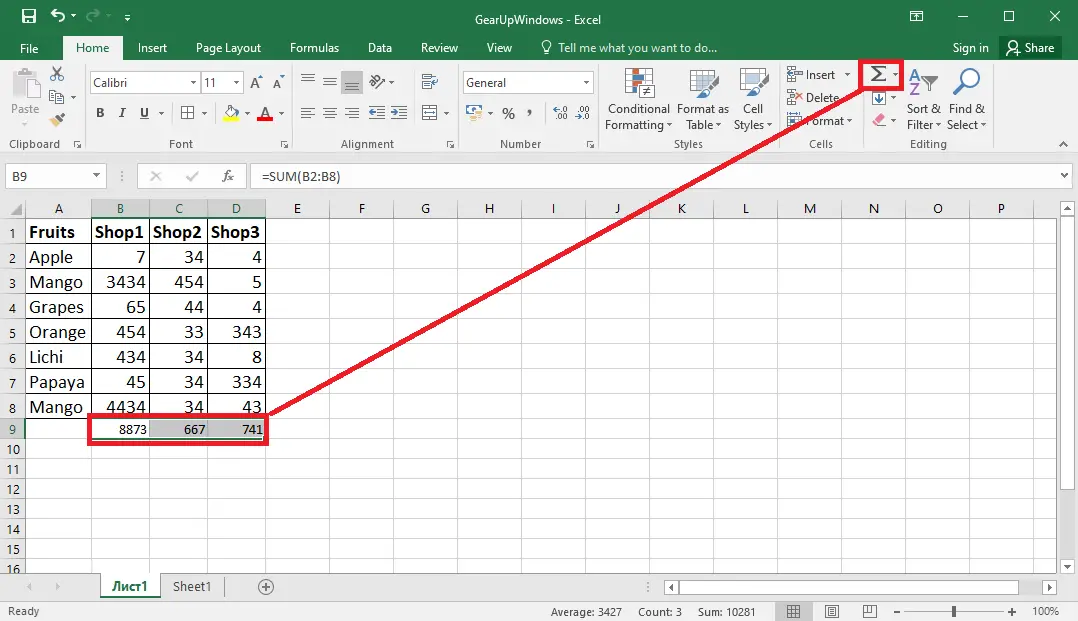
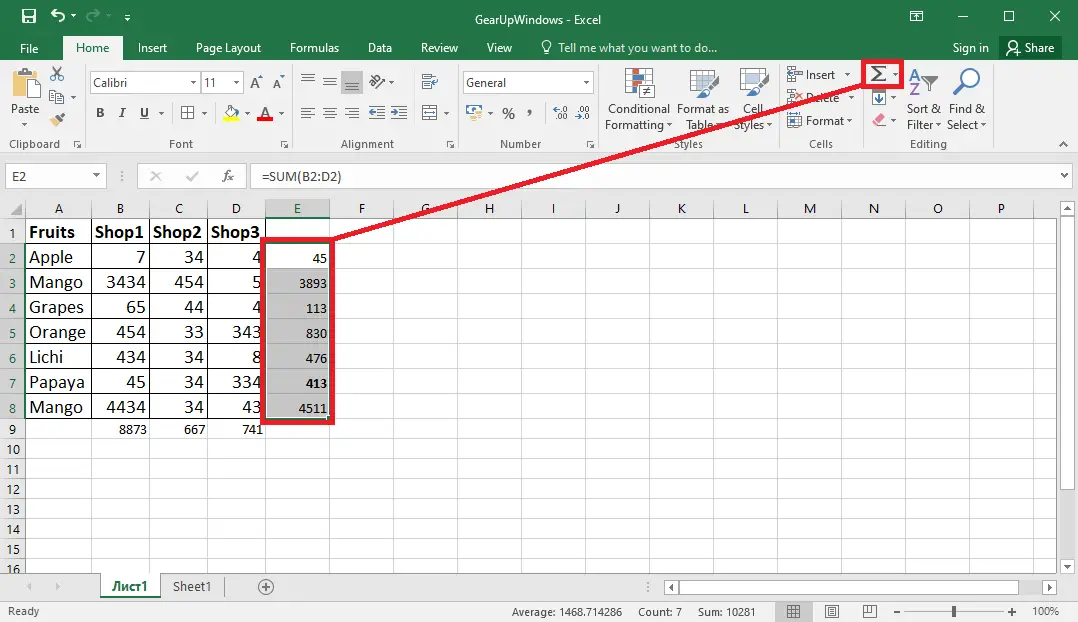
If you want to sum values in several columns or rows at once, select all the cells where you want to insert the Sum formula, click the AutoSum button on the ribbon, or press the shortcut keys Alt + =.
For example, if you want to get the sum of columns in cells A9, B9, and C9, select A9, B9, and C9, then click AutoSum. The values in each of the 3 columns will be summed individually.
Similarly, if you want to AutoSum of rows in columns E2, E3, E4, E5, E6, E7, and E8, select the E2, E3, E4, E5, E6, E7, and E8; click the AutoSum from Home or Formulas tab. You can also use the shortcut Alt and = keys.
Conclusion
In conclusion, AutoSum is a powerful feature of Microsoft Excel that allows you to automatically sum up columns, rows, or selected ranges of cells. With the help of this tutorial, you have learned where to find the AutoSum button on the Excel ribbon, how to use it to sum columns or rows, and how to use it with other functions like AVERAGE, COUNT NUMBERS, MAX, and MIN. Additionally, you have learned how to AutoSum only visible cells from filtered lists and some tips and tricks to use AutoSum more efficiently. By mastering this feature, you can save time and improve your productivity while working with large amounts of data in Excel.