Microsoft Excel is a powerful tool for managing and analyzing data, and one of the many functions it offers is the IFS function. The IFS function is a versatile and efficient way to perform multiple conditional tests in a single formula. It allows you to evaluate multiple conditions and return different values based on the first condition that is true.
In this gearupwindows article, we will explore how to use the IFS function in Microsoft Excel, step by step. We’ll cover its syntax, common use cases, and provide examples to help you understand its application.
Syntax of the IFS Function
Before we dive into practical examples, let’s take a closer look at the syntax of the IFS function:-
IFS(logical_test1, value_if_true1, [logical_test2, value_if_true2], ..., [logical_testn, value_if_truen])
– `logical_test1`: The first condition or logical test that you want to evaluate.
– `value_if_true1`: The value to return if `logical_test1` is true.
– `[logical_test2, value_if_true2], …, [logical_testn, value_if_truen]`: Optional additional conditions and values to evaluate. You can include as many of these pairs as needed.
Using the IFS Function in Excel
Now, let’s explore how to use the IFS function with practical examples.
Example 1: Basic IFS Function
Suppose you have a list of student grades and you want to assign letter grades based on their scores. You can use the IFS function for this. In cell B2, you can enter the following formula:-
=IFS(A2 >= 90, "A", A2 >= 80, "B", A2 >= 70, "C", A2 >= 60, "D", A2 < 60, "F")
In this formula:-
– `A2 >= 90` is the first condition, and if it’s true, the function returns “A.”
– `A2 >= 80` is the second condition, and if the first condition is false but the second is true, the function returns “B.”
– This pattern continues for the other grade boundaries.

Example 2: Nested IFS
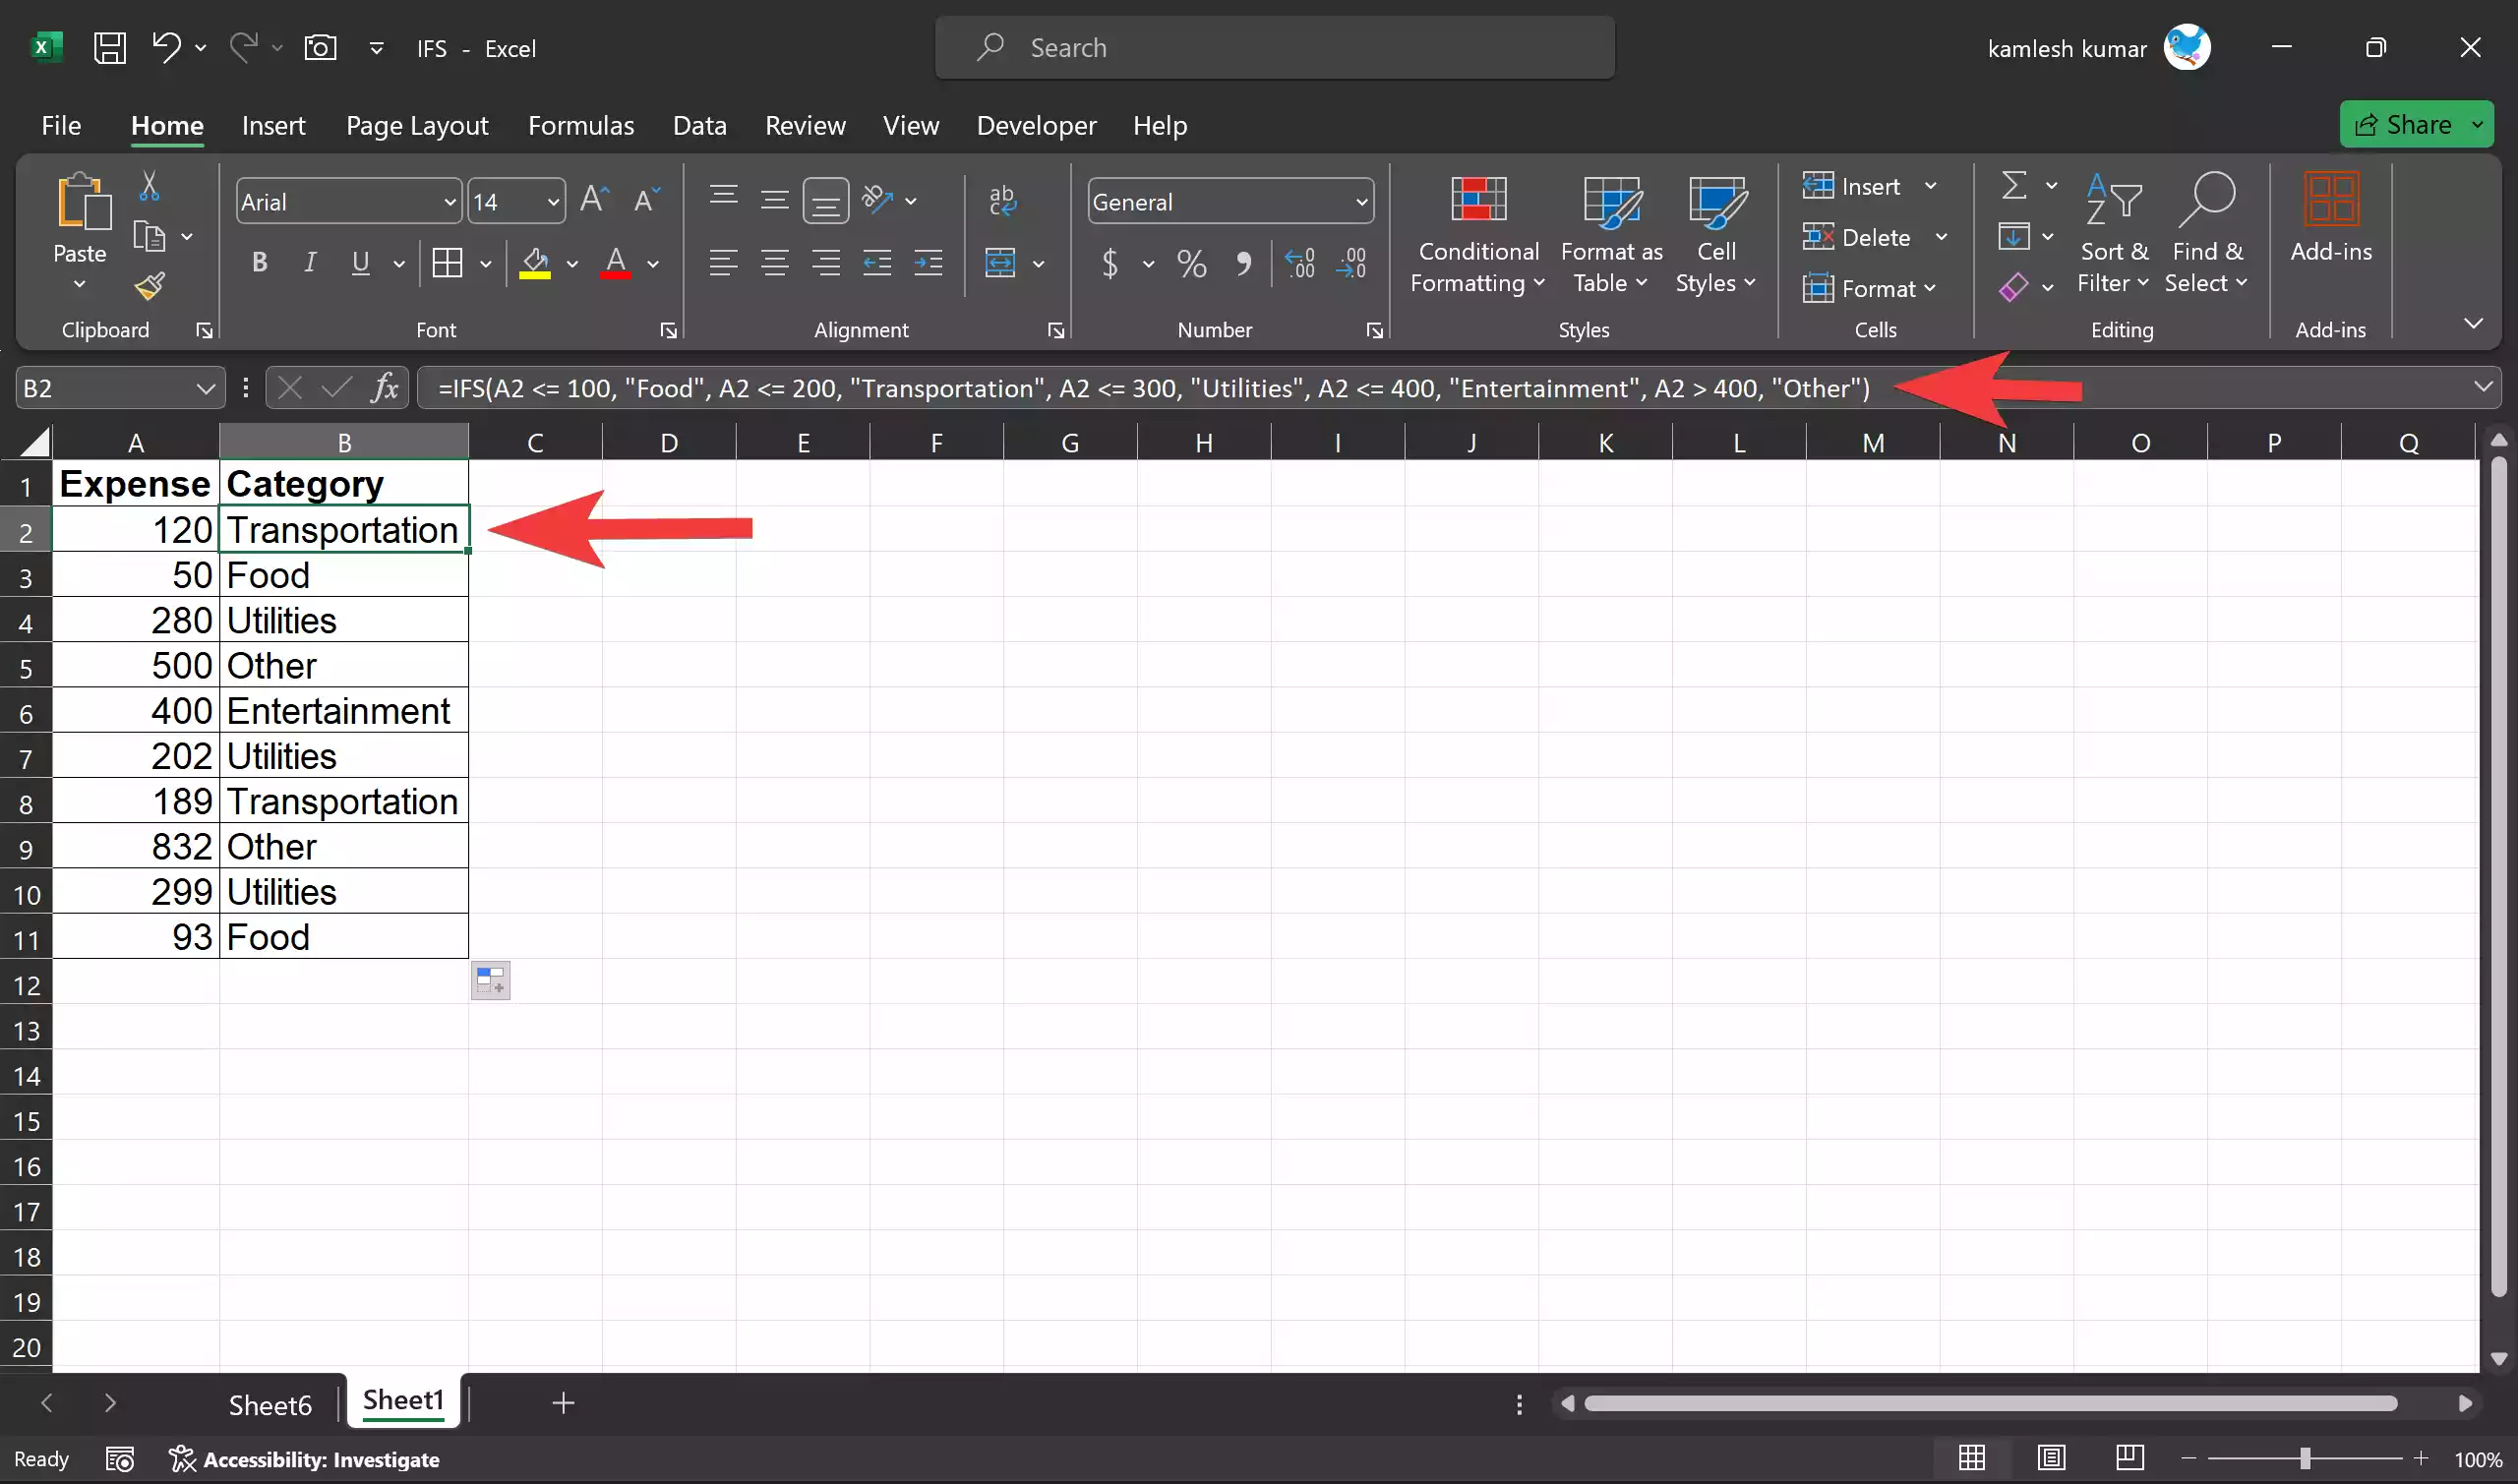
You can also use nested IFS to handle more complex scenarios. Let’s say you want to categorize expenses into different budget categories. In cell B2, you can enter the following formula:-
=IFS(A2 <= 100, "Food", A2 <= 200, "Transportation", A2 <= 300, "Utilities", A2 <= 400, "Entertainment", A2 > 400, "Other")
In this formula:-
– If the expense in cell A2 is less than or equal to $100, it is categorized as “Food.”
– If the expense is between $101 and $200, it is categorized as “Transportation.”
– This pattern continues for the other budget categories.
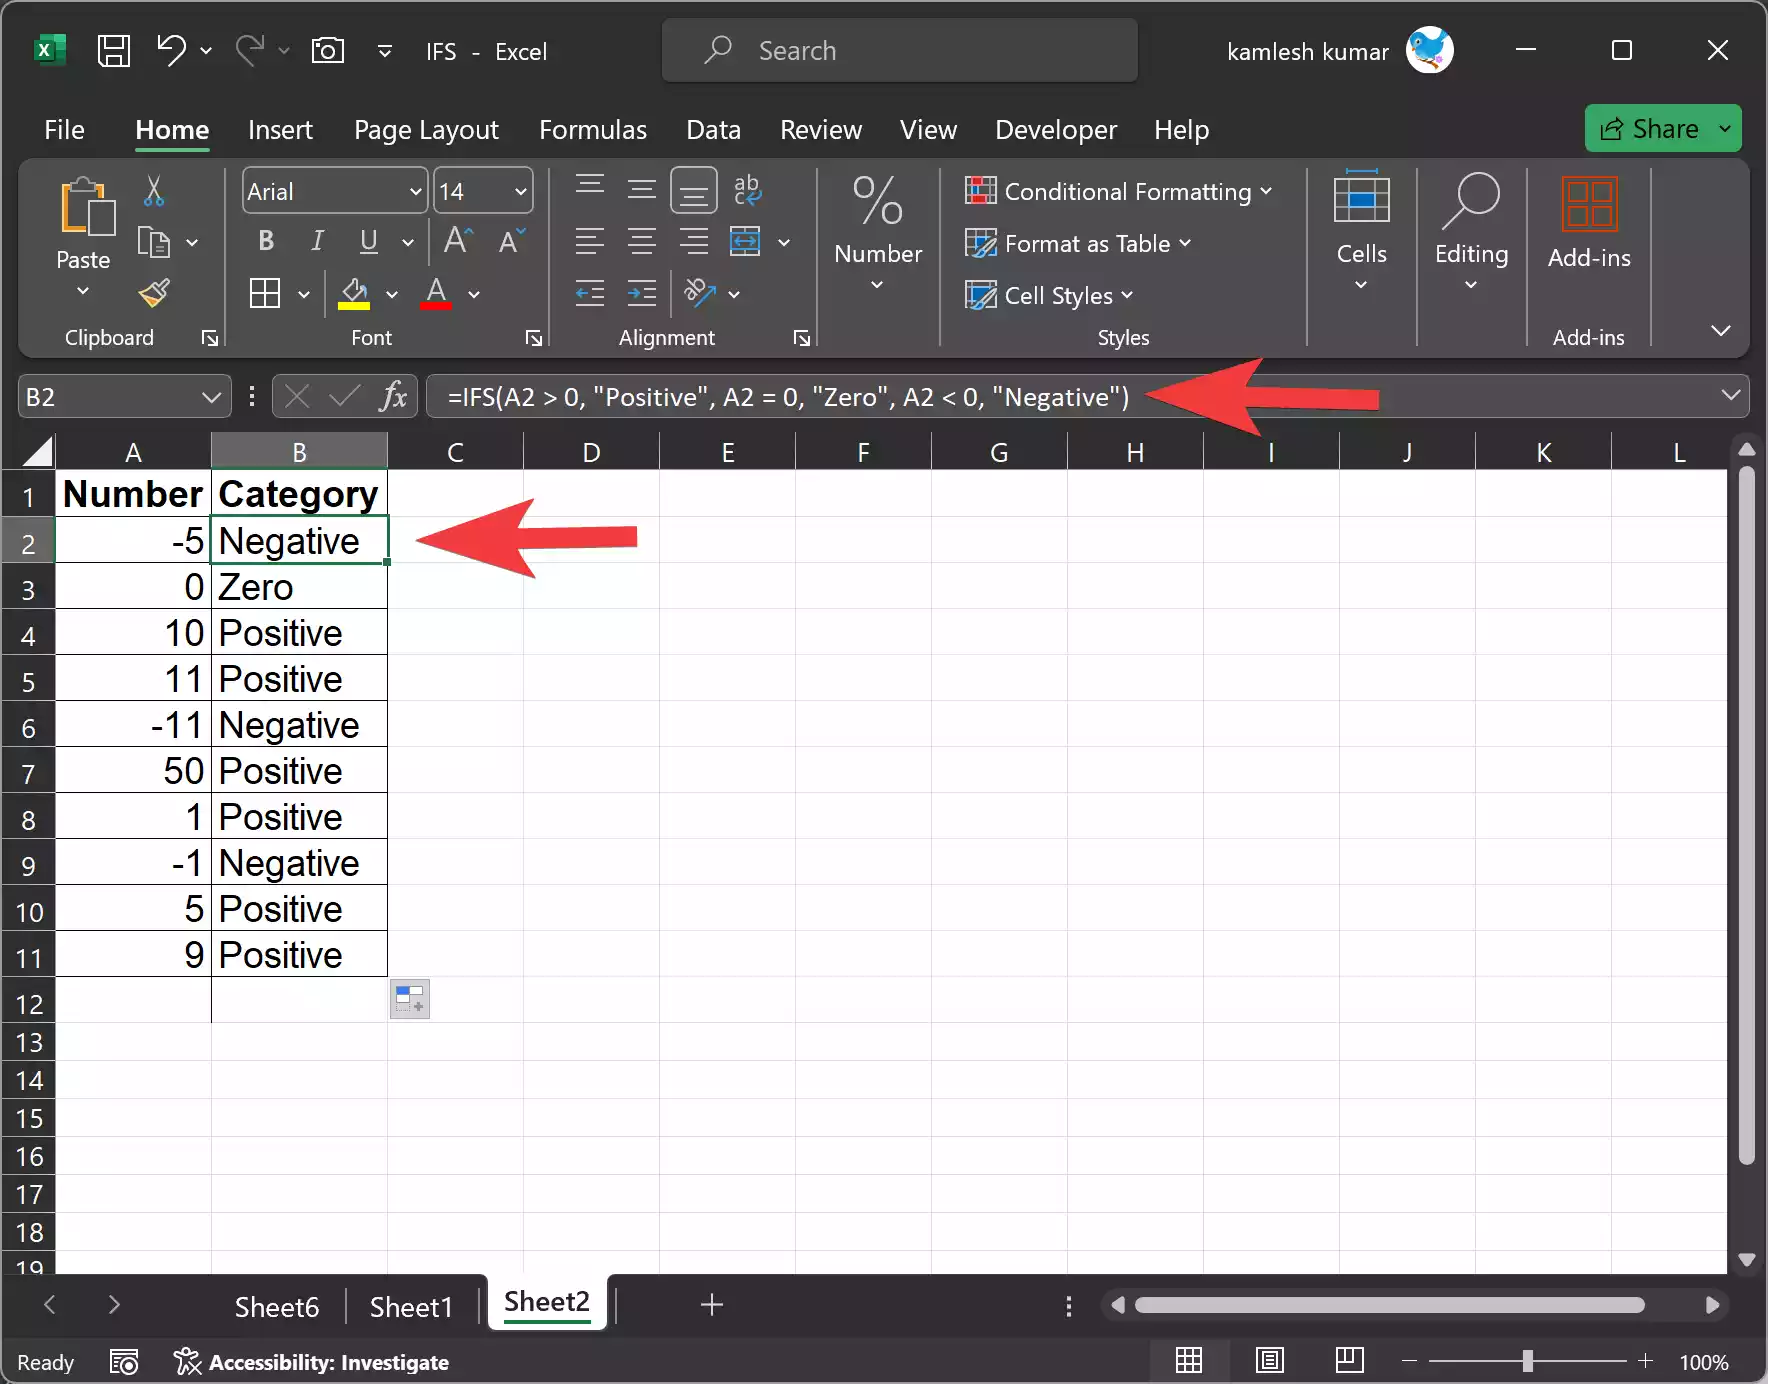
Example 3: Handling Errors with IFS
The IFS function can also be used to handle errors or special cases. Let’s say you have a column of data that includes some negative values, and you want to handle them differently. In cell B2, you can enter the following formula:-
=IFS(A2 > 0, A2, A2 = 0, "Zero", A2 < 0, "Negative")
In this formula:-
– If the value in cell A2 is greater than 0, it returns the same positive value.
– If the value is zero, it returns “Zero.”
– If the value is negative, it returns “Negative.”
Tips and Best Practices
When using the IFS function in Excel, consider the following tips and best practices:-
1. Order Matters: IFS evaluates conditions in the order they appear in the formula. Ensure that you place more specific conditions before more general ones.
2. Using AND/OR: You can combine logical tests within each condition by using the `AND` and `OR` functions. This can be particularly helpful for complex conditions.
3. Error Handling: Always include a catch-all condition at the end of your IFS function to handle unexpected cases. For example, you can use the `TRUE` condition to return a default value.
4. Testing and Debugging: Test your IFS formulas with various inputs to ensure they work as expected. If a formula becomes too complex, consider breaking it into smaller, more manageable parts.
5. Documentation: Document your IFS formulas with comments to make them more understandable for yourself and others who may work with your spreadsheets.
Conclusion
The IFS function in Microsoft Excel is a powerful tool for handling multiple conditions and returning different results based on those conditions. It allows you to simplify your formulas and make them more readable, which is essential for maintaining and sharing your spreadsheets. By understanding the syntax and practicing with real-world examples, you can become proficient in using the IFS function to solve a wide range of conditional problems in Excel.