If you have been using Windows PCs for a long time, you may already have installed some third-party software to mount ISO or IMG. In Windows 7 and earlier versions of Windows, third-party software was needed to mount an ISO or IMG file. Fortunately, Windows 8 and newer Windows 10 both support mounting ISO and IMG files, which means that you can now mount ISO and IMG files without installing any third-party applications.
Sometimes you need to mount the ISO or IMG file. For example, certain games require a physical CD/DVD to be mounted to play the game. To supplement the need for a physical CD/DVD to play the game, you can use a virtual CD-ROM.
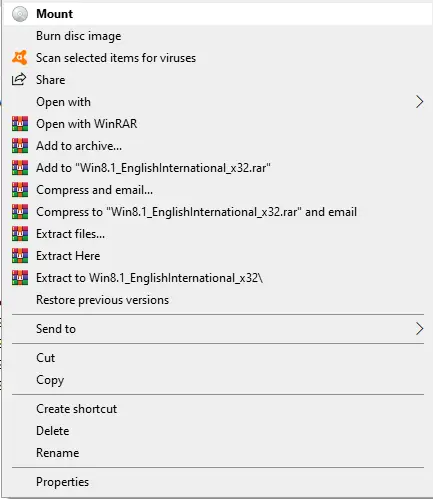
Mounting an ISO or IMG file is extremely easy in Windows 10. You need to right-click an ISO or IMG file and then click the Mount option to see the ISO or IMG file contents in File Explorer. To unmount the ISO or IMG, right-click on the mounted drive in This PC, and then click the Eject option.
Even though the mounting function works without any problems, sometimes you may not see the Mount option when you right-click an ISO or IMG file. This occurs when the Windows Disc Image Burner is not the default program for ISO or IMG file types. It may be missing due to some changes by any 3rd party software, or you have made a manual error.
If the Mount option is missing in the Windows 10 Context menu, follow the simple instructions below to restore it easily.
How to repair the missing mount option in Windows 10 Context menu?
Using Properties
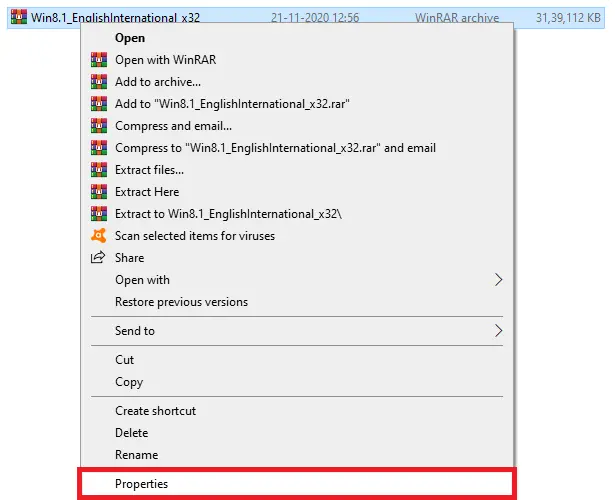
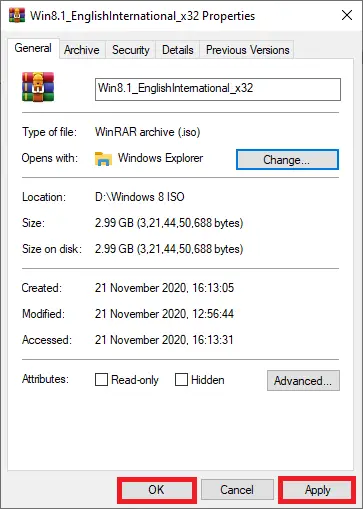
Step 1. Right-click the ISO or IMG file and select the Properties option to open the Properties dialog box.
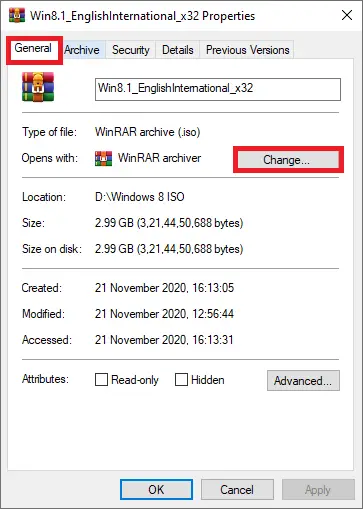
Step 2. Navigate to the General tab and then click the Change button.
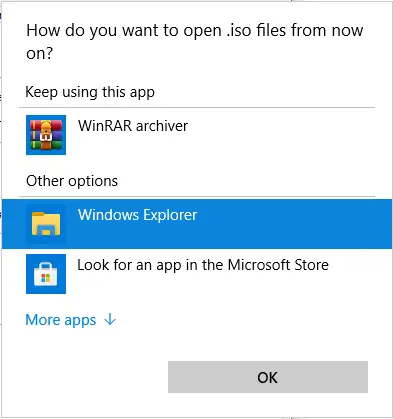
Step 3. Pick Windows Explorer from the list and click the OK button.
Step 4. Click the Apply and OK buttons in the ISO file properties dialog box.
Once you have completed the aforementioned steps, you should see the Mount option after you right-click on the ISO file.
Through File Explorer or Windows Explorer
To restore the Mount option from the Windows 10 context menu, follow these steps:-
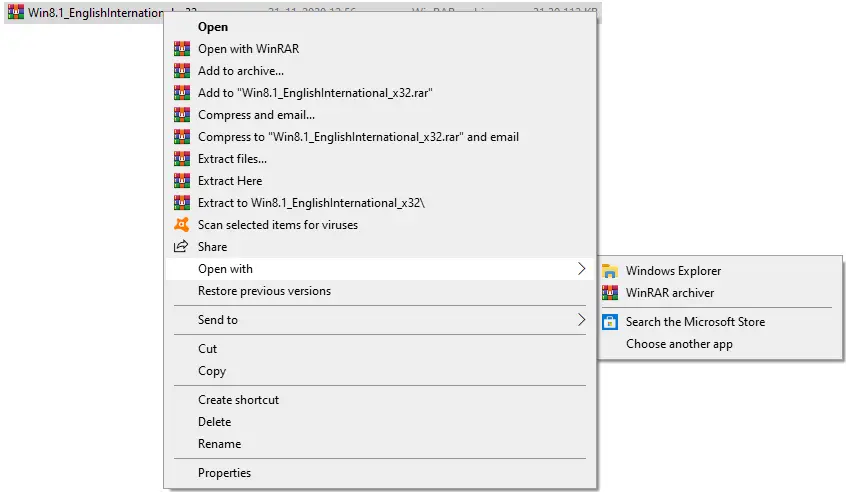
Step 1. Right-click on the ISO/IMG file, select the Open with option, and then click Choose another app from the list.
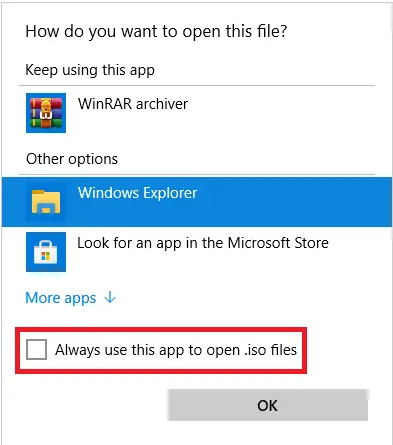
Step 2. Select Windows Explorer in the available list, click on “Always use this application to open .iso files,” and click the OK button.
These two methods mentioned above let you restore your missing Mount option in the Context menu.
Conclusion
In conclusion, mounting ISO and IMG files has become easier with the built-in feature in Windows 8 and newer Windows 10 versions. However, sometimes the Mount option may be missing due to changes made by third-party software or manual errors. If you encounter this problem, you can easily restore the Mount option by following the simple instructions mentioned above using either the Properties or Windows Explorer. With these simple steps, you can quickly access the contents of ISO and IMG files without having to install any additional third-party software.