Windows 11/10 lets you select which GPU will use a game or other application if your computer includes more than one GPU. You can assign a specific GPU to an application on games on Windows 11/10 through the Settings app. This feature was first introduced in Windows 10’s April 2018 Update. Earlier, you had to use manufacturer-specific tools like the NVIDIA Control Panel or AMD Catalyst Control Center to control this.
Although Windows 11/10 manages GPU automatically, you can select a specific GPU through the Settings app if an application is not working as desired. In this gearupwindows article, we will guide you to assign a GPU (Graphics card) to the specific application. You can set a particular GPU for traditional desktop programs and UWP (Universal Windows Platform) apps.
UWP apps are those apps that are installed from the Microsoft Store and don’t have .exe files.
How to Choose Which GPU Will Use a Game or Application on Windows 11?
Follow these steps to choose which GPU will use a Game or Application on Windows 11:-
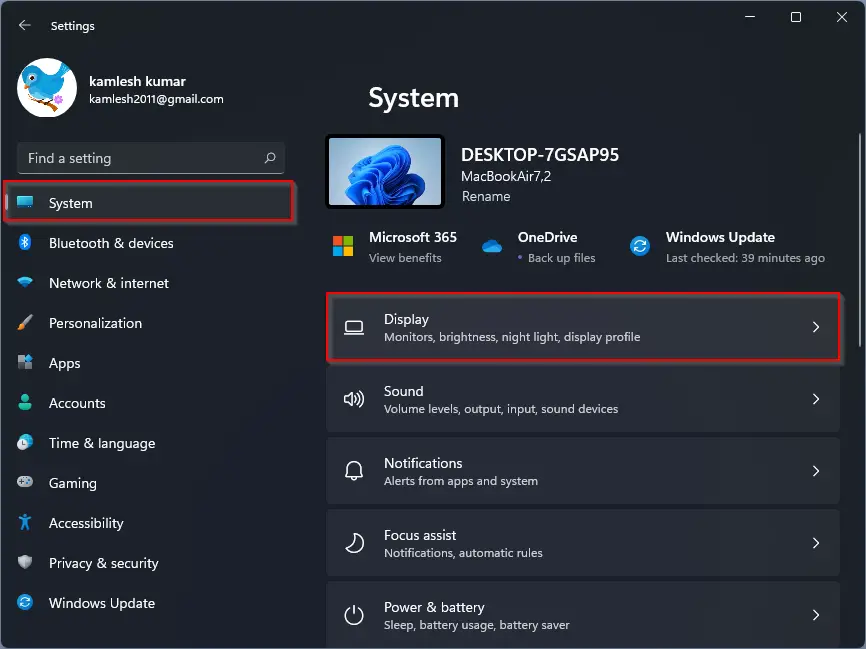
Step 1. Open the Settings app by pressing Windows + I keys from the keyboard.
Step 2. Click on the System category from the left sidebar in the Windows Settings.

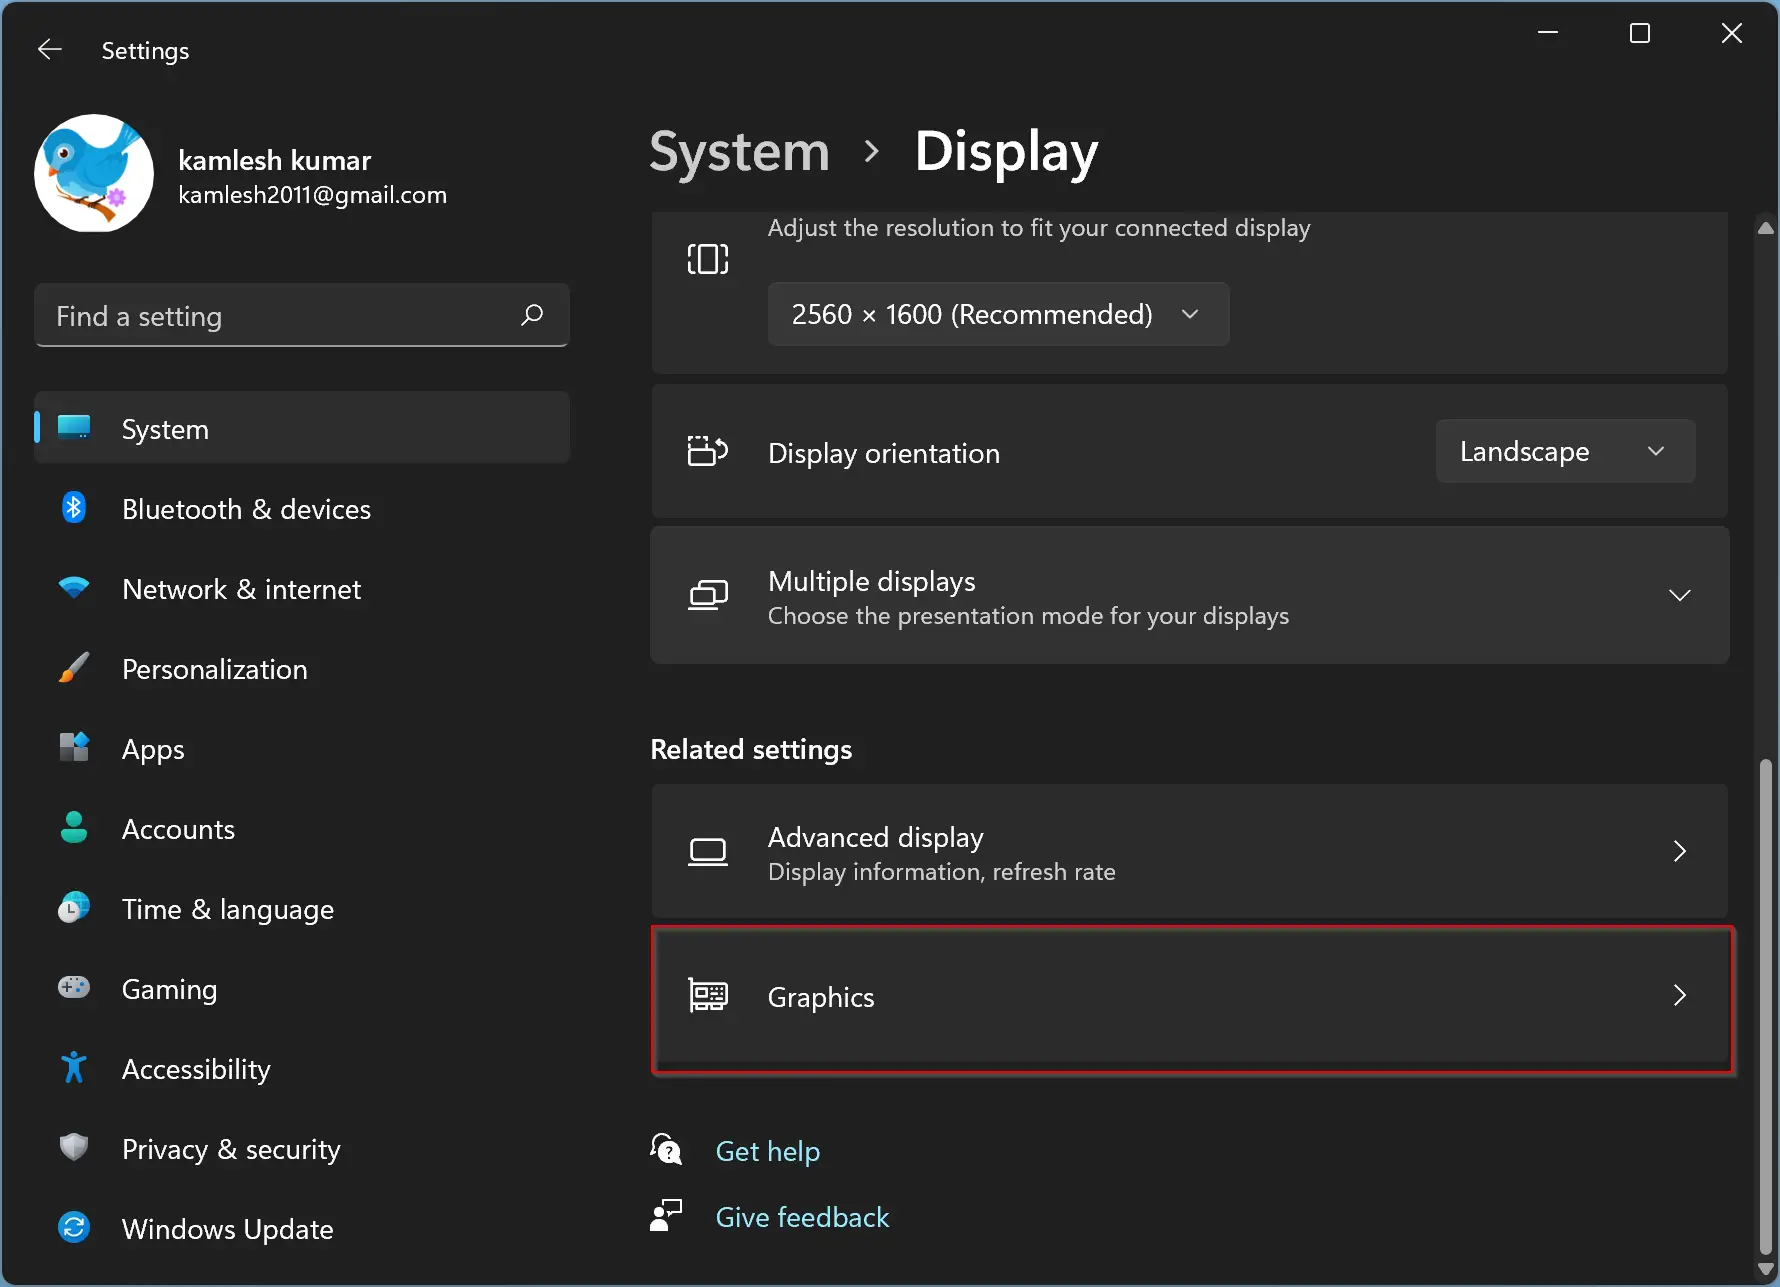
Step 3. On the right-side pane, select the Display tab.
Step 4. Click the Graphics option.
Step 5. You will see here all the installed apps on your computer, including desktop apps and store apps. Click on any app that you want to assign a specific graphics card.
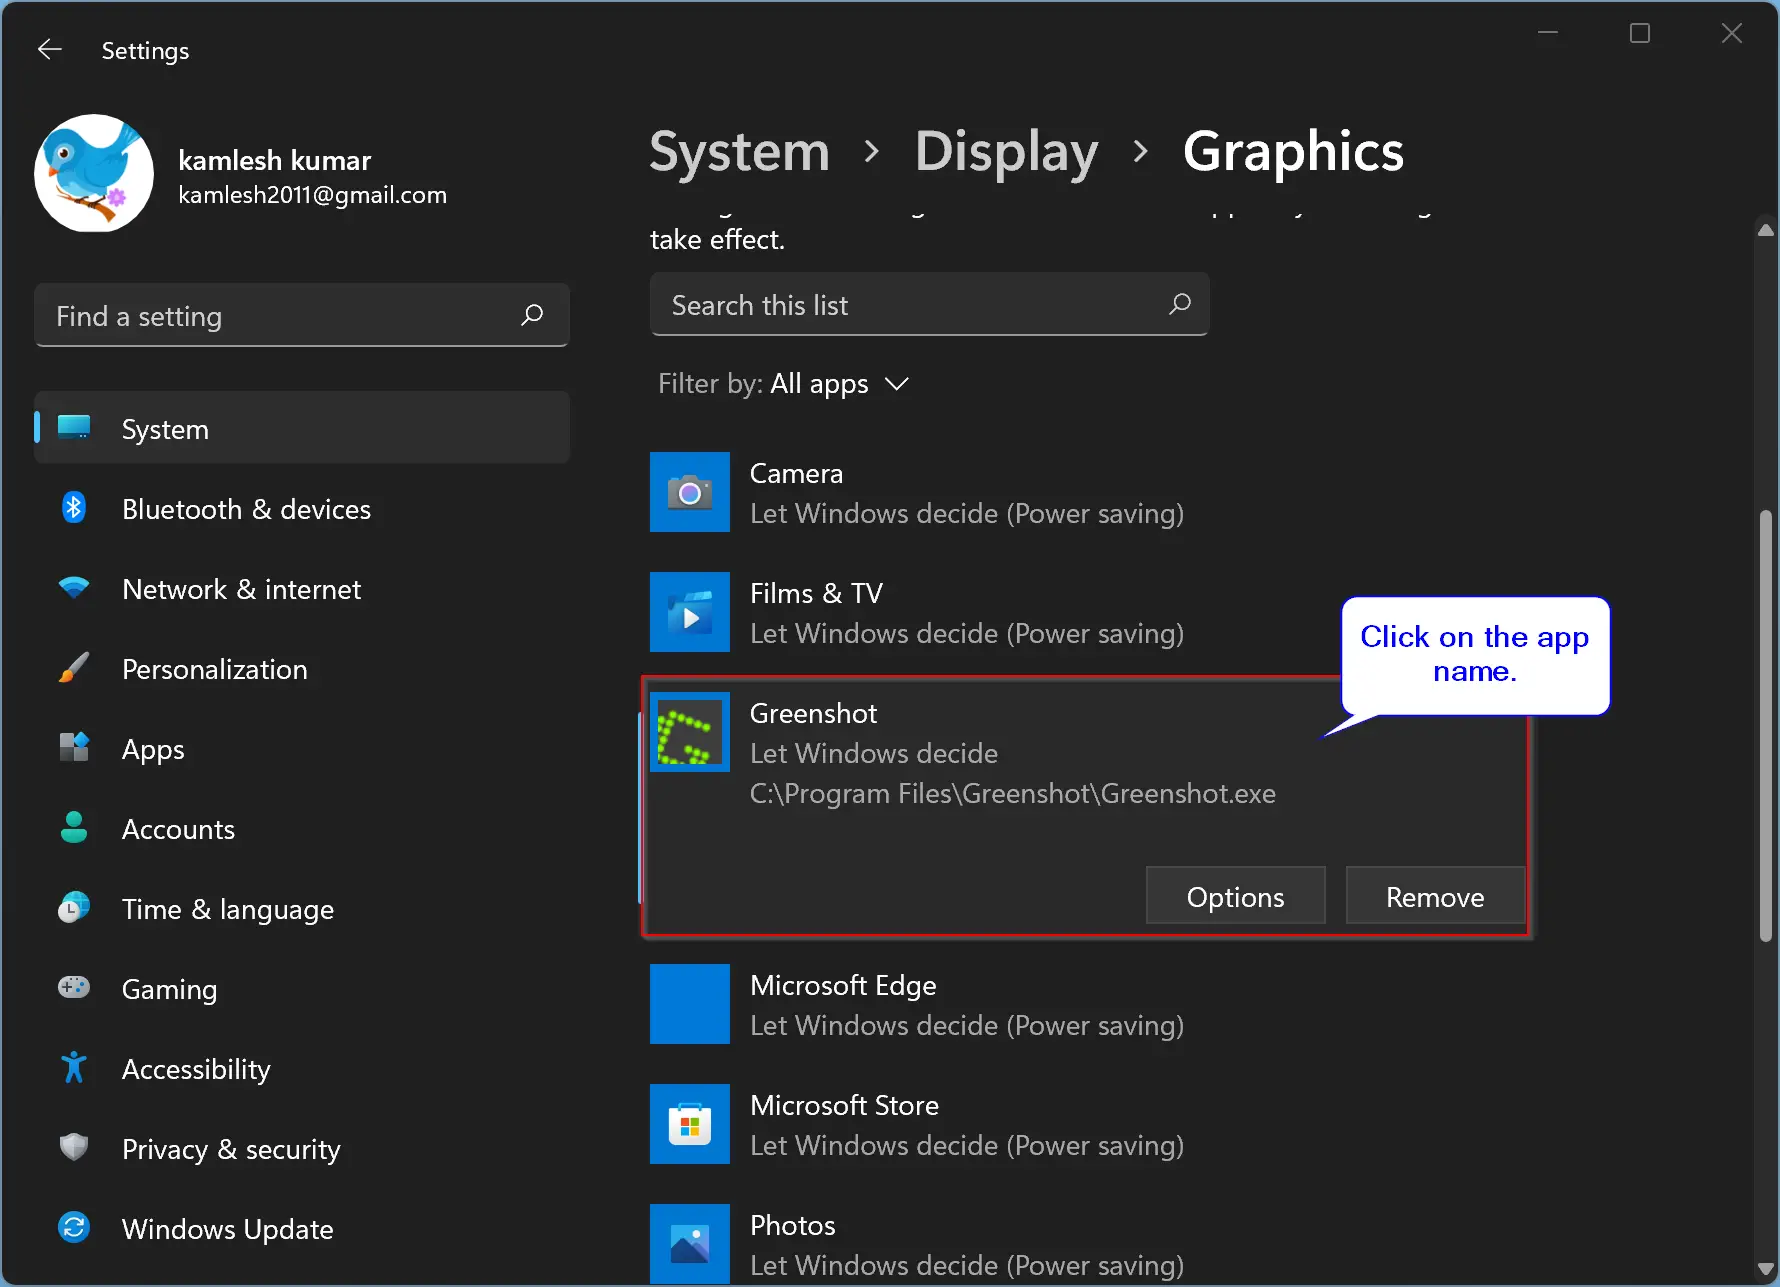
Step 6. Click on the Options button under the selected app.
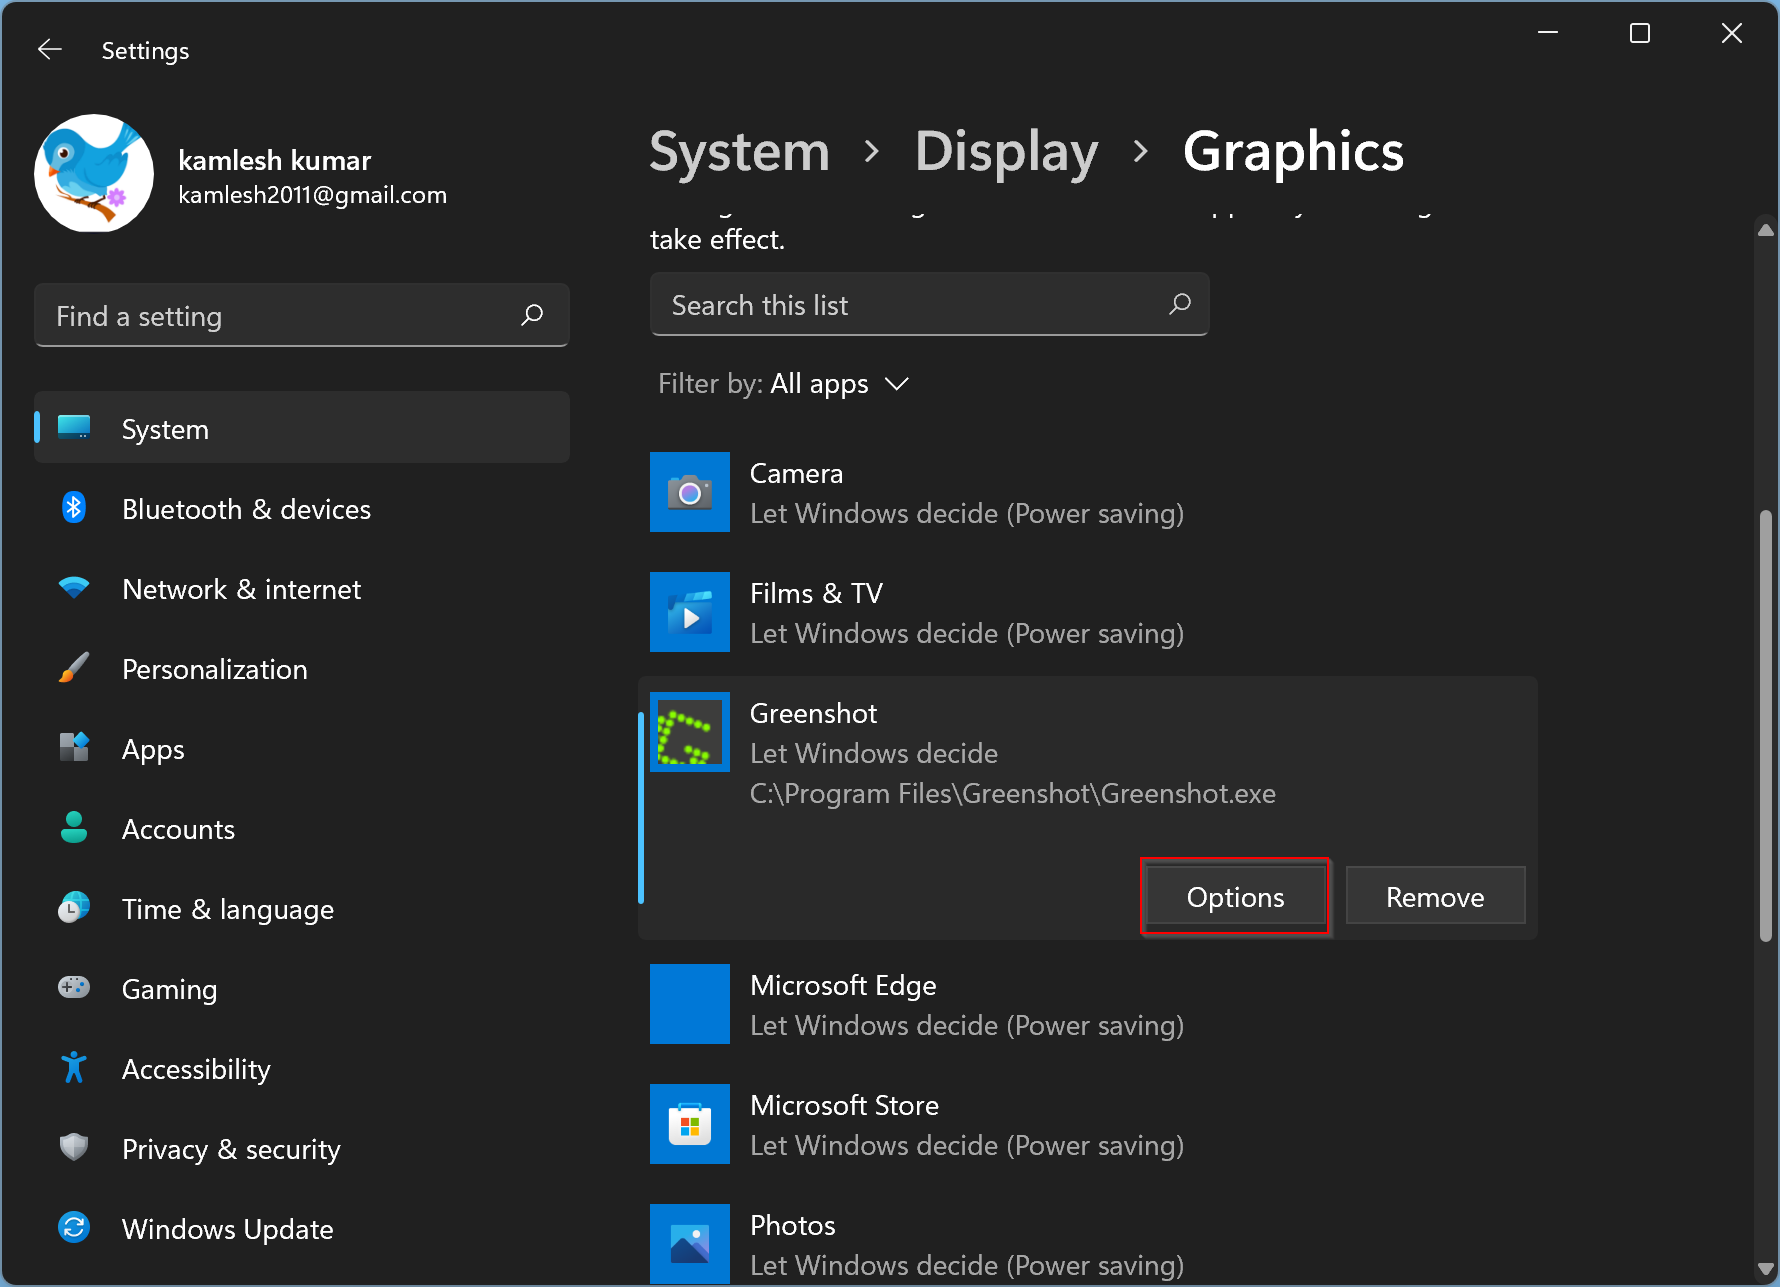
Step 7. By default, you will see the “Let Windows decide” radio box selected. Pick any GPU (Power saving or High performance) and then click on the Save button.
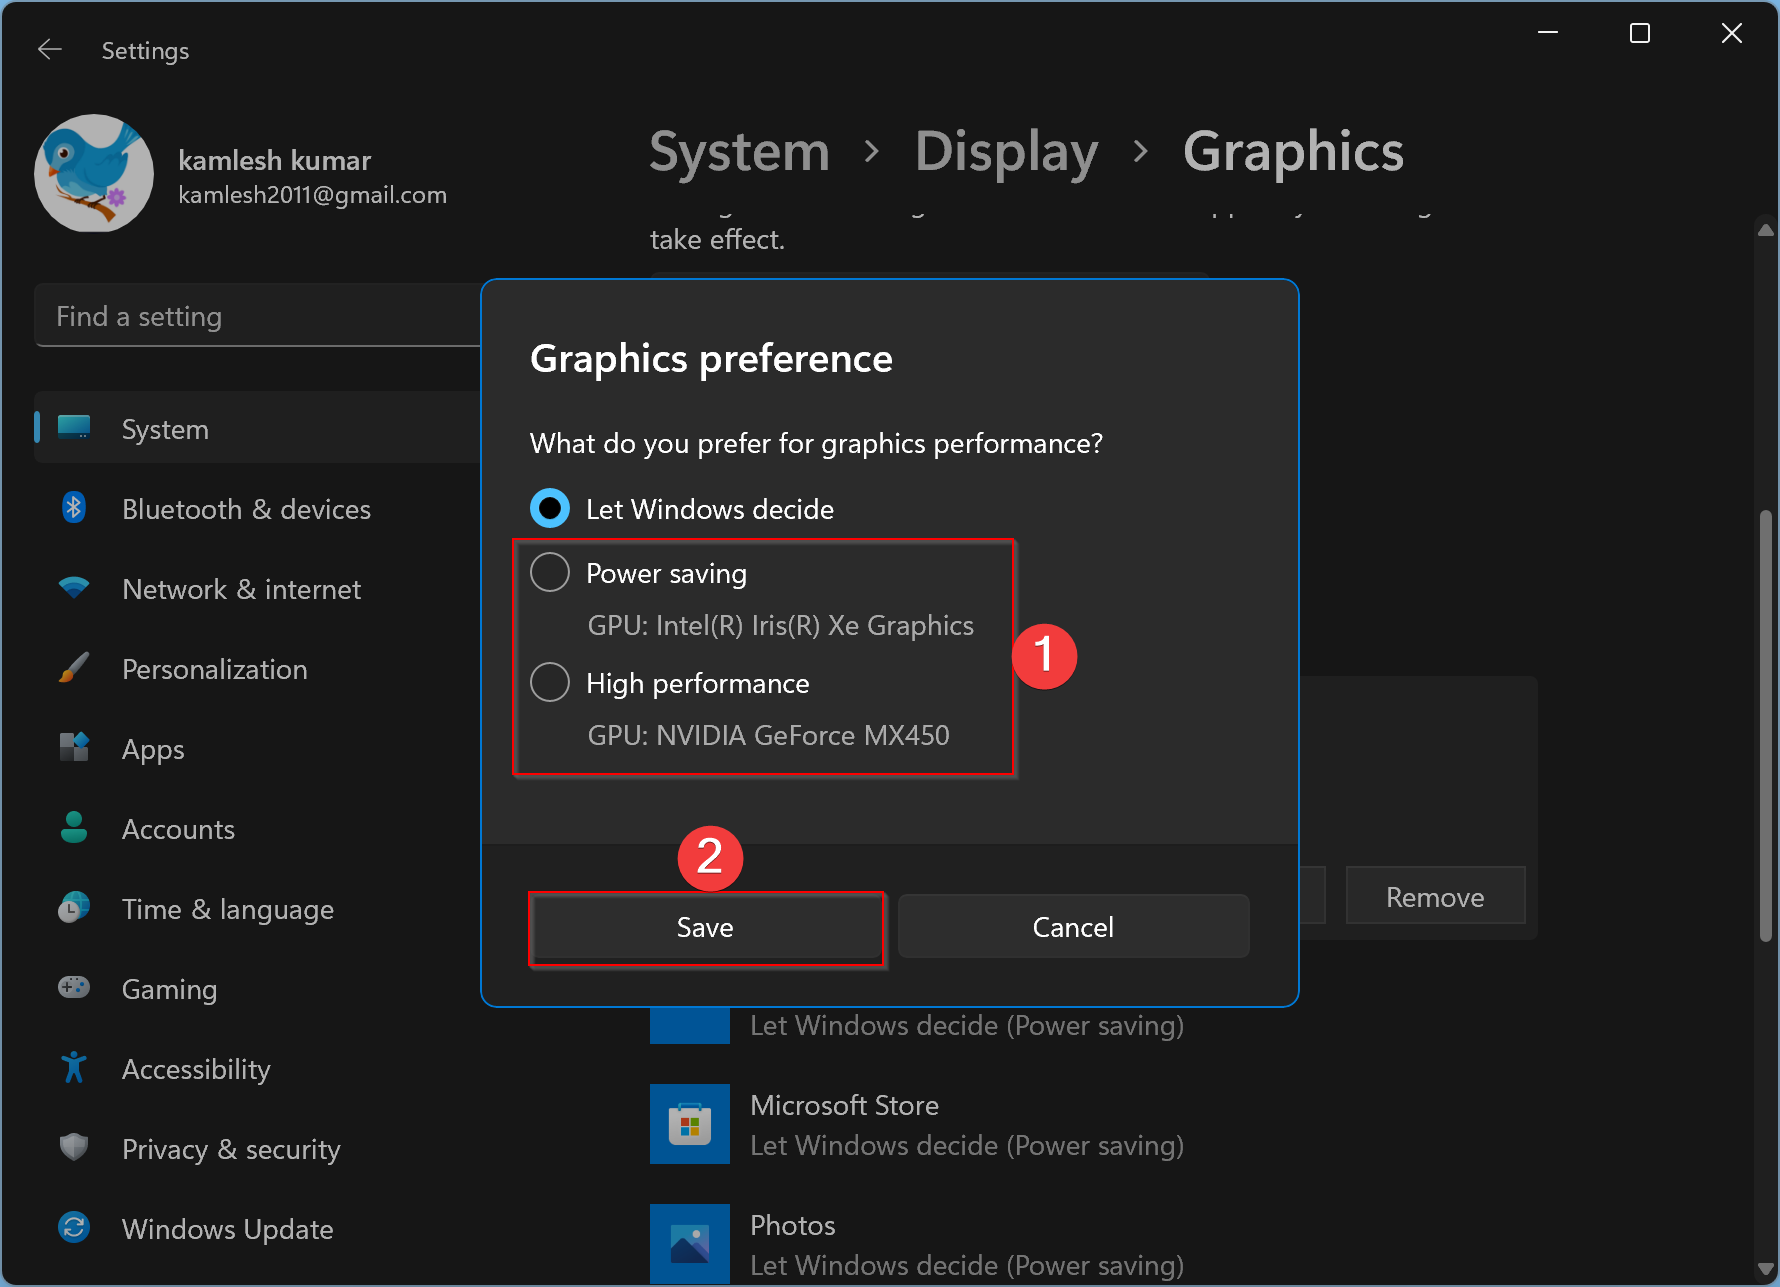
That’s it. If you have a single GPU in your system, you’ll see the same GPU’s name under both the “Power saving” and “High performance” options. Furthermore, if your application is already running, you need to restart it to apply the changes.
How to Set Default GPU for Apps on Windows 10?
If you use a multi-GPU Windows 10 system, you can manually specify the preferred graphics processor for an app to improve performance and battery life. The Windows 10 Settings app includes a page that allows you to select the preferred graphics card for legacy and Microsoft Store apps to improve system performance and battery life. Here is how to do it.
Step 1. First, open the Settings app on your computer by pressing the Windows + I keys.
Step 2. When Windows Settings opens, click on the System category.
Step 3. After that, select the Display tab in the left sidebar.

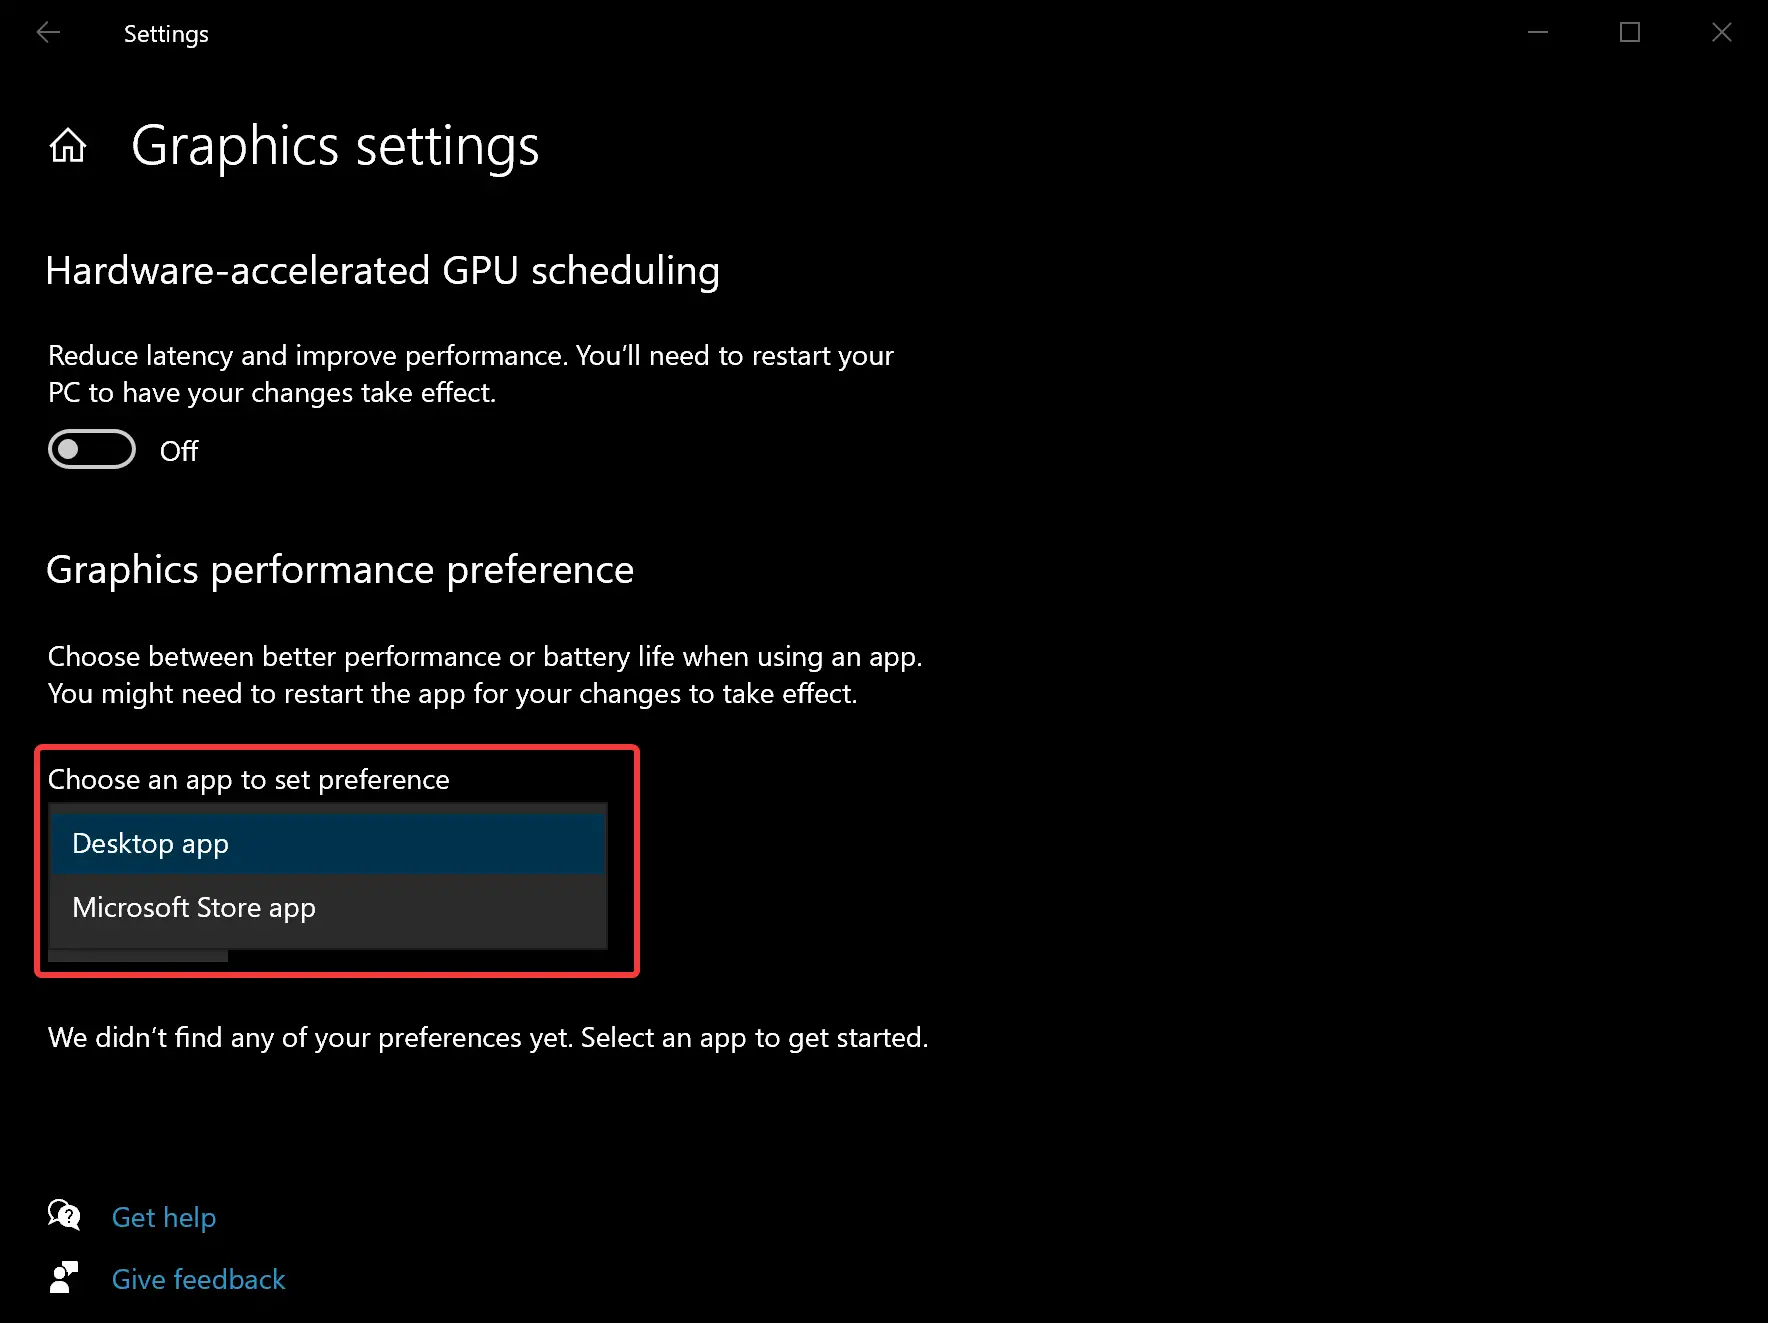
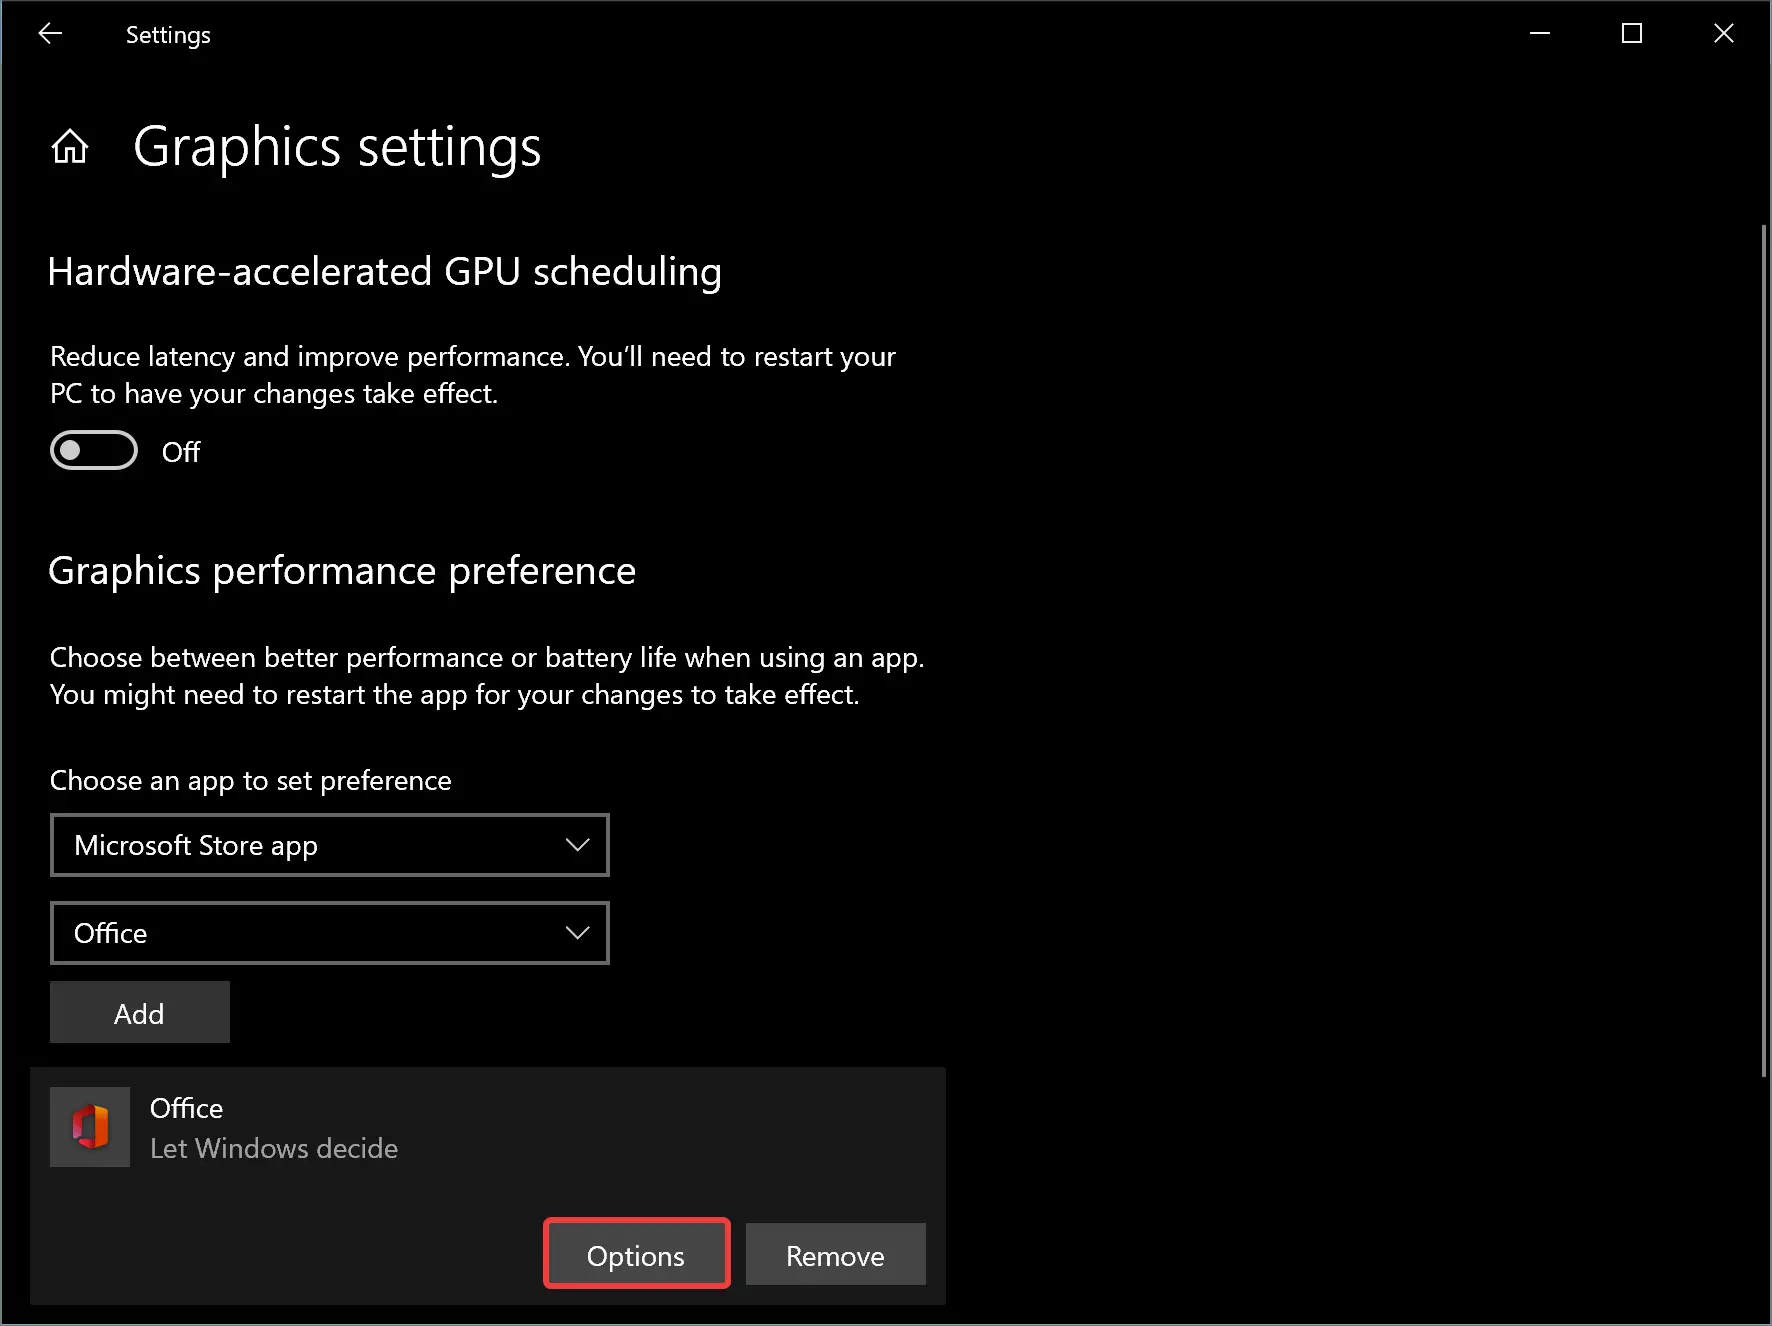
Step 4. On the right sidebar, scroll down a bit to find the “Multiple displays” section and then click the Graphics settings option.
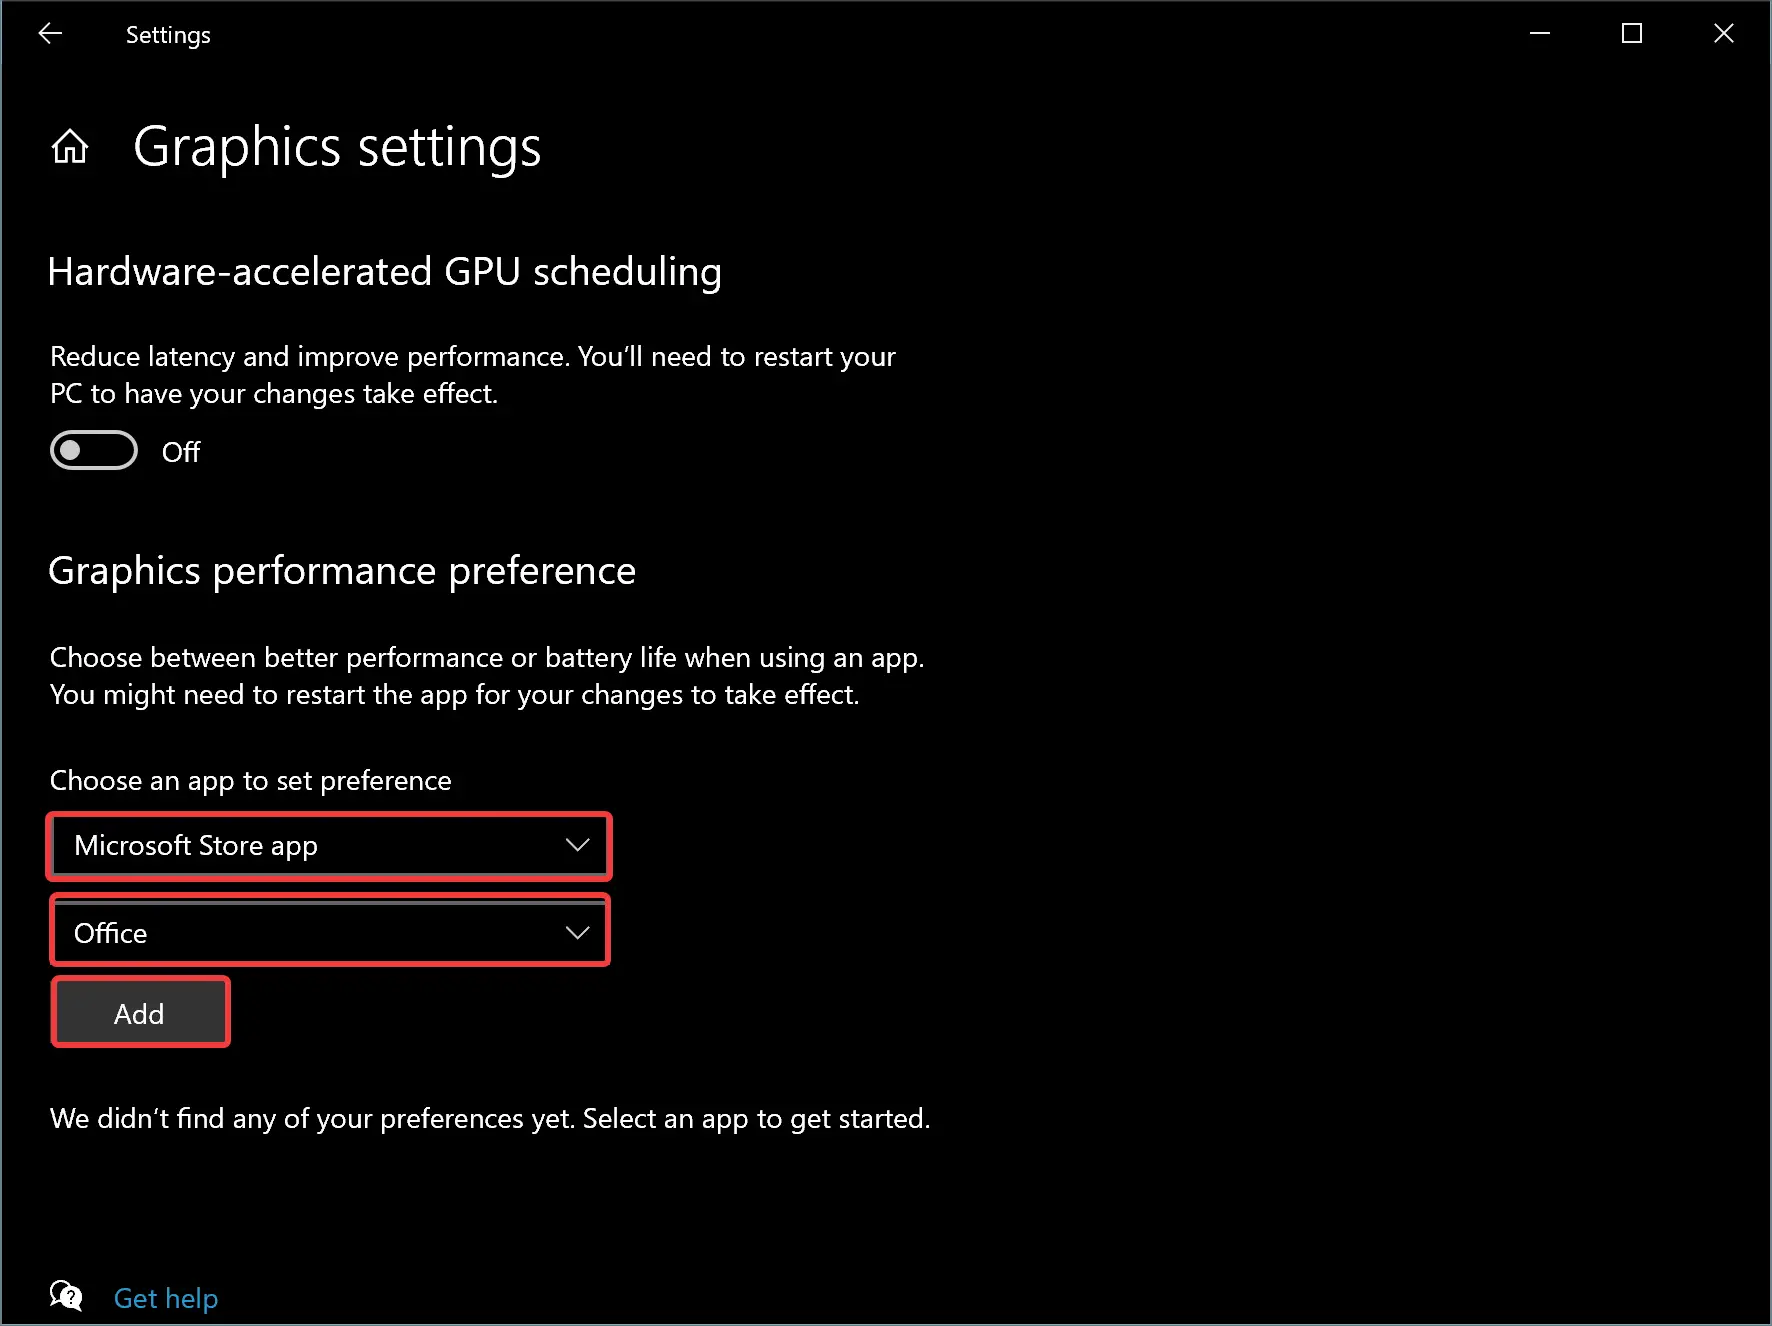
Step 5. On the “Graphics settings” page, select the app type using the drop-down menu “Choose an app to set preference”:-
- Desktop app:- Traditional (Win32) desktop programs.
- Microsoft Store app:- Apps installed from Microsoft Store.
If you select the Desktop app option, you’ll need to click the Browse button to locate the “.exe” file from your computer. However, if you select the Microsoft Store app option, you’ll see a drop-down menu to choose the app.
Step 6. Once you select an app using the drop-down menu, click the Add button.
Step 7. After that, click the Options button.
Step 8. A new pop-up window will appear on the screen when you complete the above steps. Here, you can set the graphics preference you want to use for the app:-
- Let Windows decide — This is the default option, and Windows 10 decides which GPU to use.
- Power saving — When you select this option, Windows runs the app on the GPU with the least power, usually the integrated graphics processor.
- High performance — Using this, Windows will run the app on the most capable GPU, usually an external or discrete graphics processor.
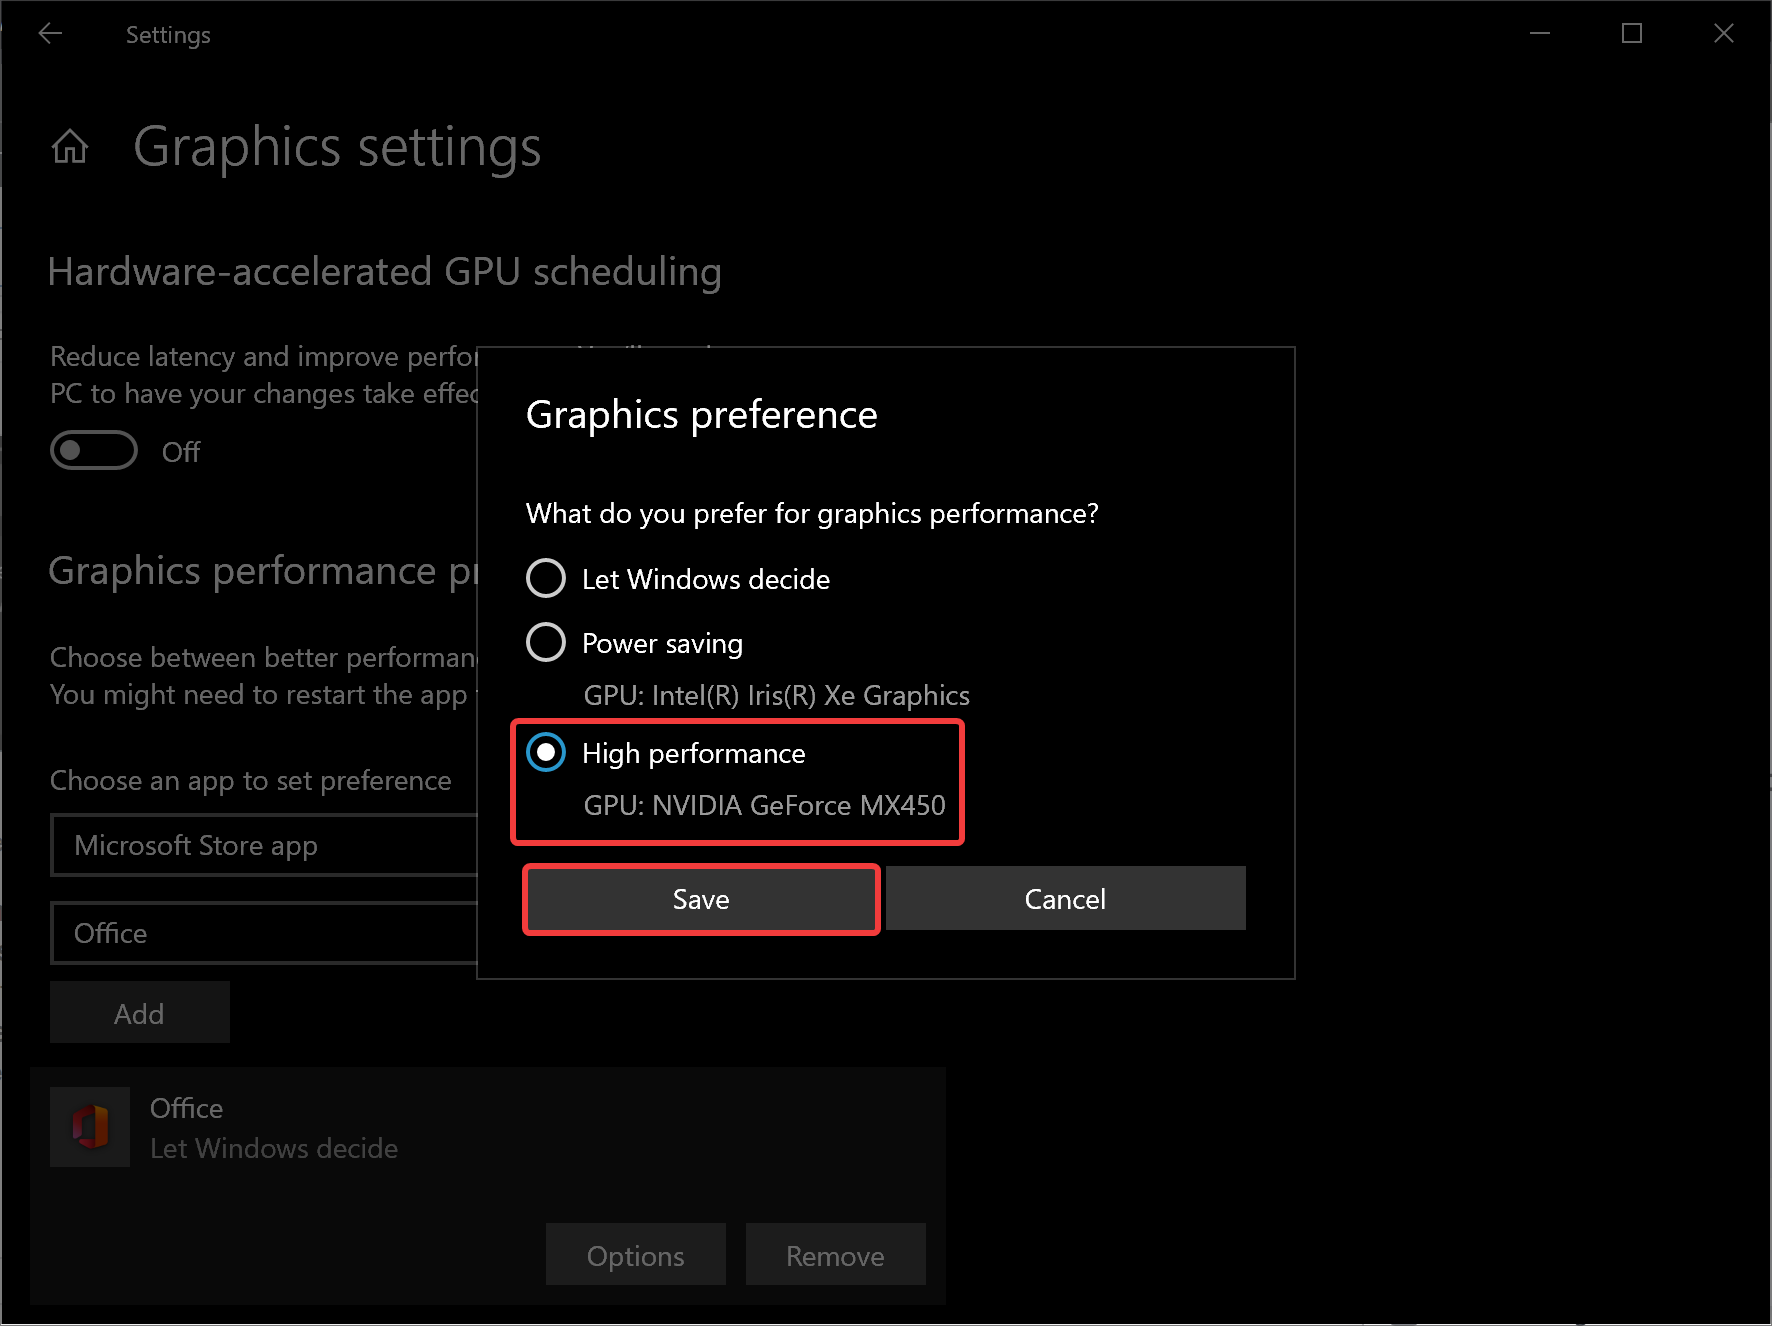
Step 9. Click the Save button.
After completing the above steps, the app you selected will use the graphics processor you specified to optimize battery life or performance the next time you launch it.
Conclusion
In conclusion, Windows 11/10 allows users to choose which GPU will be used for a game or application if their computer has multiple GPUs. This feature can be accessed through the Settings app and is available for both traditional desktop programs and Universal Windows Platform apps. Previously, users had to rely on manufacturer-specific tools like the NVIDIA Control Panel or AMD Catalyst Control Center to manage GPU usage. By manually specifying the preferred graphics processor for an app, users can improve system performance and battery life. Overall, this feature offers greater flexibility and control over GPU usage on Windows systems.
