Microsoft’s Windows 11 has been a significant shift in the world of operating systems, offering a fresh and modern user interface along with a host of new features. To keep Windows 11 running smoothly and securely, Microsoft periodically releases updates. The latest of these updates is the Windows 11 2023 Update, which introduces several exciting features and enhancements. In this guide, we’ll walk you through the process of downloading and installing the Windows 11 2023 Update on your PC.
How to Download and Install Windows 11 2023 Update?
Before you start the update process, there are a few things you should consider:-
- Check System Requirements: Ensure that your PC meets the system requirements for Windows 11. These requirements may change with each update, so it’s essential to verify your system’s compatibility.
- Backup Your Data: Although updates are generally safe, it’s a good practice to back up your important data before making any significant changes to your operating system.
- Stable Internet Connection: You’ll need a stable internet connection to download the update. Ensure that your network connection is reliable.
- Patience: Updates can take some time to download and install, so be prepared for a wait.
Now, let’s get started with the update process.
Method 1: Downloading and Installing Windows 11 2023 Update
Follow these steps to download and install the Windows 11 2023 Update:-
Step 1. Press “Windows + I” on your keyboard. This key combination will open the Windows Settings menu.
Step 2. In the Settings menu, locate and click on “Windows Update.” This is where you’ll manage your Windows updates.

Sep 3. You can choose to enable automatic updates by clicking the option that says, “Get the latest updates as soon as they’re available.” This setting ensures your system stays up-to-date automatically.
Step 4. Click on the “Check for updates” button. Windows will search for available updates.
Step 5. If the Windows 11 2023 Update (KB5030310) is available, you will see an option to “Download and install” it. Click on this option to start the update process.
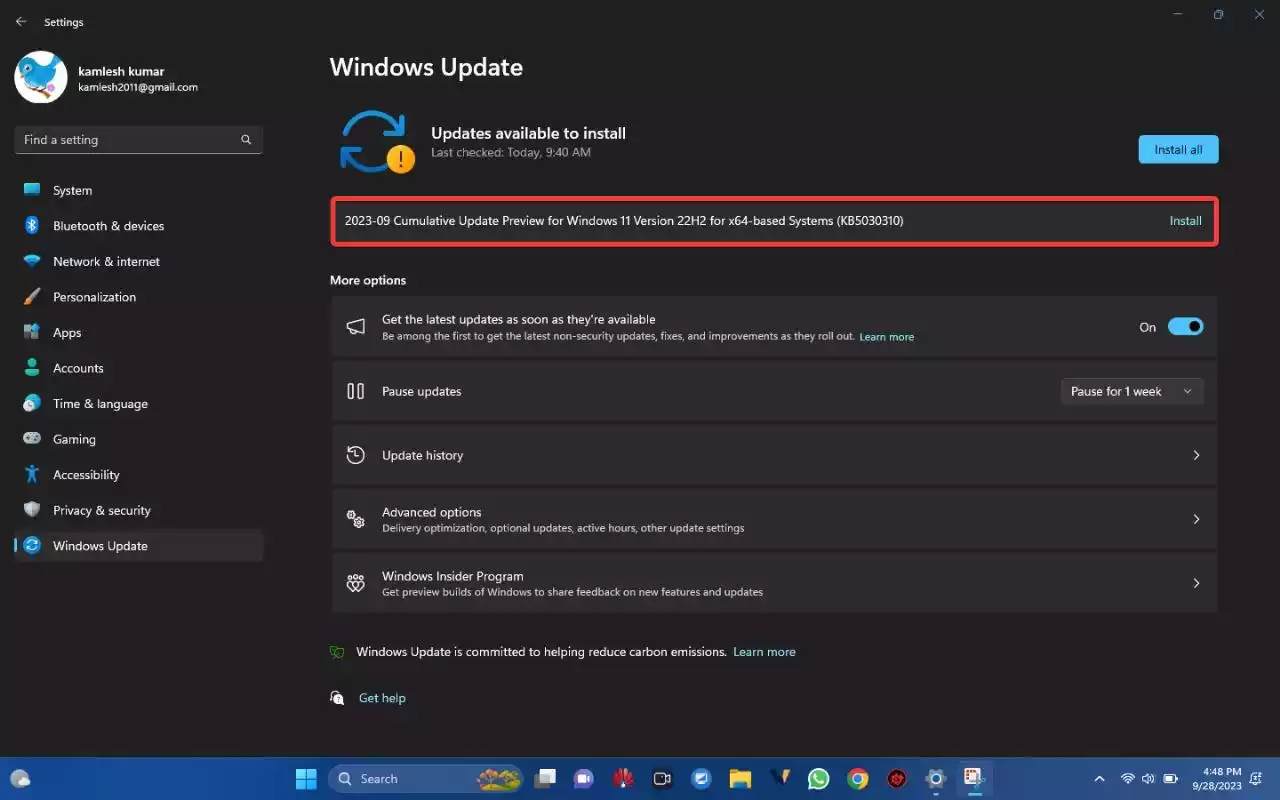
Step 6. After the update is downloaded and installed, you’ll need to restart your computer. Save any ongoing work before proceeding.
Congratulations! You’ve successfully downloaded and installed the Windows 11 2023 Update using the standard Windows Update process. Your PC should now be running the latest version of Windows 11 with all the new features and improvements.
Method 2: Downloading the Windows 11 23H2 Update
If you want to access the Windows 11 23H2 update, which includes additional features and a new build number, you can do so by following these steps:-
Step 1. Press “Windows + I” on your keyboard to open Windows Settings.
Step 2. In the Settings menu, select “Windows Update” from the options on the left.
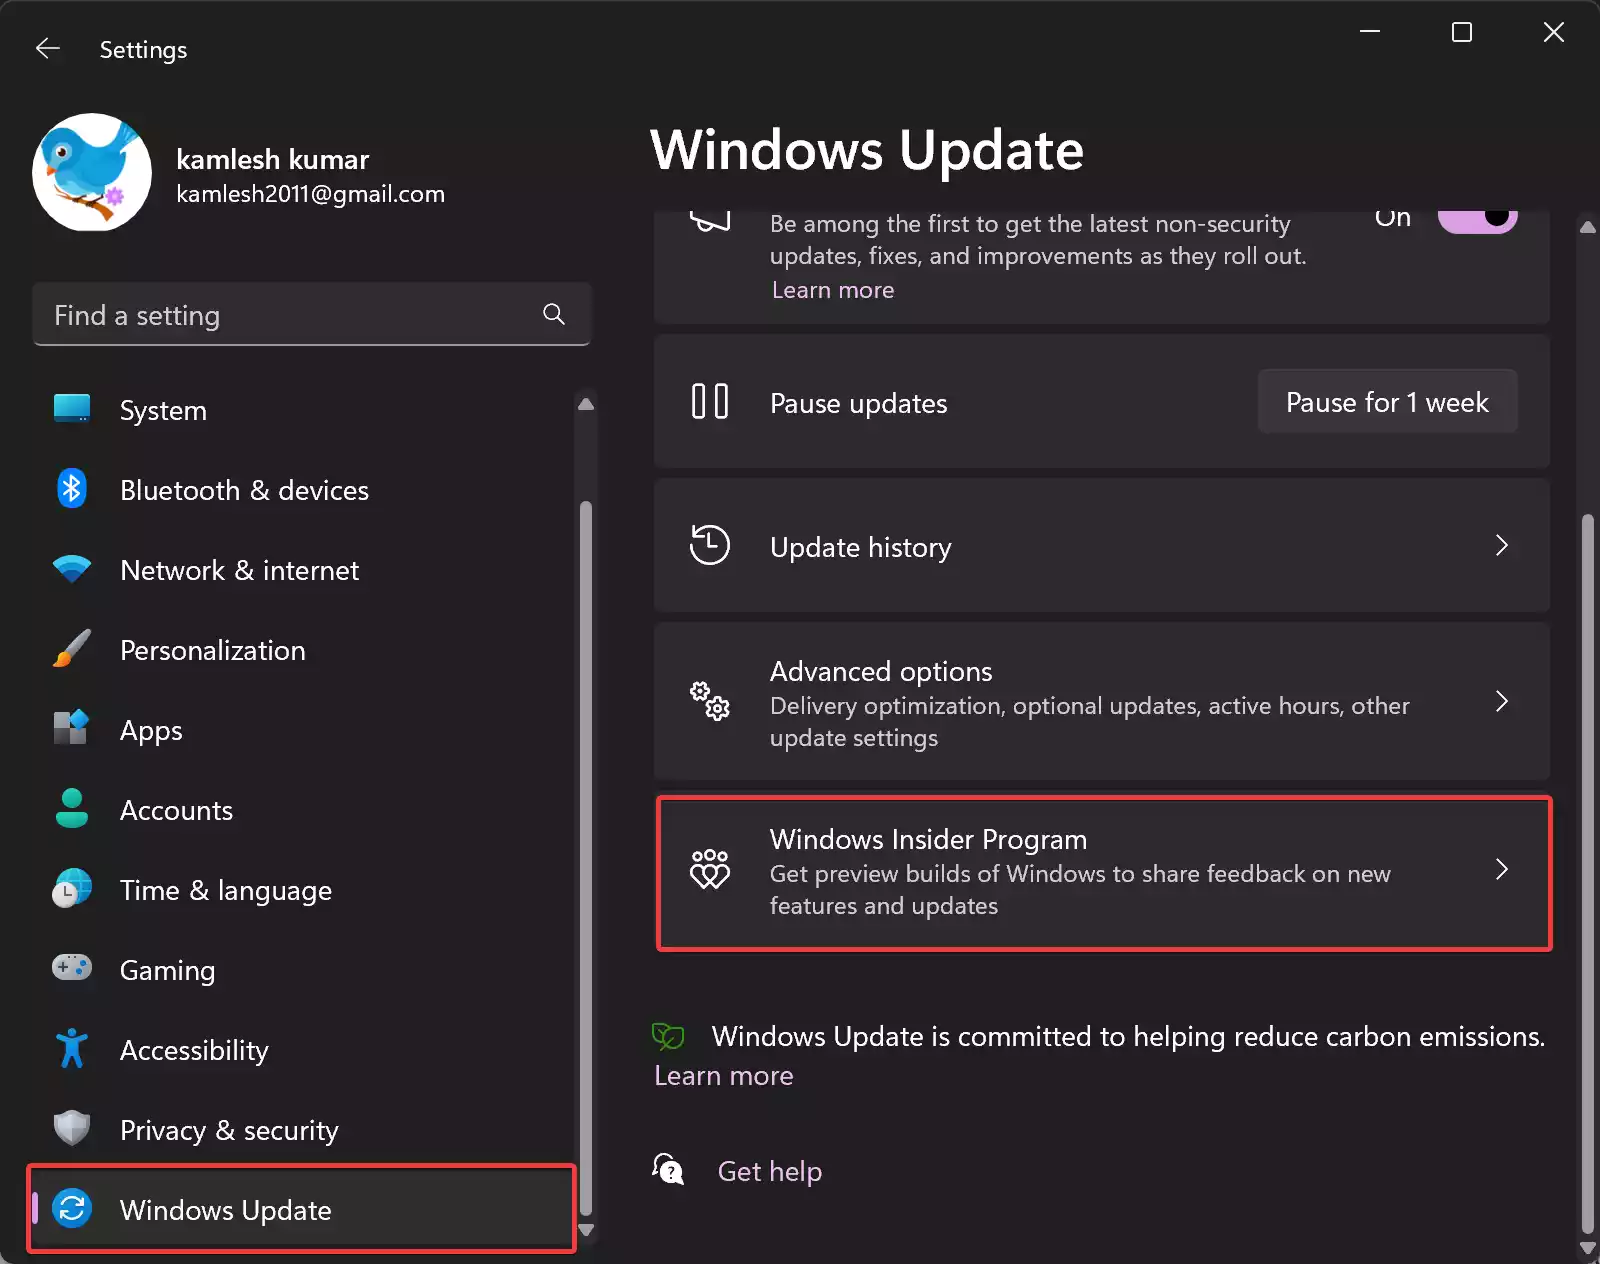
Step 3. Scroll down and click on “Windows Insider Programm.”
Step 4. In the Windows Insider Programm section, select “Release Preview” to access the new build and features.
Step 5. Go back to the main Windows Update screen and enable the option that says, “Get the latest updates as soon as they’re available.”
Step 6. Click on “Check for updates” to start searching for the Windows 11 23H2 update.
After following these steps, you should be able to download and install the Windows 11 23H2 update with all its new features and build number.
Conclusion
Updating your operating system is essential for ensuring that your PC remains secure and up-to-date with the latest features and improvements. With this guide, you now know how to download and install the Windows 11 2023 Update, whether you prefer the standard update or the 23H2 update with additional features. Keep your system up-to-date to enjoy the best Windows 11 experience possible.
