Windows 11, Microsoft’s latest operating system, comes packed with innovative features aimed at enhancing user productivity and experience. Among these features is Copilot, an AI-powered assistant designed to make your Windows 11 journey smoother. However, despite being a valuable addition, Copilot is not enabled by default. In this article, we will guide you through the process of enabling Copilot on Windows 11, allowing you to harness the potential of this AI companion.

How to Enable Copilot on Windows 11?
To turn on Copilot on Windows 11, use these steps:-
Step 1. Before diving into the process, there are a few things to note:-
- Ensure your Windows 11 is updated to the 2023 version, which includes Copilot.
- Make sure you are signed in with a Microsoft account on your PC.
Step 2. To enable Copilot, you’ll need a third-party tool called ViveTool. Visit the GitHub website and download it.
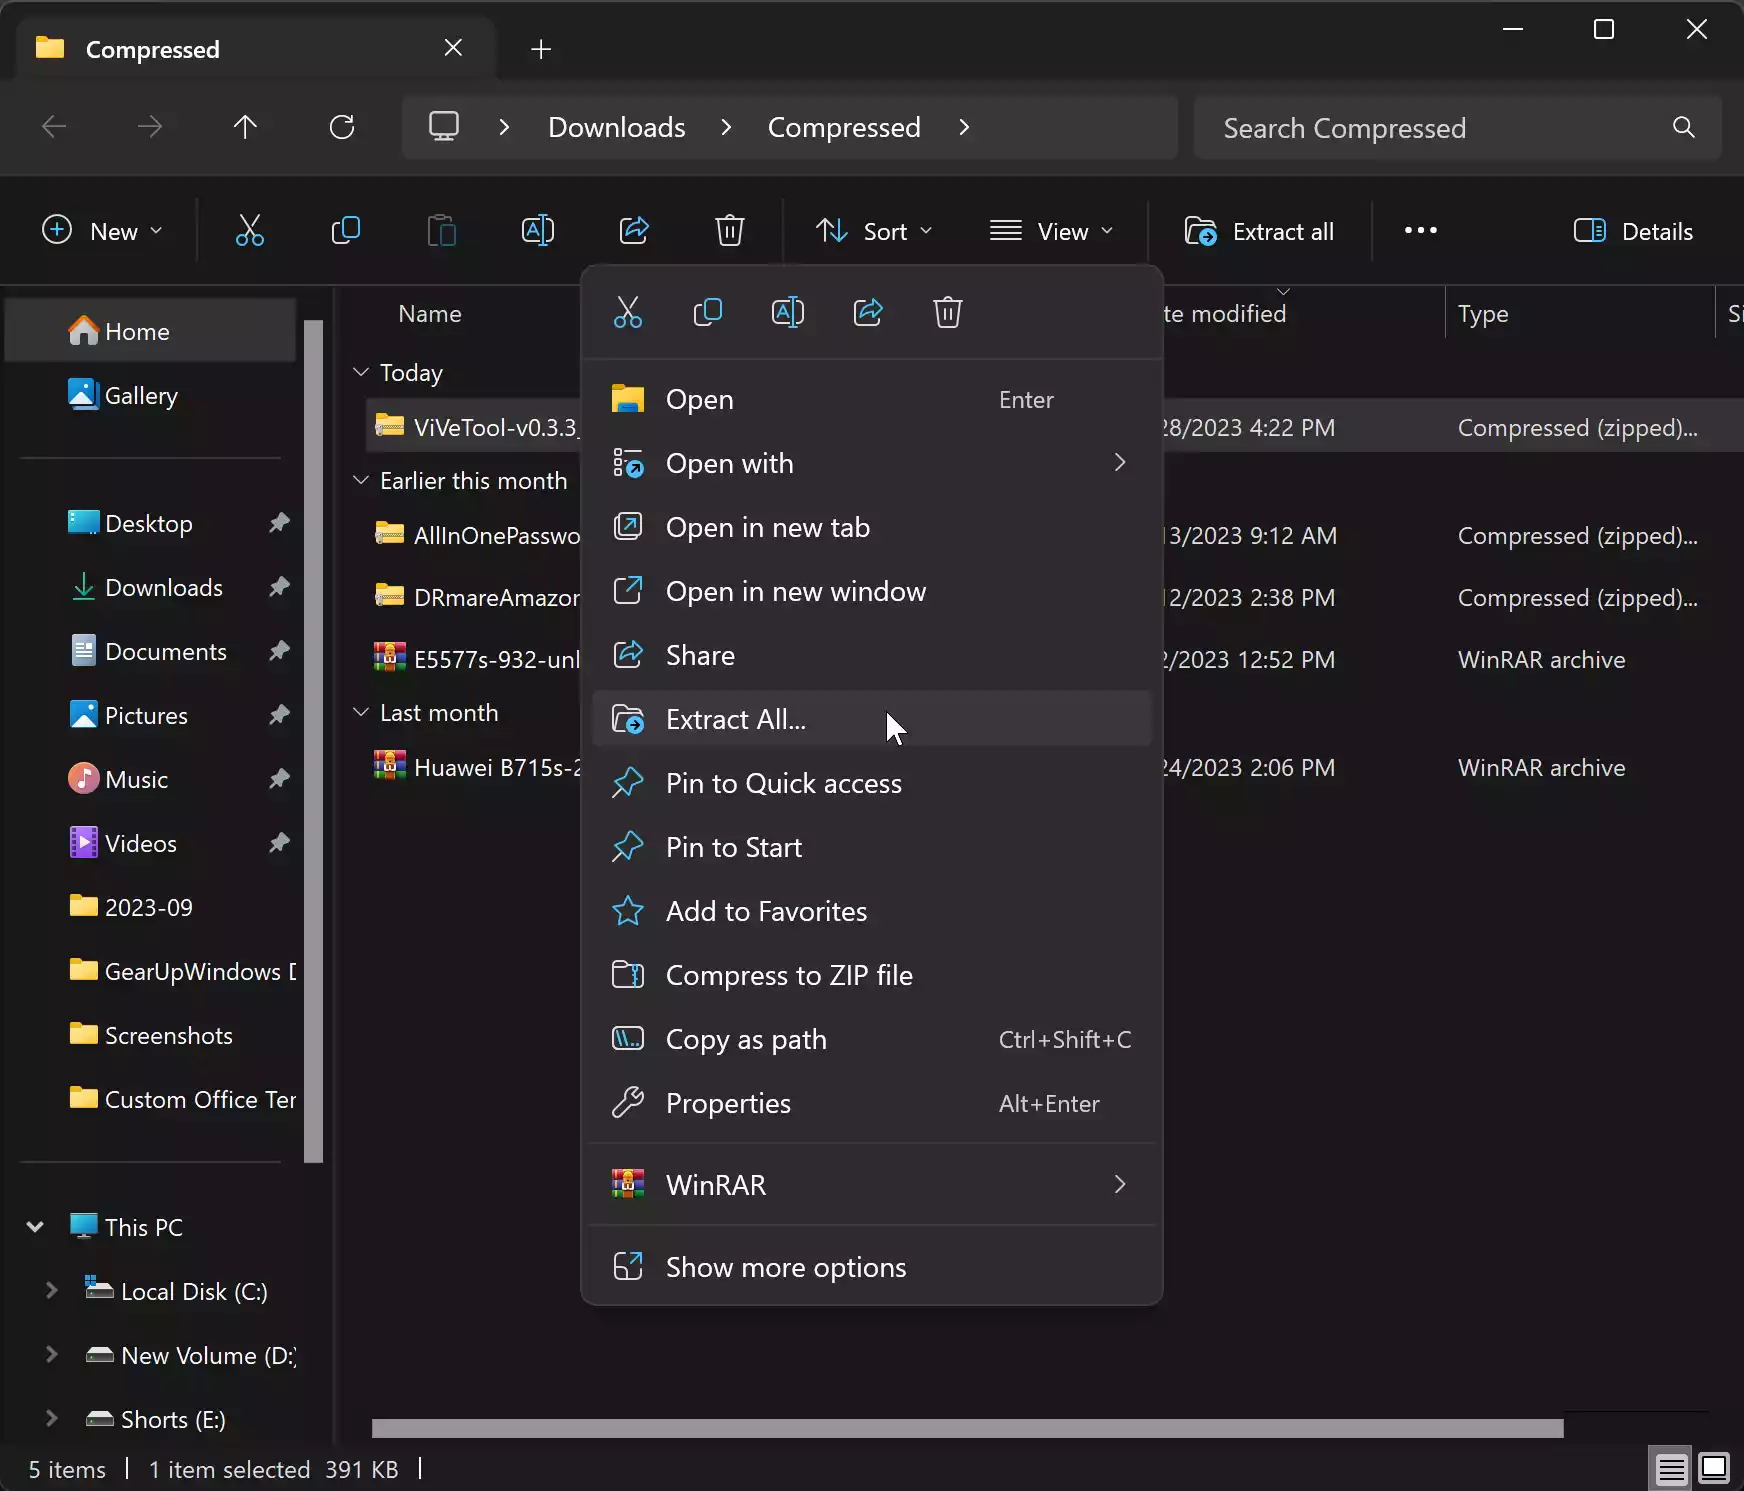
Step 3. Once downloaded, extract the ZIP file to a folder on your computer.
Step 4. Next, you need to copy the path of the folder where you extracted ViveTool. Right-click on the extracted folder. From the context menu, select “Copy as path.”

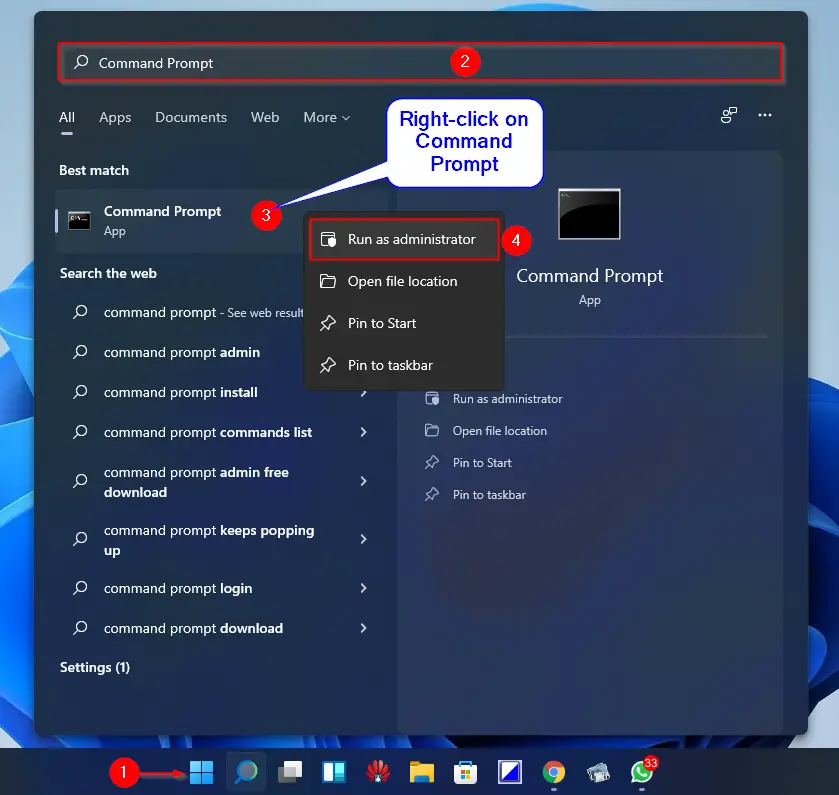
Step 5. To run the necessary commands, you’ll need to use Command Prompt with administrative privileges.
To do that, press the “Windows key” on your keyboard to open the Start menu. Type “cmd” or “Command Prompt.” Right-click on “Command Prompt” and select “Run as administrator.”
Step 6. In the Command Prompt window that opens, navigate to the directory where you extracted ViveTool. To do this, use the “cd” command followed by the path you copied earlier:-
cd "paste the path here"
Simply right-click in the Command Prompt window to paste the folder path.
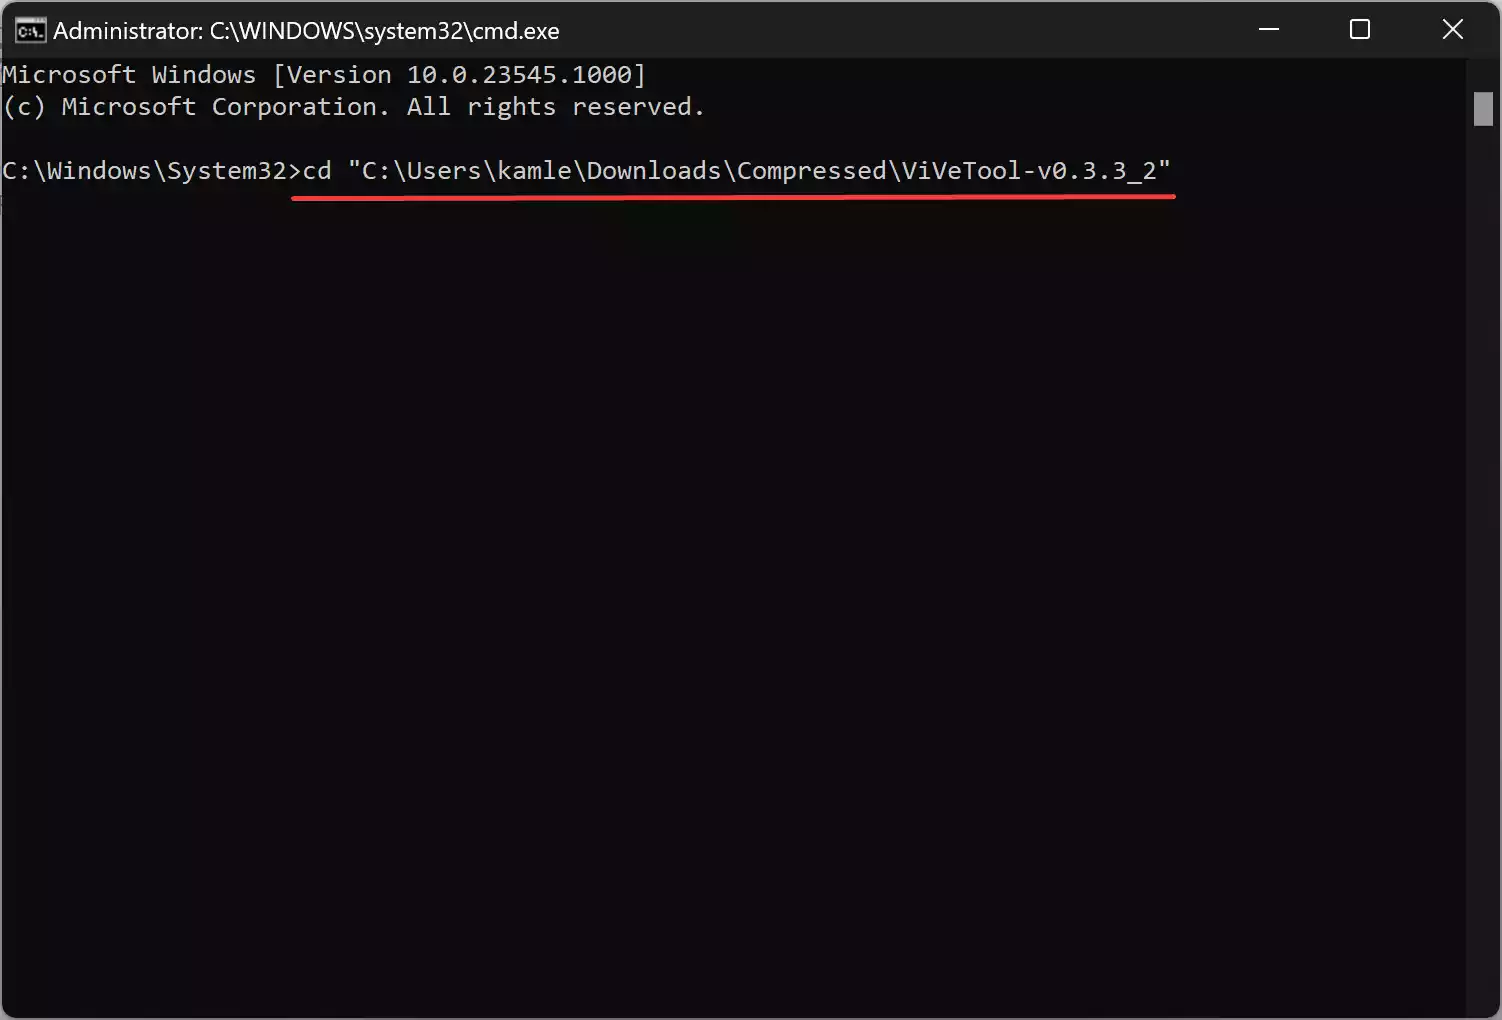
Step 7. Press Enter on your keyboard to change the path.
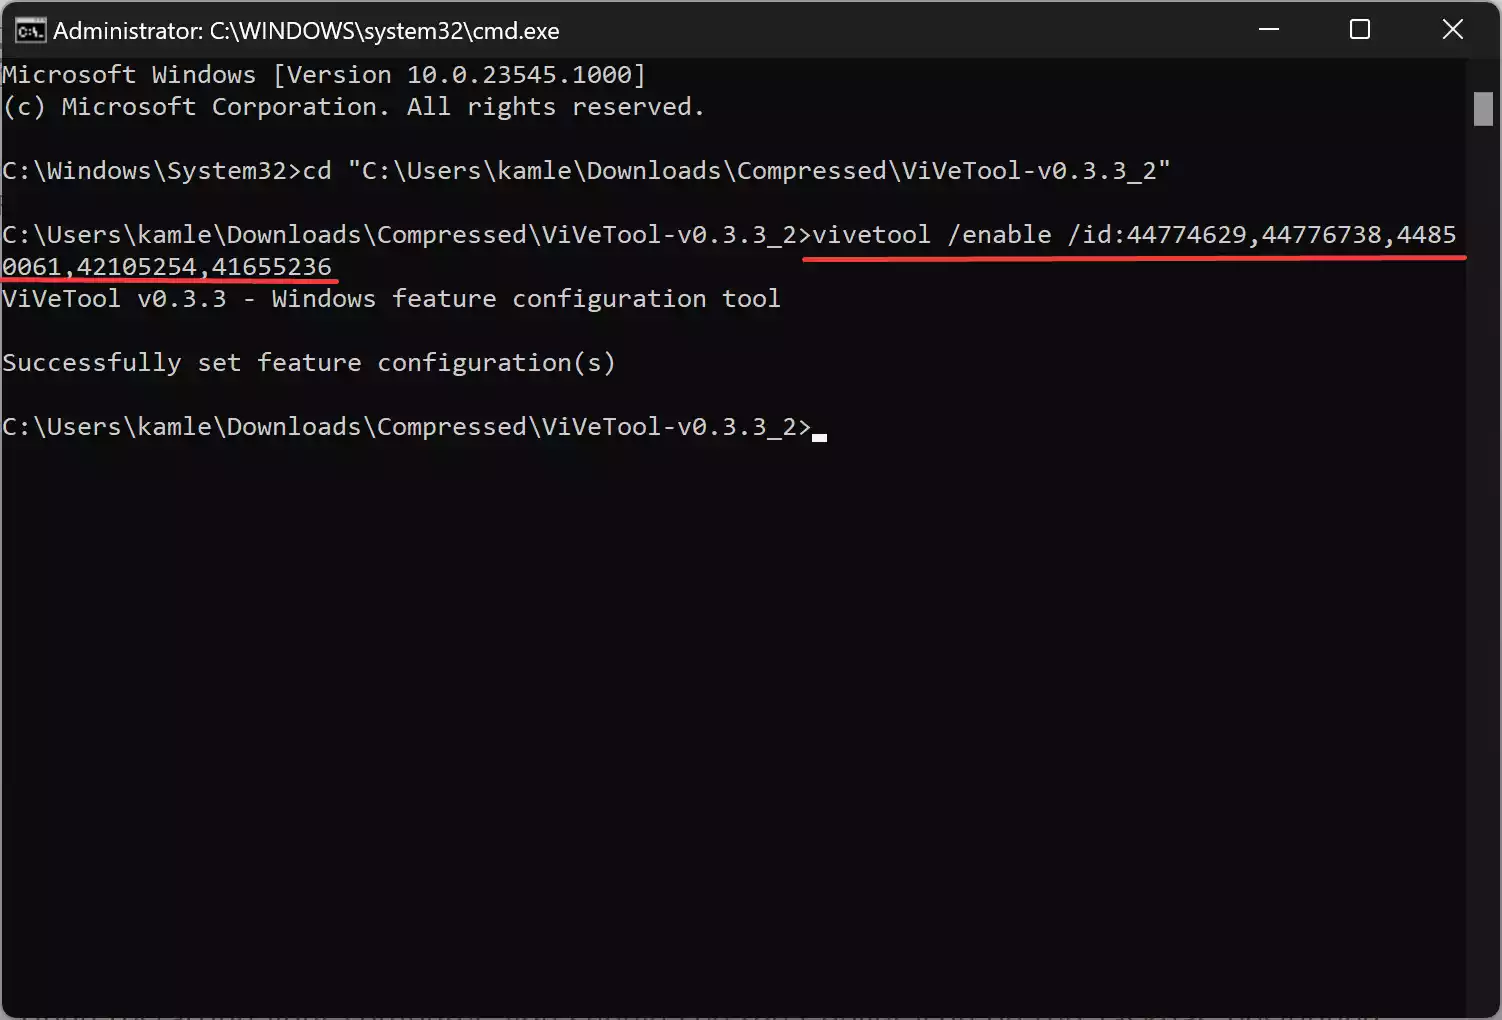
Step 8. Now, it’s time to enable Copilot on Windows 11. Enter the following command and press Enter:-
vivetool /enable /id:44774629,44776738,44850061,42105254,41655236
This command activates Copilot on your system.
Step 9. After executing the command, it’s essential to restart your Windows 11 PC. This allows the changes to take effect.
Step 10. Upon restarting your computer, you should see the Copilot icon on the Taskbar, positioned next to the search bar.
Step 11. If, for some reason, the Copilot icon does not appear, you can access the Taskbar settings to ensure it’s enabled. Right-click on the Taskbar and select “Taskbar settings.”
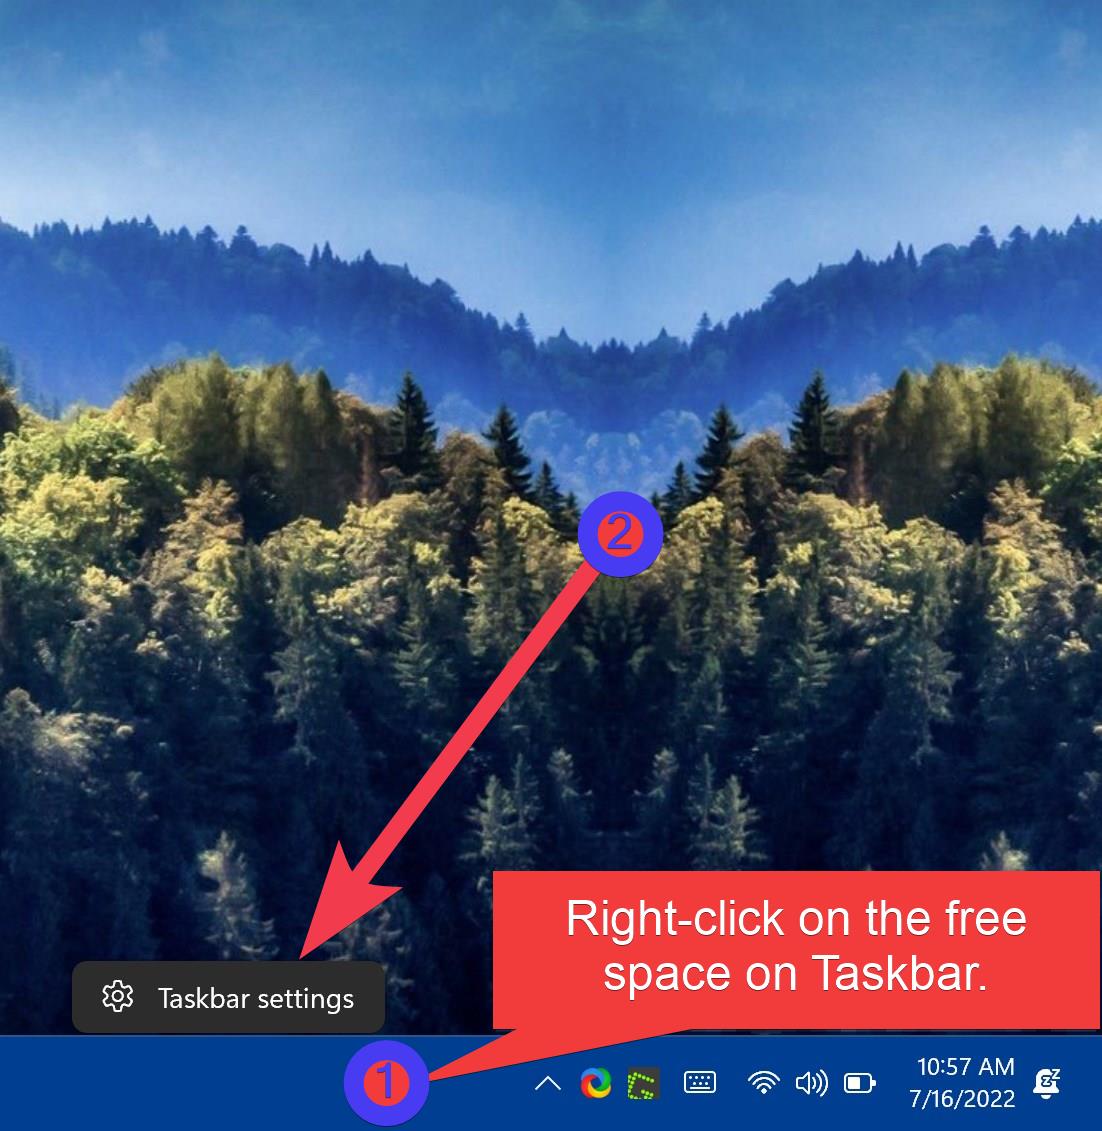
Step 11. Locate the “Copilot (preview)” toggle and turn it on.

How to Enable Copilot on Windows 11 using Registry Editor?
It is also possible to turn on Copilot on Windows 11 using Registry Editor. Here is how:-
Step 1. Open Registry Editor.
Step 2. Navigate the following folder in the left sidebar:-
HKEY_CURRENT_USER\Software\Microsoft\Windows\CurrentVersion\Explorer\Advanced
Step 3. Double-click the ShowCopilotButton REG_DWORD and set its “Value data” to 1 to enable the feature.
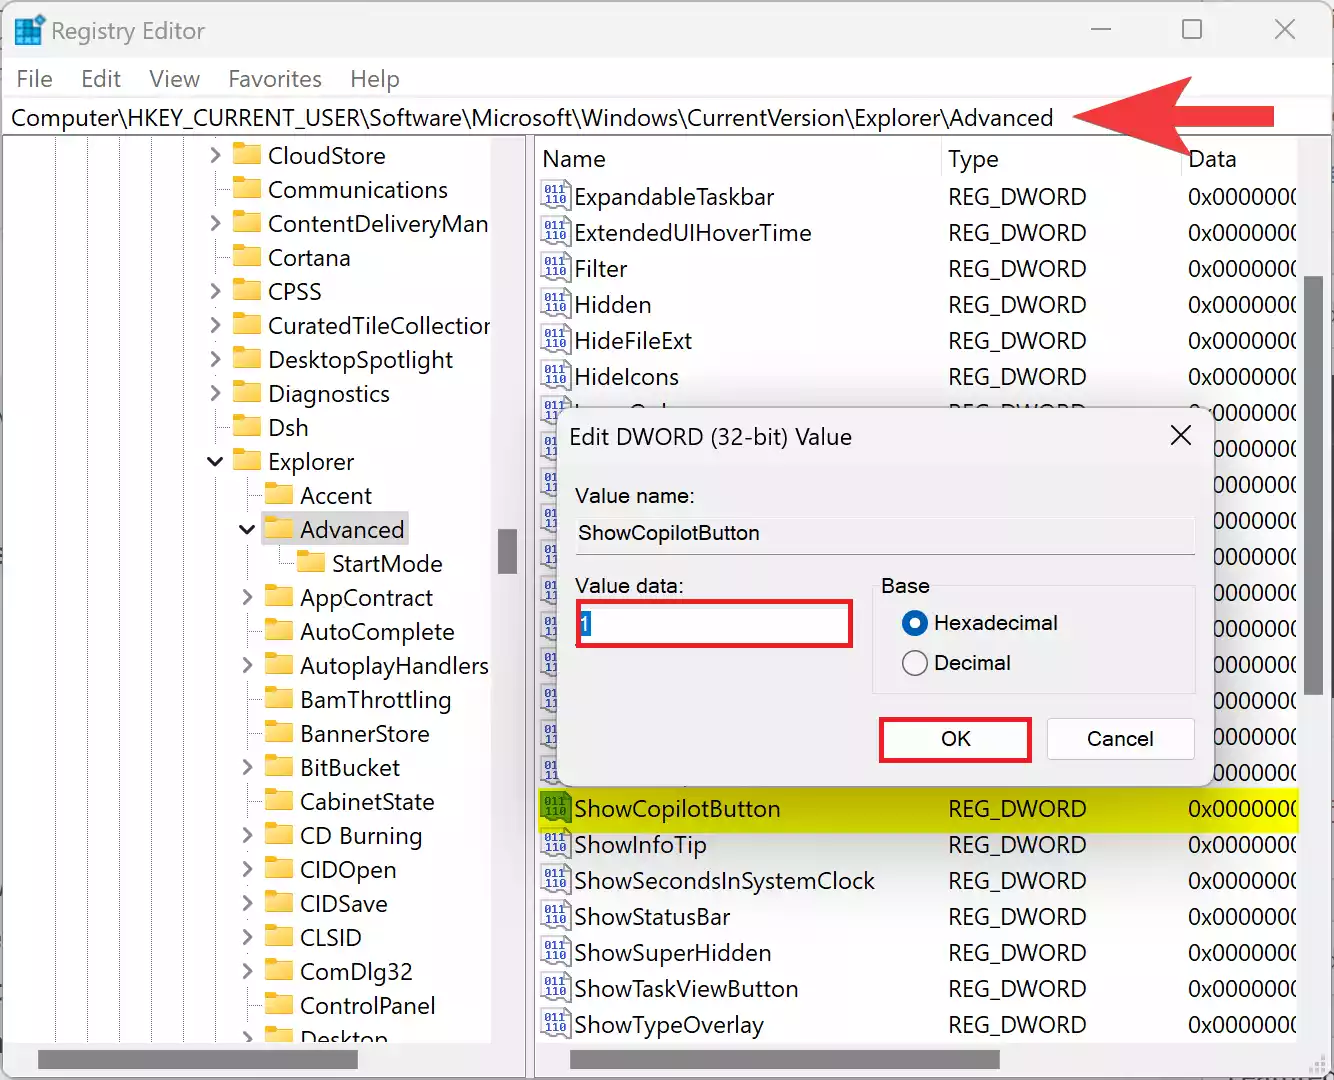
Step 4. Click OK to save the changes.
Step 5. Reboot your PC to apply the changes.
Conclusion
Enabling Copilot on Windows 11 is a straightforward process that can enhance your productivity and streamline your interaction with the operating system. With this AI-powered assistant at your fingertips, you can make the most out of the latest Windows 11 2023 update. And should you ever change your mind, remember that you can choose to disable Copilot on Windows 11 as well, giving you full control over your AI experience.
Also Read: How to Disable Copilot on Windows 11?