Do you own a touchscreen Windows 11 device? There is nothing wrong with a touchscreen Windows 11 laptop or any other device. If you’re not a fan of touch screens, but because, for some reason, you have got it, then this gearupwindows article may help you to disable the feature of Windows 11 on your device.
No special button is needed to disable or turn off the touchscreen on Windows 11, as it is built directly into the operating system. If you want to turn off or stop the touchscreen functionality on your computer, you need to disable it in the Device Manager in Windows 11. Let it be a Microsoft Surface or another Windows 11 computer with a touchscreen; this post should work, either.
When you turn off the touchscreen function, your touchscreen will not turn back unless you enable this function using Device Manager. Don’t worry; we will guide you on enabling and disabling the touch screen feature on Windows 11. So that it will help you if you want to allow a touch screen on your computer in the future.
How to Turn Off or On Touchscreen on Windows 11 Machine?
To disable or enable the touchscreen facility on a Windows 11 system, you will not find a dedicated button on your computer. You need to decide whether you need to use a keyboard/mouse on your PC. The entire decision is yours. When you choose to disable the touchscreen feature on your Windows 11 machine, do the following:-
Step 1. First, open the Settings app by pressing Windows + I keys.

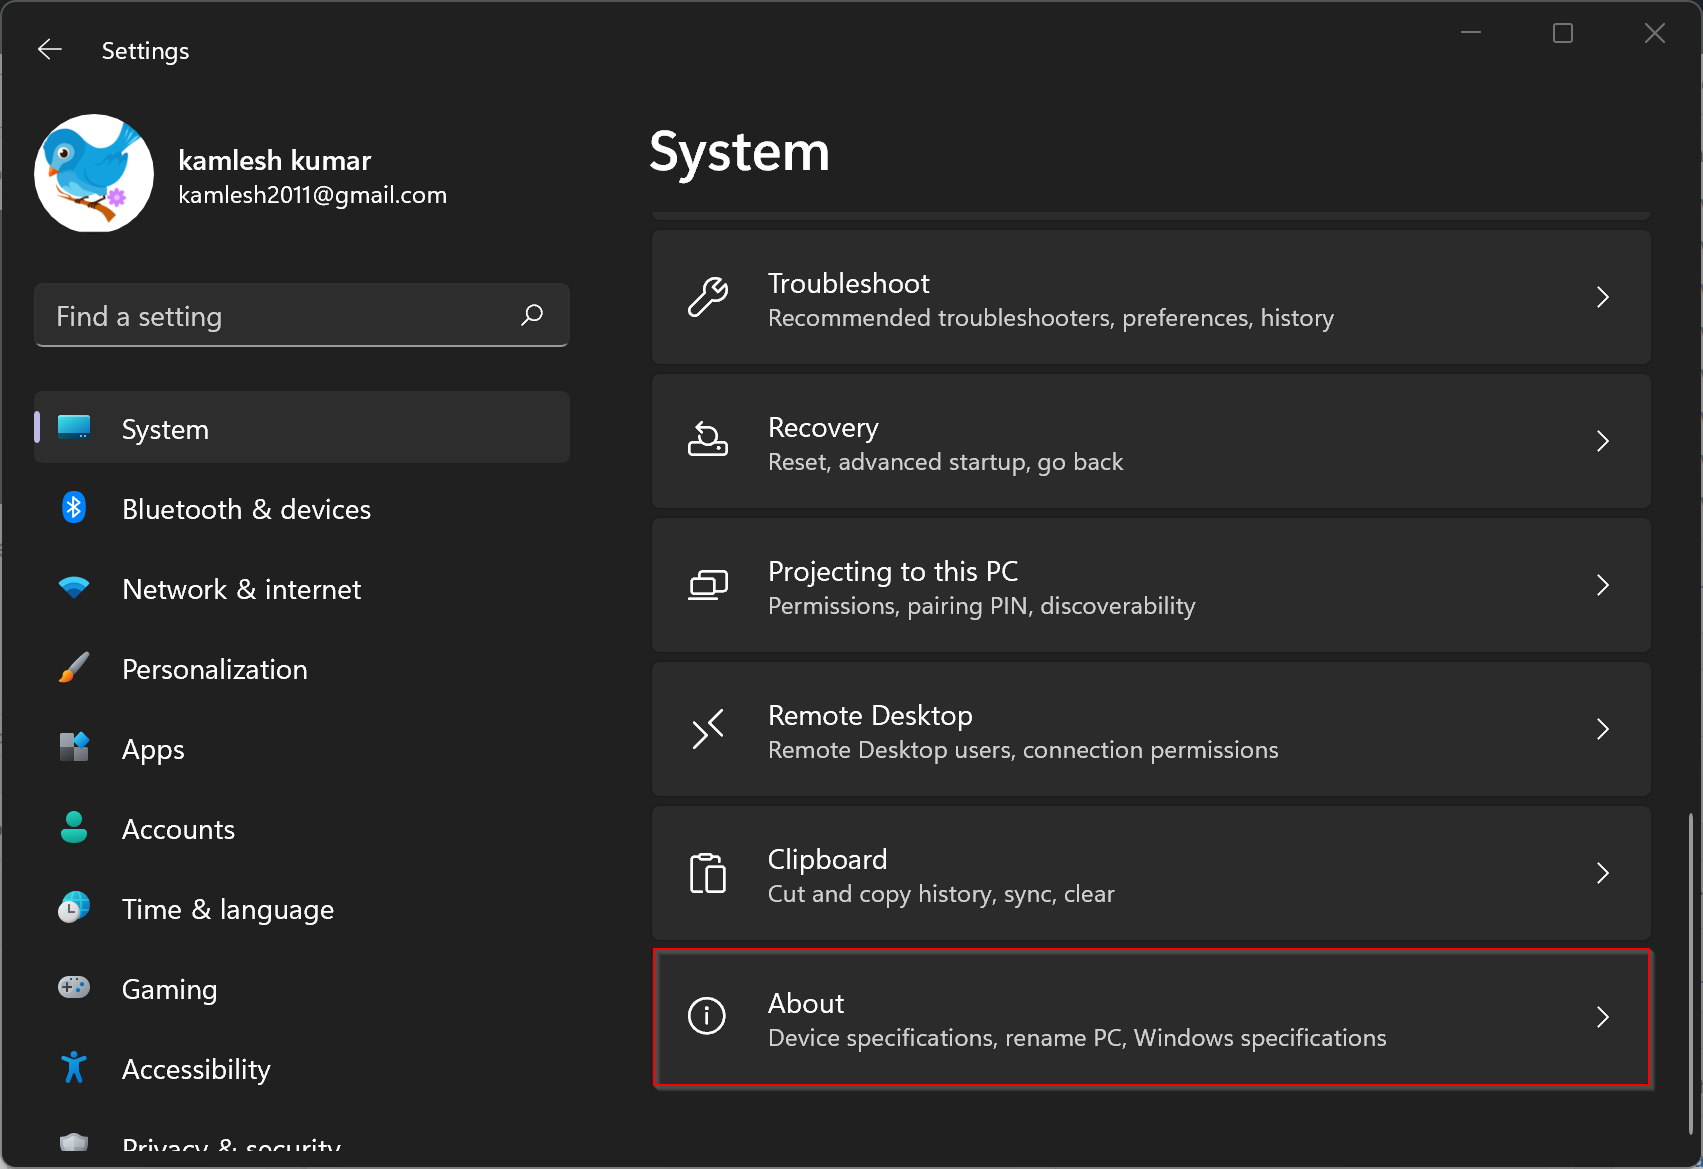
Step 2. Select the System when the Windows Settings window opens.
Step 3. After that, click on the About on the right sidebar.
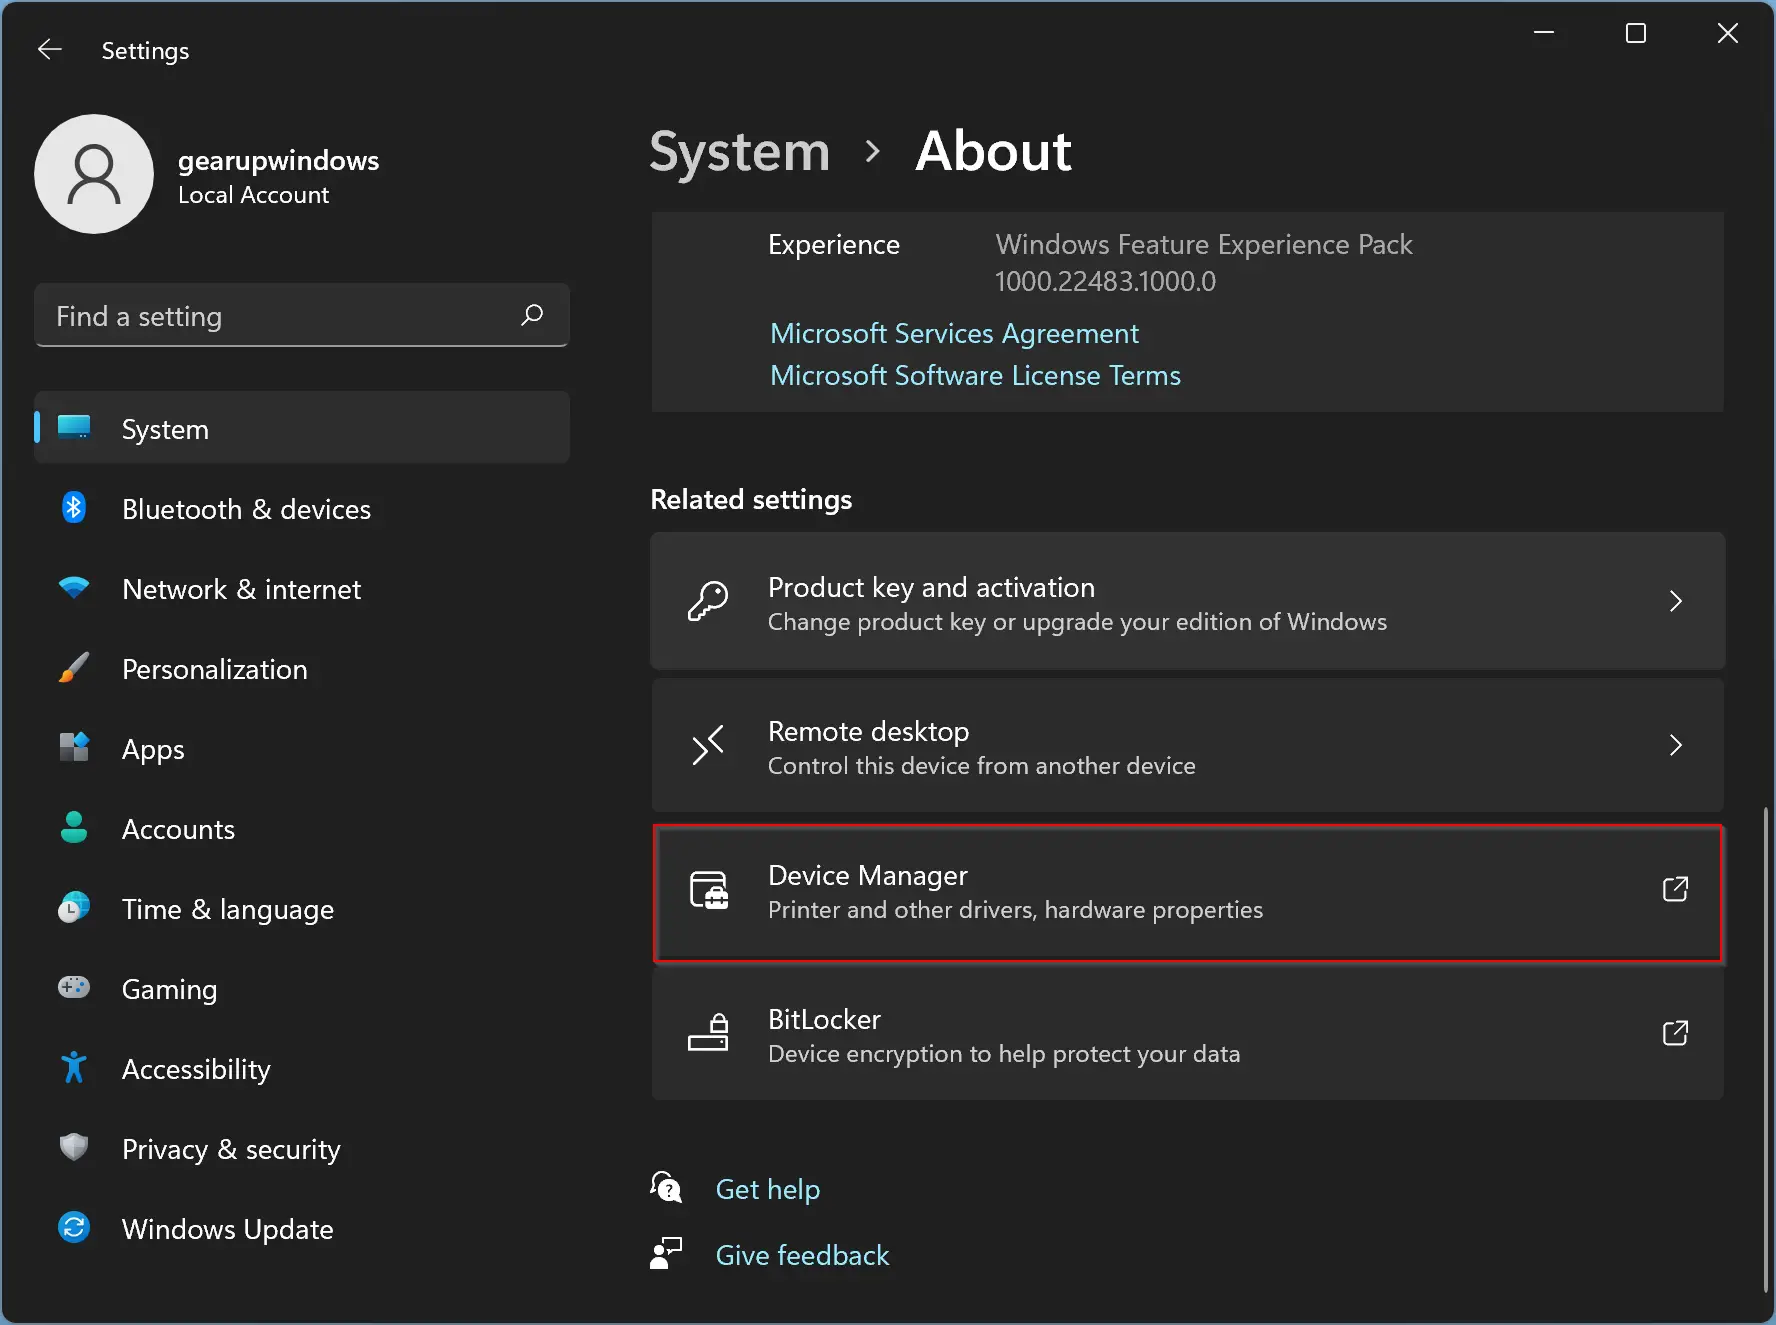
Step 4. Scroll down a bit on the About settings page and then click the Device Manager under the Related settings section.
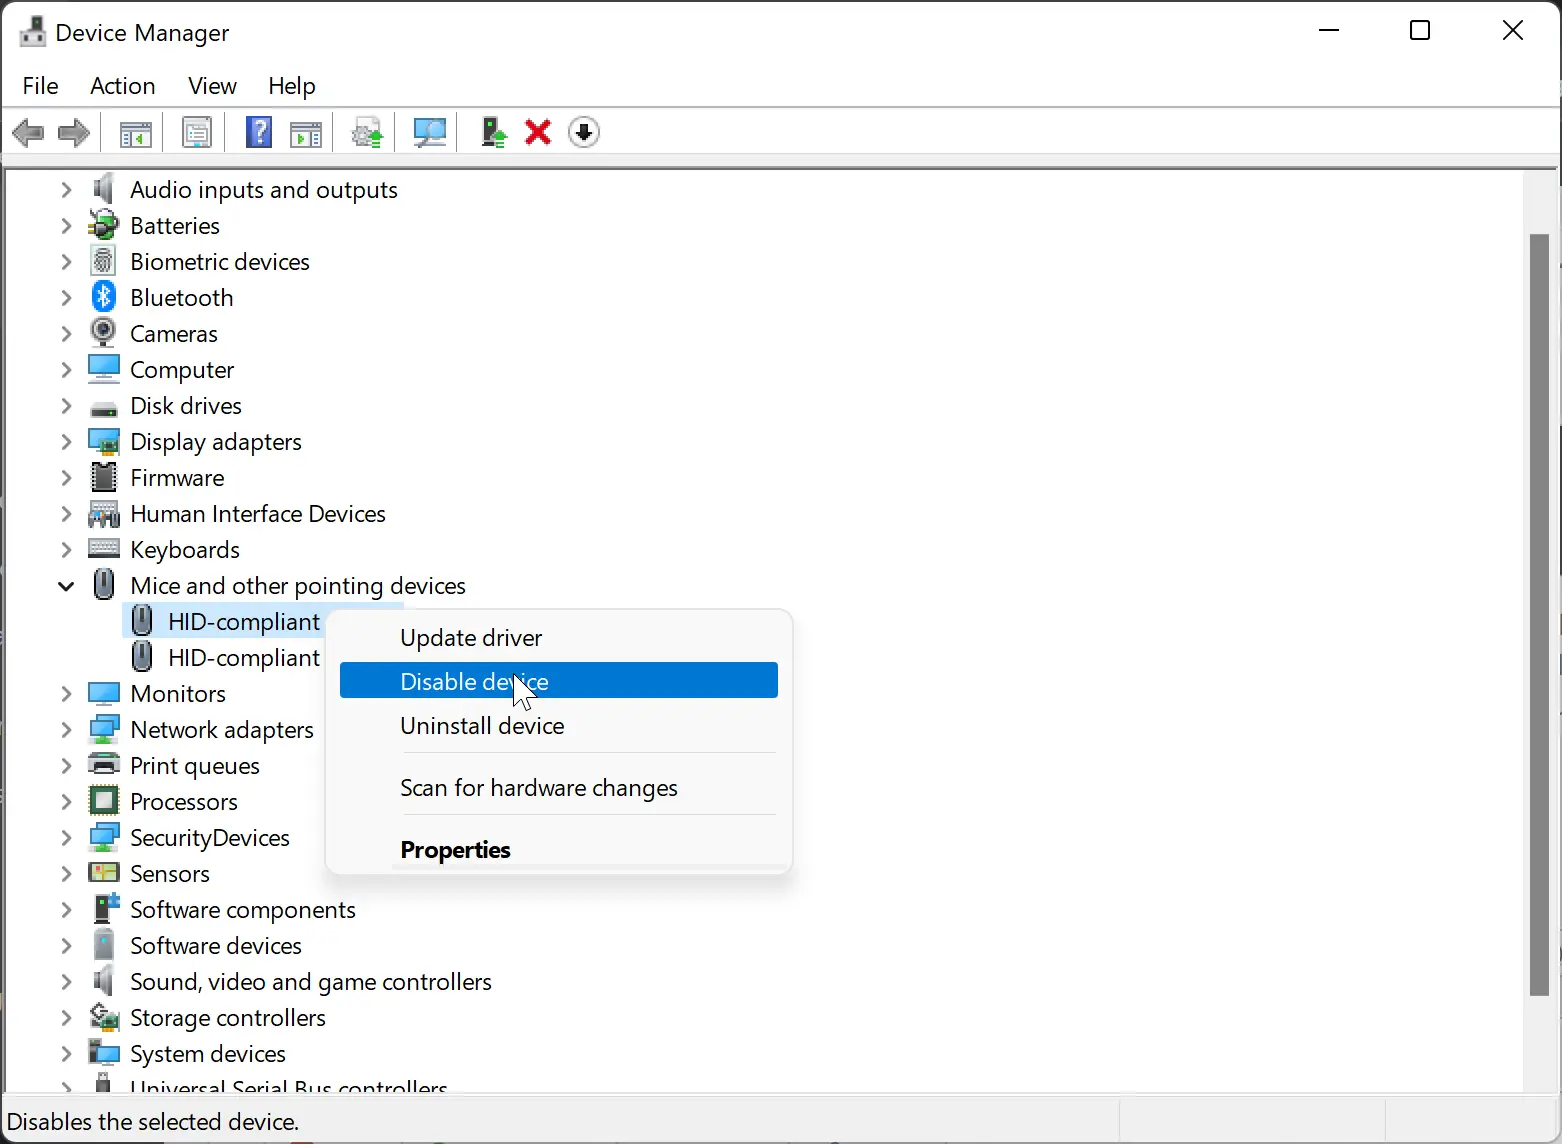
Step 5. In the Device Manager, expand the category to see the names of devices under that, and then right-click (or press and hold) the one you’d like to disable and select the Disable device option. You will find the touchscreen device(s) under the Human Interface Devices category. You need to repeat the steps if you have multiple HID-compliant touchscreen items.
Note: To enable the touchscreen, under the Human Interface Devices category, right-click the HID-compliant touchscreen items that you have disabled before and choose the Enable device option in the right-click menu.
Step 6. When you’re done, restart your computer to apply the changes.
How to Enable or Disable Touch Screen in Windows 11 using Registry Editor?
To turn on or off Touchscreen in Windows 11 through Registry Editor follow these steps:-
Step 1. Open Registry Editor.
Step 2. Navigate to the following path in the left sidebar of Registry Editor:-
Computer\HKEY_CURRENT_USER\Software\Microsoft\Wisp\Touch
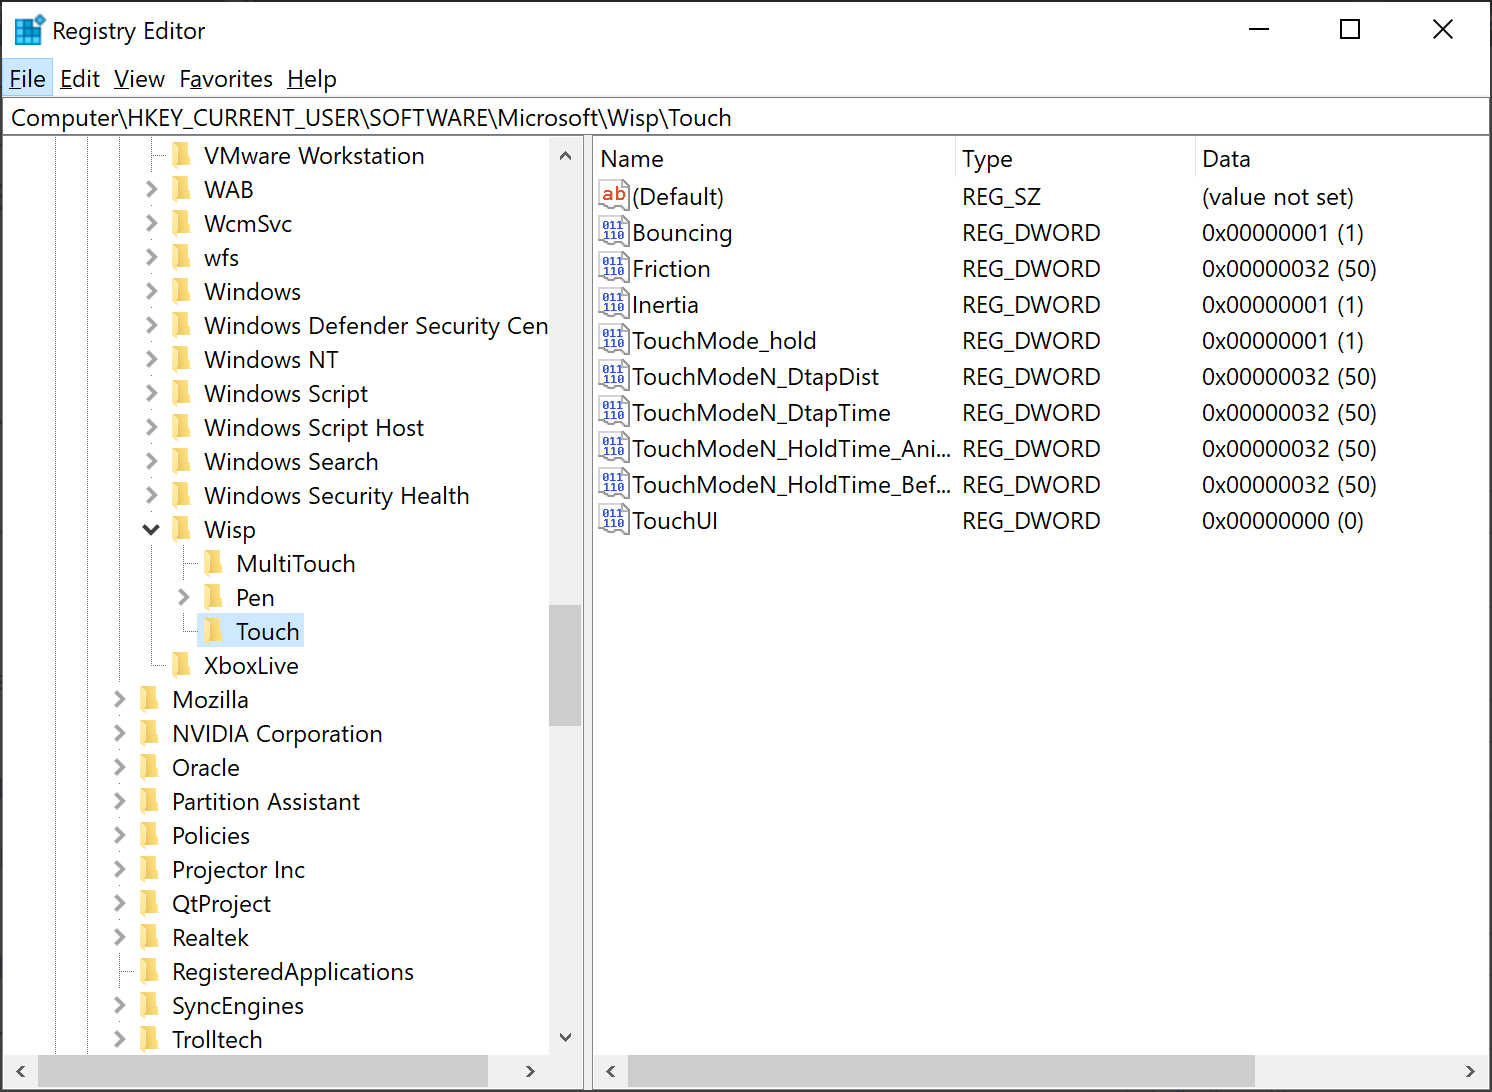
Step 3. In the right pane of the Touch folder, right-click on the free space and select New > DWORD (32-bit) Value.
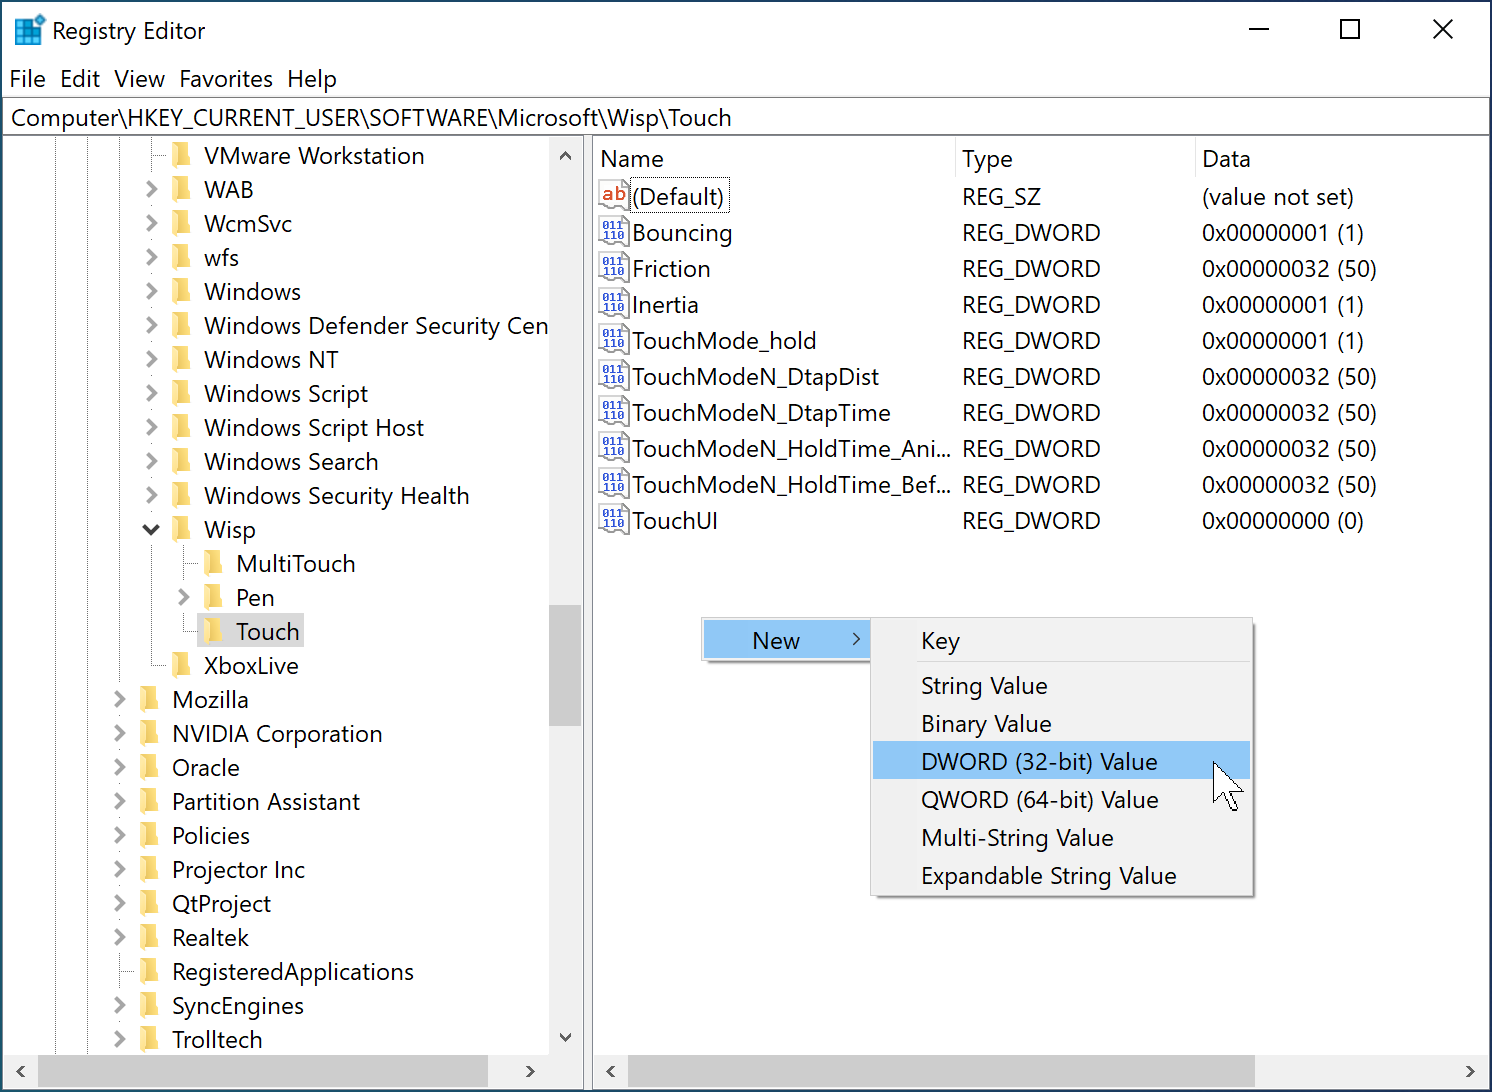
Step 4. Name the newly created REG_DWORD as TouchGate.
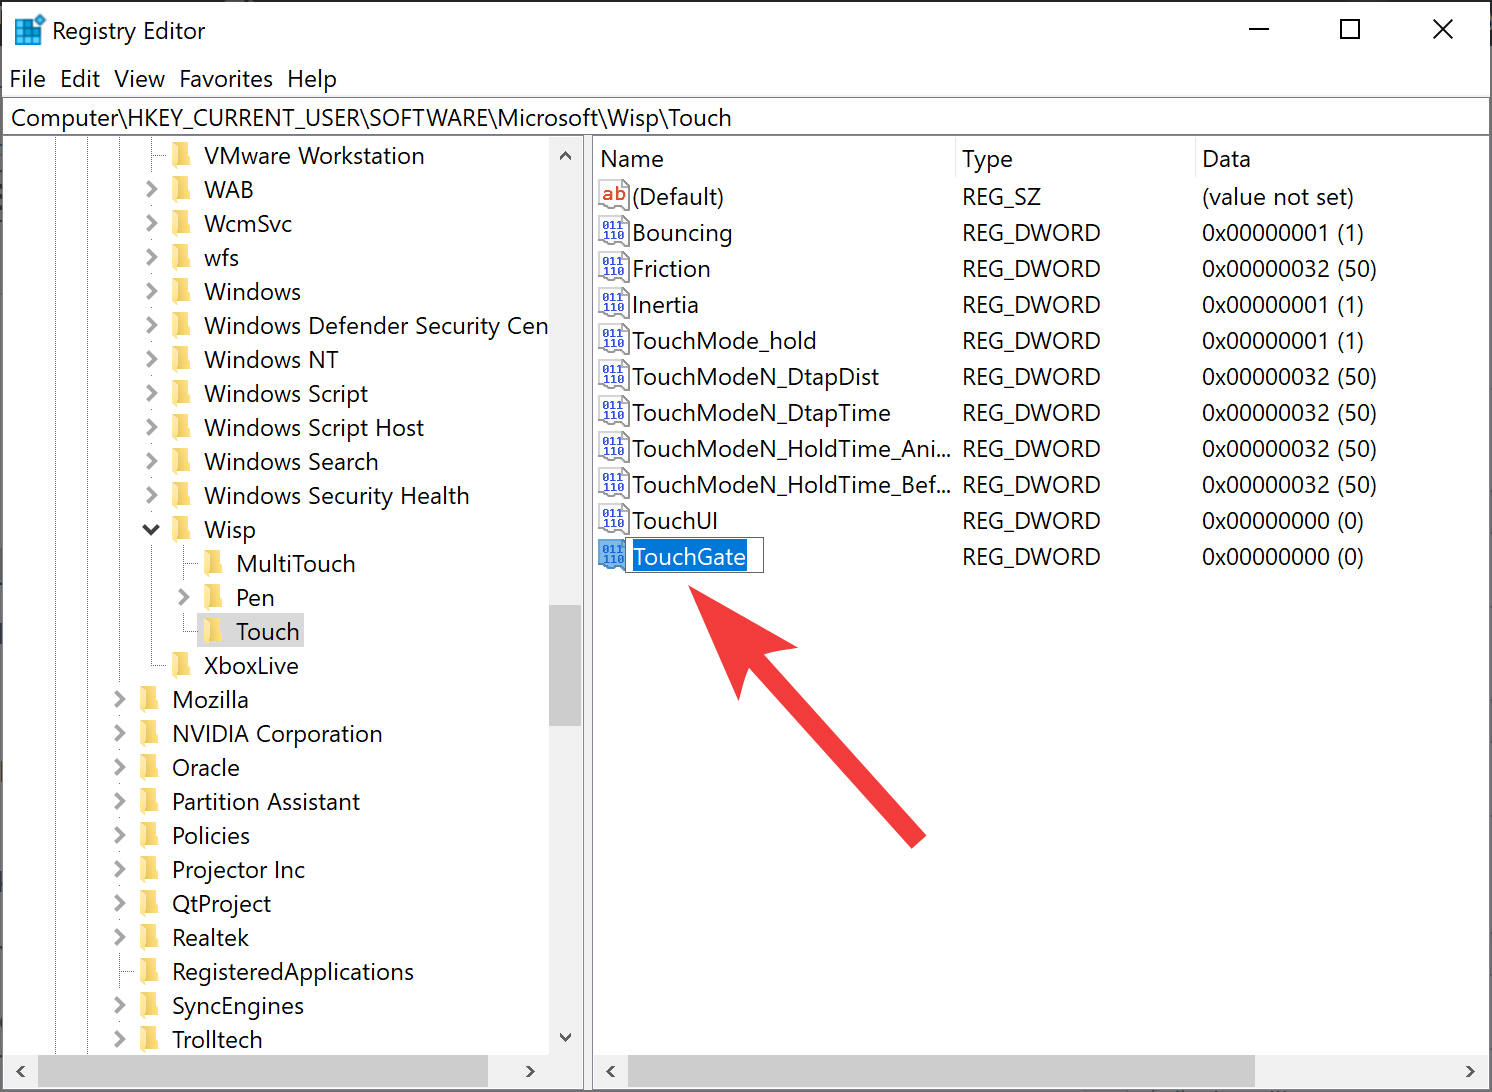
Step 5. Now, double-click on the newly created TouchGate REG_DWORD and set its “Value data” as 0. This will disable the touchscreen on your Windows 11 PC.
In case you want to enable the touchscreen, set the “Value data” as 1.

Step 6. Click OK.
Step 7. Reboot your touch screen to apply the changes.
Good luck.
Conclusion
In conclusion, disabling the touchscreen functionality on a Windows 11 device can be helpful for some users who prefer using a keyboard and mouse instead of touch controls. While there is no dedicated button to turn off the touchscreen feature, it can be disabled through the Device Manager in Windows 11. This post provides a step-by-step guide on how to disable and enable the touchscreen feature on a Windows 11 machine. By following these steps, users can easily switch between touch and non-touch modes on their Windows 11 devices.