Adding a program to startup in Windows 11 or Windows 10 can be a valuable way to streamline your computer experience. Whether you want your preferred applications to launch automatically when you log in or need essential tools readily available at startup, this guide will help you through the process. We will walk you through the steps for both Windows 11 and Windows 10, as the process is similar in both operating systems.
Why Add Programs to Startup?
Adding programs to the startup list offers several benefits, such as:-
- Improved Efficiency: Frequently used applications can be ready to use without manually launching them every time you log in.
- Convenience: You can configure essential tools or apps to start automatically, saving you time and effort.
- Customization: Personalize your computer experience by determining which applications are launched at startup.
How to Add a Program to Startup in Windows 11 or 10?
Follow these steps to add a program to startup:-
Method1: Using the Startup Folder
Step 1. First, you need to access the Startup Folder. In both Windows 11 and Windows 10, you can access the startup folder by pressing `Windows + R,` typing `shell:startup,` and hitting Enter.
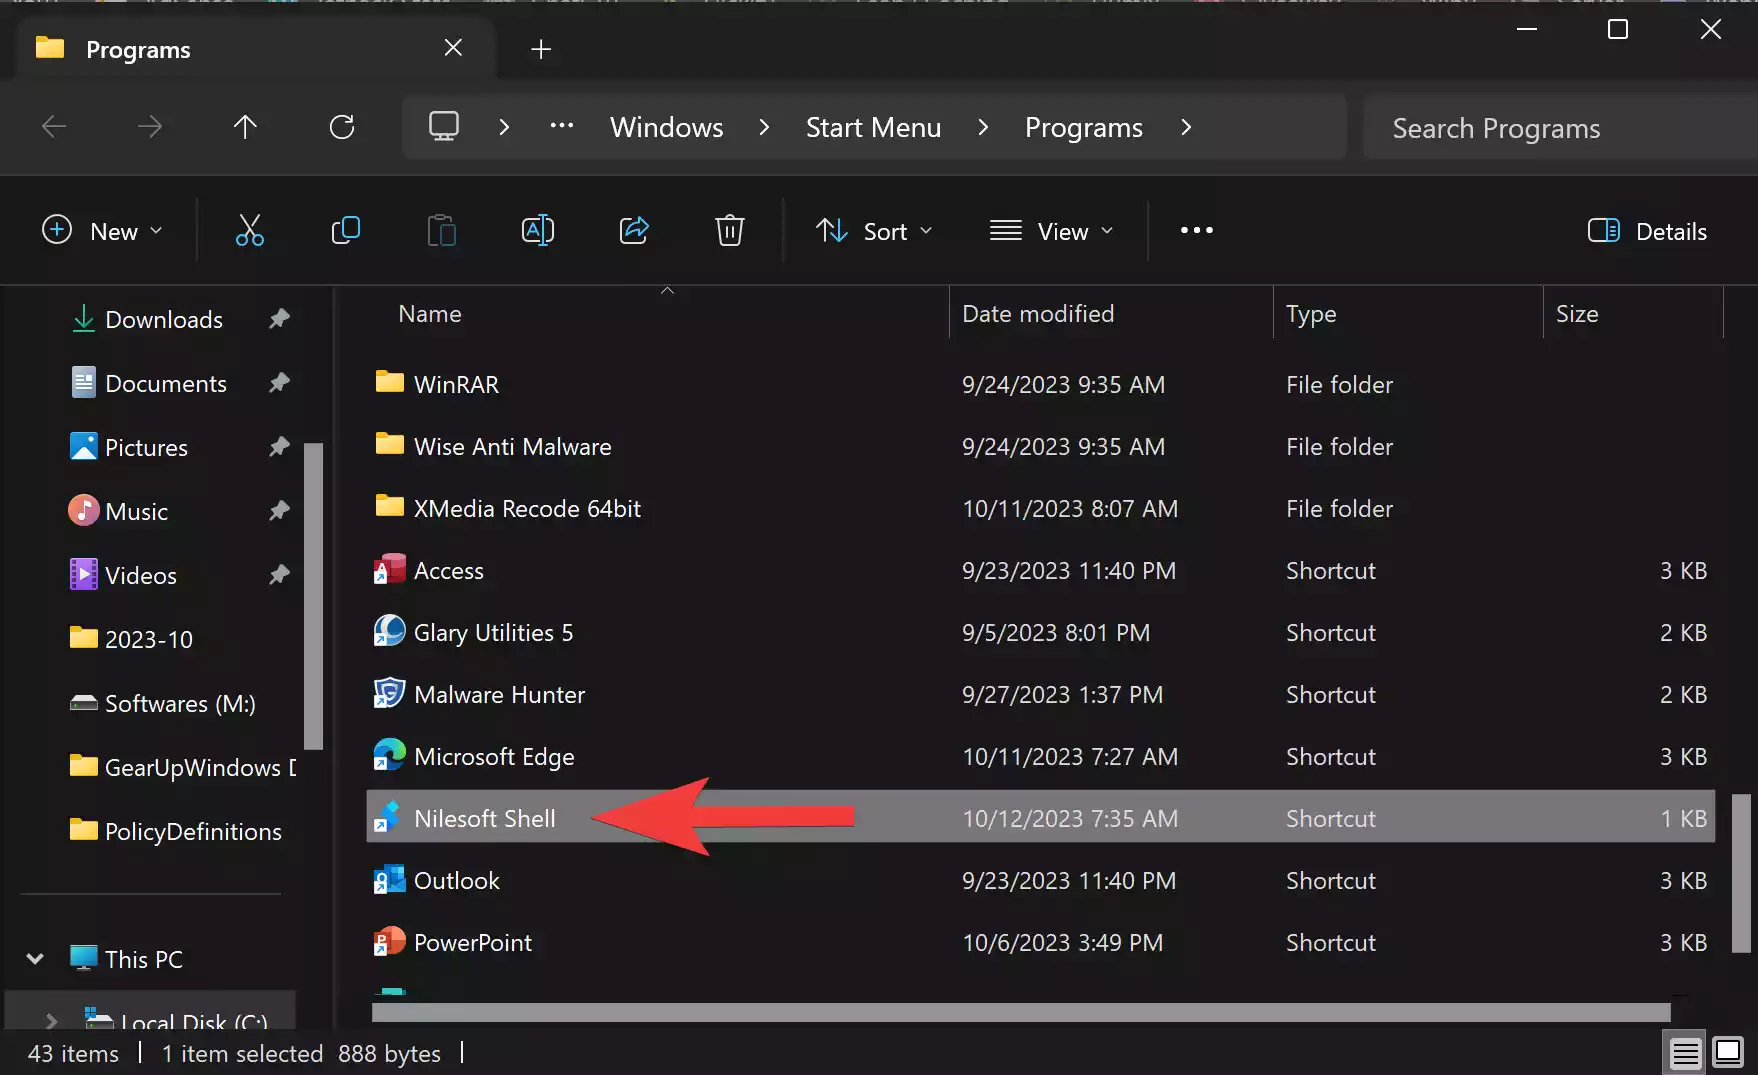
Step 2. Once the folder is open, you need to copy the program’s shortcut to the folder you want to launch at startup. If you don’t find the program shortcut, you need to locate it. To find a shortcut to the program you want to launch at startup, right-click on the program name in the Start menu and select “Open file location” in the context menu.
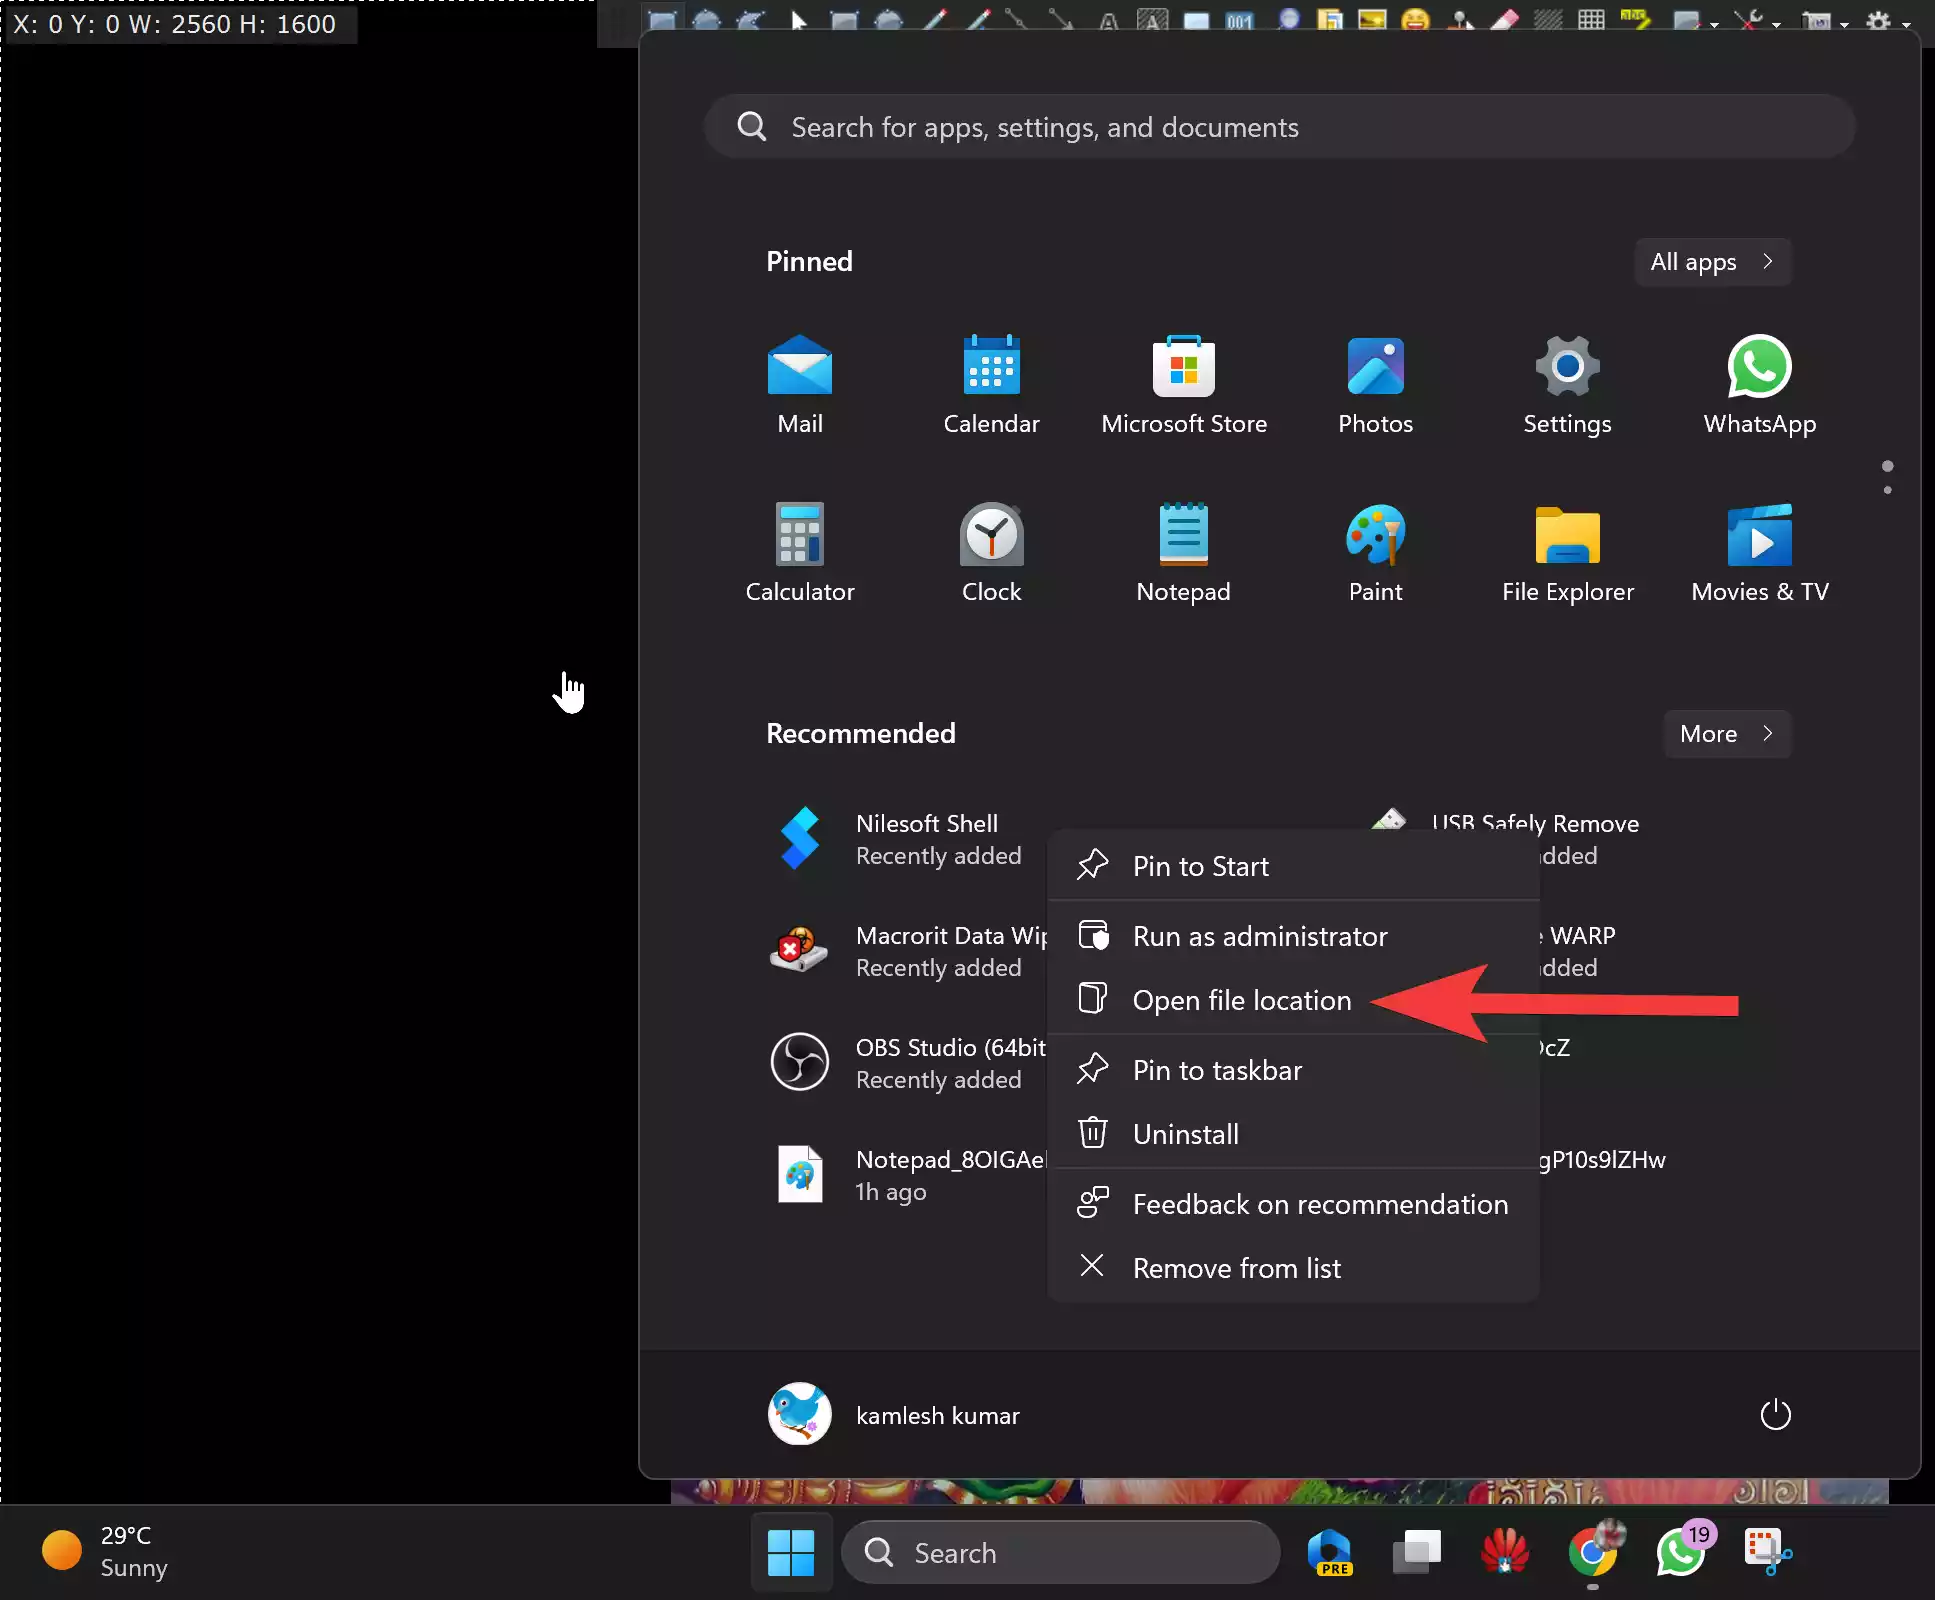
The above action will open the folder where your program shortcut is available.
Step 3. Copy the program’s shortcut and paste it into the Startup folder. Alternatively, press the Shift key and drag the program’s shortcut to the Startup folder.
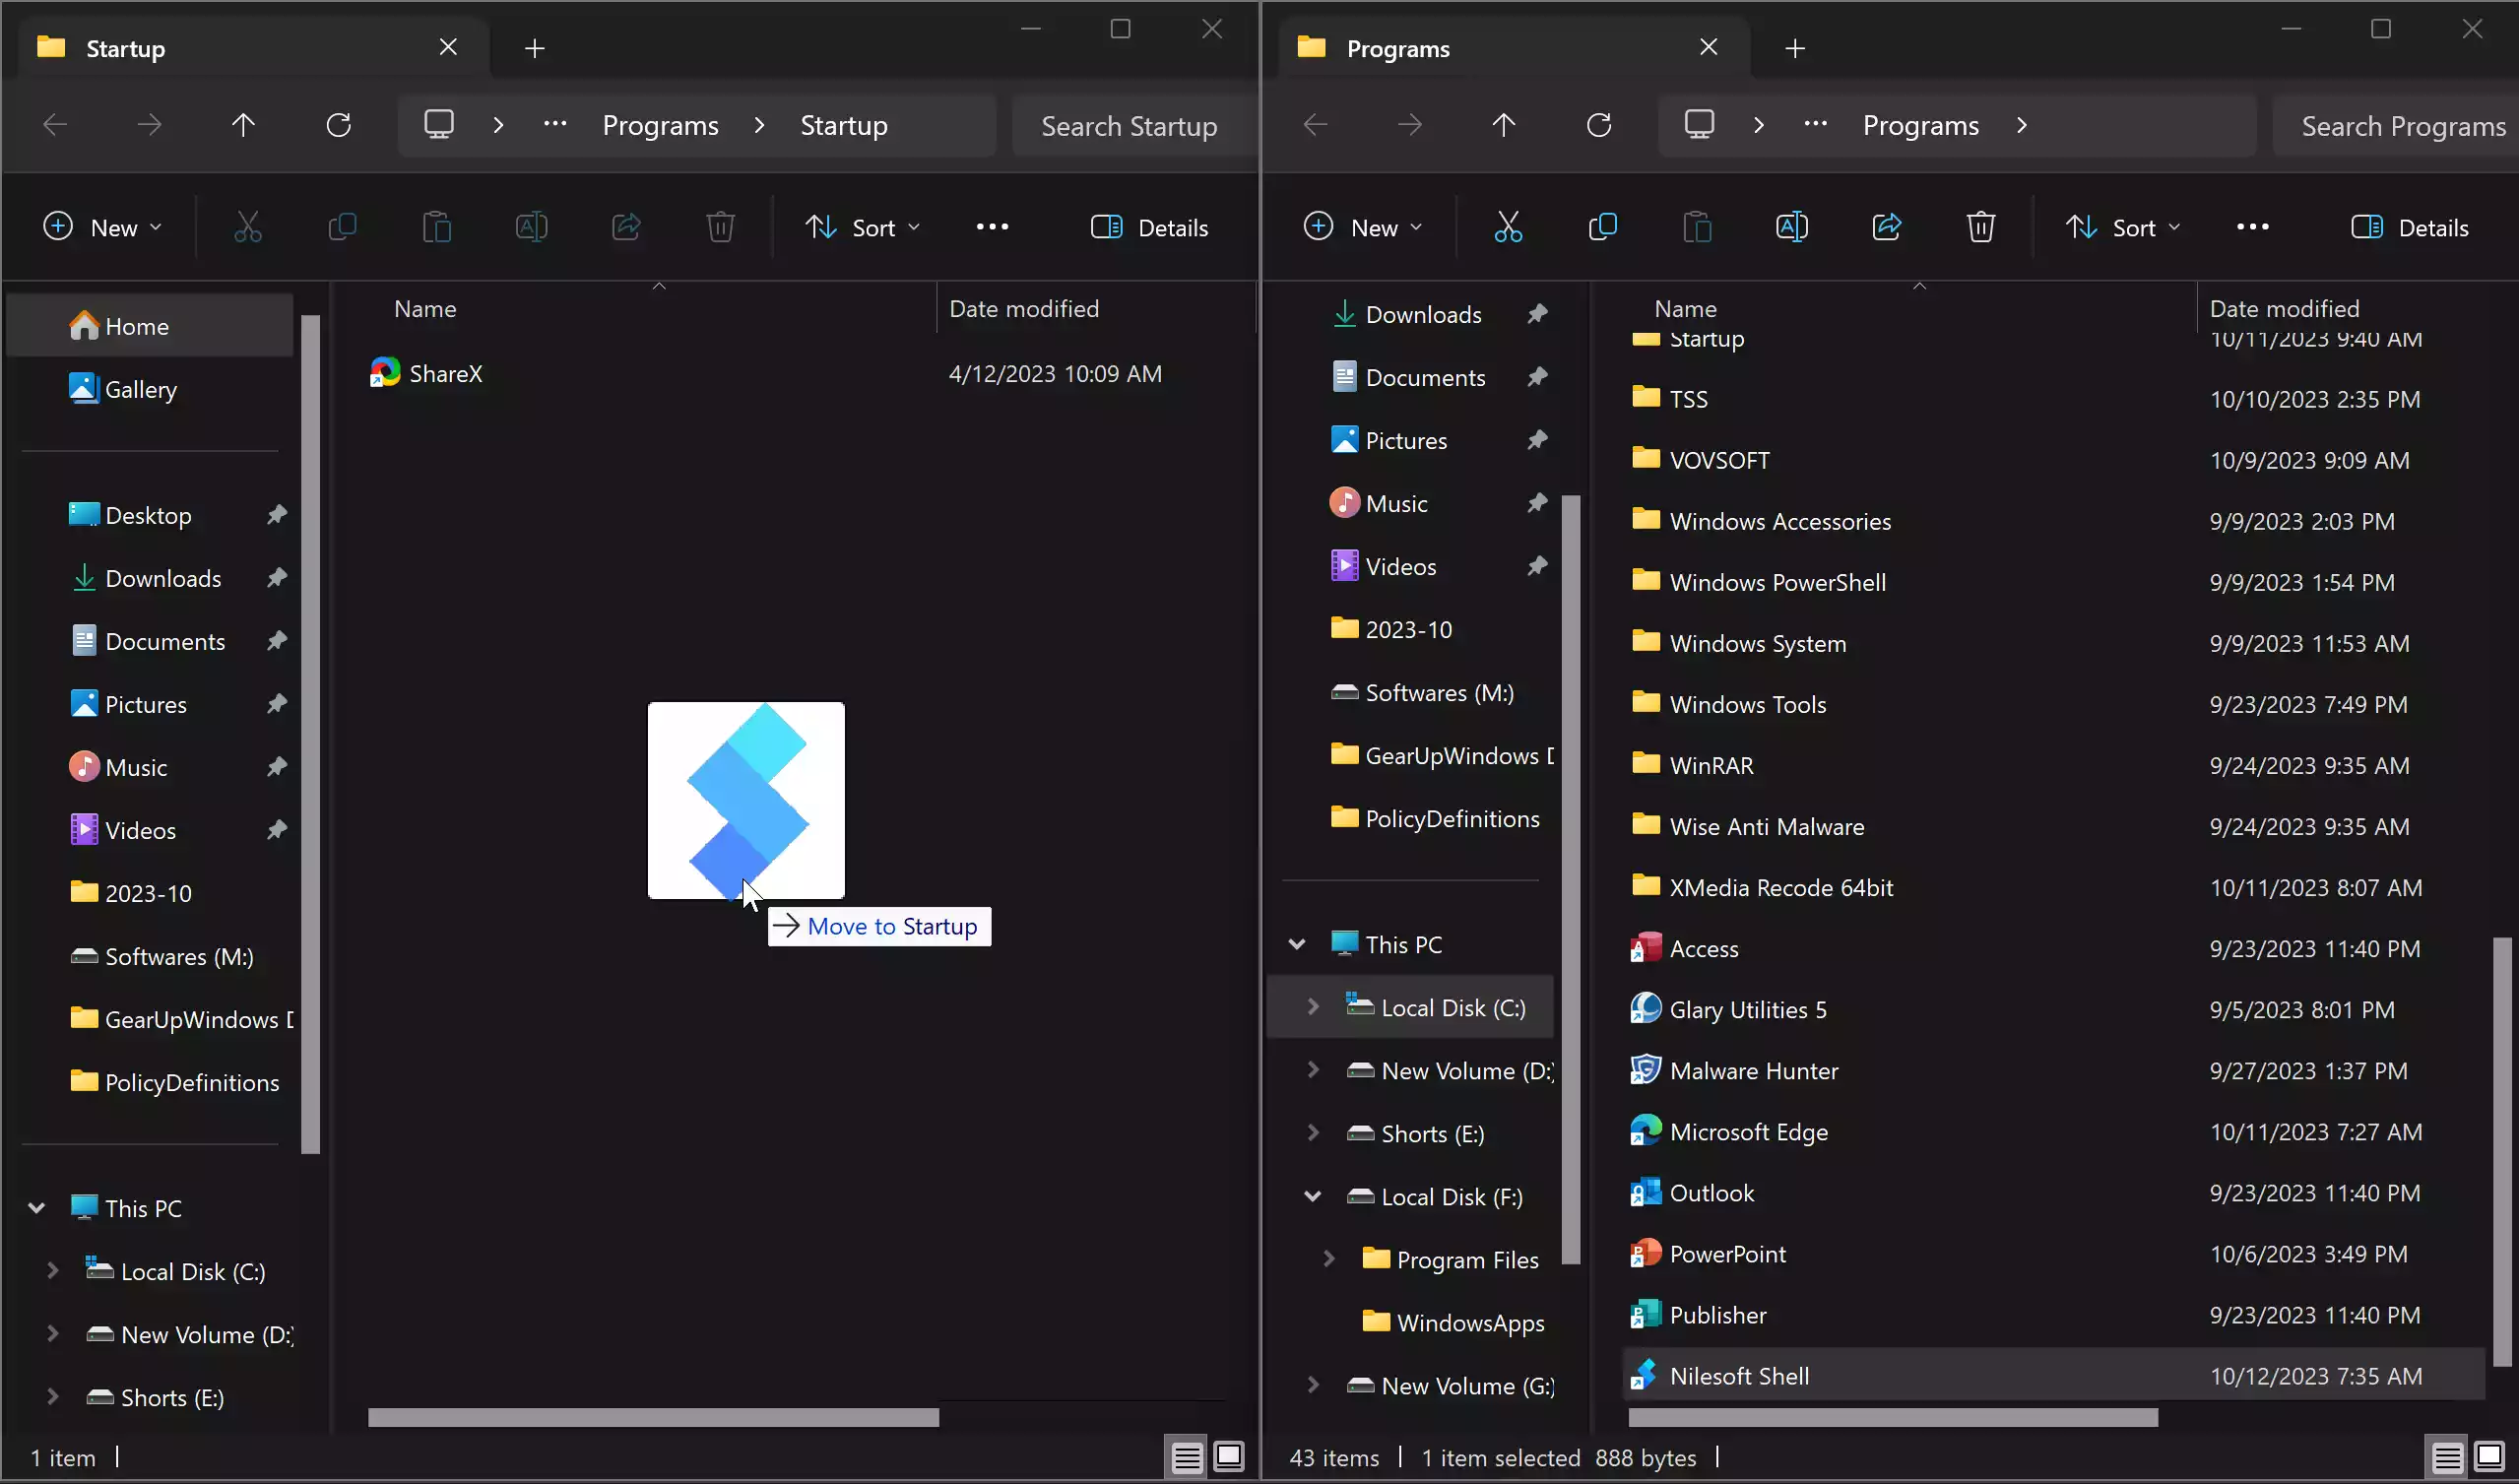
Once you complete the above steps, your chosen program will start with Windows startup.
Method 2: Using the Task Manager
You can quickly manage Startup programs on Windows using Task Manager. Here is how to do it:-
Step 1. Press “Ctrl + Shift + Esc” or right-click the taskbar and select “Task Manager” to open Task Manager.
Step 2. In the Task Manager, click on the “Startup” tab.
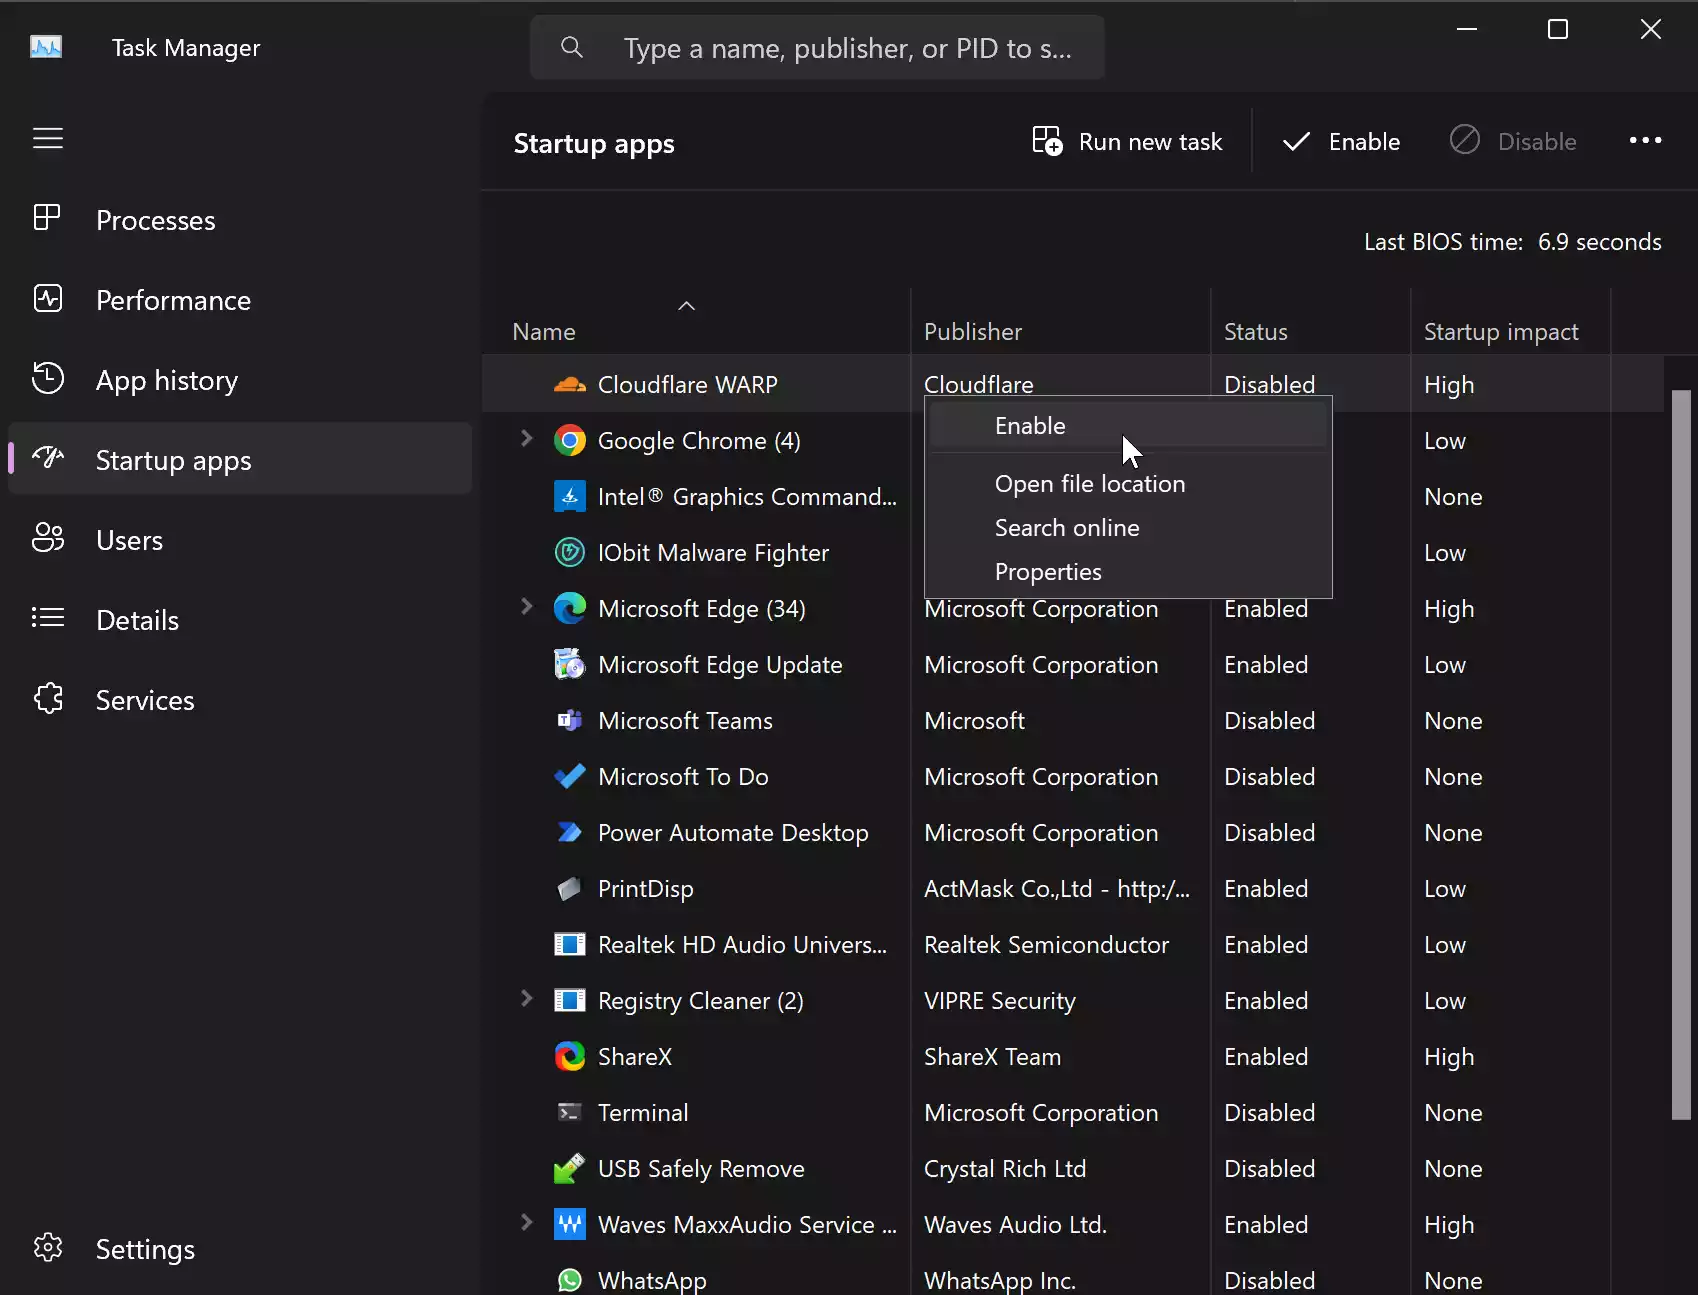
Step 3. You will see a list of programs that are configured to start with your computer. To add a program to the startup, select and right-click on it and click the “Enable” option. To remove a program from startup, select it, right-click, and choose the “Disable” option.
Method 3: Using the Registry Editor
You can also add a program to the Windows Startup list using Registry Editor. Here is how to do it:-
Step 1. Press “Windows + R,” type “regedit,” and press Enter to open the Registry Editor.
Step 2. In the Registry Editor, go to:-
HKEY_CURRENT_USER\Software\Microsoft\Windows\CurrentVersion\Run
for your user account, or
HKEY_LOCAL_MACHINE\Software\Microsoft\Windows\CurrentVersion\Run
for all users.
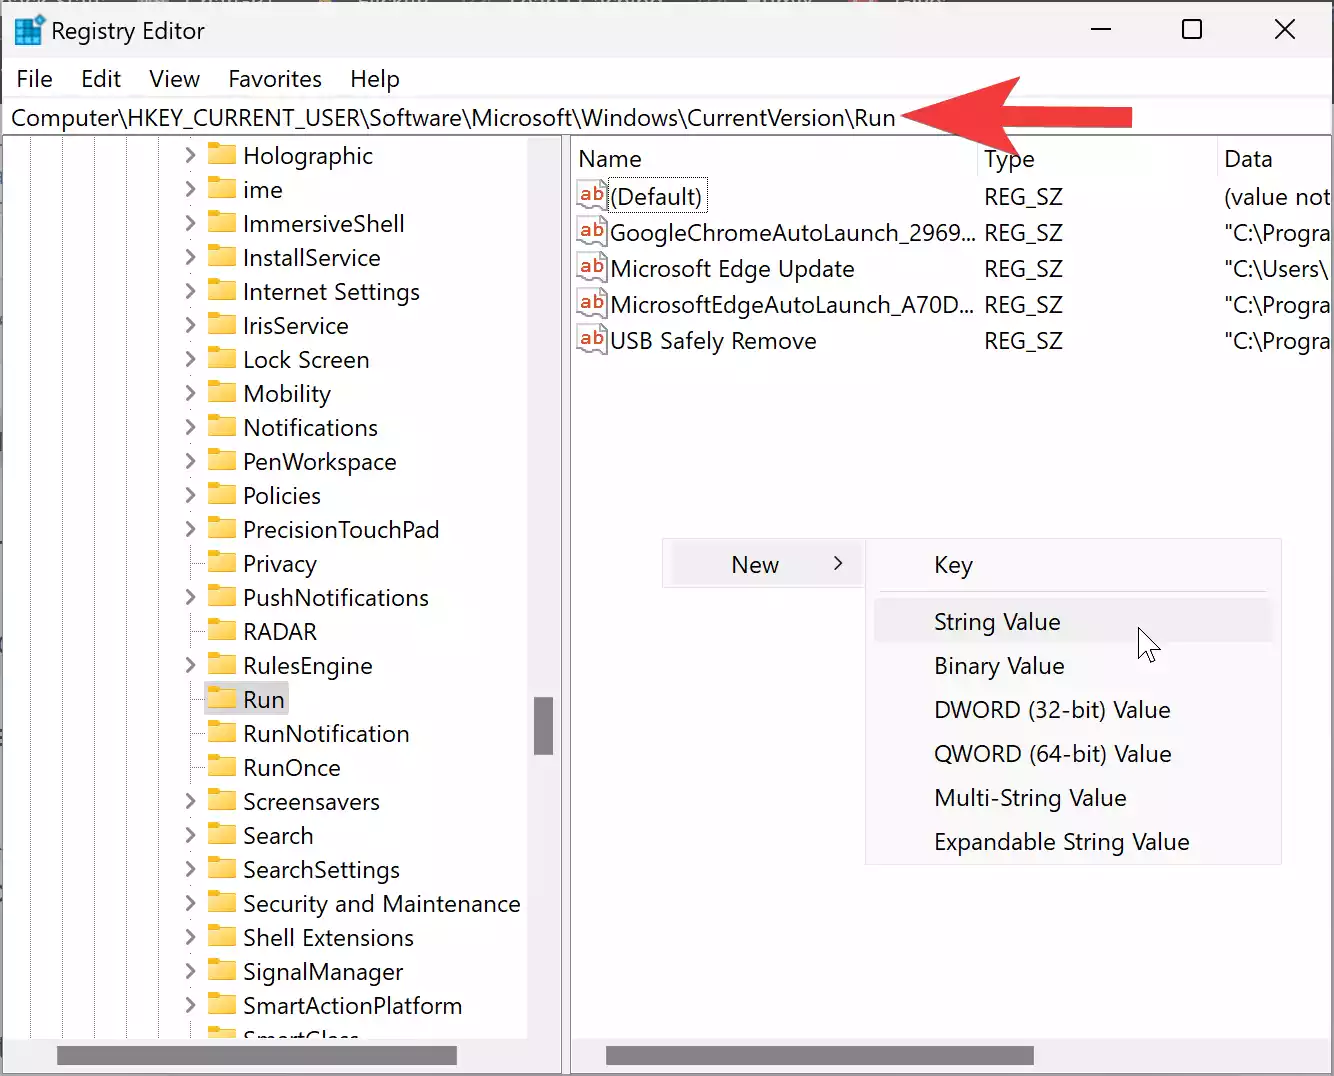
Step 3. Right-click on the right pane, select “New,” and then “String Value.” Name the value application name, such as idm.
Step 4. Double-click the newly created value and set the value data to the path of the program’s executable file.

To get the path of the program on your Windows PC, navigate to the program executable file in File Explorer, right-click on it, and select “Copy as path.”
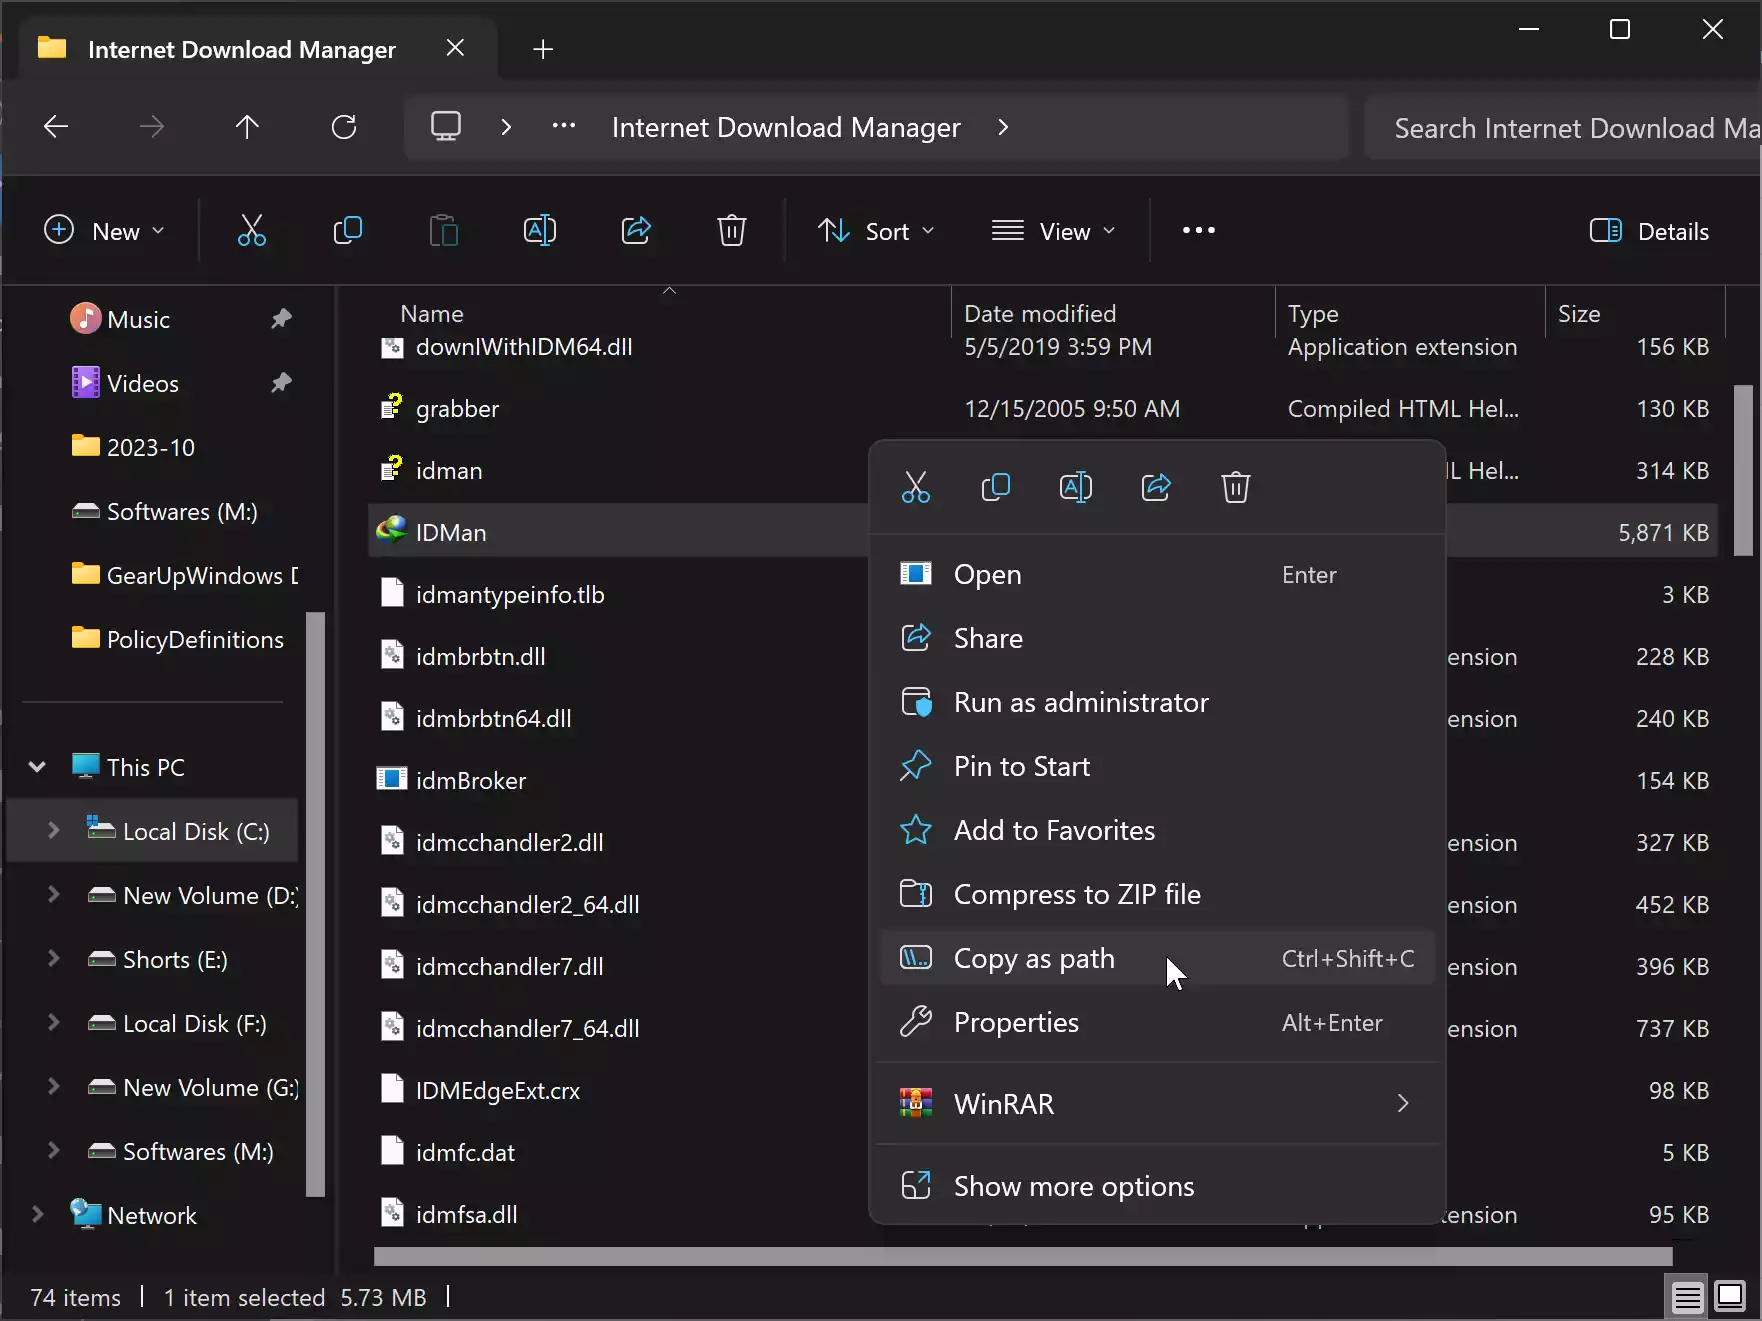
Step 5. Click OK.
Close the Registry Editor, and the program will launch at startup.
Conclusion
Adding a program to the startup in Windows 11 or 10 is a simple process that can save you time and make your computer experience more efficient. Whether you prefer using the Startup Folder, Task Manager, or Registry Editor, you can now customize your computer to your liking. Remember to choose wisely, as too many startup programs can slow down your system’s boot time. Enjoy a more personalized and efficient computing experience with your favorite applications ready at your fingertips.
Hi thanks for the info, I use Auto Start tool (Portable Freeware)
https://www.majorgeeks.com/files/details/auto_start_tool.html