Hyperlinks are an essential feature in Microsoft Word that allows you to create interactive documents, making it easy for readers to access additional information, websites, or email addresses directly from your document. Whether you’re working on a report, presentation, or any other type of document, adding and formatting hyperlinks can enhance the overall user experience. In this gearupwindows article, we will guide you through the process of adding and formatting hyperlinks in Microsoft Word.
How to Add Hyperlinks to a Word Document?
To add Hyperlinks to a Word document, follow these steps:-
Step 1. Launch Microsoft Word and open the document in which you want to add a hyperlink.
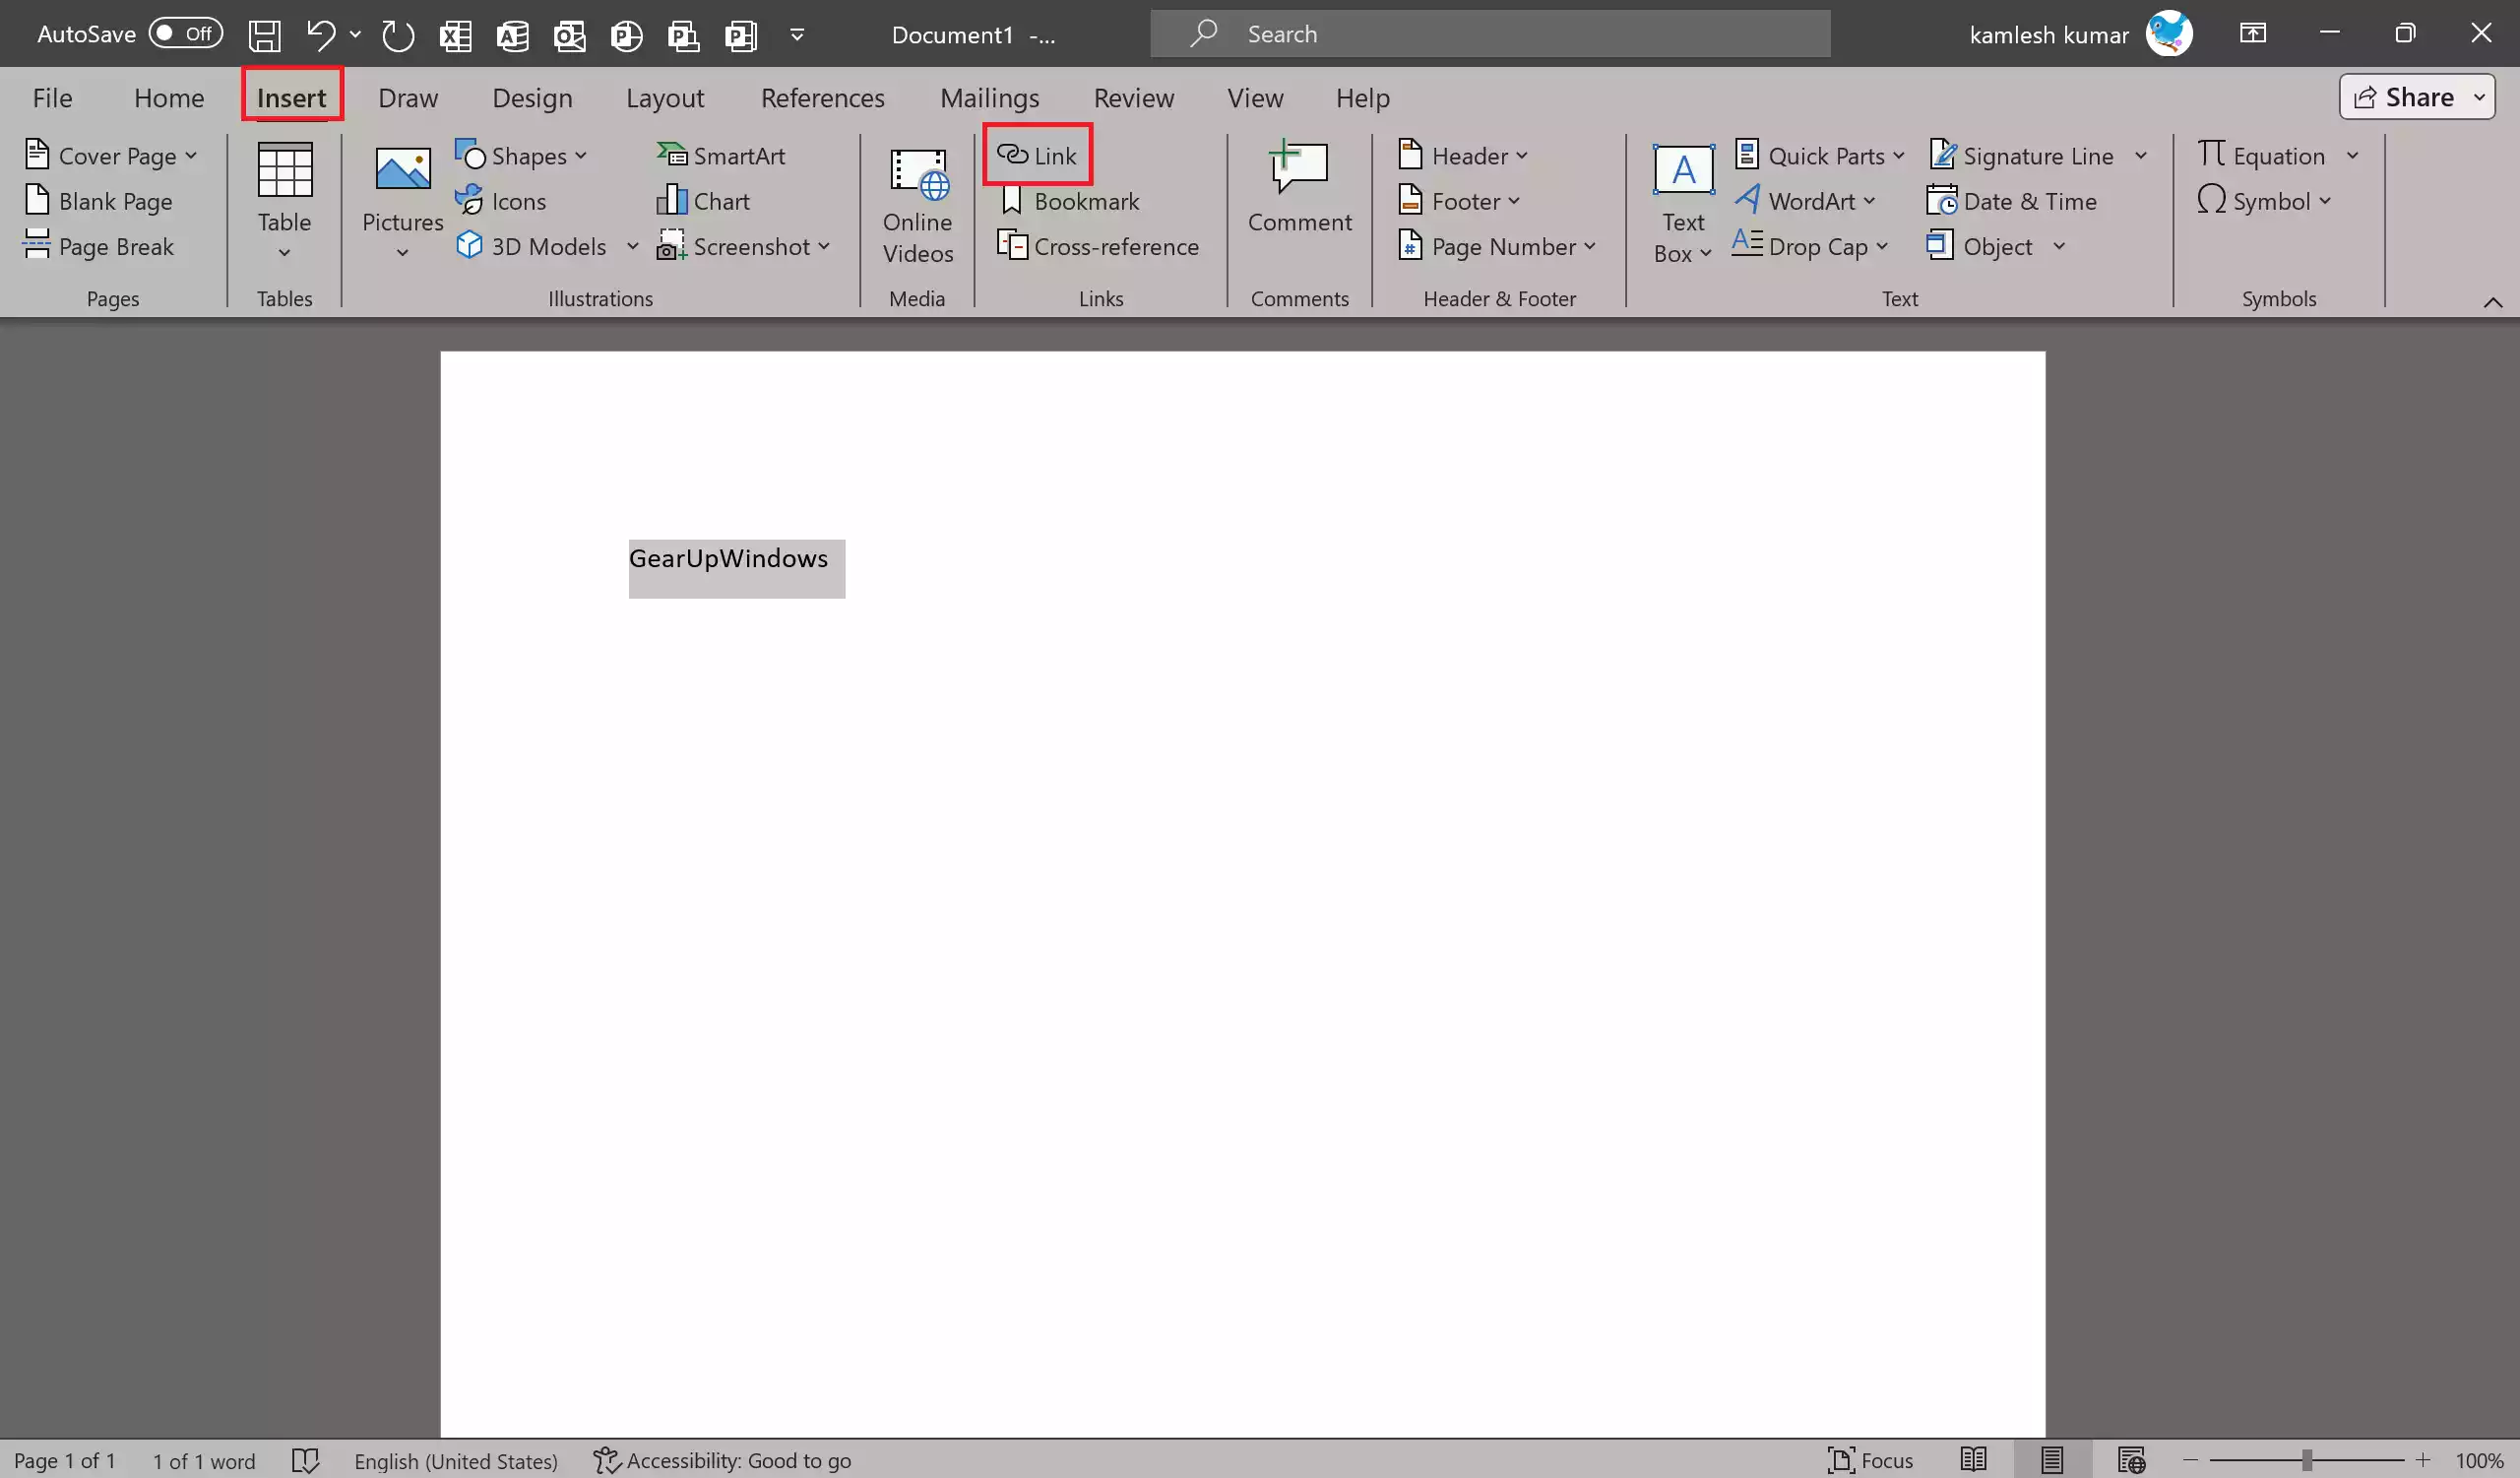
Step 2. Highlight the text or select the object (such as an image or shape) where you want to insert the hyperlink. This will be the clickable area that triggers the link.
Step 3. Press the “Ctrl + K” keyboard shortcut or go to the “Insert” tab and click on the “Link” button in the “Links” group.
Step 4. The “Insert Hyperlink” dialog box will appear.
Step 5. In the left pane of the dialog box, you’ll see options for different types of hyperlinks:-
- Existing File or Web Page: To link to a website or a file on your computer, select this option.
- Place in This Document: To link to another section of the same document, select this option.
- Create New Document: To create a new document and link to it, choose this option.
- Email Address: To create an email hyperlink, select this option.
Step 6. Depending on the option you choose, enter the web address, file path, email address, or document location in the “Address” field.
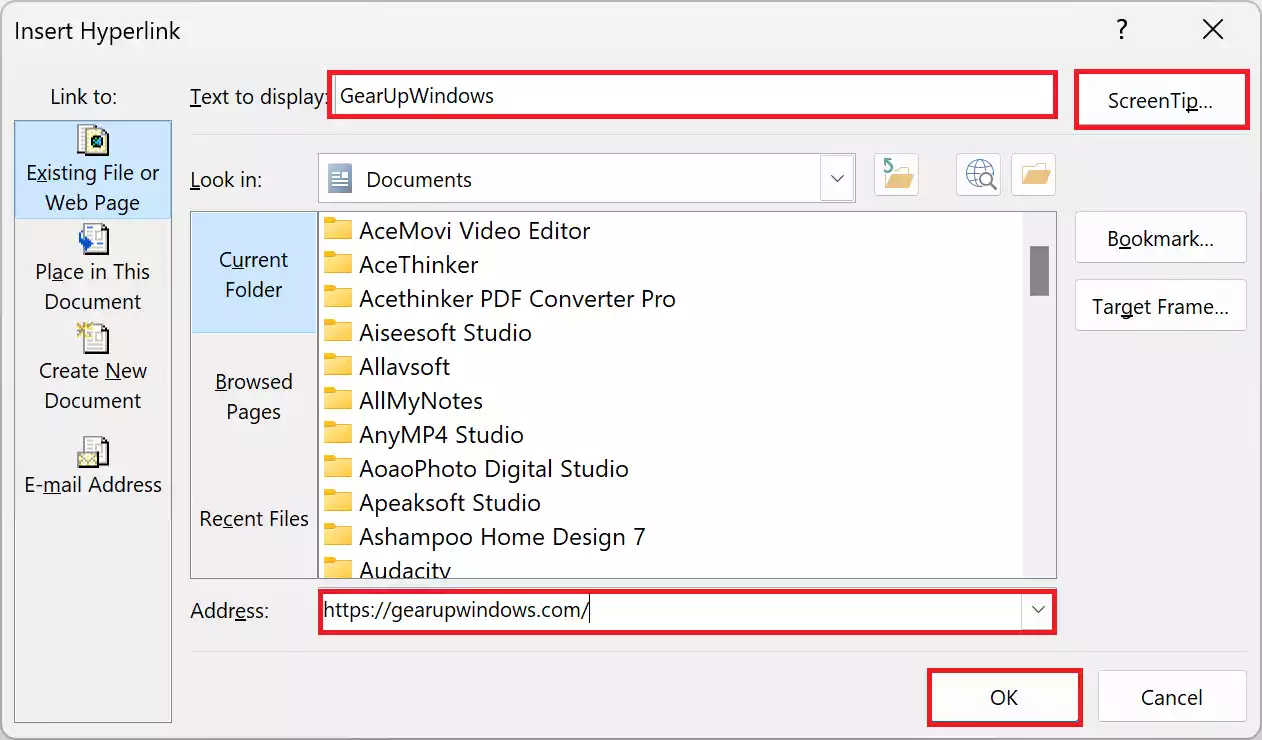
Step 7. In the “Text to Display” field, you can edit the text that will appear as the hyperlink. By default, it uses the selected text or object’s content.
Step 8. ScreenTip (optional): You can add a description that appears when users hover their cursor over the hyperlink. This is helpful for providing additional context.
Step 9. Once you’ve configured the hyperlink settings, click the “OK” button to insert the hyperlink.
How to Format Hyperlinks in a Word Document?
After adding a hyperlink, you can format it to suit your document’s style and make it more visually appealing. Here’s how to do it:-
Step 1. Click on the hyperlink in your document to select it.
Step 2. Right-click on the selected hyperlink and a context menu will appear.
Step 3. To modify the hyperlink’s destination or other properties, choose “Edit Hyperlink” from the context menu.
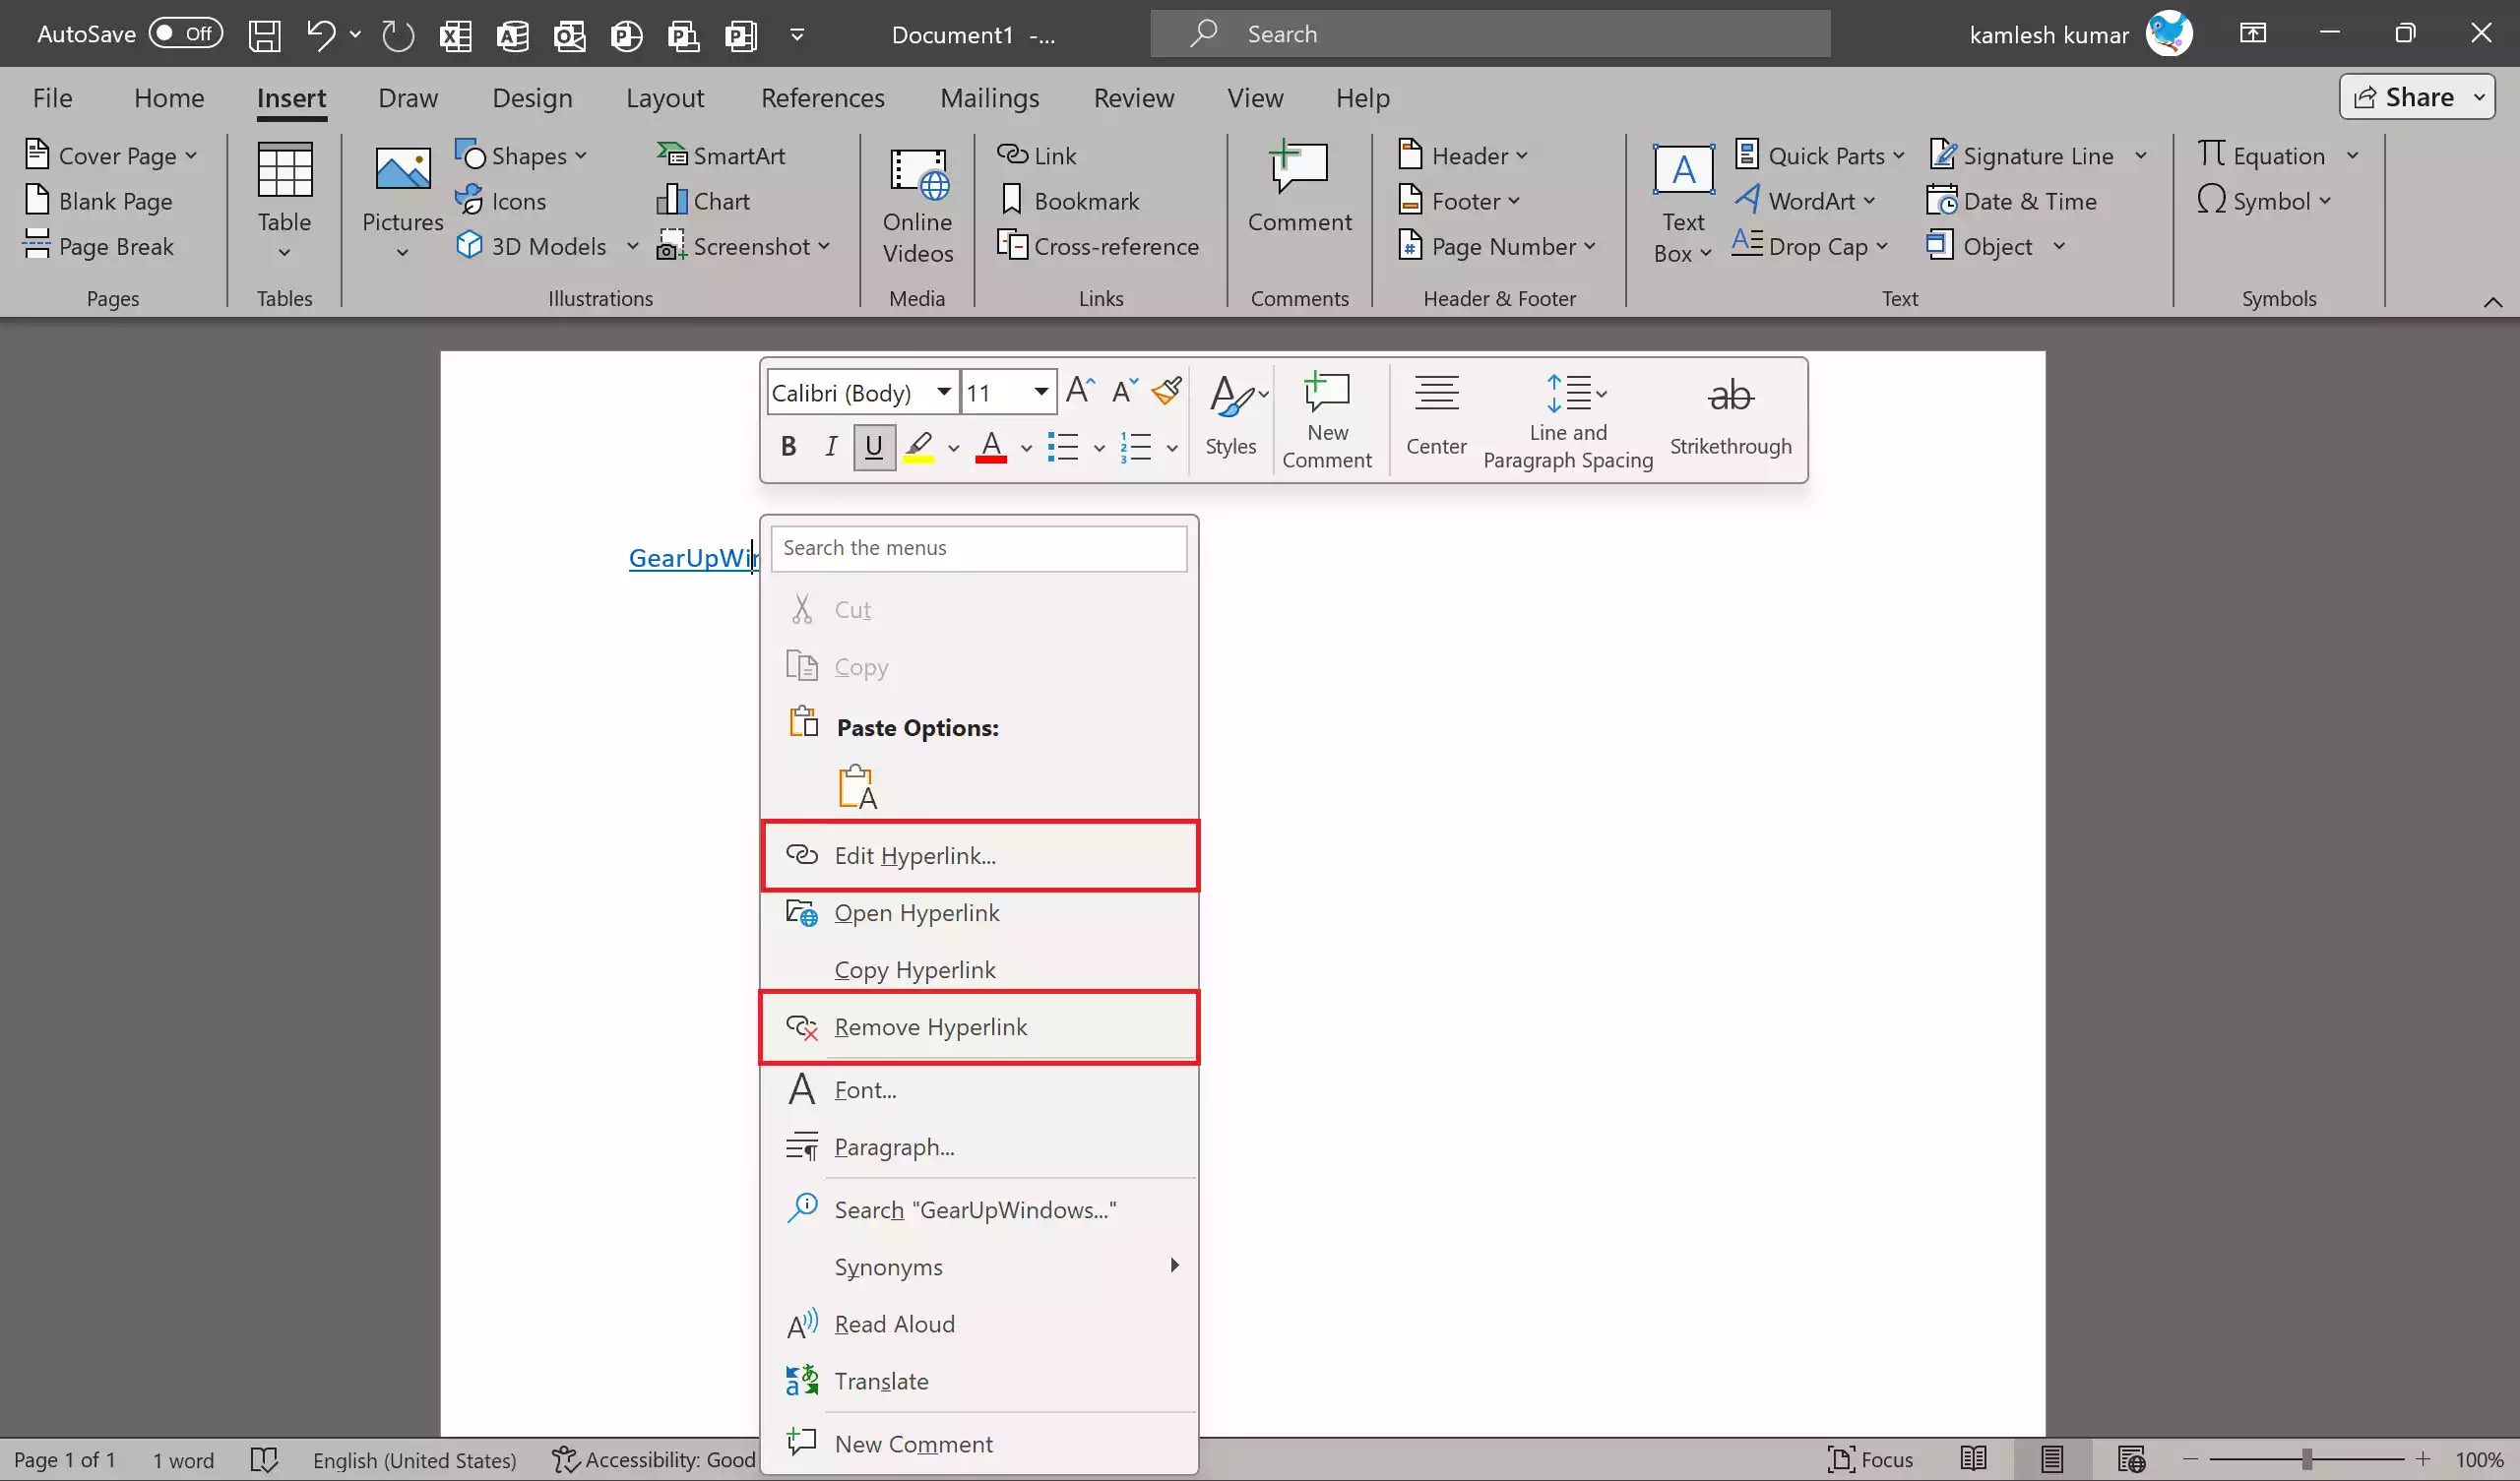
Step 4. To remove the hyperlink while retaining the linked text or object, select “Remove Hyperlink.”
Step 5. To change the color of the hyperlink, go to the “Home” tab, click the small arrow in the corner of the “Font” group to open the “Font” dialog box, and then select a new color under “Font color.”
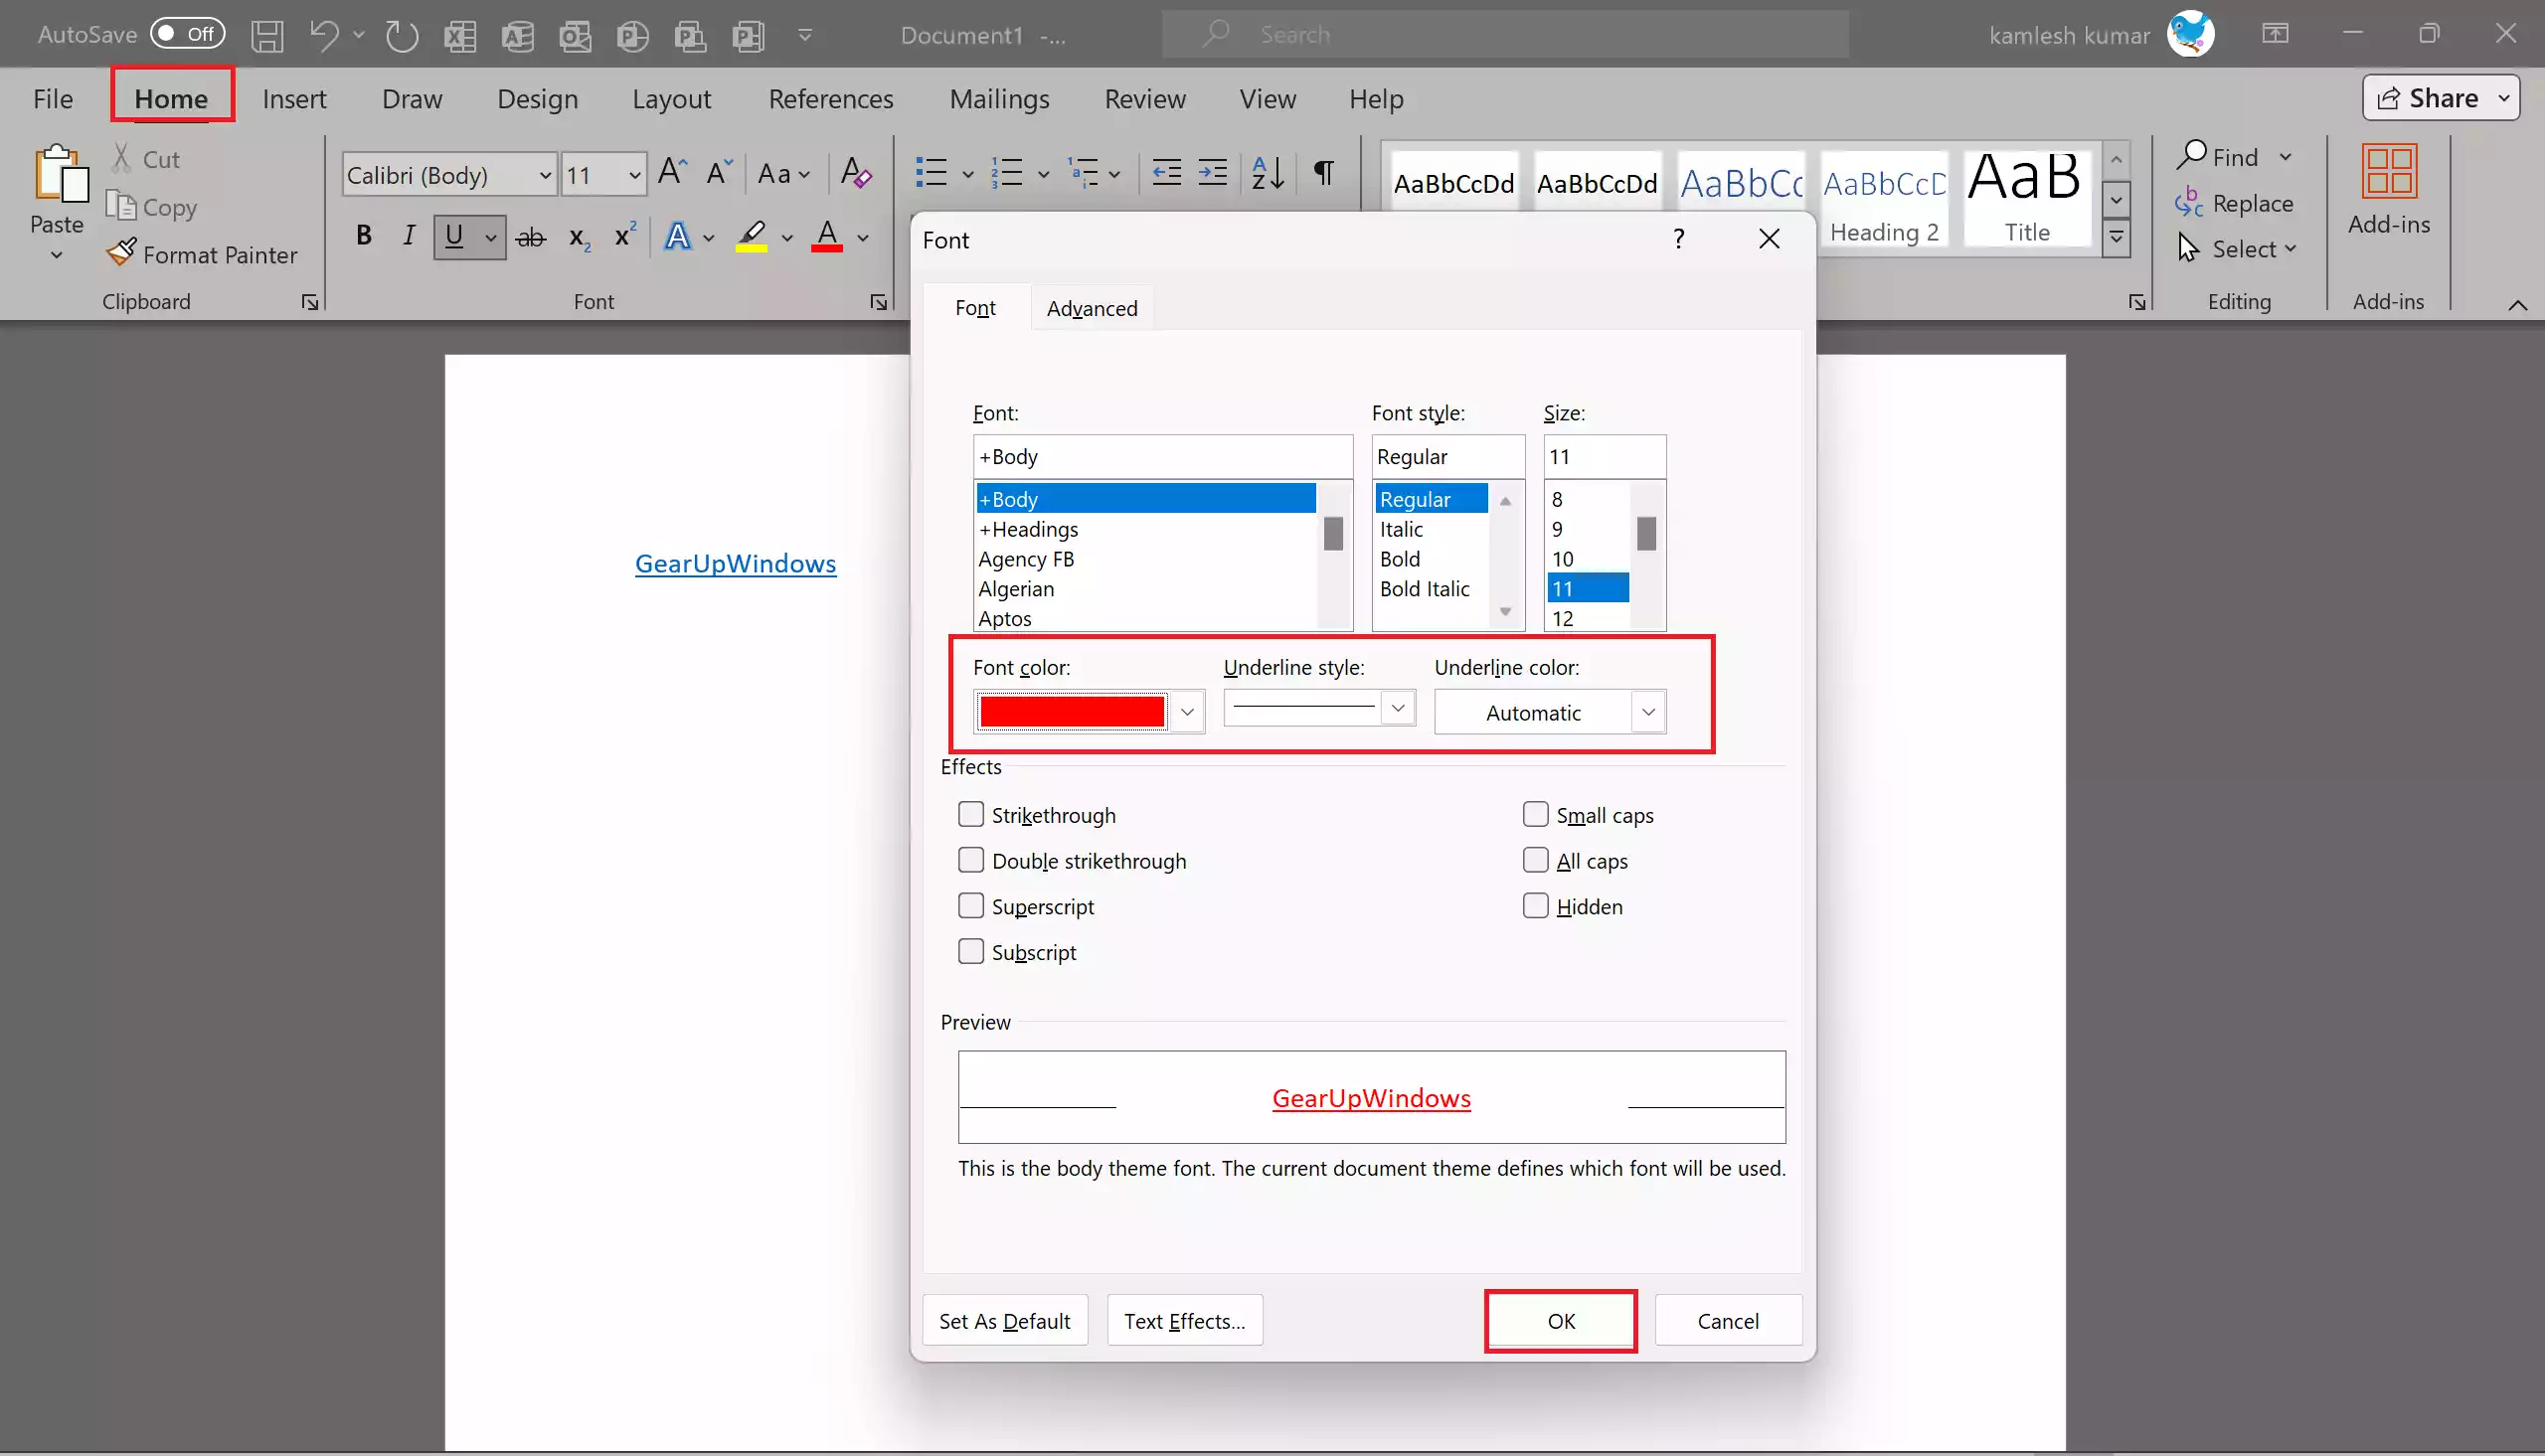
Step 6. You can choose to underline hyperlinks for better visibility. To do this, simply use the underline formatting option in the “Font” dialog box.
Step 7. You can also change the font style, size, or any other formatting attributes to make the hyperlink stand out.
Step 8. It’s a good practice to preview your document to ensure the hyperlinks work as expected. Click on the hyperlinks to test them.
Step 9. Once editing is done, click OK to save the changes.
Remember that hyperlink formatting should be consistent throughout your document to maintain a professional appearance.
Conclusion
Adding and formatting hyperlinks in Microsoft Word is a straightforward process that can greatly enhance the functionality and interactivity of your documents. Whether you’re creating a report, a presentation, or any other document, using hyperlinks effectively can improve the user experience and provide easy access to additional resources or information.