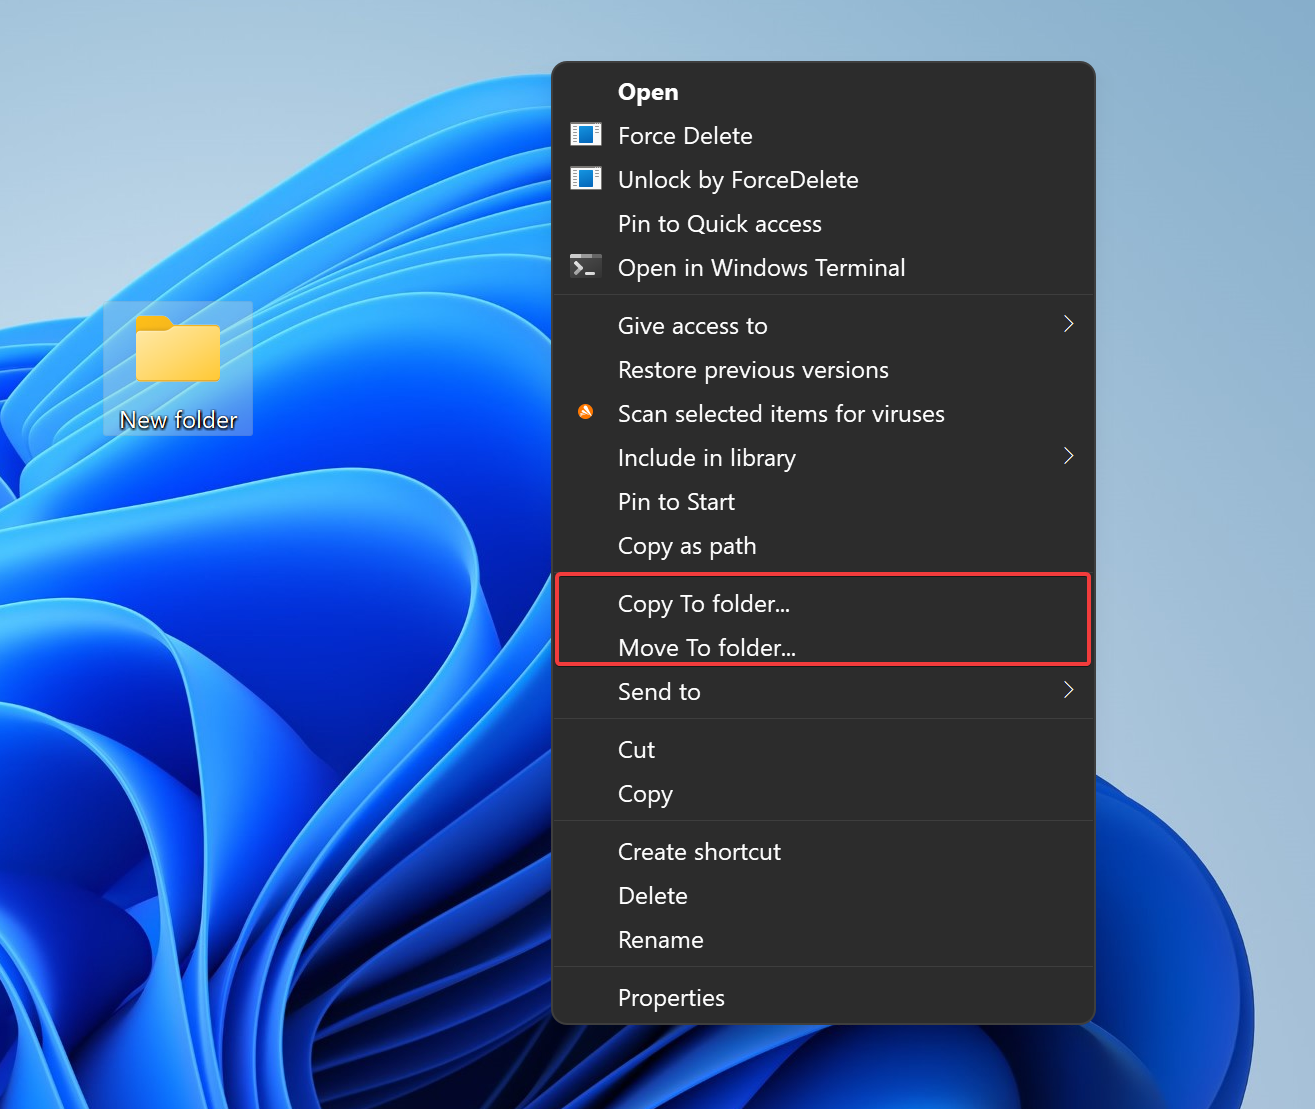
Suppose you frequently copy or move files/folders from one location to another on a Windows 11/10 computer. In that case, this gearupwindows will help you to add “Copy To folder” and “Move To folder” options in the context menu. After enabling these options in the context menu, when you right-click on file/folder, you will find the “Copy To folder” and “Move To folder” options in the classic context menu. It will help you to copy or move items to different locations quickly.
Although, you can move or copy files/folders on Windows 11/10 with simple drag-and-drop gestures. You can also use a shortcut key, “Ctrl + C,” to copy an item, then you can paste to a different location by pressing the “Ctrl + V” shortcut. To move an item from one place to another, use the shortcut keys “Ctrl + X” to cut and paste it into another location using the “Ctrl + V” keyboard shortcut.
How to Add or Remove “Move To folder” to Context Menu on Windows 11/10?
To add the “Move To folder” option to the context menu, use the following steps:-
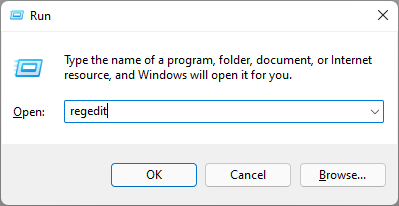
Step 1. Press Windows + R keys from the keyboard to open the Run box.
Step 2. In the Run box, type regedit and hit Enter from the keyboard to open the Registry Editor window.
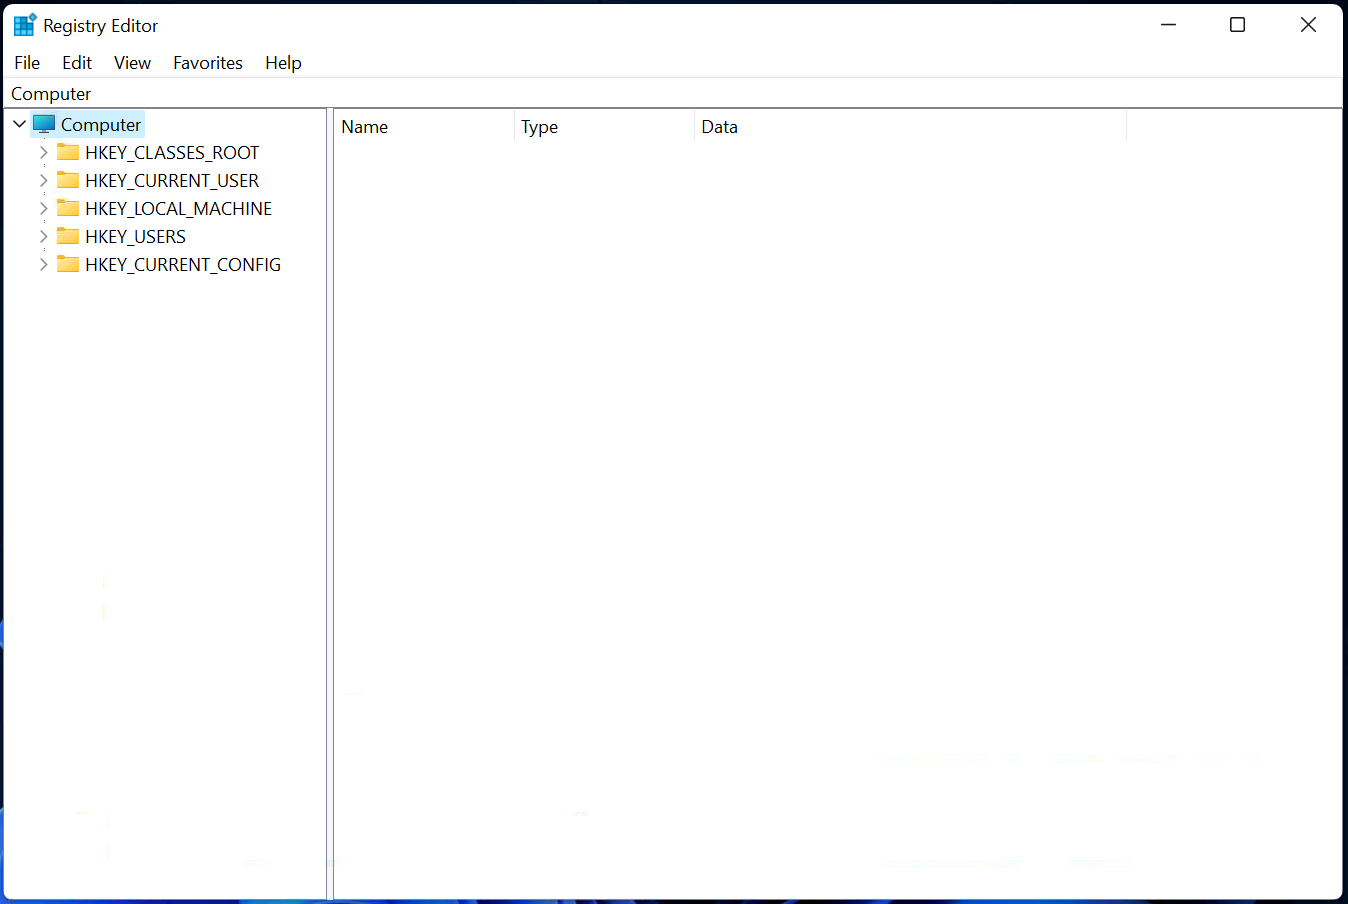
Step 3. In the Registry Editor window, navigate or browse for the following key from the left sidebar:-
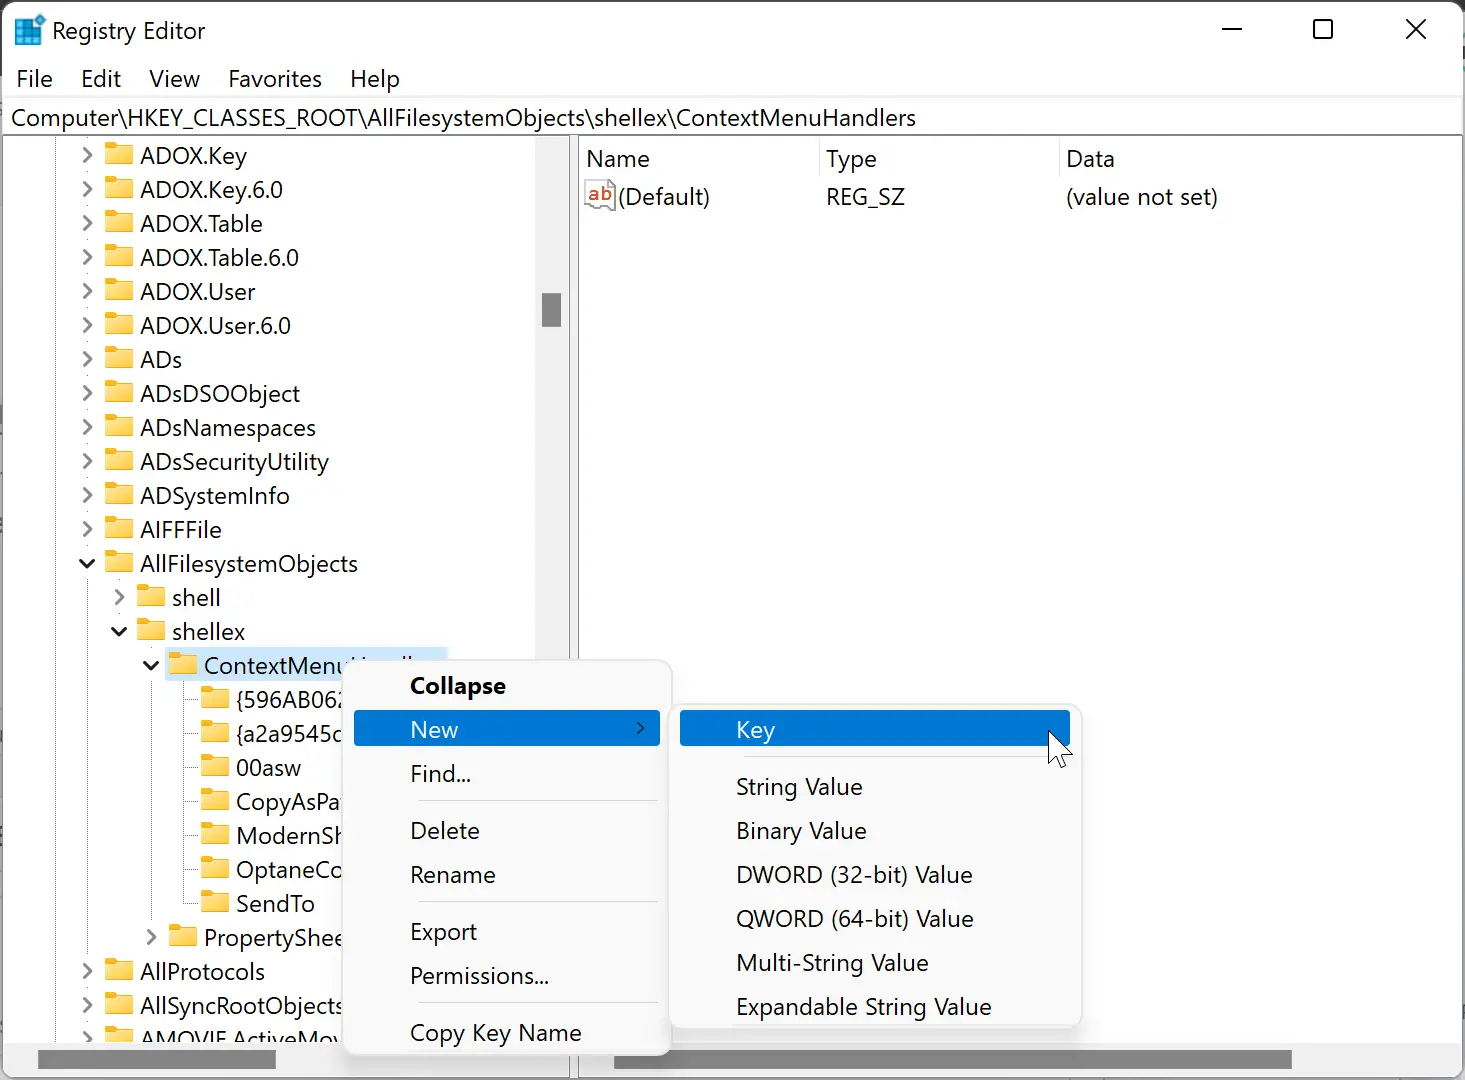
HKEY_CLASSES_ROOT\AllFilesystemObjects\shellex\ContextMenuHandlers
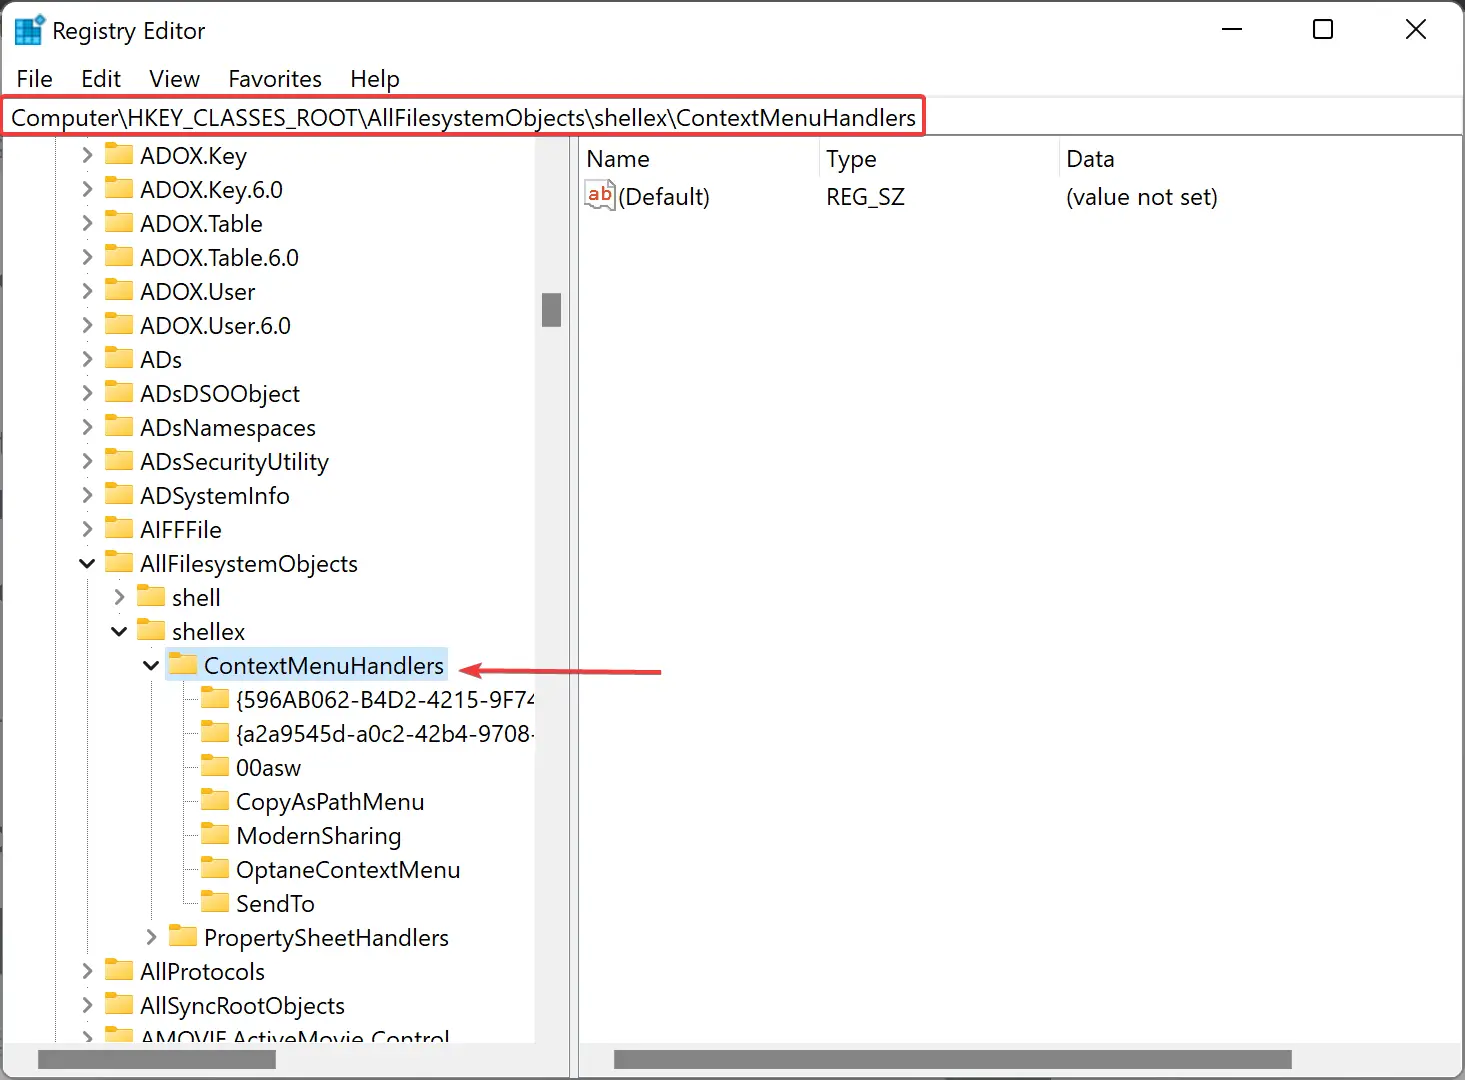
Step 4. Then right-click on the ContextMenuHandlers folder and select the New > Key option. Name it Move to folder.
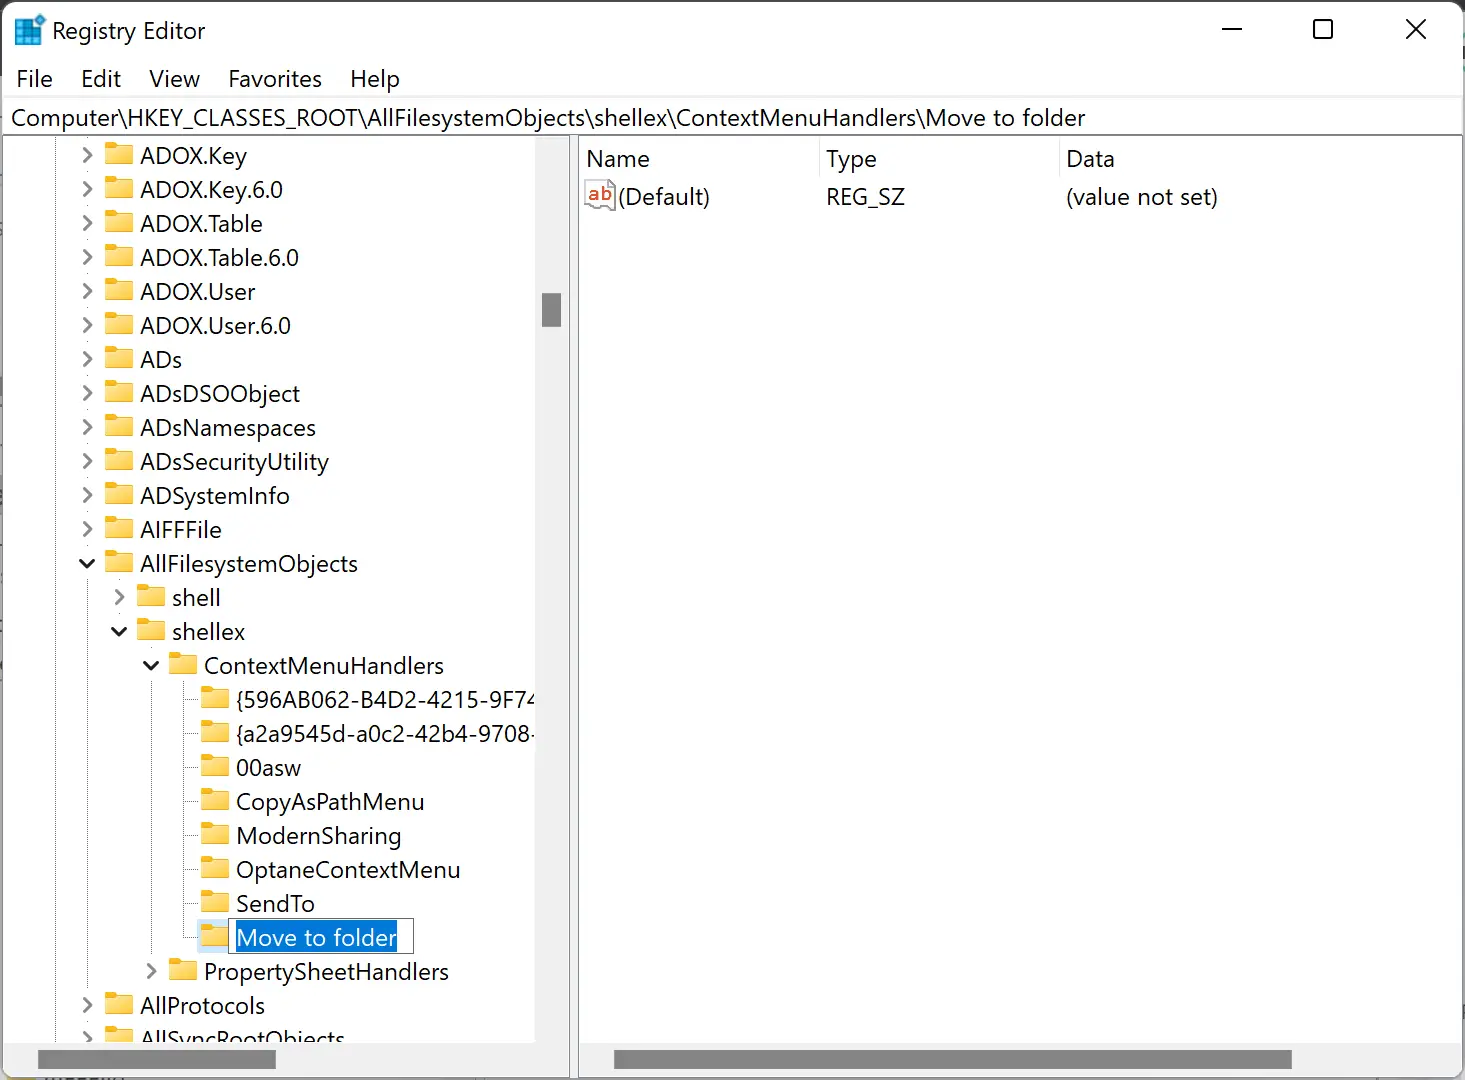
Step 5. On the opposite side of “Move to folder,” you will see a (Default) string. Double-click on it, modify and then enter the following:-
{C2FBB631-2971-11D1-A18C-00C04FD75D13}
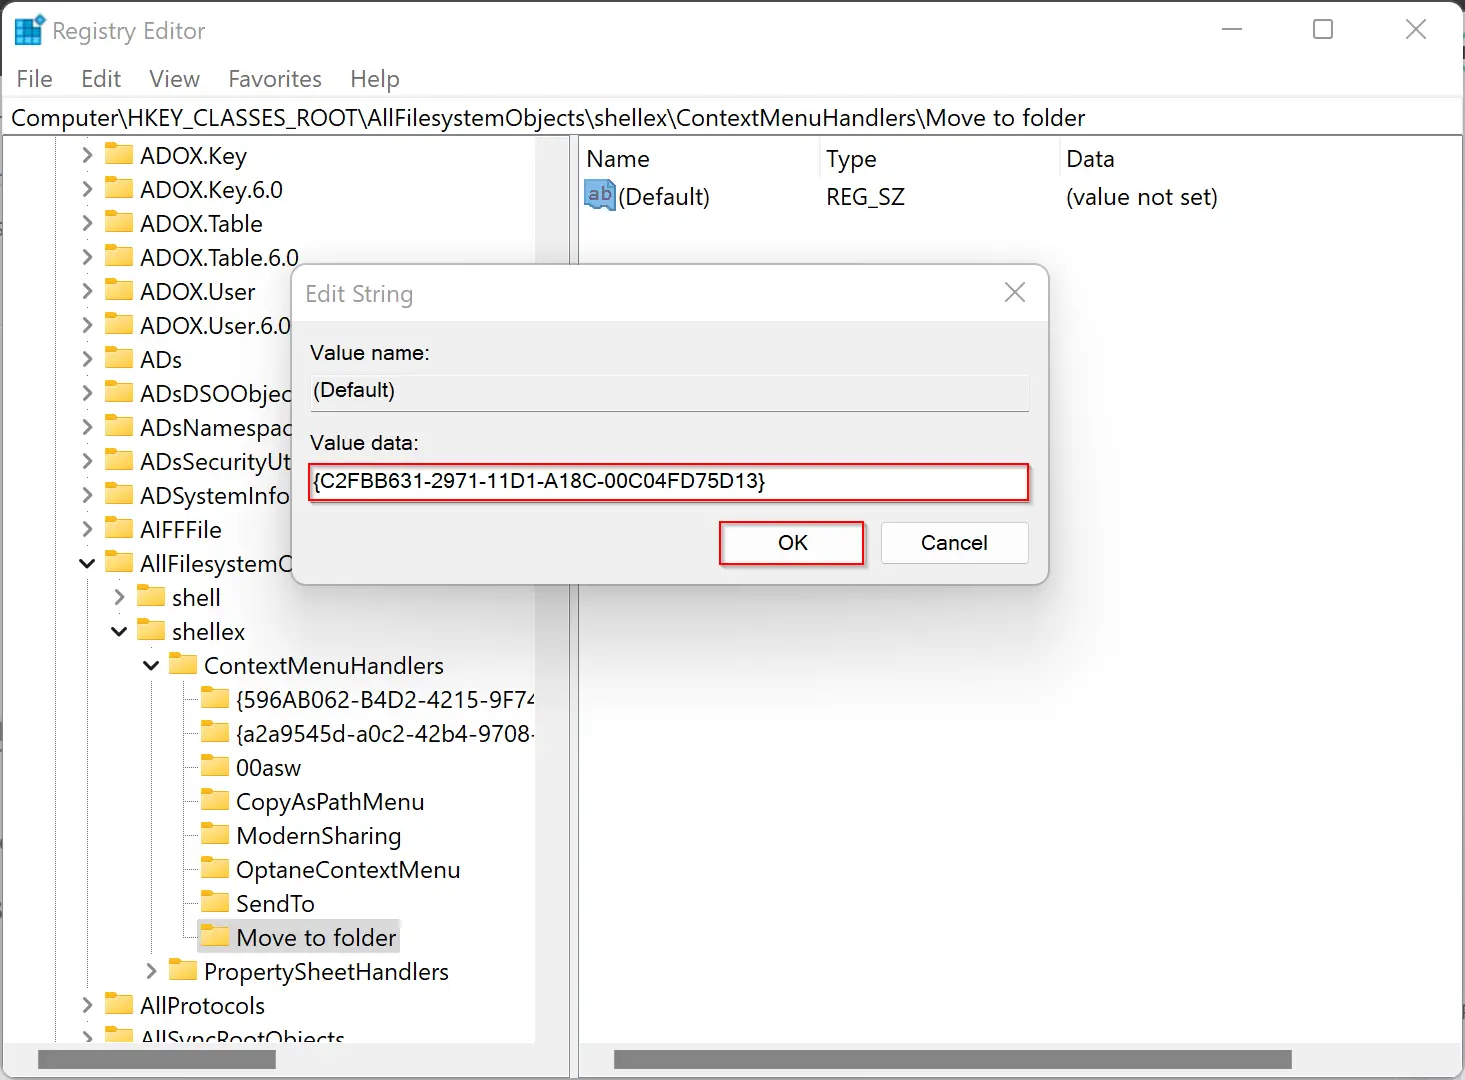
Step 6. Then click OK.
You will see the “Move To folder” option in the Classic Context Menu when you complete the above steps.
If you want to remove the “Move To folder” option from the context menu, navigate to the following key in the registry editor:-
Computer\HKEY_CLASSES_ROOT\AllFilesystemObjects\shellex\ContextMenuHandlers\Move to folder
Then right-click on “Move to folder” and select the Delete option. Click Yes to confirm.
How to Add or Remove “Copy To folder” to Context Menu on Windows 11/10?
To add the “Move To folder” option to the context menu, use the following steps:-
Step 1. Press Windows + R keys from the keyboard to open the Run box.
Step 2. In the Run box, type regedit and hit Enter from the keyboard to open the Registry Editor window.
Step 3. In the Registry Editor window, navigate or browse for the following key from the left sidebar:-
HKEY_CLASSES_ROOT\AllFilesystemObjects\shellex\ContextMenuHandlers
Step 4. Then right-click on the ContextMenuHandlers folder and select the New > Key option. Name it Copy to folder.
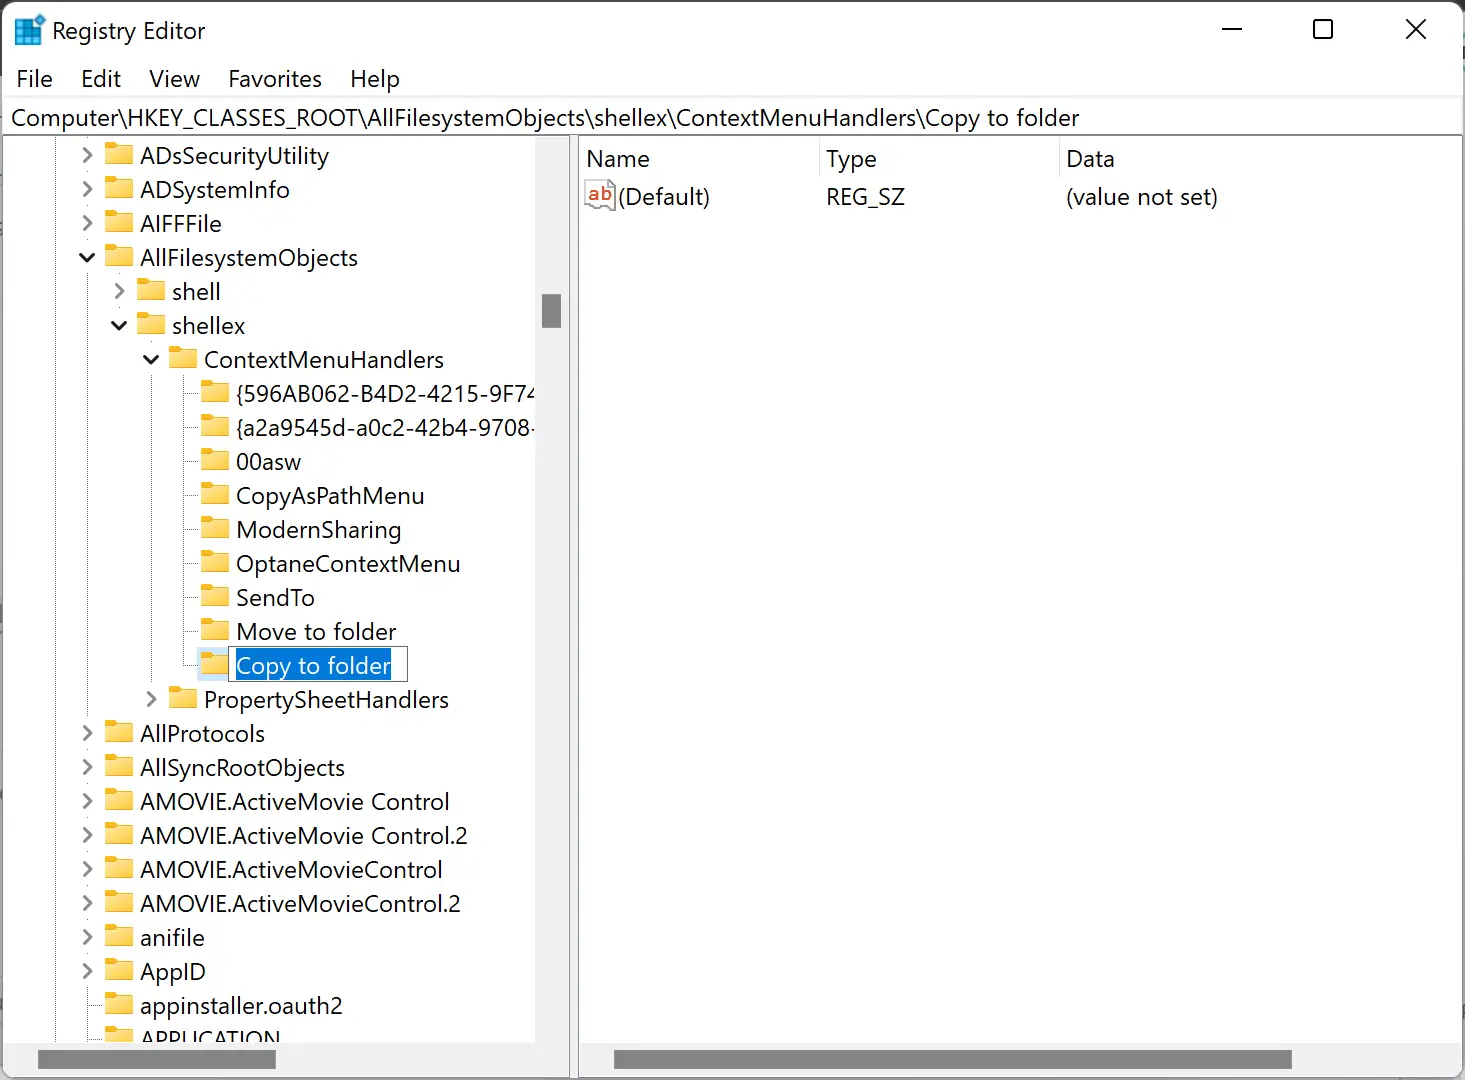
Step 5. On the opposite side of “Copy to folder,” you will see a (Default) string. Double-click on it, modify and then enter the following value:-
{C2FBB630-2971-11D1-A18C-00C04FD75D13}
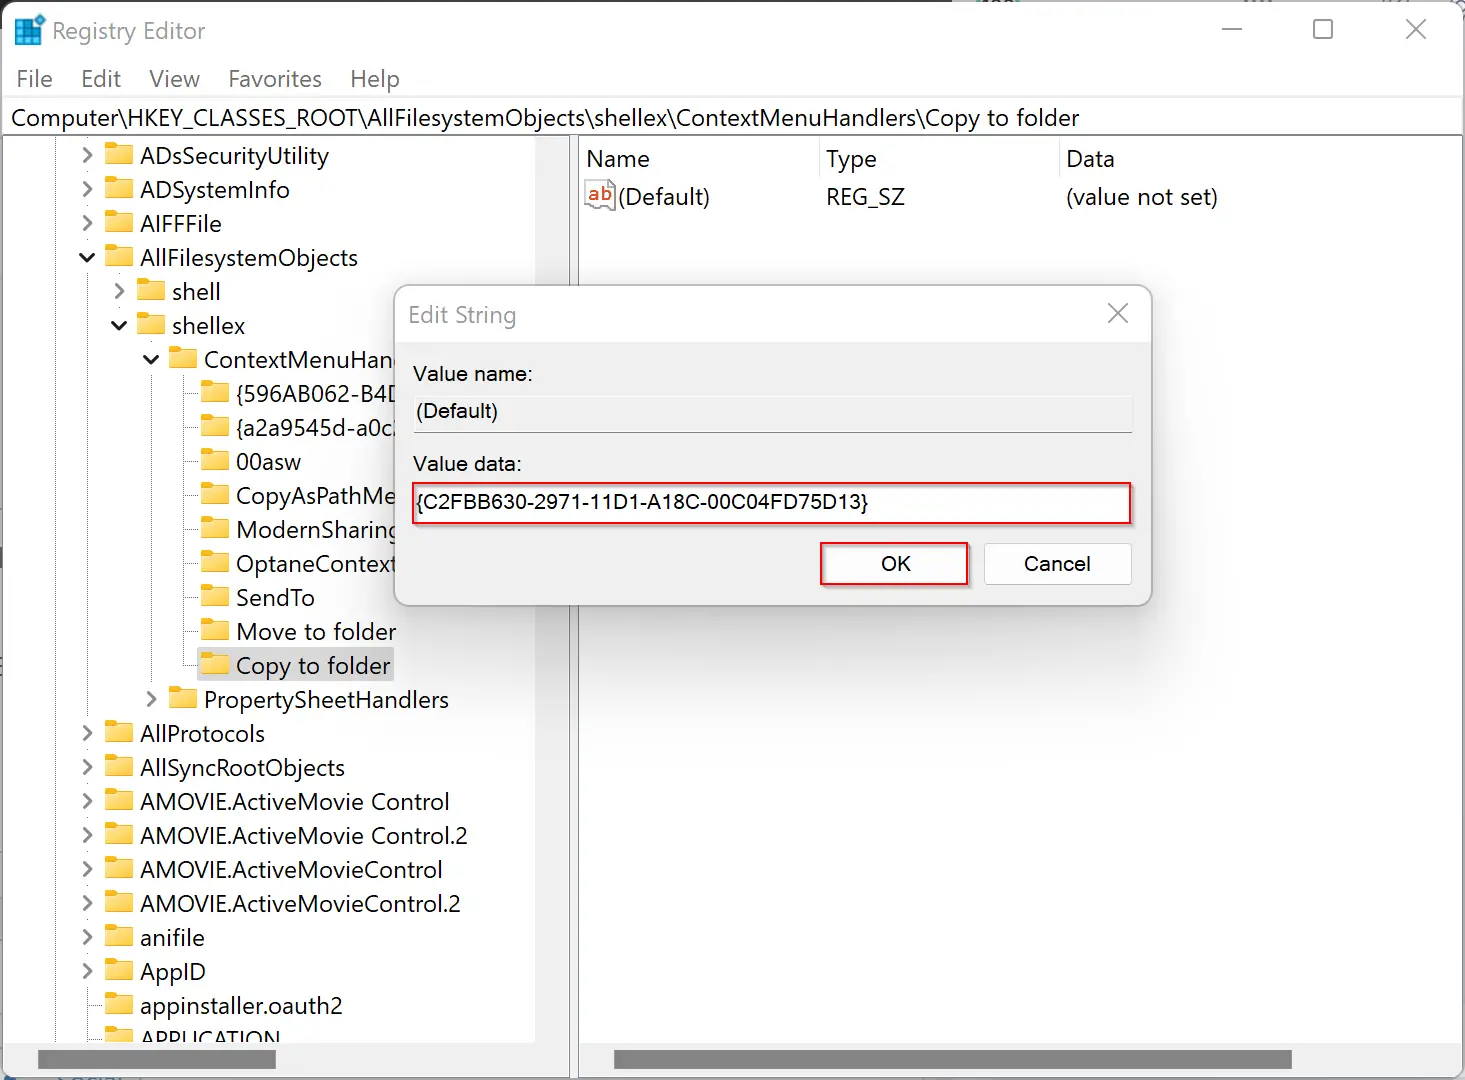
Step 6. Click OK to save the changes.
Once you complete the above steps, the “Copy To folder” will appear in the classic context menu.
In the future, if you no more require the “Copy To folder” option in the classic context menu, navigate to the following key in the registry editor:-
Computer\HKEY_CLASSES_ROOT\AllFilesystemObjects\shellex\ContextMenuHandlers\Copy to folder
Then right-click on the “Copy to folder” key and select the Delete option. When prompted, click the Yes button.
How to Use “Move To folder” and “Copy To folder” Options?
To use the “Move To folder” and “Copy To folder” options, use these steps:-
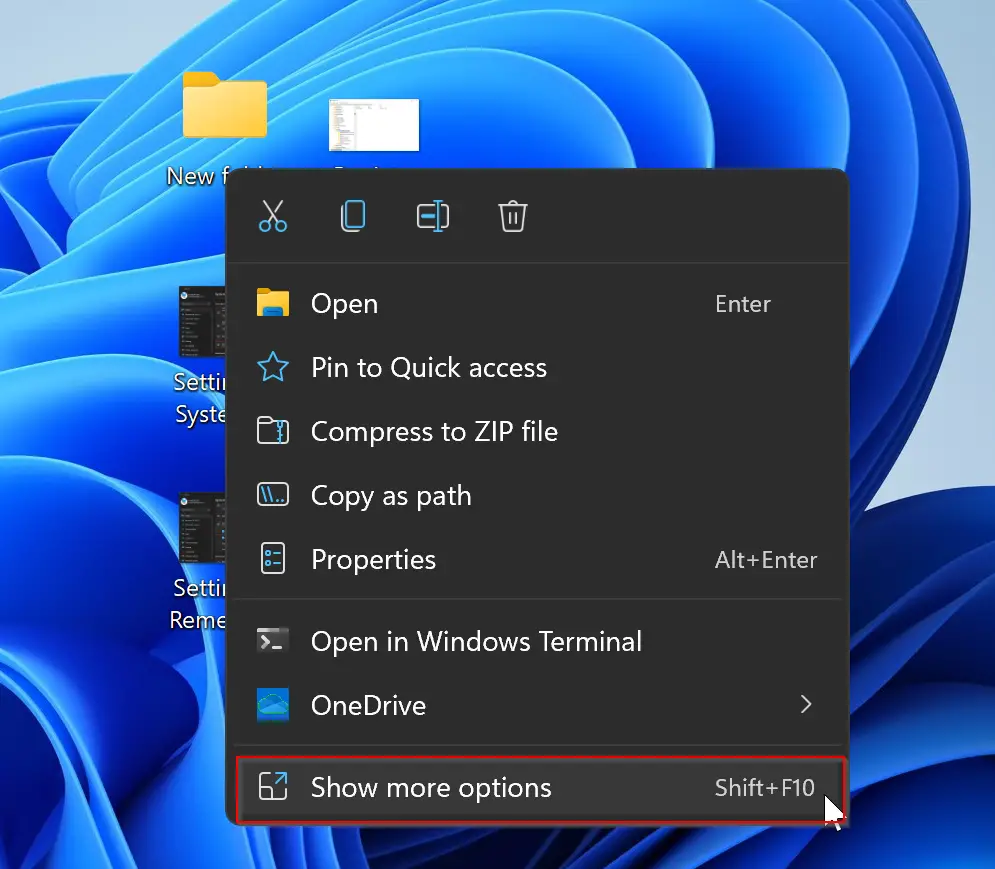
Step 1. Right-click on file(s)/folder(s) and select Show more options (if you are using Windows 11) in the context menu.
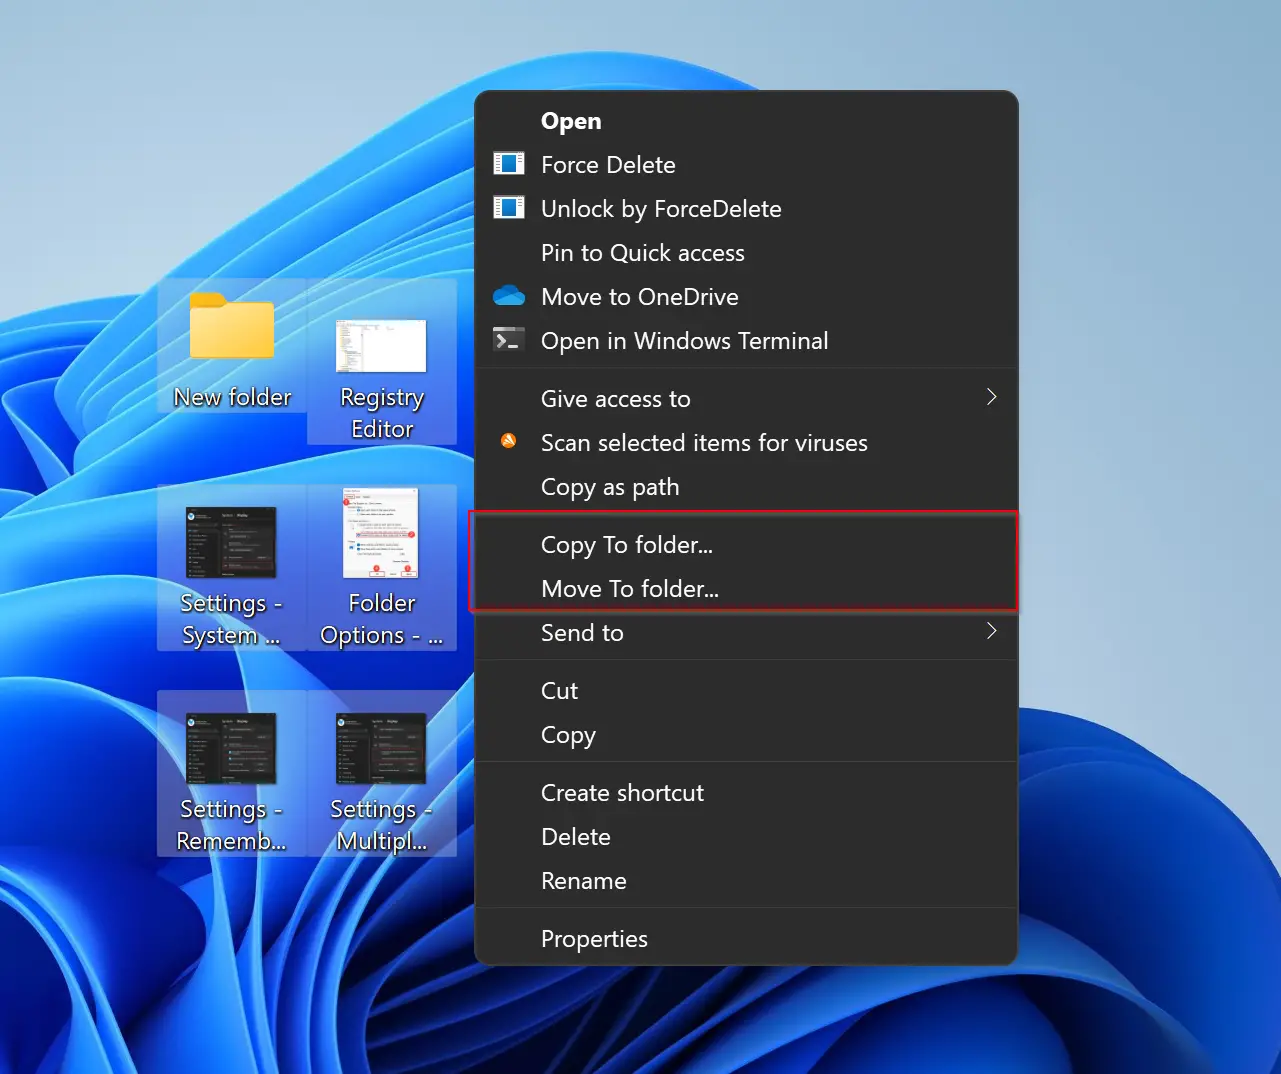
Step 2. In the classic context menu, select the desired option “Copy To folder” or “Move To folder.”
Step 3. Select the destination location and click the Copy/Move button.
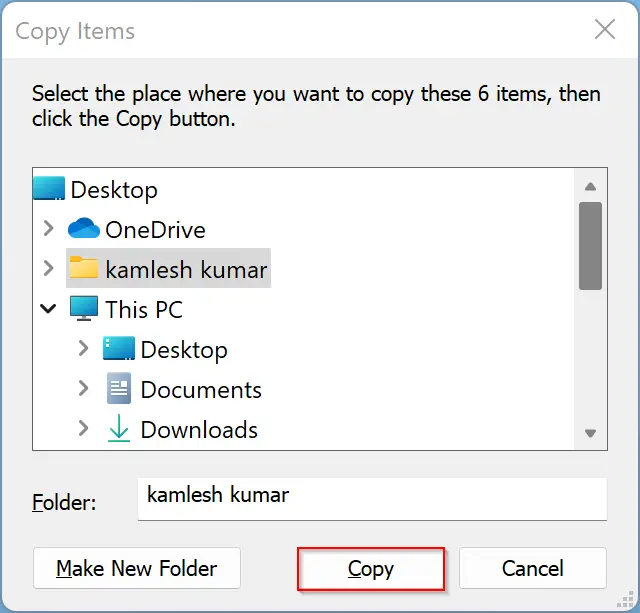

That’s it.
You can apply the steps mentioned above for Windows 7 and Windows 8 operating systems also if you want to add “Copy To folder” and “Move To folder” options in the context menu.
Conclusion
In conclusion, adding the “Copy To folder” and “Move To folder” options to the context menu in Windows 11/10 can be useful for those who frequently copy or move files/folders from one location to another. While there are other ways to copy or move items, using these options in the context menu can help you do it more quickly. The process of adding or removing these options is simple and can be done by following the steps mentioned in this article. These steps can also be applied to Windows 7 and Windows 8 operating systems. Overall, adding these options to the context menu can make file management on Windows more efficient and convenient.
can not drag file to folder nor can i find move to folder when i right click. WHY IN HELL CAN”T THIS WORK LIKE WINDOWS 10??????
Awesome, this worked!! I used to use all the time with Windows 10, then upgraded and it was gone!!
I followed the instructions to add “move to folder” in the context menu for Windows 11. After rebooting, the move to folder does does show up in the context menu. Copy remains but not move. I doubled checked the registry key to ensure no typos. What might I have done wrong?
Dear Glenn,
I rechecked and looks everything in order.
This didn’t work at all.
I’ve tried hitting more options. THERE’S NO MOVE TO FOLDER, OR COPY TO FOLDER. THERE’S MOVE TO, AND THEN I GET A POP UP WITH A SELECTION OF 5 PLACES, TO A ZOP FOLDER, TO LIBRARY, TO DESKTOP, EYC BUTO NO MOVE TO FOLDER. AND AM UNABLE TO CLICK AND DROP!!
Hi,
I have created a video to demonstrate this article; it is still working on Windows 11 22H2. You can watch it at https://www.youtube.com/watch?v=A-rvkMQVmHI
Worked seamlessly! Thank you!
You are welcome.
it worked, thanks a lot
Welcome.