Everybody wants to connect to the fastest Wireless connection when multiple network hotspots are available nearby you. However, Windows 11 and 10 are not configured to auto-switch to the most robust Wi-Fi network. WiFinian is a freeware application that allows you to automatically switch to the best network nearby. But, those Windows users who don’t prefer to use a third-party application can also configure the Wi-Fi adapter manually to select the strongest network automatically.
You need to modify the Roaming Aggressiveness value for your Wi-Fi adapter for auto-switching. This will set the signal strength at a limit; after that, the Wi-Fi adapter will start scanning for another AP (Access Point) or hotspot.
In this gearupwindows article, we will guide you on automatically connecting to the strongest Wi-Fi network in Windows 11 and 10.
How to Automatically Switch to the Strongest Wi-Fi Network in Windows 11 or 10?
To automatically connect to the strongest Wi-Fi network in Windows 11 or 10, use these steps:-
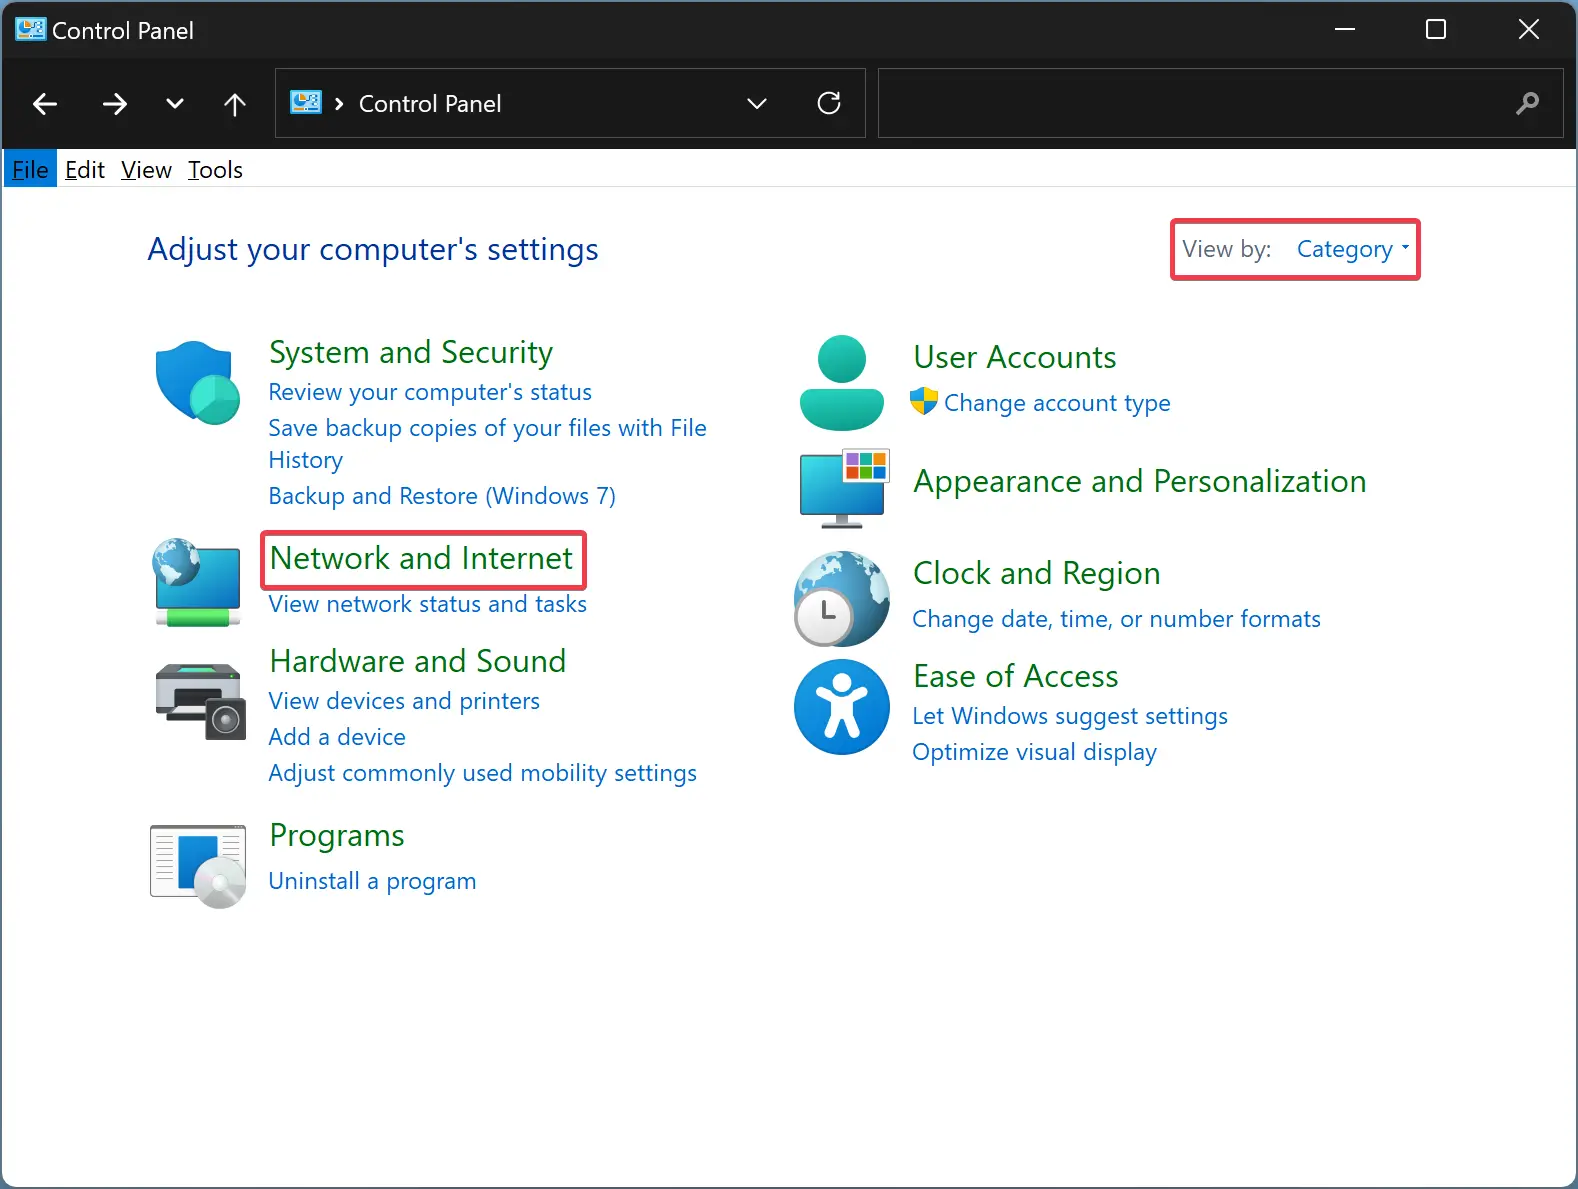
Step 1. Open Control Panel.
Step 2. Then, click on Network & Internet after setting “View by” to “Category.”
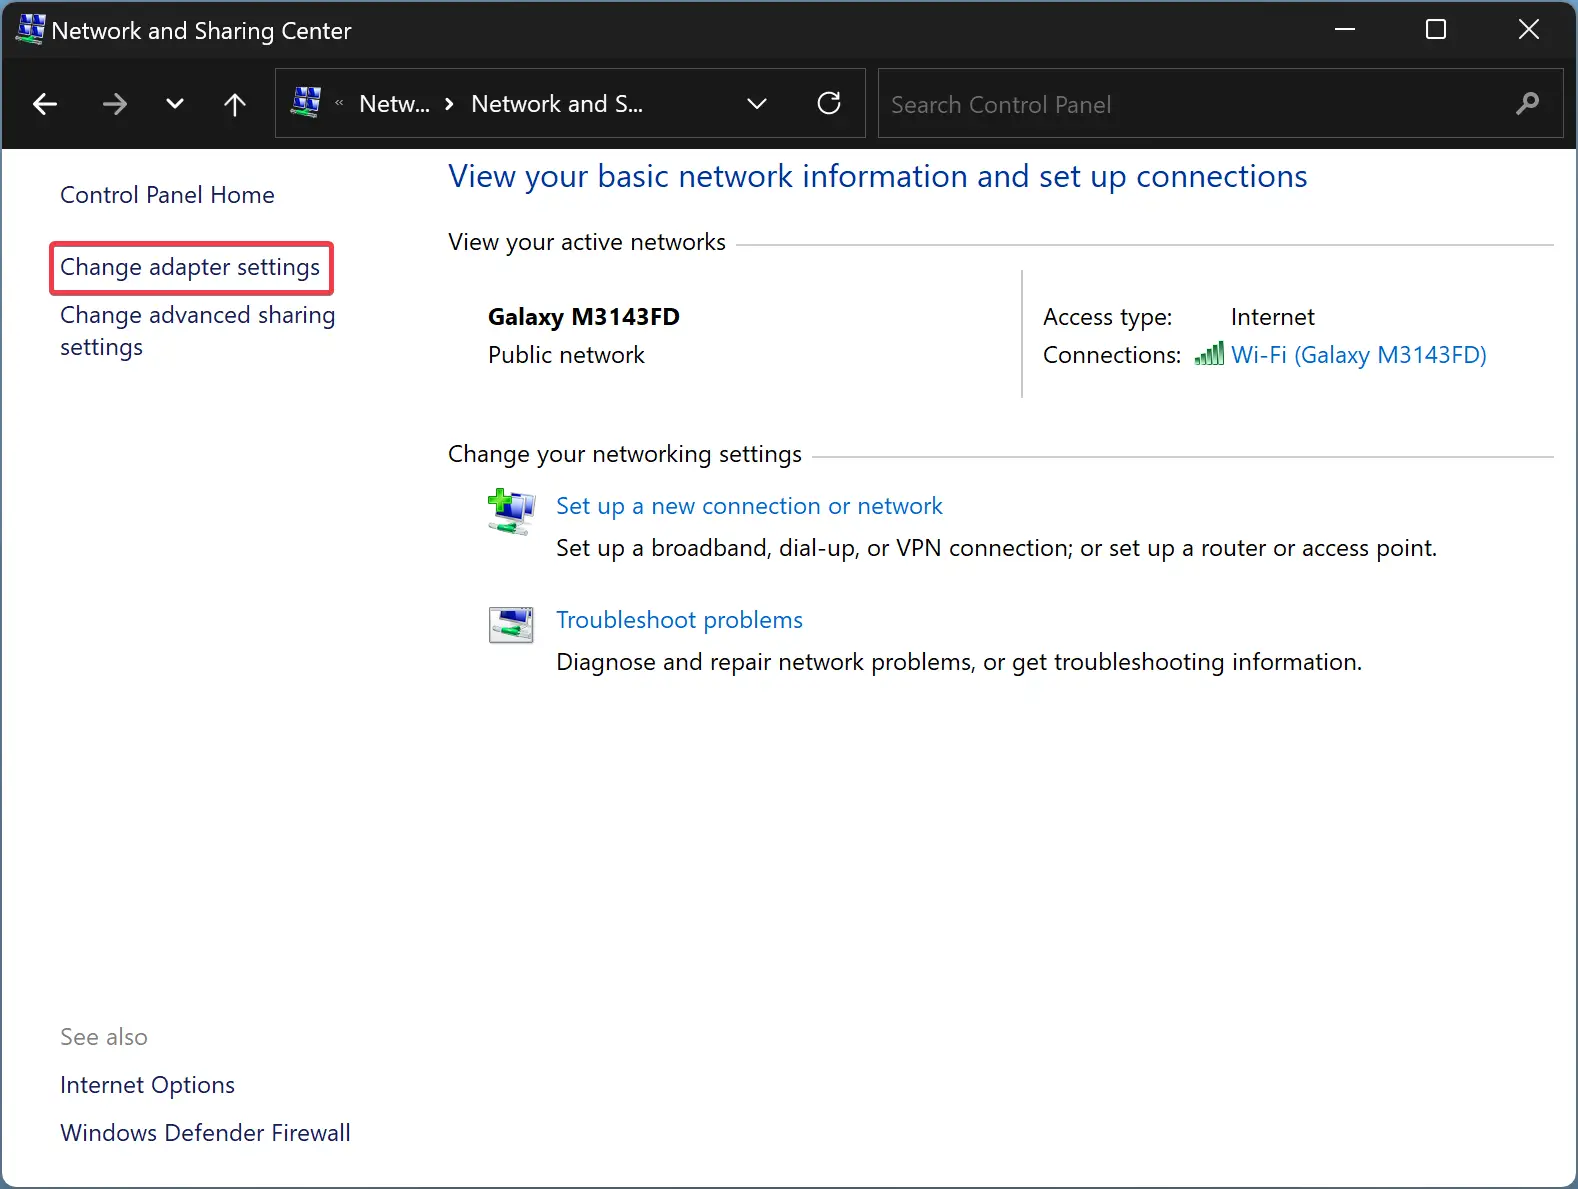
Step 3. Click on the Network and Sharing Center.

Step 4. On the left sidebar, click on the Change adapter settings.
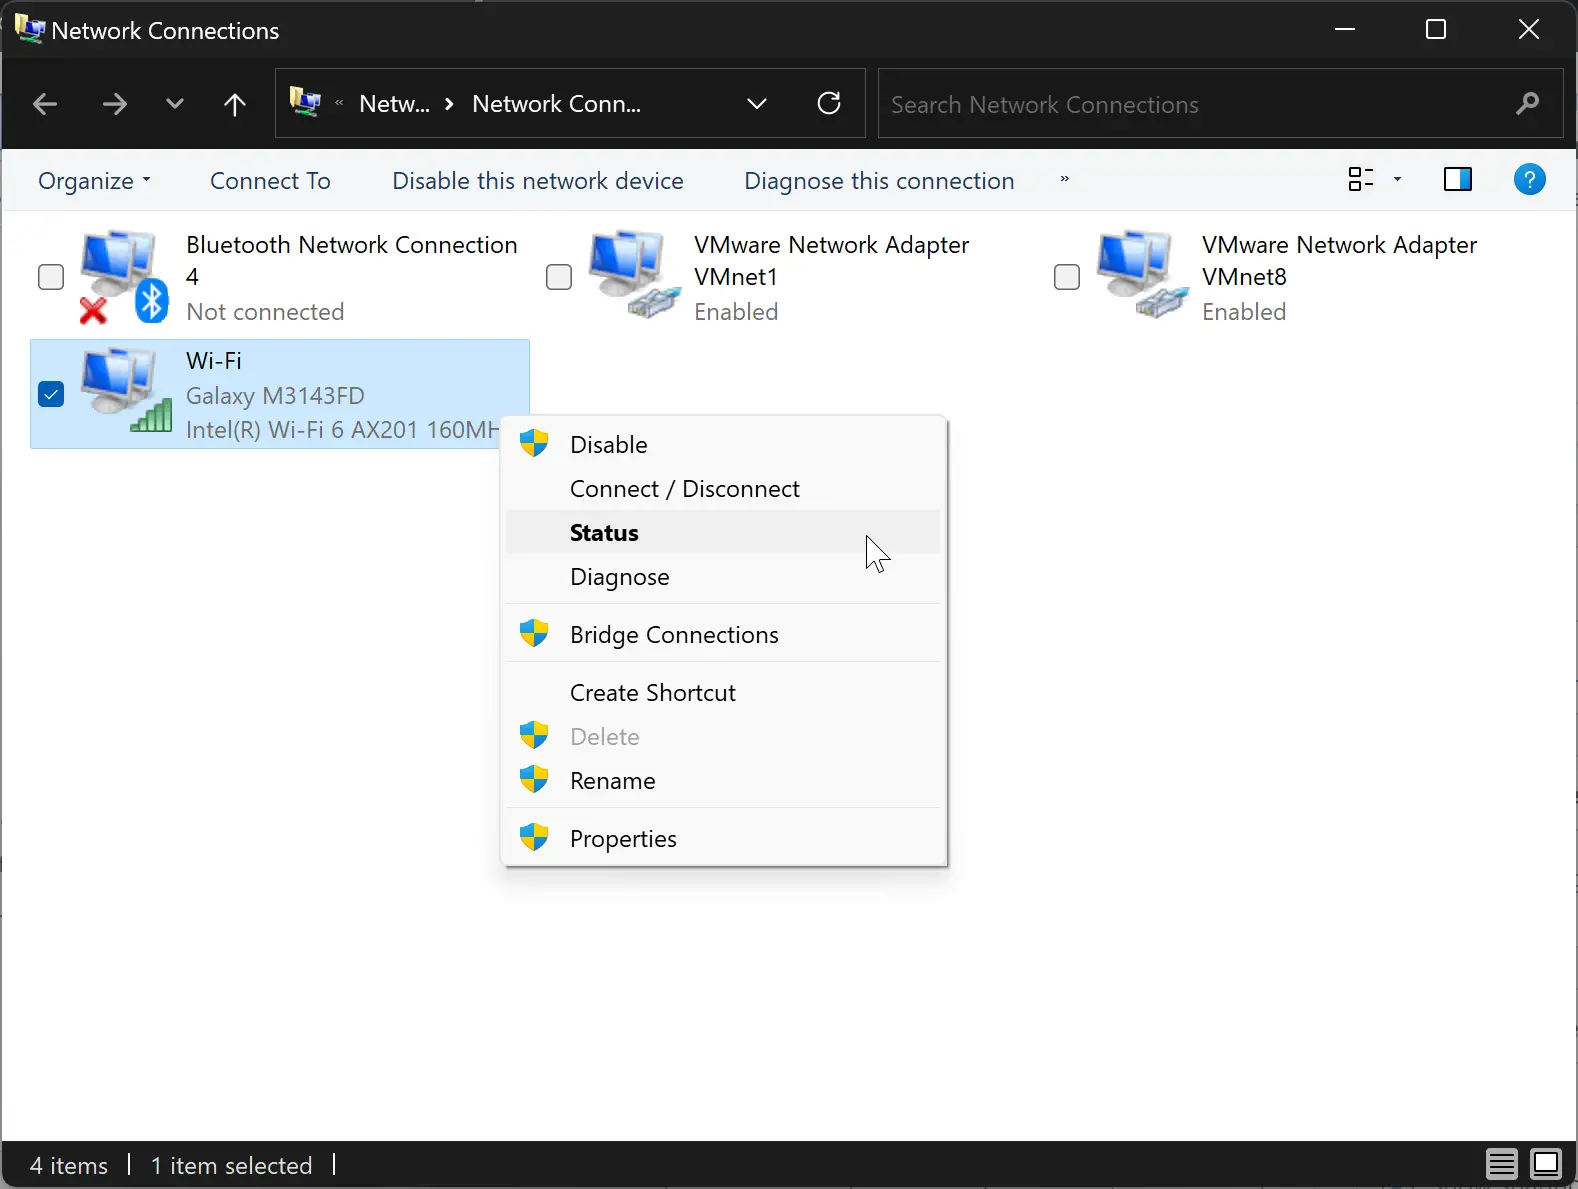
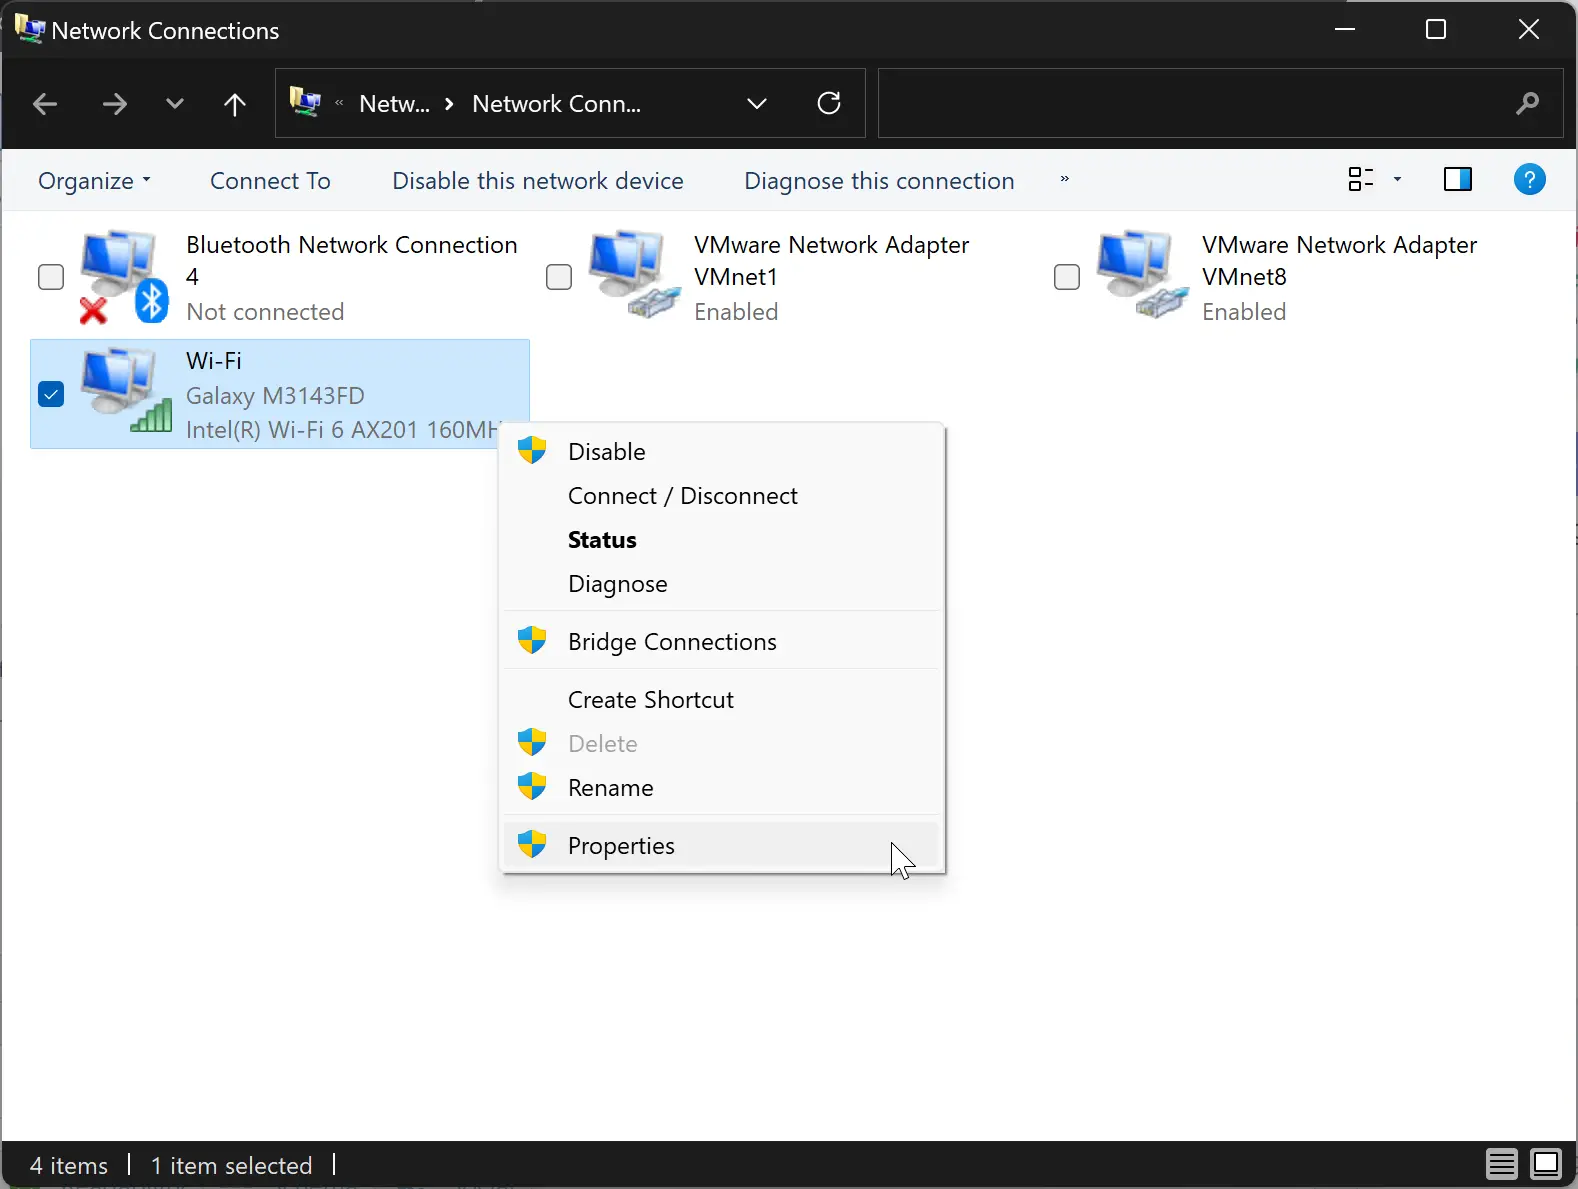
Step 5. Select the Wi-Fi adapter, right-click on it, and choose the Status in the menu.
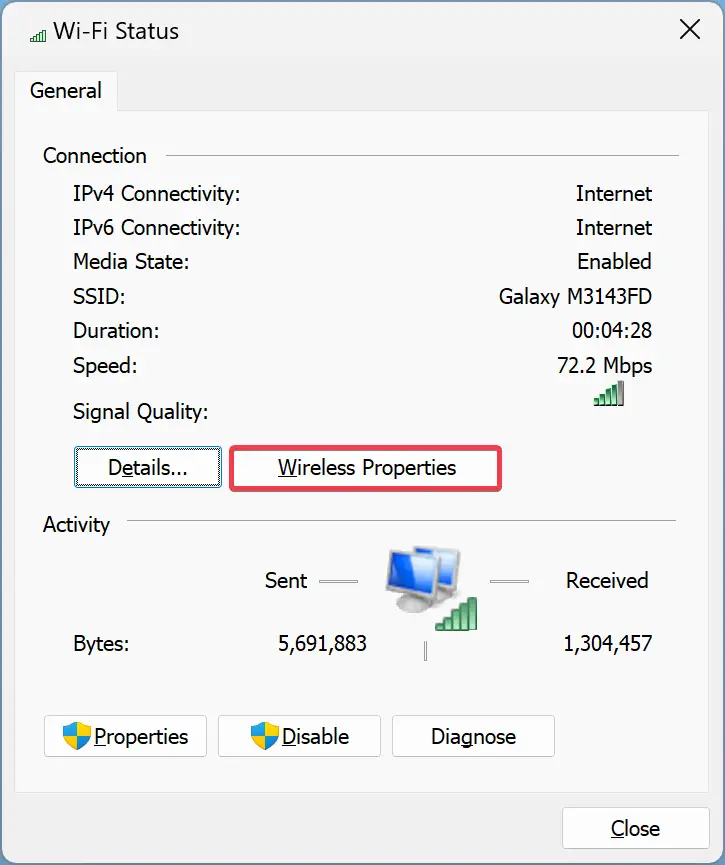
Step 6. In the Wi-Fi Status dialog, click the Wireless Properties button.
Step 7. In the following window, check the “Connect automatically when this network is in range” and “Look for other wireless networks while connected to this network” options.
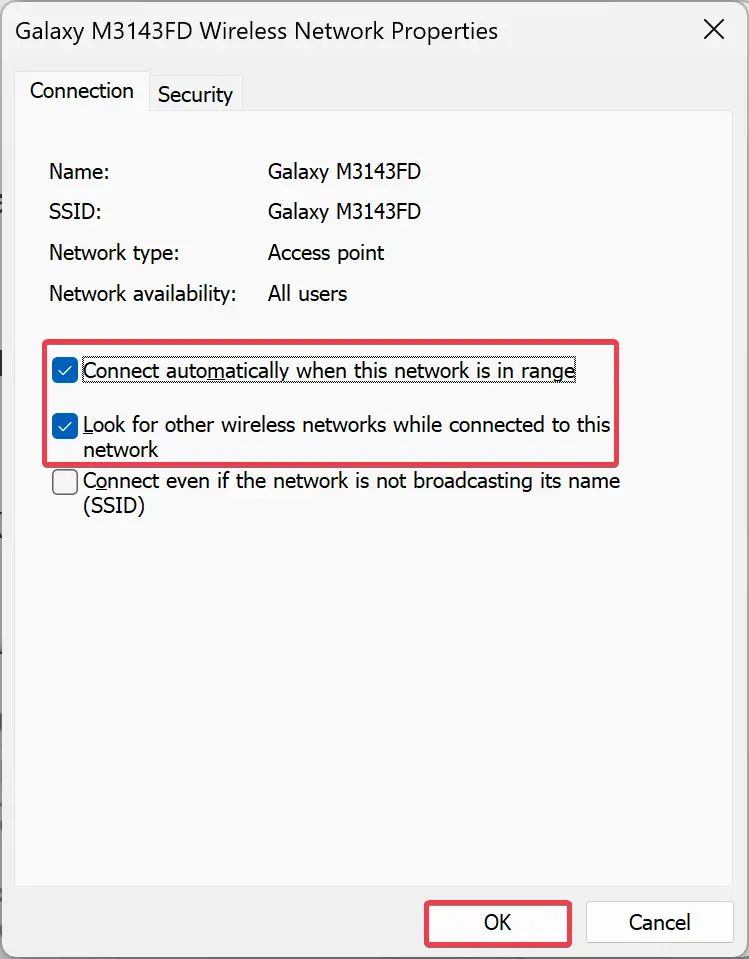
Step 8. Click OK.
Now, you need to modify the Roaming Aggressiveness value for your Wi-Fi adapter for auto-switching. To do that, perform the following steps:-
Step 1. Open Control Panel.
Step 2. Then, click on Network & Internet after setting “View by” to “Category.”
Step 3. Click on the Network and Sharing Center.
Step 4. On the left sidebar, click on the Change adapter settings.
Step 5. Select the Wi-Fi adapter, right-click on it, and choose the Properties in the menu.
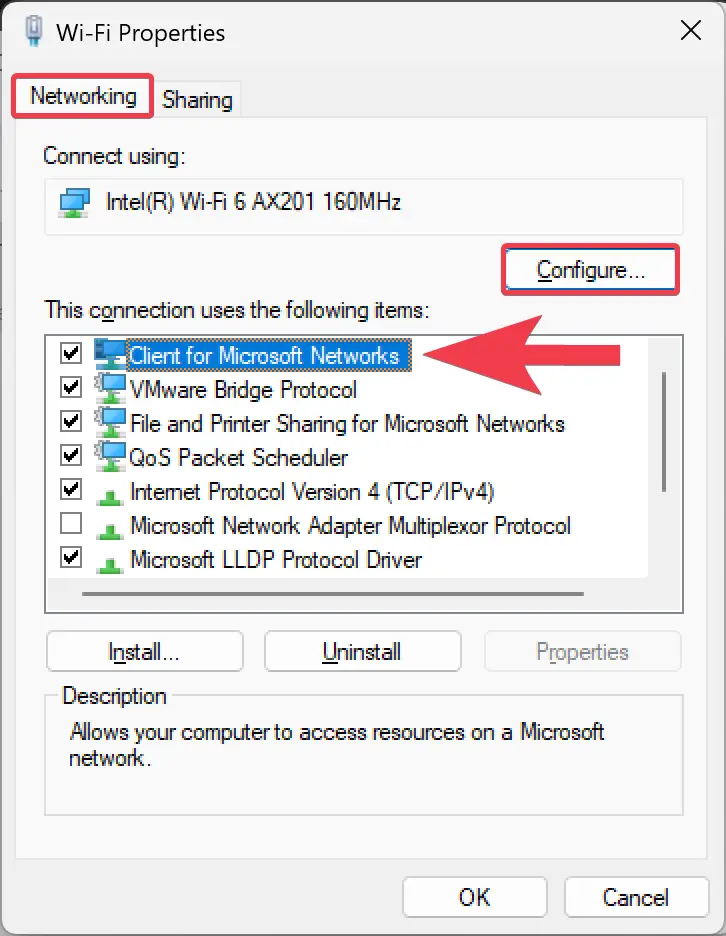
Step 6. In the Wi-Fi Properties dialog, switch to the Networking tab. Select the “Client for Microsoft Network” option and click the Configure button.
Step 7. In the next window, switch to the Advanced tab.
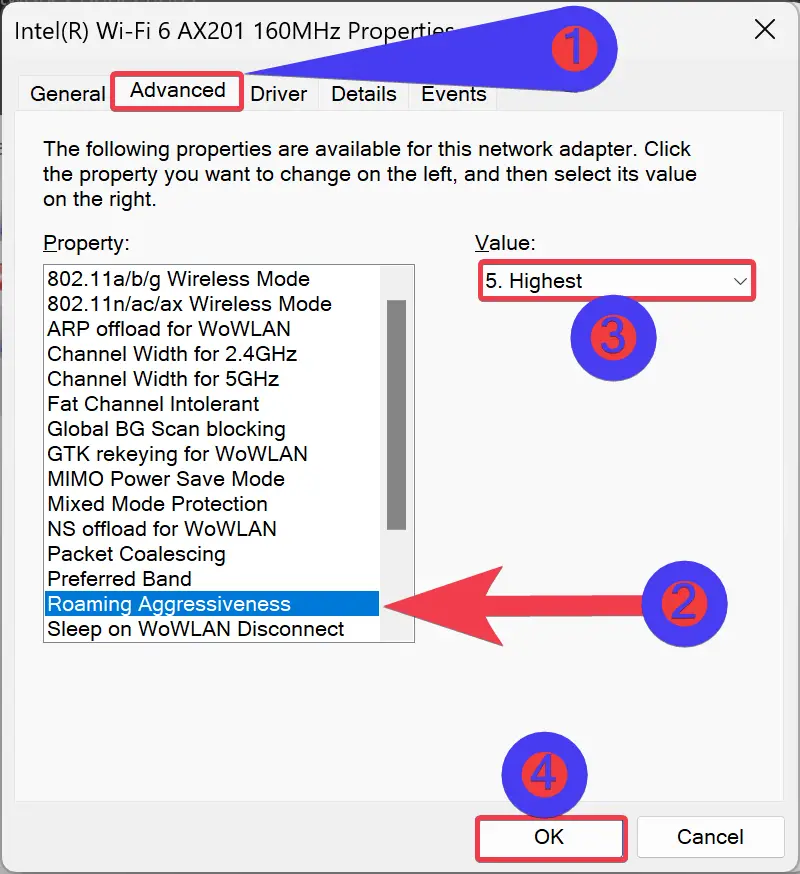
Step 8. Select the Roaming Aggressiveness option under the Property section.
Step 9. Use the drop-down menu “Value” and choose 5. Highest.
Quick Note: By default, Roaming Aggressiveness is set to 3. Medium.
Step 10. Click OK.
Step 11. Finally, restart your computer for the changes to take effect.
Once you complete the above steps, your Windows 11 or 10 computer will automatically connect to the strongest Wi-Fi network nearby you. And, if you have already connected to a weak Wi-Fi network, it will automatically switch to a stronger network.
Conclusion
In conclusion, having a strong and stable Wi-Fi connection is essential for seamless browsing and streaming experience. While Windows 11 and 10 do not come with a built-in auto-switching feature to connect to the strongest network automatically, users can use third-party applications or follow the steps mentioned above to configure their Wi-Fi adapter manually. By modifying the Roaming Aggressiveness value for the Wi-Fi adapter, users can ensure that their device automatically switches to the best available network without any interruption. Whether you choose to use a third-party application or configure the adapter manually, a robust Wi-Fi connection will undoubtedly enhance your browsing and streaming experience.
have the roaming agressivness on highest. Makes no difference at all.