Maybe your Windows 11 PC is not working properly, and you suspect that a recently installed update is causing issues on your PC. If you want to know which updates were recently installed on your Windows 11 PC, this gearupwindows article will guide you in viewing Windows Update history.
By default, Windows 11 downloads and installs updates automatically. So that your operating system will be up to date, rarely an unfinished or buggy update might cause you trouble. If your Windows PC starts acting, you might want to check if a recent update was causing the issue before resetting the Windows 11 installation.
How to View Update History in Windows 11 using the Settings app?
To view update history in Windows 11 using the Settings app, do the following:-
Step 1. At first, open the Settings app by pressing the Windows + I keys on the keyboard.
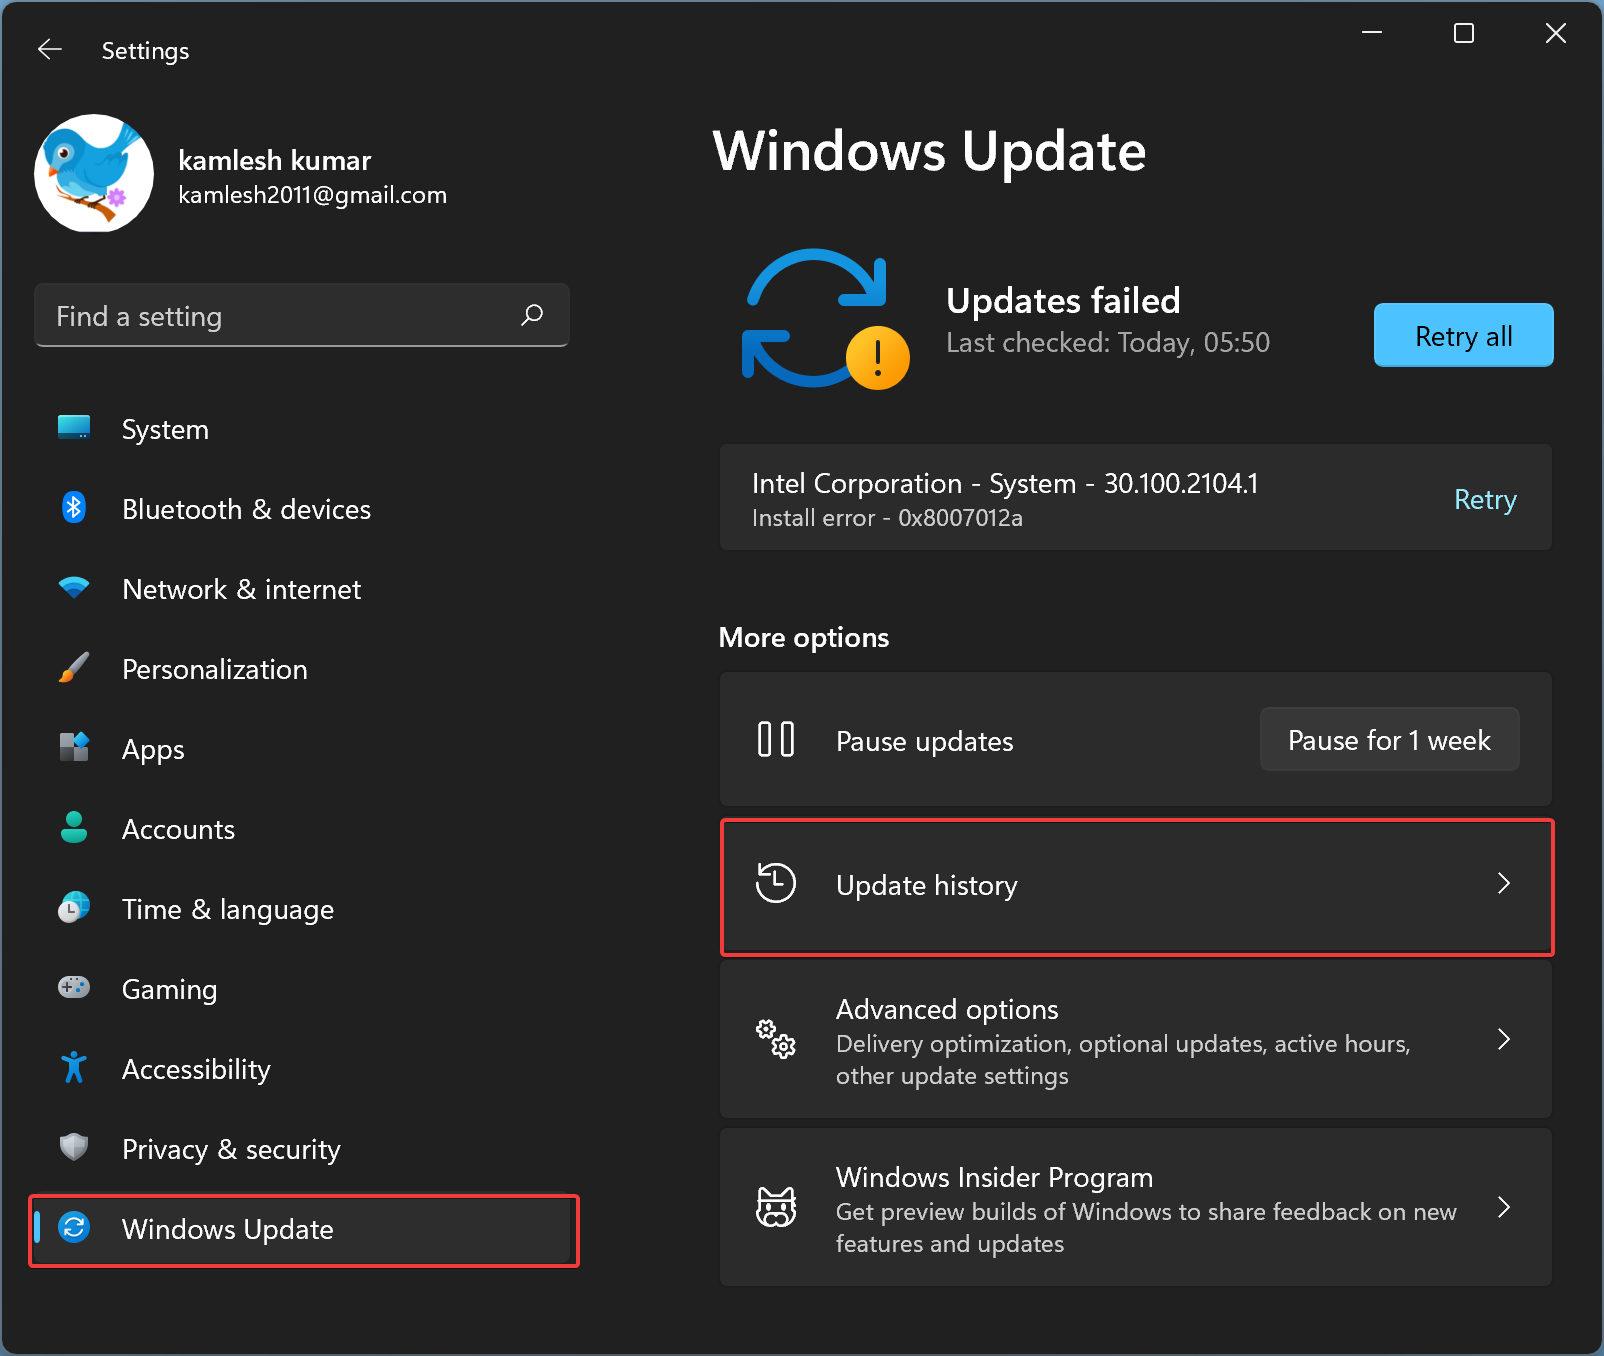
Step 2. Then, on the left pane of the Settings window, click Windows Update.
Step 3. After that, hit the Update history tile on the right sidebar.
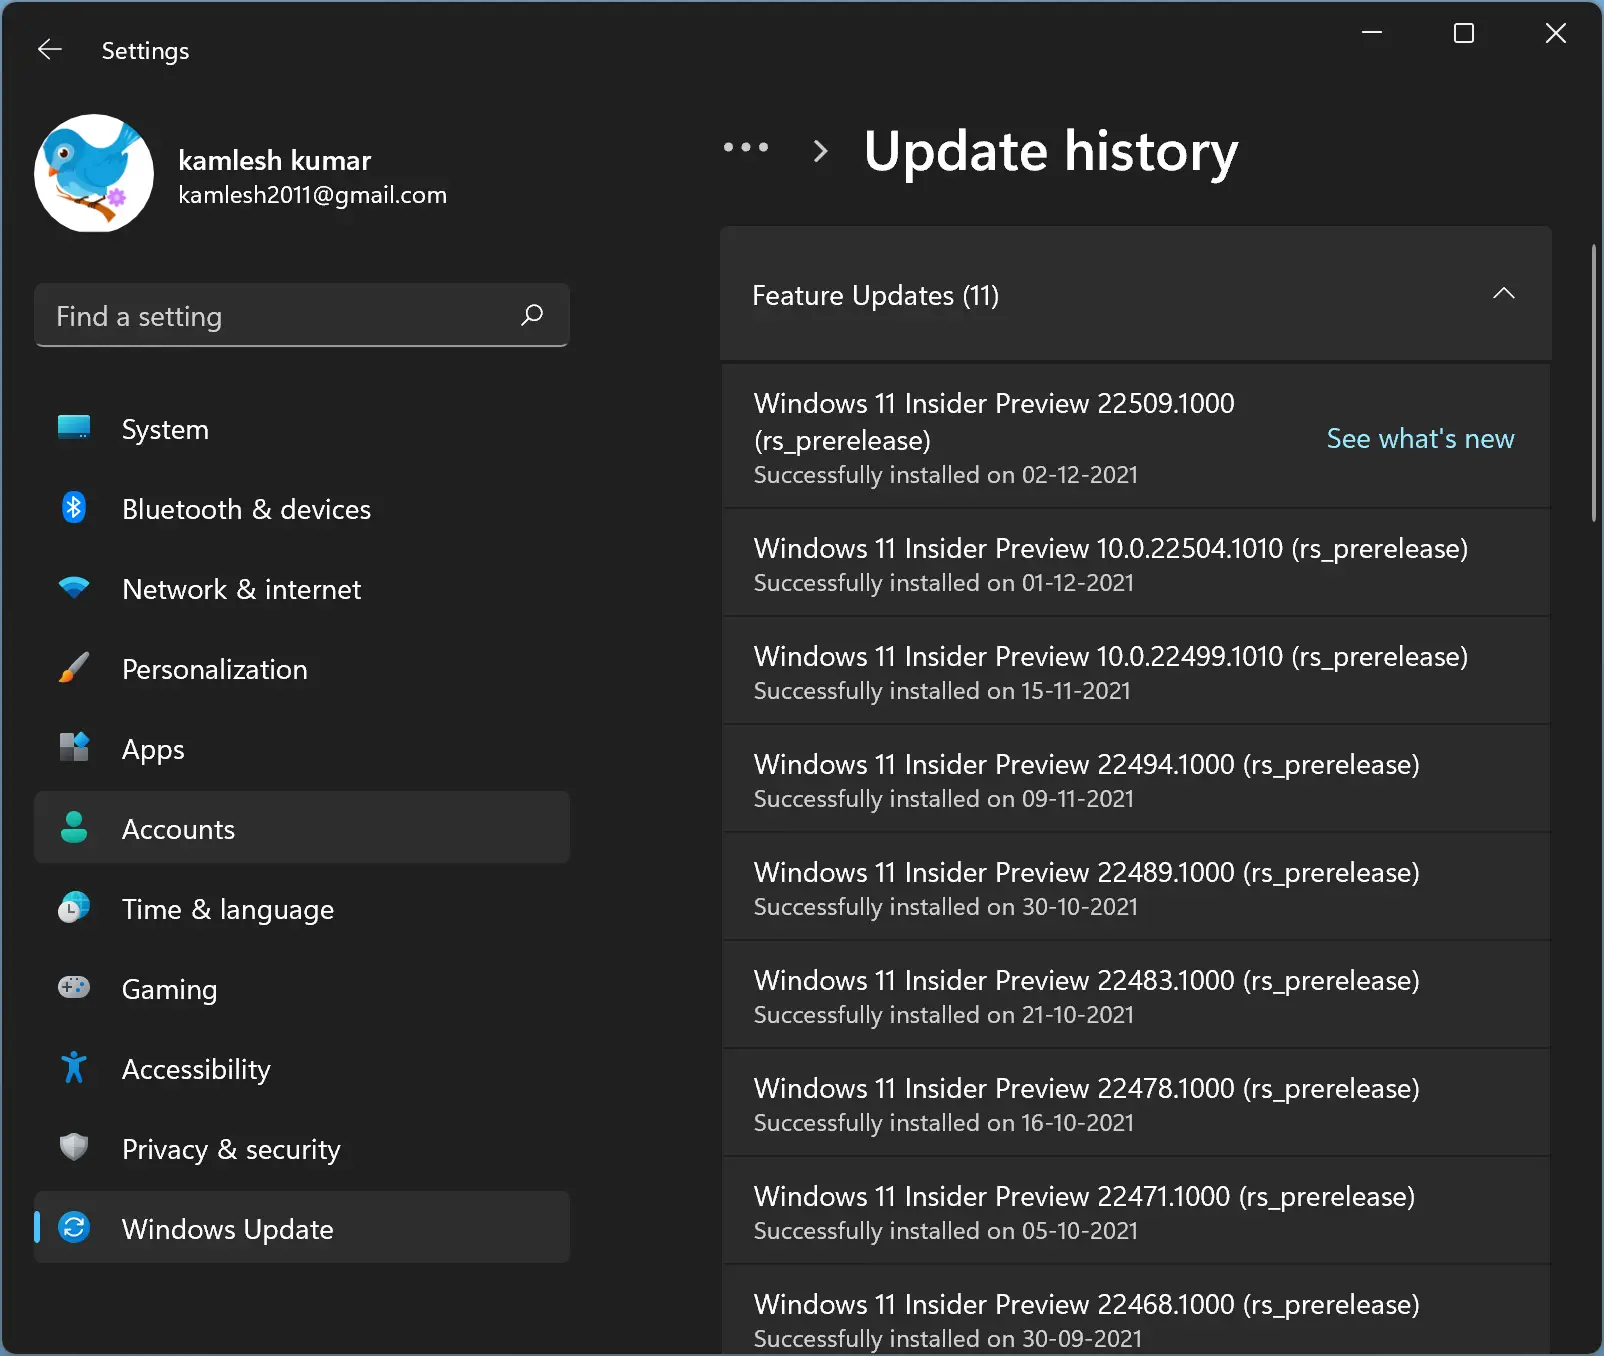
Once you complete the above steps, the resulting “Update history” settings page will display all installed updates, including feature updates, definition updates, and quality updates. In addition to these updates, you can also view driver updates on this page.
Besides each update, you will find the installed date for updates and version number (if available). If you want to know more about an installed update, click on the Learn more link, if available, next to the update name. This action will open Microsoft’s website and provide detailed information about that specific update.
How to View Update History in Windows 11 using Command Prompt?
To view Update History on Windows 11 through Command Prompt, follow these steps:-
Step 1. Open Command Prompt.
Step 2. Type the following and press Enter to view the update history:-
wmic qfe list
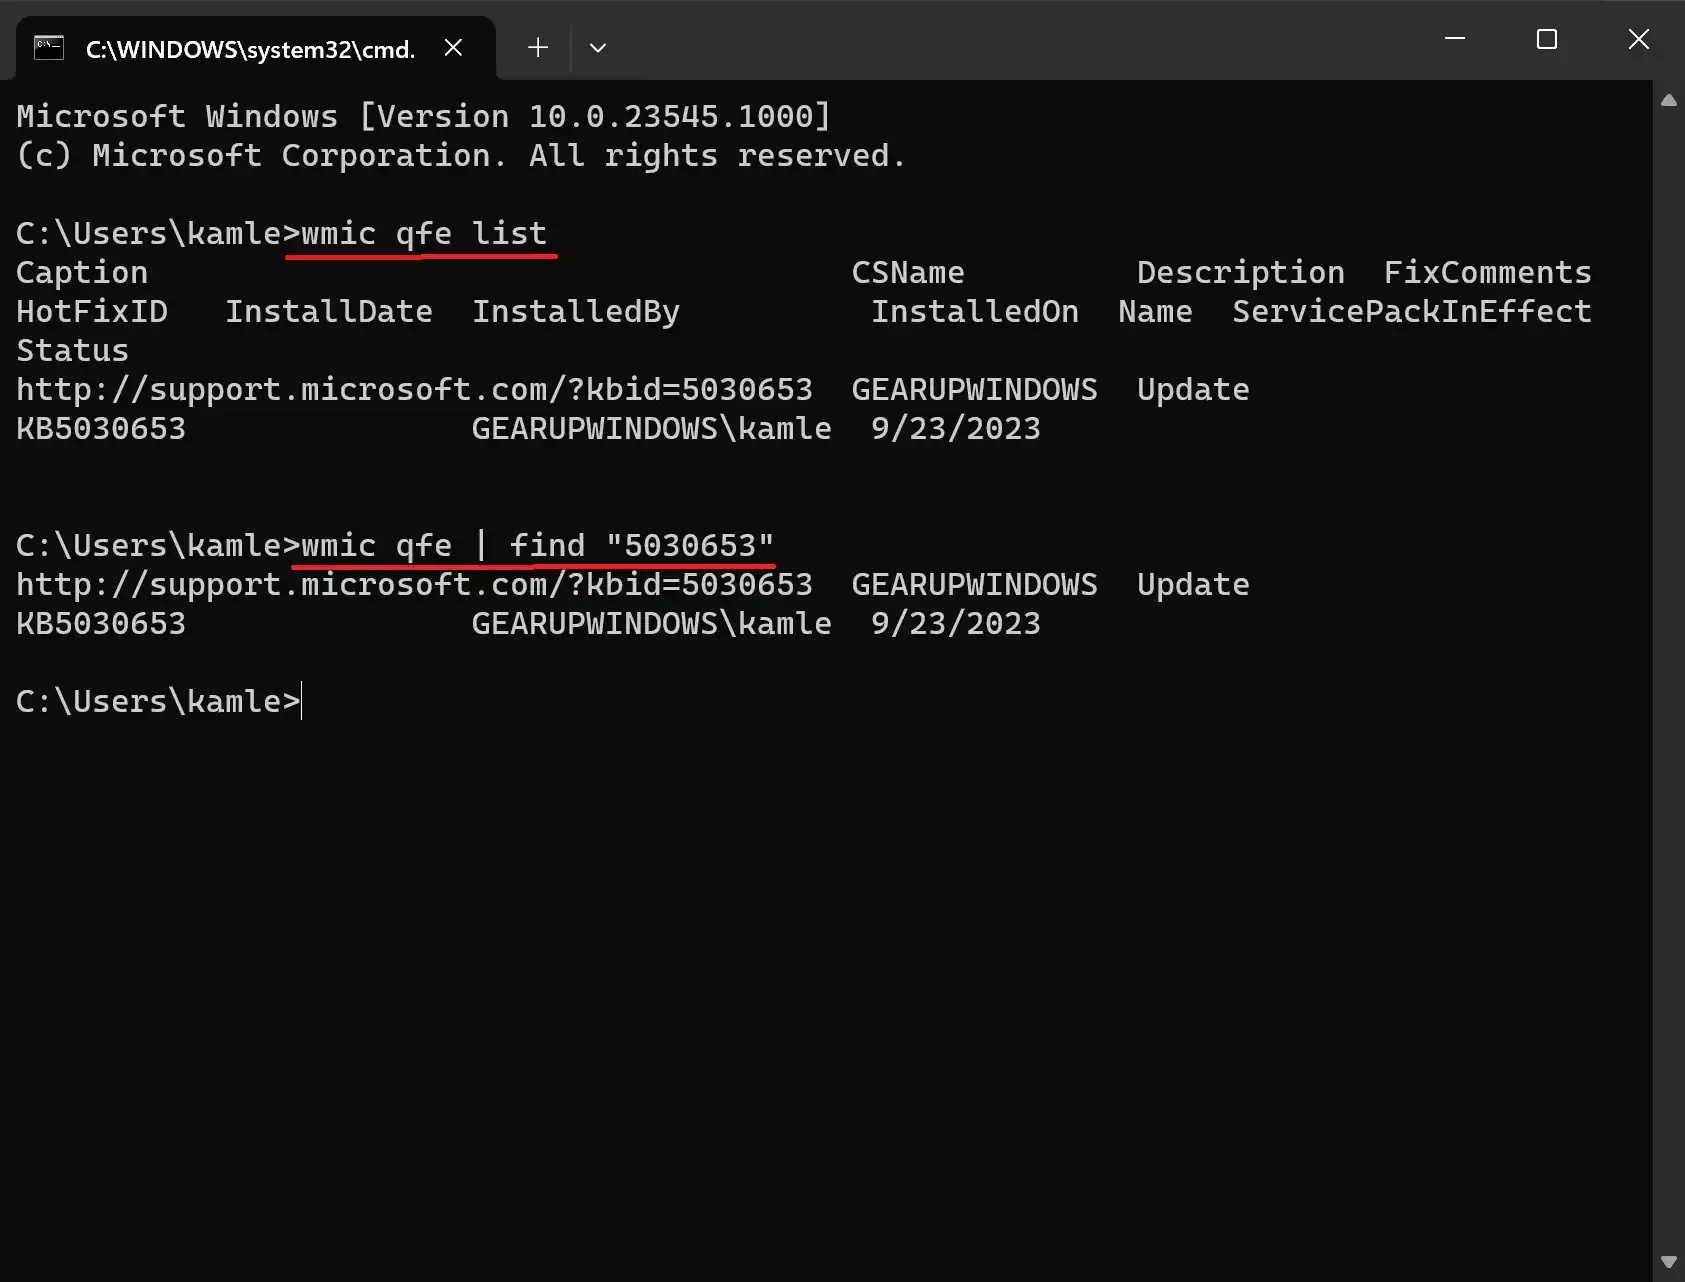
Step 3. In case you need to find a specific update using KB number, type the following and press Enter:-
wmic qfe | find "5030653"
Note: In the above command, replace “5030653” with the KB number you want to find the history.
Conclusion
In conclusion, checking the update history of your Windows 11 PC can help you identify if a recently installed update is causing any issues. The steps to view the update history are simple and can be easily accessed through the Settings app or Command Prompt. By regularly checking the update history, you can keep track of any updates that might be causing problems and take necessary action to fix them. It is always recommended to keep your Windows 11 PC up to date with the latest updates, but it is equally important to ensure that the updates are not causing any issues.