By default, Windows 11 and 10 downloads and install drivers for most of the components automatically with every Windows Update. Also, when you uninstall a driver from your PC, Windows Update will install it automatically the next time you restart your computer.
However, if you want to stop or prevent Windows from automatically overwriting drivers, you need to change device installation settings.
In this gearupwindows article, we will guide you on changing the device installation settings in Windows 11 and 10. To do this, you can either use System Properties or Registry Editor.
How to Change Device Installation Settings using System Properties?
To change or alter device installation settings through System Properties, do these steps:-
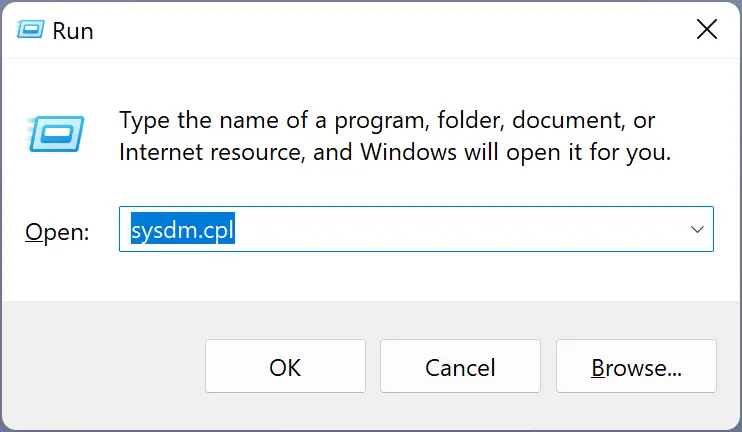
Step 1. Open the System Properties window.
To do that, press the Windows + R keyboard shortcut to bring up the Run dialog box. In the Run box, type sysdm.cpl and press Enter key on the keyboard.
Step 2. In the “System Properties” window, switch to the Hardware tab.
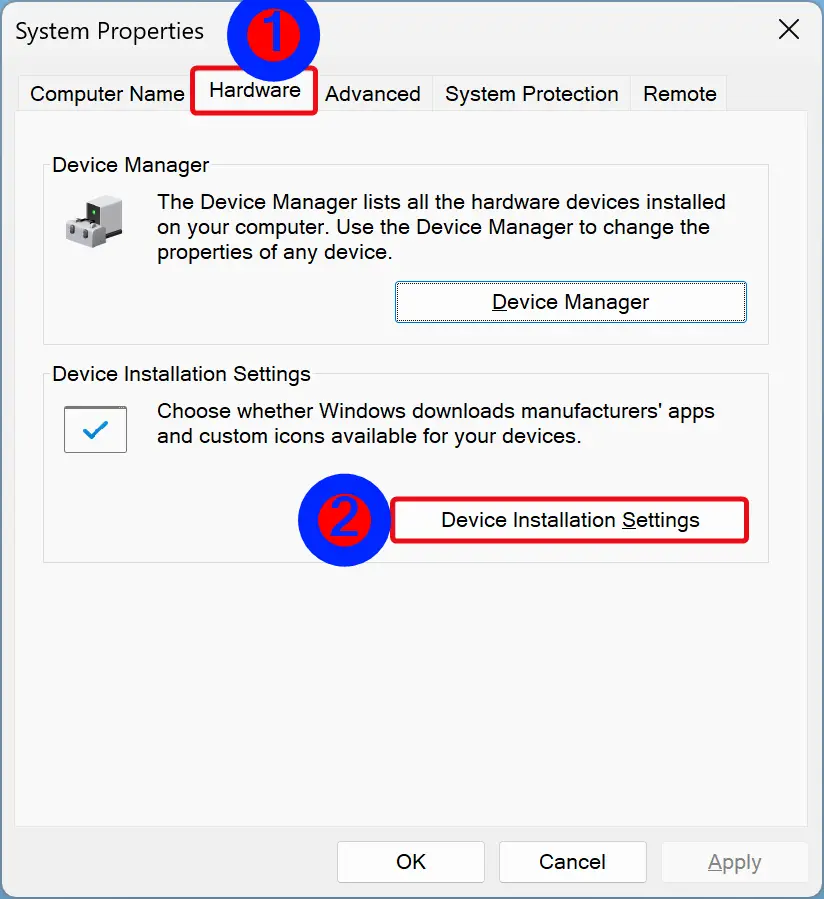
Step 3. Click the Device Installation Settings button.
Step 4. When you’re done, a pop-up dialog will ask whether you want to automatically download manufacturers’ apps and custom icons available for your devices. Choose the No (your device might not work as expected) option.
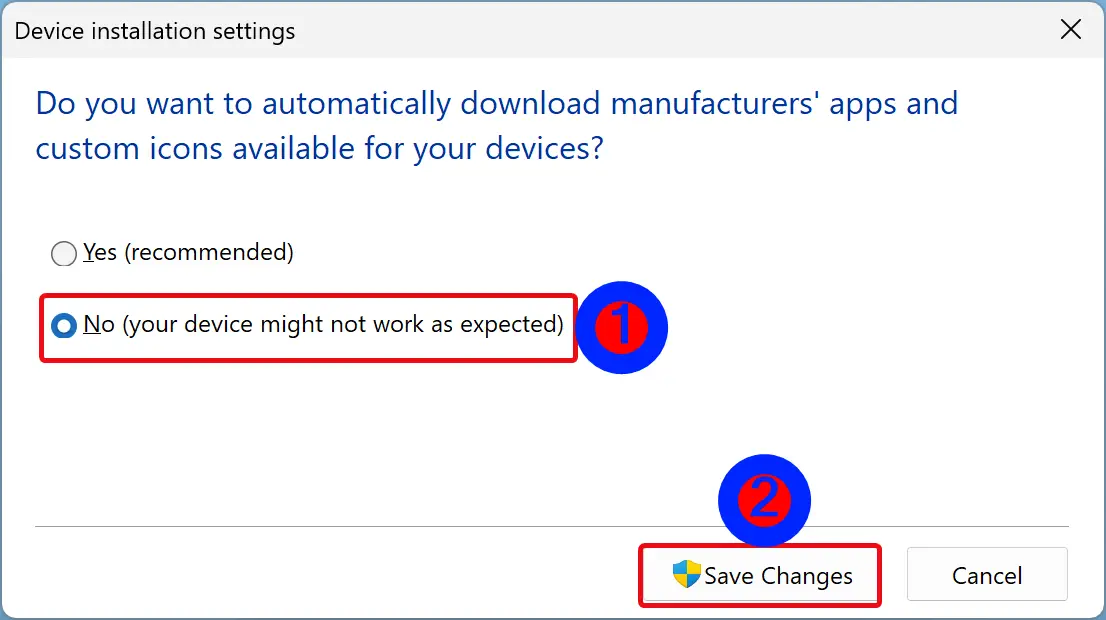
Step 5. Click Save Changes.
Step 6. Click OK.
Once you complete the above steps, Windows 11 or 10 will disable automatic driver installation on your PC.
How to Change Device Installation Settings from Windows 11 or 10 Registry Editor?
To change device installation settings using Windows 11 or 10 Registry Editor, use these steps:-
Step 1. Open Registry Editor.
Step 2. Then, browse or navigate to the following key in the left sidebar of Registry Editor:-
HKEY_LOCAL_MACHINE\SOFTWARE\Microsoft\Windows\CurrentVersion\Device Metadata
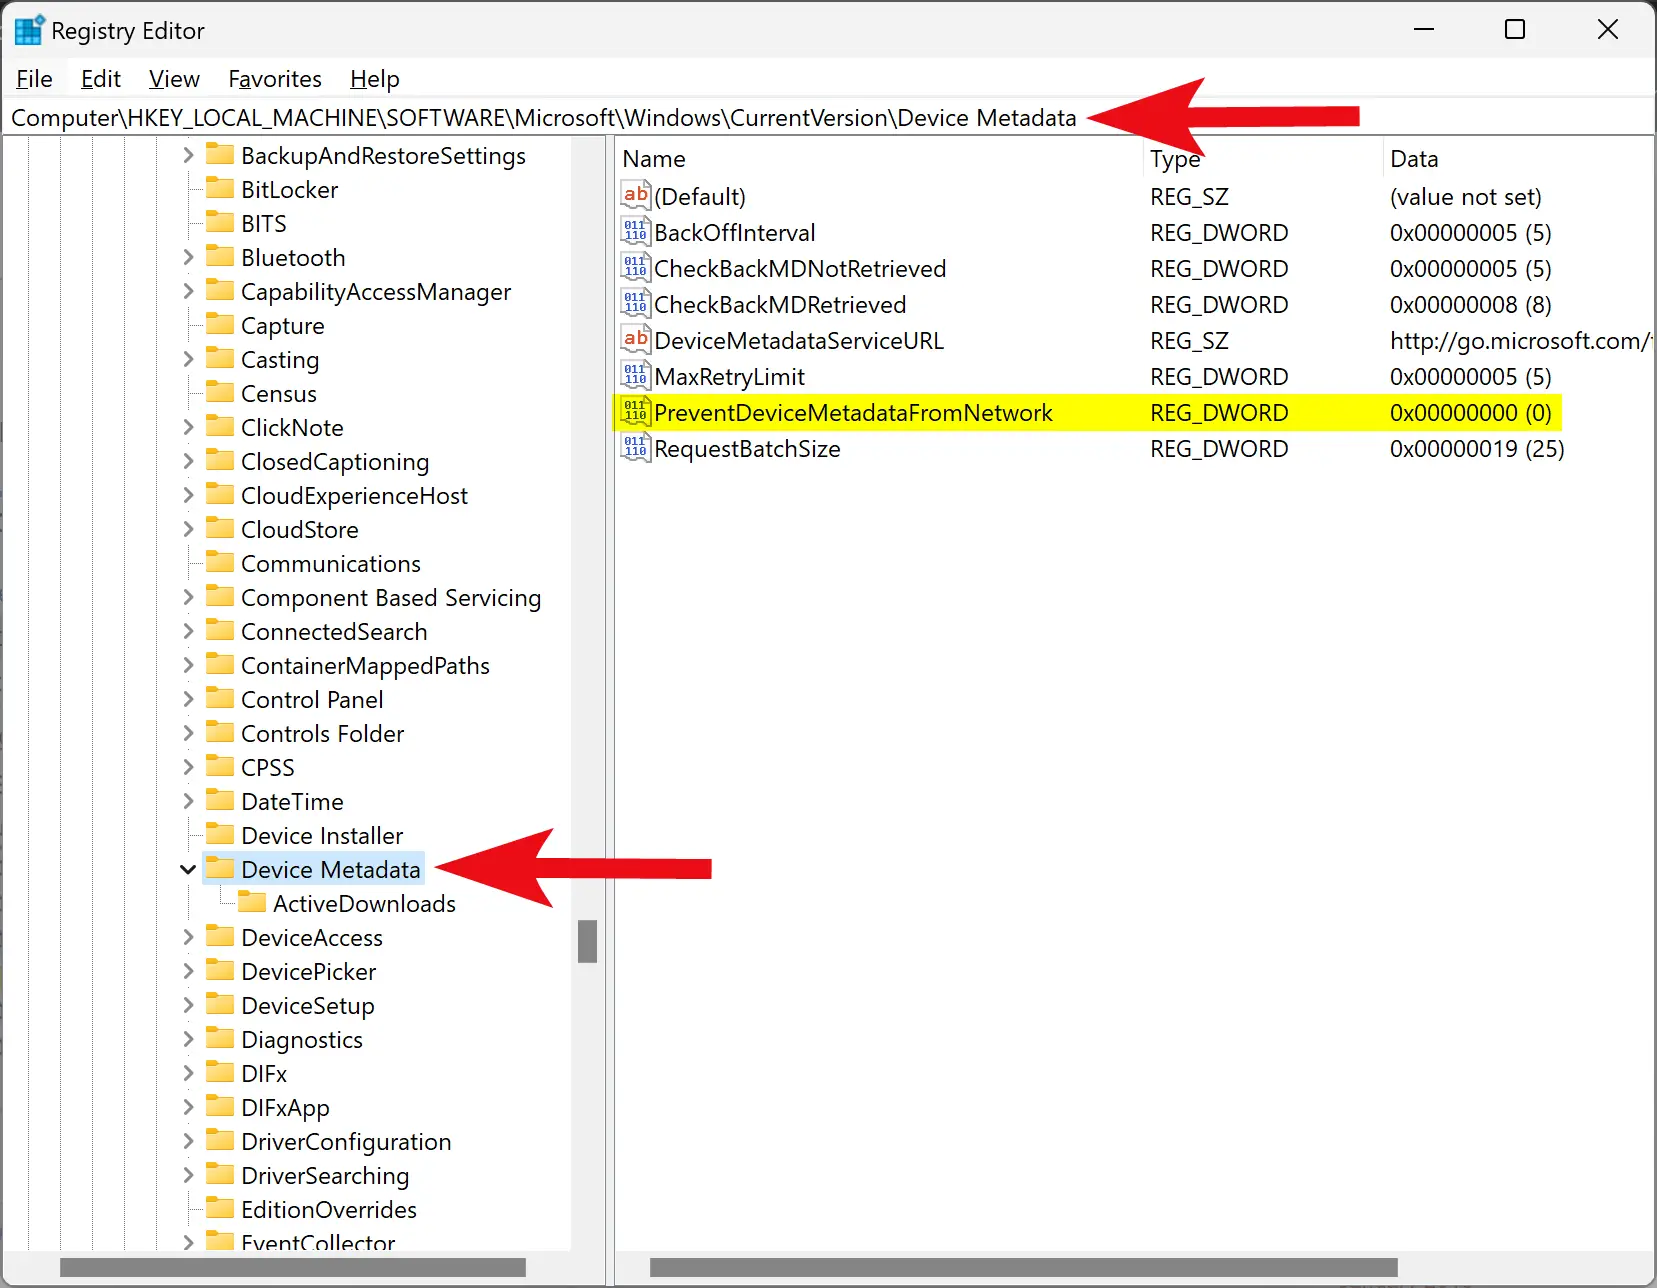
Step 3. On the right side of the “Device Metadata” folder, double-click on the PreventDeviceMetadataFromNetwork REG_DWORD.
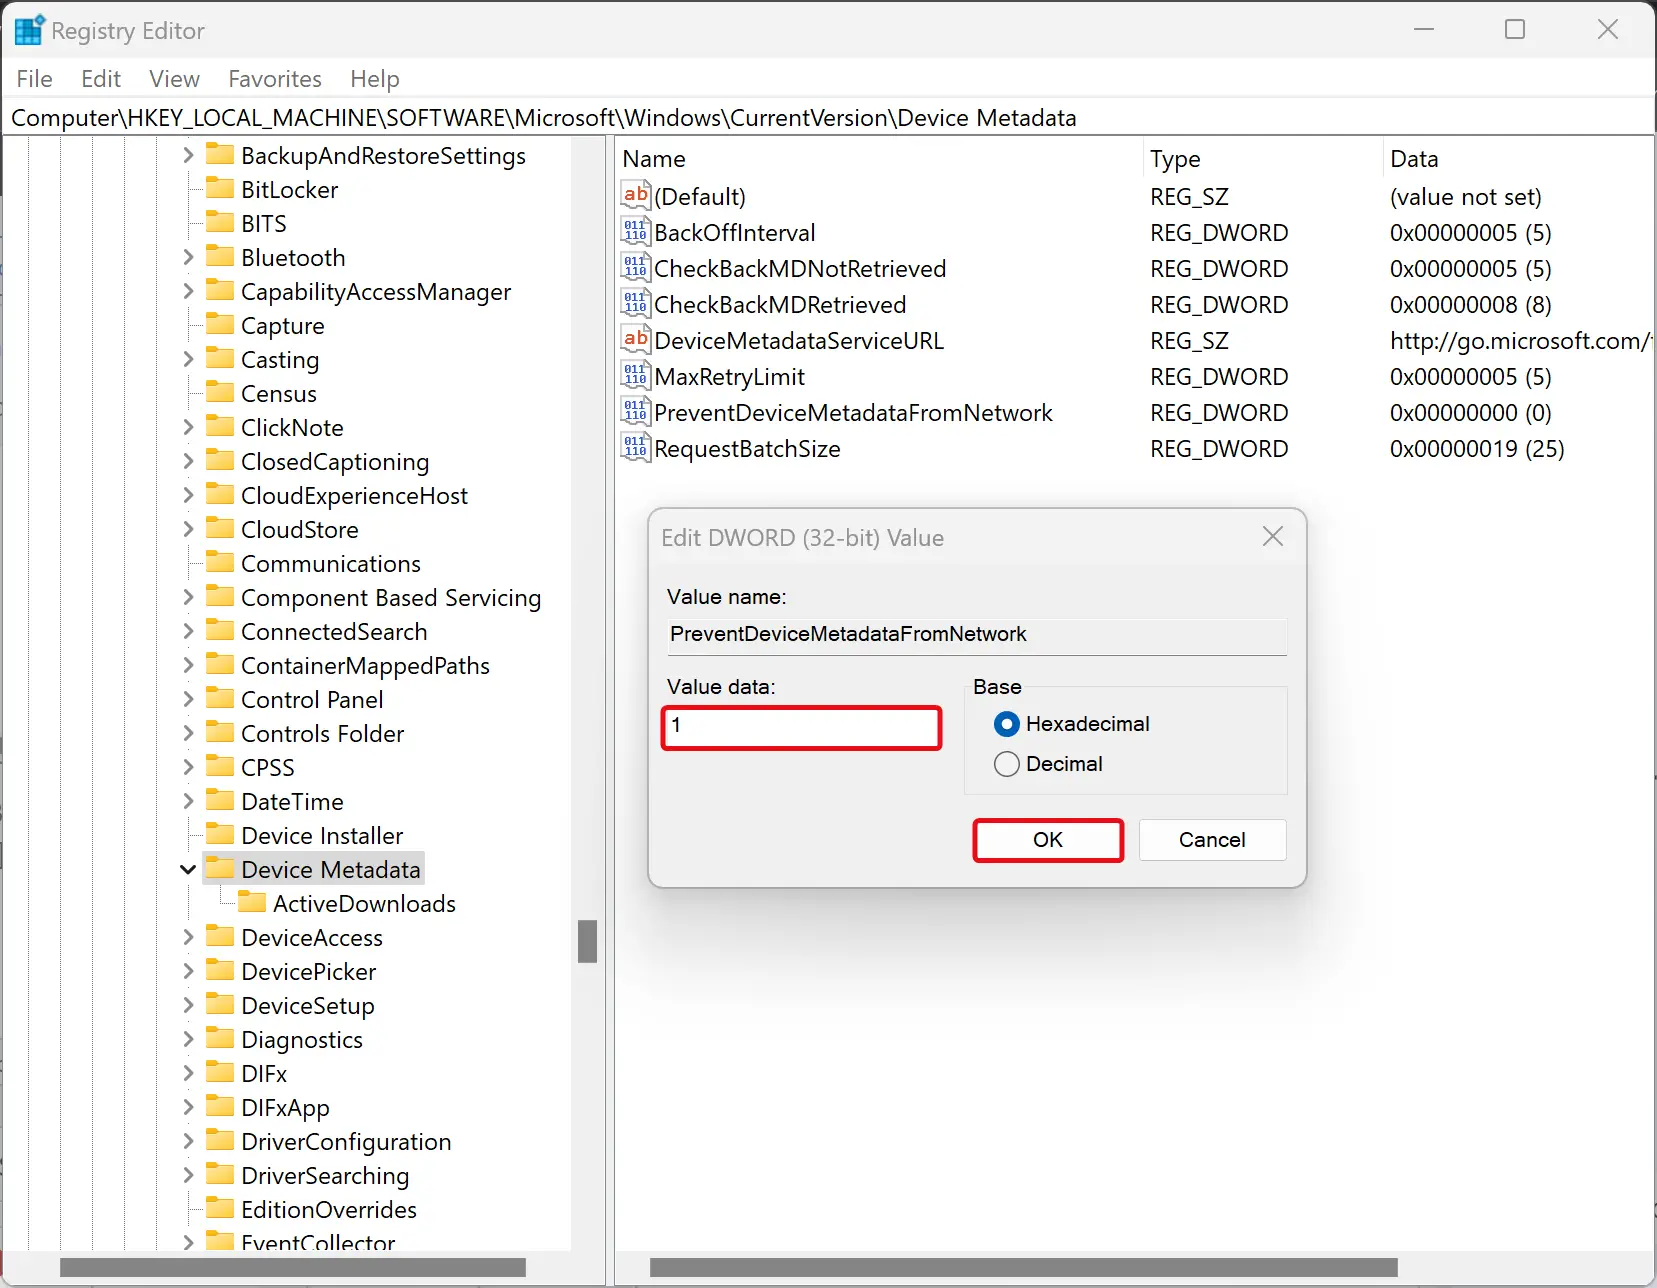
Step 4. Set the “Value data” to 1.
Step 5. Click OK.
When you complete the above steps, your Windows 11 or 10 machine will no longer automatically download and install the latest device drivers.
Conclusion
In conclusion, changing device installation settings in Windows 11 or 10 can be done through System Properties or Registry Editor. By default, Windows automatically downloads and installs drivers for most components with every update. However, you can prevent Windows from overwriting drivers automatically by changing device installation settings. In System Properties, you can choose not to automatically download manufacturers’ apps and custom icons available for your devices, while in Registry Editor, you can set the PreventDeviceMetadataFromNetwork value to 1 to stop automatic driver installation.