Modern laptop’s touchpad offers many settings, one of which is “Press the lower right corner of the touchpad to right-click” on Windows 11 and 10. If you don’t use this feature or you accidentally right-click, you might want to turn off this function on your Windows 11 or 10 machine.
In this gearupwindows article, you will learn how to turn on or off “Press the lower right corner of the touchpad to right-click” on Windows 11 and 10. You can enable or disable this feature either using built-in Settings or by tweaking the registry. We will guide you with both methods, and you can use either at your convenience.
How to Turn On or Off “Press the Lower Right Corner of the Touchpad to Right-click” in Windows 11 Settings?
To enable or disable the “Press the lower right corner of the touchpad to right-click” in Windows 11 Settings, use these steps:-
Step 1. First, open Windows 11 Settings.
To that, you can use Windows + I shortcut keys. Alternatively, right-click on the Start button and select Settings in the menu.
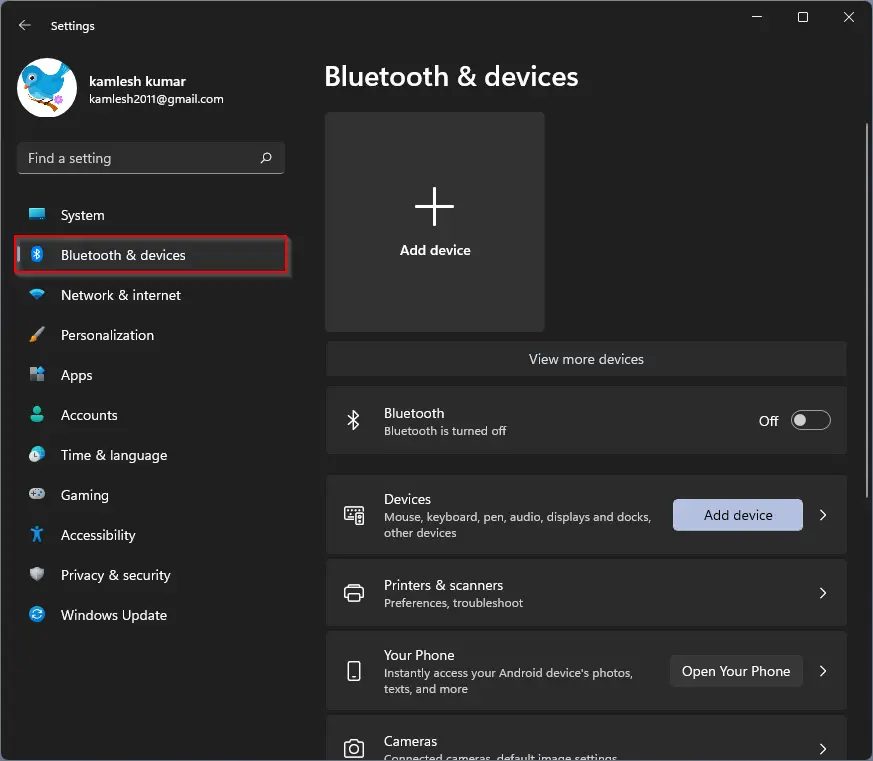
Step 2. When the Settings window appears, click on the Bluetooth & devices in the left sidebar.
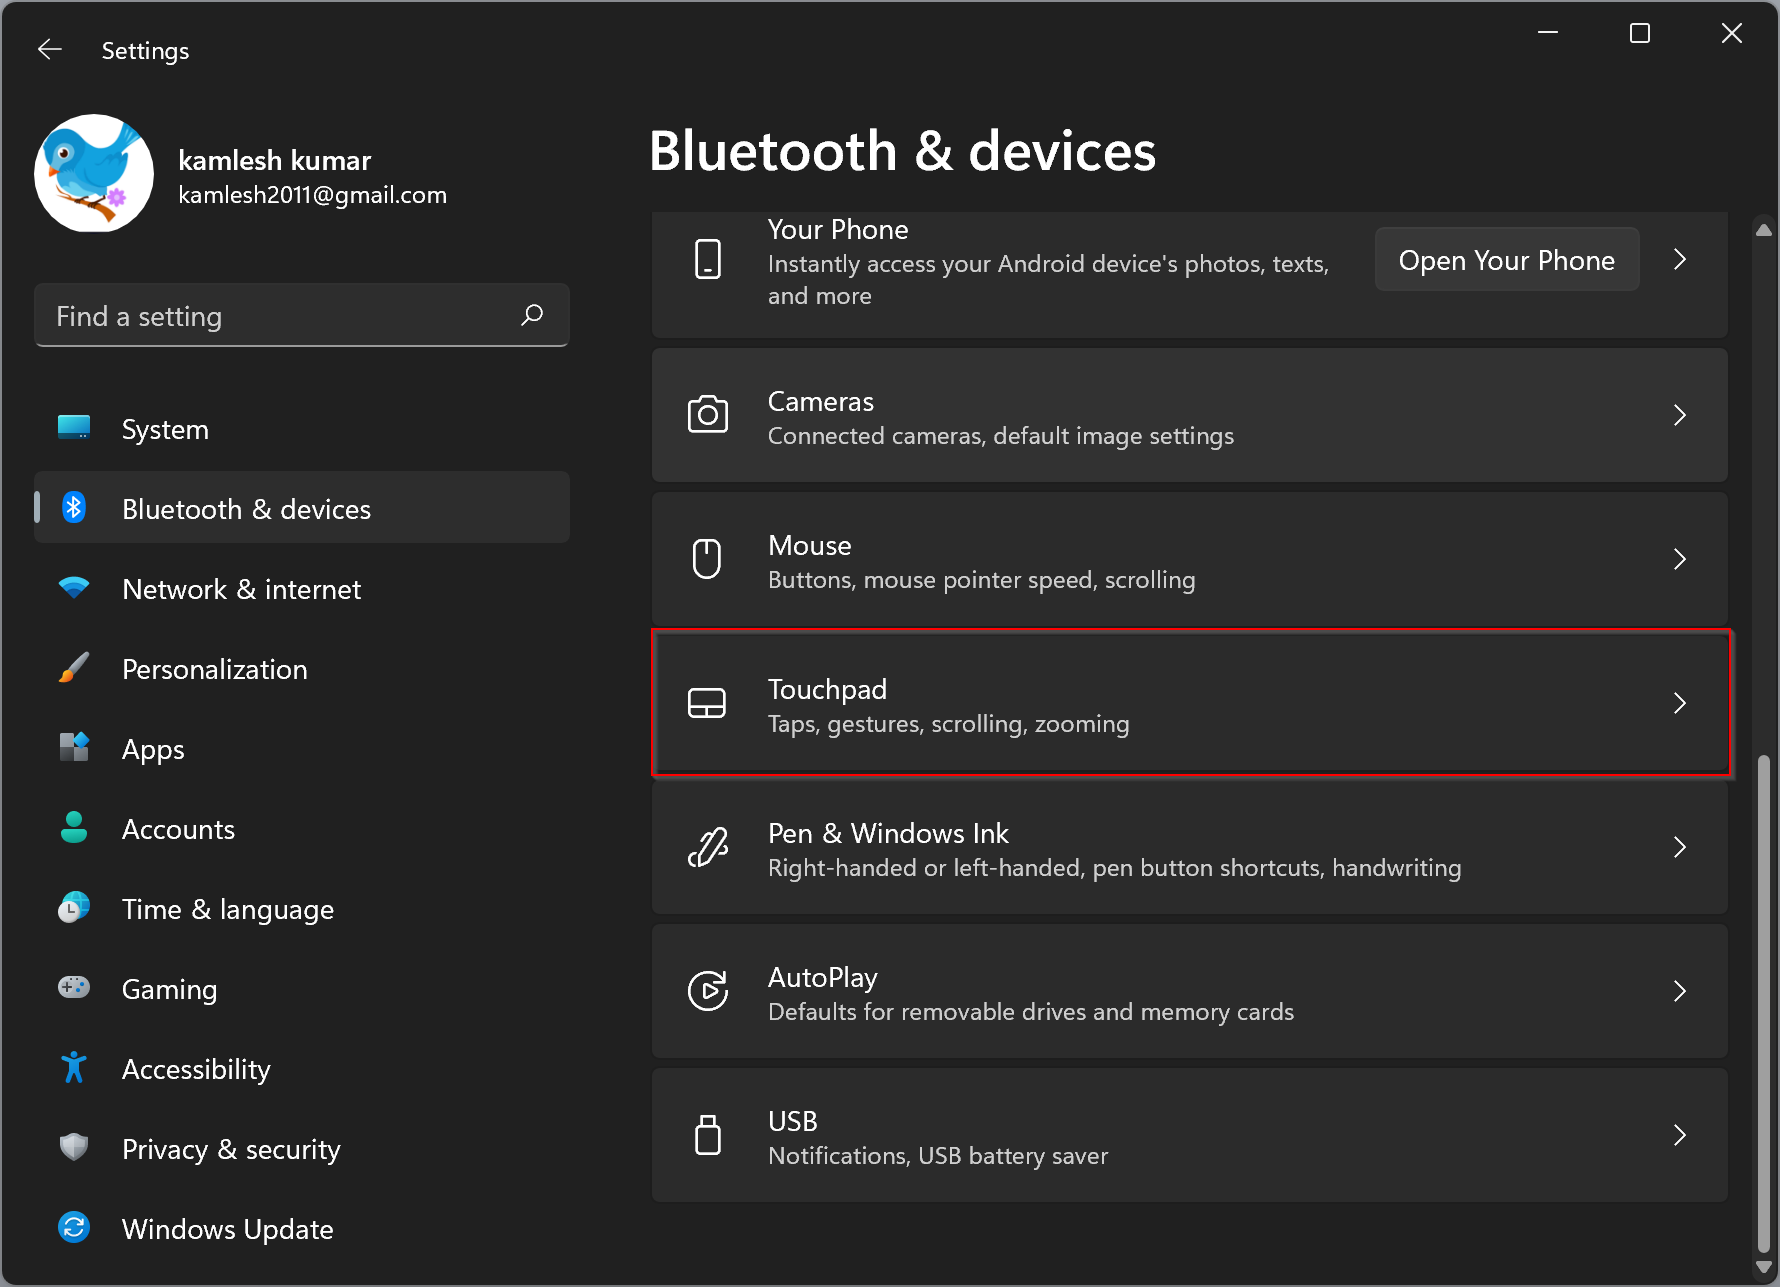
Step 3. On the right sidebar, click on the Touchpad tile.
Step 4. Click Taps.
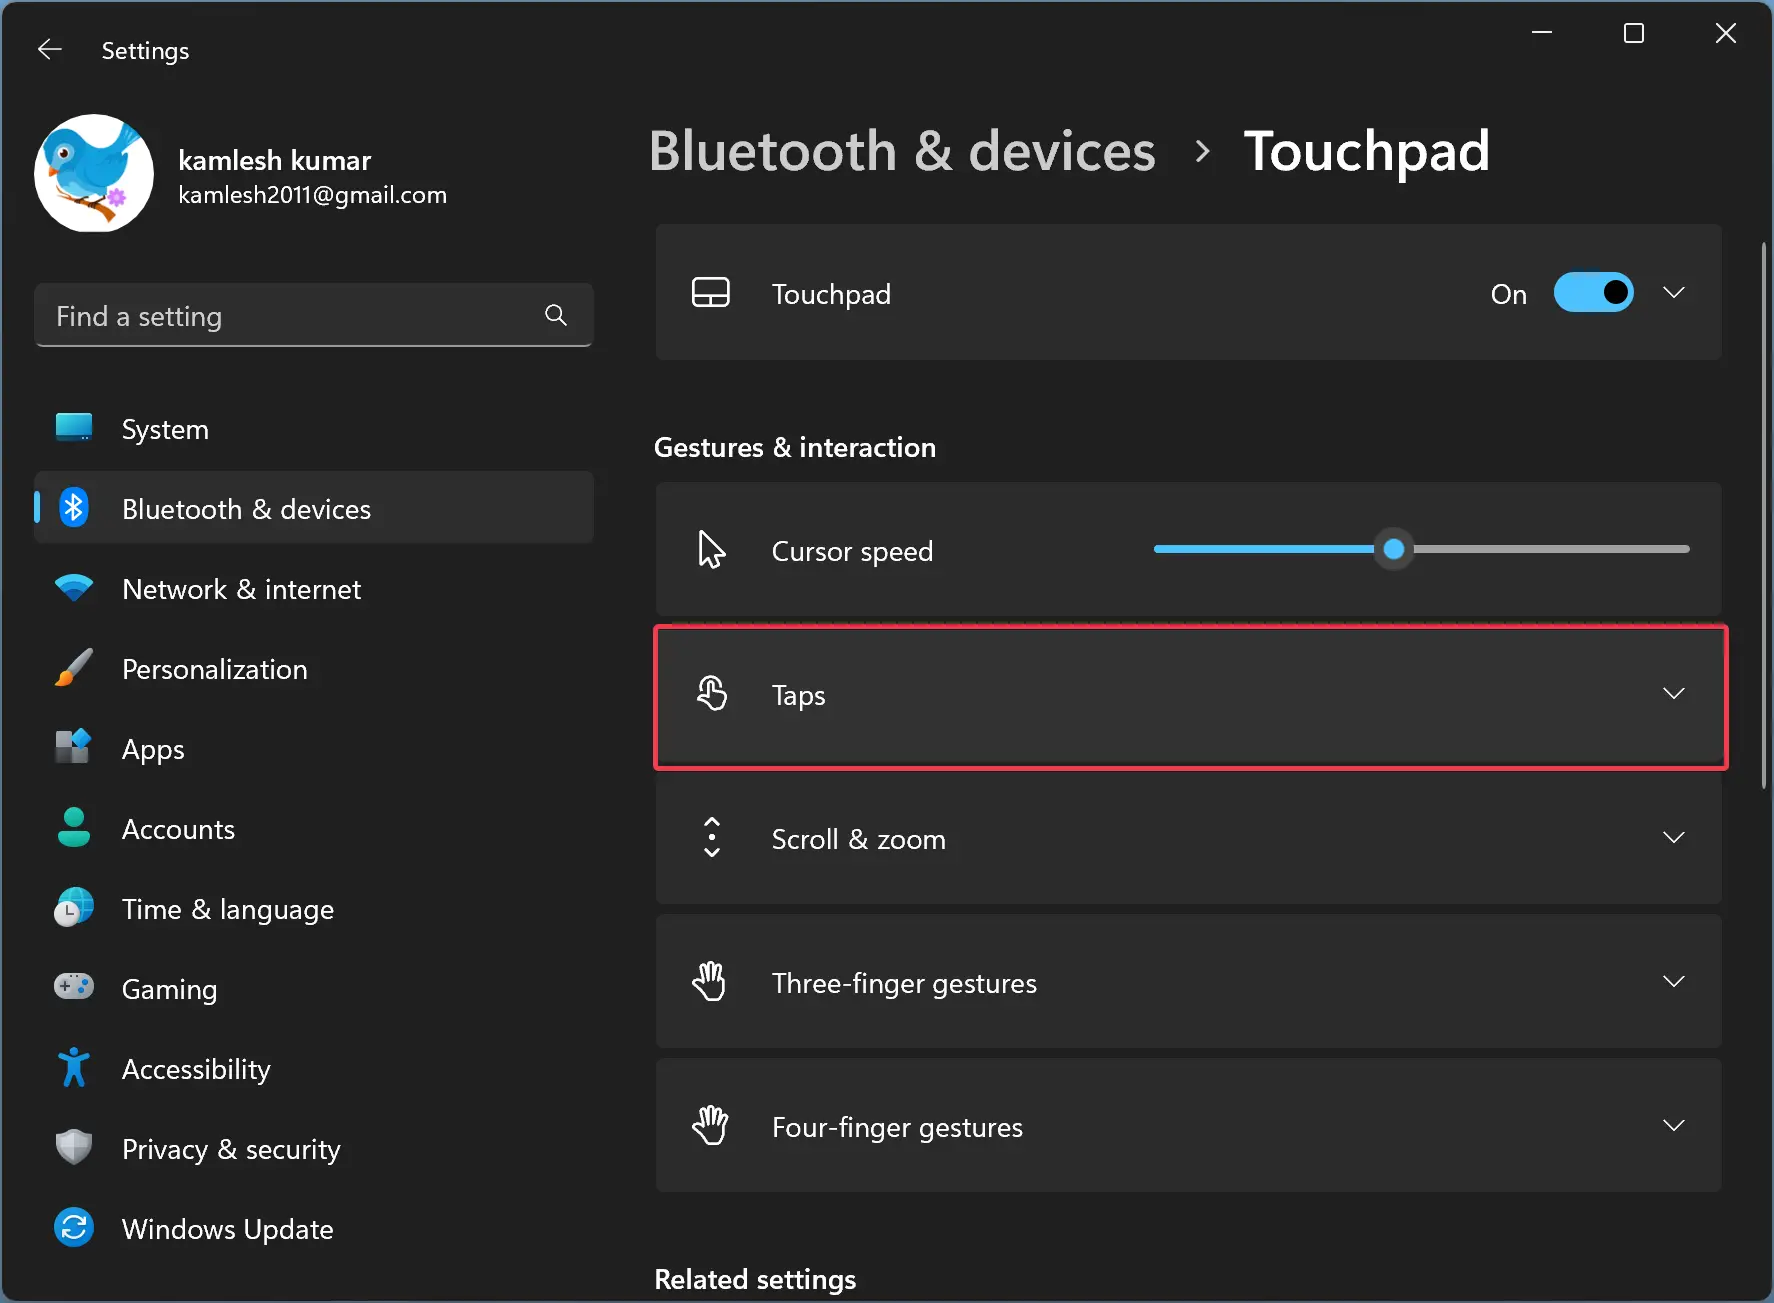
Step 5. Check the “Press the lower right corner of the touchpad to right-click” option under the Taps section to enable the future.

To disable the future, you need to uncheck the “Press the lower right corner of the touchpad to right-click” option under the Taps section in Step 5 above.
How to Enable or Disable “Press the Lower Right Corner of the Touchpad to Right-click” in Windows 10 Settings?
To turn on or off the “Press the lower right corner of the touchpad to right-click” in Windows 10 Settings, use these steps:-
Step 1. First, open Windows 10 Settings.
To that, you can use Windows + I shortcut keys. Or, right-click on the Start button and select Settings in the menu.
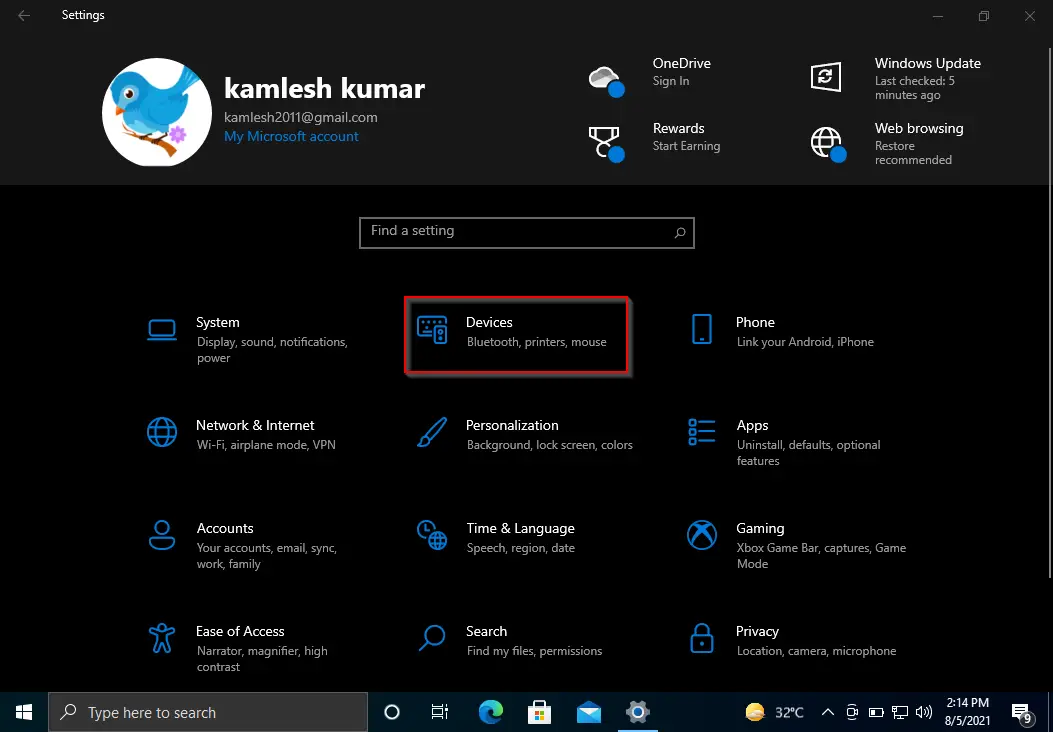
Step 2. Click on Devices.
Step 3. Under “Devices,” select Touchpad in the left sidebar.

Step 4. On the right sidebar, check or uncheck the option “Press the lower right corner of the touchpad to right-click” to enable or disable the feature on your Windows 10 machine.
How to Allow or Disallow “Press the Lower Right Corner of the Touchpad to Right-click” using Windows 11 or 10 Registry Editor?
To allow or block “Press the lower right corner of the touchpad to right-click” settings through Windows 11 or 10 Registry Editor, do these steps:-
Step 1. Open Registry Editor.
Step 2. Then, browse or navigate to the following key in the left sidebar of Registry Editor:-
HKEY_CURRENT_USER\Software\Microsoft\Windows\CurrentVersion\PrecisionTouchPad

Step 3. On the opposite side of “PrecisionTouchPad,” double-click on the RightClickZoneEnabled REG_DWORD and set its “Value data” to the following:-
- 0: Turns off “Press the Lower Right Corner of the Touchpad to Right-click.”
- ffffffff: Turns on “Press the Lower Right Corner of the Touchpad to Right-click.”

Step 4. Click OK.
Step 5. Restart your computer to apply the changes.
Conclusion
In conclusion, the touchpad is an essential feature of modern laptops that makes it easier to navigate the computer. However, some users may find the “Press the lower right corner of the touchpad to right-click” feature on Windows 11 and 10 to be a hindrance or an accidental trigger. Fortunately, there are different methods to enable or disable this feature on your Windows 11 or 10 machine, either through the built-in Settings or the Registry Editor. By following the steps outlined in this gearupwindows article, you can customize your touchpad settings to suit your needs and preferences.