Margins in a Microsoft Word document determine the space between the text and the edges of the page. Adjusting margins is a common task when you want to format your document for different purposes, such as creating a professional report, formatting a manuscript, or preparing a document for printing. In this guide, we will walk you through the steps to change margins in Microsoft Word.
How to Change Margins in Microsoft Word?
To change Margins in Microsoft Word, follow these steps:-
Step 1. Before you can change the margins, open Microsoft Word and create a new document or open an existing one that you want to edit.
Step 2. Go to the “Layout” tab on the Microsoft Word ribbon. This tab contains all the tools and options related to page formatting, including margins.
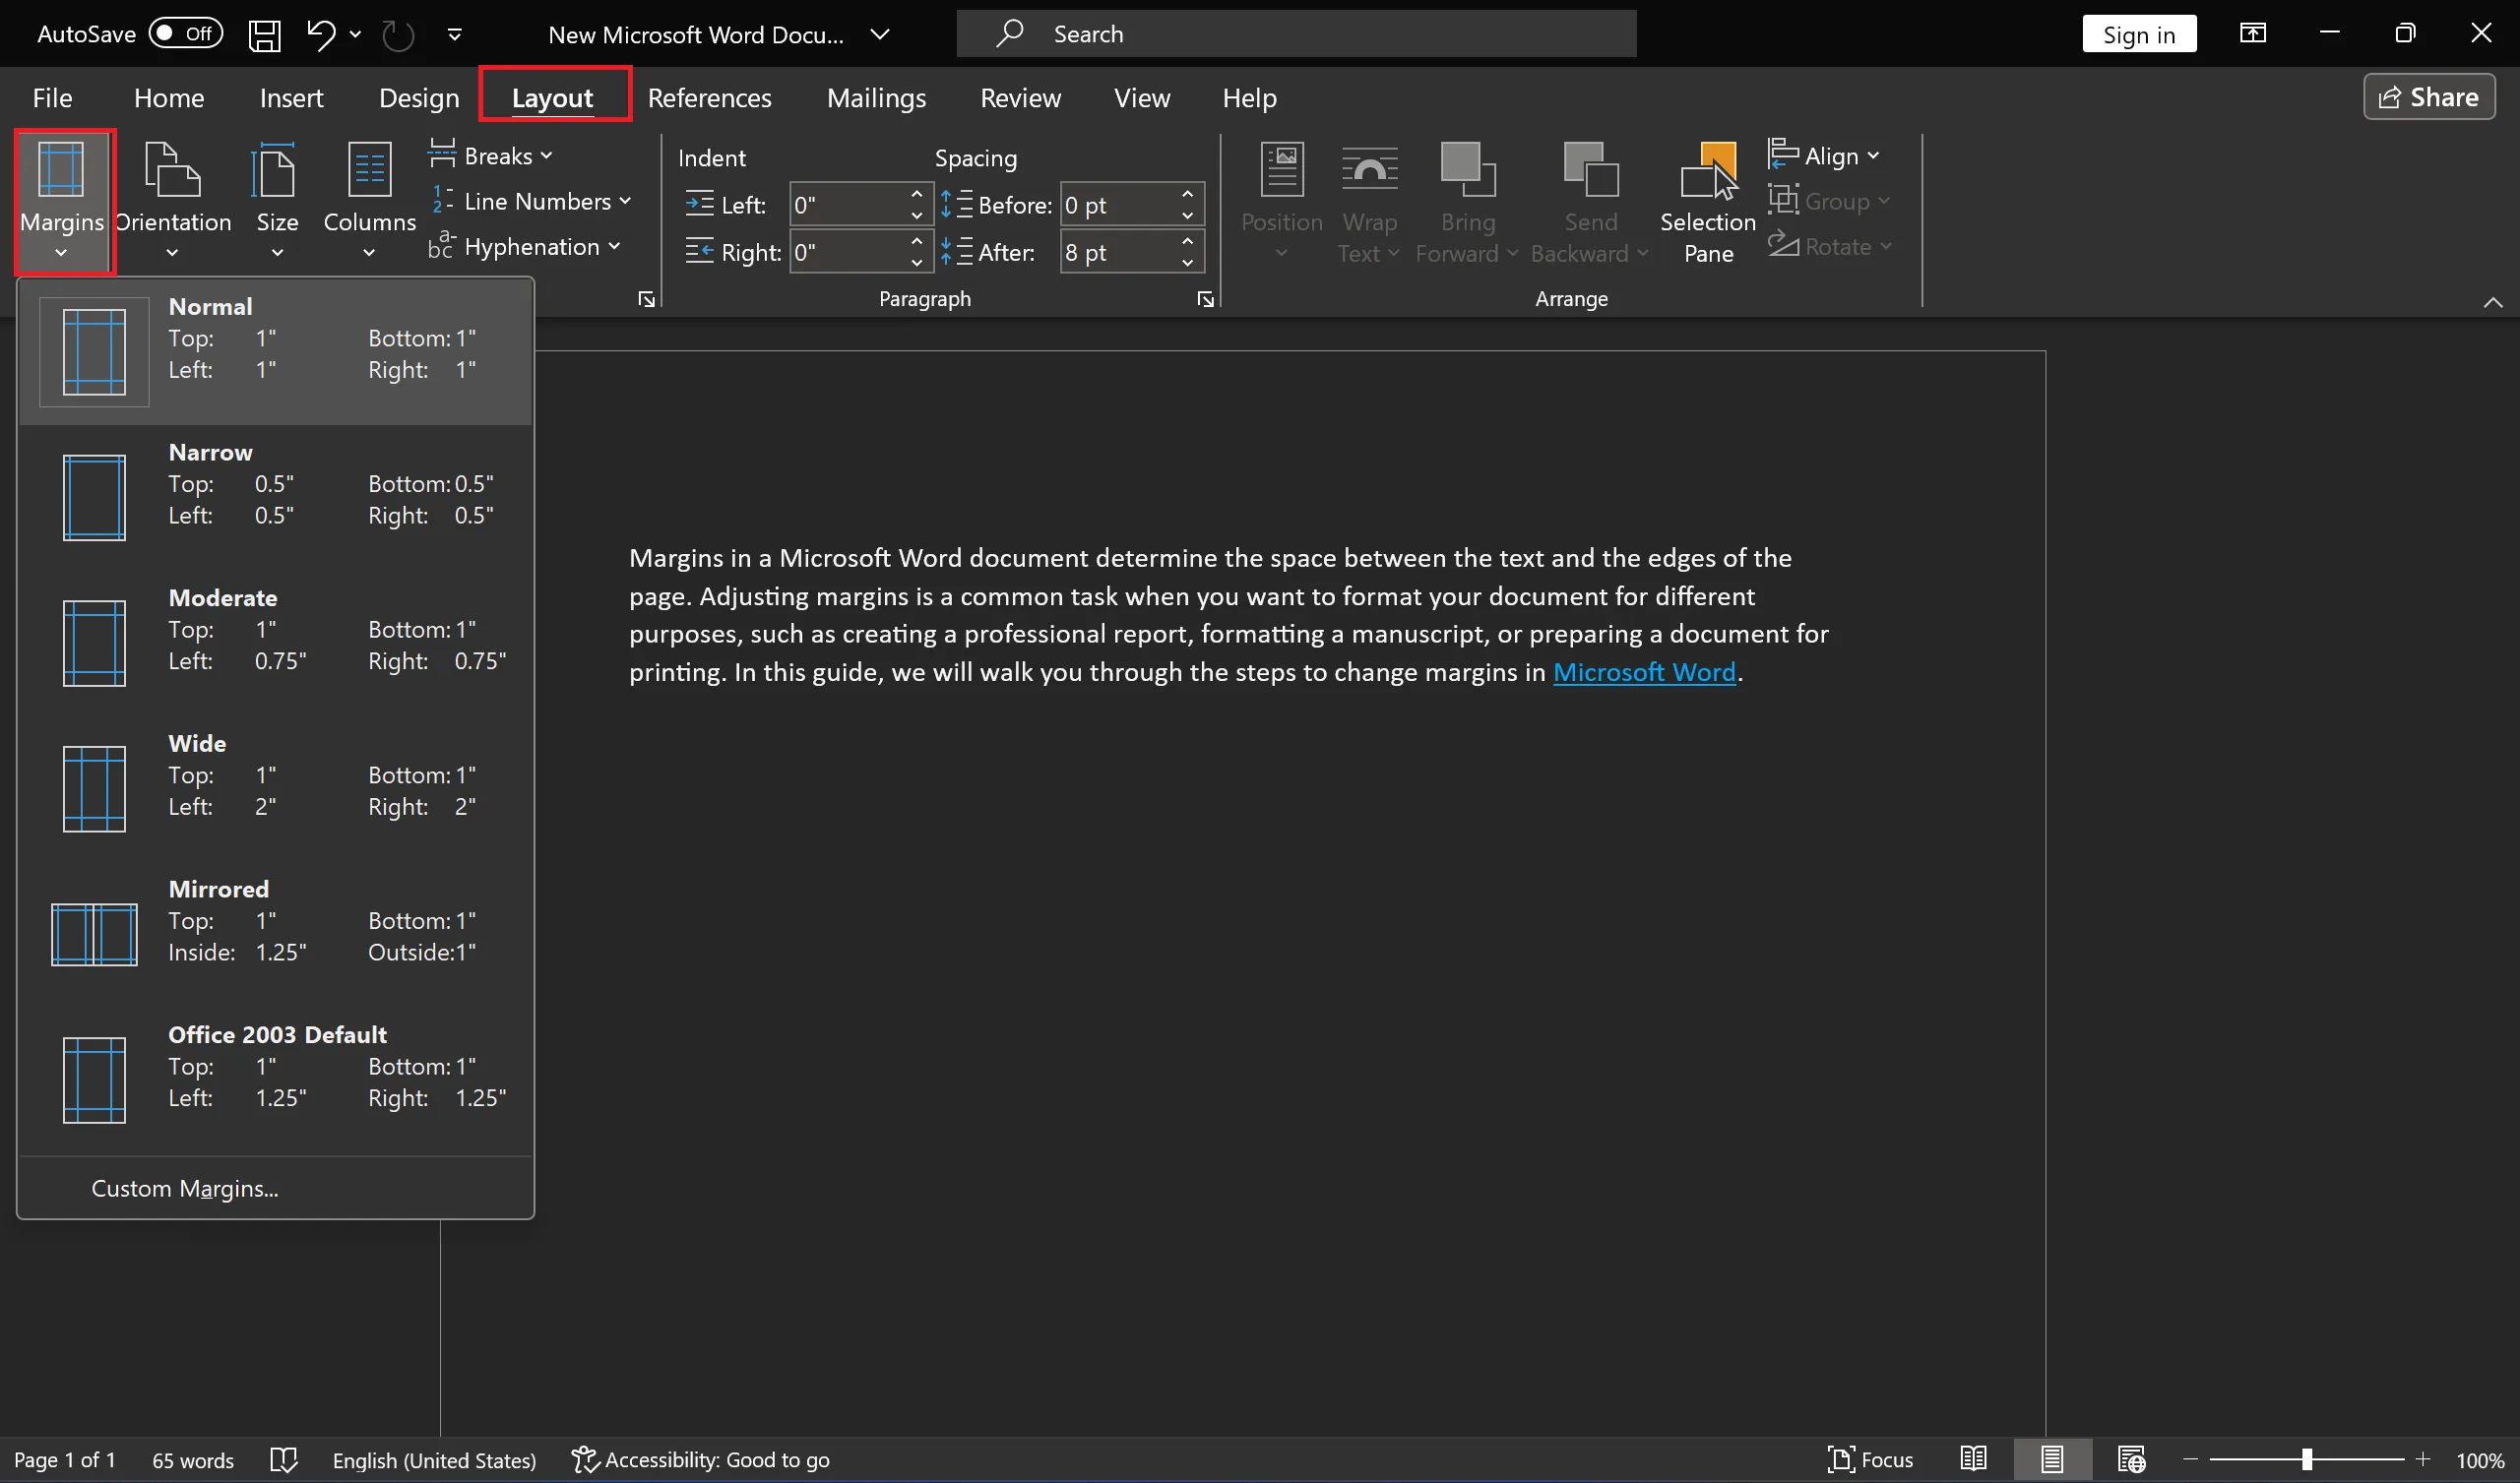
Step 3. In the “Layout” tab, you’ll find the “Margins” option. Click on the “Margins” button to see a drop-down menu with preset margin options.
Step 4. Word provides several preset margin options such as Normal, Narrow, Moderate, Wide, Mirrored, Office 2003 Default, and Custom Margins. You can hover your mouse over each preset to see a preview of how it will affect your document. Click on the preset margin you want to apply. If one of the presets meets your needs, you’re done. The margins in your document will be updated accordingly.
Step 5. If you need margins that aren’t covered by the preset options, you can set custom margins. To do this, click on the “Custom Margins” option at the bottom of the Margins menu.

Step 6. A “Page Setup” dialog box will appear, allowing you to customize your margins. Here are the options you can adjust:-
-
- Margins: Enter specific margin measurements for the top, bottom, left, and right margins. Use inches, centimeters, or other units, depending on your preference.
- Orientation: You can change the orientation of your document between portrait (vertical) and landscape (horizontal).
- Pages: You can specify whether you want your margins to apply to the whole document or only to certain sections, such as the current section or from this point forward.
- Apply to: Choose whether the margin changes should apply to the entire document or just a section.
Step 7. After you’ve made your custom margin adjustments, click the “OK” button to apply the changes. Your document will now have the margins you specified.
Step 8. Don’t forget to save your document after making margin adjustments to ensure your changes are preserved.
That’s it! You’ve successfully changed the margins in your Microsoft Word document. Whether you’re adjusting margins for a school project, business report, or any other document, Word provides you with the flexibility to customize your document’s layout to your liking.
Remember that properly formatted margins can enhance the readability and overall appearance of your document, so it’s a valuable skill to master in Microsoft Word.
Also Read: How to Create, Format or Remove Columns in Microsoft Word?