Columns are a powerful formatting tool in Microsoft Word that allow you to organize text and content in a visually appealing way. Whether you’re creating a newsletter, a brochure, or simply want to divide your text into multiple columns, this guide will walk you through the process of creating and formatting columns in Microsoft Word.
How to Create and Format Columns in Microsoft Word?
To create and format Columns in a Microsoft Word document, use these steps:-
Step 1. Start by opening Microsoft Word and creating a new document or opening an existing one that you want to format with columns.
Step 2. Highlight the text that you want to format into columns. If you want to apply columns to the entire document, you can skip this step.
Step 3. Navigate to the “Layout” tab on the Microsoft Word ribbon. This tab contains various formatting options for your document layout.
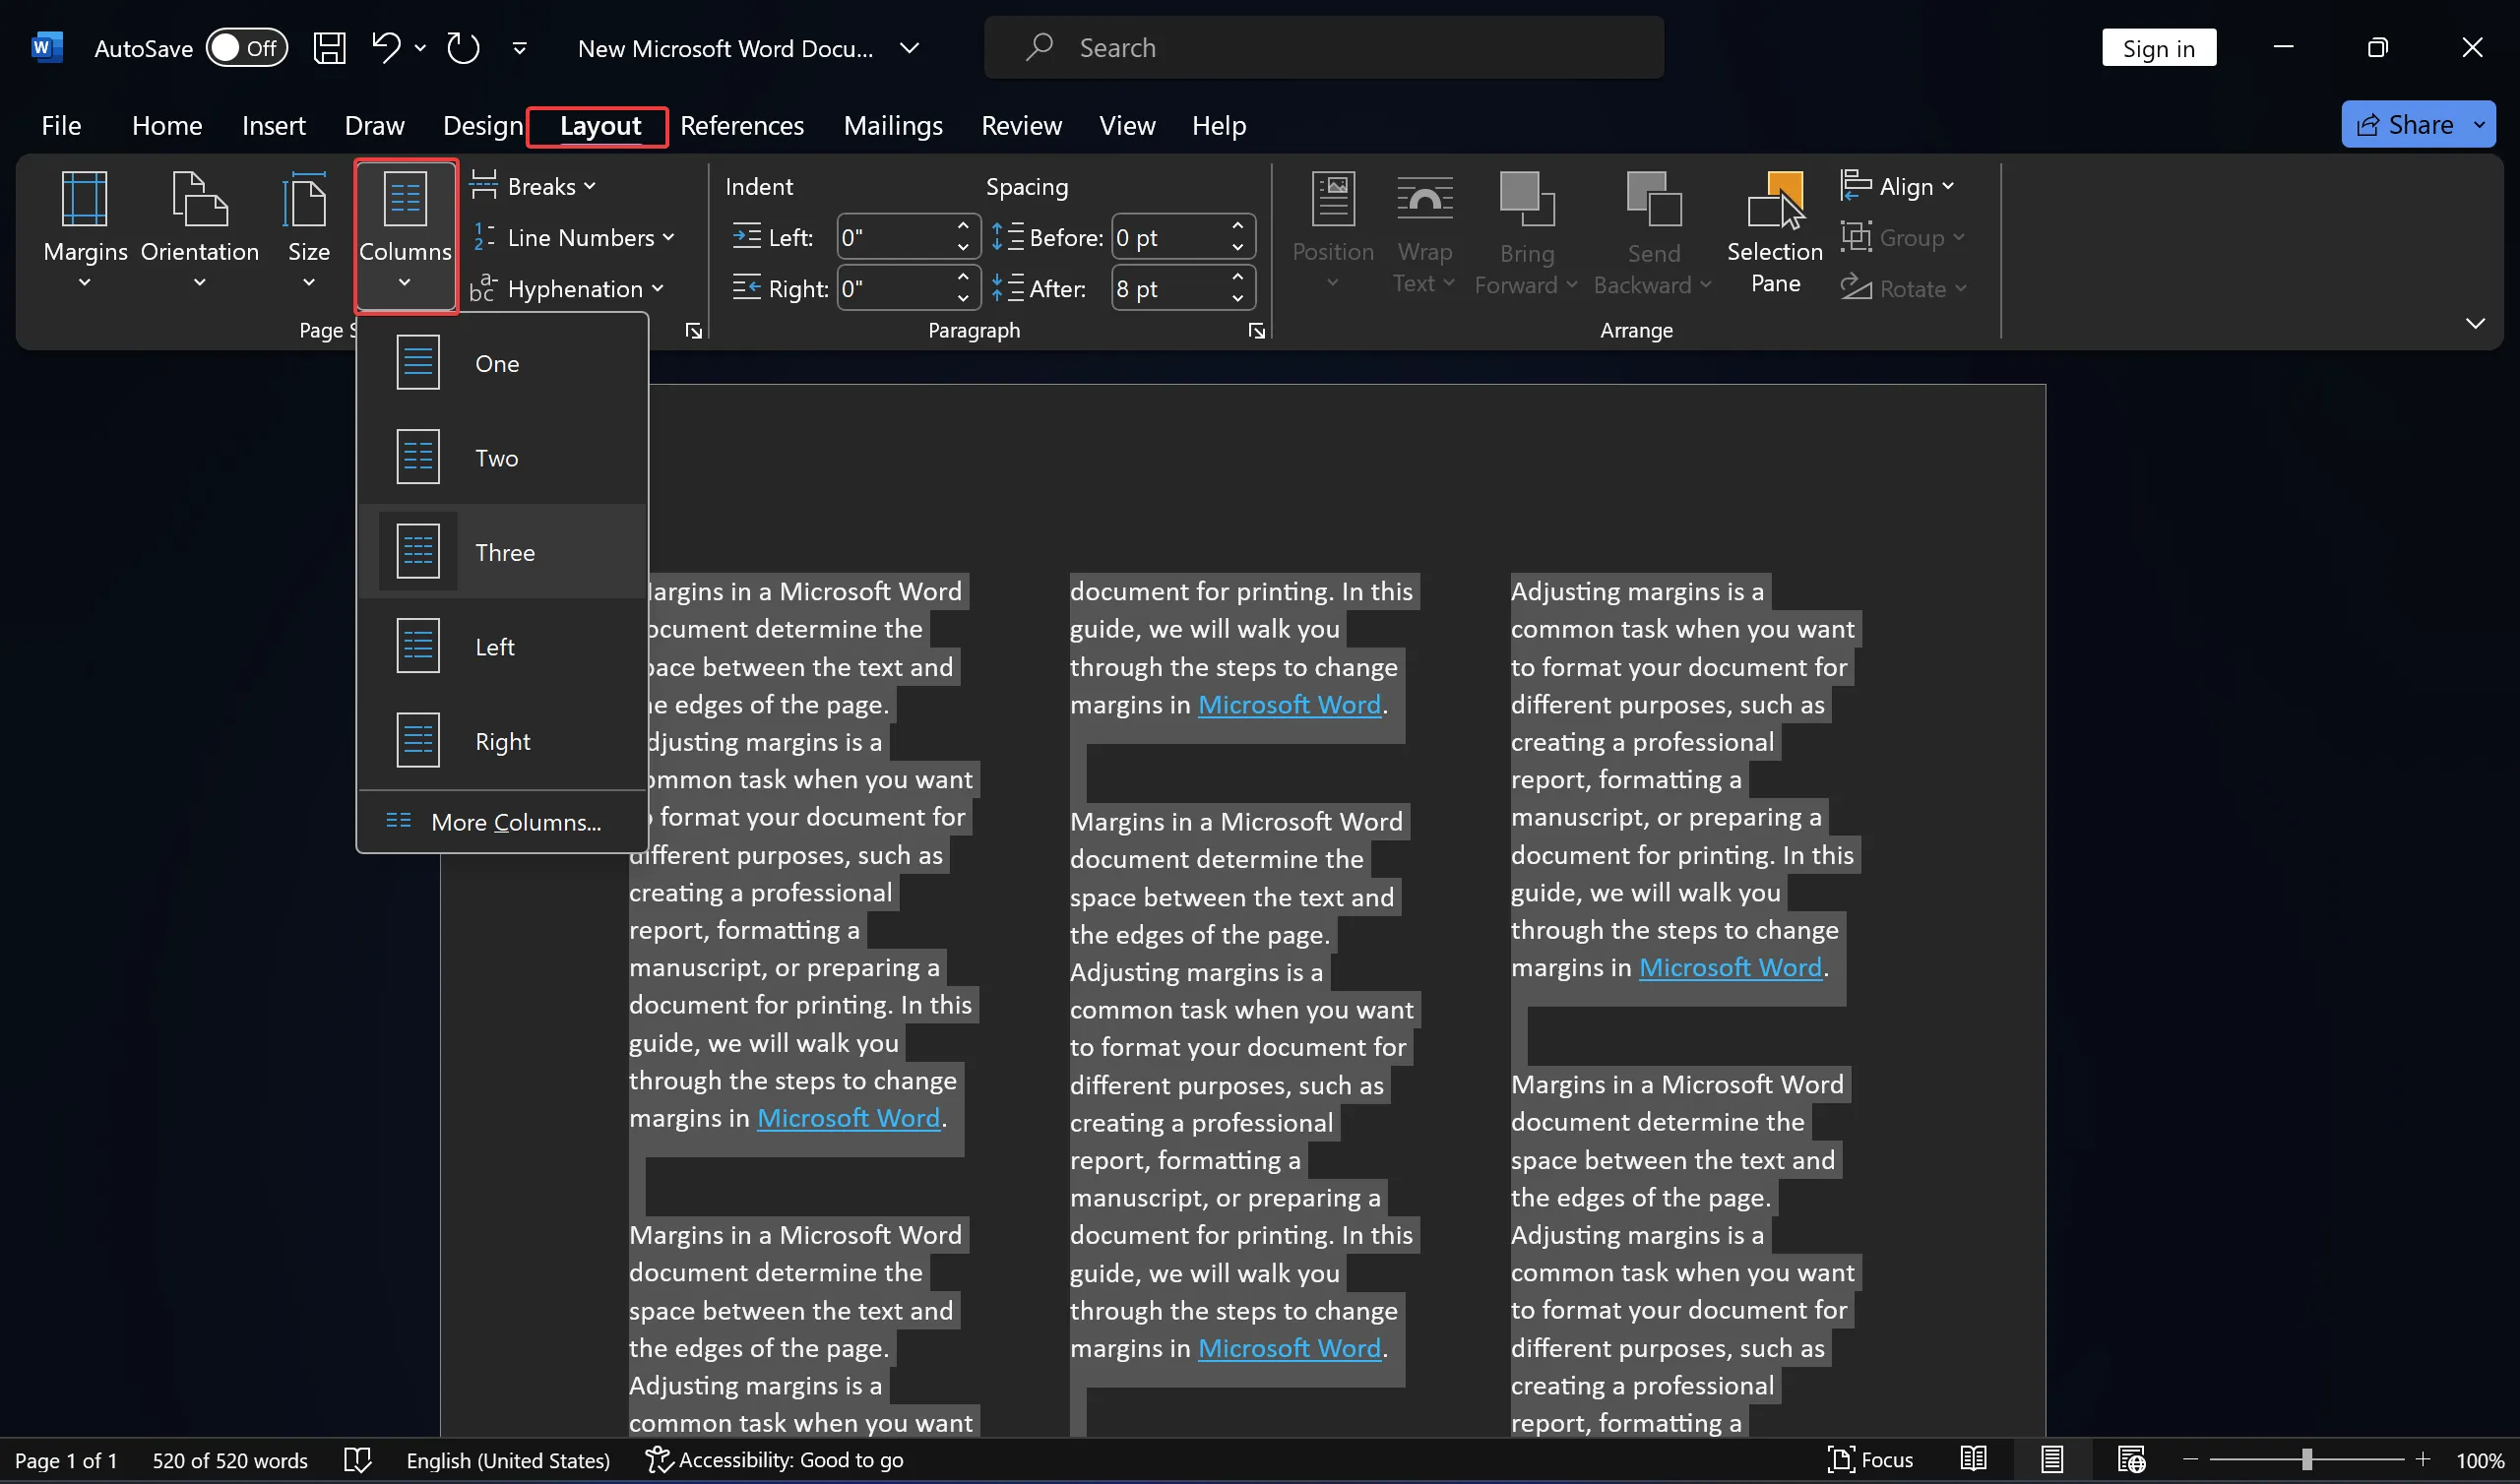
Step 4. In the “Layout” tab, locate the “Columns” button. Click on it to reveal a dropdown menu with options for the number of columns you want to create. You can choose from one column, two columns, three columns, or more.
Step 5. If you want to customize the column layout further, click on “More Columns” at the bottom of the dropdown menu. This will open the “Columns” dialog box, where you can make detailed adjustments:-
-
- Presets: Choose from preset column layouts or specify the number of columns.
- Width and Spacing: Adjust the width and spacing between columns. You can specify the exact width for each column or have Word distribute them evenly.
- Line Between: If you want to add a line between columns, check the “Line between” box.
- Apply To: Select whether you want the column formatting to apply to the whole document or just to a specific section.
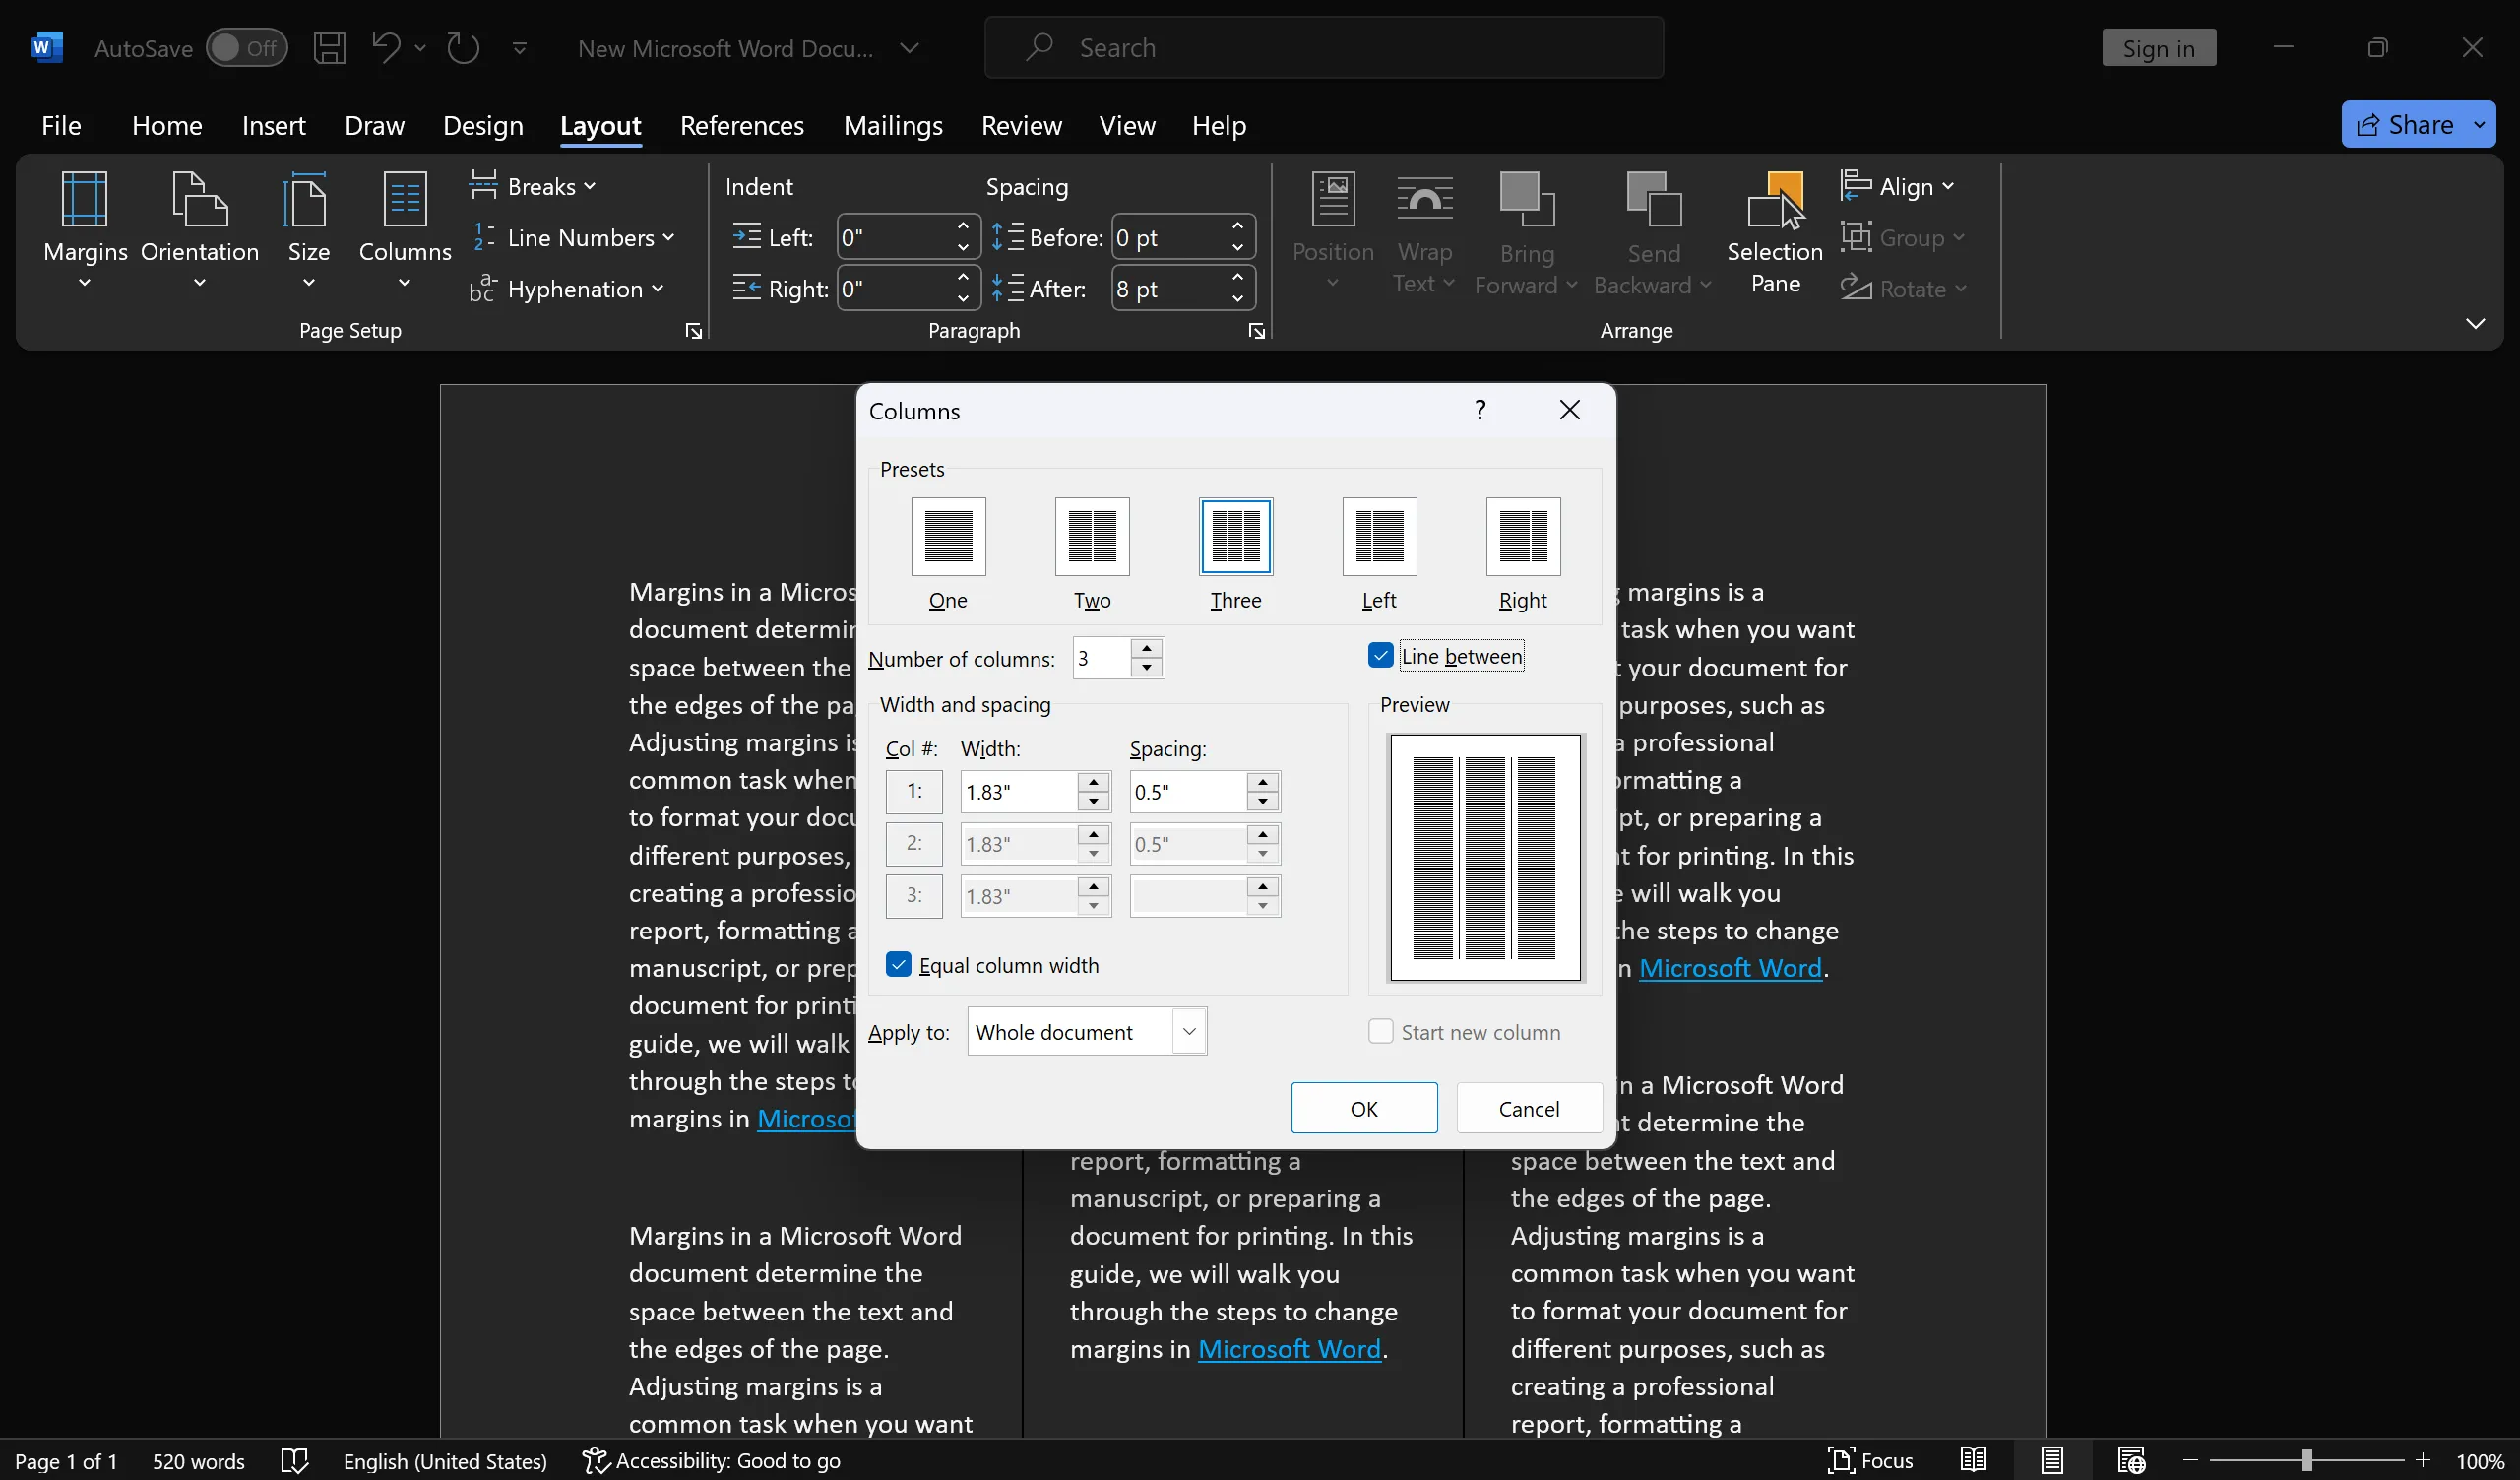
Step 6. As you make adjustments in the “Columns” dialog box, use the preview pane to see how your columns will appear in your document.
Step 7. Once you’re satisfied with your column settings, click the “OK” button to apply the changes. Your selected text or the entire document will now be formatted into columns according to your specifications.
Step 8. With your text divided into columns, you can now add, edit, or format content as needed. To move text between columns, simply cut and paste it. You can also adjust font sizes, styles, and alignment within each column to achieve the desired appearance.
Step 9. Don’t forget to save your document to preserve your column formatting.
How to Columns in Microsoft Word?
Removing columns in Microsoft Word is a straightforward process. Here’s a step-by-step guide on how to do it:-
Step 1. Begin by opening the Microsoft Word document that contains the columns you want to remove.
Step 2. Highlight the text that is formatted into columns. You can do this by clicking and dragging your cursor over the text. If you want to remove columns throughout the entire document, you can press “Ctrl + A” (Windows) or “Command + A” (Mac) to select all text.
Step 3. Go to the “Layout” tab on the Microsoft Word ribbon. This tab contains various formatting options, including those related to columns.

Step 4. In the “Layout” tab, locate the “Columns” button. Click on it to reveal a dropdown menu with options for column formatting.
Step 5. In the dropdown menu, you’ll find an option called “One.” Click on “One” to clear the column formatting. This will return your text to a single-column layout.
Step 6. Check your document to ensure that the columns have been removed as desired. You should now have a single-column layout for the selected text or the entire document if you had selected all text.
Step 7. Remember to save your document to preserve the changes you’ve made.
That’s it! You’ve successfully removed columns from your Microsoft Word document. This process is quick and easy, making it useful when you want to revert to a standard single-column layout or apply a different formatting style to your text.
Columns in Microsoft Word offer a versatile way to present your content, whether it’s for professional documents or creative projects. By following these steps, you can easily create and format columns that enhance the readability and visual appeal of your documents. Experiment with different column layouts to find the one that best suits your needs.
Remember that columns are just one of the many formatting tools available in Microsoft Word, and mastering them can significantly improve your document design skills.
Also Read: How to Change Margins in Microsoft Word?