If you are one of those Windows users who mostly sits on your system to do your job, then I guess you primarily use your PC time for a break or other types of requirements. Let it you need to attend a meeting or go to the market to shop at a specific time; you can use your computer clock. But, if your PC lock shows up at the wrong time, you can not do your job on time. In such a simulation, you need to change or sync the time of Windows 11 with the actual time.
On a Windows PC, there may be multiple reasons to show incorrect times. The reason may be any, but you can change your time to make it right in Windows 11. Windows 11 allows you to change the time in both ways, manually or automatically.
How to Automatically Change Time in Windows 11?
If you prefer to set time automatically, Windows 11 provides an easy way. Complete the following steps to update your Windows PC time automatically:-
Step 1. Open the Settings app by pressing the Windows + I keys from the keyboard.
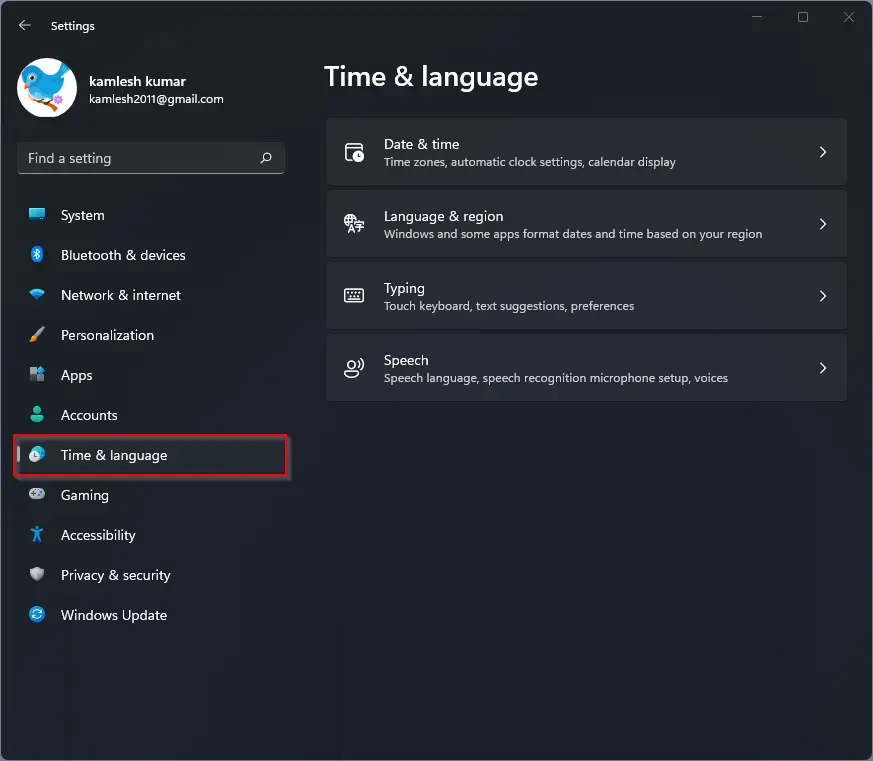
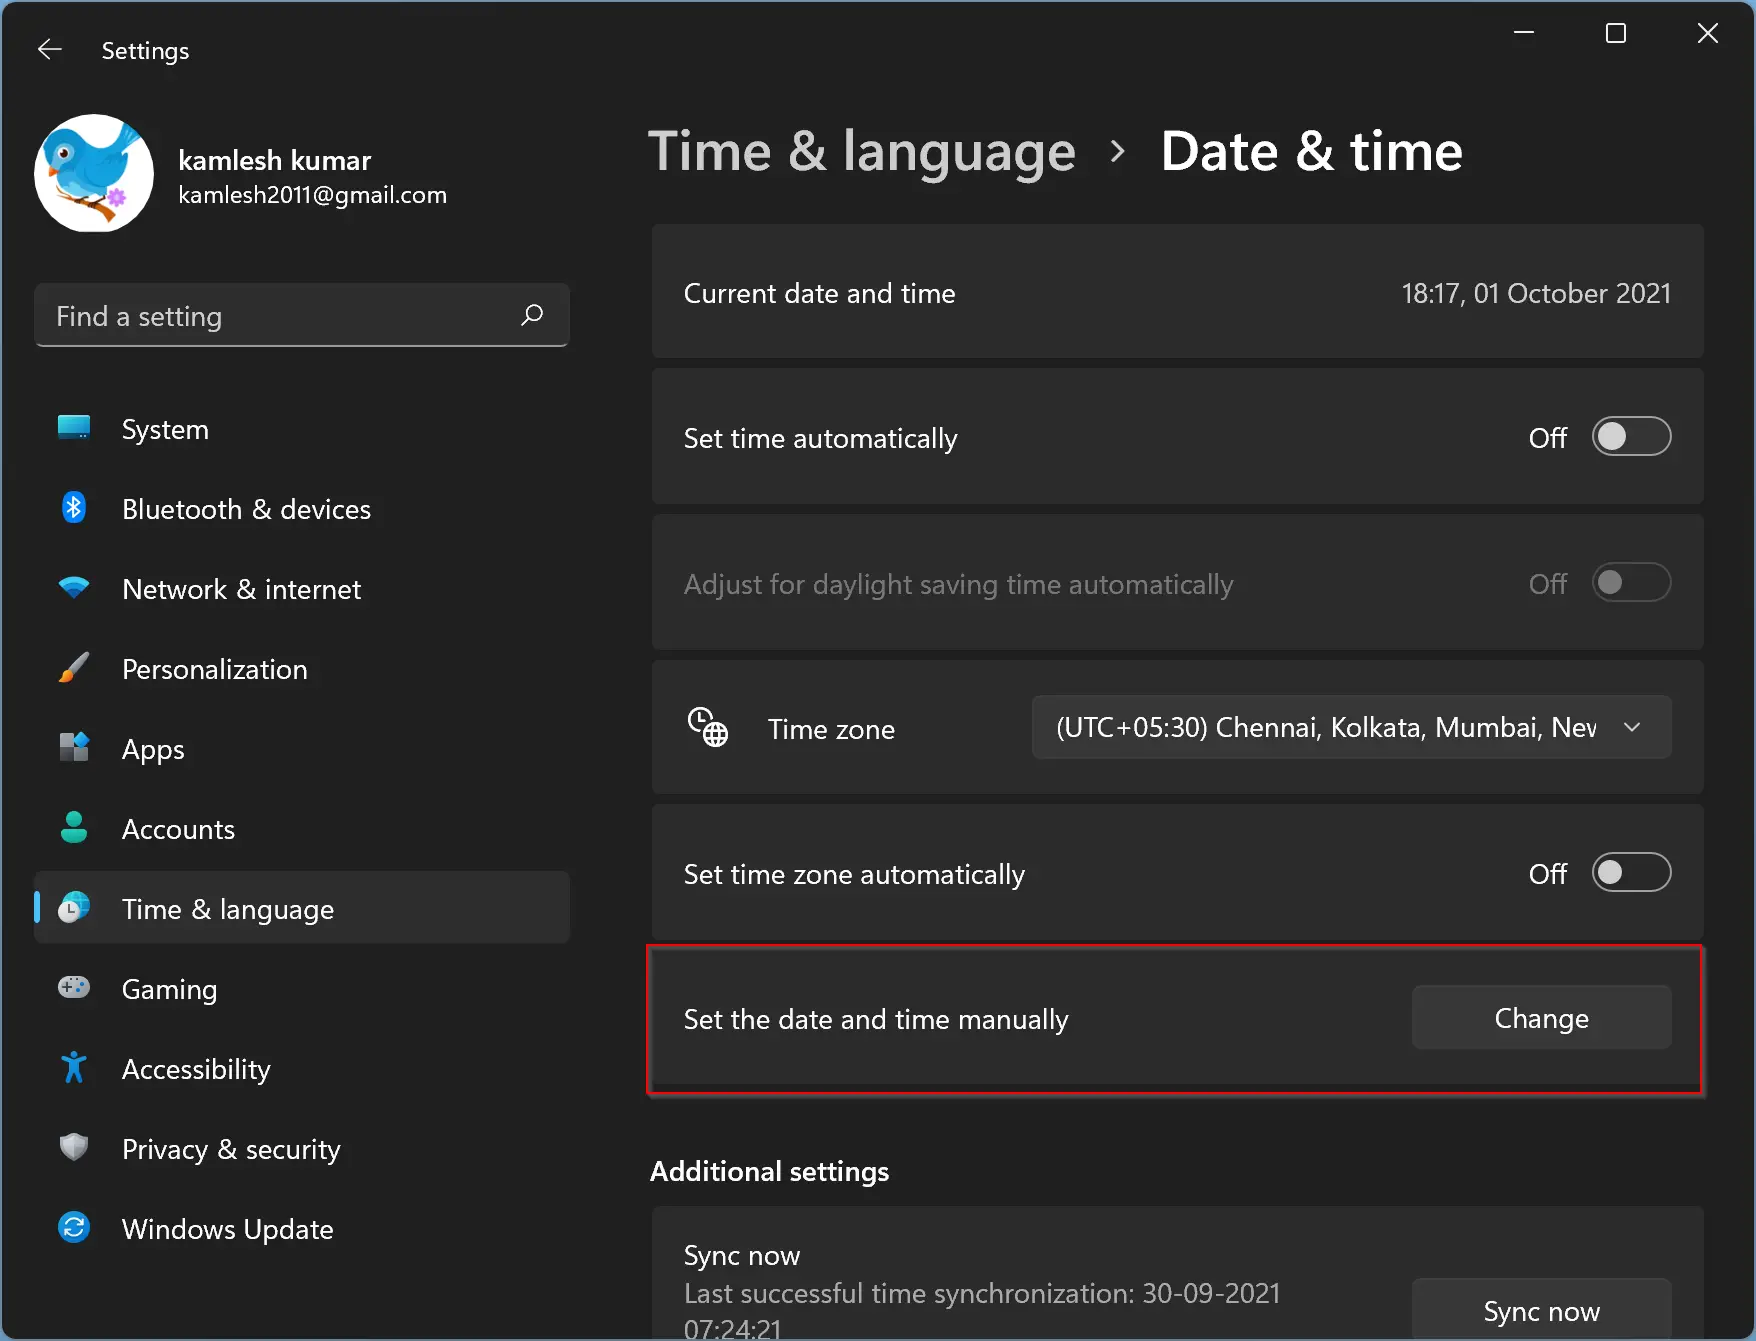
Step 2. When Windows Settings opens, select the Time & language category from the left side pane.
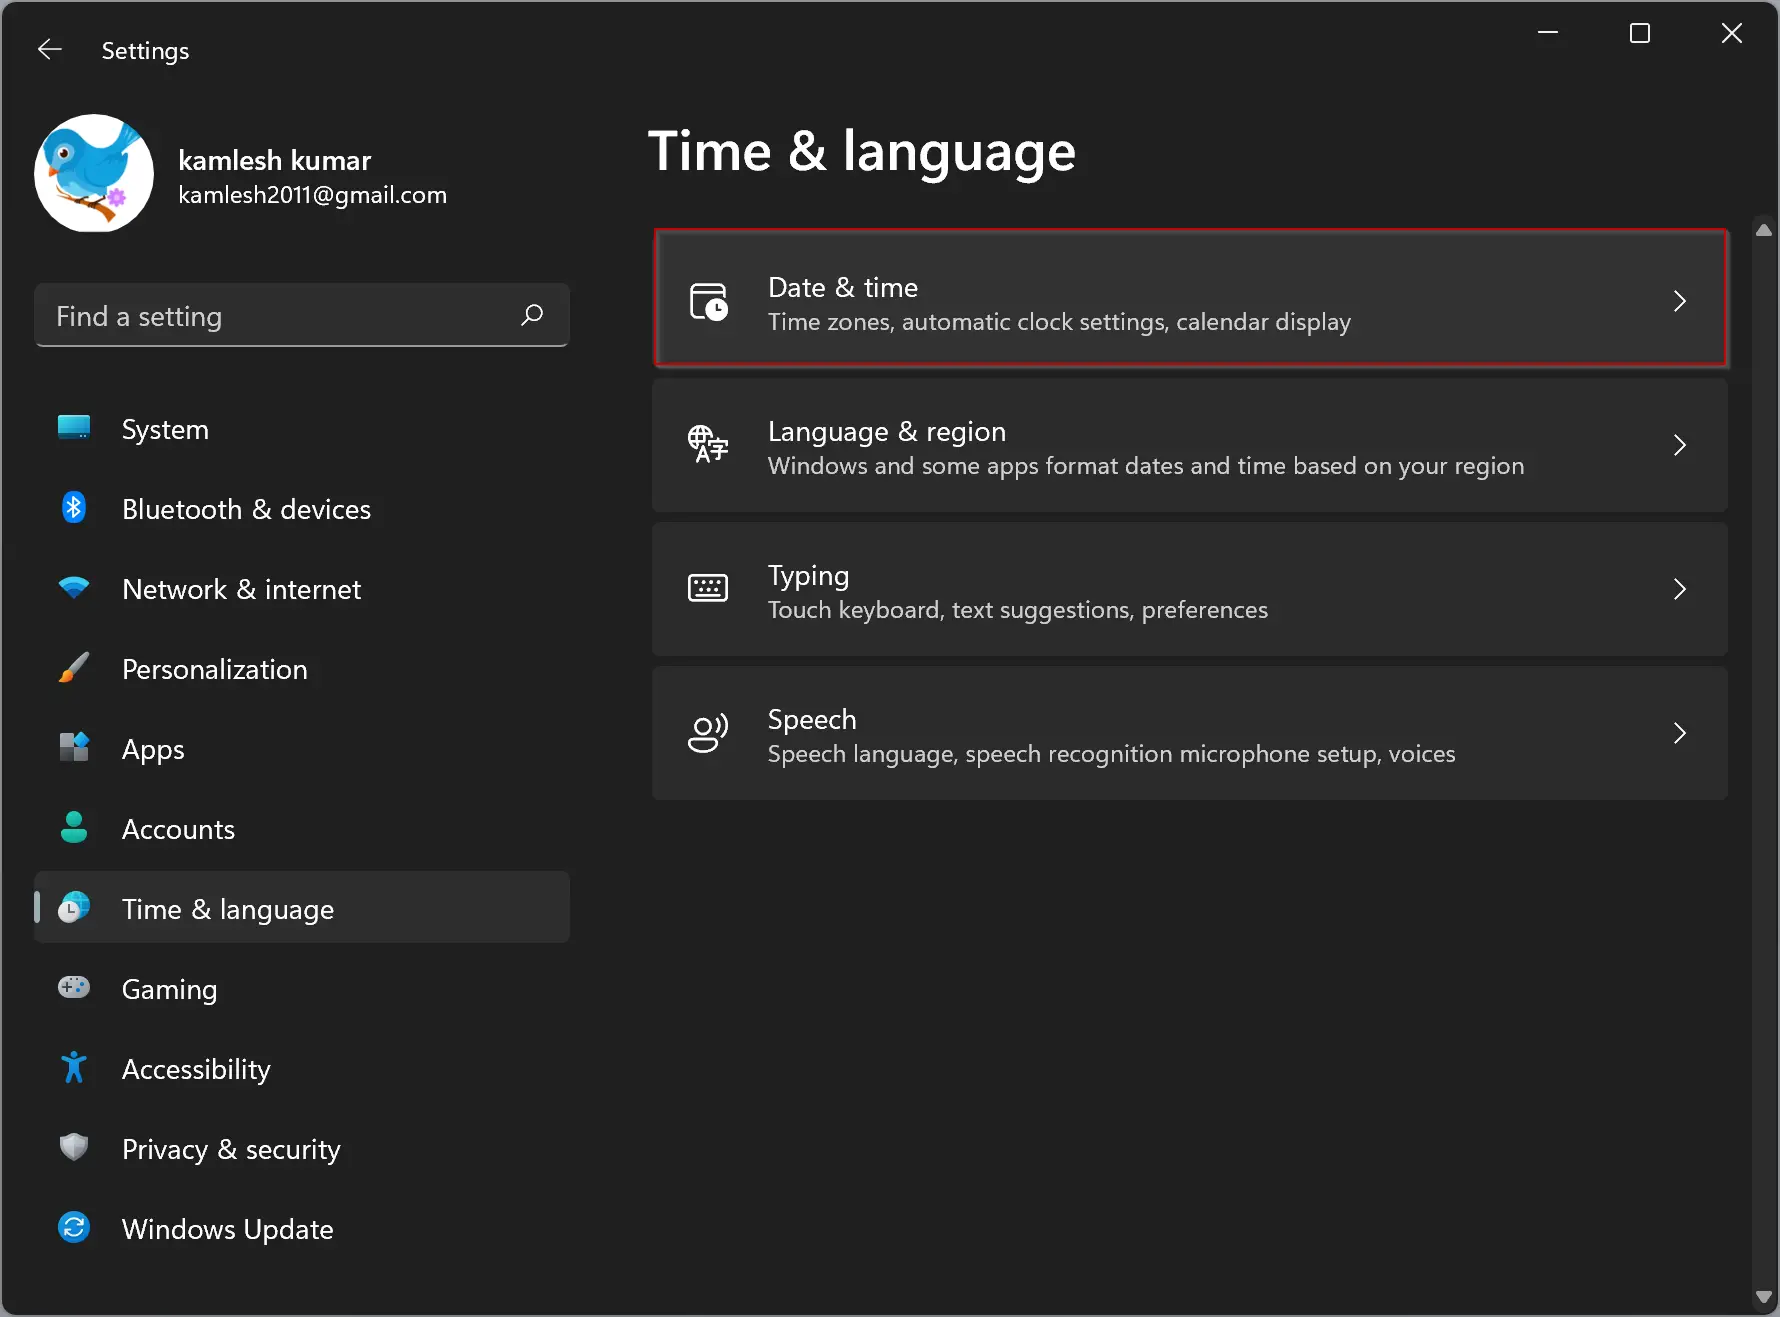
Step 3. Then click the Date & time tab on the right-side pane.
Step 4. In the Date & time settings page, turn On the toggle switch beside Set time automatically.
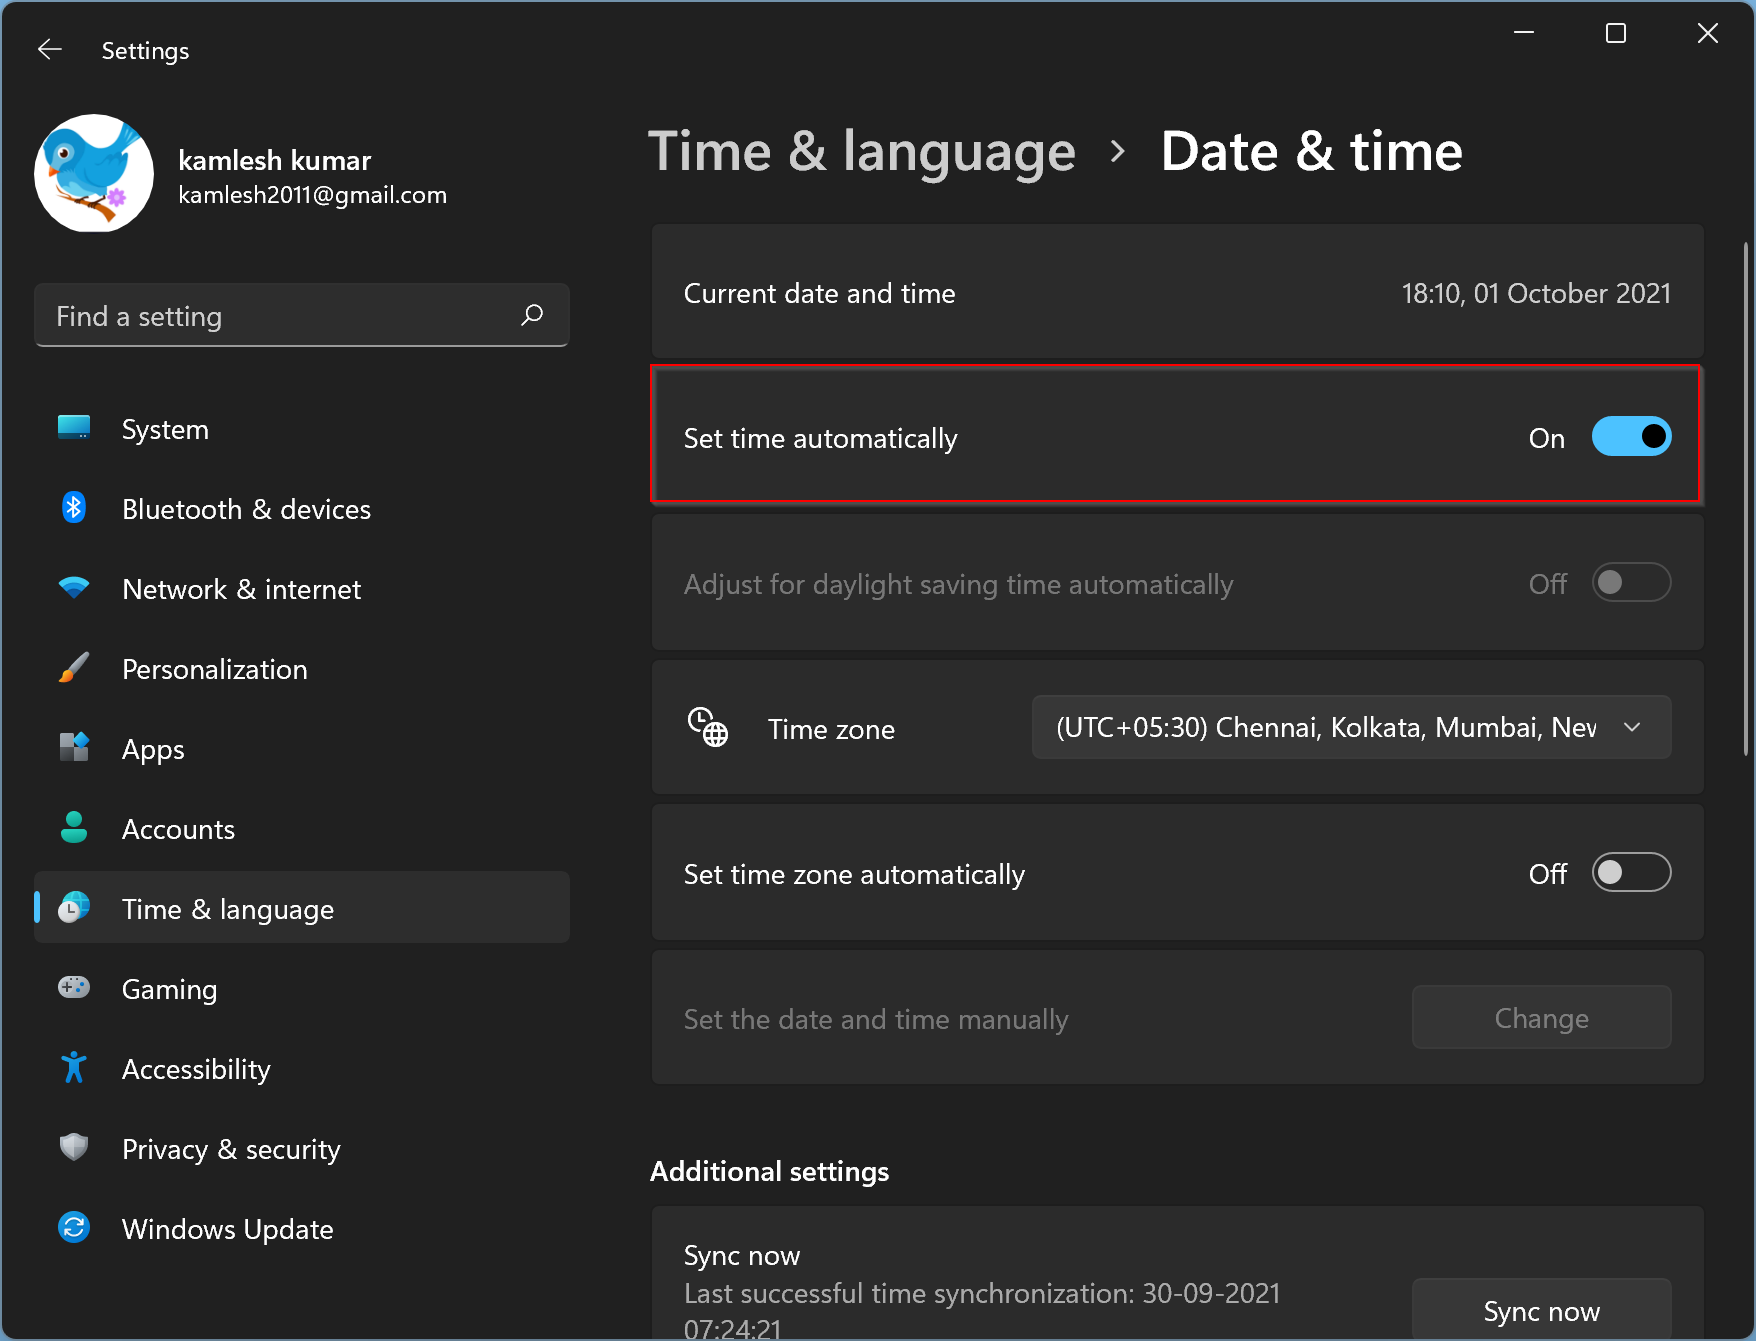
When done, your Windows 11 computer will sync the Microsoft server’s time and set the correct time according to your time zone.
How to Manually Set Time in Windows 11?
Due to some reason, if you want to set the time and date manually, then do the following steps:-
Step 1. Open the Settings app by pressing the Windows + I keys from the keyboard.

Step 2. When Windows Settings opens, select the Time & language category from the left side pane.
Step 3. Then click the Date & time tab on the right-side pane.

Step 4. In the Date & time settings pane, turn Off the toggle switch beside Set time automatically.
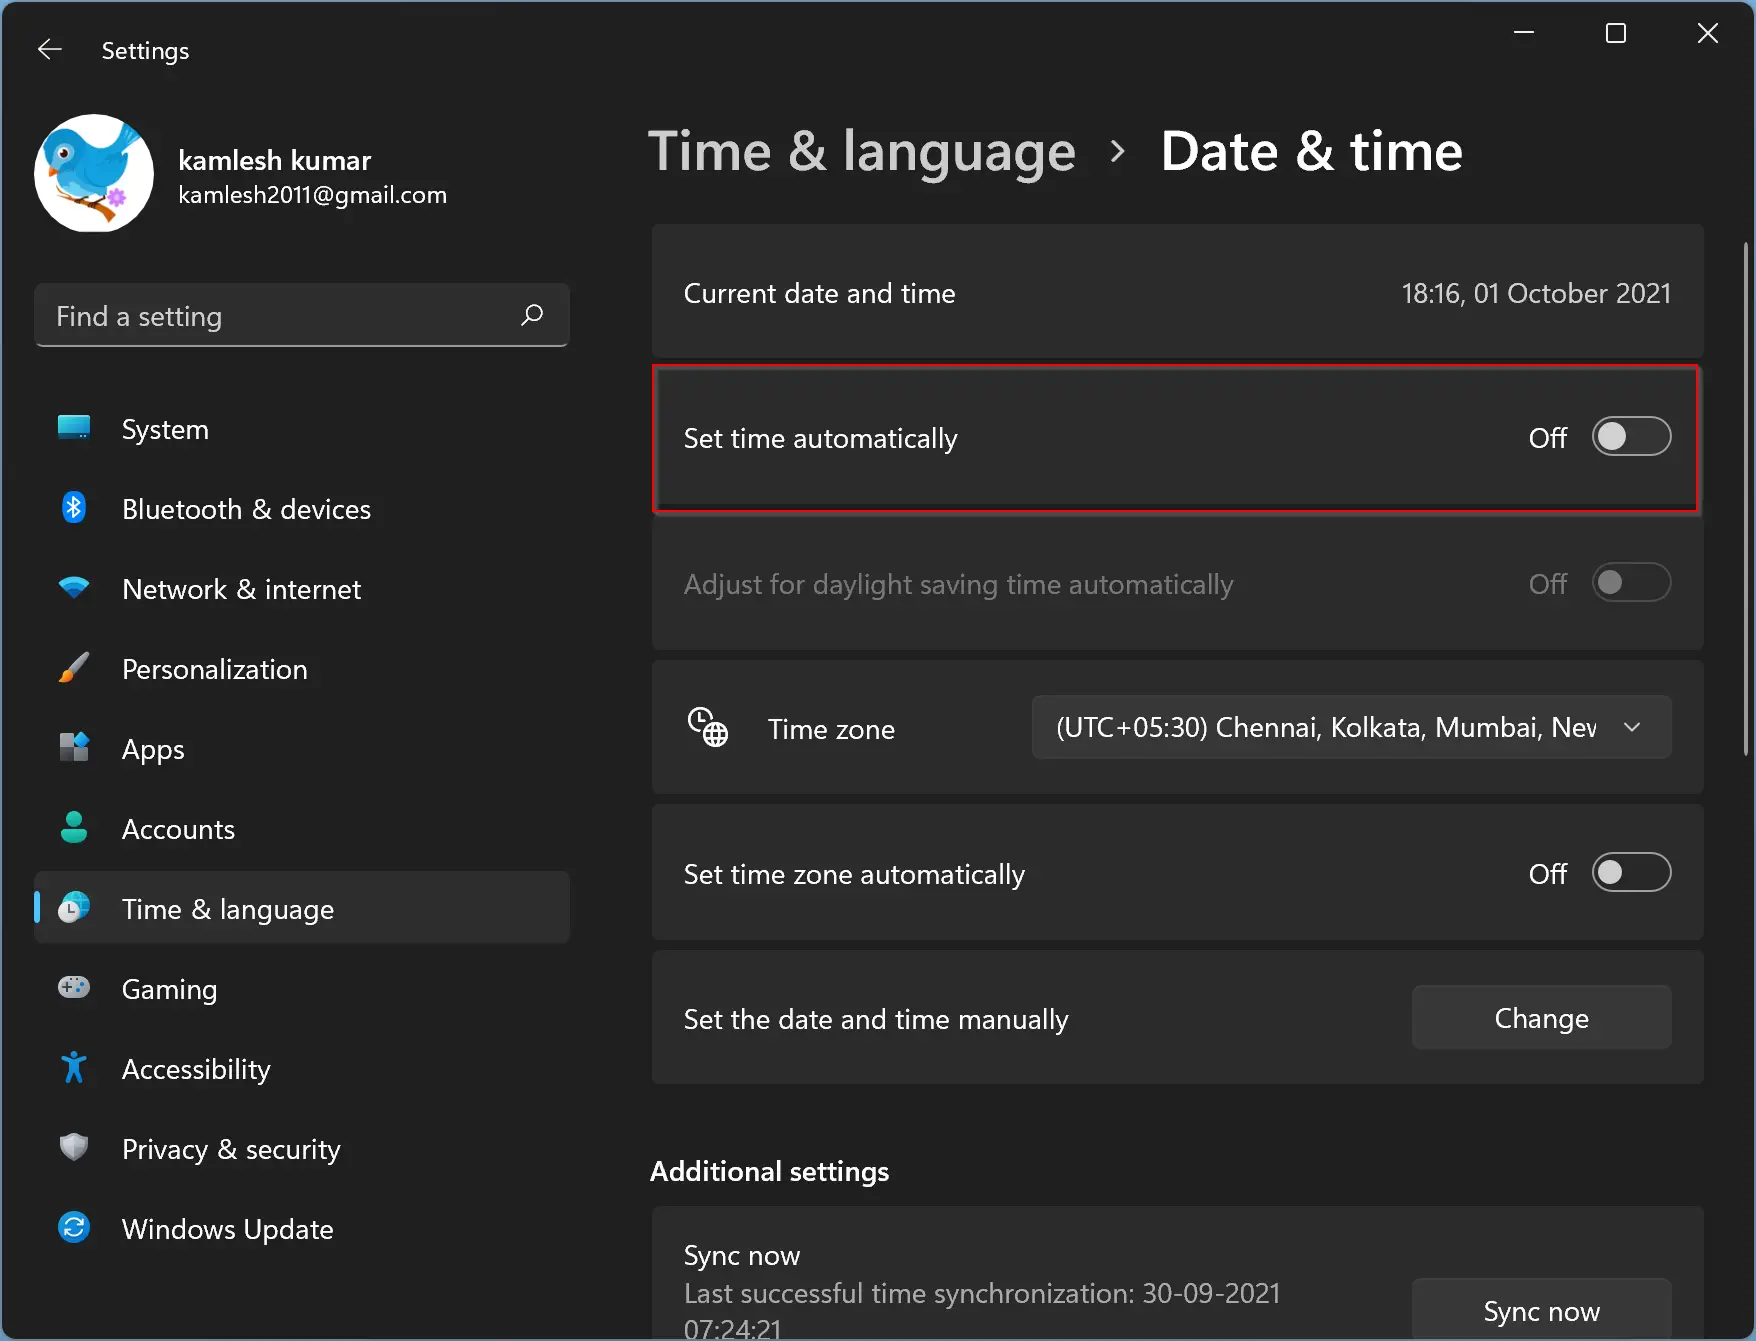
Step 5. While you’re on Date & time settings, click the Change button beside “Set the date and time manually.”
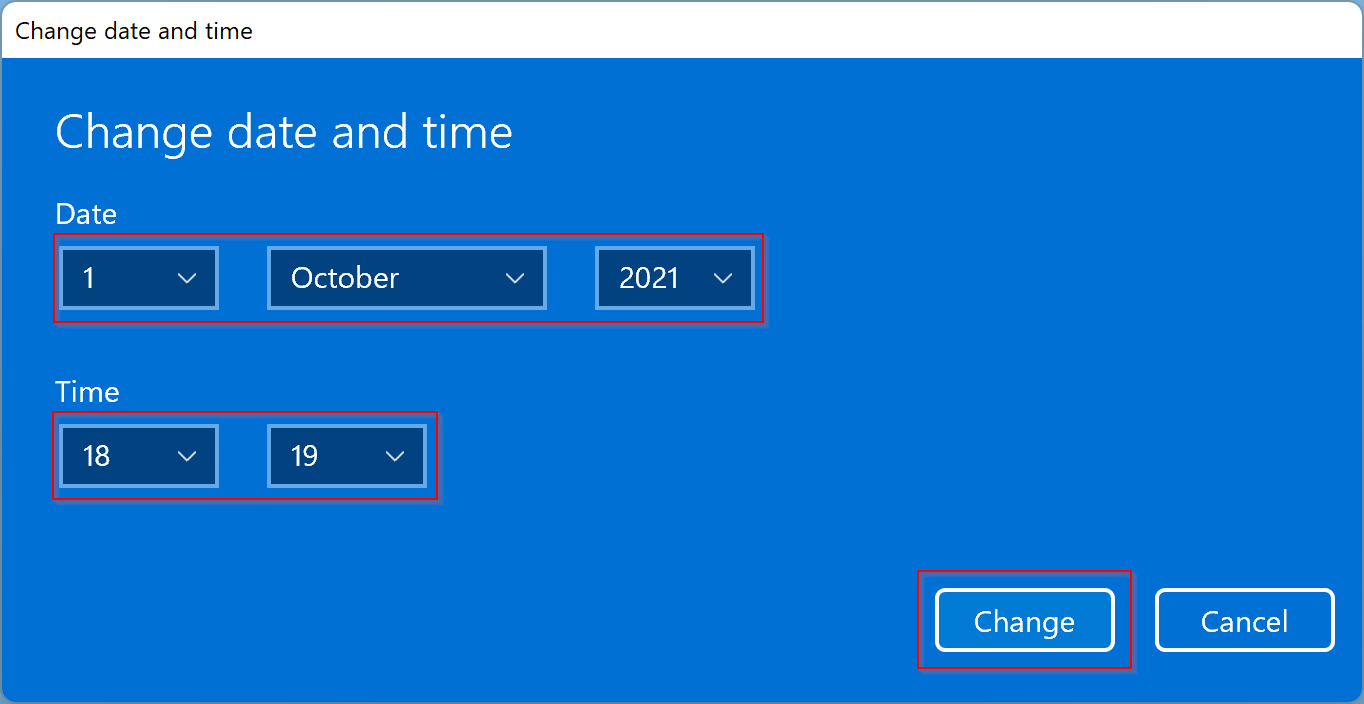
Step 6. On the Change date and time pop-up window, select the correct date and time, then click the Change button.
That’s it.
Conclusion
In conclusion, Windows 11 offers users the flexibility to change the time manually or automatically. Whether you need to attend a meeting, go shopping, or complete any other task that requires accurate timekeeping, you can ensure that your computer clock is synced with the actual time by following the simple steps provided in this guide. With the ability to switch between manual and automatic time-setting, you can choose the option that suits your preference and ensure that your Windows 11 PC displays the correct time. Additionally, if you want to change the date and time format in Windows 11, there is a guide available for that too.
Also Read: