Do you know an image on your computer screen is built up from thousands or millions of pixels? The screen creates these images by changing the colors of these tiny square elements. The screen resolution informs how many pixels your screen can display horizontally and vertically. It is written in the form of 1,440 x 900 pixels. In this example, the screen can show 1,440 pixels horizontally and 900 vertically.
Screens that are different sizes can still have the same screen resolution. That means display resolution does not depend upon the size of the monitor. You may have laptops with 17″ and 15″, both with a resolution of 1,440 x 900 pixels. In this example, although the monitor on your desk is larger, you won’t actually be able to fit anything extra onto it. Since the total number of pixels is the same, everything may look a bit bigger:
By reading the above paragraphs, you might now understand the importance of screen resolution. The computer’s screen resolution determines how large texts and images will appear on your monitor. That means an incorrect display resolution may make the text blur or totally invisible.
When you install a correct display driver, Windows 11 automatically pick the proper screen resolution, and in most cases, you don’t need to change that. But if the texts do not appear and you want to troubleshoot, you may want to try with a different screen resolution set. Windows 11 allows you to change the screen resolution using the Settings app. Here is how to do it.
How to Change Display Resolution using Settings app in Windows 11?
Follow these steps to change Display Resolution using the Settings app in Windows 11:-
Step 1. Open the Settings app by pressing Windows + I keys from the keyboard.
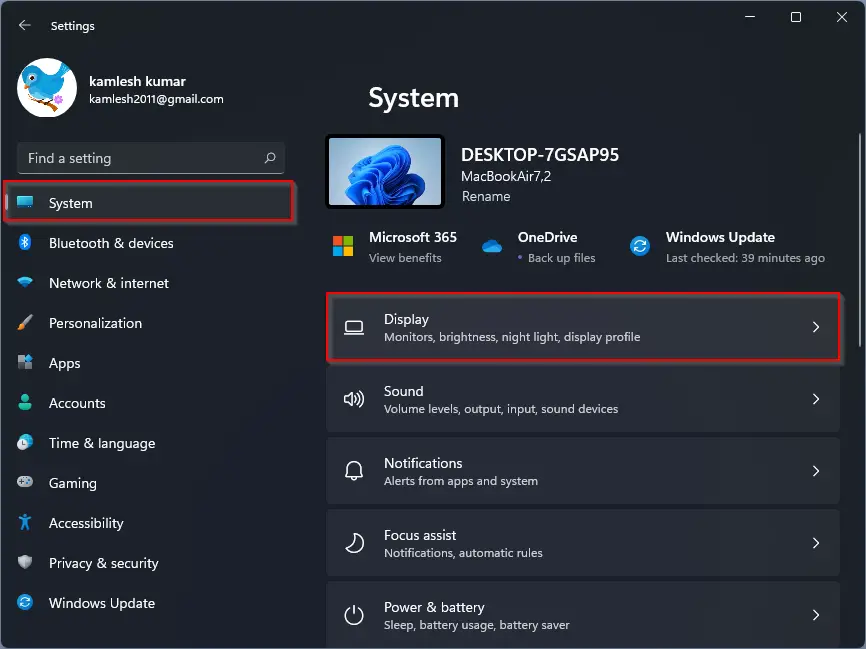
Step 2. When Windows Settings opens, select the System category from the left sidebar.

Step 3. On the right-side pane, click the Display tab.
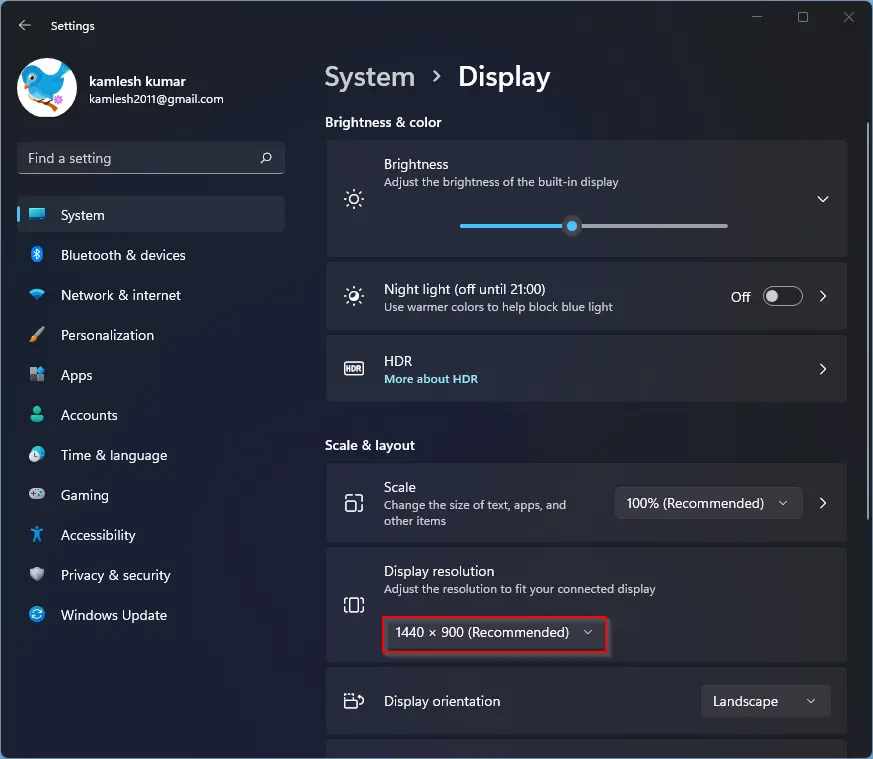
Step 4. Now, look for the Scale & layout section. Under that, you will see the Display resolution option.
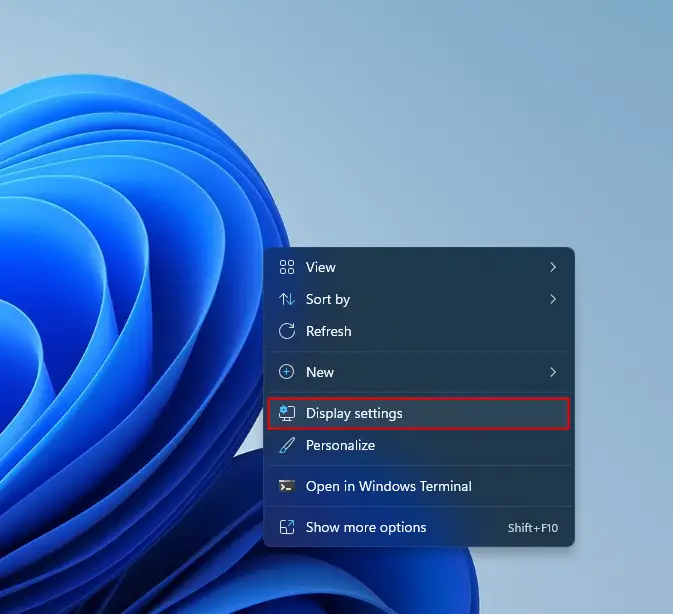
Quick Note: You can also reach this page by right-clicking on the free space Desktop and selecting Display Settings.
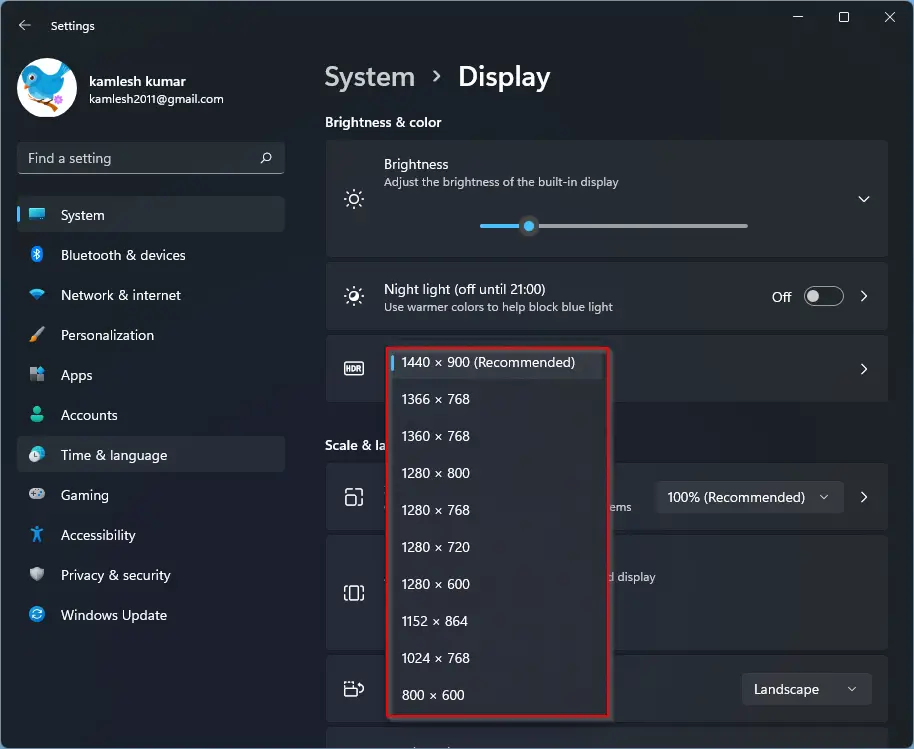
Step 5. Click the Display resolution drop-down and select a resolution that fits with your computer. Windows 11 automatically detects the correct resolution for you, and next to that, you will see a Recommended word.
If your PC includes an Intel Graphics card, you can use the Intel Graphics Command Center app to change the screen resolution.
How to Adjust Screen Resolution via Intel Graphics Command Center in Windows 11?
Follow these steps to adjust Screen Resolution via Intel Graphics Command Center in Windows 11:-
Step 1. Click on the Start button on the taskbar and search for Intel. From the available results, click on the Intel Graphics Command Center app to open it.
Note: If you have not yet installed Intel Graphics Command Center, you can get it from Microsoft Store.

Step 2. When the Intel Graphics Command Center app opens, click Display on the left sidebar.
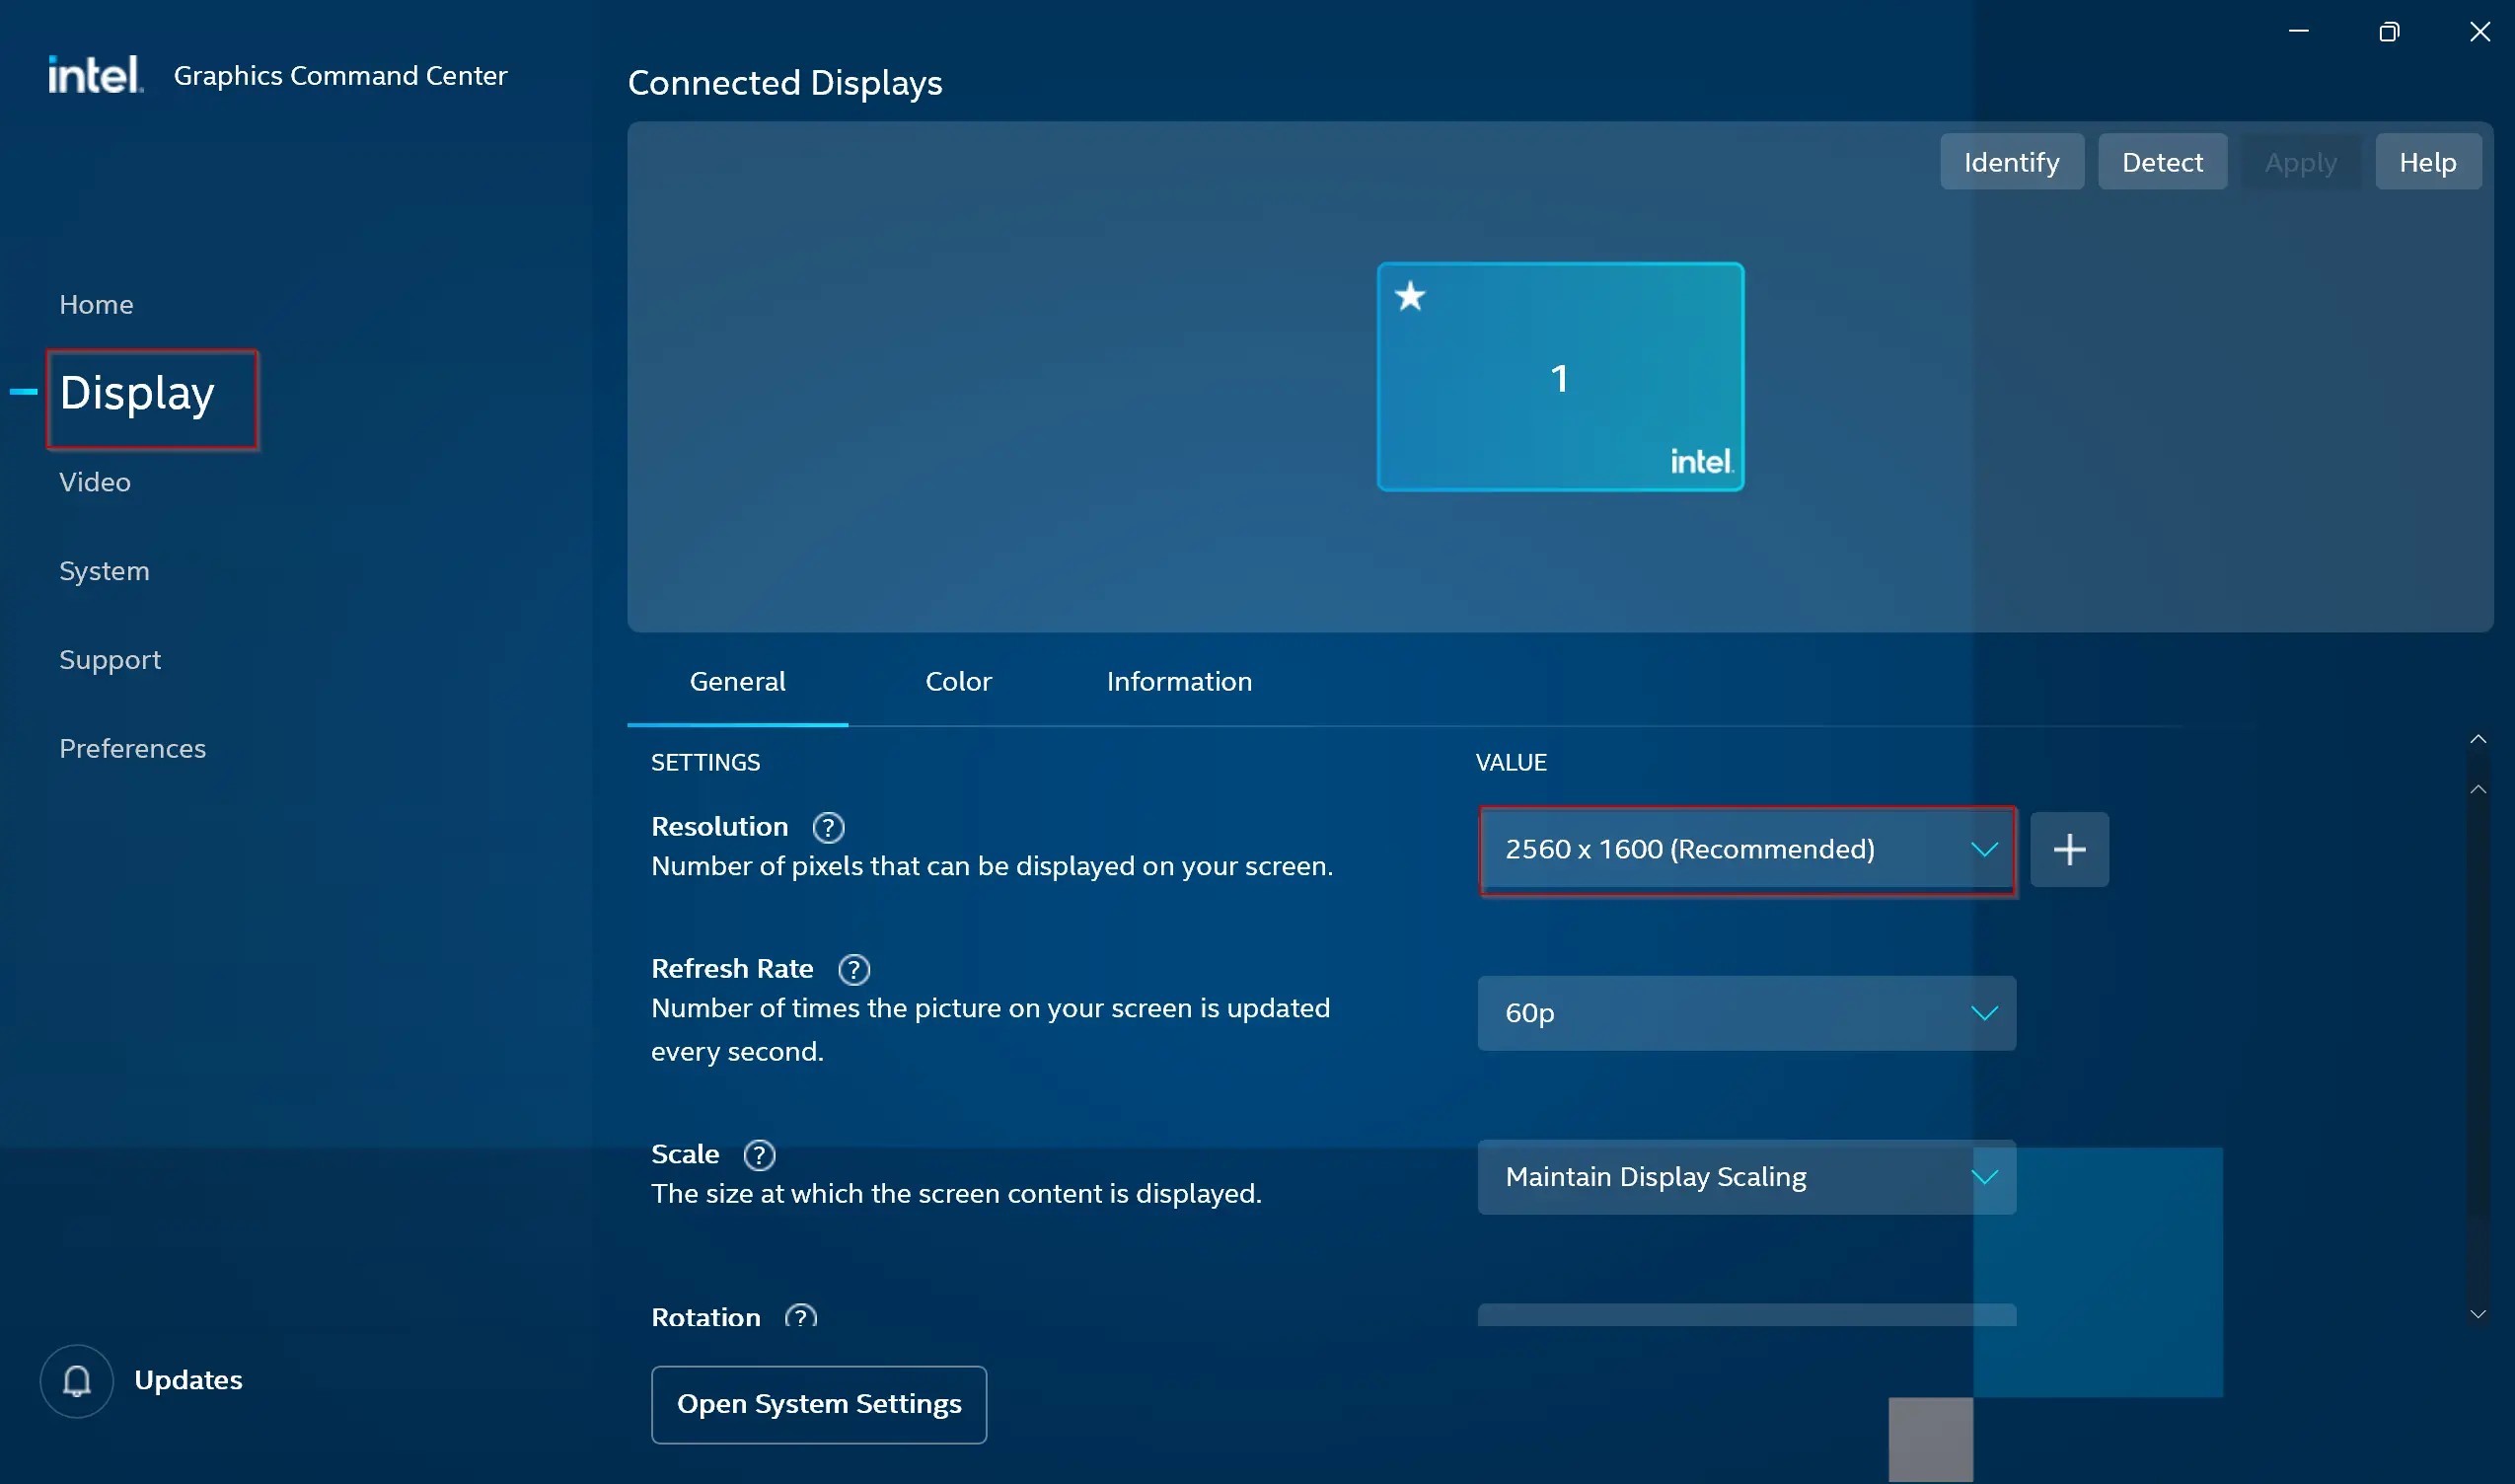
Step 3. On the right-sidebar of Display, click the drop-down of Resolution and select that fits your monitor.
Conclusion
In conclusion, understanding screen resolution and how to adjust it is crucial to ensuring a comfortable and effective computing experience. Screen resolution determines the clarity and size of text and images on your monitor, and an incorrect resolution can lead to blurred or invisible text. Windows 11 offers an easy way to change screen resolution through the Settings app, and those with Intel Graphics cards can use the Intel Graphics Command Center app. By following the simple steps outlined in this article, you can optimize your display for maximum visibility and productivity.
