All modern Windows computers and laptops come equipped with a sound card to hear music, watch videos, etc. I hope your PC also has an audio card installed; if not, you can attach it after purchasing from the market. After that, install the drivers from the manufacturer’s website, and then you can hear sound from your computer. If the sound is too loud or quiet coming from Windows 11 PC speakers or headphones, you need to adjust it. It’s straightforward to adjust the volume output, and several different techniques you can use.
In this gearupwindows article, we will guide you on adjusting the sound volume on Windows 11.
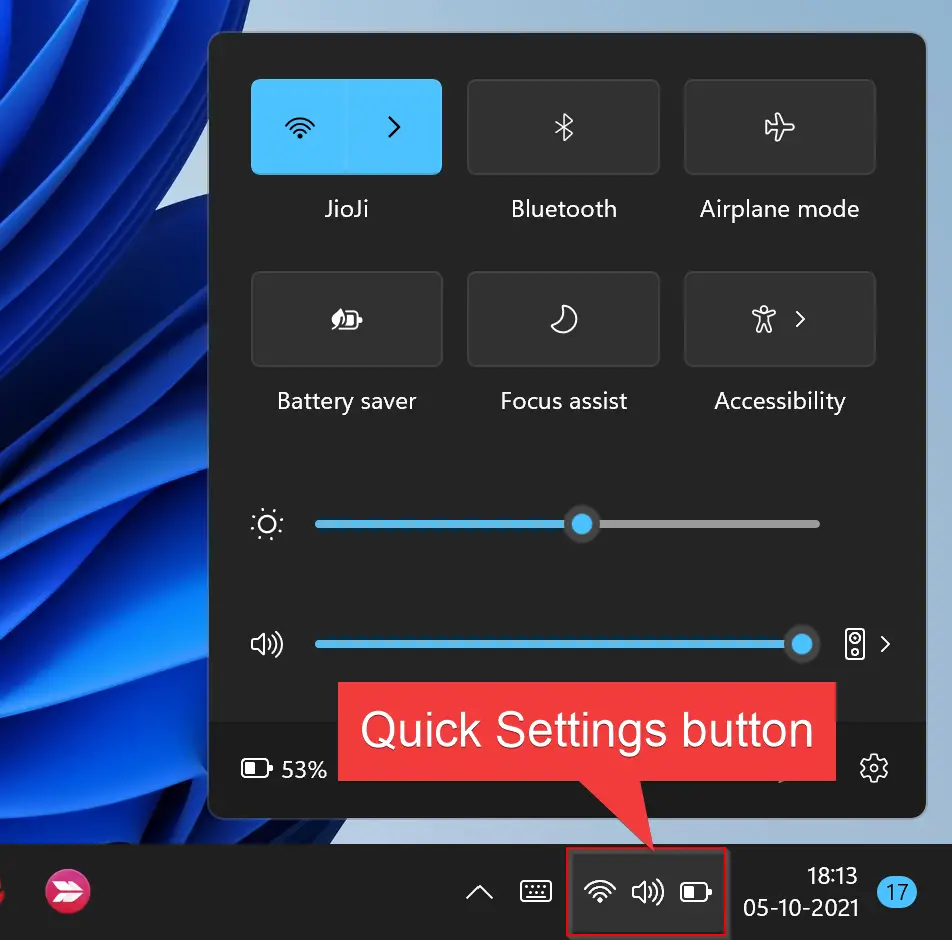
How to Change System Volume on Windows 11 using Quick Settings?
To quickly adjust sound volume, open the Quick Settings menu. To do so, click the Quick Settings button in your taskbar (click anywhere on Wi-Fi, Speaker, or Battery icons).
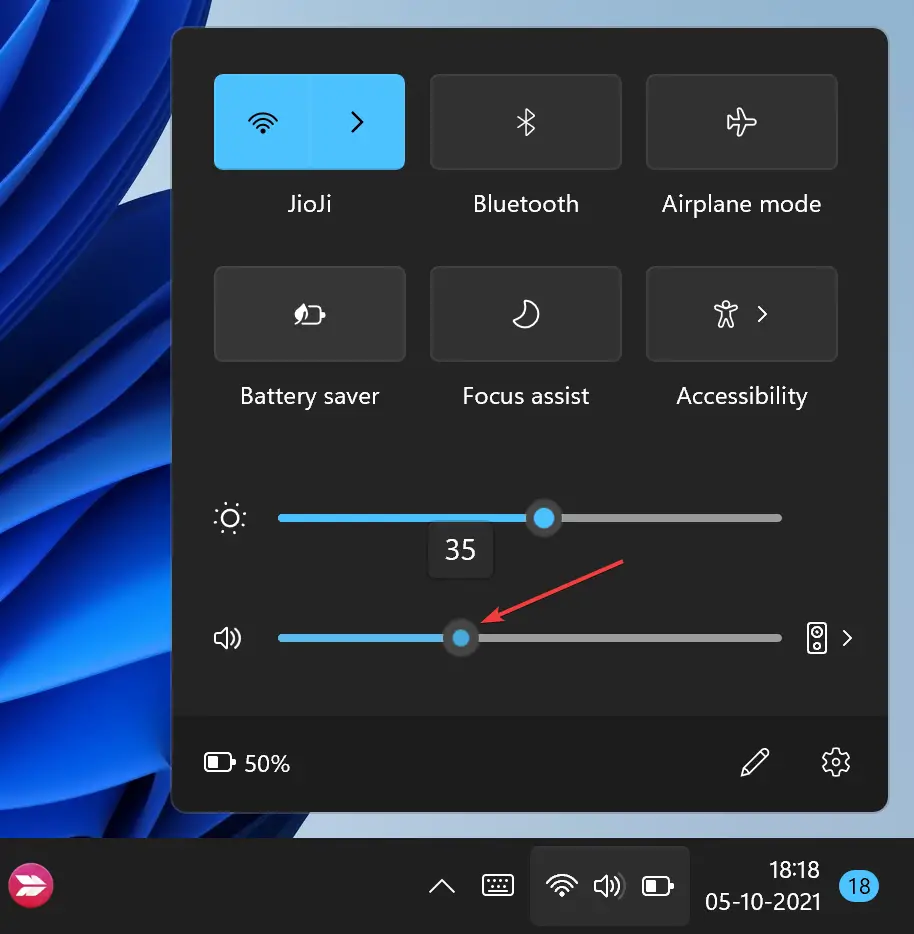
After that, the Quick Settings menu will appear. Locate the volume slider (with a speaker icon beside it) and click the circle icon on the slider. Then drag it right or left to increase or decrease the system volume anywhere from 0 to 100. When you move the slider, you will notice that the speaker icon changes from more to fewer wave lines or vice-versa. After adjusting the volume, click anywhere outside the Quick Settings menu to disappear.
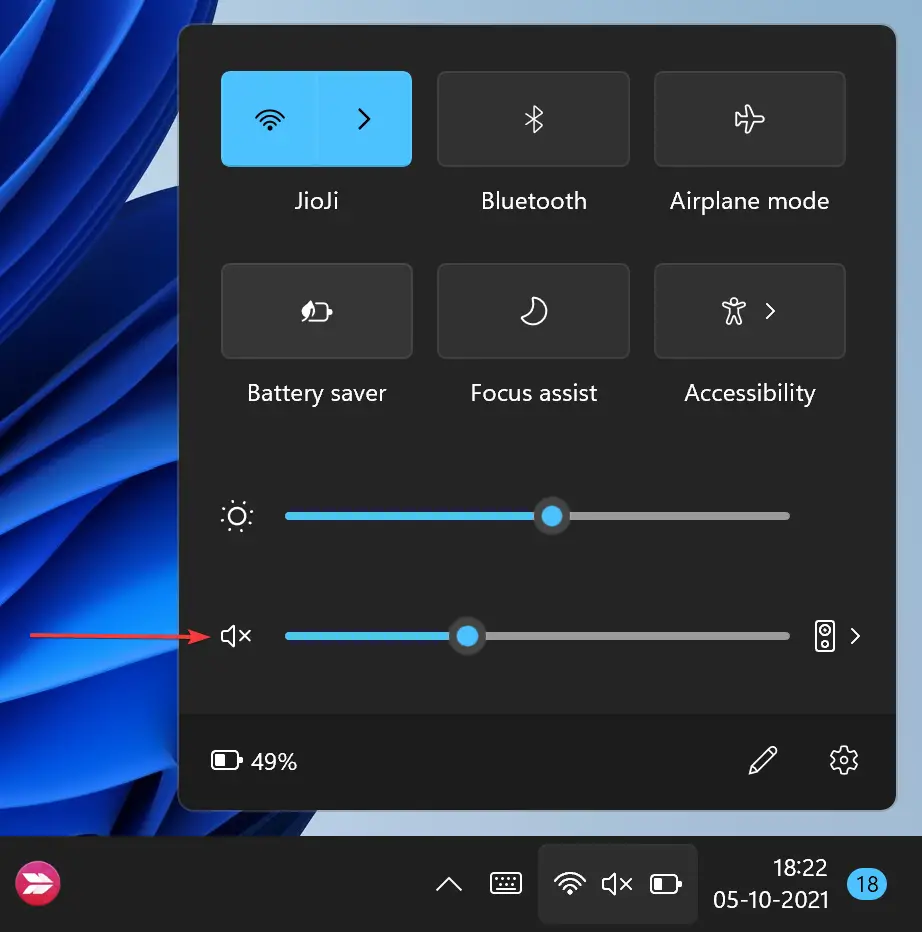
If you want to mute your Windows 11 sound output quickly, just click the speaker icon beside the volume slider. When muted, the speaker icon will wear “x” beside it. To unmute, click the sound icon again.
How to Adjust System Volume in Windows 11 using the Settings app?
It is also possible on Windows 11 to adjust the system volume using the Settings app. To do that, perform the following steps:-
Step 1. Open the Settings app by pressing Windows + I keys from the keyboard.

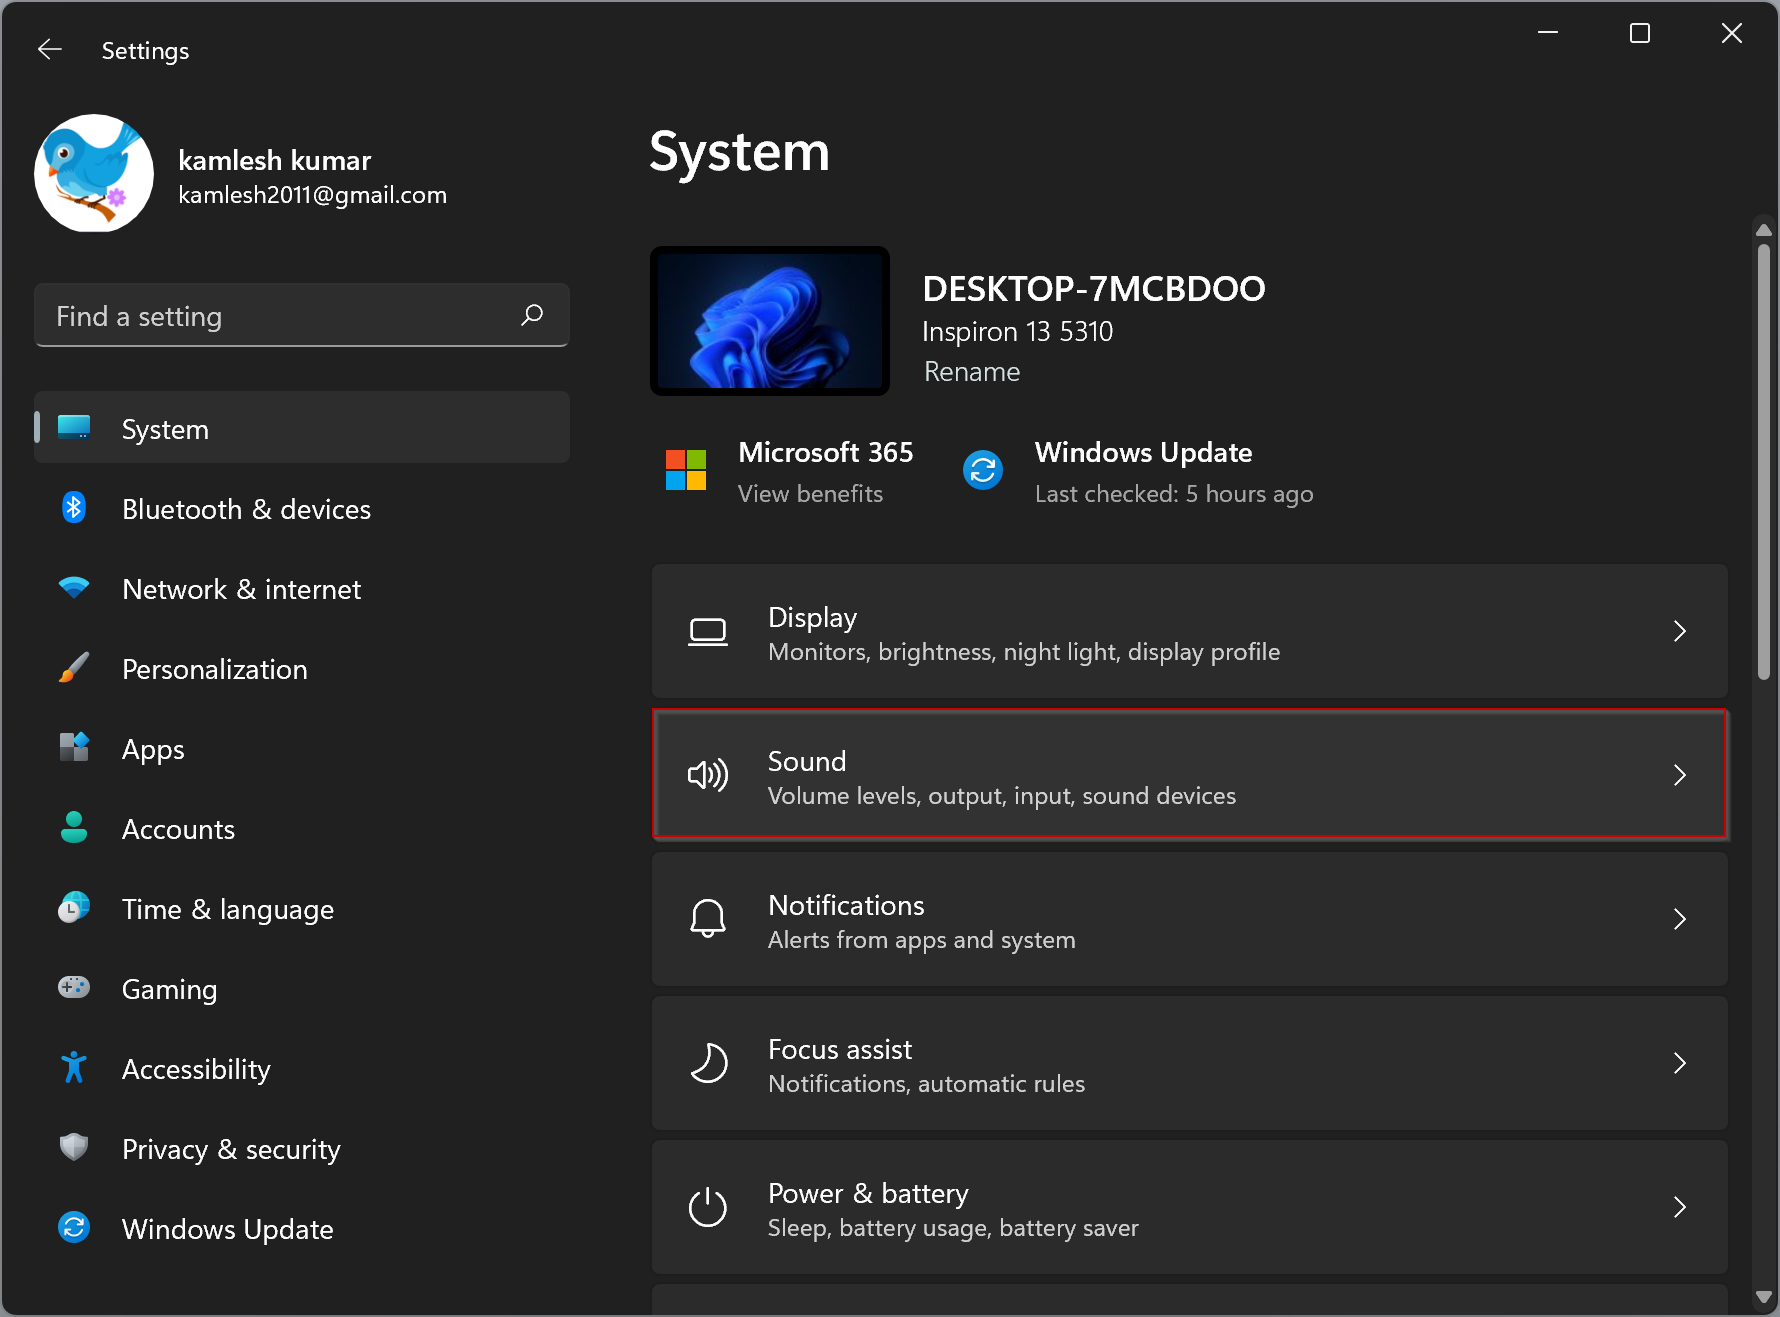
Step 2. When Windows Settings open, select the System category from the left sidebar.
Step 3. On the right side pane, click the Sound tab.
Step 4. In the Sound Settings pane, under the “Output” section, use the “Volume” slider to increase or decrease the audio output level. You can adjust the volume from 0 to 100.
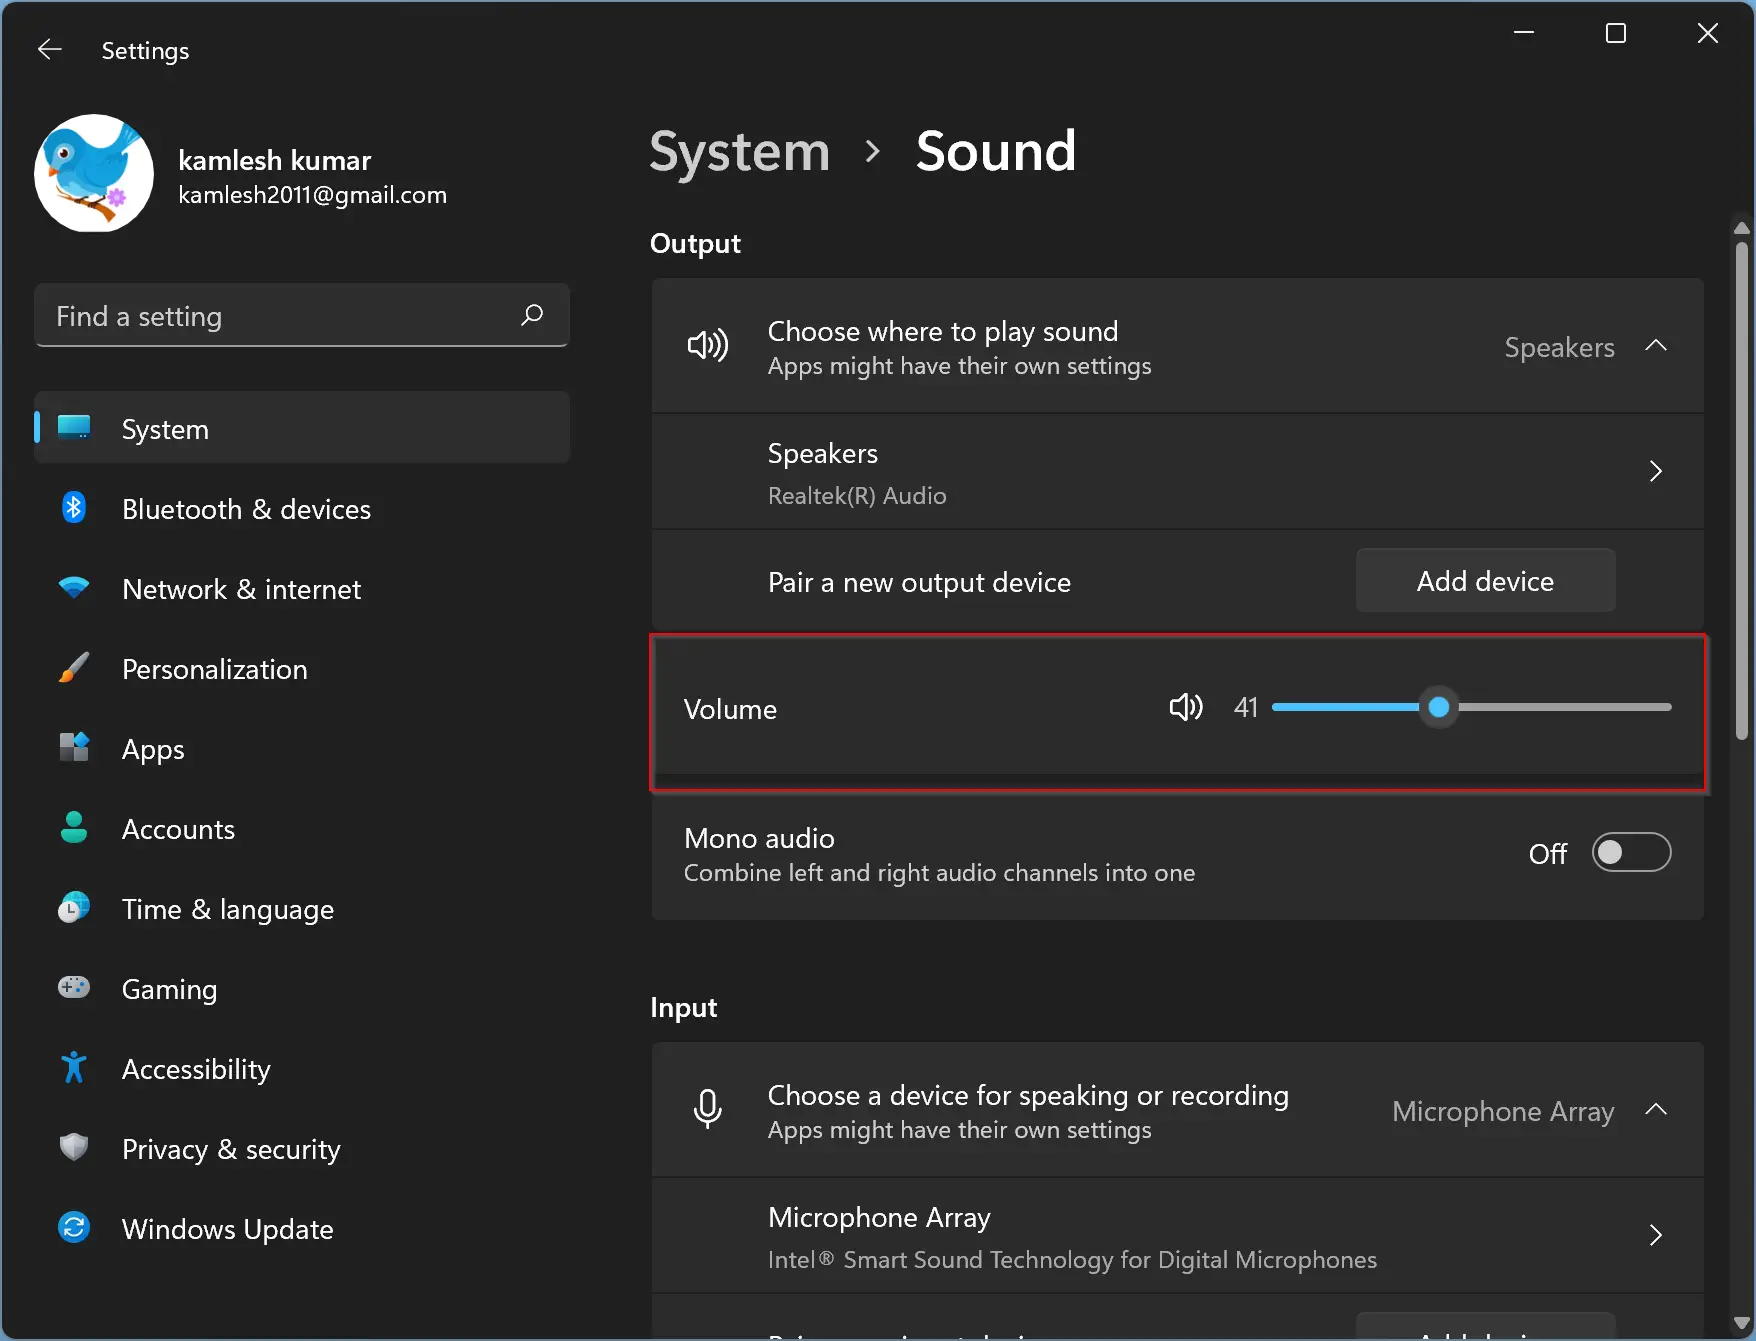
When done, you can close the Settings app. If you want to mute the sound, click the speaker icon. Click the same icon to unmute the system volume.
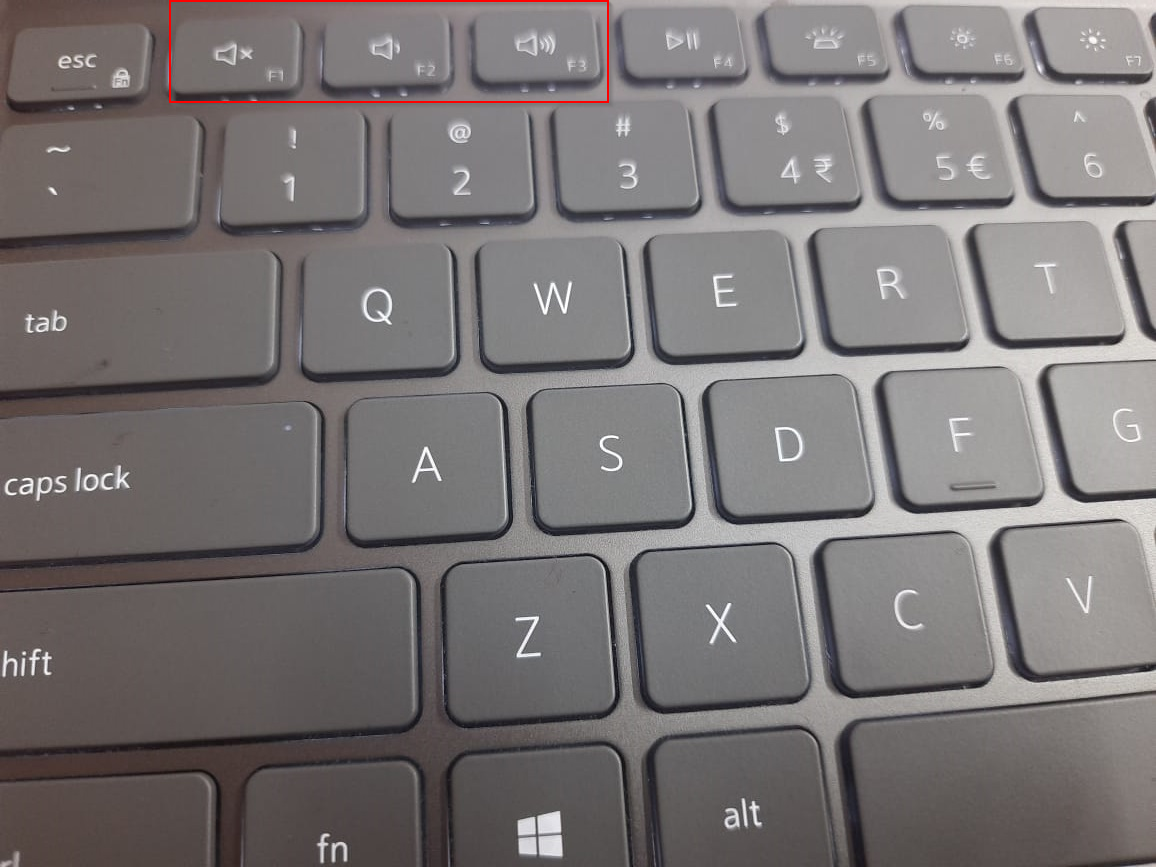
How to Change System Volume using Hardware Buttons?
Many Windows laptops, computers, and tablets include physical hardware volume up and down buttons somewhere on the device. If you are using a table, sound controls should usually be on one of the side edges. While if you use a laptop or computer, you can see buttons on the top row of the keyboard. Using the physical volume button, you can increase, decrease or mute the system sound.
Conclusion
In conclusion, adjusting the sound volume on your Windows 11 PC is a simple process that can be done using various methods. You can use the Quick Settings menu to quickly adjust the volume by dragging the slider left or right or clicking the speaker icon to mute or unmute the sound output. Alternatively, you can use the Settings app to adjust the volume by navigating to the Sound tab and using the volume slider. Finally, many Windows laptops, computers, and tablets include physical hardware volume up and down buttons that you can use to adjust the system sound. Regardless of the method you choose, you can easily control the volume output of your Windows 11 PC to suit your needs.