Microsoft Word is a versatile and powerful word processing tool that offers a wide range of formatting options to make your documents look just the way you want them to. One aspect of document formatting that often requires attention is spacing. Whether you need to tighten up the space between words for a more compact look or increase the space to enhance readability, Microsoft Word provides several methods for adjusting spacing between words or letters. In this gearupwindows article, we’ll explore these methods in detail.
How to Change Spacing Between Words or Letters in Microsoft Word?
Method 1: Using the Font Dialog Box
Step 1. Open your Microsoft Word document.
Step 2. Select the text for which you want to adjust the spacing.
Step 3. Go to the “Home” tab on the ribbon.
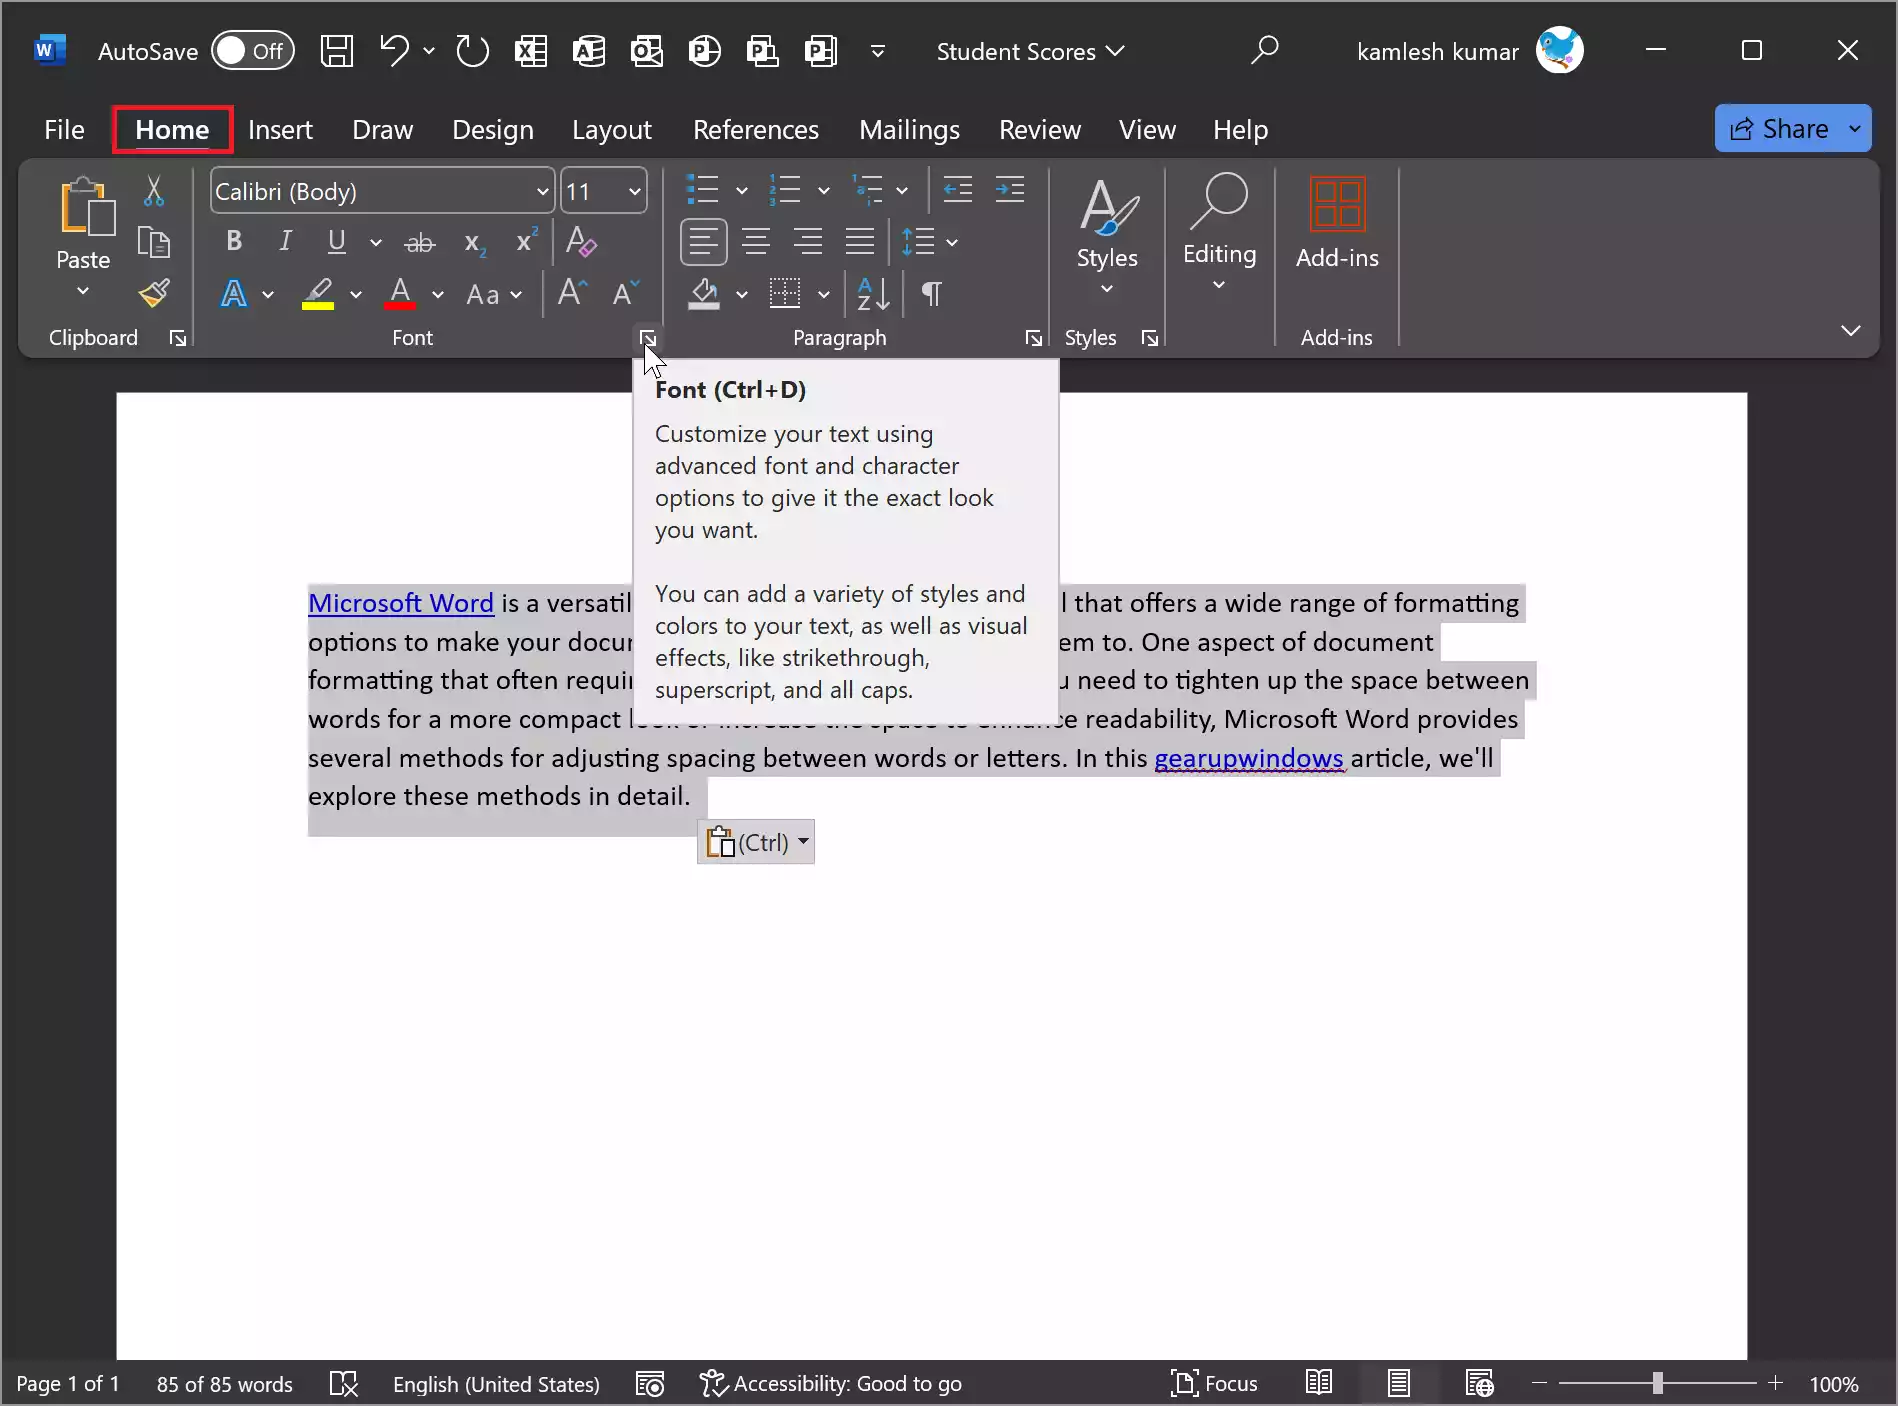
Step 4. In the “Font” group, click the small arrow in the lower right corner of the group, or simply press Ctrl + D on your keyboard. This opens the “Font” dialog box.
Step 5. In the “Font” dialog box, switch to the “Advanced” tab.
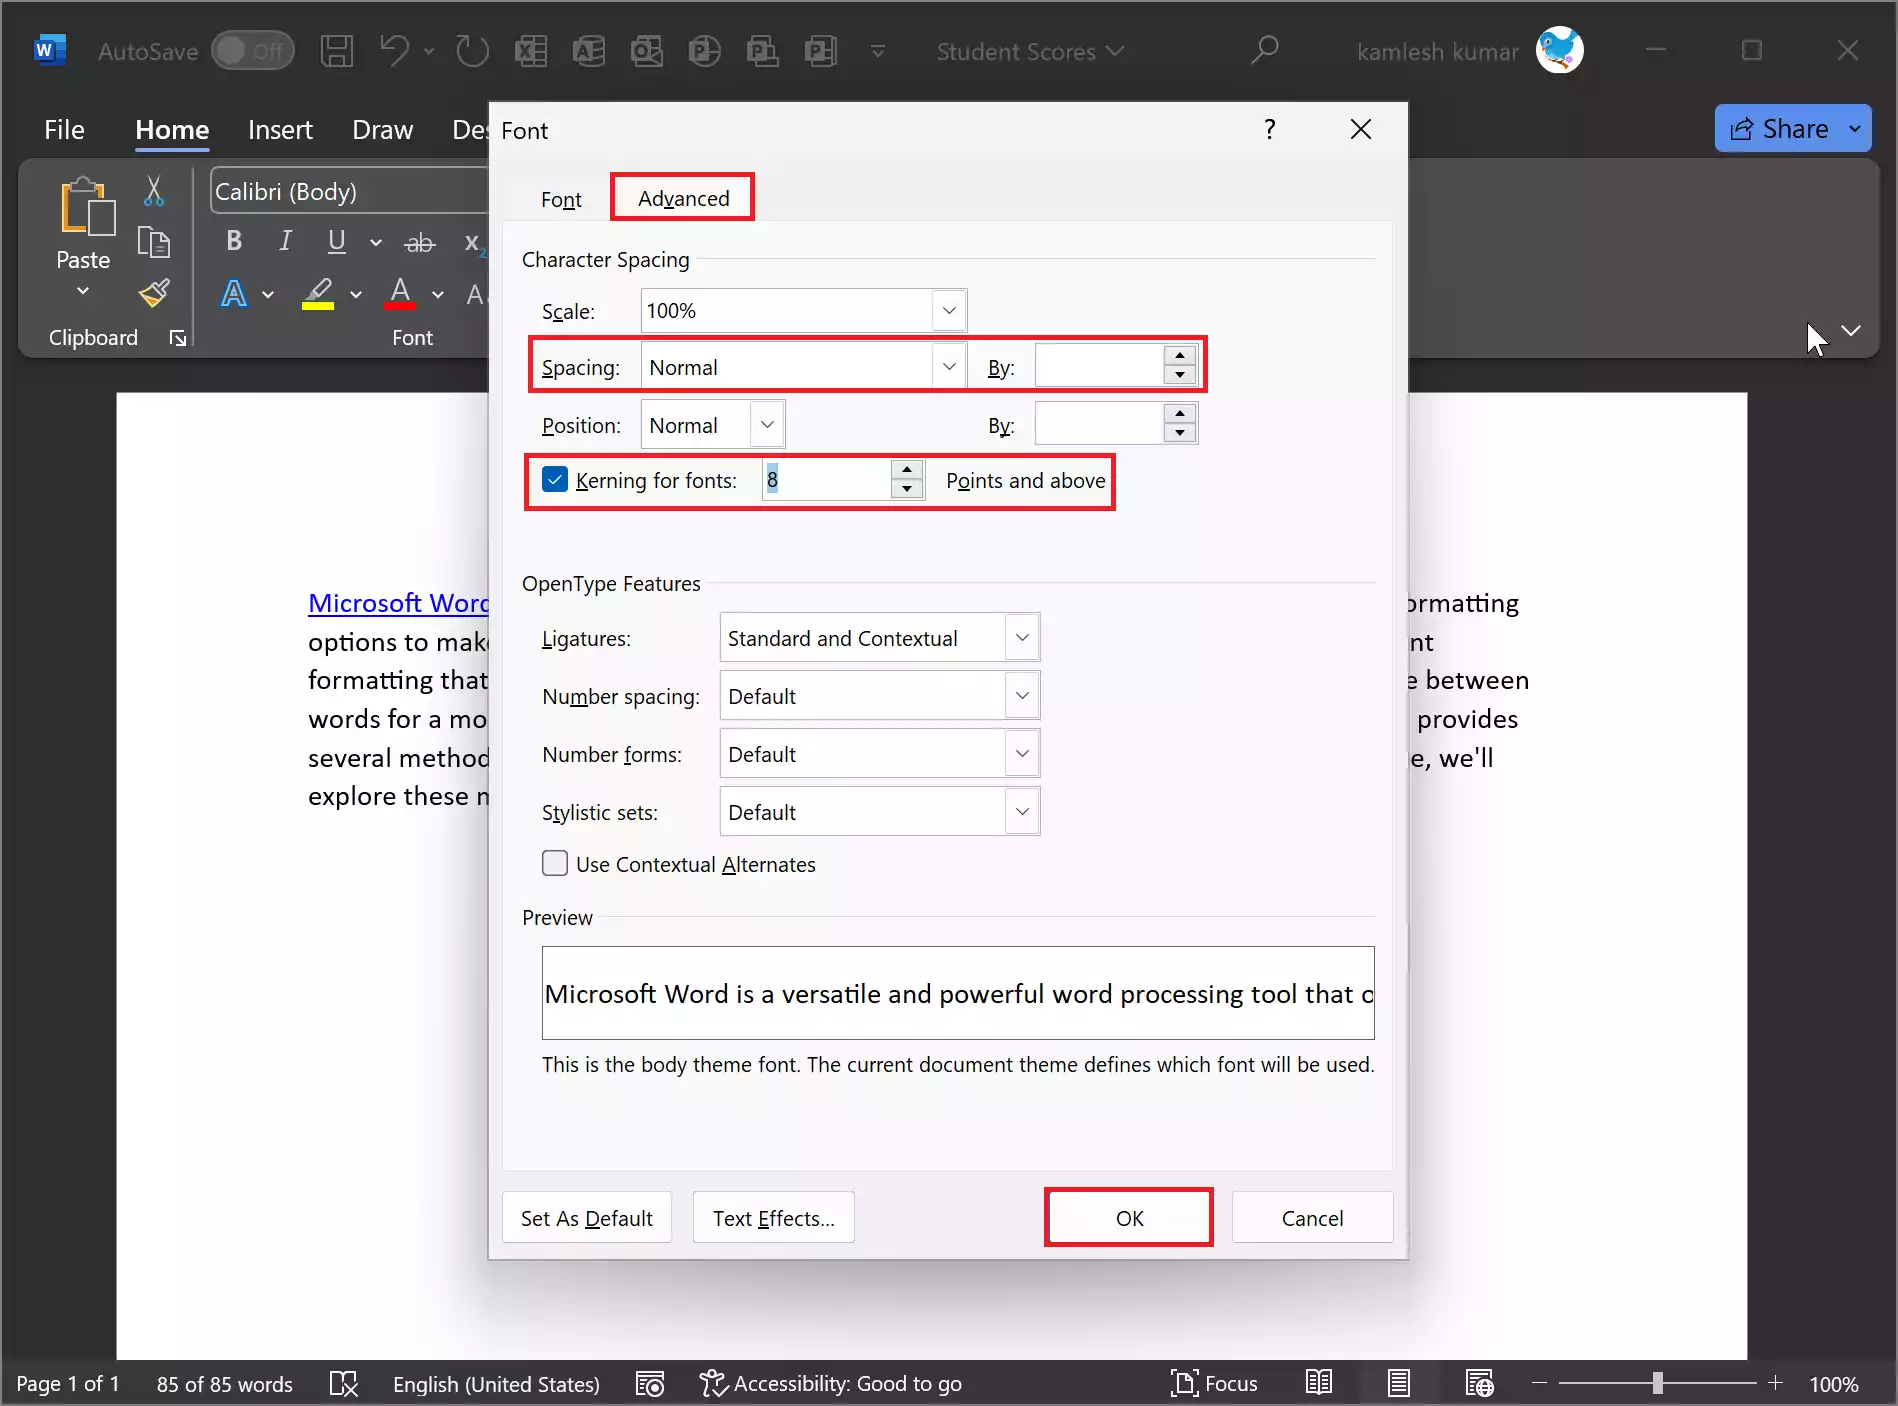
Step 6. In the “Character Spacing” section, you can adjust the spacing between characters (letters) and words:-
-
- Spacing between characters: Under “Character Spacing,” use the “By” option to set the number of points you want to add or subtract between characters. Positive values increase spacing, while negative values decrease it. You can also choose “Expanded” or “Condensed” from the dropdown menu.
- Spacing between words: Under “Character Spacing,” you can adjust the space between words by checking the “Kerning for fonts” option and entering the point size in the “Points and above” box.
Step 7. After making your adjustments, click the “OK” button to apply the changes.
Method 2: Using the Paragraph Dialog Box
In some cases, you may want to adjust the spacing between words on an entire paragraph rather than just specific text. Here’s how to do it:-
Step 1. Select the paragraph for which you want to adjust word spacing.
Step 2. Go to the “Layout” tab on the ribbon.
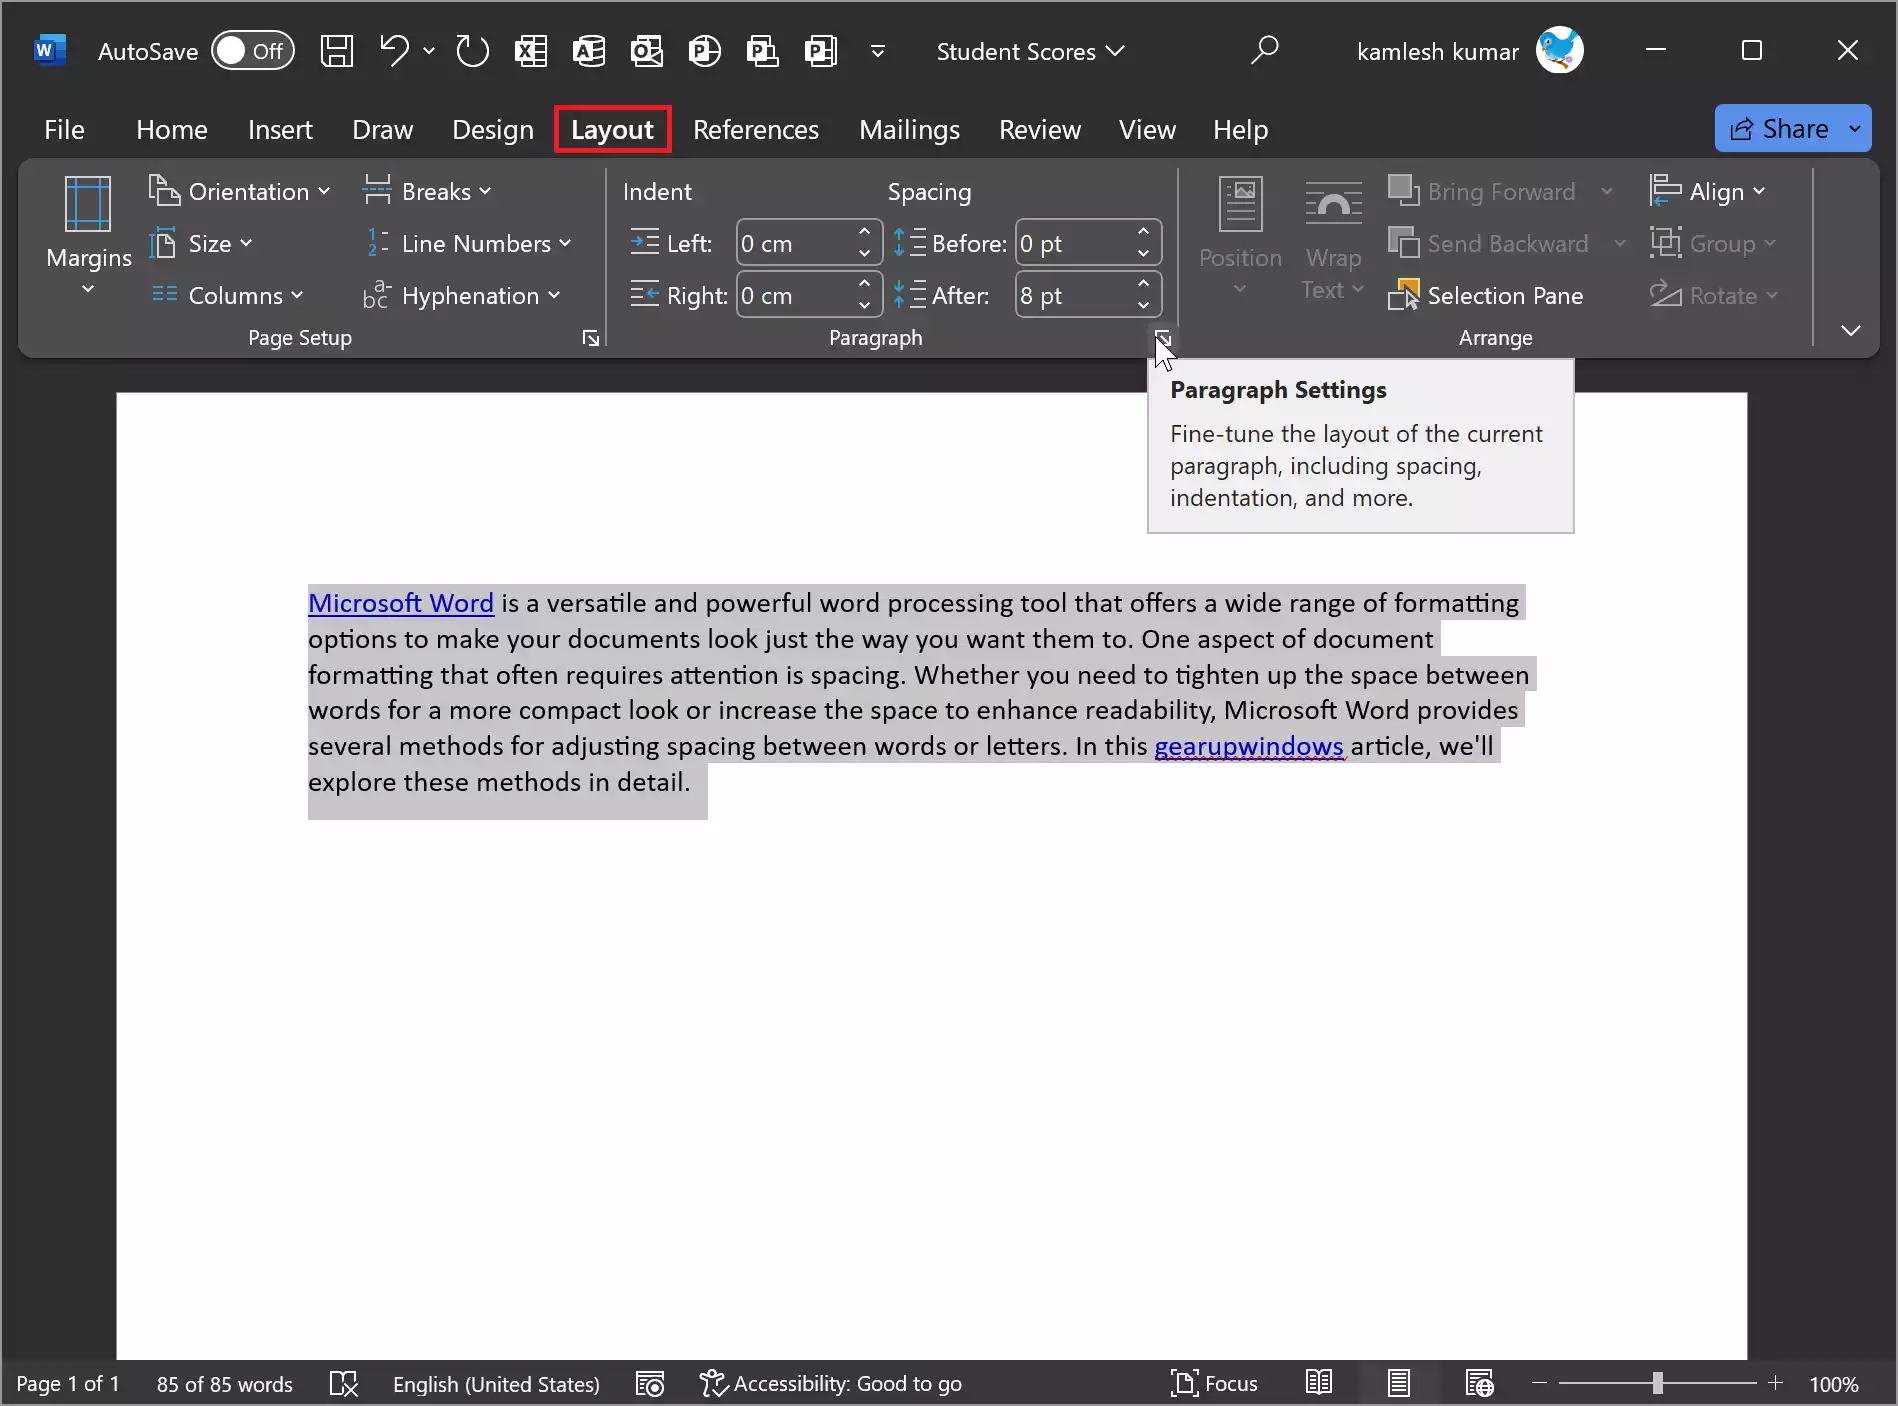
Step 3. In the “Paragraph” group, click the small arrow in the lower right corner. This opens the “Paragraph” dialog box.
Step 4. In the “Paragraph” dialog box, go to the “Indents and Spacing” tab.

Step 5. Under “Spacing,” you can adjust the space between lines using the “Line spacing” option. You can also use the “By” option to set the number of points you want to add or subtract between lines.
Step 6. Click “OK” to apply the changes.
Method 3: By Modifying Style
Modifying a style to adjust line spacing is an efficient way to ensure consistency throughout your document. You can easily change the line spacing for a specific style or the default style in your Microsoft Word document. This method helps maintain a consistent and professional look for your document by adjusting line spacing as per your preferences. Here’s a detailed guide on how to change line spacing using your suggested method:-
Step 1. Open your Microsoft Word document.
Step 2. In the Home tab, locate and select the style you want to modify. Styles are found in the “Styles” group, and they control the formatting of text within your document. If you’re not using a specific style, you can modify the default style.
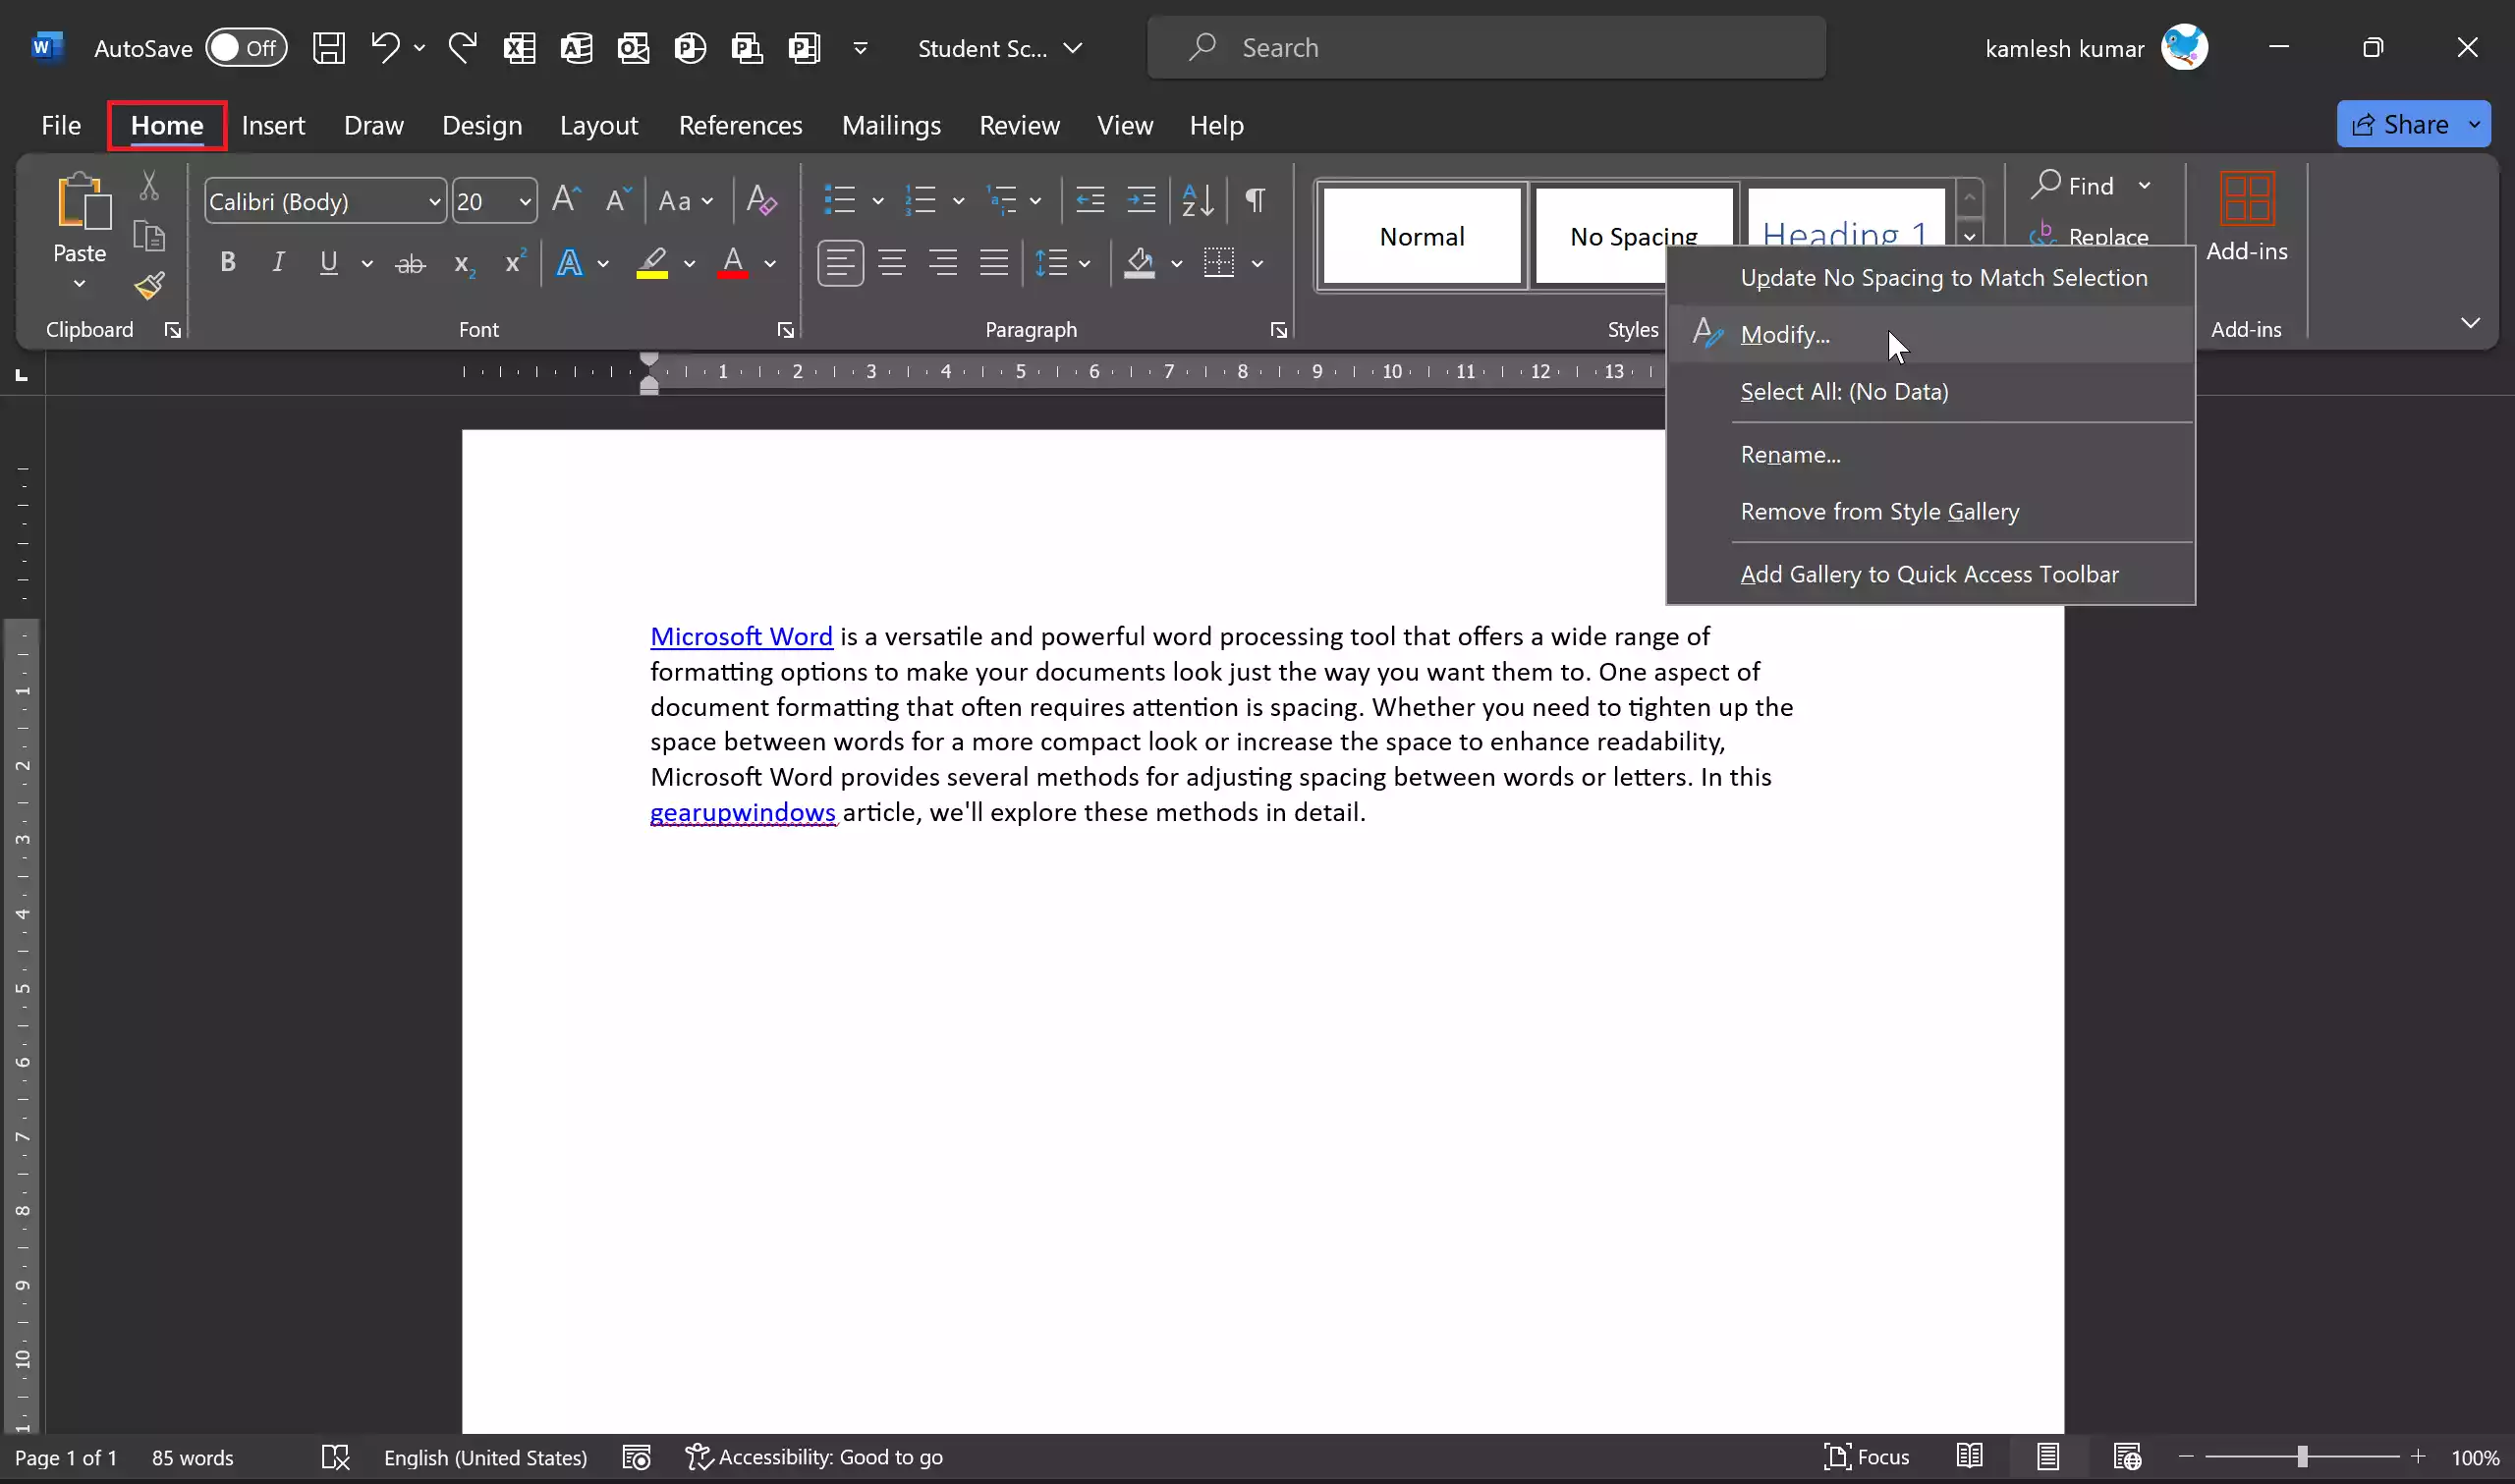
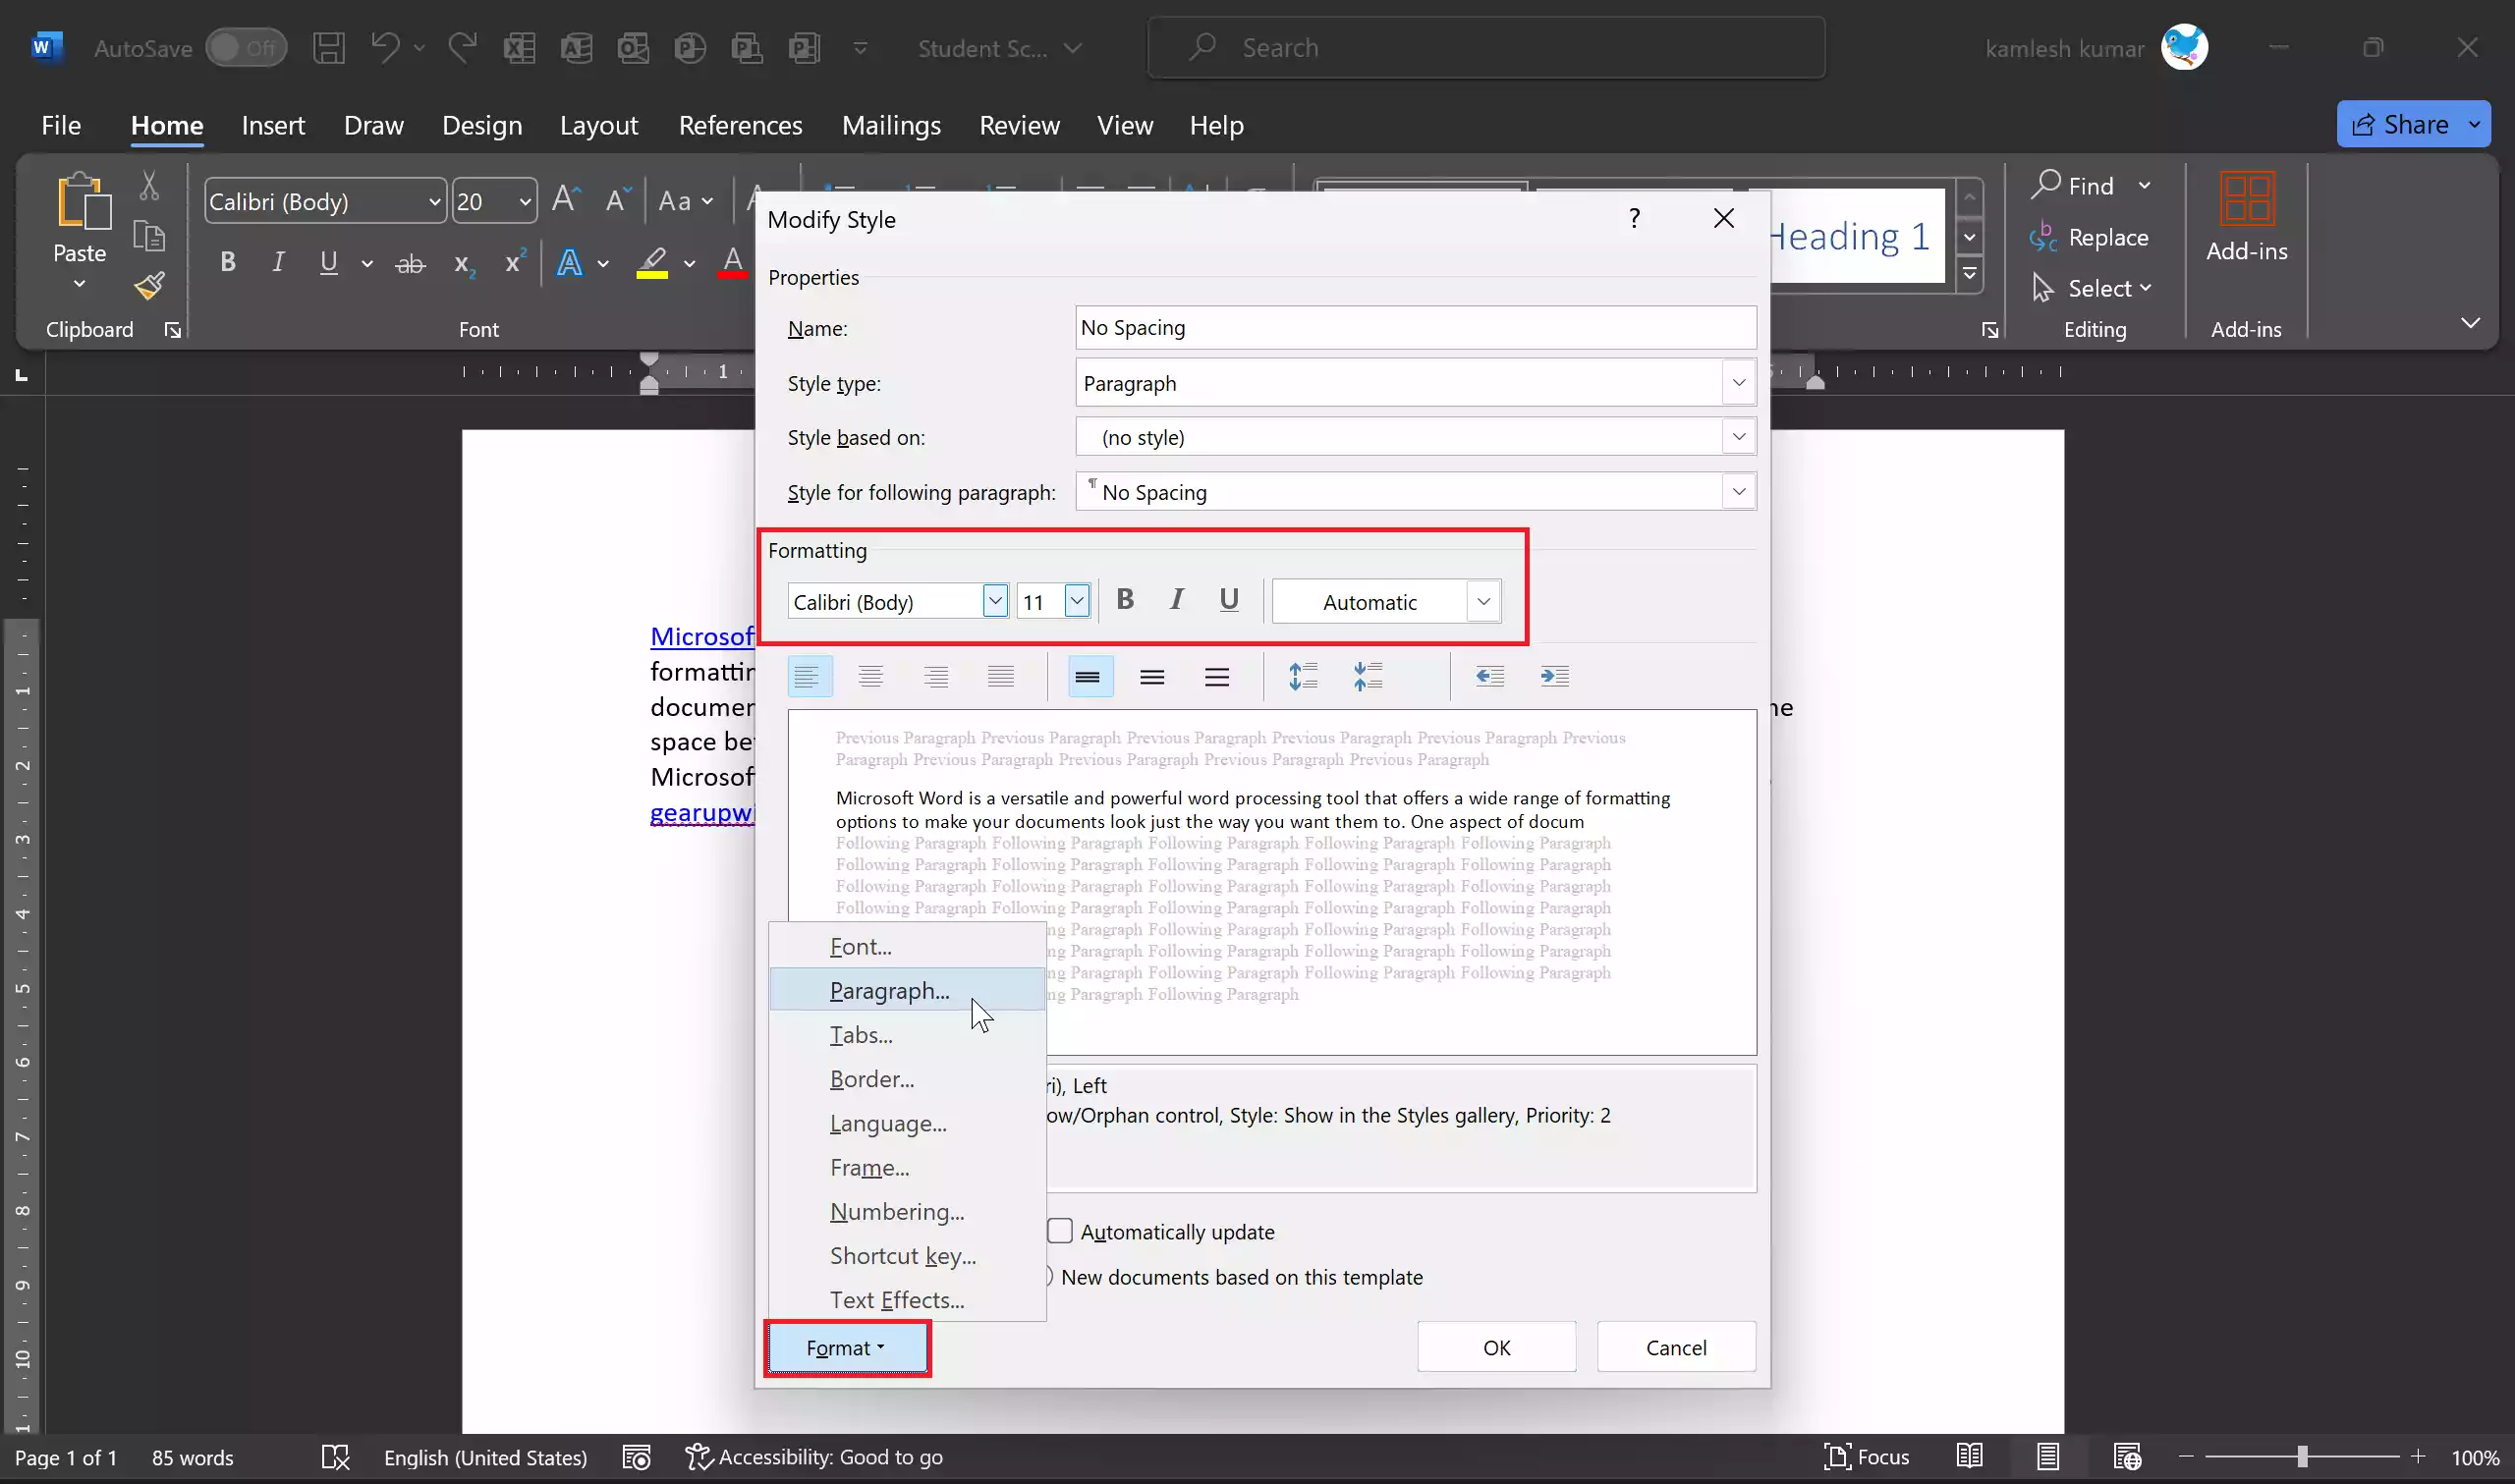
Step 3. Right-click the style you’ve selected, and from the context menu, choose “Modify.” This action opens the “Modify Style” dialog box.
Step 4. In the “Modify Style” dialog box, you can adjust the line spacing. To do this:-
-
- a. Locate the “Formatting” section, where you can choose the font, size, and other formatting options.
-
- b. Click the “Format” button at the bottom left of the dialog box.
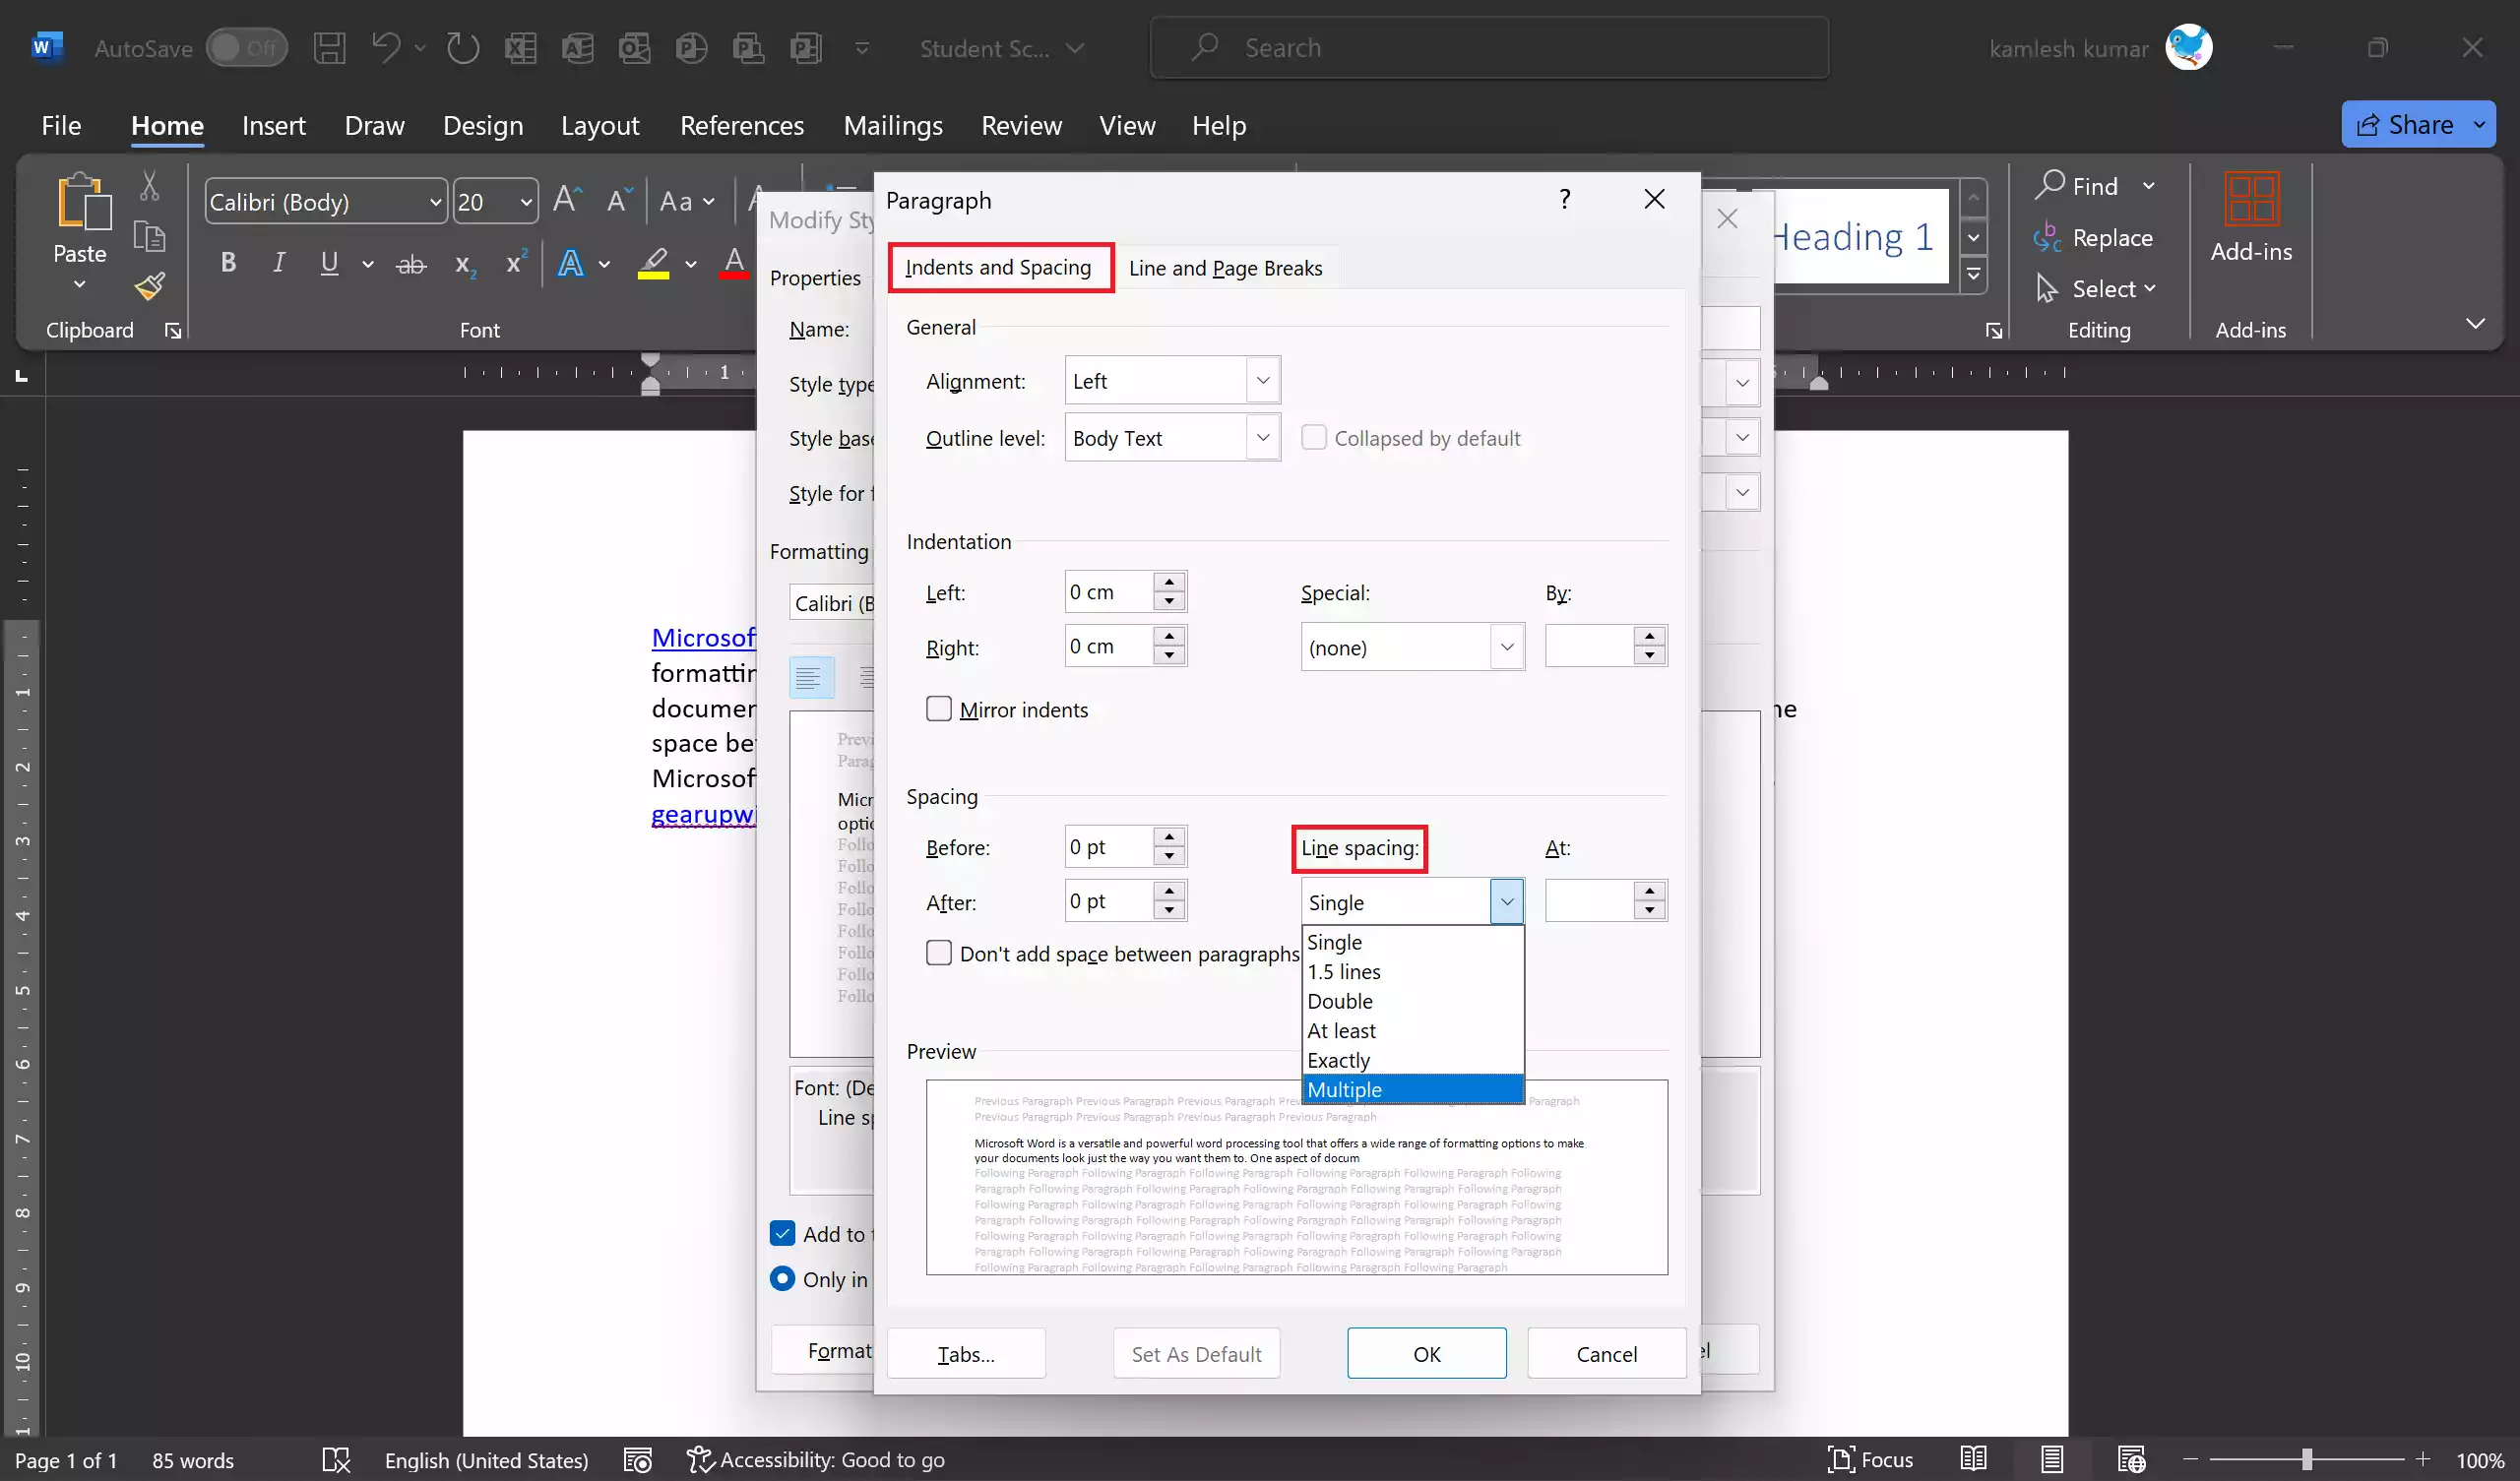
- c. From the dropdown menu, select “Paragraph.” This opens the “Paragraph” dialog box.
Step 5. In the “Paragraph” dialog box, you’ll find the “Line spacing” dropdown. Here, you can choose from options like “Single,” “1.5 Lines,” or “Double” to set the desired line spacing for the selected style.
Step 6. Once you’ve made your selections, click “OK” to confirm the line spacing changes.
Step 7. Finally, click “OK” again in the “Modify Style” dialog to save your modifications.
Method 4: Using Keyboard Shortcut
If you need to make quick adjustments to spacing, you can use keyboard shortcuts. You can use the keyboard shortcut Ctrl + 1 to set single-line spacing, Ctrl + 2 to set double-line spacing, Ctrl + 5 to set 1.5-line spacing, and Ctrl + Y to re-do the last action.
By following these methods, you can easily adjust the spacing between words and letters in Microsoft Word to achieve the desired formatting for your documents. Whether you’re working on a professional report, a creative project, or any other document, Word’s flexibility and options for customization will help you create documents that look exactly as you envision.