Windows 11, the latest iteration of Microsoft’s iconic operating system, introduces a fresh and streamlined user interface. Among its noticeable changes is the taskbar, which, by default, displays only application icons without accompanying labels. While this minimalist approach can be visually appealing, it can sometimes be inconvenient. If you find yourself yearning for the classic taskbar labels that provide immediate information about your open windows, fret not. In this gearupwindows guide, we will walk you through two distinct methods to regain control over your taskbar labels in Windows 11.
How to Show or Hide Taskbar Labels in Windows 11?
Method 1: Using the Settings App
The first method to show or hide taskbar labels in Windows 11 is straightforward and can be accomplished through the Windows Settings app. Here’s how to do it:-
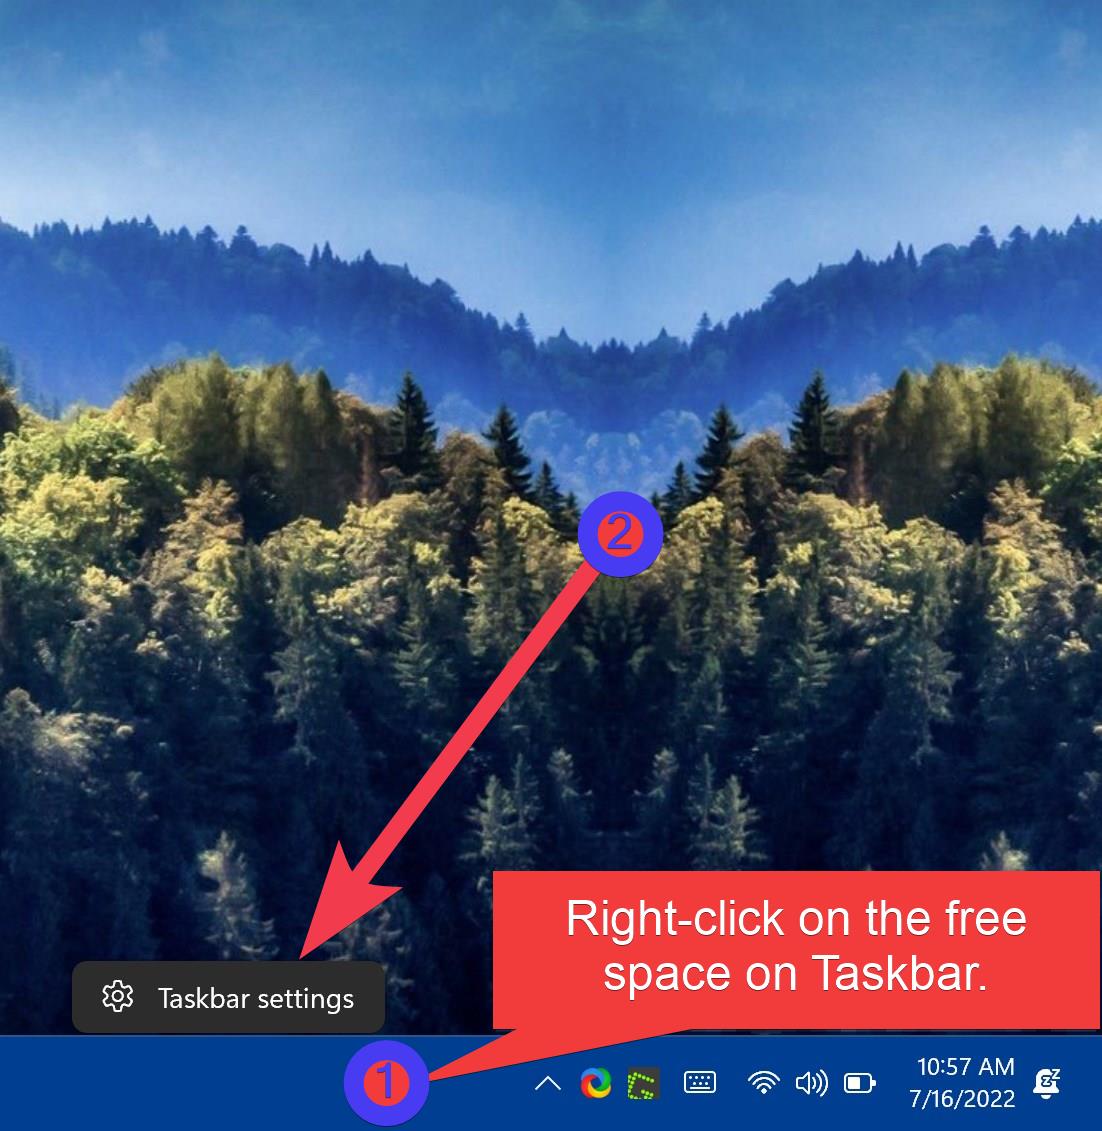
Step 1. Find an empty space on your taskbar, and right-click it to bring up a context menu.
Step 2. From the context menu, click on “Taskbar settings.” This will launch the Windows Settings app and take you to the Taskbar section.
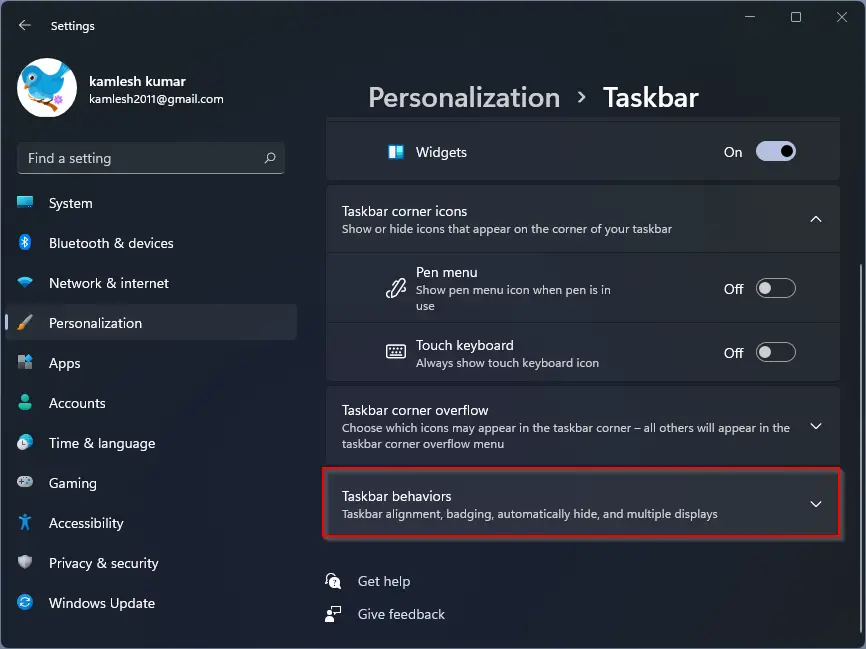
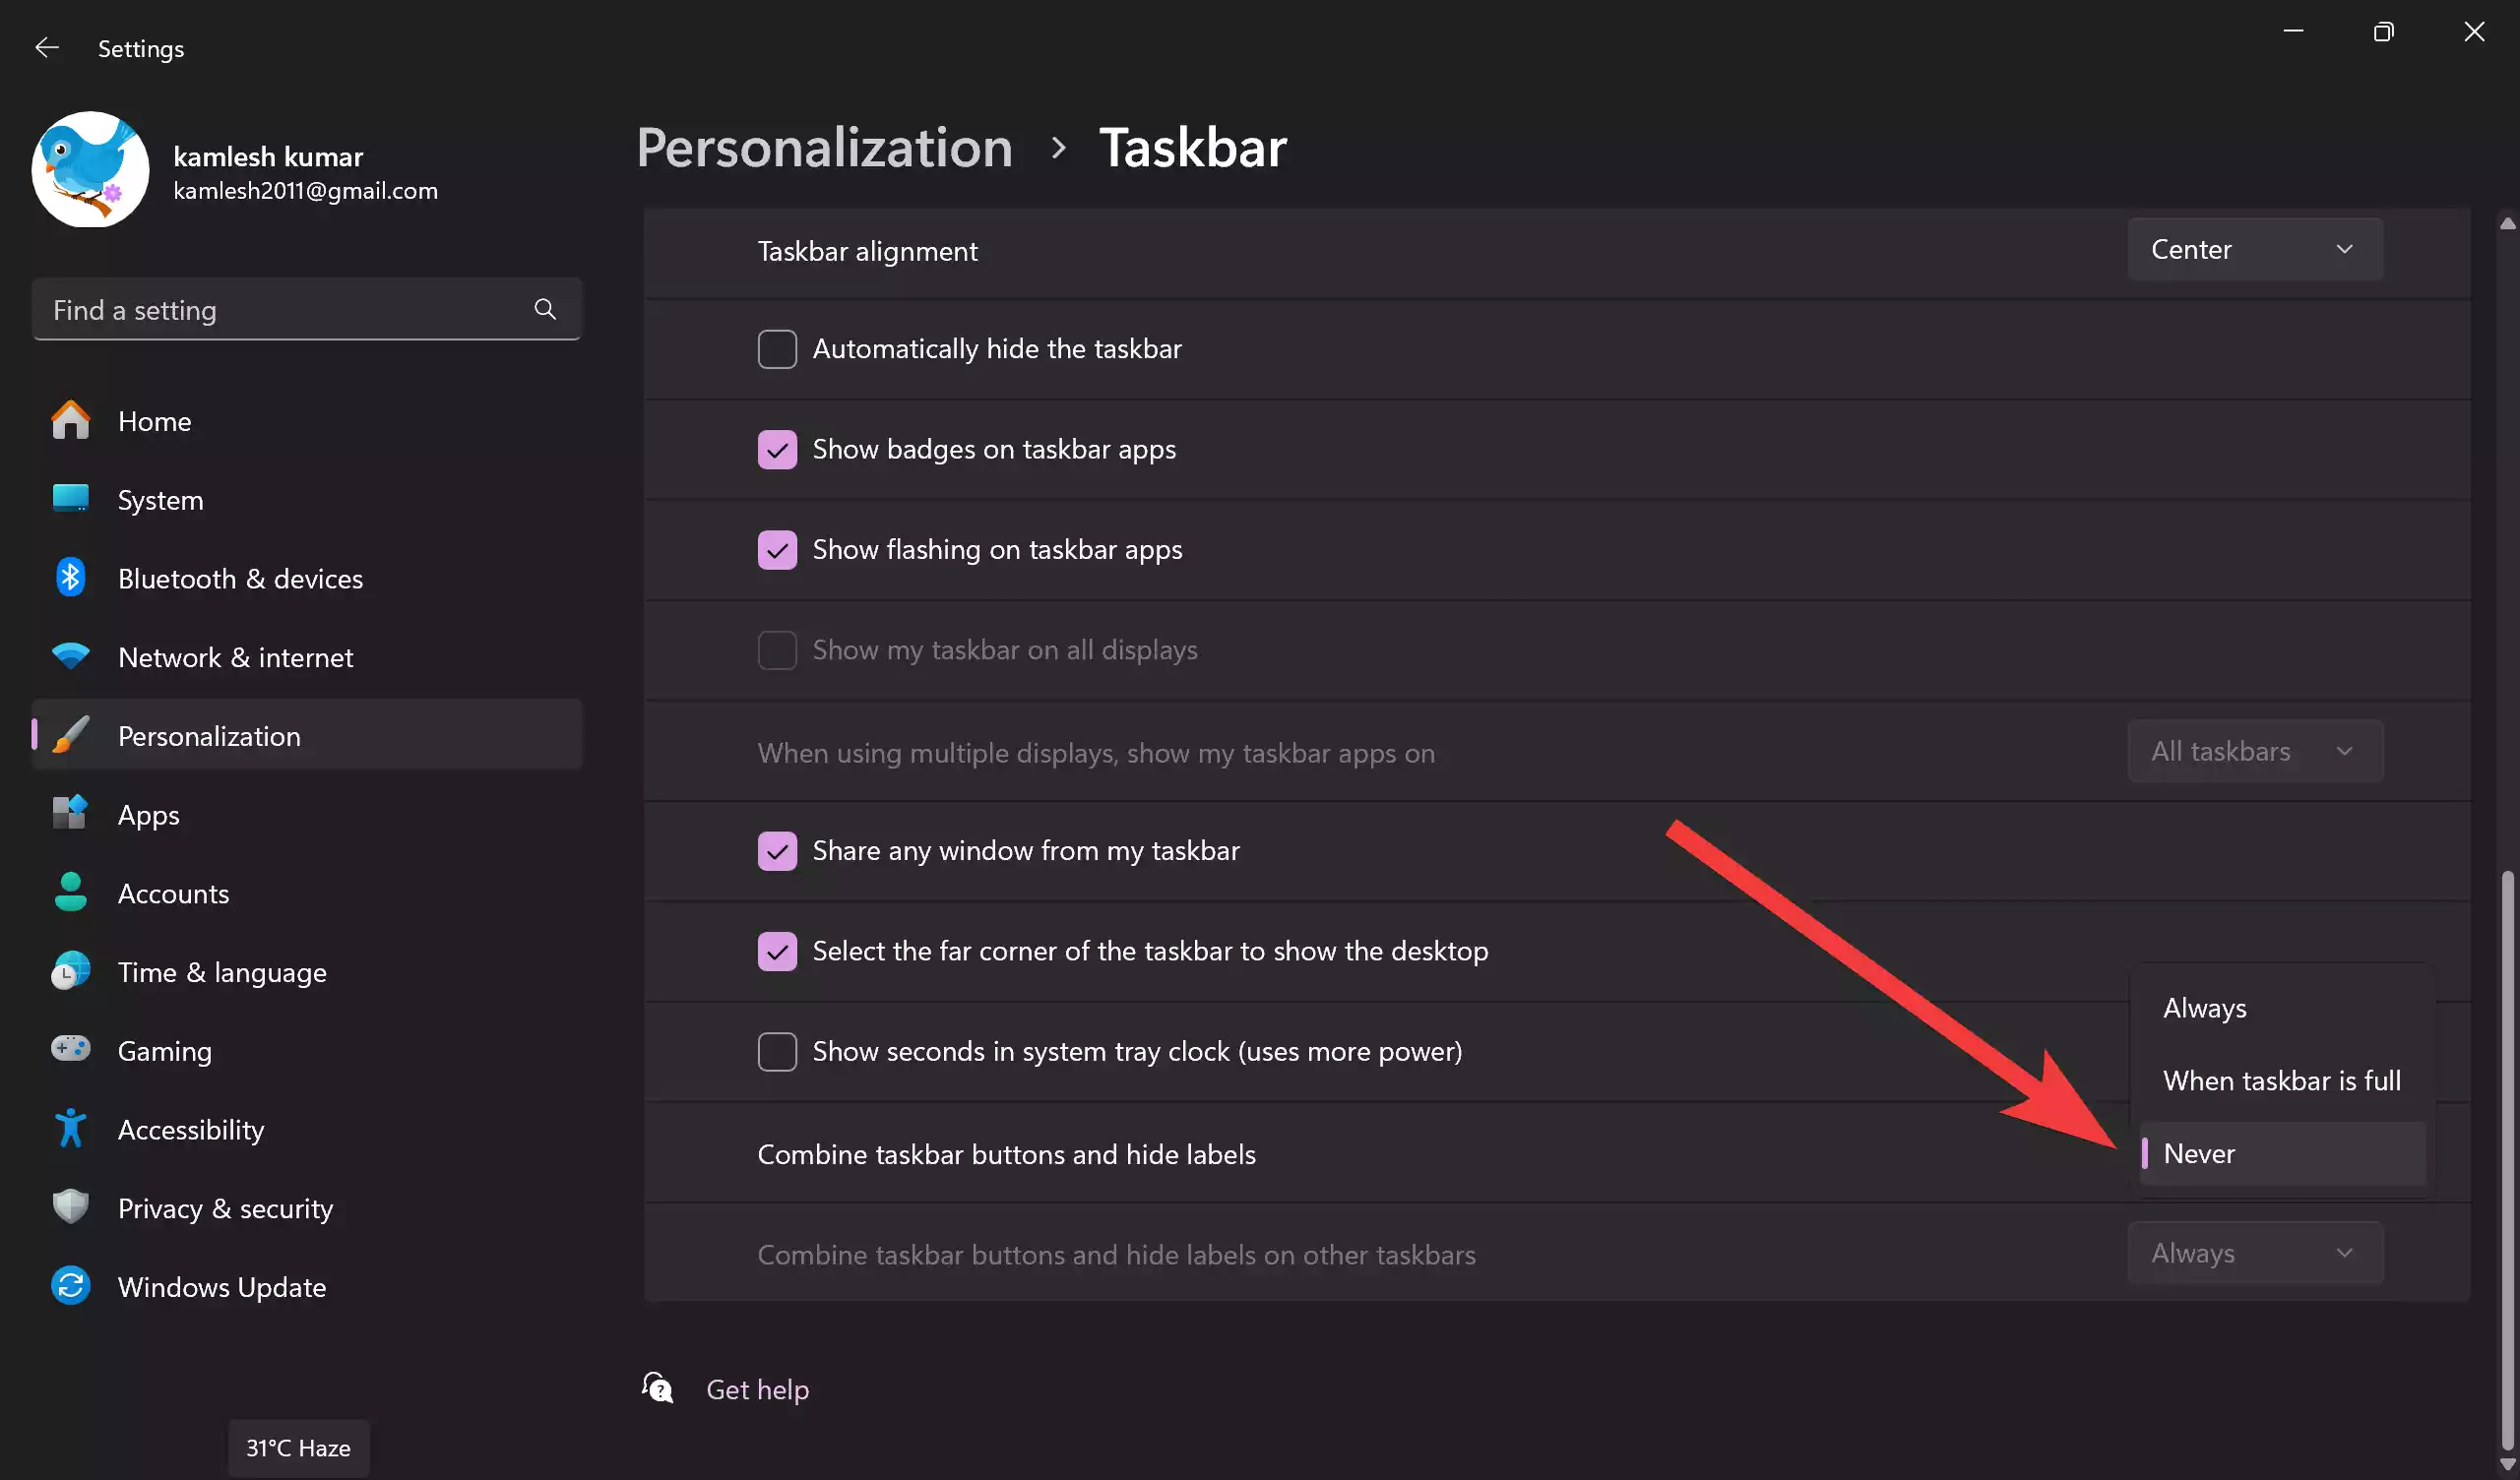
Step 3. In the Settings app, you’ll be in the “Personalization” section by default. On the right pane, you’ll see the Taskbar settings page. Once in the Taskbar settings, you’ll see a section titled “Taskbar behaviors” in the right pane. Click on it. This is where you can control how taskbar labels are displayed.
Step 4. Under “Combine taskbar buttons and hide labels,” you will find three options:-
-
- Never: This option will always show taskbar labels and never combine taskbar icons.
- Always: Choose this to hide taskbar labels, displaying only icons.
- When taskbar is full: This option hides taskbar labels only when the taskbar is full of program icons.
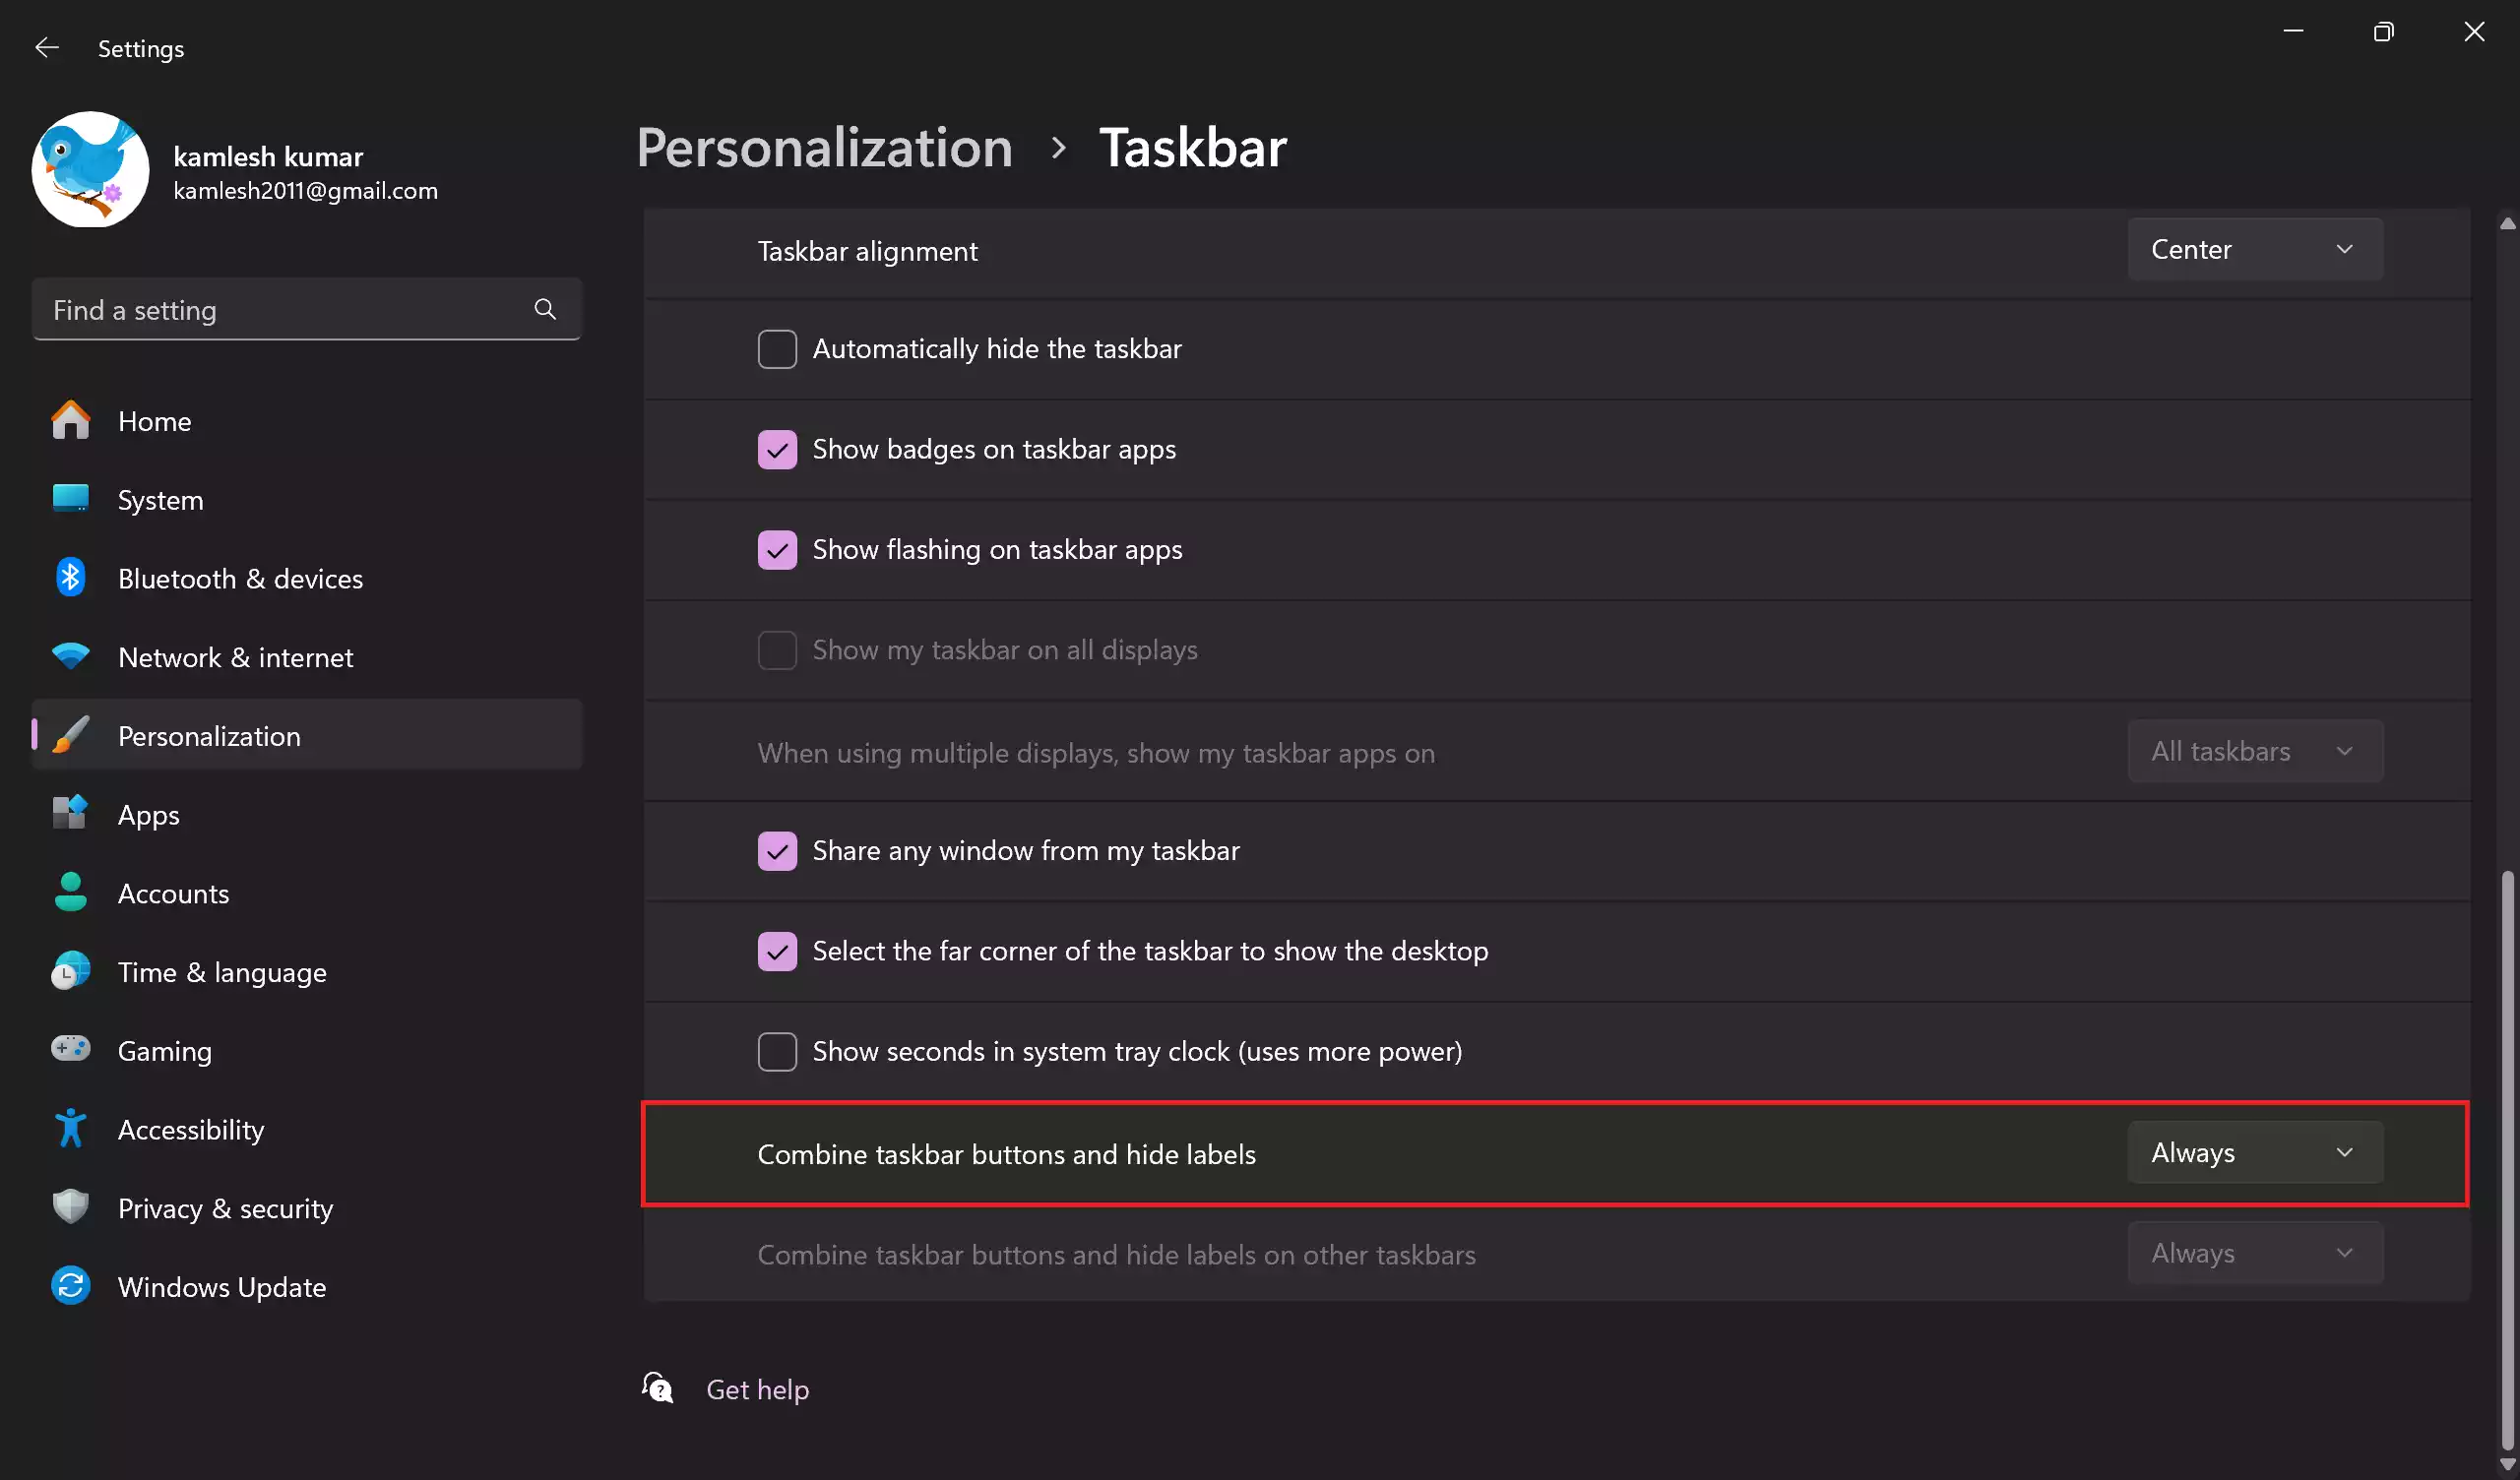
Step 5. Select the option that best suits your needs and preferences.
This method allows for a quick and easy way to customize your taskbar labels in Windows 11 to match your personal preferences.
Method 2: Using the Registry Editor
For those who prefer a more advanced and granular approach to customizing their Windows experience, method 2 involves editing the Windows Registry. This method provides more control but should be approached with caution. Follow these steps:-
Step 1. To begin, press `Win + R` to open the Run dialog. Type “regedit” and press Enter to launch the Registry Editor.
Step 2. In the Registry Editor window, navigate to the following location in the left sidebar:-
HKEY_CURRENT_USER\Software\Microsoft\Windows\CurrentVersion\Explorer\Advanced
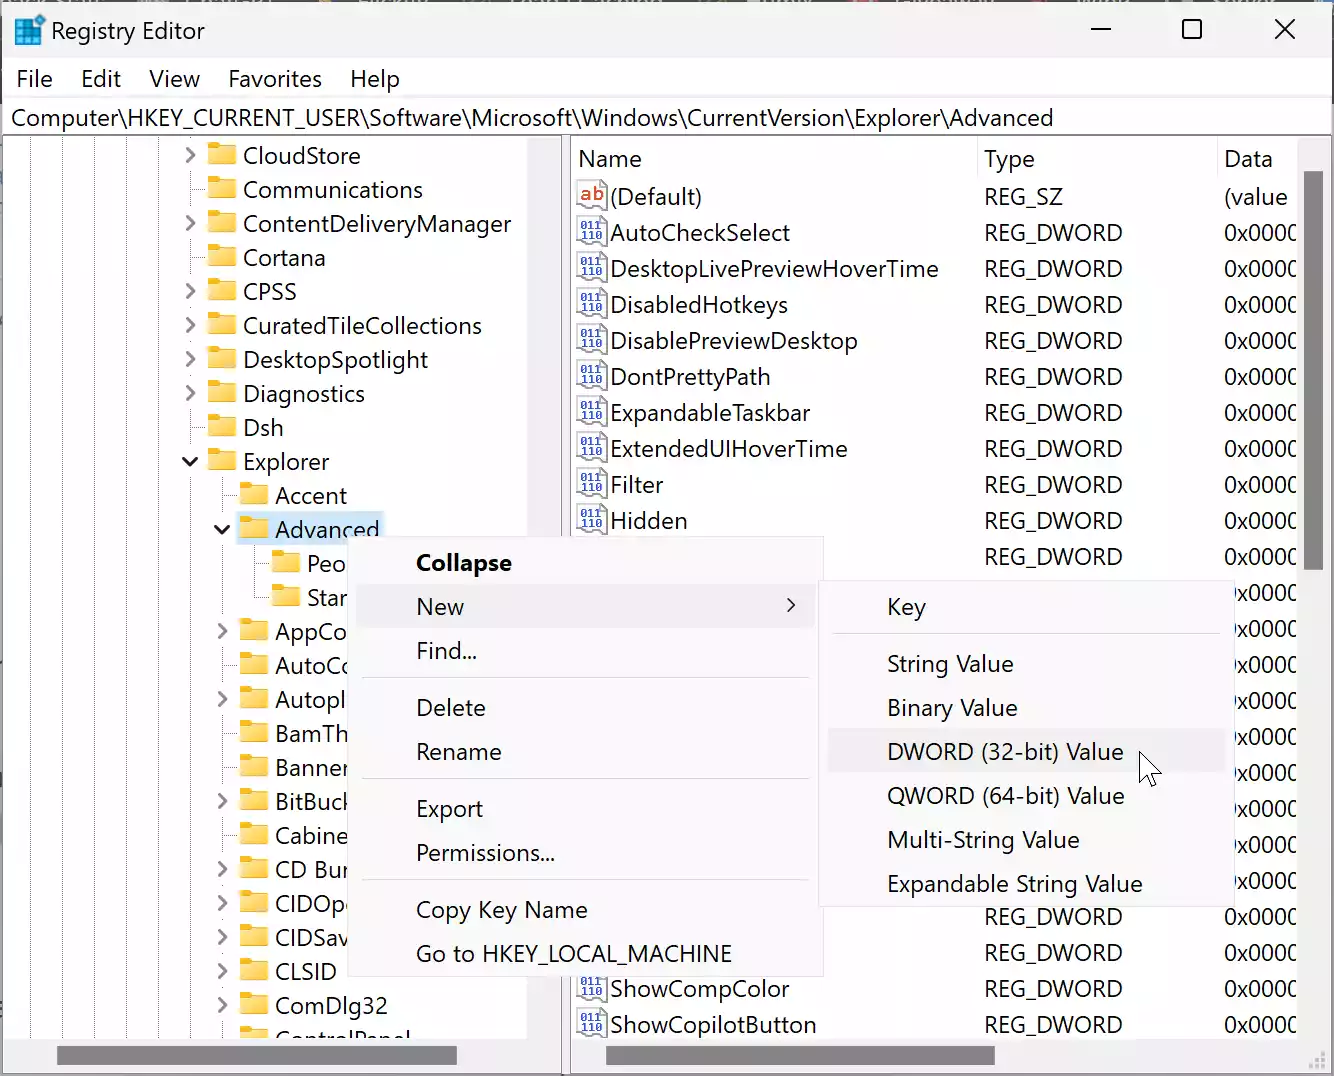
Step 3. In the right panel, you will find a DWORD value named “TaskbarGlomLevel.”
If you don’t find “TaskbarGlomLevel” REG_DWORD, right-click the “Advanced” folder on the left pane. Choose “New” and then “DWORD (32-bit) Value” from the context menu. Rename the new value to “TaskbarGlomLevel.”
Step 4. Double-click on it to modify its value. Here, you have three options to choose from:-
-
- 0 (Always): This setting ensures that taskbar labels are always hidden.
- 1 (When taskbar is full): Taskbar labels will be hidden when the taskbar is full.
- 2 (Never): Choose this option if you want to hide taskbar labels entirely.
Step 5. After selecting your preferred value, click “OK” to save your changes.
Step 6. You can now close the Registry Editor.
To see the changes take effect, you need to either restart File Explorer or restart your computer. To restart File Explorer, press `Ctrl + Shift + Esc` to open Task Manager, locate “Windows Explorer” under the “Processes” tab, right-click it, and select “Restart.”
Conclusion
In conclusion, Windows 11 offers you the flexibility to choose whether you want to show or hide taskbar labels according to your preferences. You can easily achieve this by either using the user-friendly Settings app or by delving into the Registry for more precise control. Whether you prefer a clean, minimalist look or a more informative taskbar, Windows 11 has got you covered.
