The Taskbar is a fundamental component of the Windows operating system, providing quick access to frequently used applications and system functions. However, sometimes, you may wish to customize its appearance to better suit your preferences or improve your overall desktop experience. In this gearupwindows article, we’ll explore two free tools, Windhawk and ExplorerPatcher, that allow you to change the Taskbar size on Windows 11. These applications offer simple, user-friendly solutions for adjusting the Taskbar to your liking.
How to Change Taskbar Size on Windows 11?
Method 1: Changing Taskbar Size with Windhawk
Windhawk is a free utility that provides various customization options for Windows 11. One of its features allows you to modify the size of the Taskbar, making it larger or smaller according to your needs.
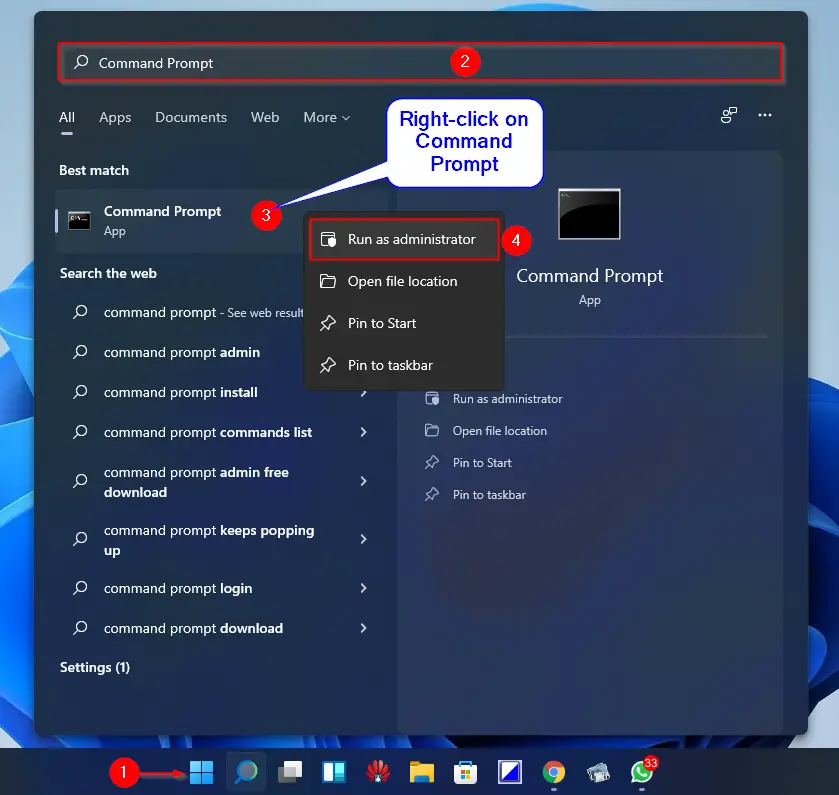
Step 1. Open the Start menu by clicking the Start button on the Taskbar.
Step 2. Search for “Command Prompt,” right-click it, and select “Run as administrator.”
Step 3. Enter the following command and press Enter:-
winget install --id RamenSoftware.Windhawk
Step 4. Once installation is complete, Windhawk will be available on your Windows 11.
Note: If you are unable to install Windhawk using the winget command, you can directly download it from its official website.
Step 5. Now, open the Windhawk application.
Step 6. Click the “Explore” button to access additional customization options.
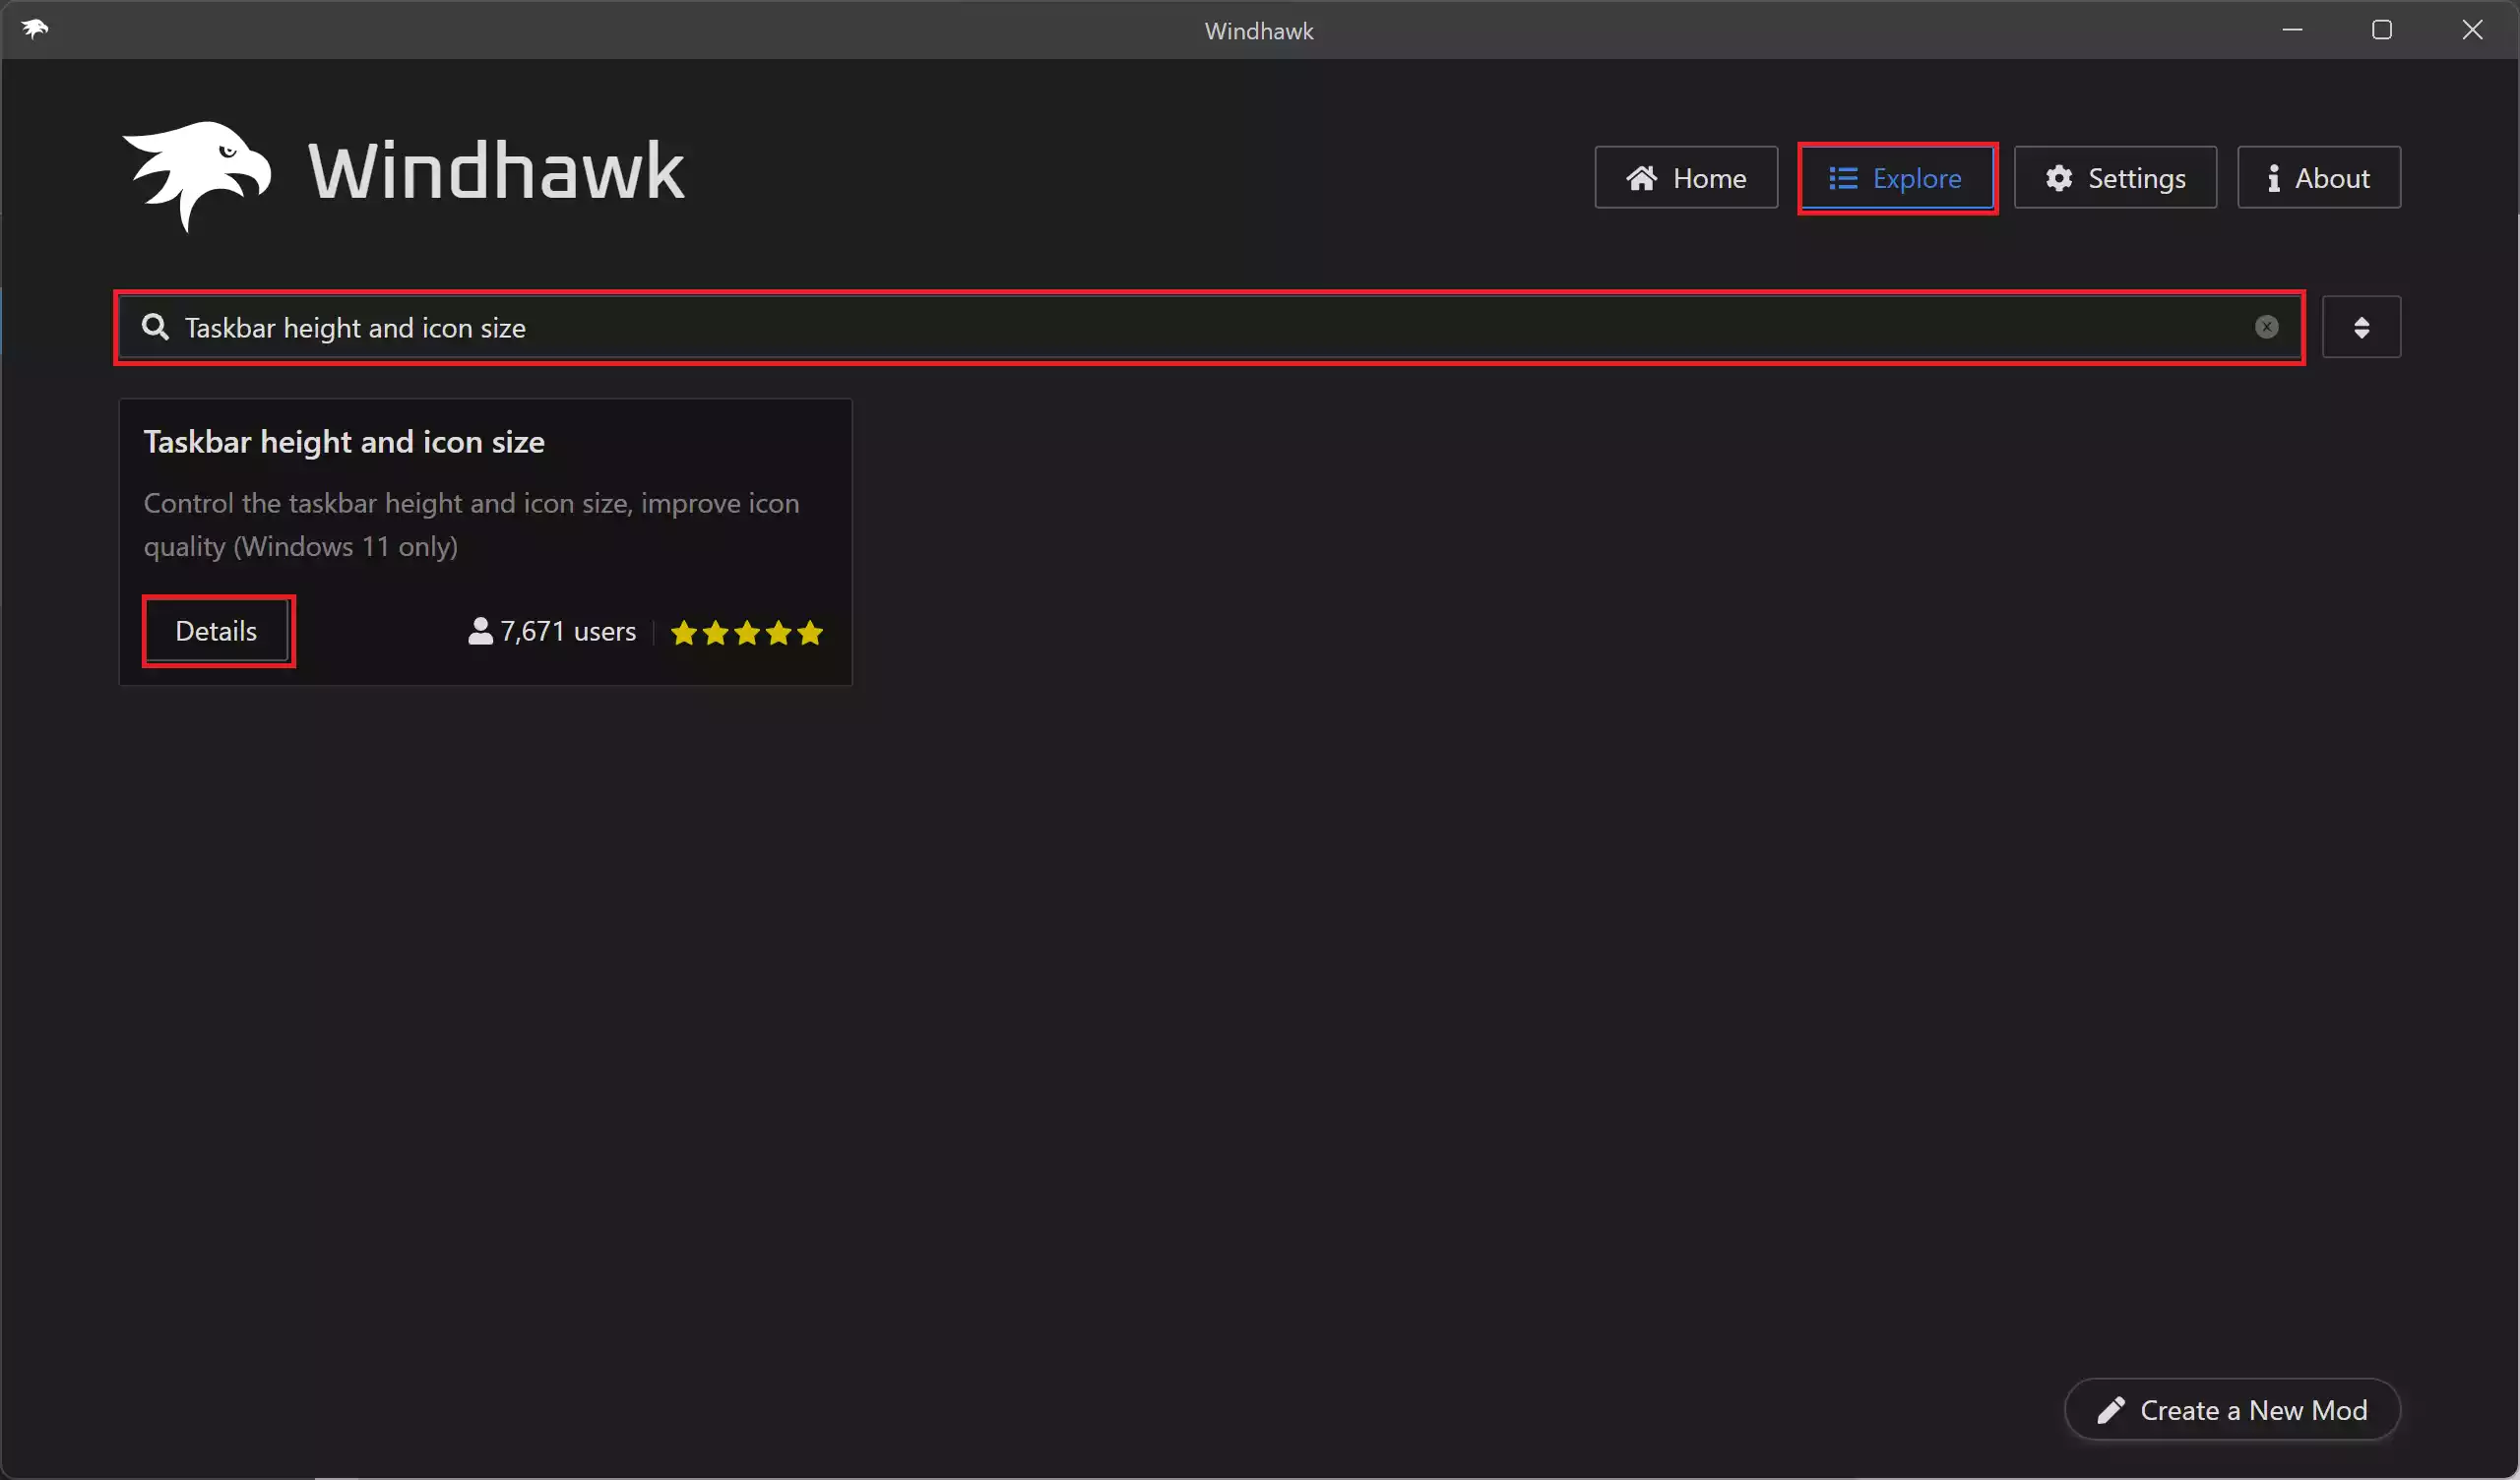
Step 7. Search for “Taskbar height and icon size” and click on the “Details” button.
Step 8. Click the “Install” button to add the desired Taskbar extension.
![]()
Step 9. Confirm the installation by clicking “Accept Risk and Install.”
![]()
Step 10. Navigate to the “Settings” tab.
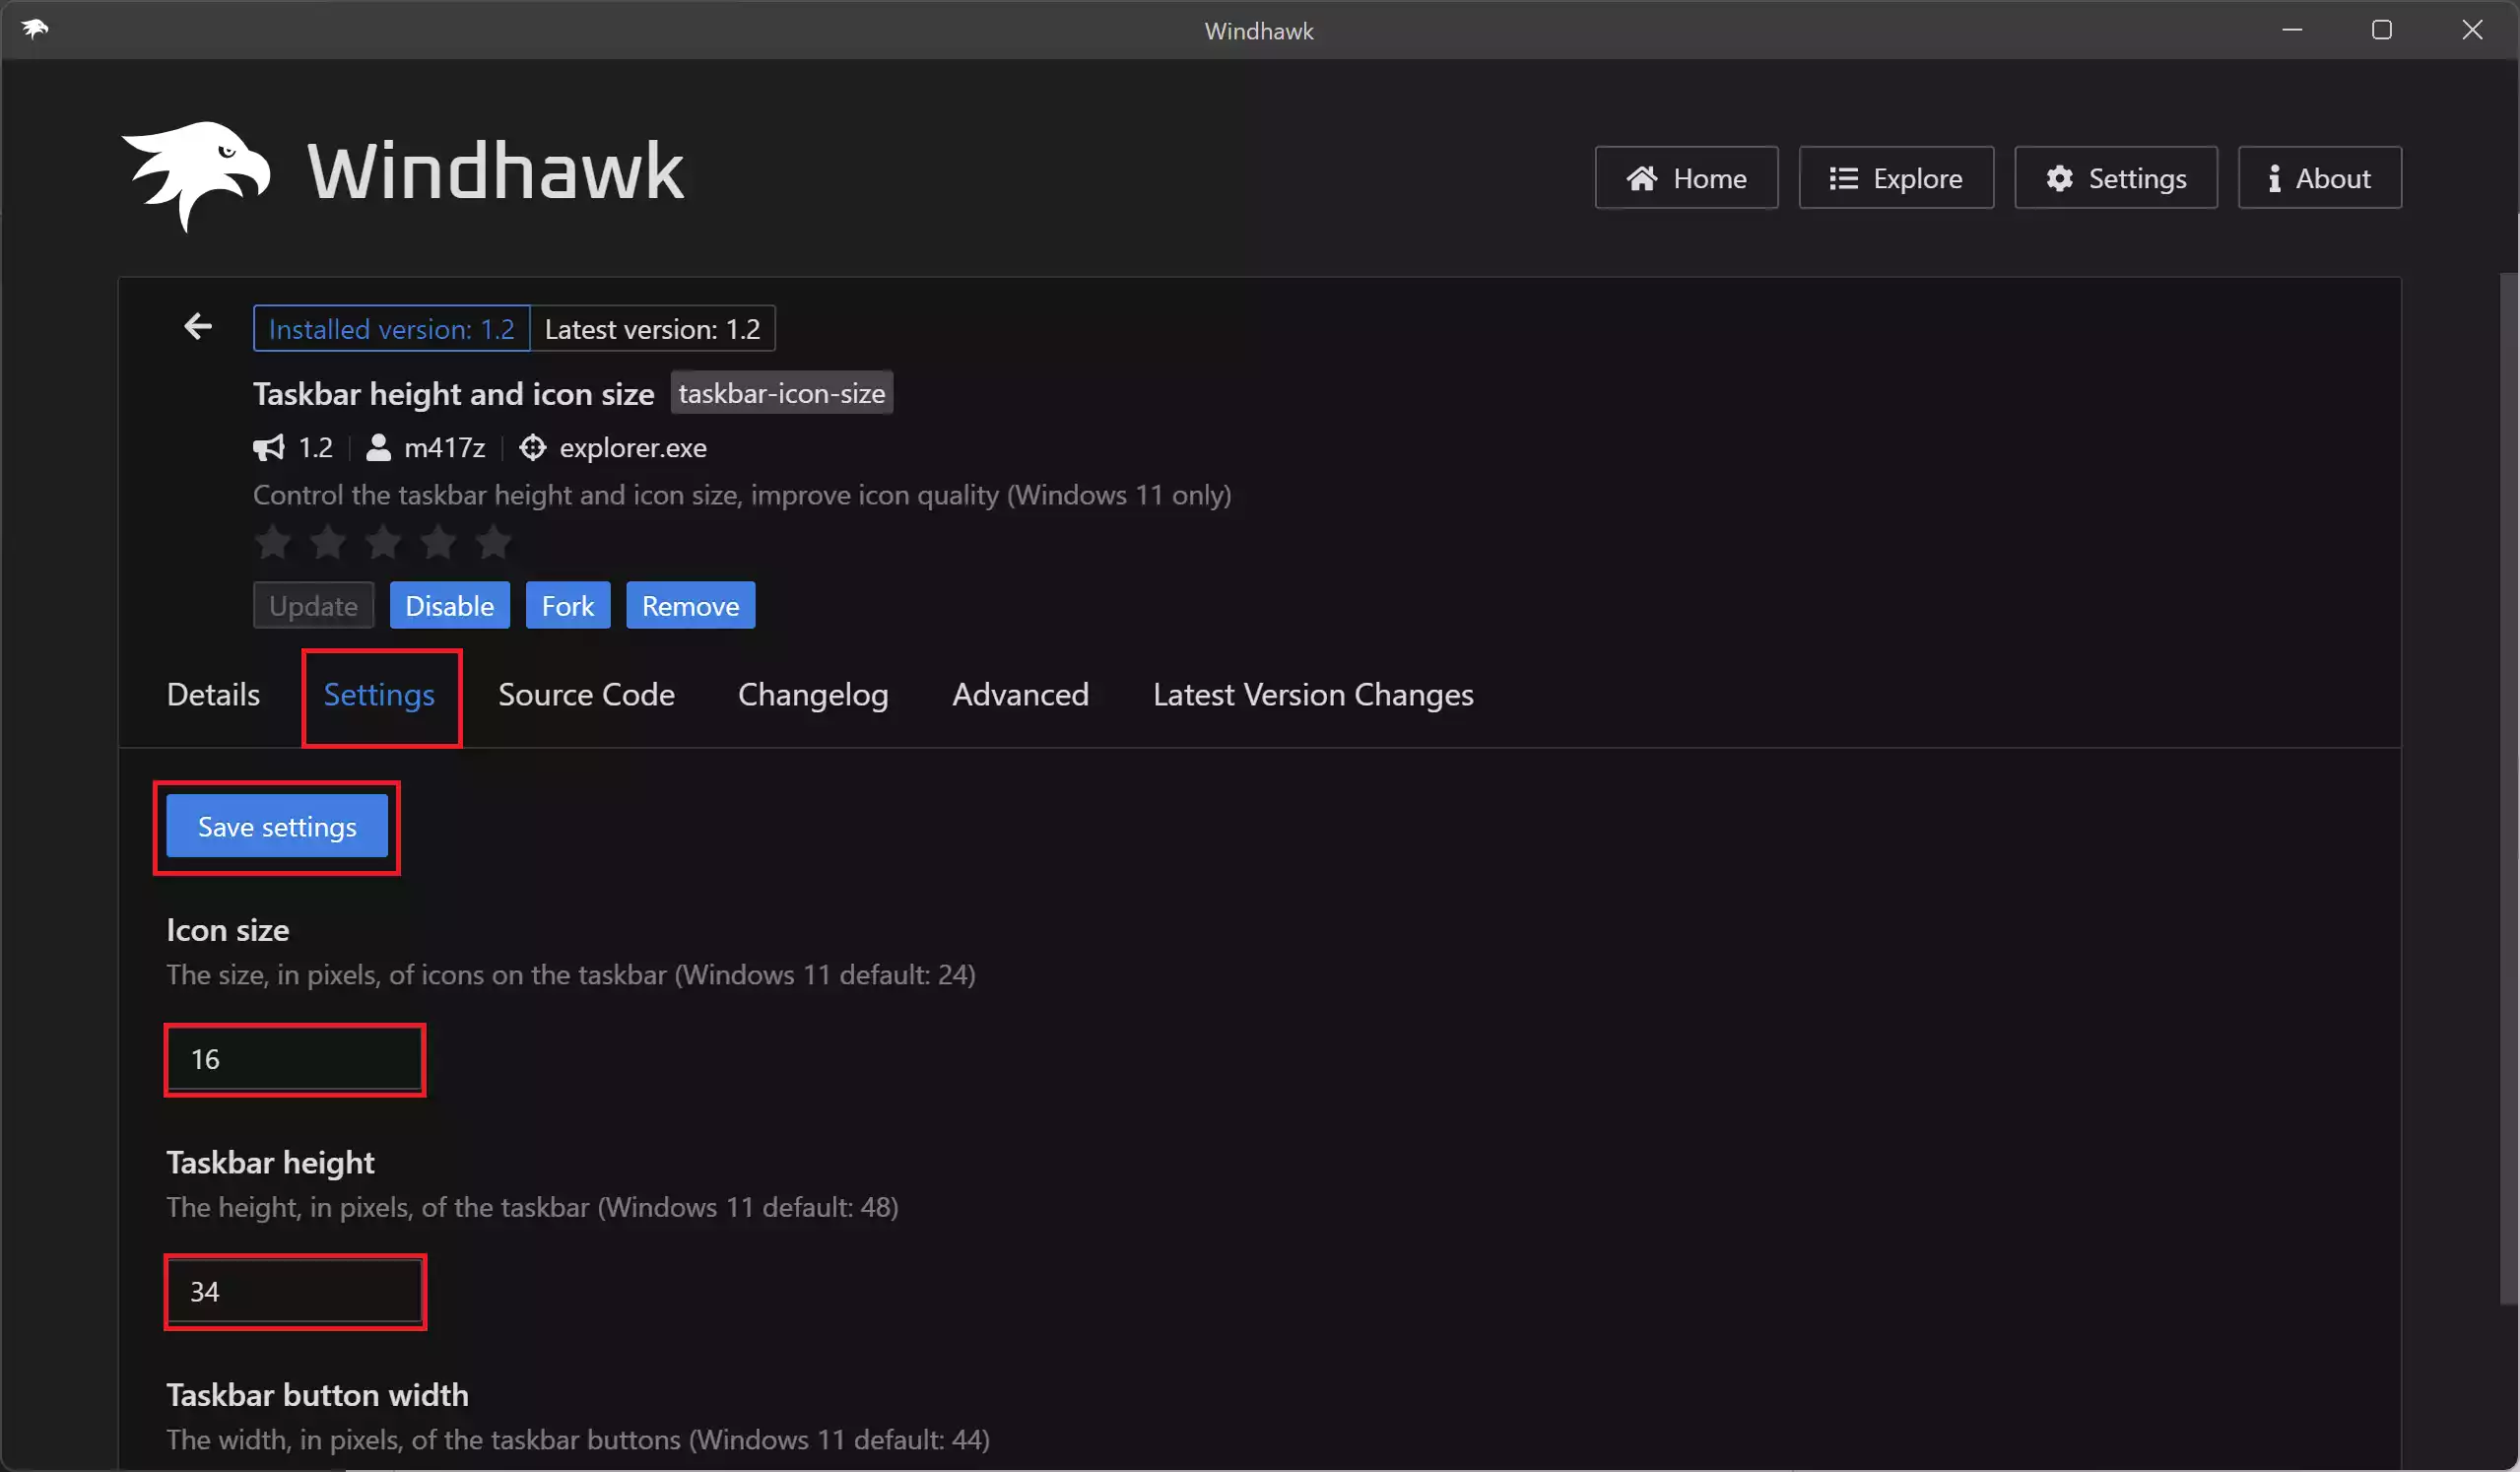
Step 11. Adjust the “Icon size” to your preferred value (e.g., 16 or 32).
Step 12. Accordingly, modify the “Taskbar height” to your desired setting (e.g., 34 to make the Taskbar smaller or 52 to make the Taskbar bigger).
Step 13. Once you’ve made the desired changes, click the “Save settings” button to apply the changes.
Windhawk will apply your chosen settings, making your Taskbar smaller or bigger on the Windows 11 desktop.
Method 2: Changing Taskbar Size with ExplorerPatcher
ExplorerPatcher is another free tool that simplifies the process of customizing the Windows 11 Taskbar. It allows you to change the Taskbar’s size and location with ease.
Step 1. Open the Start menu.
Step 2. Search for “Command Prompt,” right-click it, and select “Run as administrator.”
Step 3. Enter the following command and press Enter to install Explorer Patcher on your PC:-
winget install --id valinet.ExplorerPatcher
Note: If you are experiencing issues with the winget command, you can directly download it from this link.
Step 4. After installation, ExplorerPatcher will be accessible on your Windows 11. It’s worth noting that, by default, it moves the Taskbar icons to the left of the screen.
Step 5. Again, open the Start menu, search for “ExplorerPatcher,” and click on the top result to open the “Properties (ExplorerPatcher)” interface.
Step 6. Select the “Taskbar” tab.
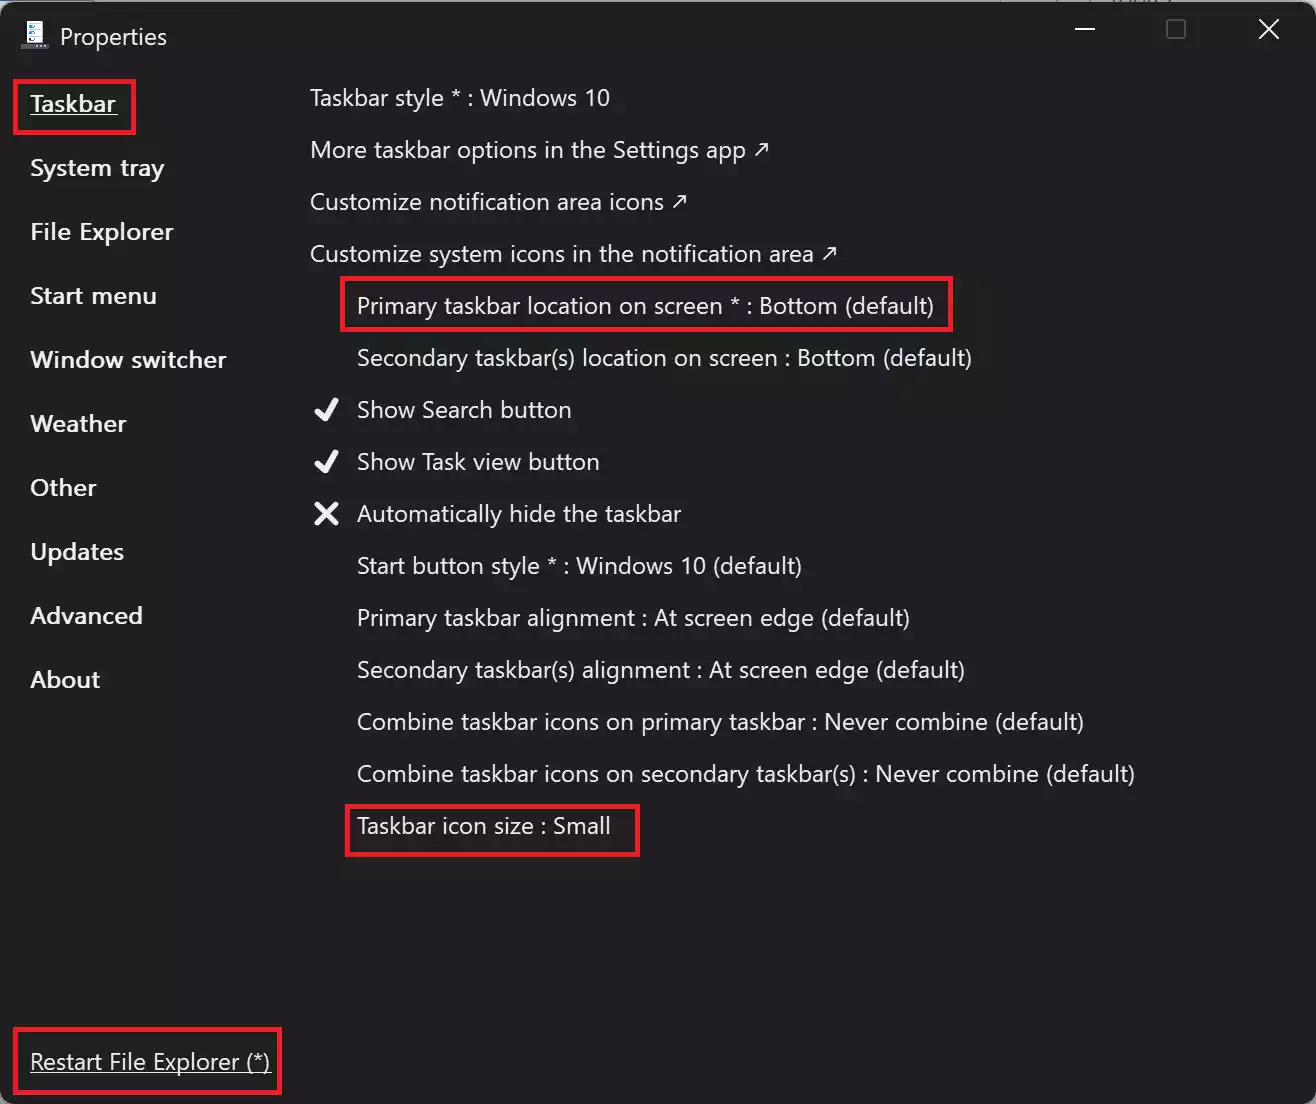
Step 7. Change the “Taskbar icon side” to “Small” to make the Taskbar smaller.
Step 8. Adjust the “Primary taskbar location on screen” to your preferred position (e.g., “Bottom,” “Top,” or another location).
Step 9. Click the “Restart File Explorer” option in the bottom-left corner to apply the changes.
ExplorerPatcher will promptly resize the Taskbar as per your configuration.
Conclusion
Customizing the Taskbar on Windows 11 can help improve your desktop experience and tailor it to your specific needs. With the free tools, Windhawk and ExplorerPatcher, you have the freedom to adjust the Taskbar’s size and appearance to suit your preferences, enhancing your overall Windows 11 experience. These user-friendly applications make the process quick and hassle-free, ensuring you get the desktop environment you desire.