In the vast digital landscape we navigate daily, Google Chrome stands as a beacon of efficiency and accessibility. However, despite its myriad features, many users find themselves grappling with the default zoom level, struggling to attain a browsing experience that caters to their visual preferences. Fear not, for in this comprehensive guide, we unveil the secrets to seamlessly altering Chrome’s default zoom level, empowering you to commandeer your browsing destiny with precision and ease.
Understanding the Default Zoom Level
Before delving into the intricacies of customization, let us first acquaint ourselves with the default zoom level in Chrome. This setting dictates the initial magnification applied to web pages upon loading, influencing the size of text, images, and overall page layout. While Chrome’s default zoom level is generally adept at rendering content legible for most users, personal preferences and varying screen resolutions often necessitate adjustments to optimize the browsing experience.
Customization for All Sites
For those seeking a uniform browsing experience across all websites, customizing the default zoom level in Chrome proves invaluable. To embark on this journey of personalized browsing bliss, follow these simple steps:-
Step 1. Launch Chrome and navigate to the three dots located in the upper-right corner.
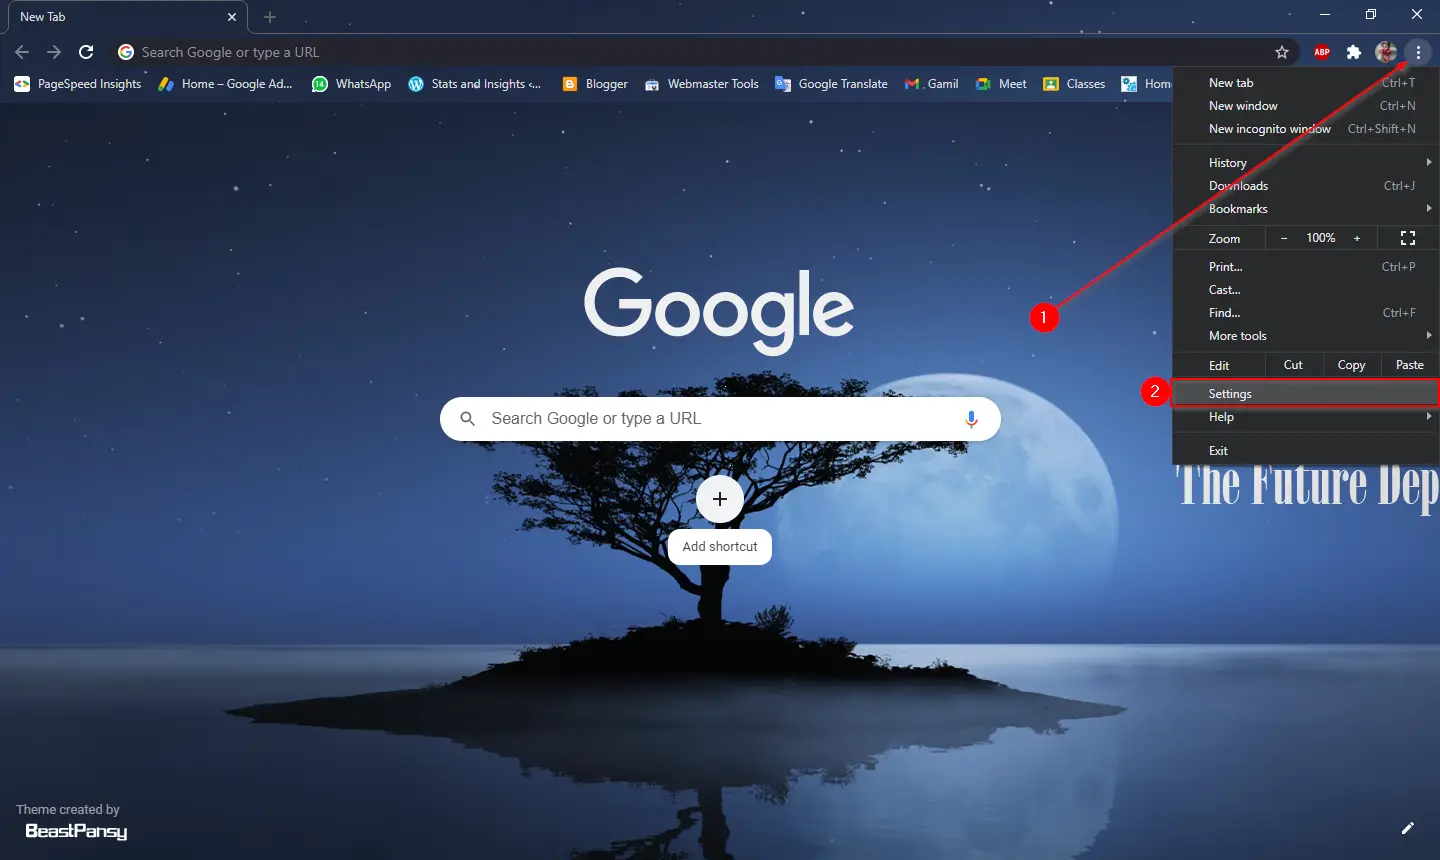
Step 2. From the dropdown menu, select “Settings” to access Chrome’s configuration options.
Step 3. Within the Settings interface, direct your attention to the left-hand sidebar and click on “Appearance”.
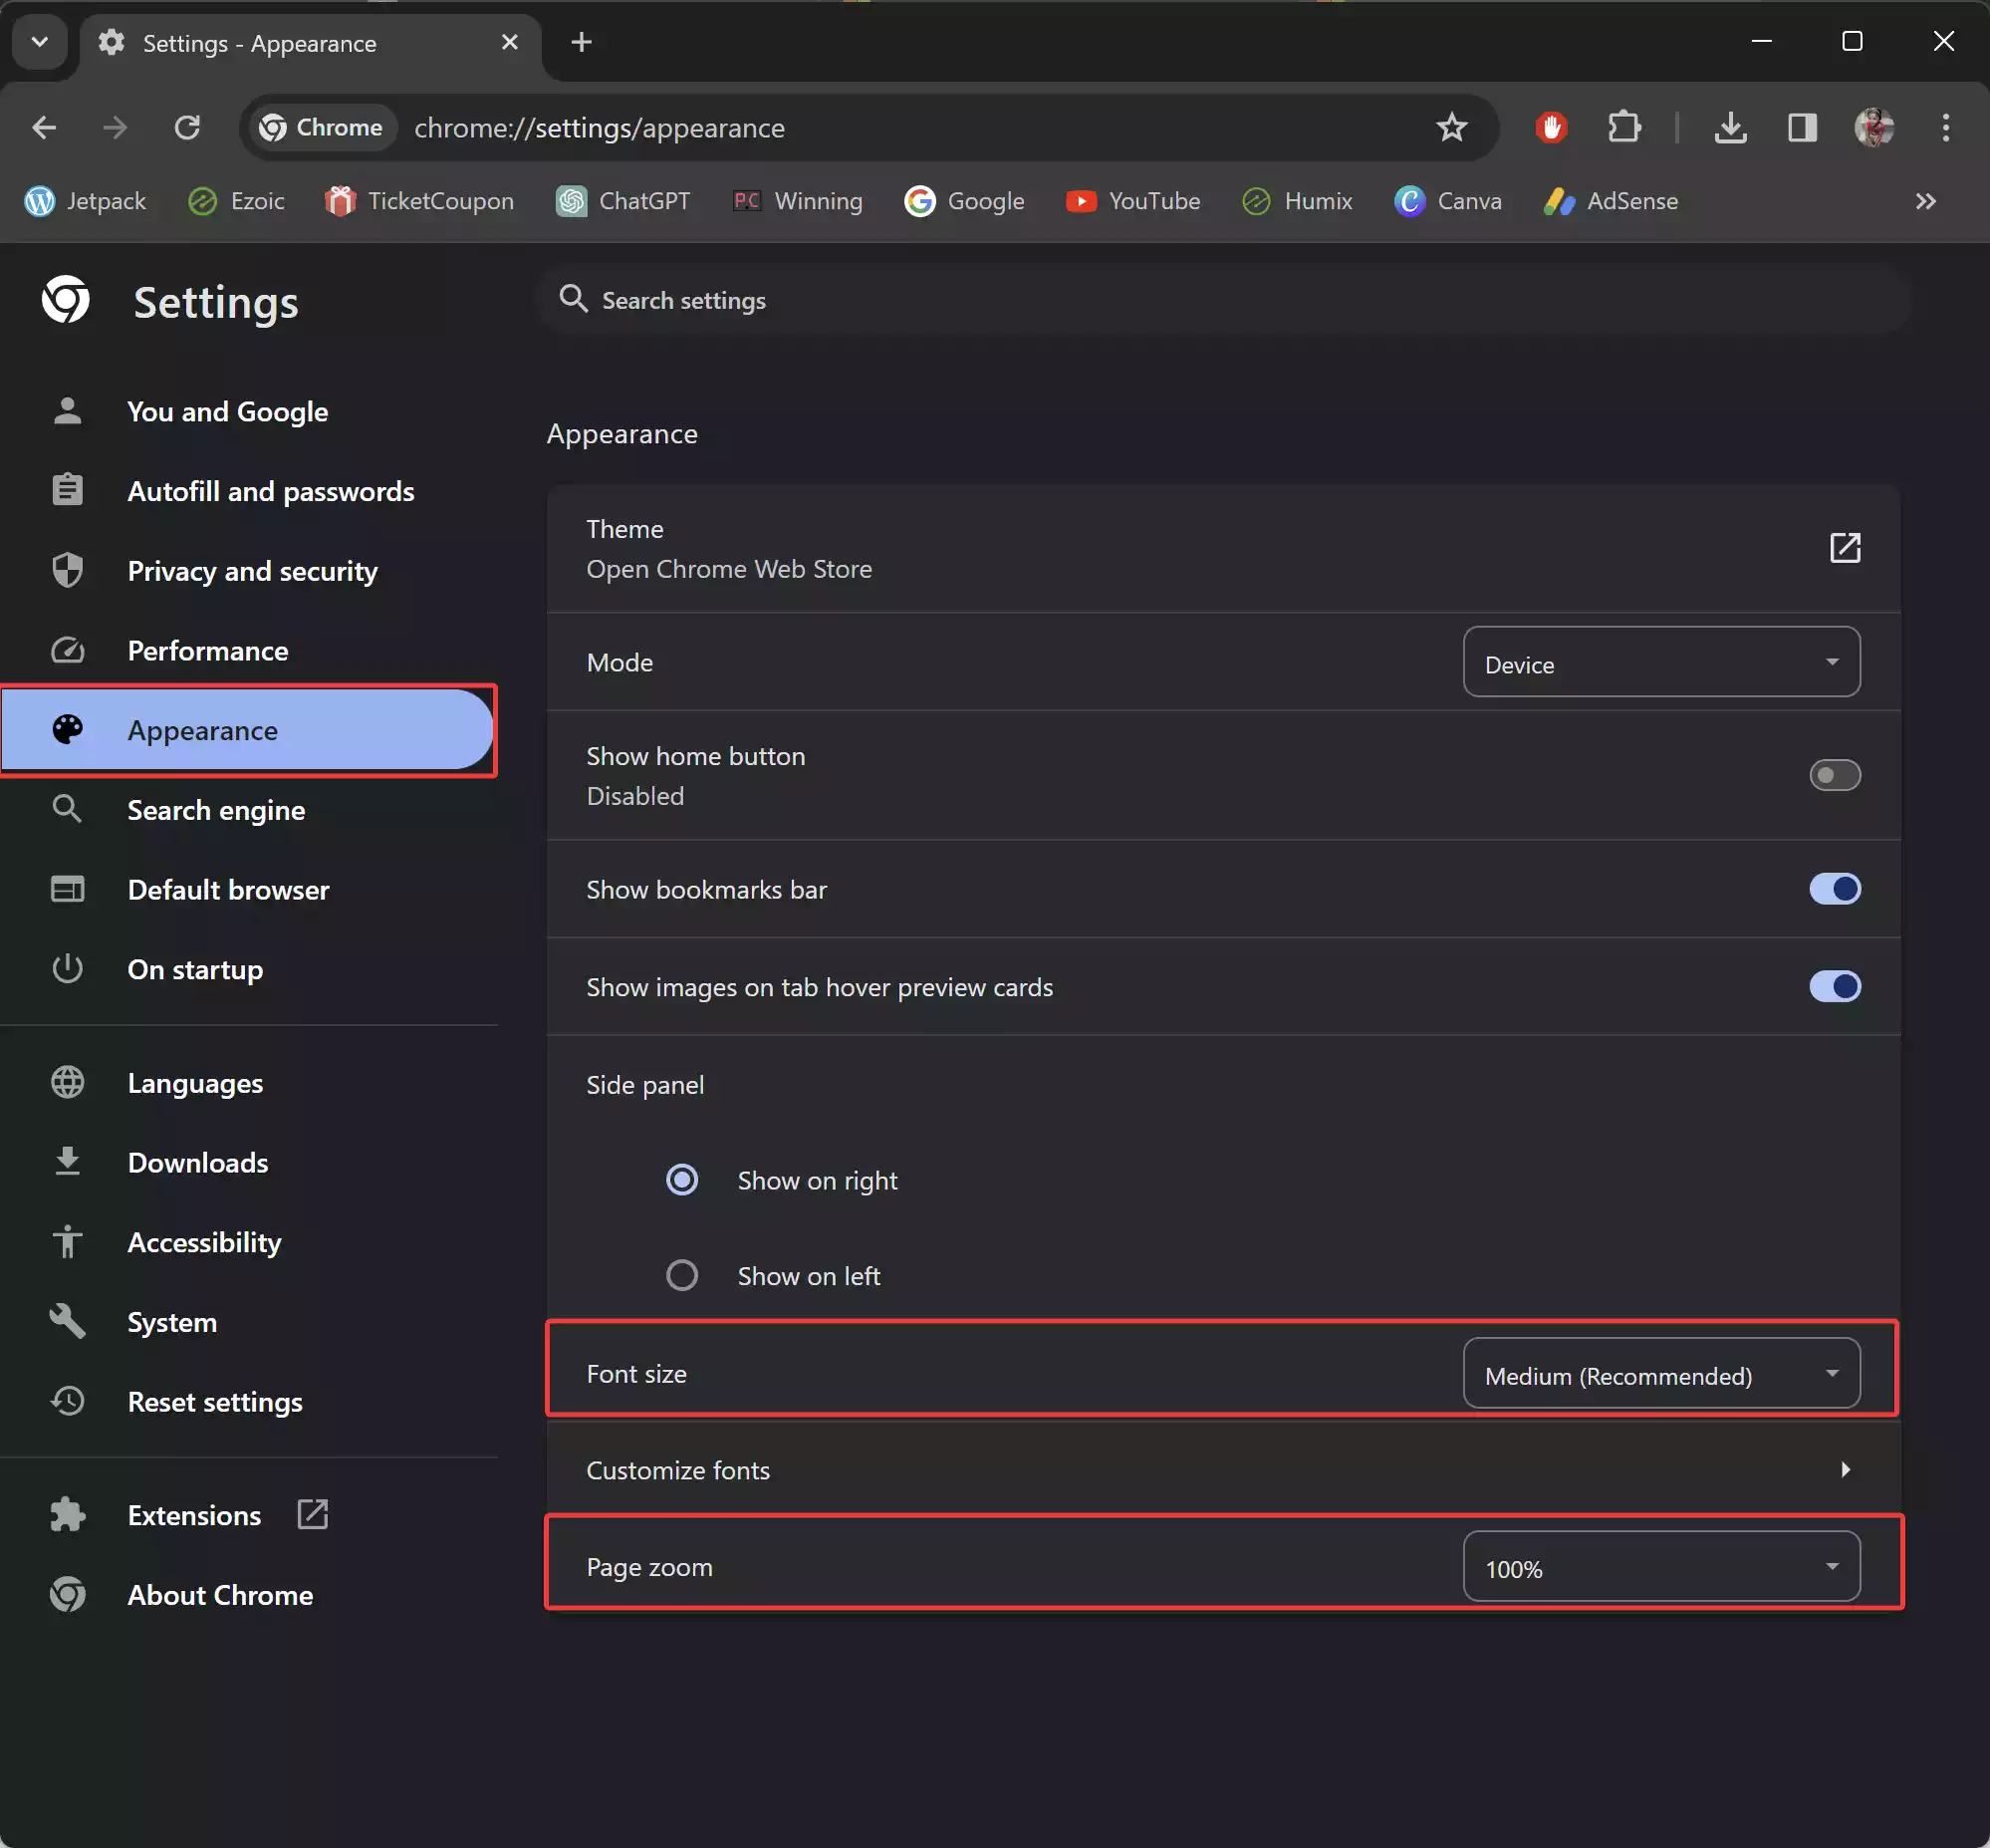
Step 4. On the right-hand side, locate the “Page Zoom” dropdown menu and select your desired zoom level from the available options.
Step 5. Alternatively, fine-tune your browsing experience by adjusting the font size to complement your chosen zoom level.
Step 6. Once satisfied with your selections, bask in the glory of a consistently optimized browsing experience across all websites.
Tailored Zoom Levels for Individual Sites
While uniformity has its merits, there are instances where specific websites may warrant unique zoom levels to accommodate their distinct layouts or content. Fear not, for Chrome affords users the flexibility to customize zoom levels on a per-site basis:-
Step 1. Begin by launching Chrome and navigating to the desired website.
Step 2. Upon arrival, direct your attention to the three dots in the upper-right corner to unveil the browser’s menu options.
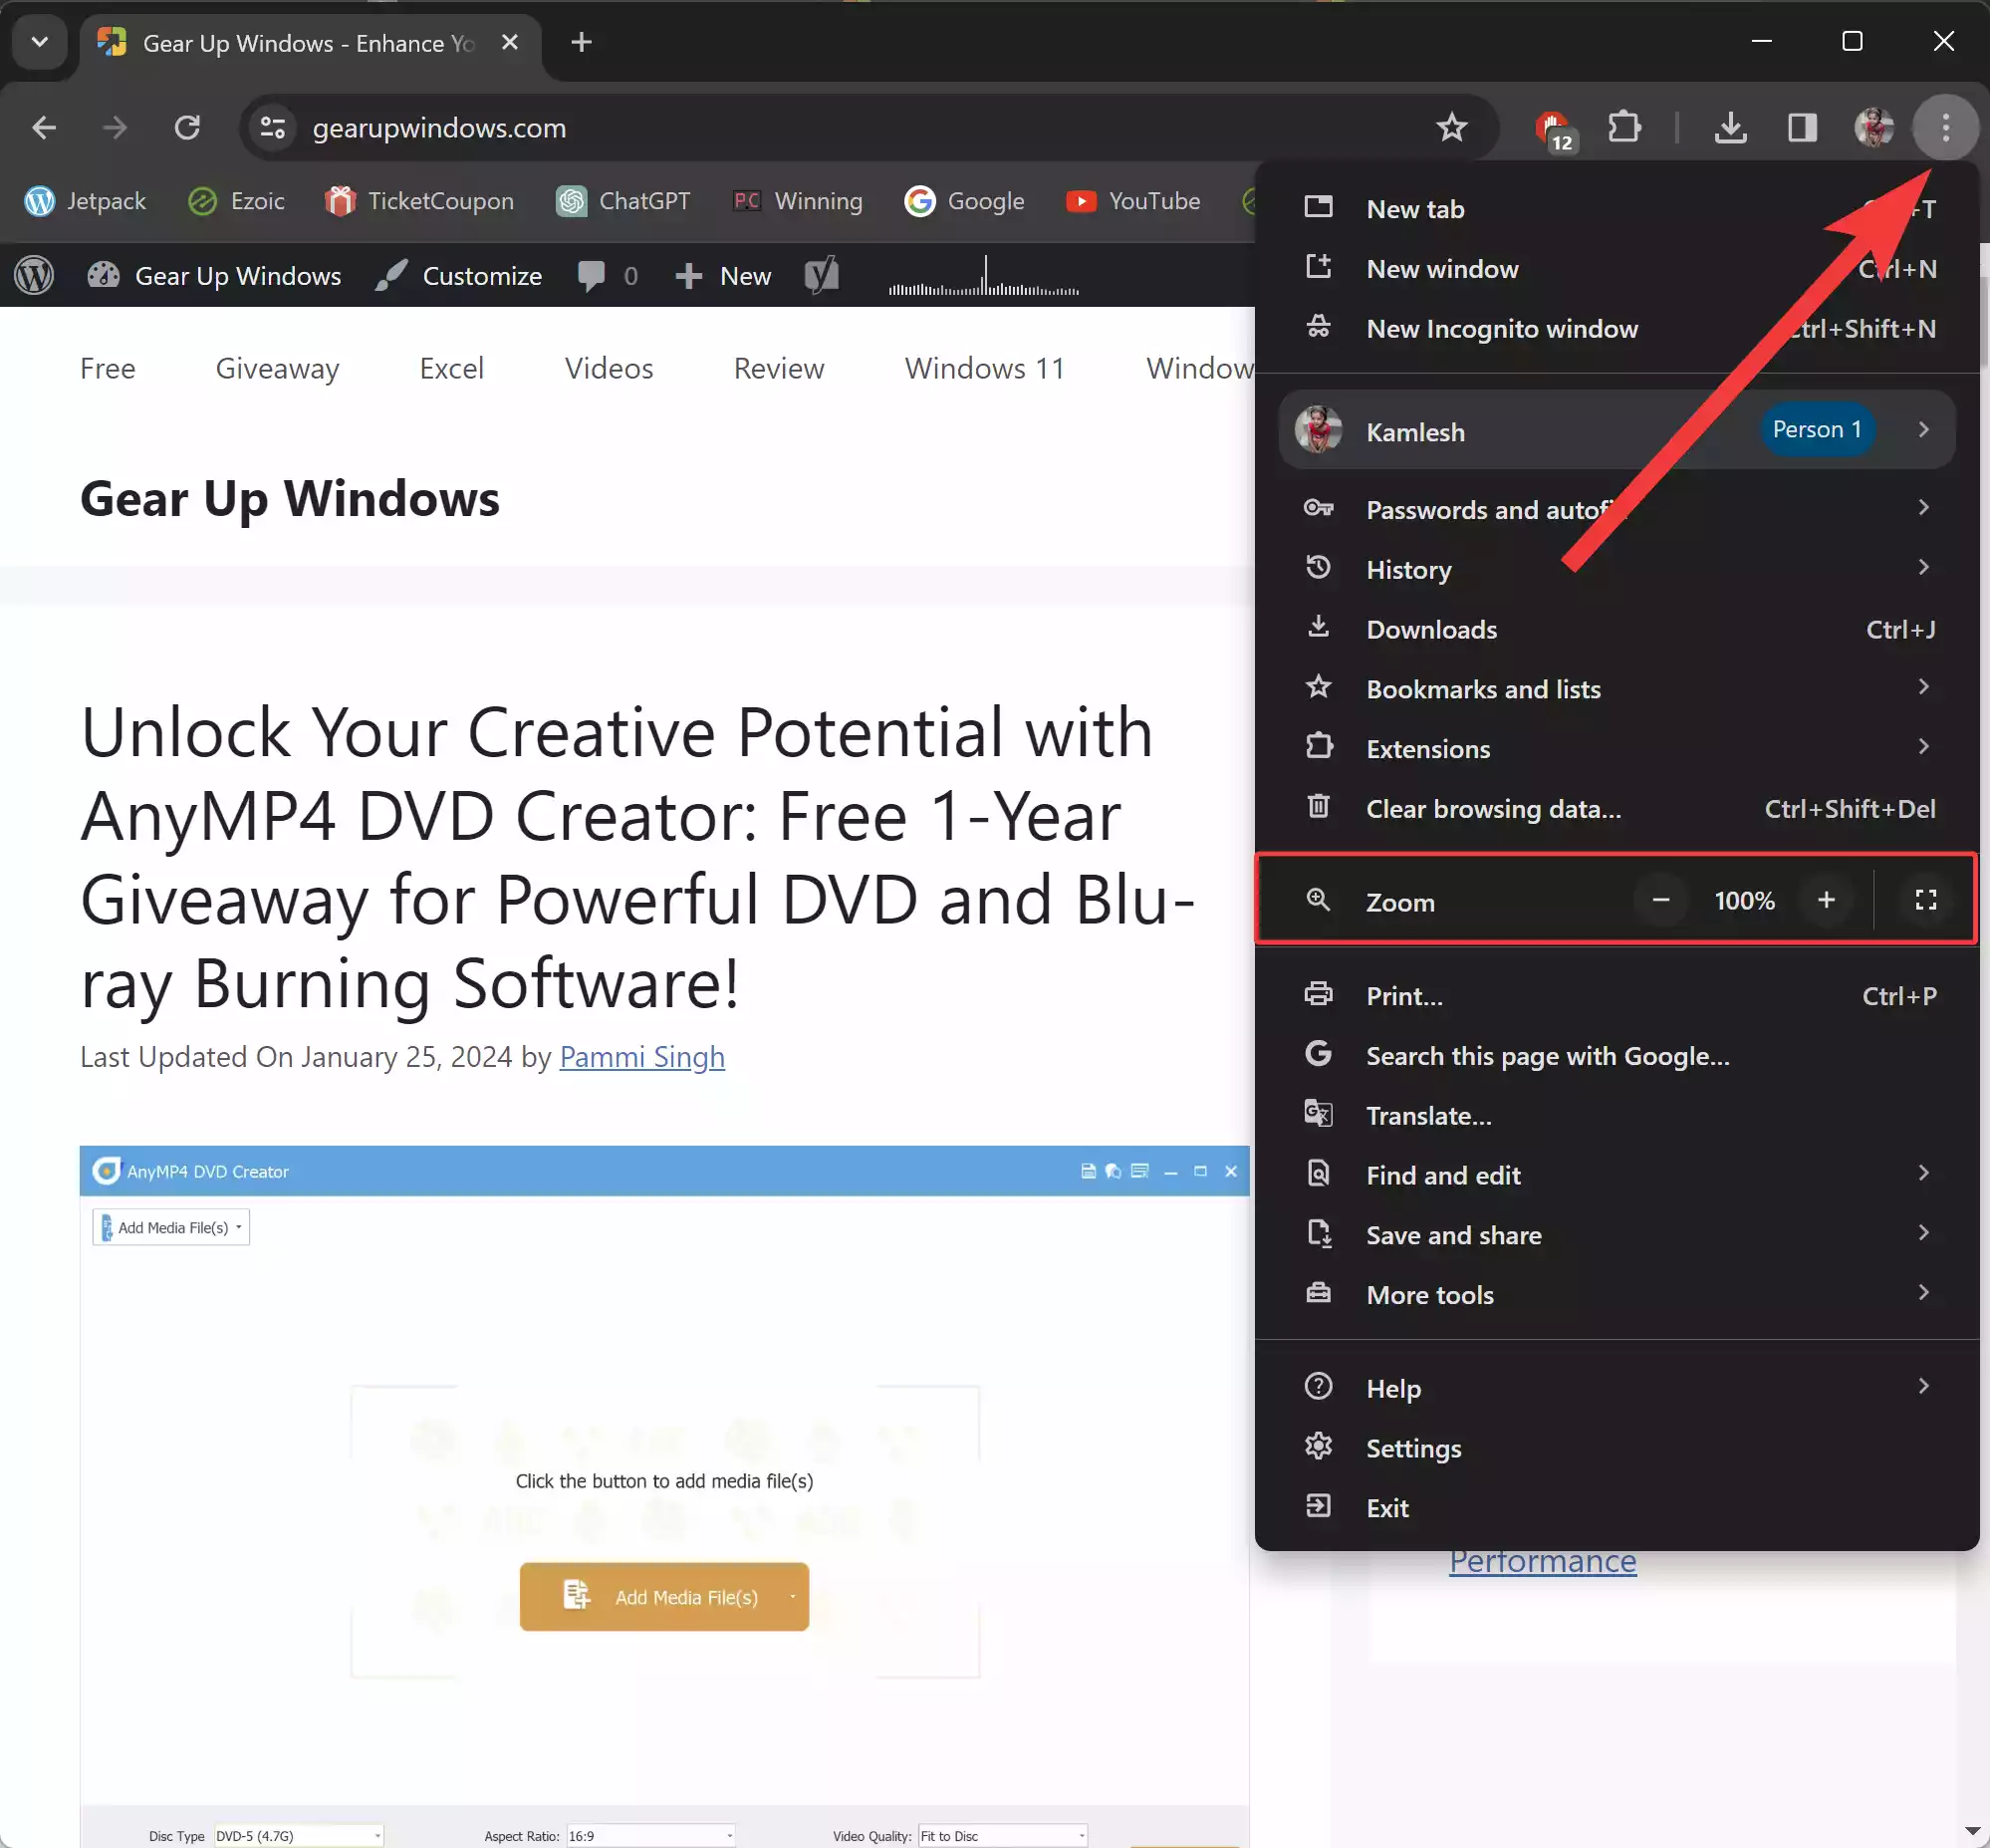
Step 3. From the dropdown menu, hover over “Zoom” to reveal additional options.
Step 4. Here, utilize the Plus (+) and Minus (-) signs to incrementally adjust the zoom level to your liking.
Step 5. Revel in the newfound clarity and comfort as you navigate the intricacies of individual websites with tailored precision.
Refinement and Reversion
As we traverse the ever-evolving landscape of the internet, it’s inevitable that our browsing preferences may evolve in tandem. Fear not, for Chrome provides intuitive mechanisms for refining and reverting zoom level settings:-
Step 1. To refine or revert the zoom level for individual sites, simply revisit the site in question and readjust the zoom level as desired.
Step 2. Alternatively, for a comprehensive reset to Chrome’s default zoom level, employ the convenient keyboard shortcut: Ctrl + 0 on Windows PCs or Command + 0 on Macs.
Conclusion
In a digital realm replete with endless possibilities, mastering Chrome’s default zoom level empowers users to sculpt their browsing experience with unparalleled precision and comfort. Whether seeking uniformity across all sites or bespoke adjustments for individual domains, Chrome’s versatile customization options ensure that every pixel of the web is yours to command. So, heed these insights, embark on your journey of browsing enlightenment, and revel in the newfound clarity and comfort that awaits you in the boundless expanse of the internet.