With every Windows update comes new features, and while some are welcomed additions, others may not align with every user’s preferences or workflow. Windows 11 introduced Gallery, a feature integrated into File Explorer, designed to streamline access to your photo collection. However, for users who find themselves seldomly using this feature or prefer a cleaner navigation pane, removing Gallery can be a desirable customization. In this gearupwindows guide, we’ll walk through the process of removing Gallery from File Explorer on Windows 11.

Why Remove Gallery?
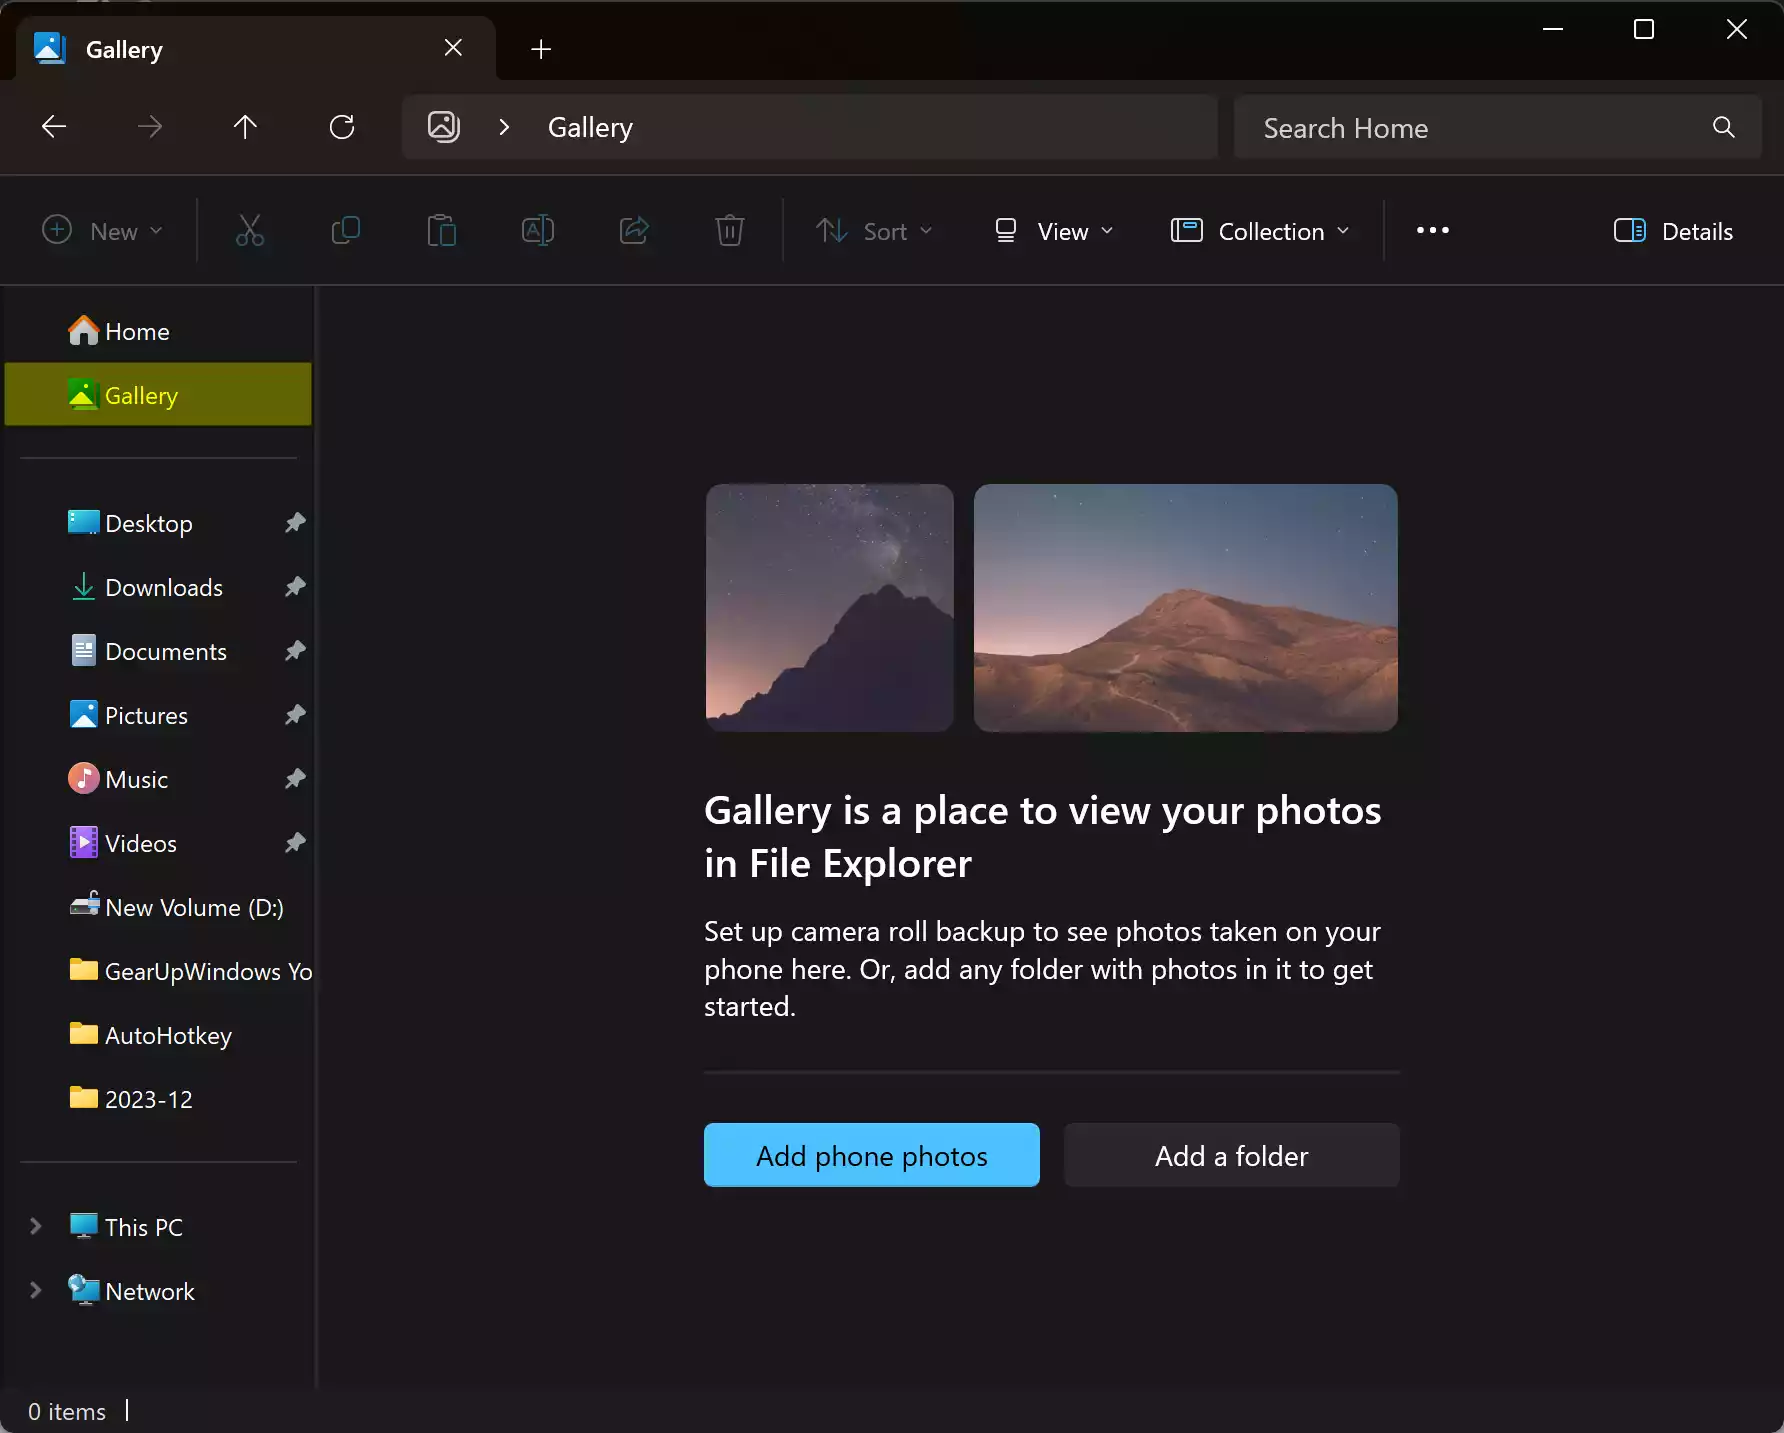
Gallery is essentially a consolidated view of your photos, mirroring what you see in the Photos app, including recent photos and those backed up from your phone via OneDrive. While useful for some, others may find it redundant or prefer a more minimalist File Explorer interface. Removing Gallery can declutter the navigation pane, providing a more focused browsing experience tailored to individual preferences.
How to Remove Gallery from File Explorer on Windows 11?
To remove Gallery from Windows 11 File Explorer, follow these steps:-
Step 1. Press `Windows key + R` to open the Run dialog.
Step 2. Type `regedit` and hit Enter. Click Yes if prompted for permission to open the Registry Editor.
Step 3. In the Registry Editor window, navigate to the following path on the left sidebar:-
HKEY_LOCAL_MACHINE\SOFTWARE\Microsoft\Windows\CurrentVersion\Explorer\Desktop\NameSpace_41040327\{e88865ea-0e1c-4e20-9aa6-edcd0212c87c}
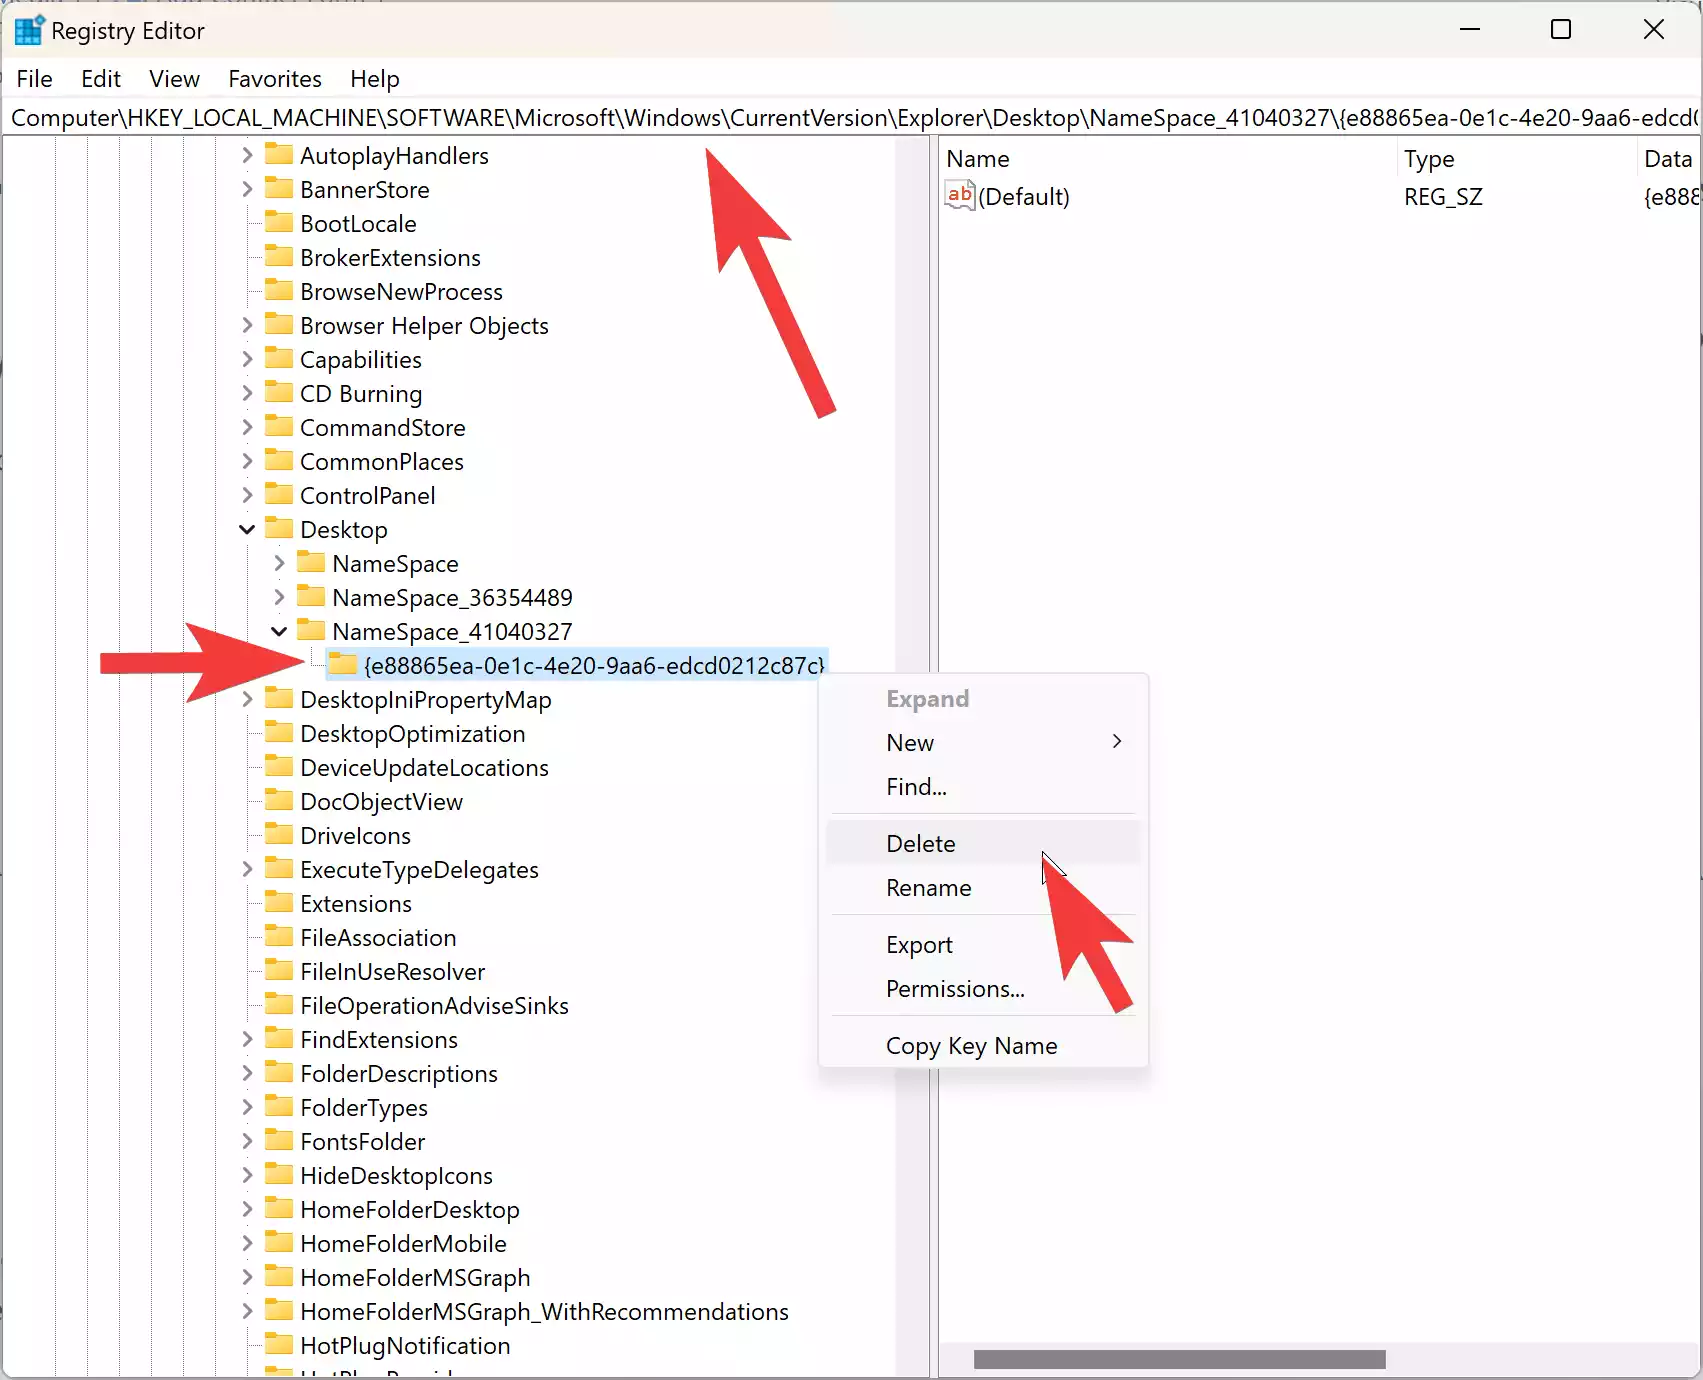
Step 4. Right-click the `{e88865ea-0e1c-4e20-9aa6-edcd0212c87c}` key and select Delete from the context menu.
Step 5. Confirm the deletion when prompted.
Step 6. Close the Registry Editor once the deletion is completed.
How to Add Gallery from File Explorer on Windows 11?
If you ever decide to bring Gallery back to File Explorer, follow these steps:-
Step 1. Press `Windows key + R` to open the Run dialog.
Step 2. Type `regedit` and hit Enter. Click Yes if prompted for permission to open the Registry Editor.
Step 3. In the Registry Editor window, navigate to the following path on the left sidebar:-
HKEY_LOCAL_MACHINE\SOFTWARE\Microsoft\Windows\CurrentVersion\Explorer\Desktop\NameSpace_41040327\
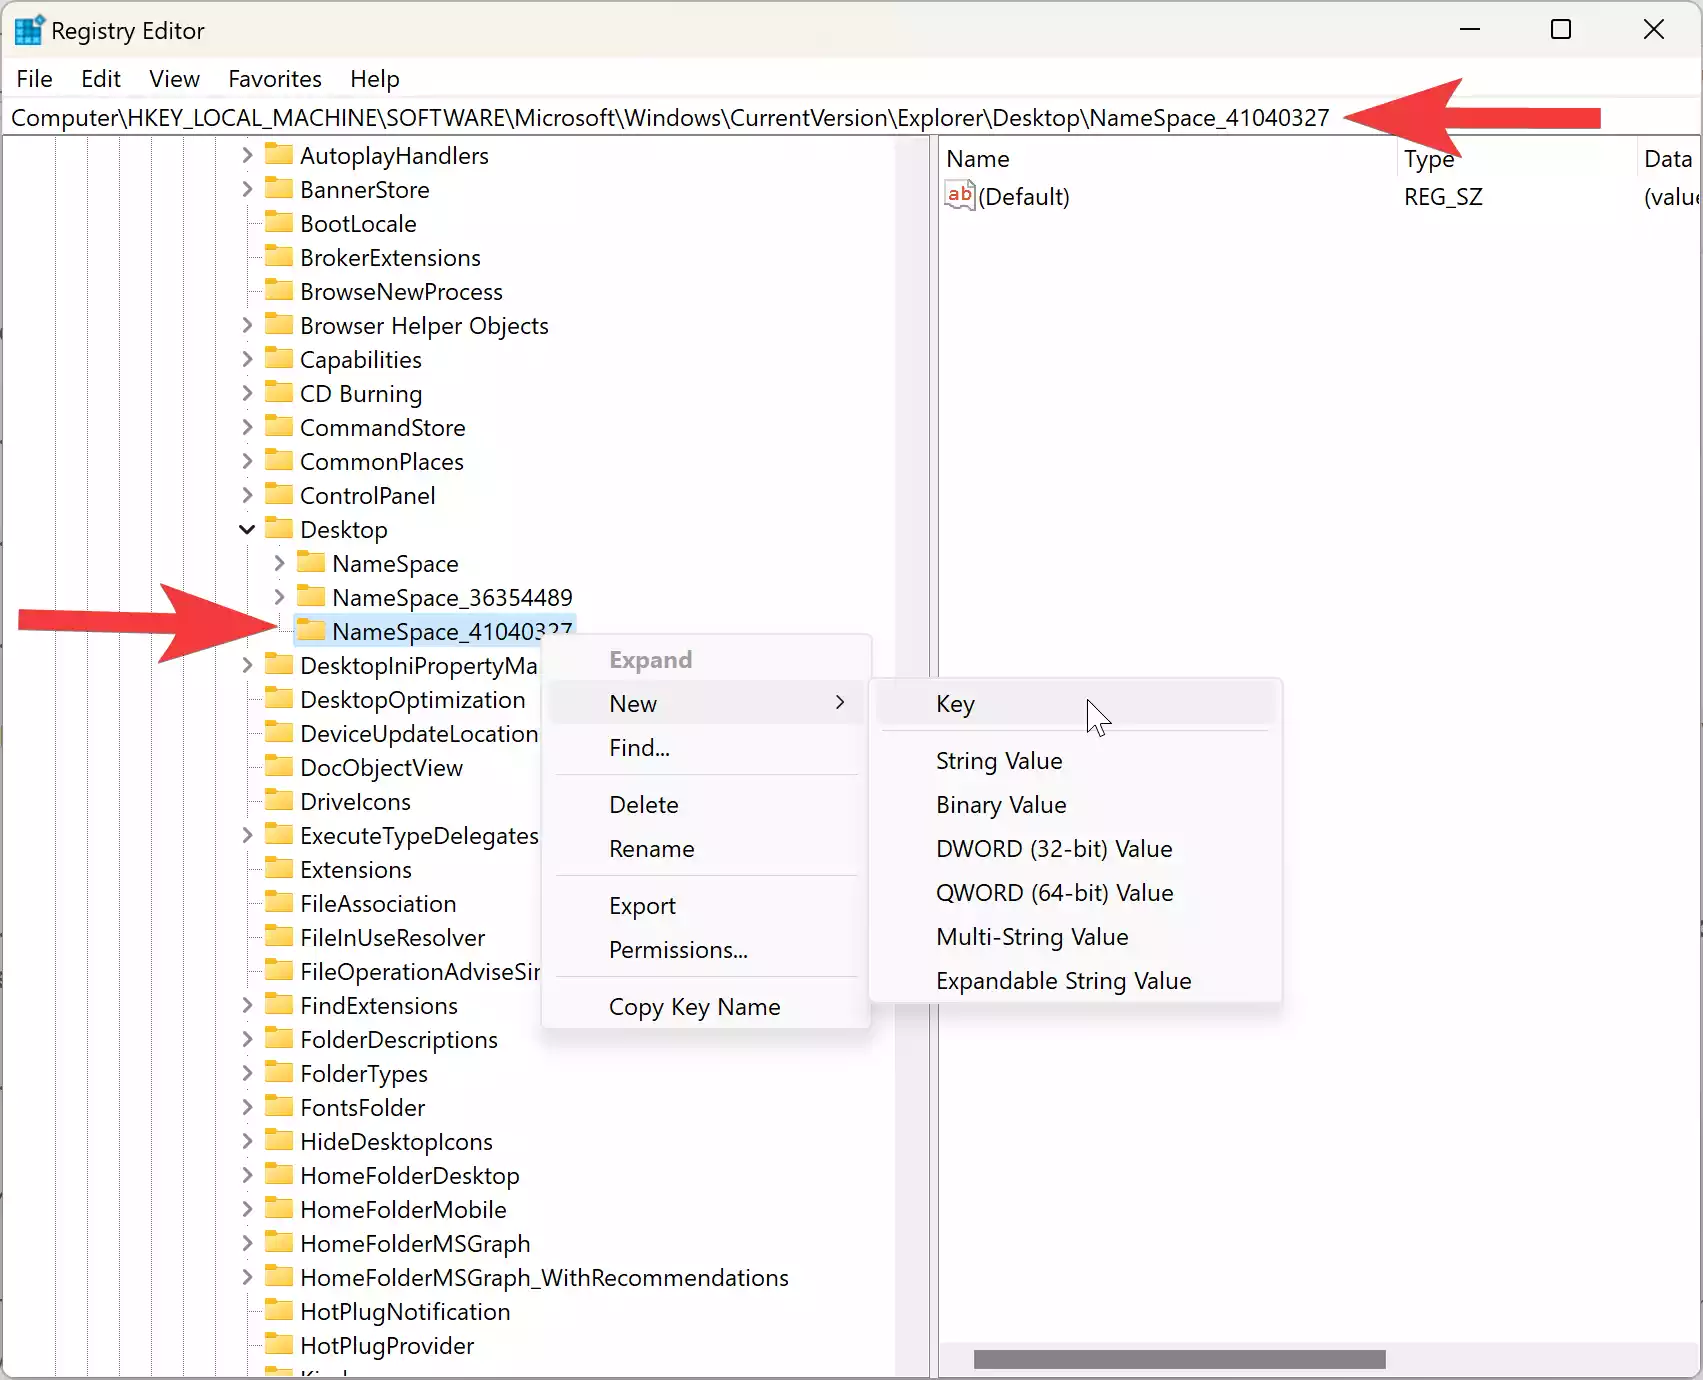
Step 4. Right-click on `NameSpace_41040327`, select New > Key from the context menu, and name it ‘{e88865ea-0e1c-4e20-9aa6-edcd0212c87c}.’
Step 5. Close the Registry Editor after recreating the key.
Conclusion
Customizing your operating system to suit your preferences is one of the joys of using a platform like Windows. Removing the Gallery feature from File Explorer on Windows 11 is a straightforward process, offering users the flexibility to tailor their experience. Whether you prefer a clutter-free interface or simply don’t find the Gallery feature useful, following the steps outlined in this guide empowers you to personalize your File Explorer navigation pane according to your needs.
Also Read: How to Add or Remove a Folder in Gallery in Windows 11 File Explorer?