Is your computer showing the wrong date and time? If you have selected the wrong time zone during the Windows 11 operating system installation or, for some reason, you want to change the time zone, this gearupwindows article will help you. Although Windows 11 detects time zone automatically, if you have no active internet connection, the process might fail. An incorrect time zone is one of the reasons for showing the wrong date and time on your computer.
There are several methods to adjust Time Zone in Windows 11. We will see them one by one.
How to Change Time Zone in Windows 11 using the Settings app?
First Method:
To adjust the time zone in Windows 11 using settings, perform the following steps:-
Step 1. Press Windows + I keys simultaneously from the keyboard to open the Settings app.
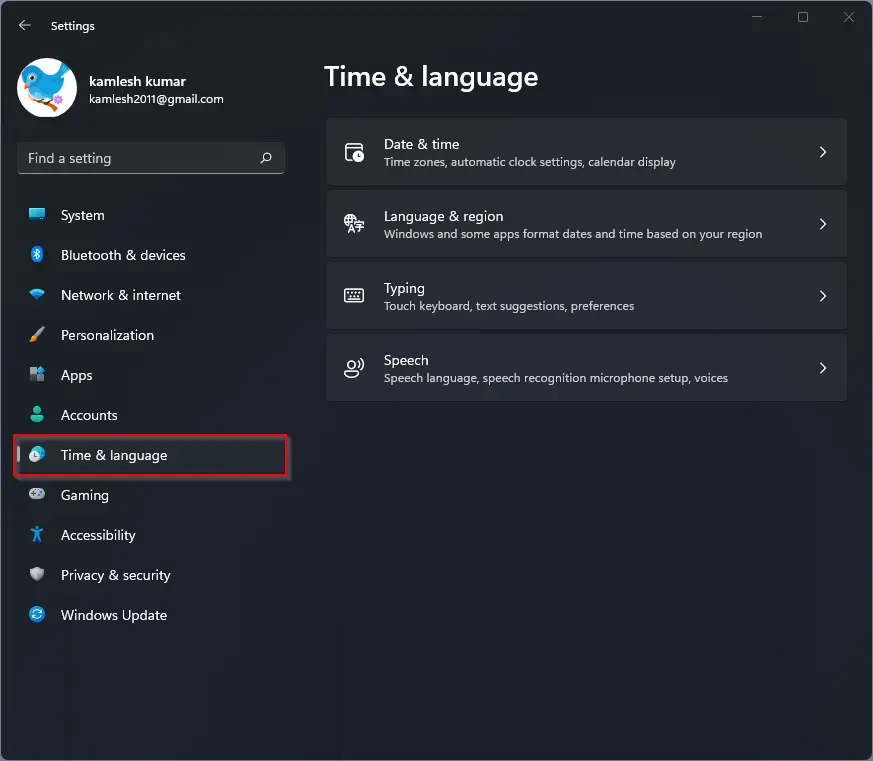
Step 2. When Windows Settings opens, select Time & language category from the left sidebar.
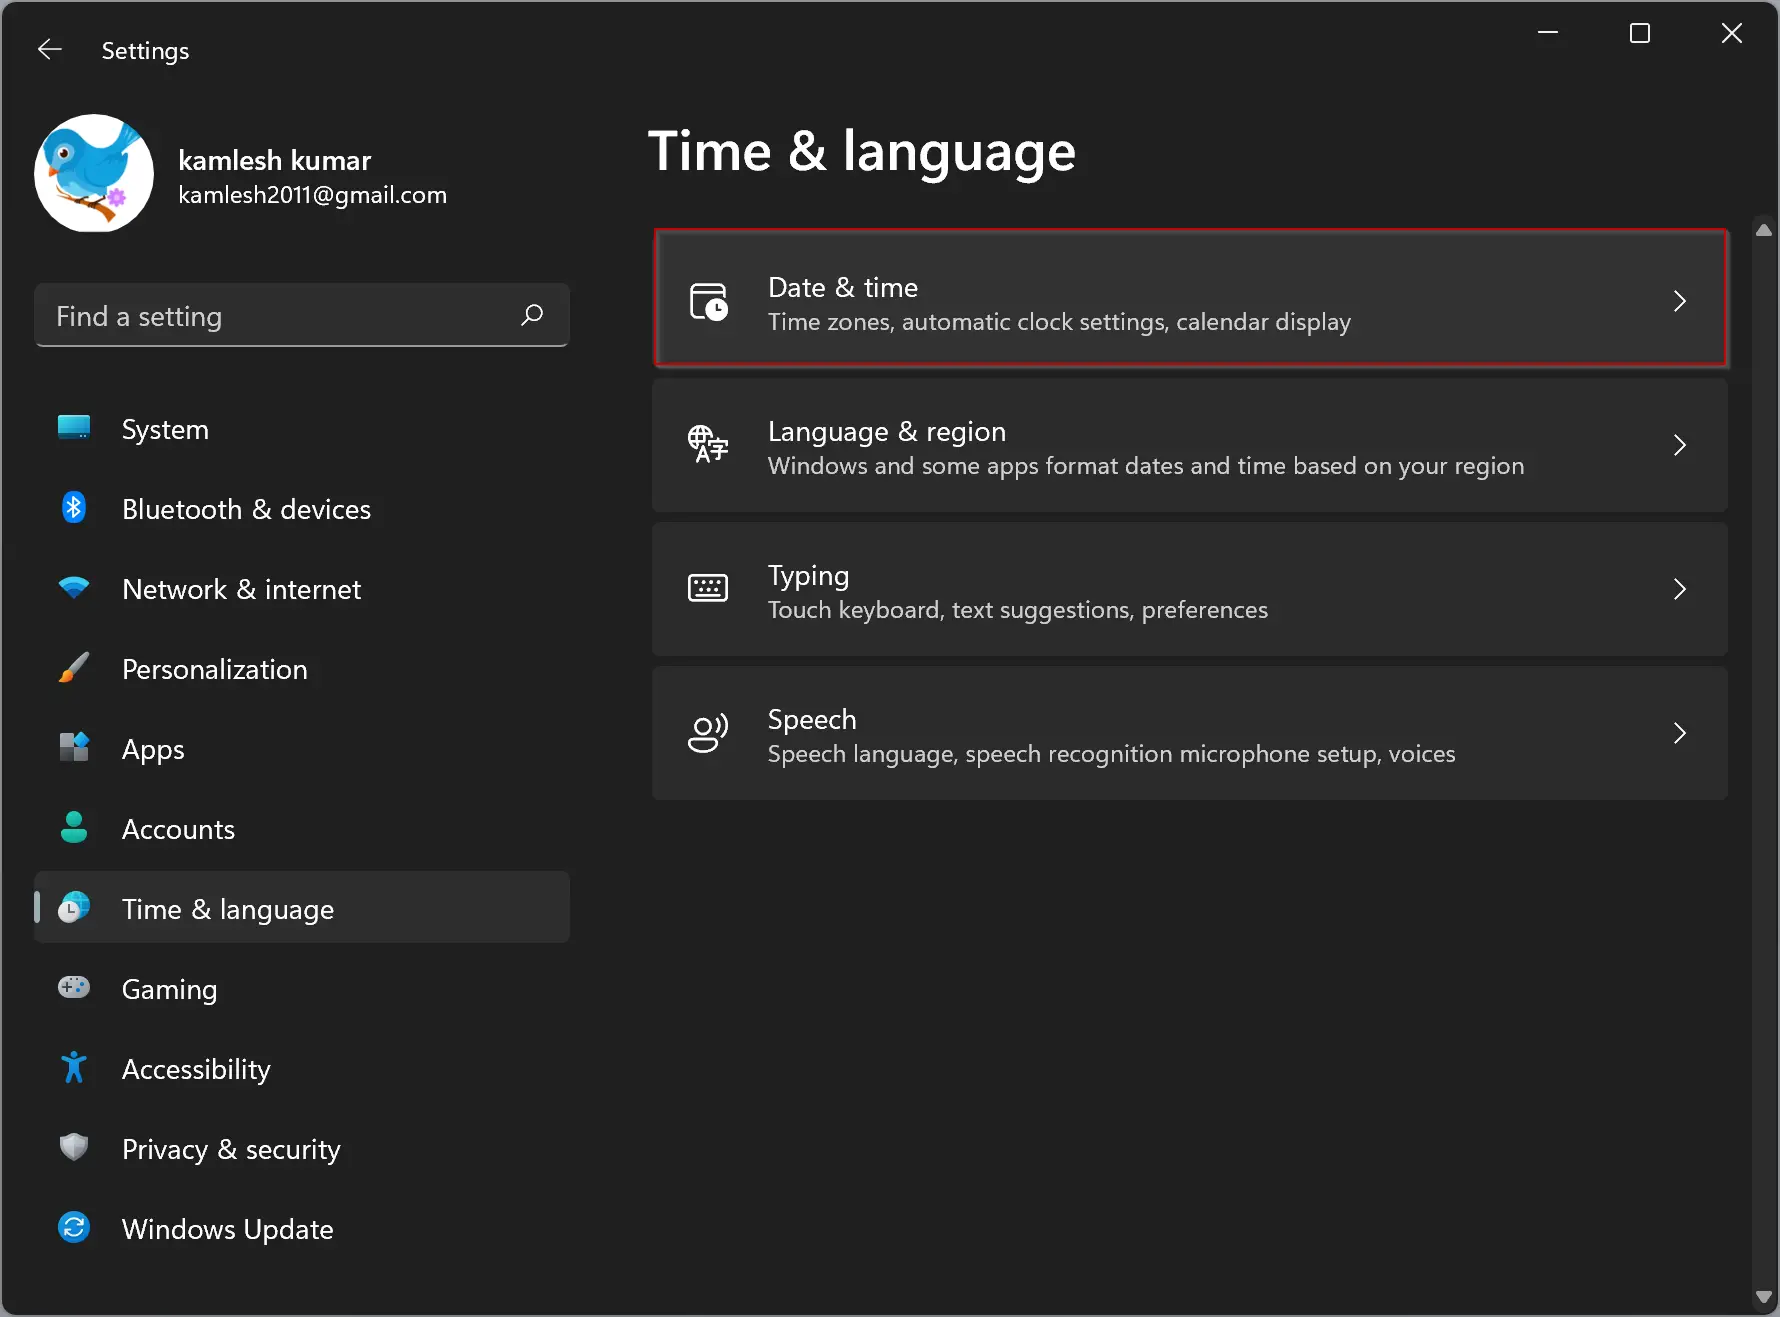
Step 3. Click Date & time tab on the right-side pane on the Time and language page.
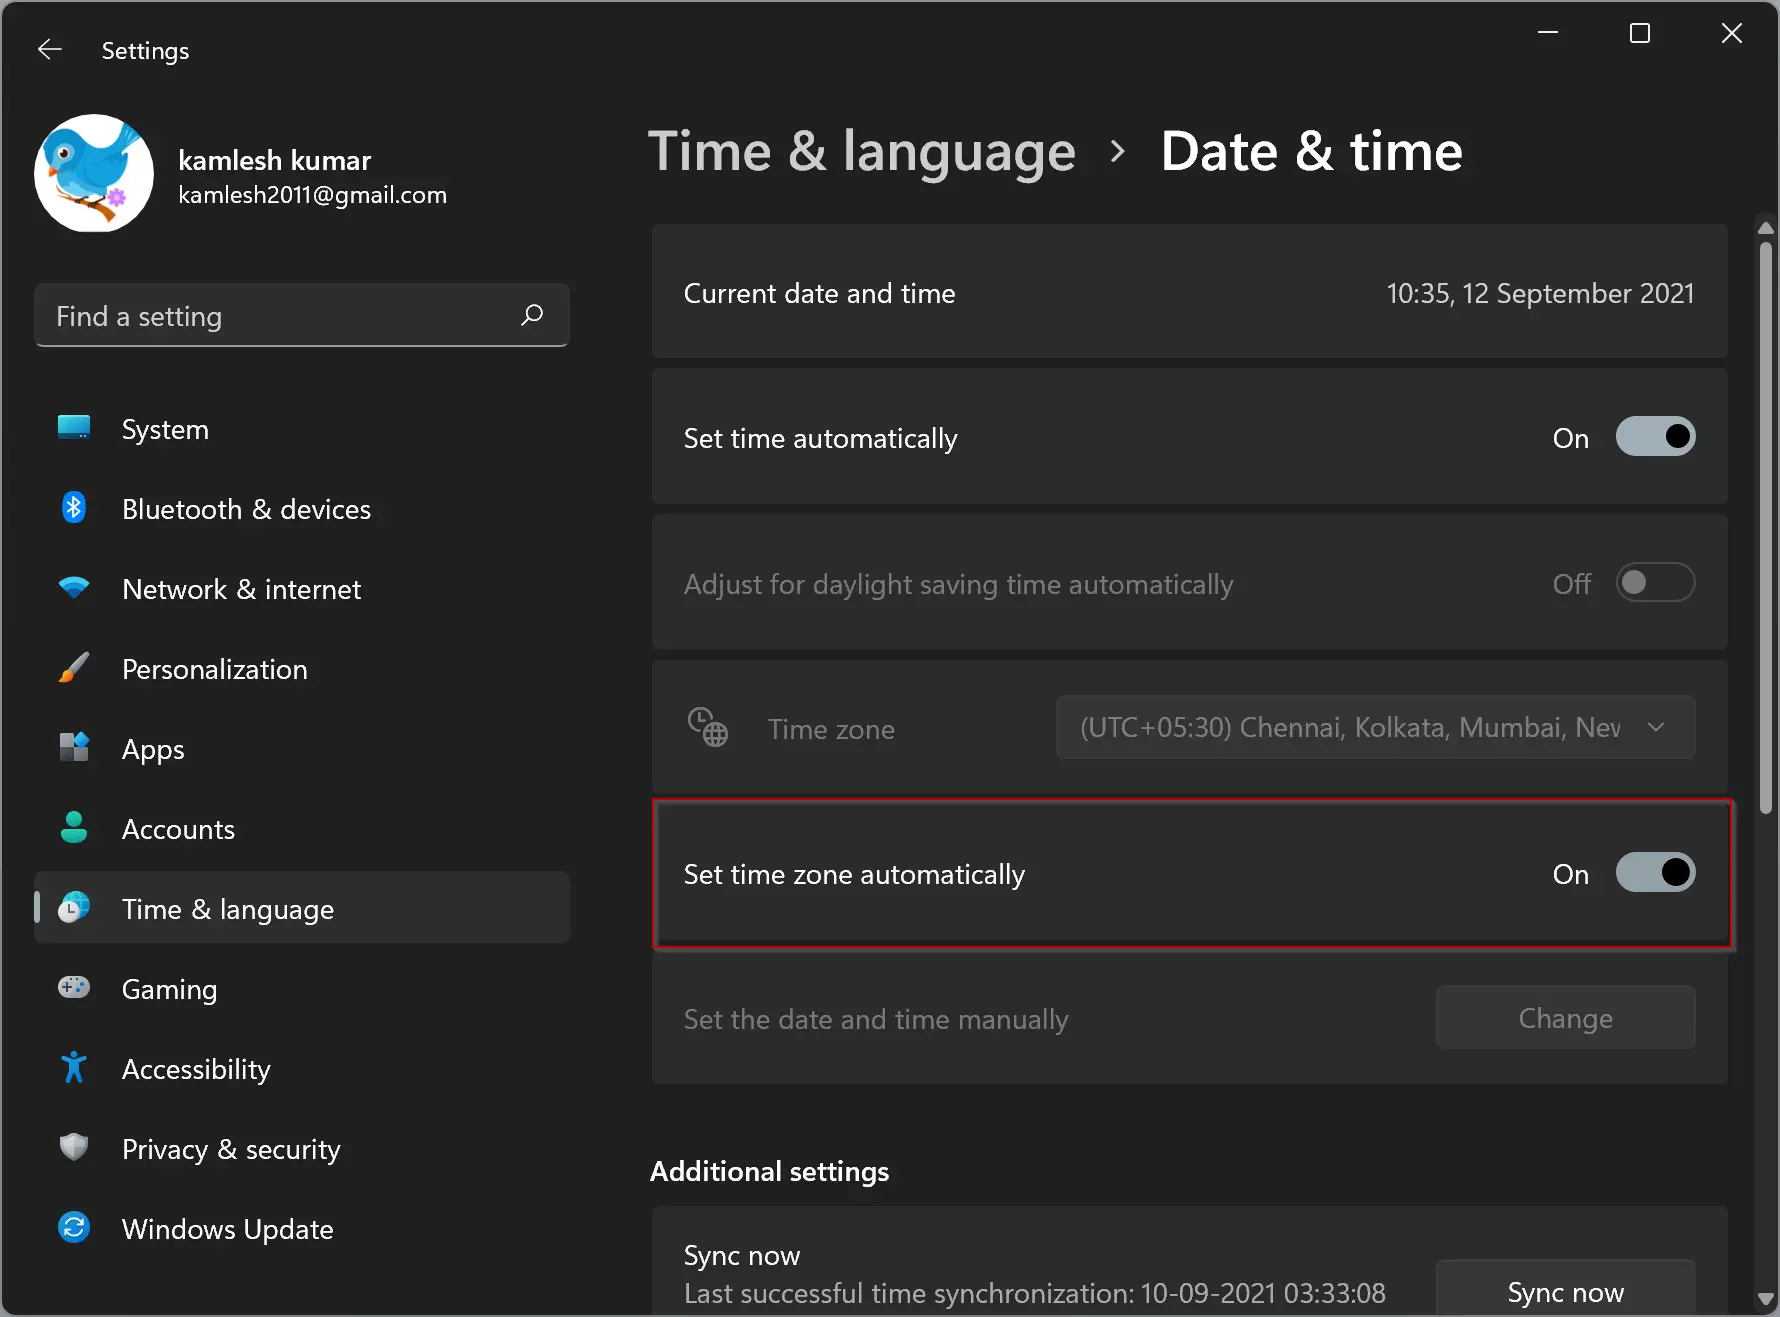
Step 4. Since you will change the Time Zone manually, you need to turn off the automatic time zone choice. To do that, find the “Set time zone automatically” option and turn the toggle switch to the Off position.
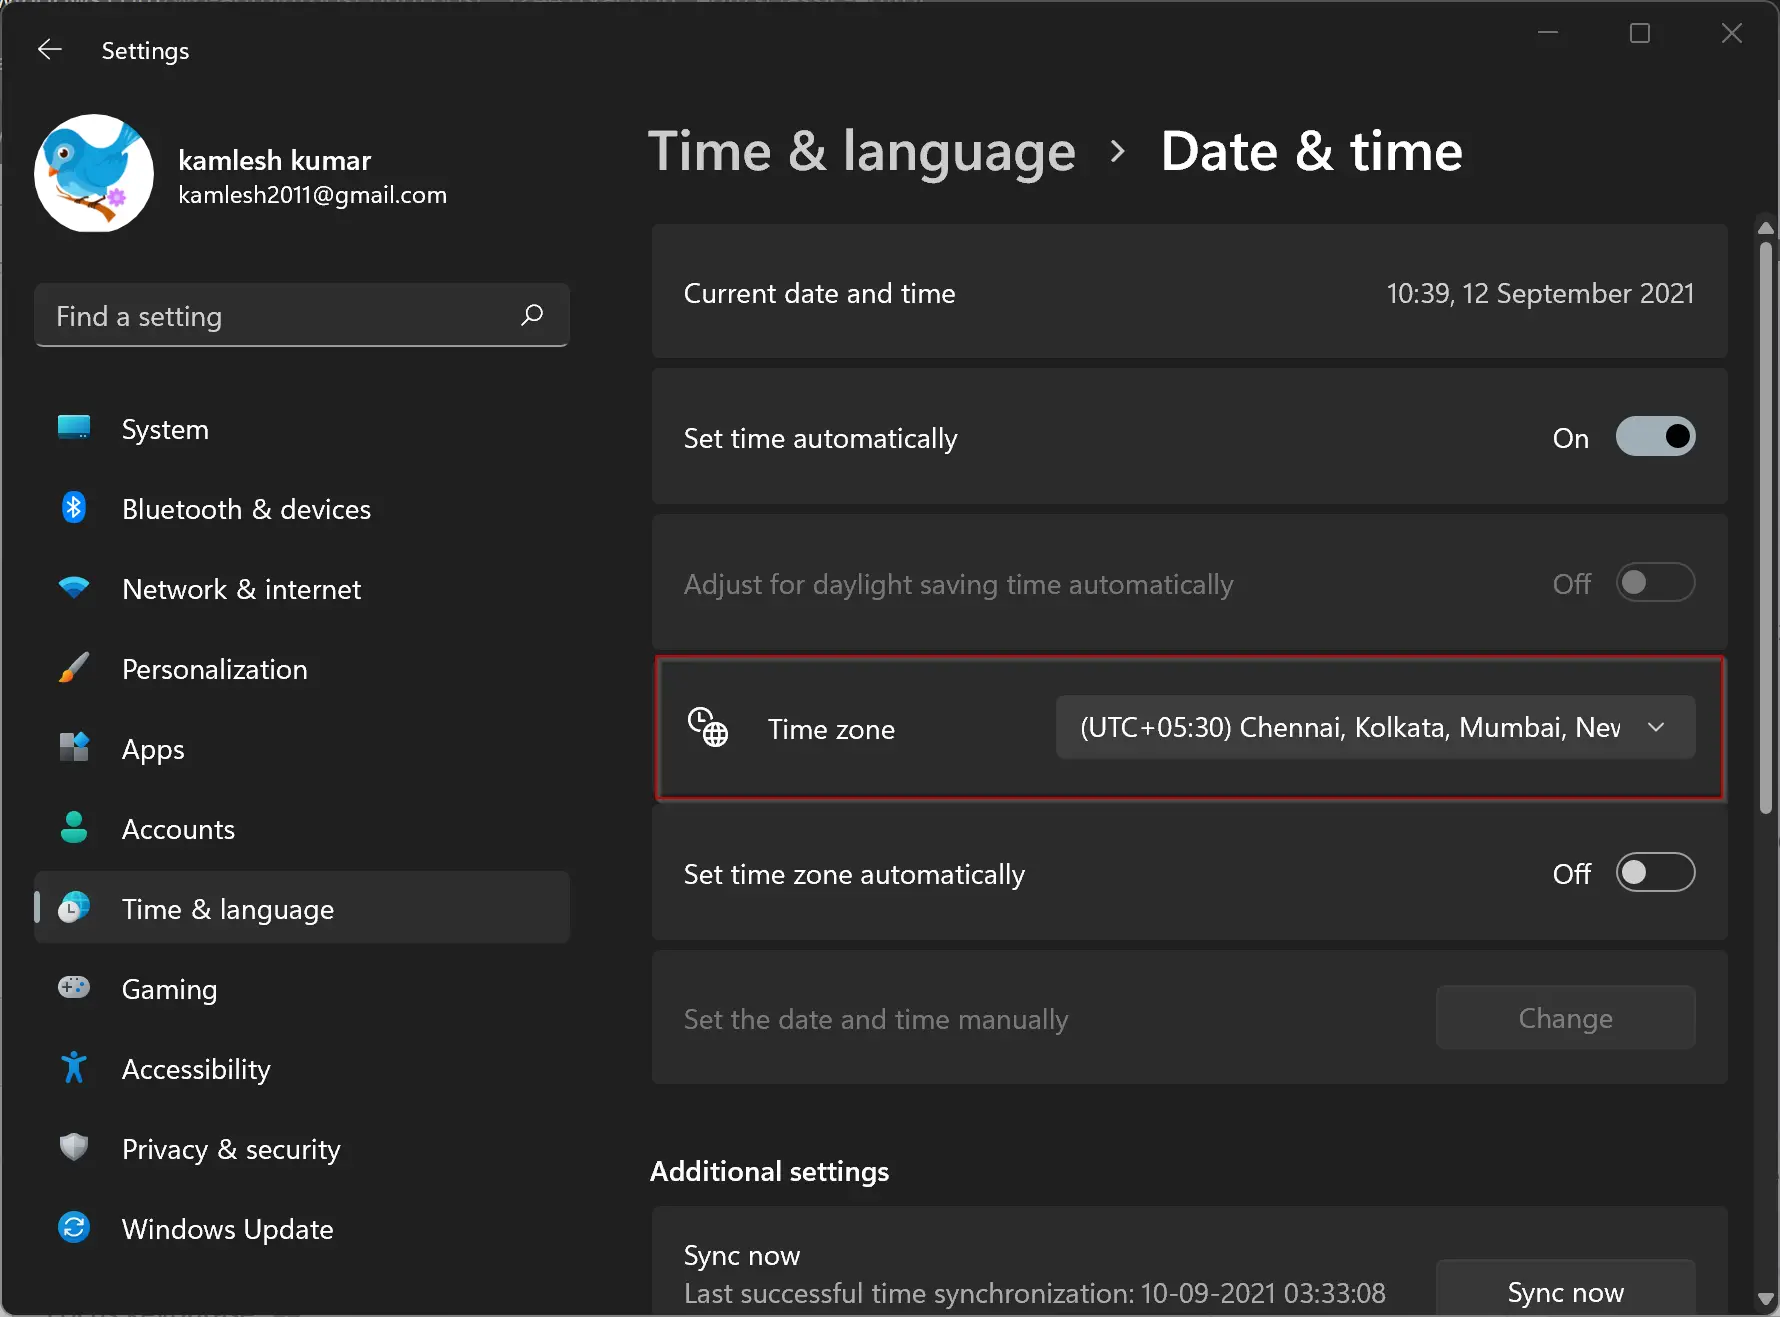
Step 5. Next, select the time zone from the Time zone drop-down list. Once you have chosen the preferred time zone, close the Settings app. Windows will apply changes automatically without additional confirmation.
Second Method:
Step 1. Perform a right-click on the clock in the bottom-right corner of the screen and then select Adjust date and time option.
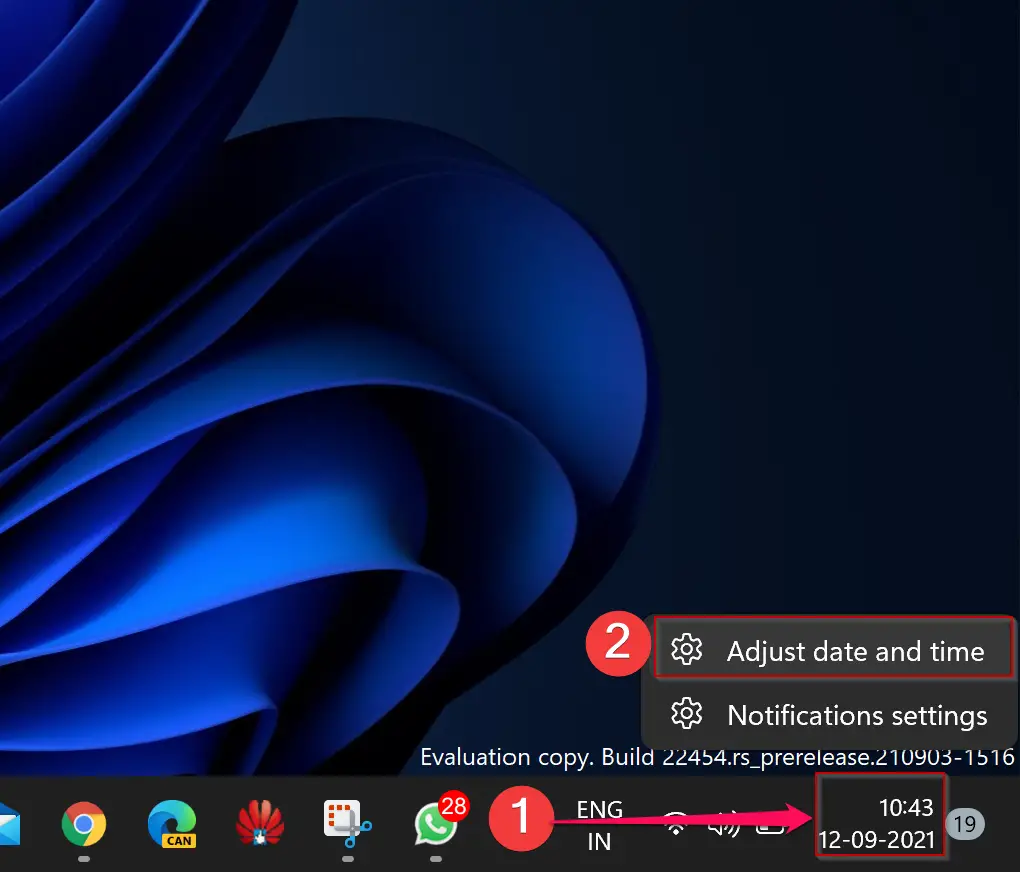
Step 2. Now, turn off the toggle switch of the “Set time zone automatically” option.
Step 3. Select the time zone from the Time zone drop-down list. Once you have decided preferred time zone, close the Settings app. Windows will apply changes without restarting your computer.
How to Adjust Time Zone in Windows 11 through Control Panel?
Follow these steps to adjust Time Zone in Windows 11 through Control Panel:-
Step 1. Open Control Panel.
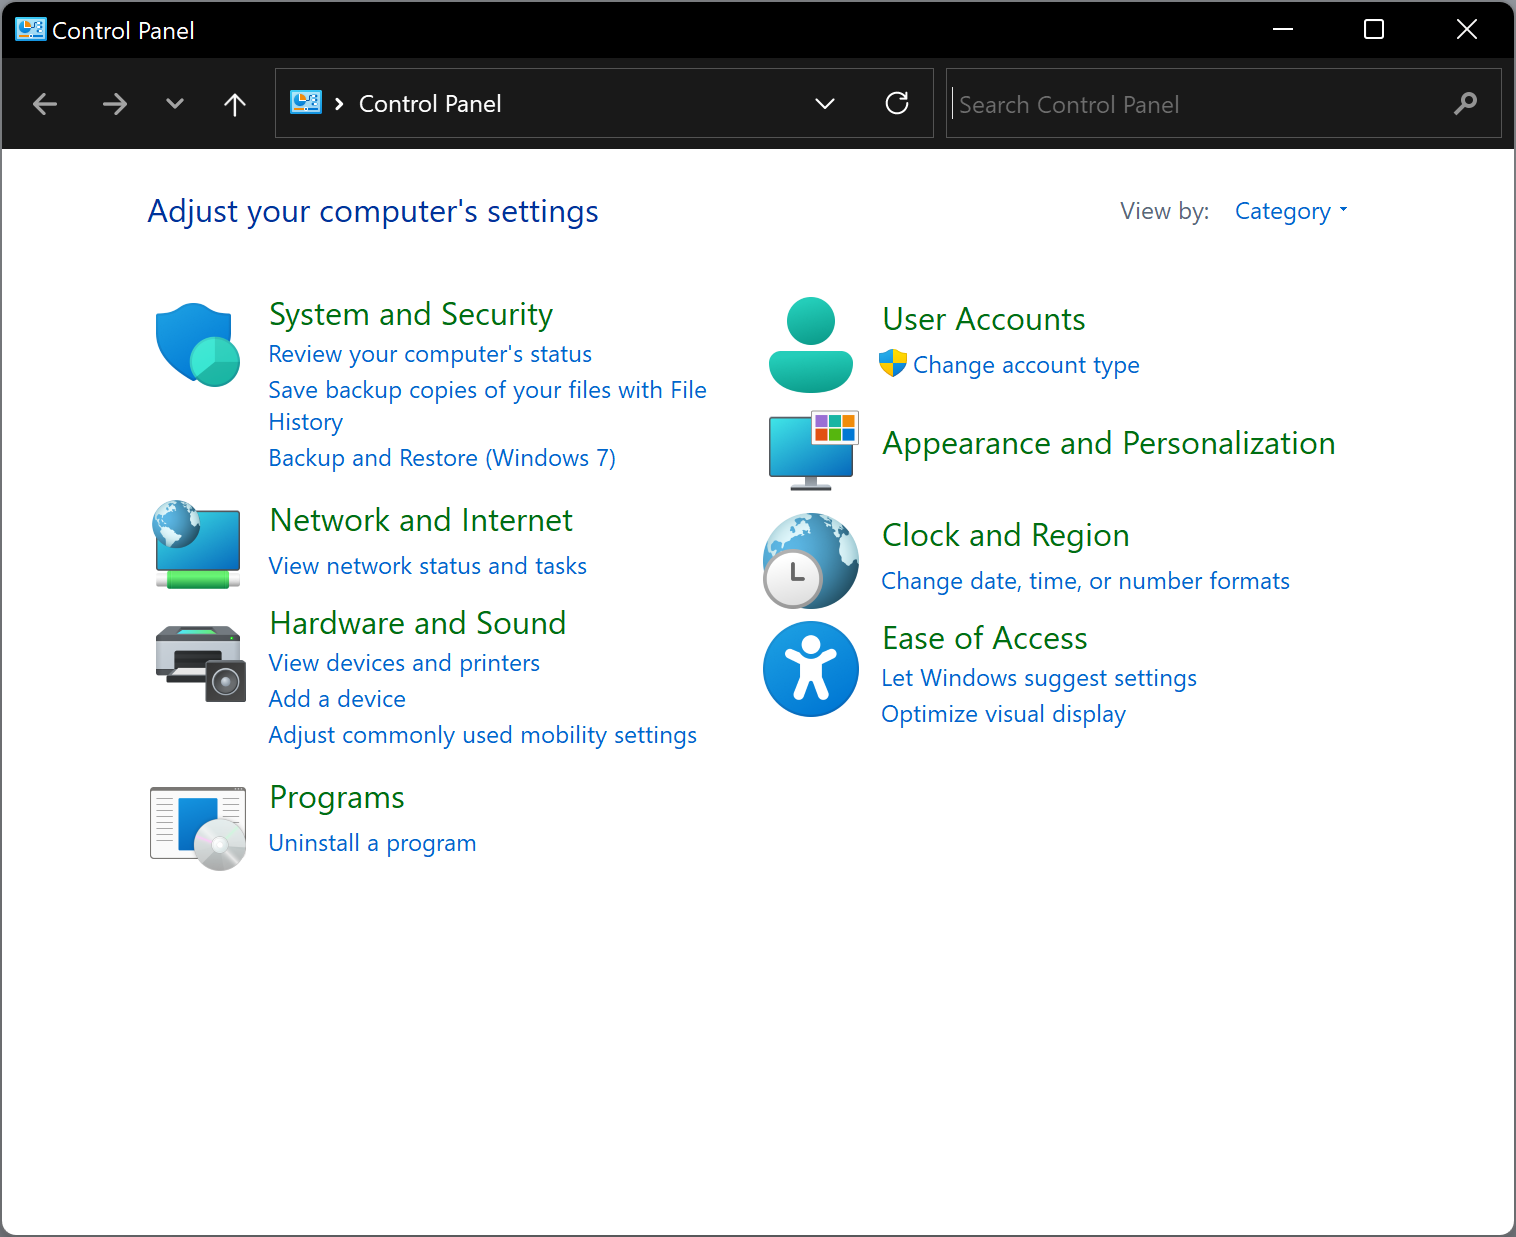
Step 2. When Control Panel opens, click the Clock and Region category.
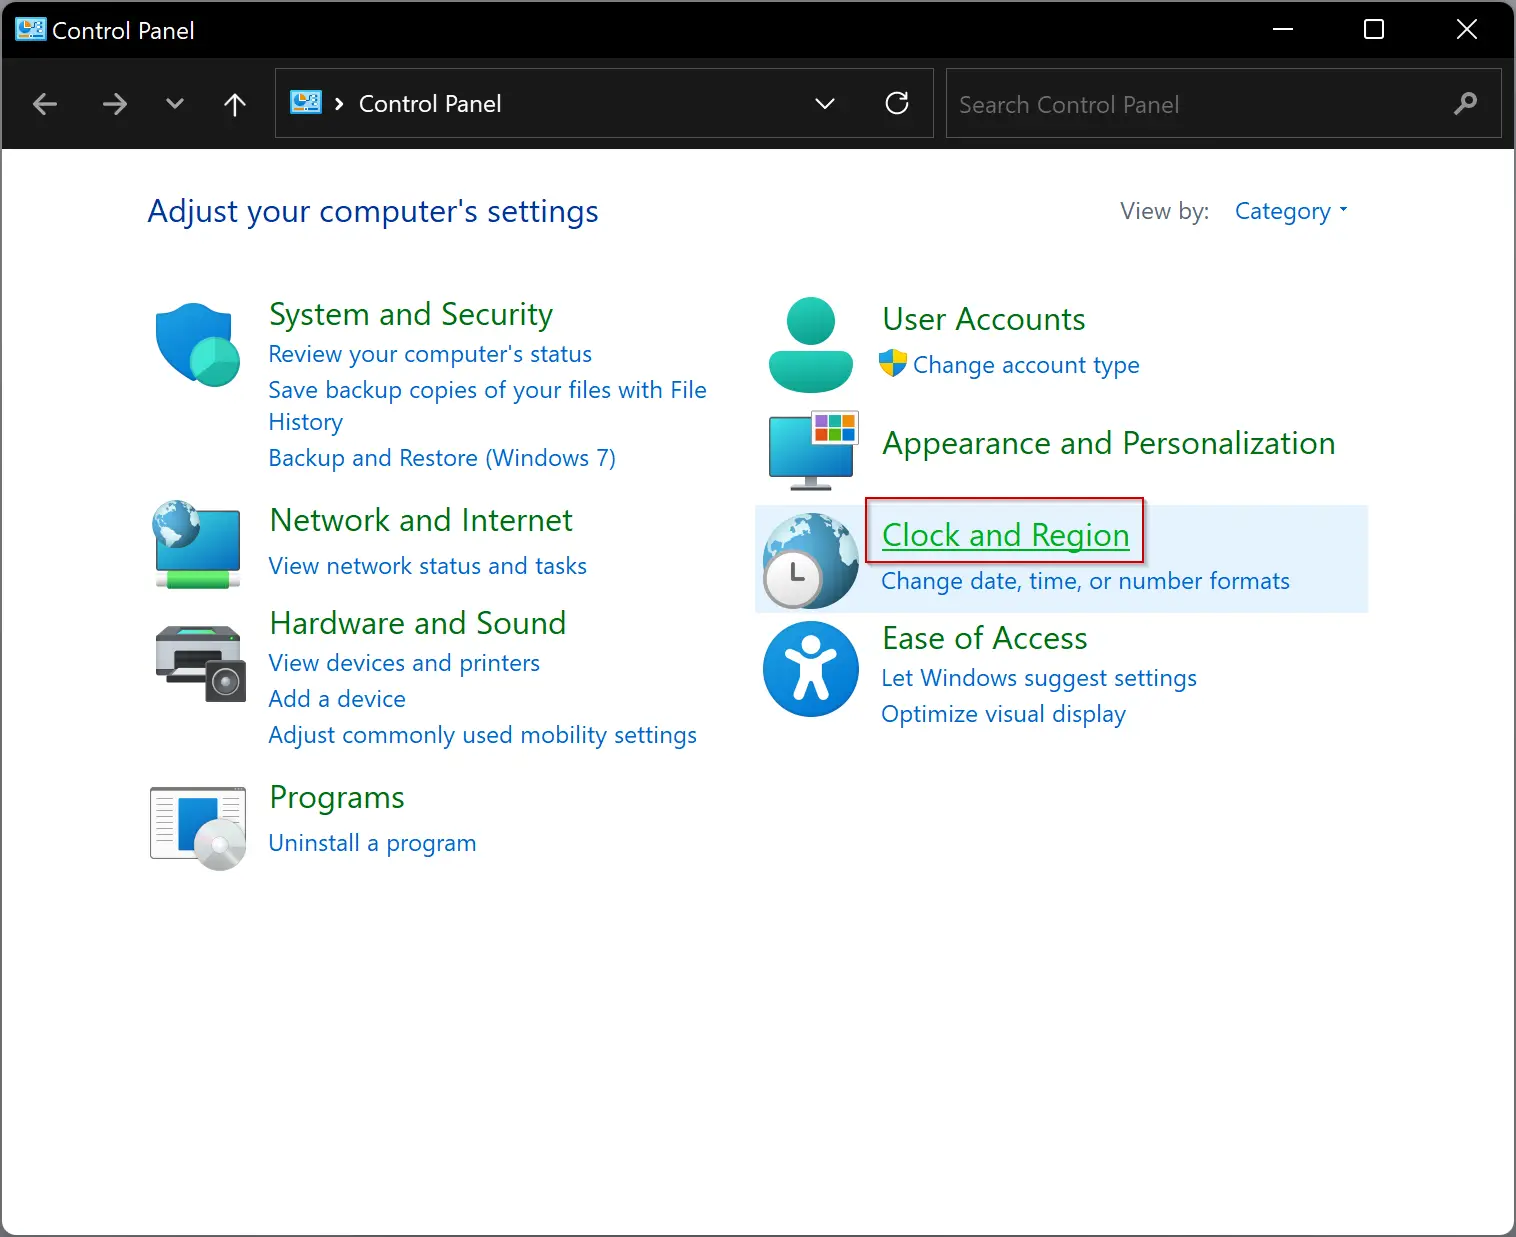
Step 3. Next, under Date and Time, click the link Change the time zone.
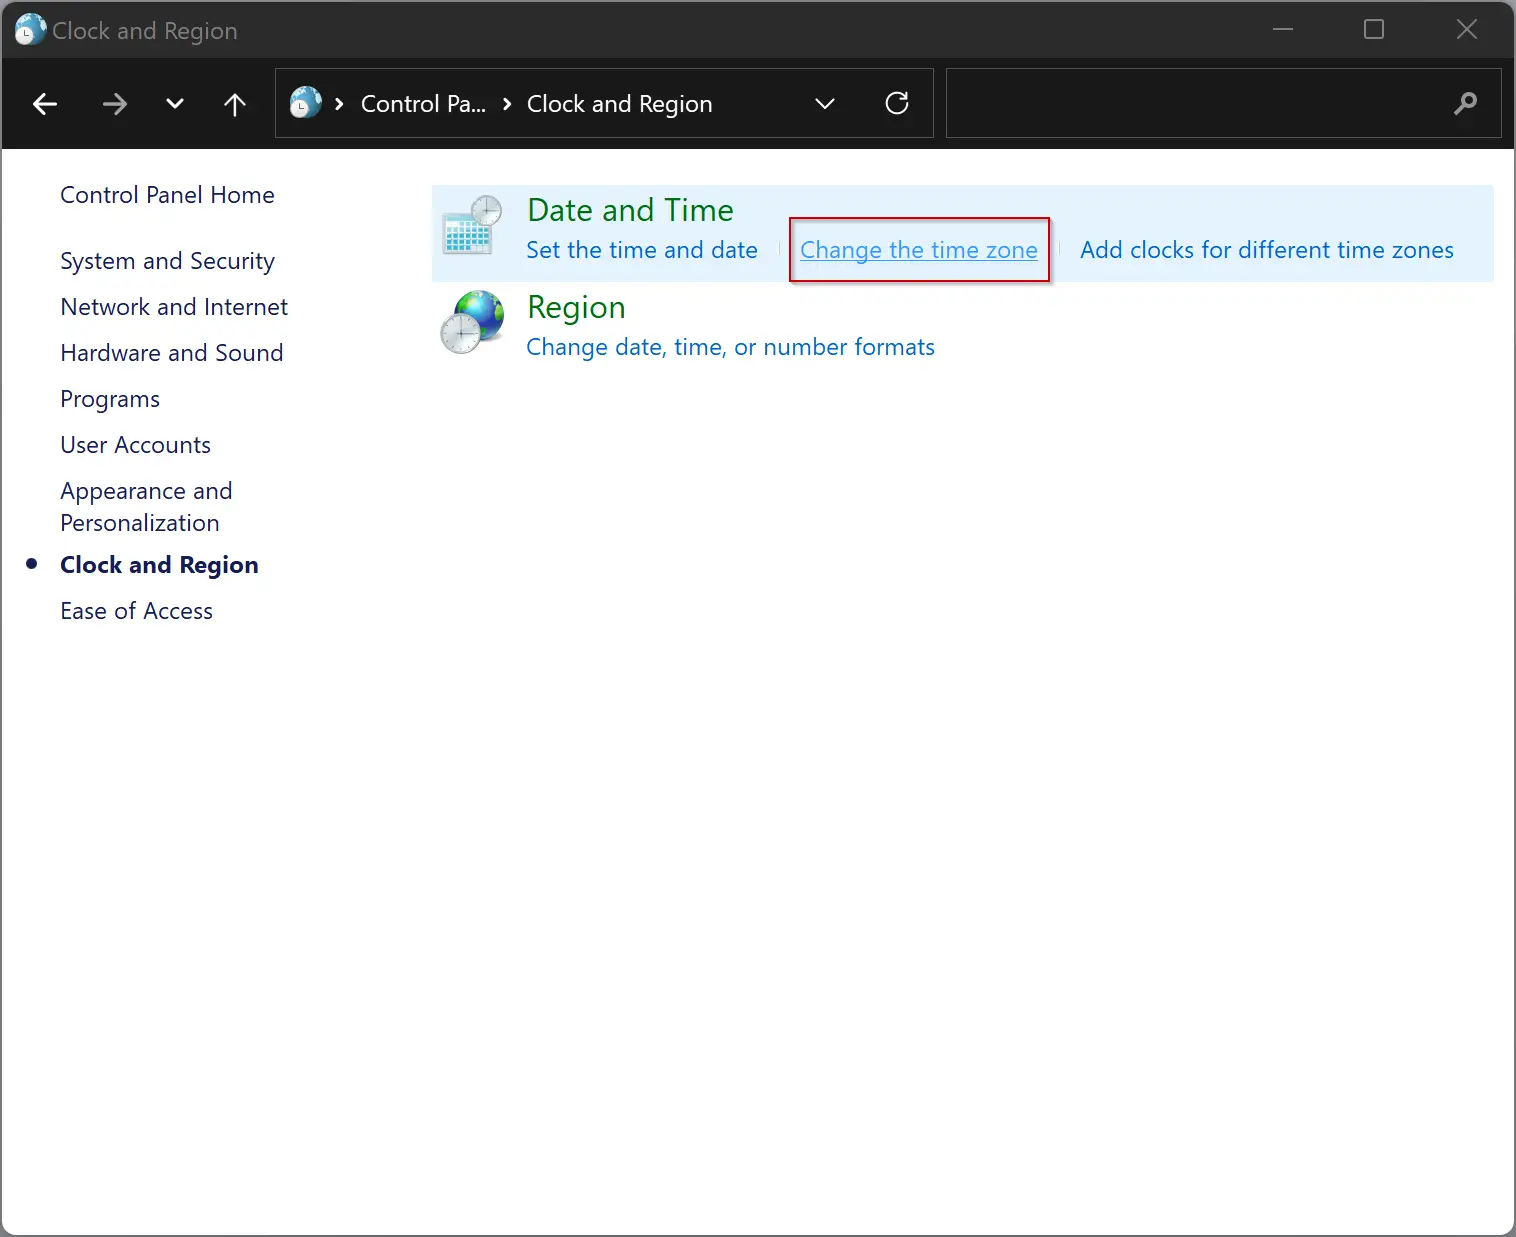
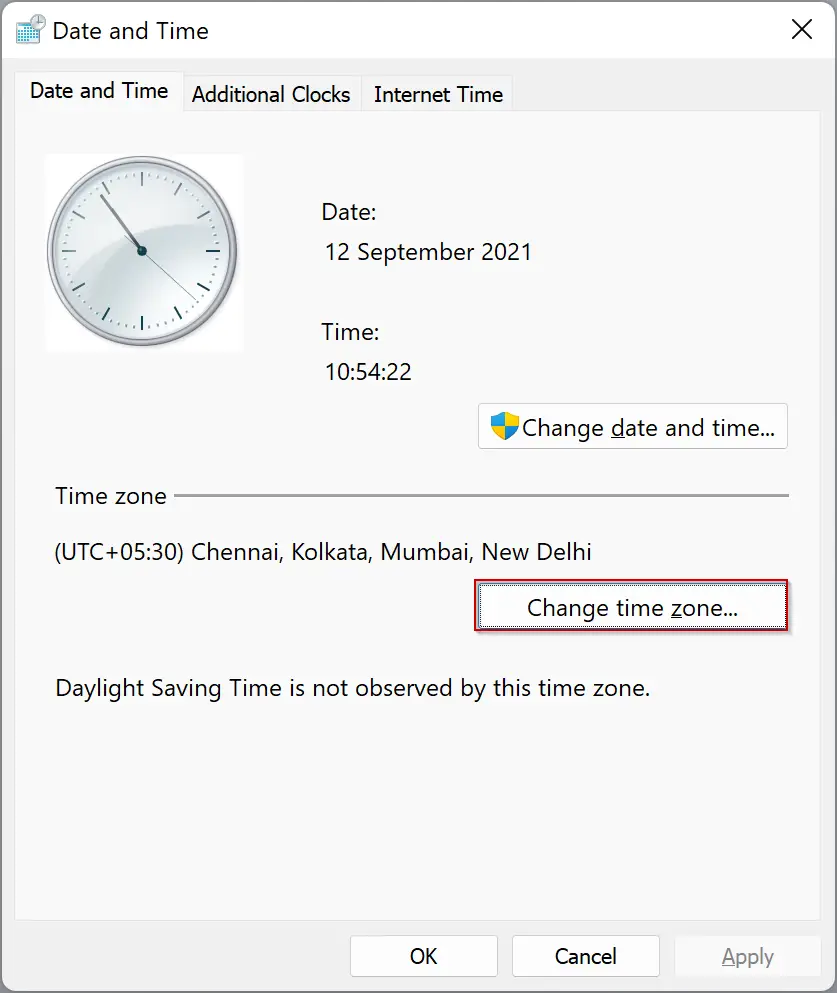
Step 4. On the pop-up window, click the Change time zone button.
Step 5. On the next pop-up window, select the appropriate time zone from the drop-down list of Time zone.
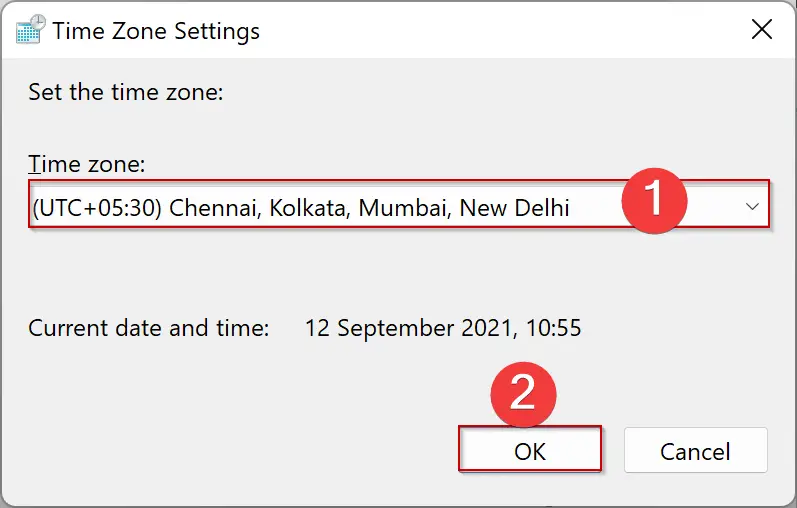
Step 6. Click OK.
Step 7. Click Apply.
Step 8. Click OK.
Conclusion
In conclusion, having the correct time zone is crucial for accurate date and time display on your computer. Windows 11 offers multiple methods to adjust the time zone, including using the Settings app and Control Panel. By following the steps outlined in this article, you can easily change the time zone on your computer to ensure that the date and time displayed are correct. If you have an incorrect time zone, try these methods to adjust it and resolve any issues with the date and time on your Windows 11 device.