In order for your browser to reach the web server and retrieve its contents, Windows uses DNS to translate domain names entered in your browser’s search bar with their IP address. Alternatively, DNS resolution can be carried out by translating IP addresses into domain names.
According to your system configuration, your browser sends name-resolution queries to DNS servers. In Windows, we can determine which name servers to use in multiple places, and some may take precedence over others. For example, if you use VPN, the DNS server that your ISP configures on your router may take precedence.
Windows OS and browsers cache DNS query results for faster response times. The cache improves response time, but you need to clear it as it can become outdated over time. Caches that are old may also pose privacy and security threats, as they may be used to track user activity.
In this gearupwindows article, we’ll tell you how to clear or flush Google Chrome DNS Cache in Windows 11 or 10. Clearing the browser cache may not clear the DNS cache at all.
How to Flush or Clear Google Chrome DNS cache?
To clear or flush the Google Chrome DNS cache, use the following steps:-
Step 1. First, open the Chrome browser on your PC.
Step 2. When Google Chrome opens up on your computer, copy and paste the following in the address bar:-
chrome://net-internals/#sockets
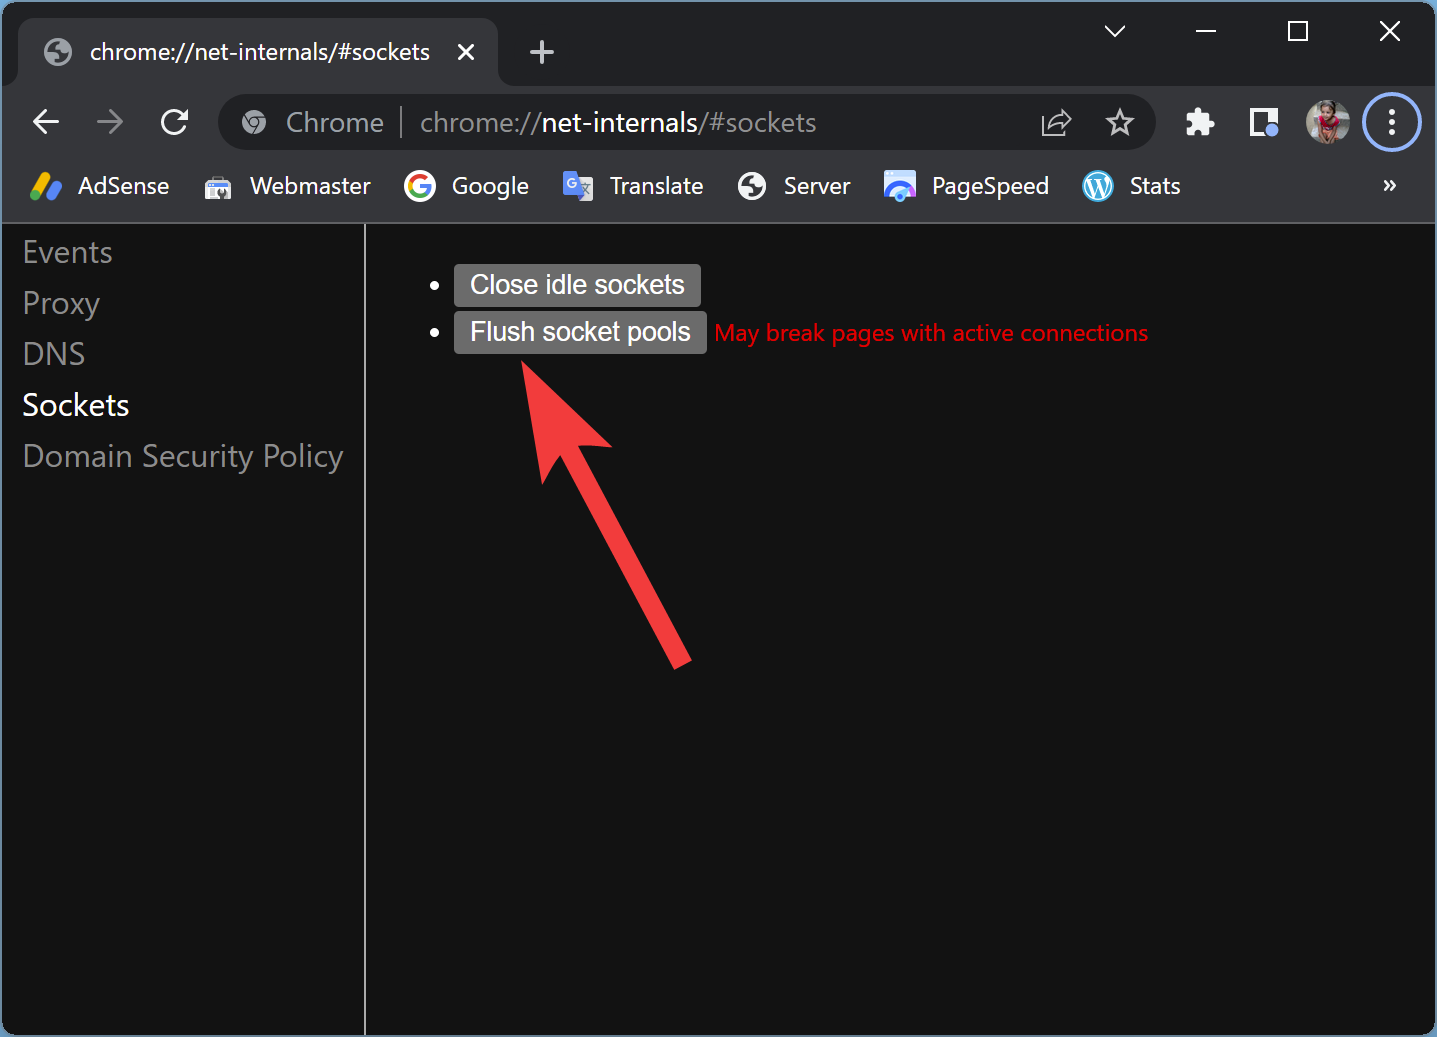
Step 3. Then, click the Flush socket pools button.
Please ensure that it may break pages with active connections.
Step 4. Now, click the DNS tab in the left sidebar. Alternatively, copy and paste the following URL in the address bar and hit Enter on the keyboard:-
chrome://net-internals/#dns
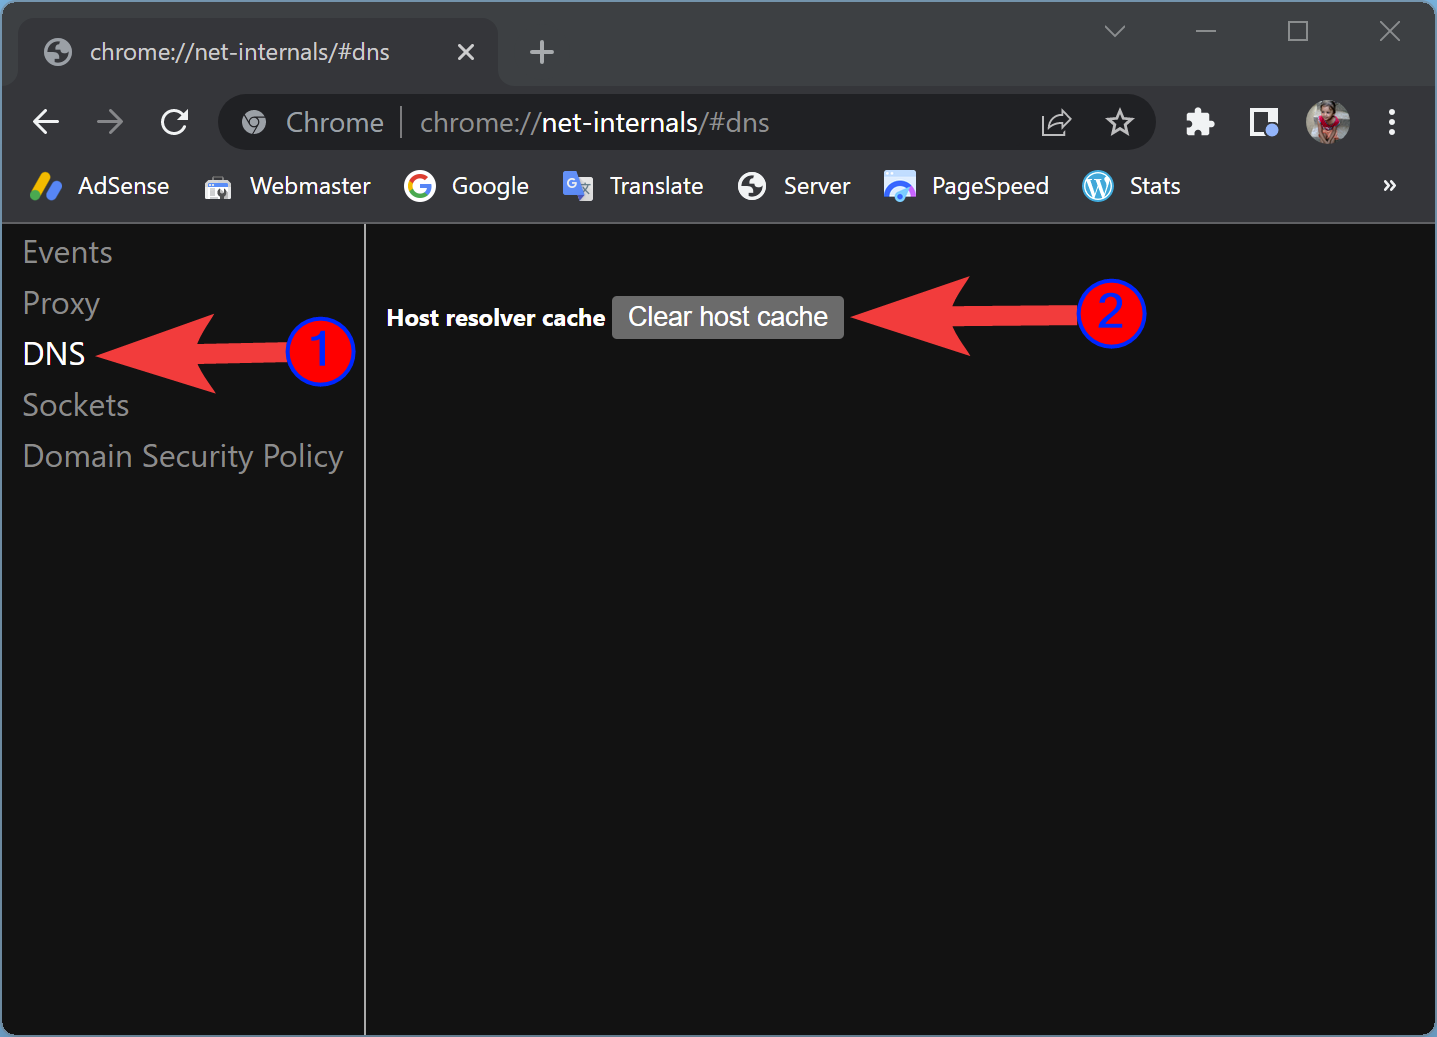
Step 5. After that, hit the Clear host cache button.
Once you complete the above steps, Google Chrome DNS Cache will be cleared, and any problem related to DNS should be solved in the Chrome browser.
If you are still struggling with the Chrome browser, where some webpages refuse to open, you should Flush or Clear the Windows cache. For that, do the following steps:-
- Open the Command Prompt with administrator privilege.
- Then, type ipconfig /flushdns and hit Enter key on the keyboard.
Once you complete the above steps, you’ll get the output “Successfully flushed the DNS Resolver Cache.”
Conclusion
In conclusion, DNS is an essential component of internet connectivity that translates domain names into IP addresses, allowing browsers to connect to web servers. However, DNS resolution can be affected by multiple factors, such as the DNS servers used, cache, and VPN configuration. Therefore, clearing or flushing the DNS cache is necessary to ensure efficient and secure internet browsing. In this gearupwindows article, we have provided steps on how to clear or flush the Google Chrome DNS cache in Windows 11 or 10, as well as how to clear the Windows cache using Command Prompt. By following these steps, users can solve DNS-related issues and improve their browsing experience.