Assigned Access (or Kiosk Mode) on Windows 10 enables administrators to restrict the usage of a specific machine for particular purposes by converting it into a Kiosk device. Usually, you’ll see kiosks at the airports or PCs used to display digital signage.
Once you configure kiosk mode on your Windows 10 PC, it will always sign in automatically into a user account with restricted access and run only one app at a time. Nobody will be able to view the desktop, multitask, or modify anything on it. Using the Kiosk mode, you can restrict a guest user’s access to one or more Universal Windows Program (UWP) apps, and others will be disabled by default on your machine.
Before configuring the Kiosk on your PC, ensure this feature isn’t available on Windows 10 Home Edition. Your computer must be running Windows 10 Pro (v1709 or later), Enterprise, or Education to set up a kiosk. After that, you need to create a standard user account if you have not already done so.
How to Create a Standard User Account on Windows 10?
To make a standard or restricted user account on Windows 10, use the following steps:-
Step 1. Open Windows Settings.
Step 2. Then, click on Accounts.
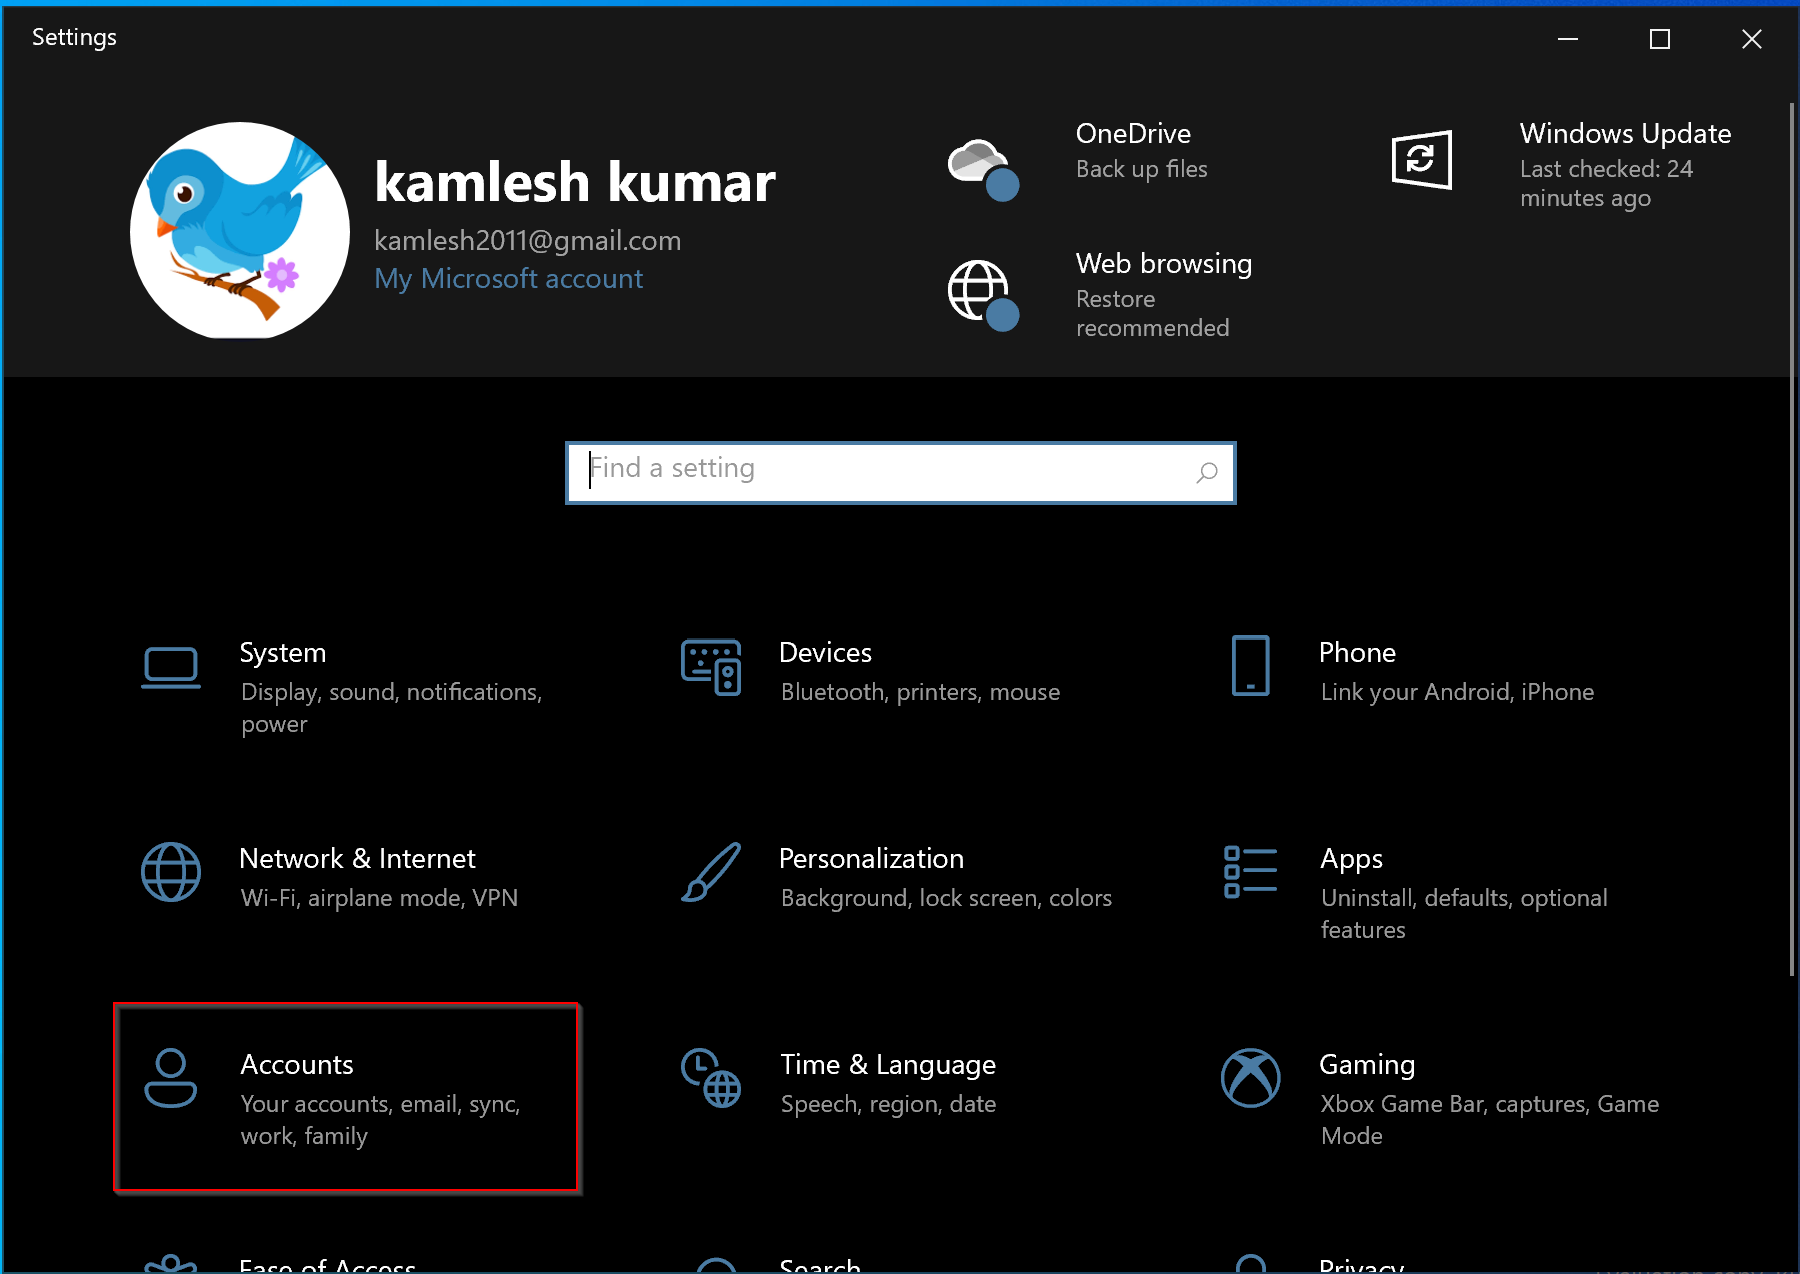
Step 3. After that, select Family & other users in the left side pane.
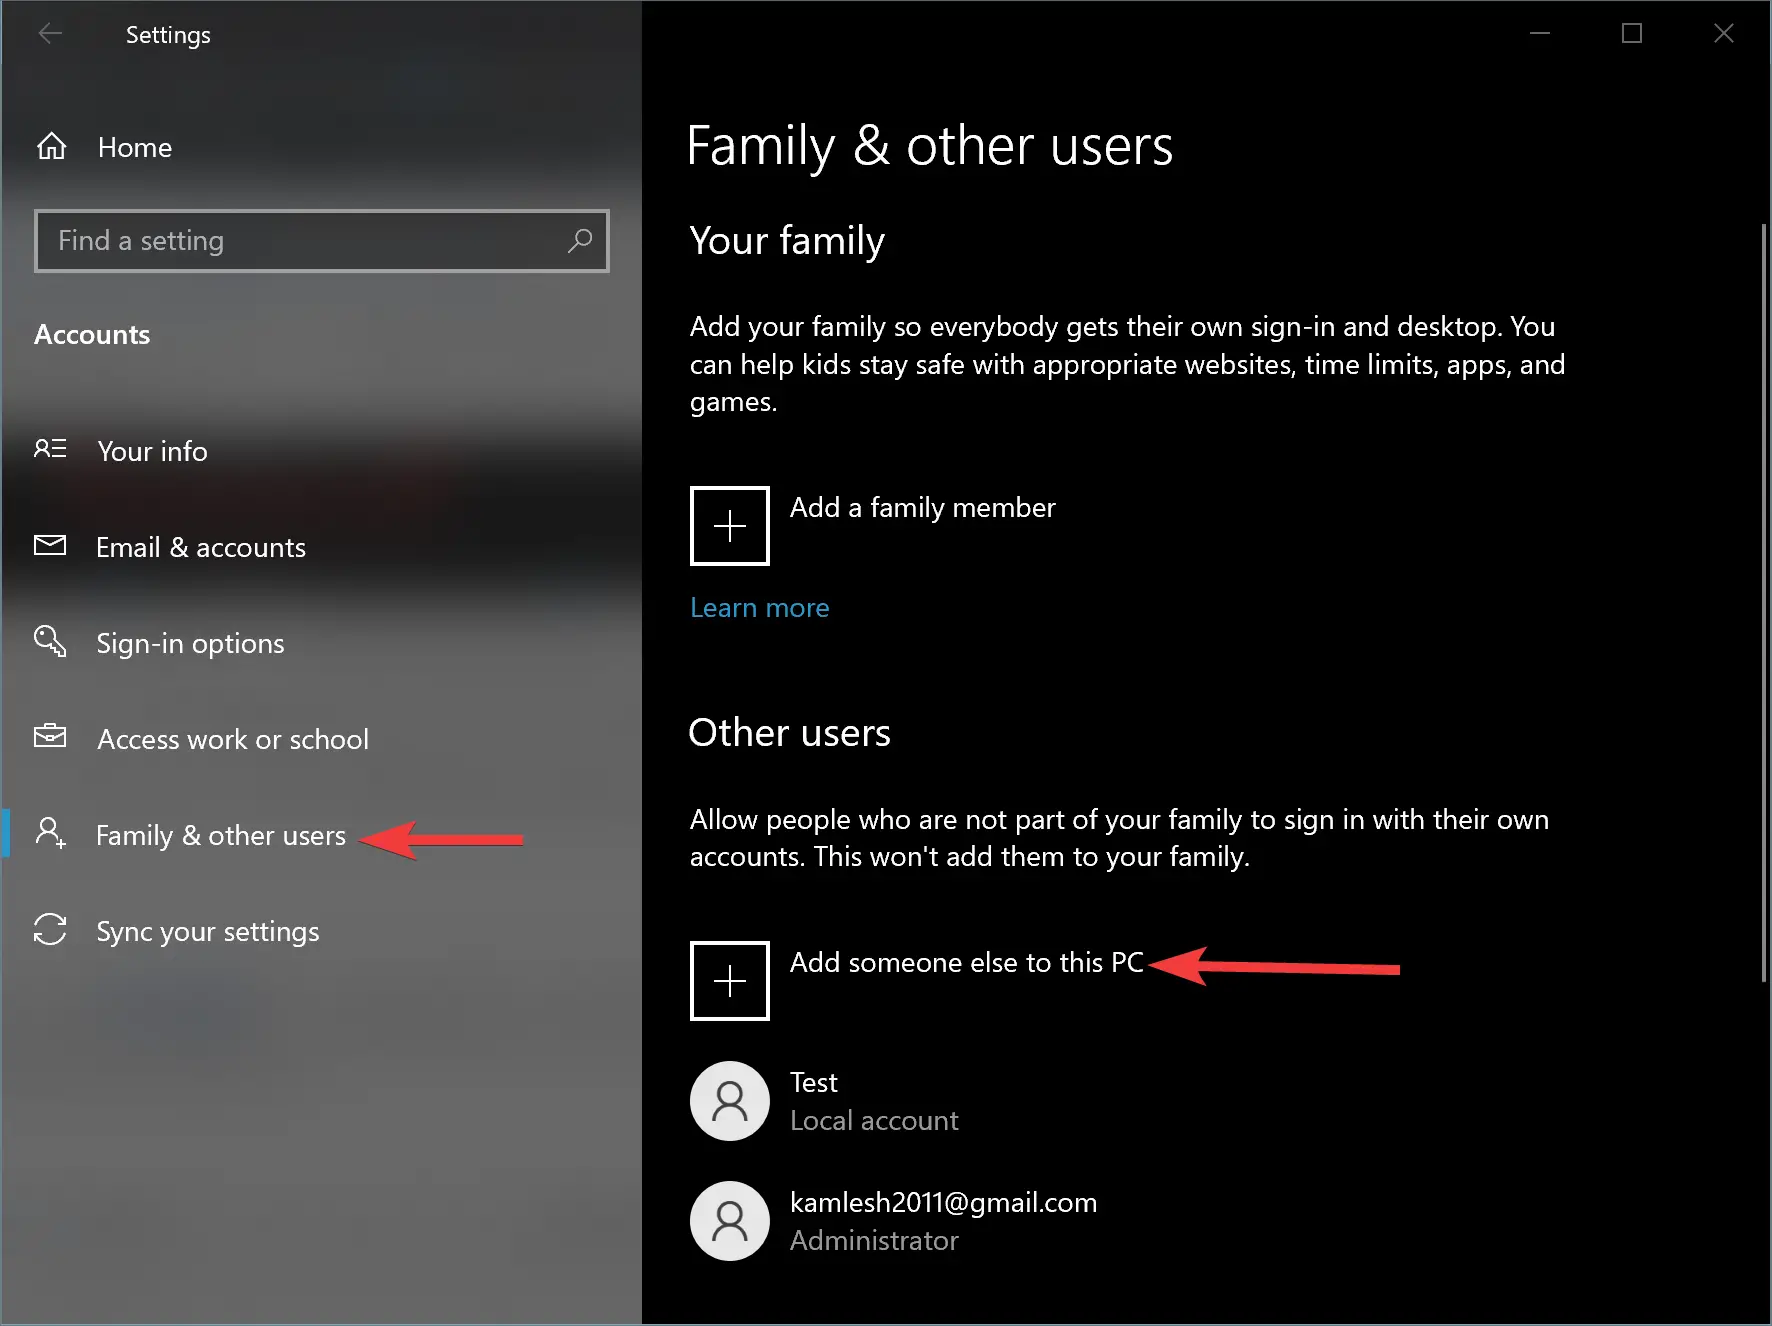
Step 4. Next, on the right side of “Family & other users,” click the button Add someone else to this PC.
Step 5. In the pop-up window, type the “User name” and click the Next button if you want them to sign in automatically.
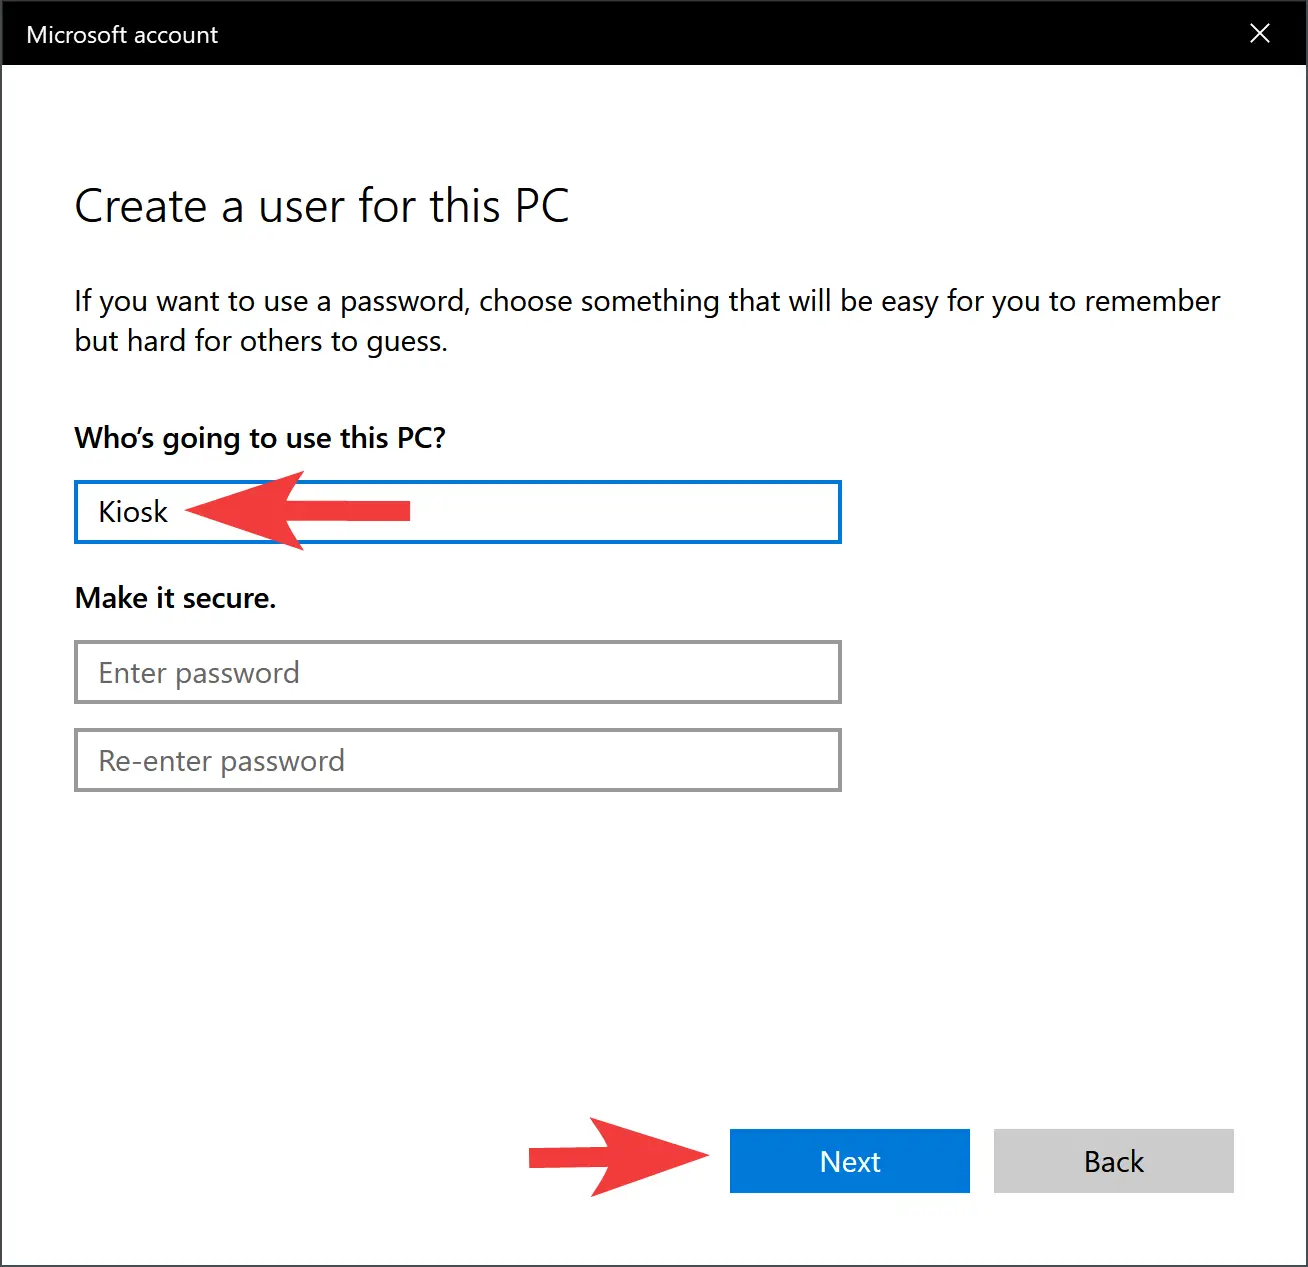
Note: If you’re asked for the email or phone of the person so they can sign in, click on “I don’t have this person’s sign-in information” and click Next.
How to Set up Kiosk Mode in Windows 10?
Once you’ve created a standard account on your Windows 10 machine. Do the following to configure Kiosk Mode:-
Step 1. Open Windows Settings.
Step 2. Then, click on Accounts.
Step 3. After that, select Family & other users in the left side pane.
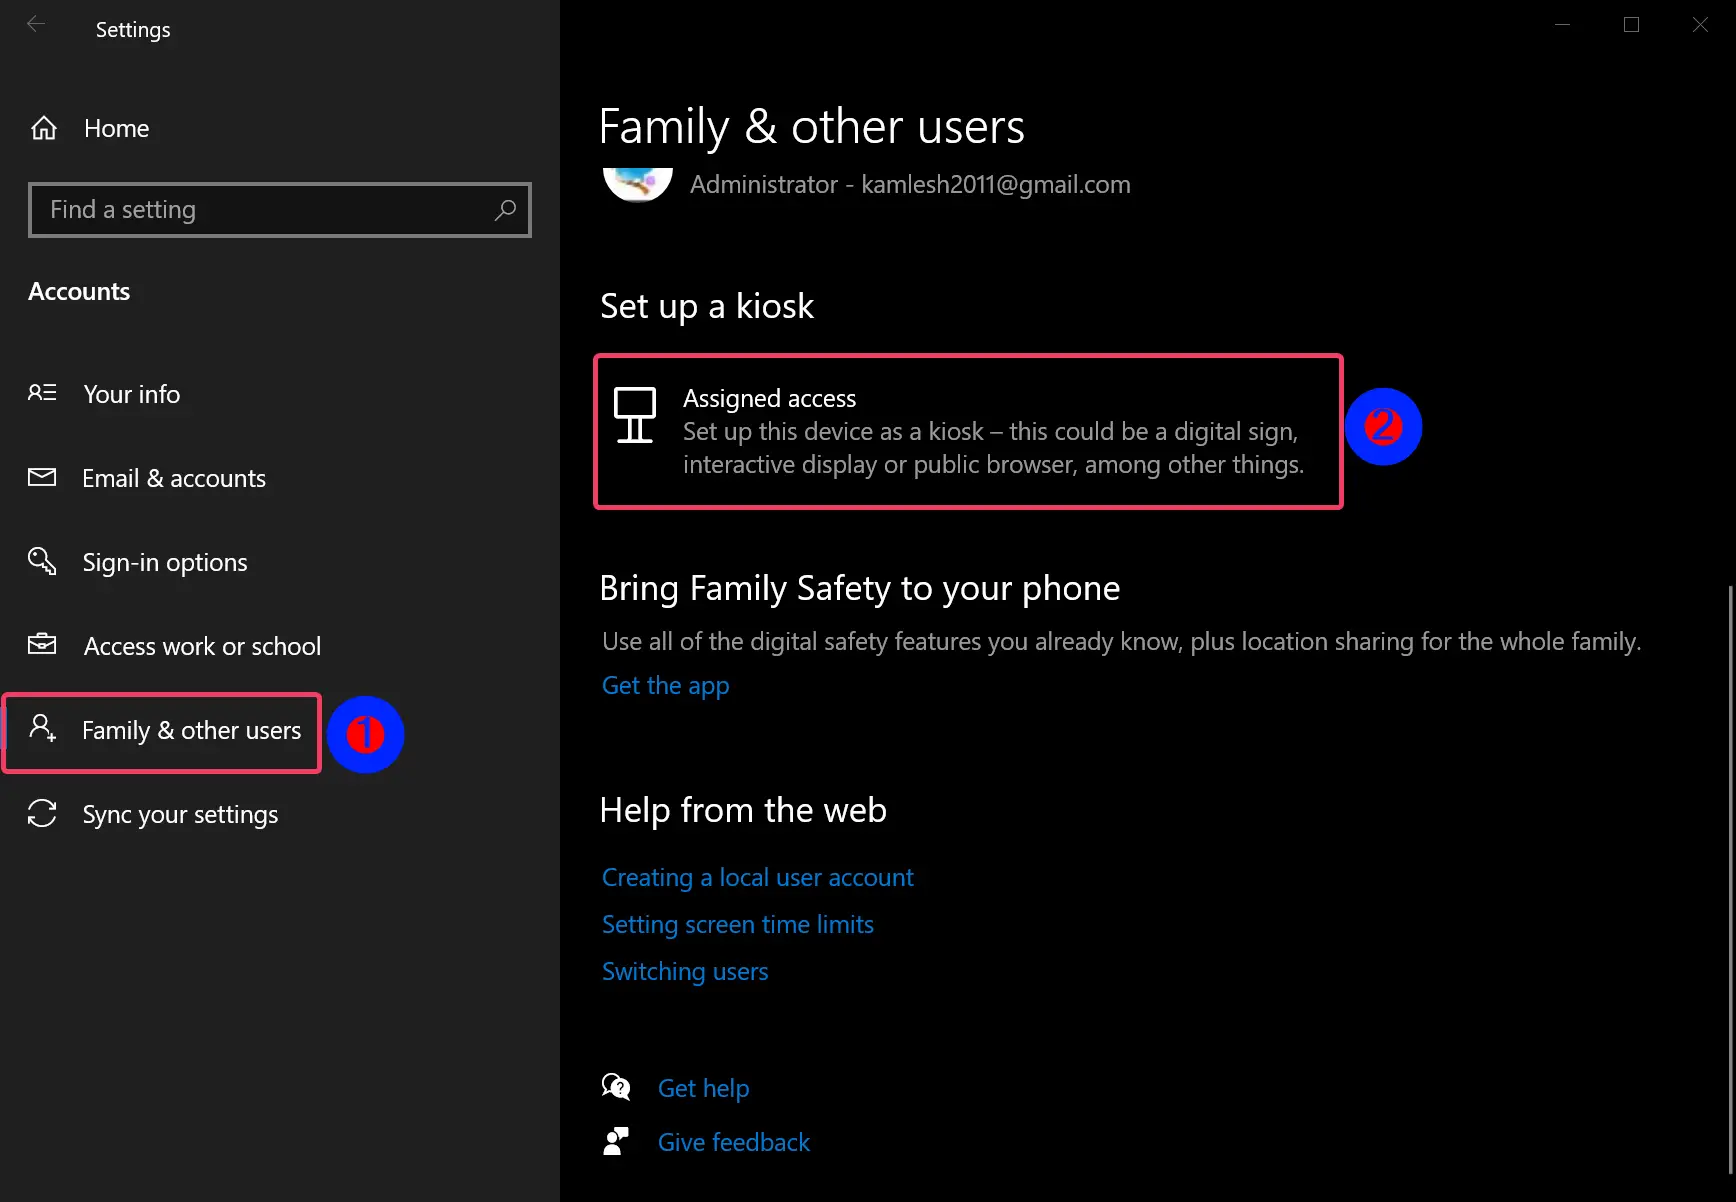
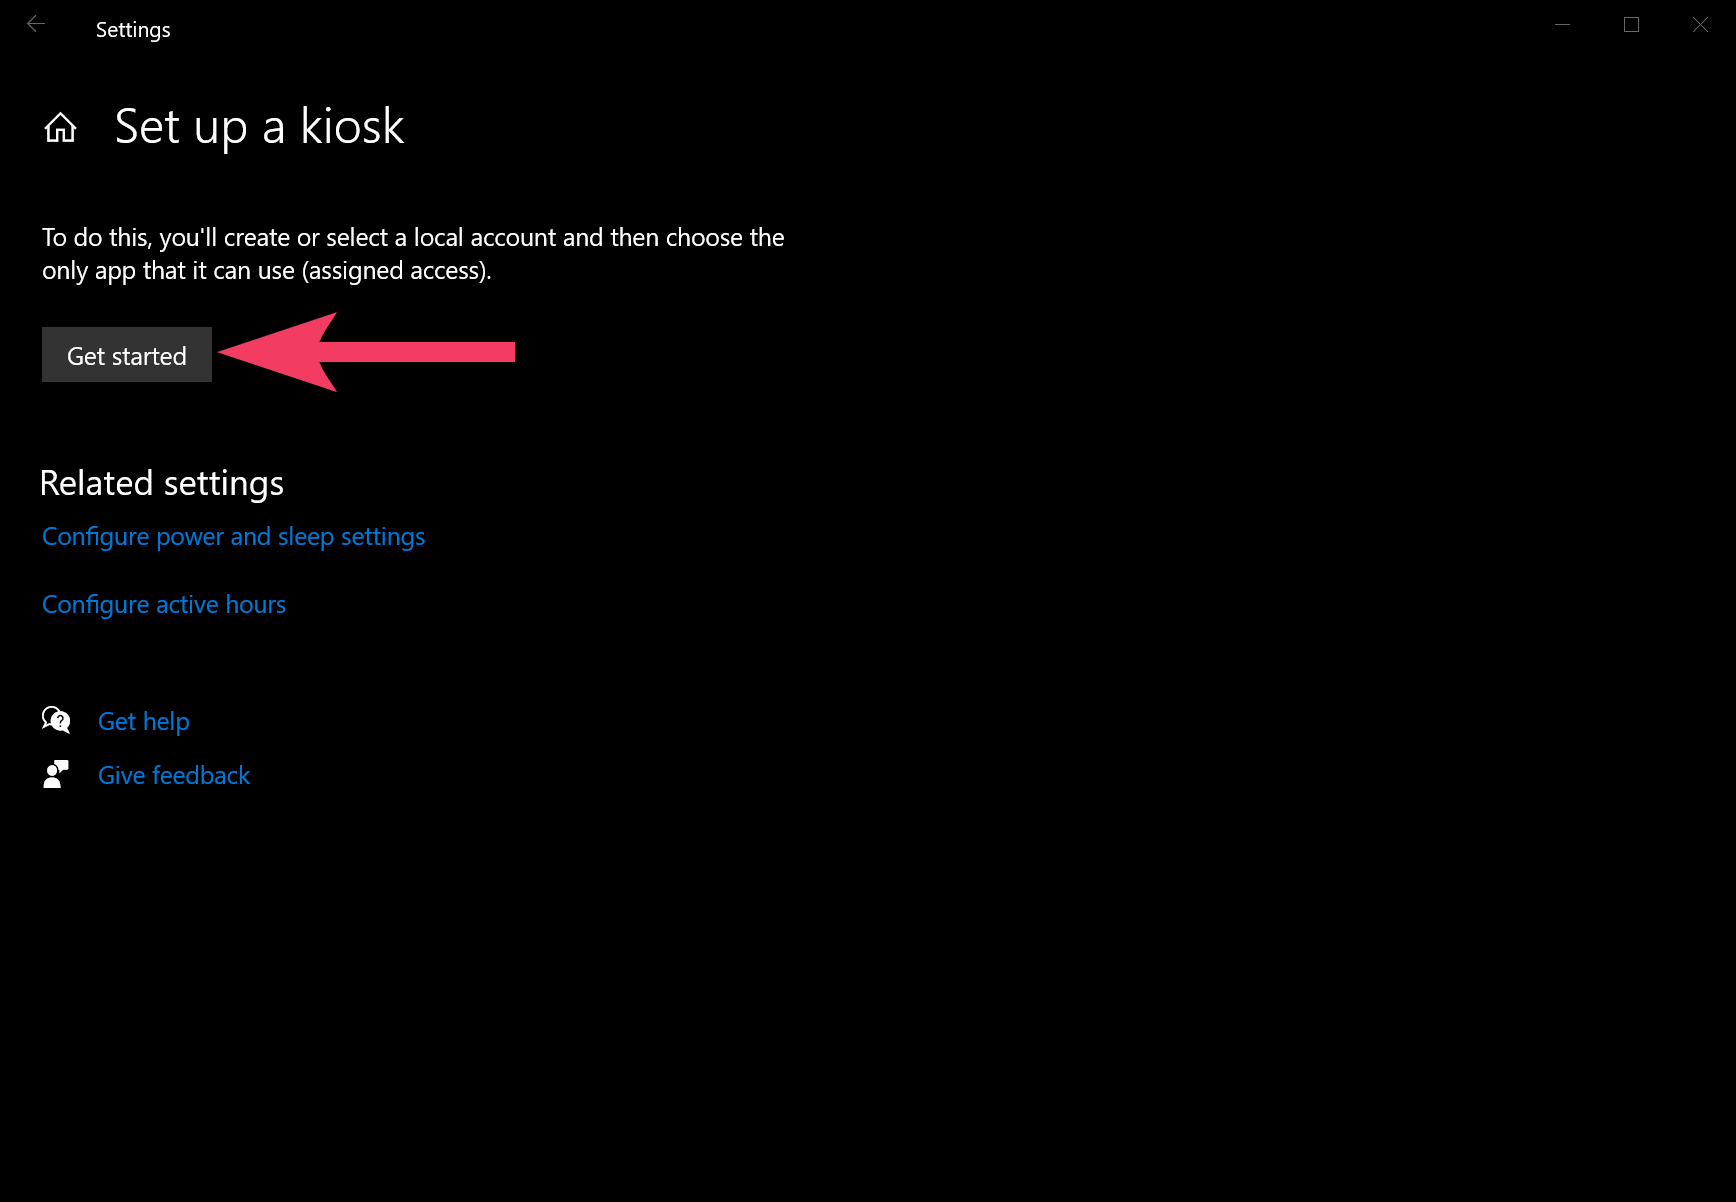
Step 4. Next, click the Assigned access under the “Set up a kiosk” section on the right sidebar.
Step 5. Click the Get started button.
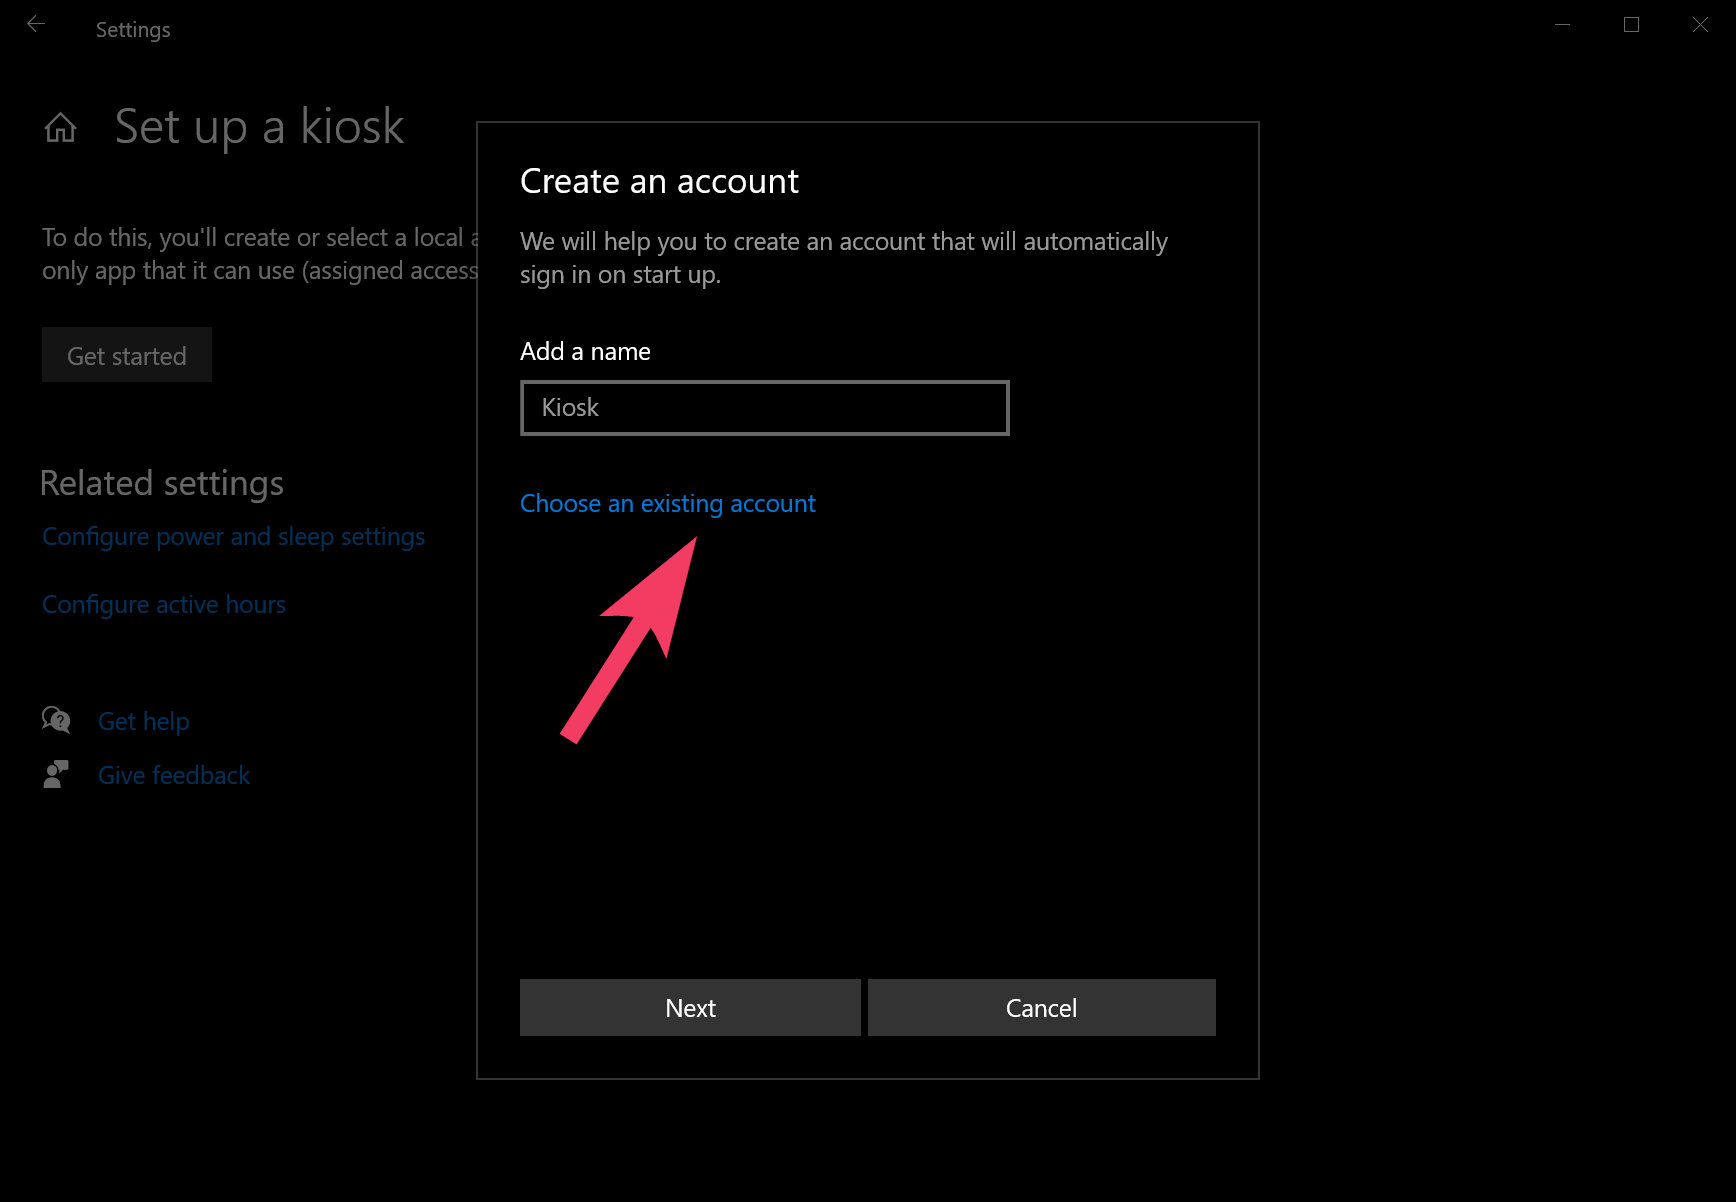
Step 6. Now, click the link Choose an existing account.
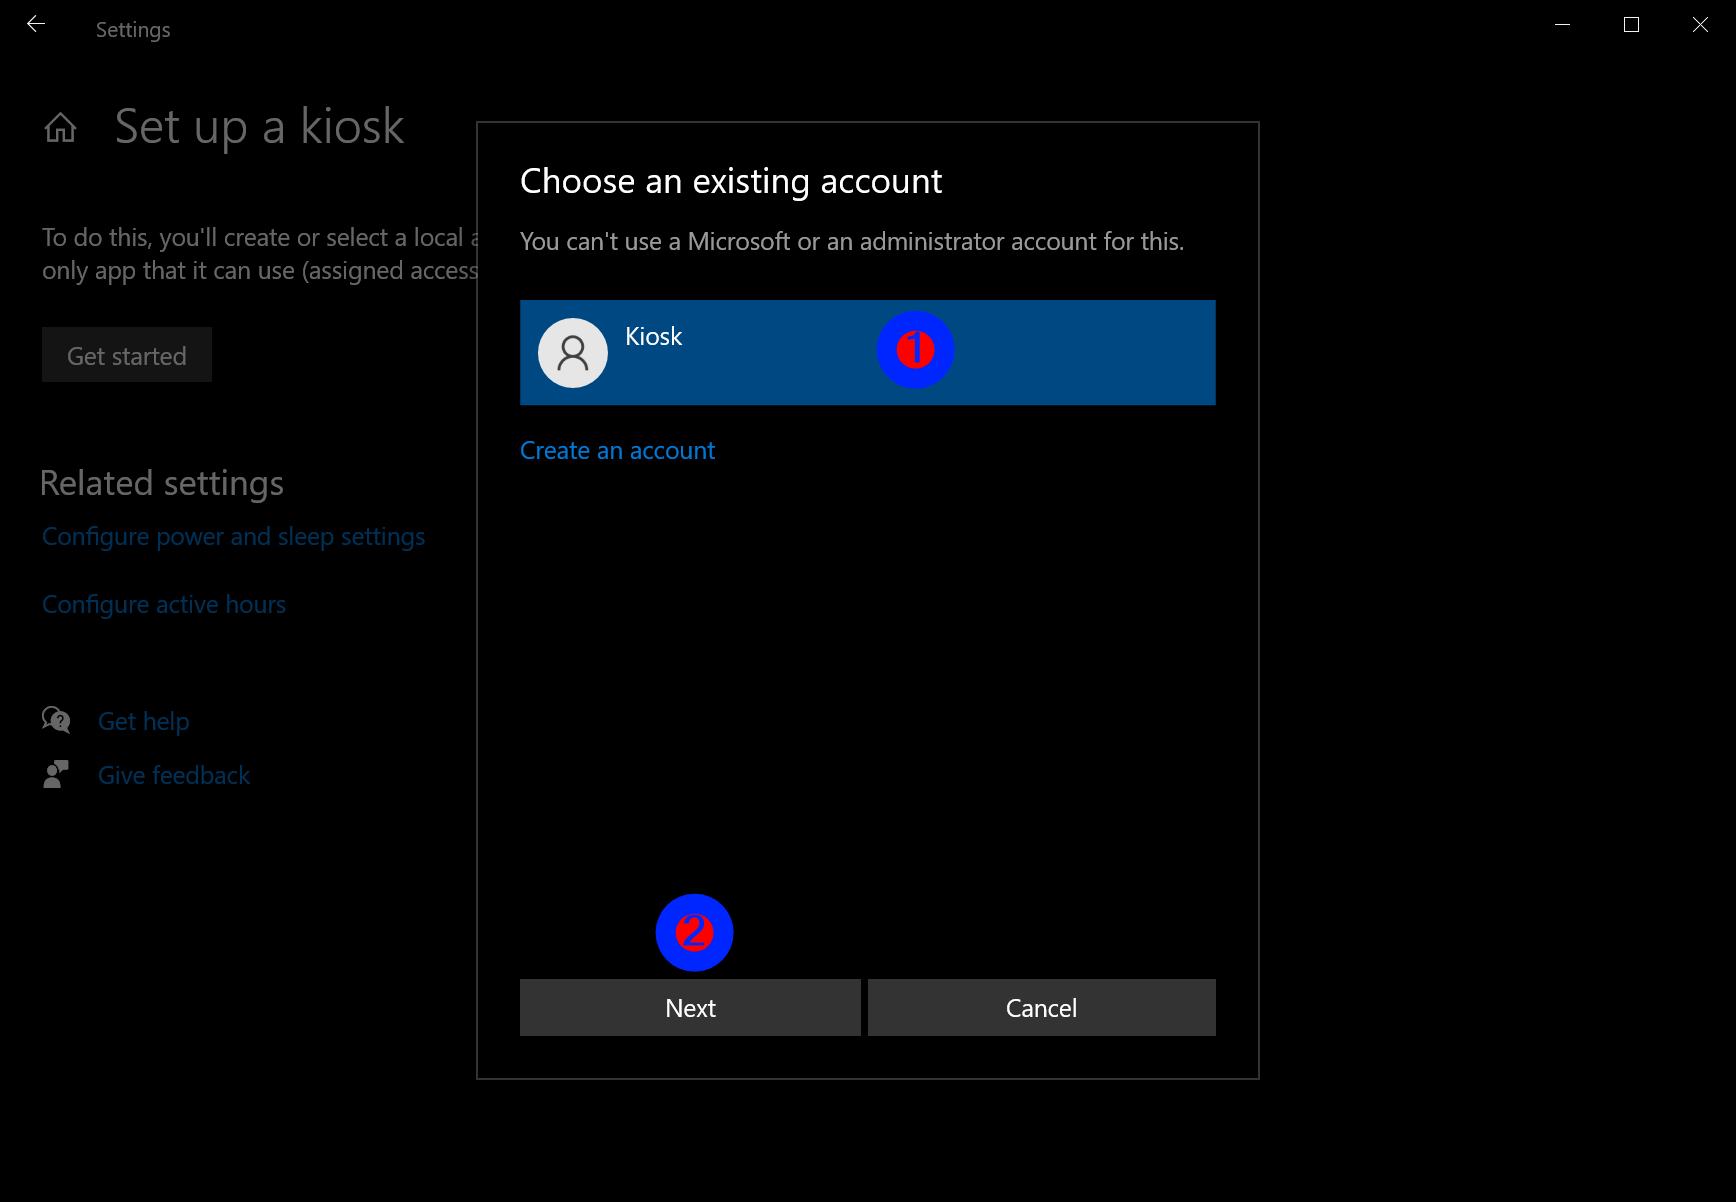
Step 7. Click on the user account you have created for the Kiosk and then hit the Next button.
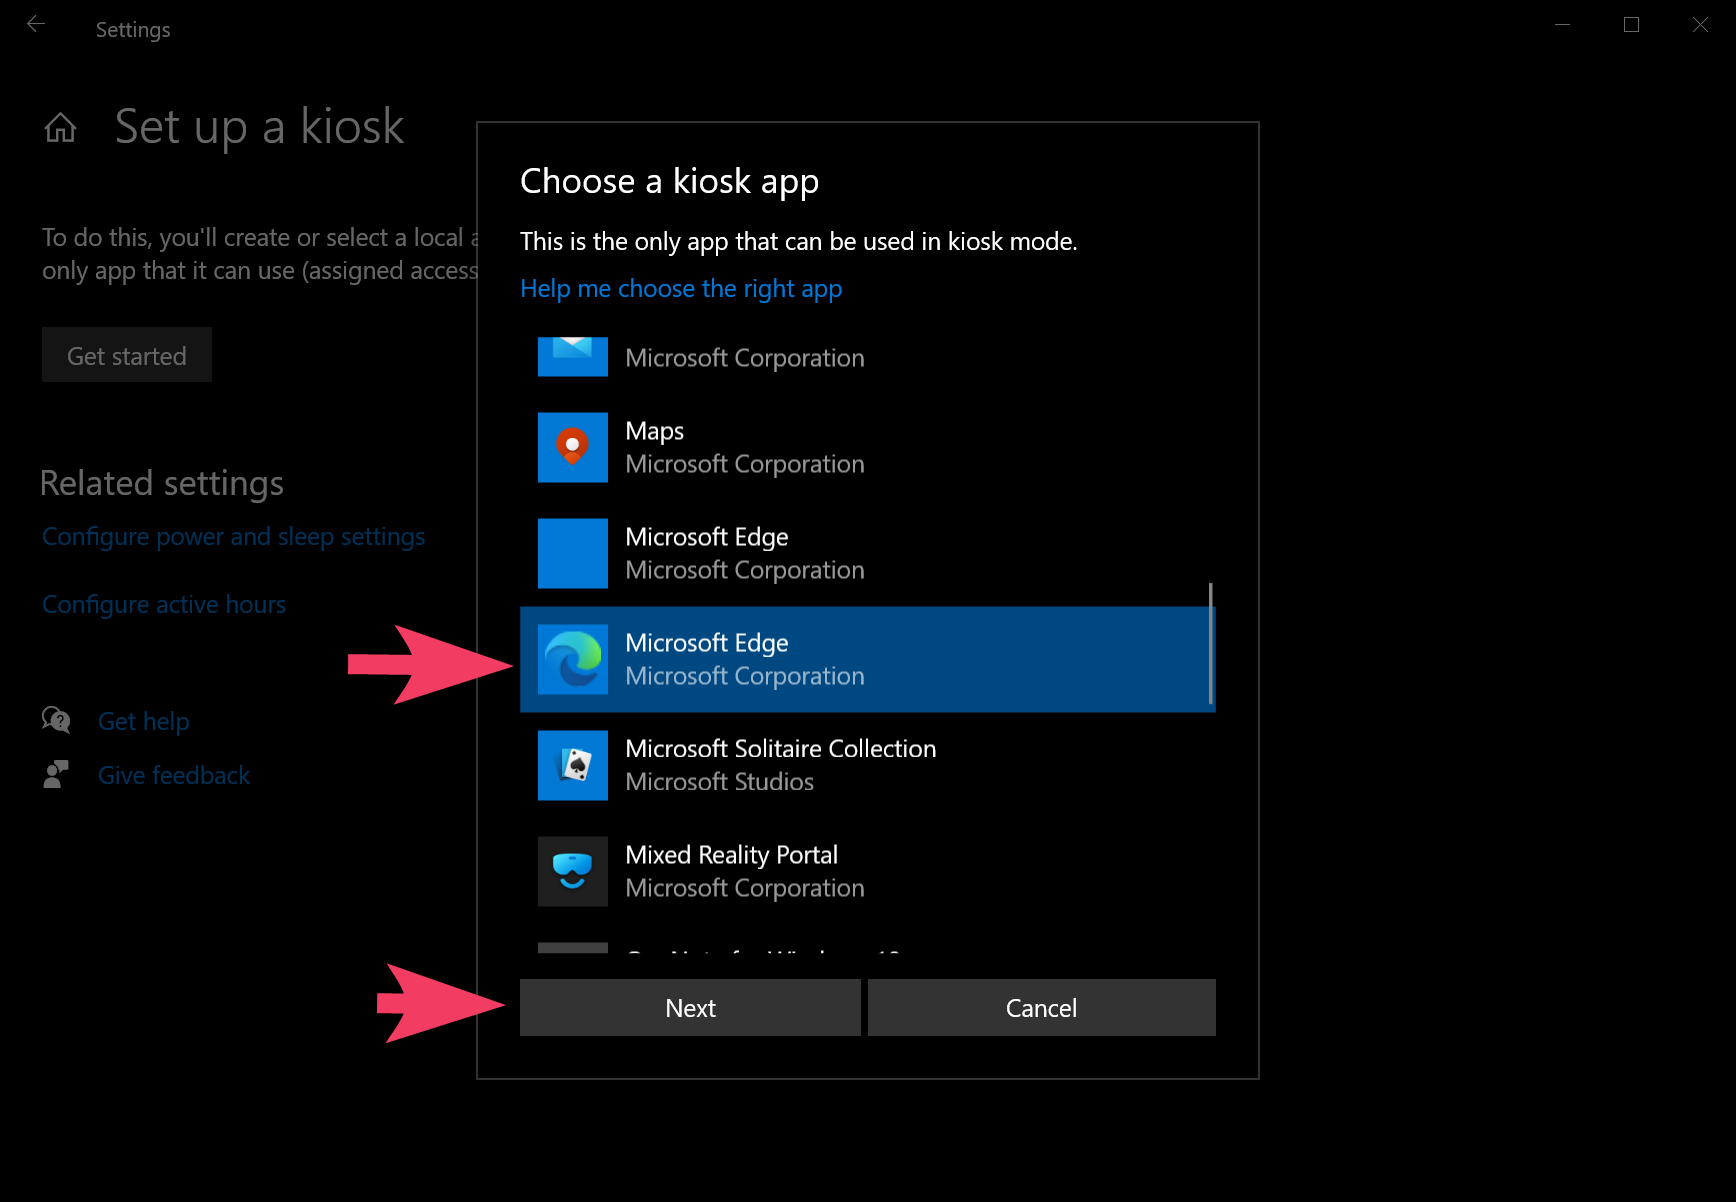
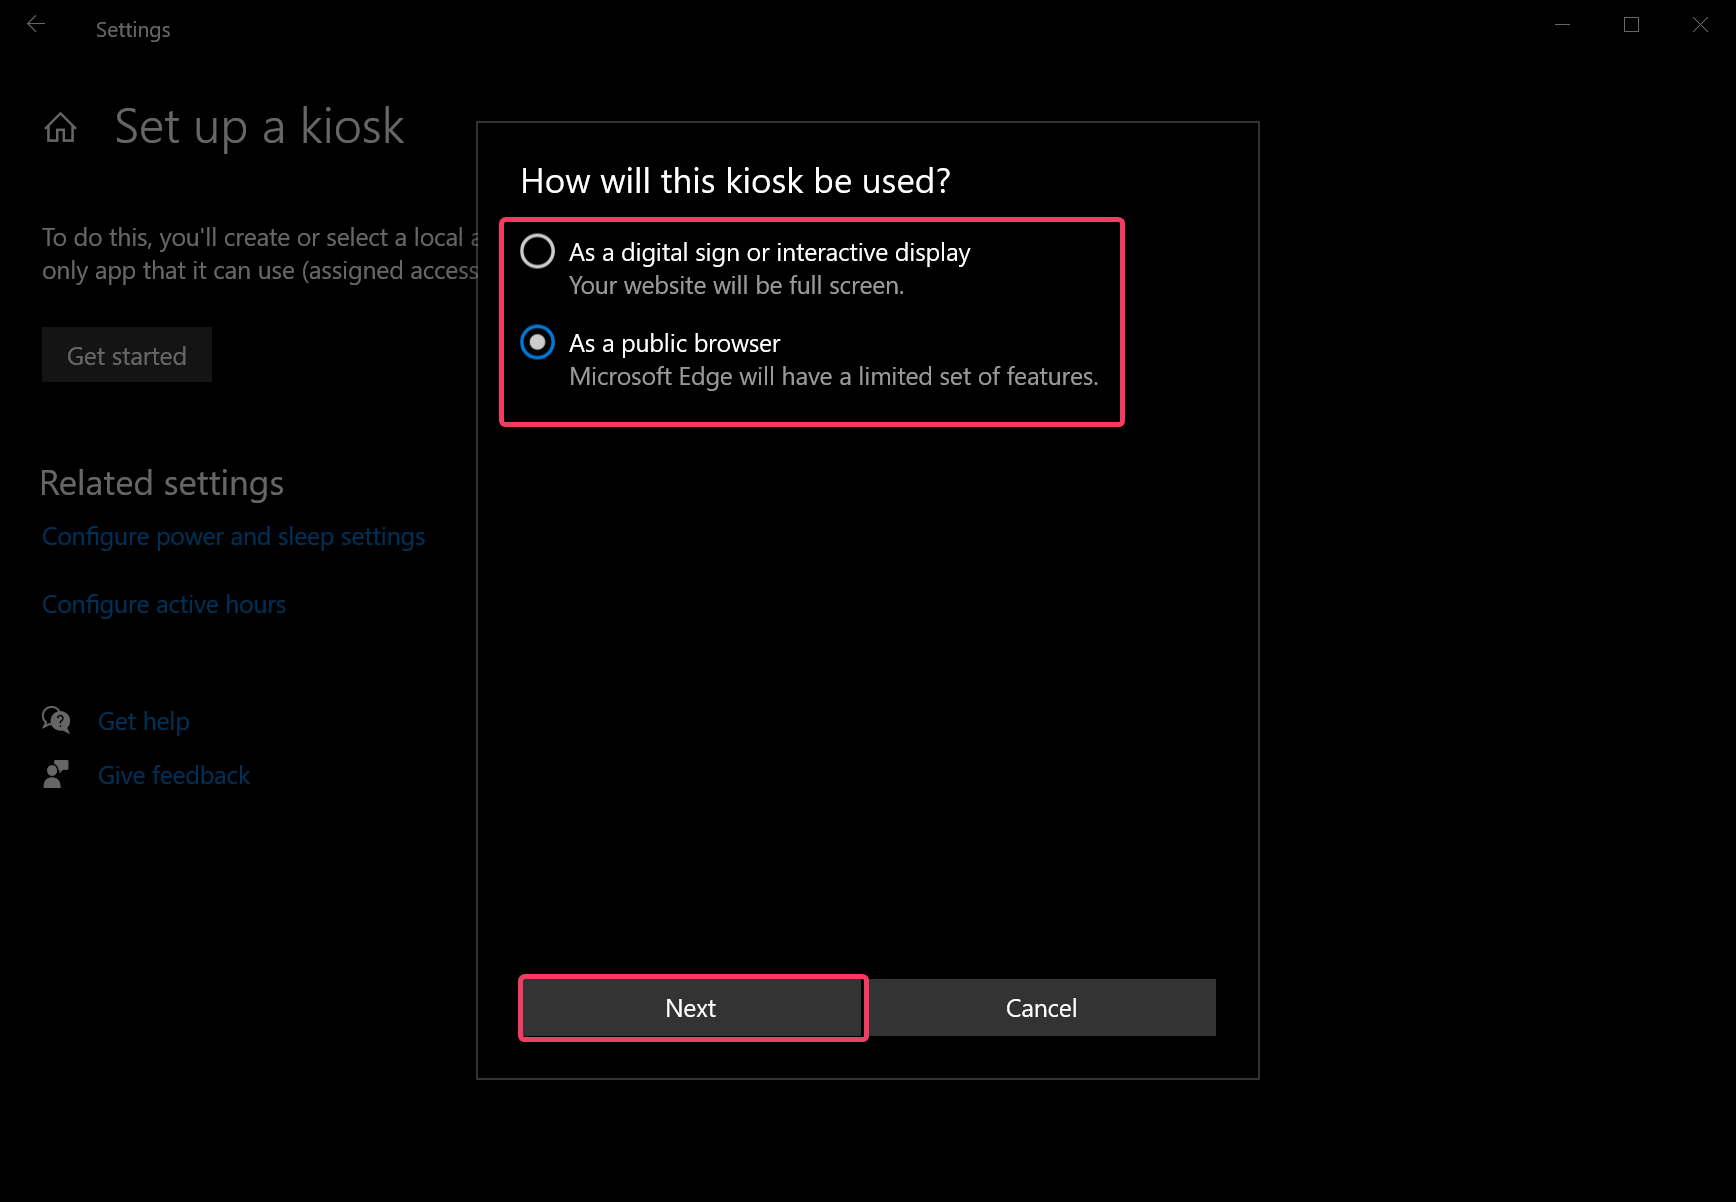
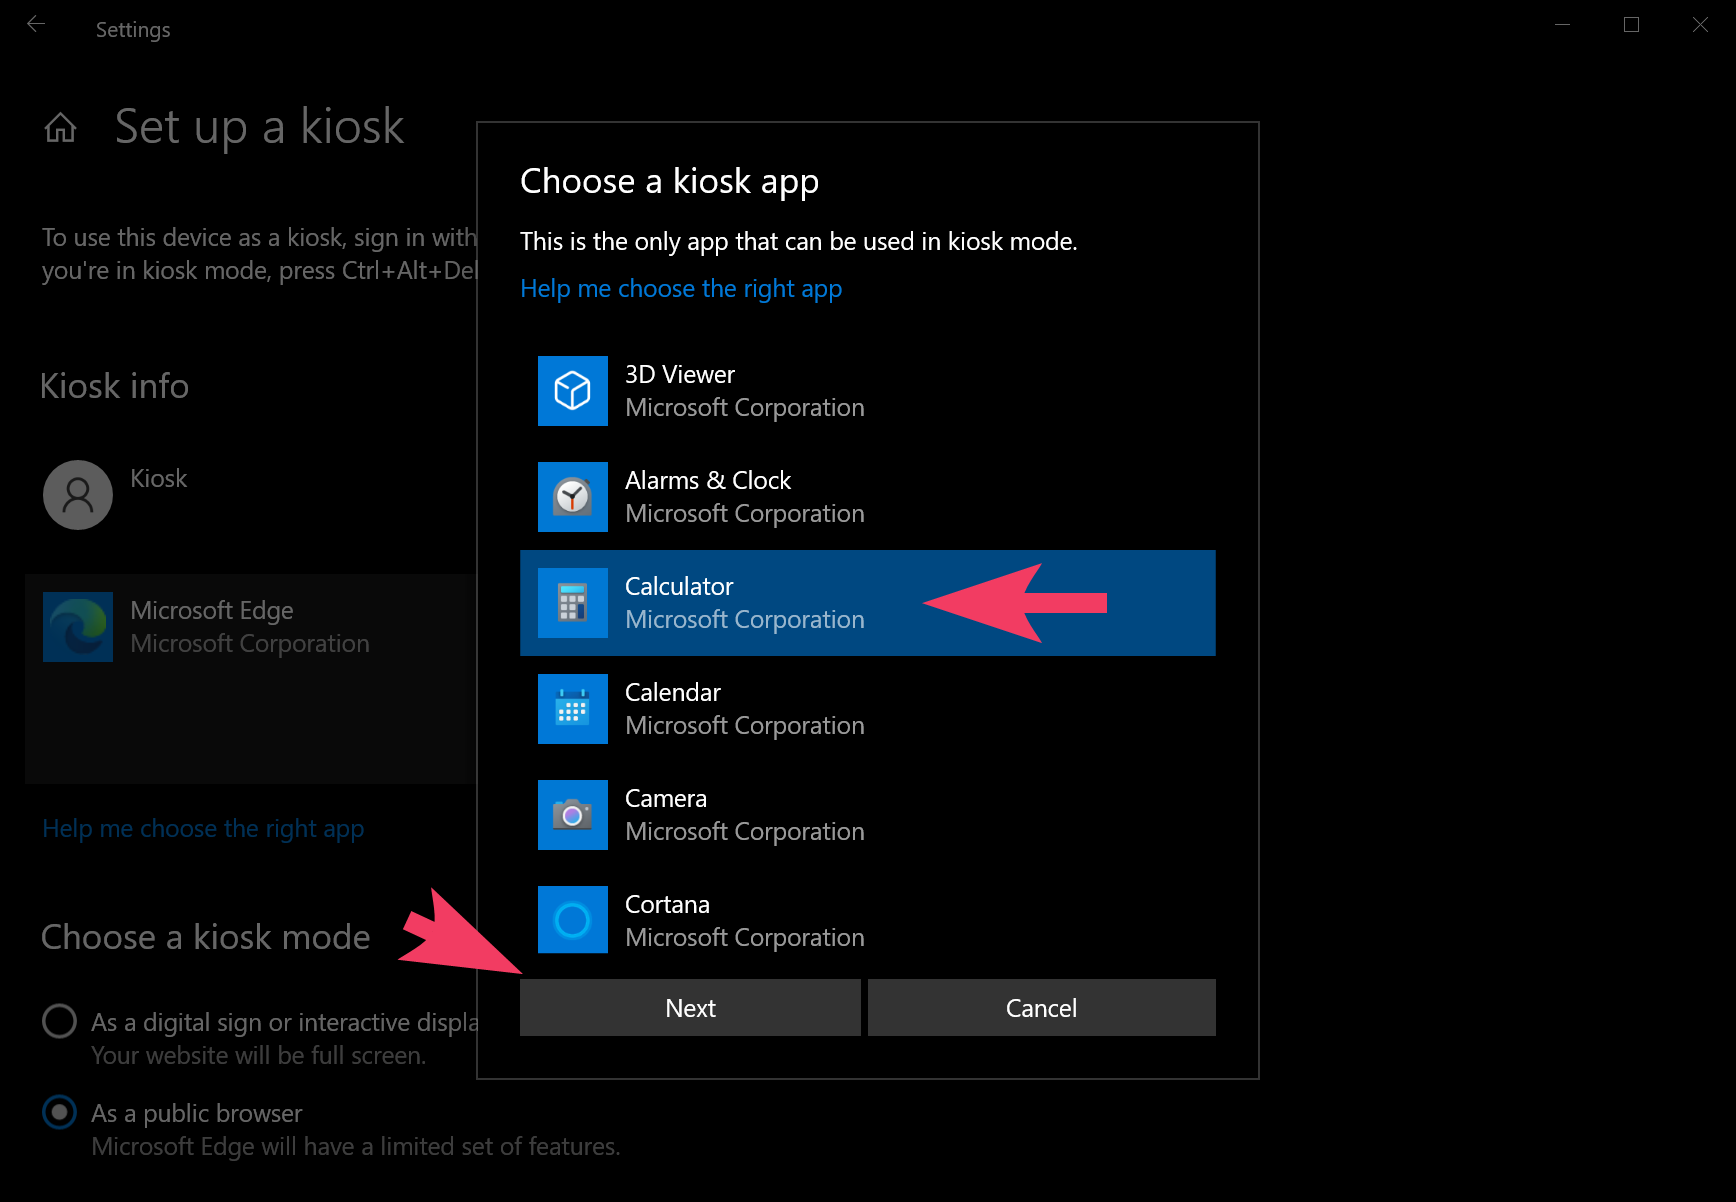
Step 8. Select a UWP app and click the Next button.
Note: Depending upon the application, you can see different options on the following screen.
Step 9. Select the option that suits your environment and click the Next button.
Step 10. Type the web page address you want to set for the home page. Then, specify the time before Microsoft Edge restarts the session if no one uses the device.
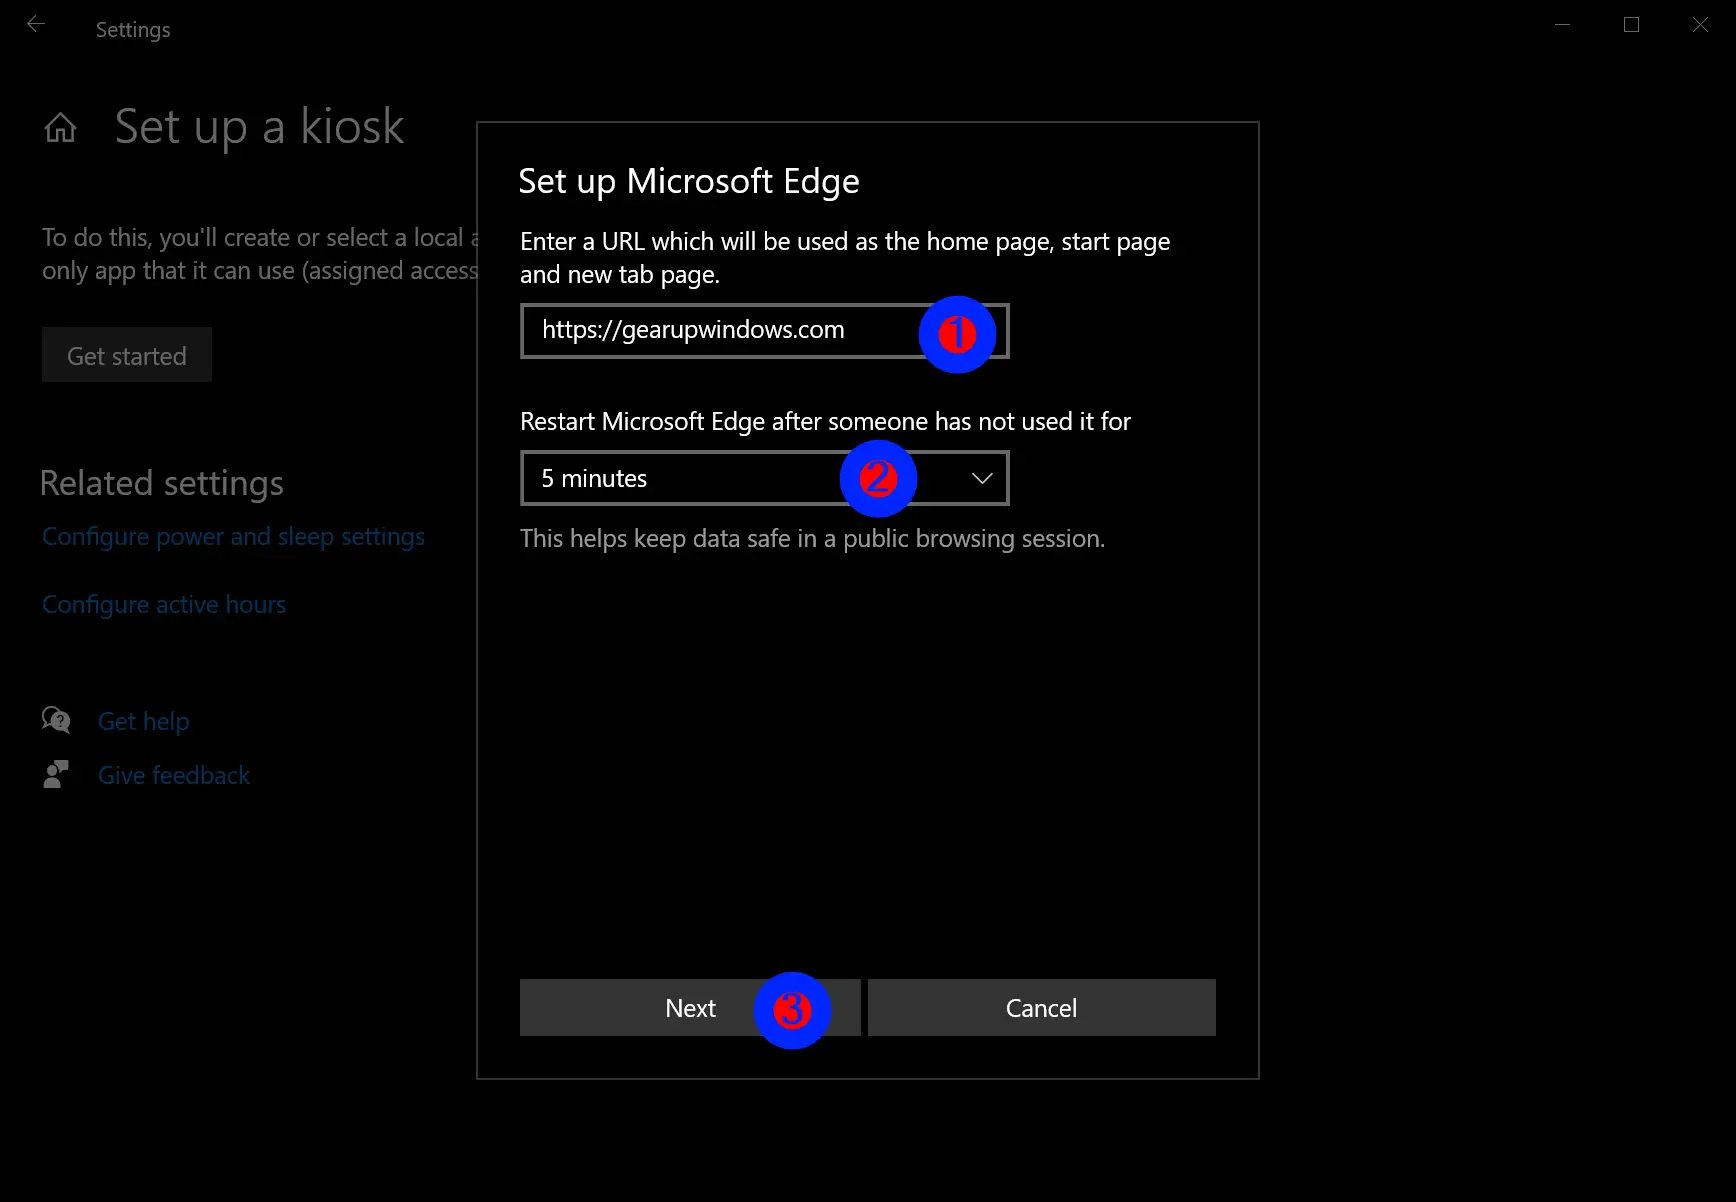
Step 11. Click Next.
Once you complete the above steps, restart your computer to start in kiosk mode.
Since you’ll not have access to the desktop, if you want to shut down or restart the computer or access an administrator account, you’ll need to use the Ctrl + Alt + Del keyboard shortcut to bring up the Lock screen to access the sign-in screen and power options.
How to Change App for Kiosk Mode in Windows 10?
To change the app for Kiosk in Windows 10, do the following:-
Step 1. Open Windows Settings.
Step 2. Then, click on Accounts.
Step 3. After that, select Family & other users in the left side pane.
Step 4. Next, click the app, which will be visible just below the Kiosk user name.

Step 5. After that, click the Change kiosk app button.
Step 6. Select a new app in the list and click the Next button.
That’s it. Depending on the app you selected, you may need to configure it more.
How to Disable Kiosk Mode in Windows 10?
To disable kiosk mode, use the following steps:-
Step 1. Open Windows Settings.
Step 2. Then, click on Accounts.
Step 3. After that, select Family & other users in the left side pane.
Step 4. Next, click the Kiosk user name.
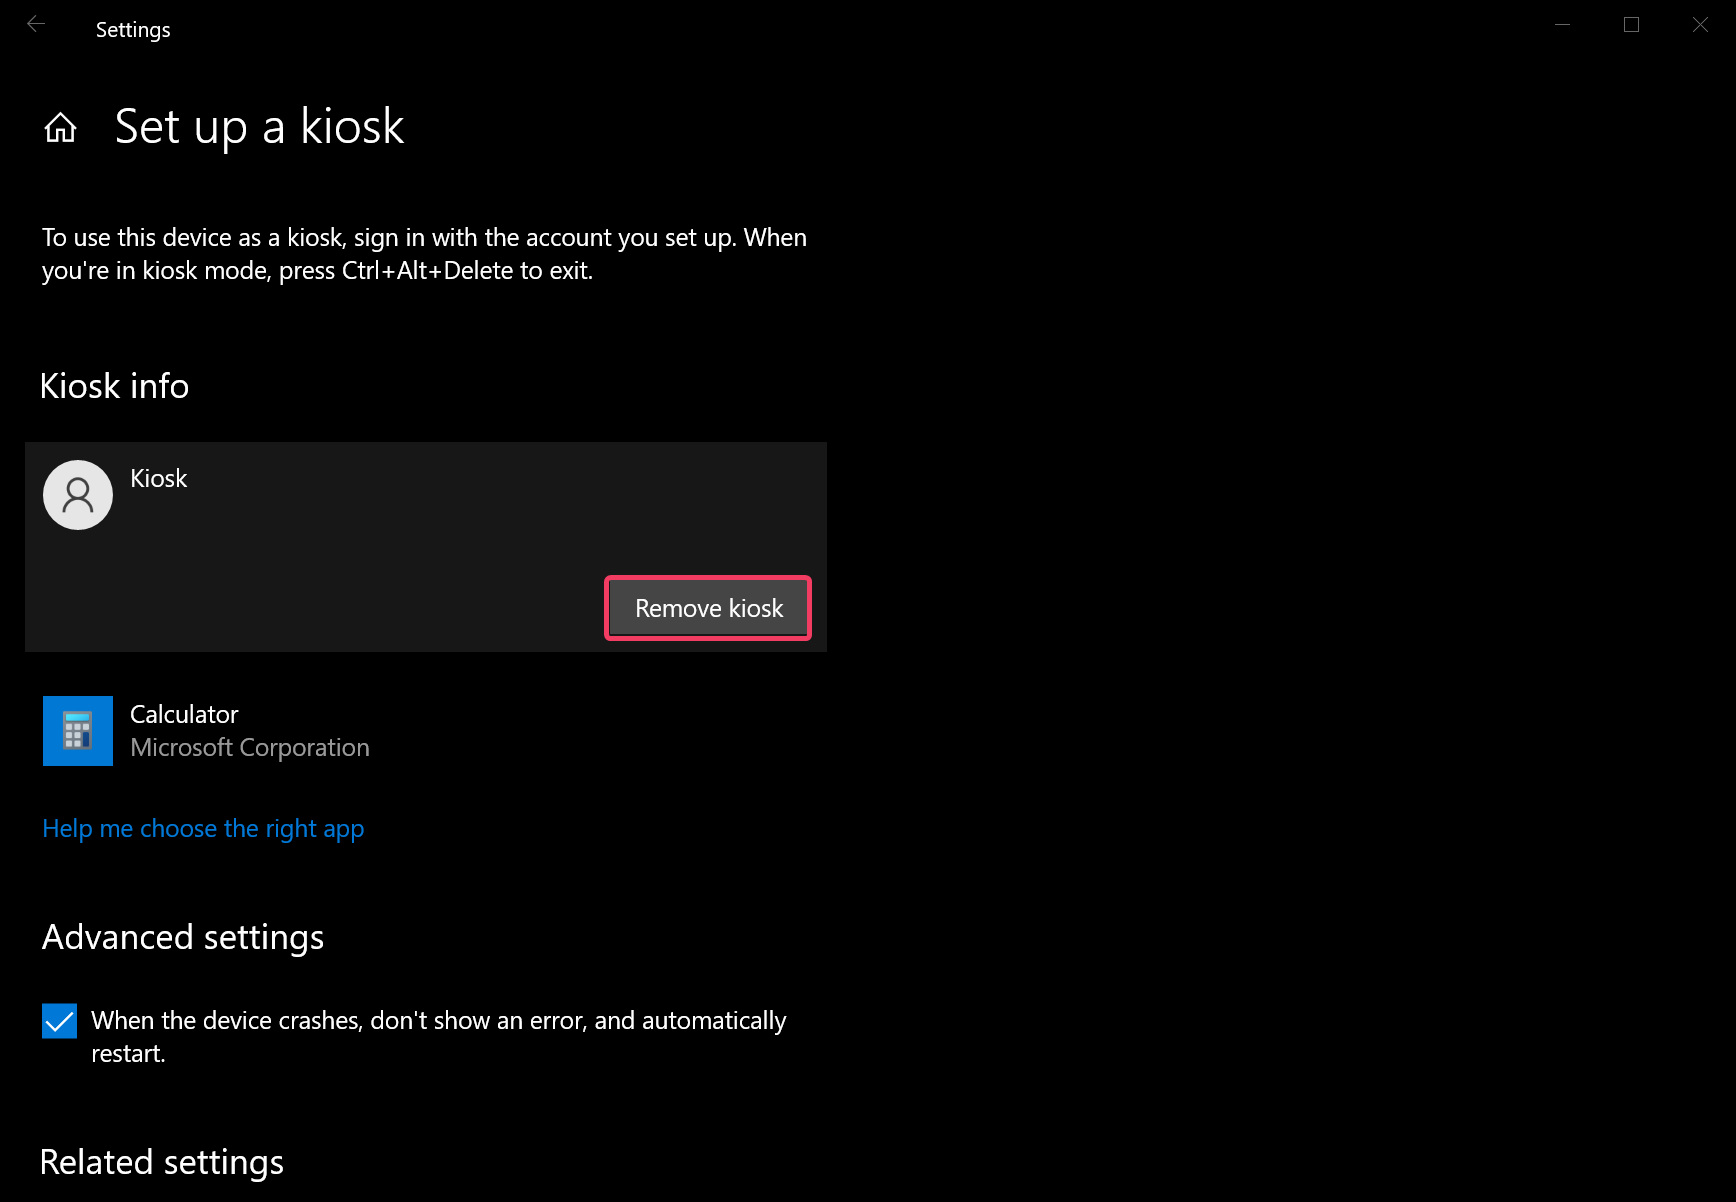
Step 5. In the pop-up window, click the Remove button. This will delete all kiosk settings and sign out of the selected account. However, the user account will remain available on your PC.

How to Remove Kiosk User in Windows 10?
Deleting a Kiosk user account is similar to removing an account on your computer. If you do not require Kiosk, you might want to delete it permanently from your Windows 10 machine.
To remove the user account on your Windows 10 PC, do the following:-
Step 1. Press Windows + R keys on the keyboard to open the Run dialog box.
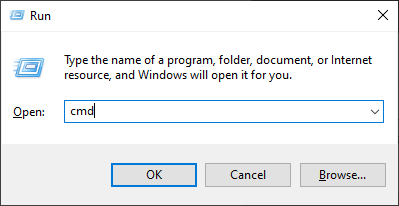
Step 2. Type cmd in the Run box and press Ctrl + Shift + Enter to launch an elevated Command Prompt.
Step 3. Next, type the following in the Command Prompt and hit Enter on the keyboard:-
net user "username" /delete
Note: Please replace the word username with the user name you created for Kiosk. For instance, we have created a kiosk account with the Kiosk name. So, my command will be:-
net user "Kiosk" /delete
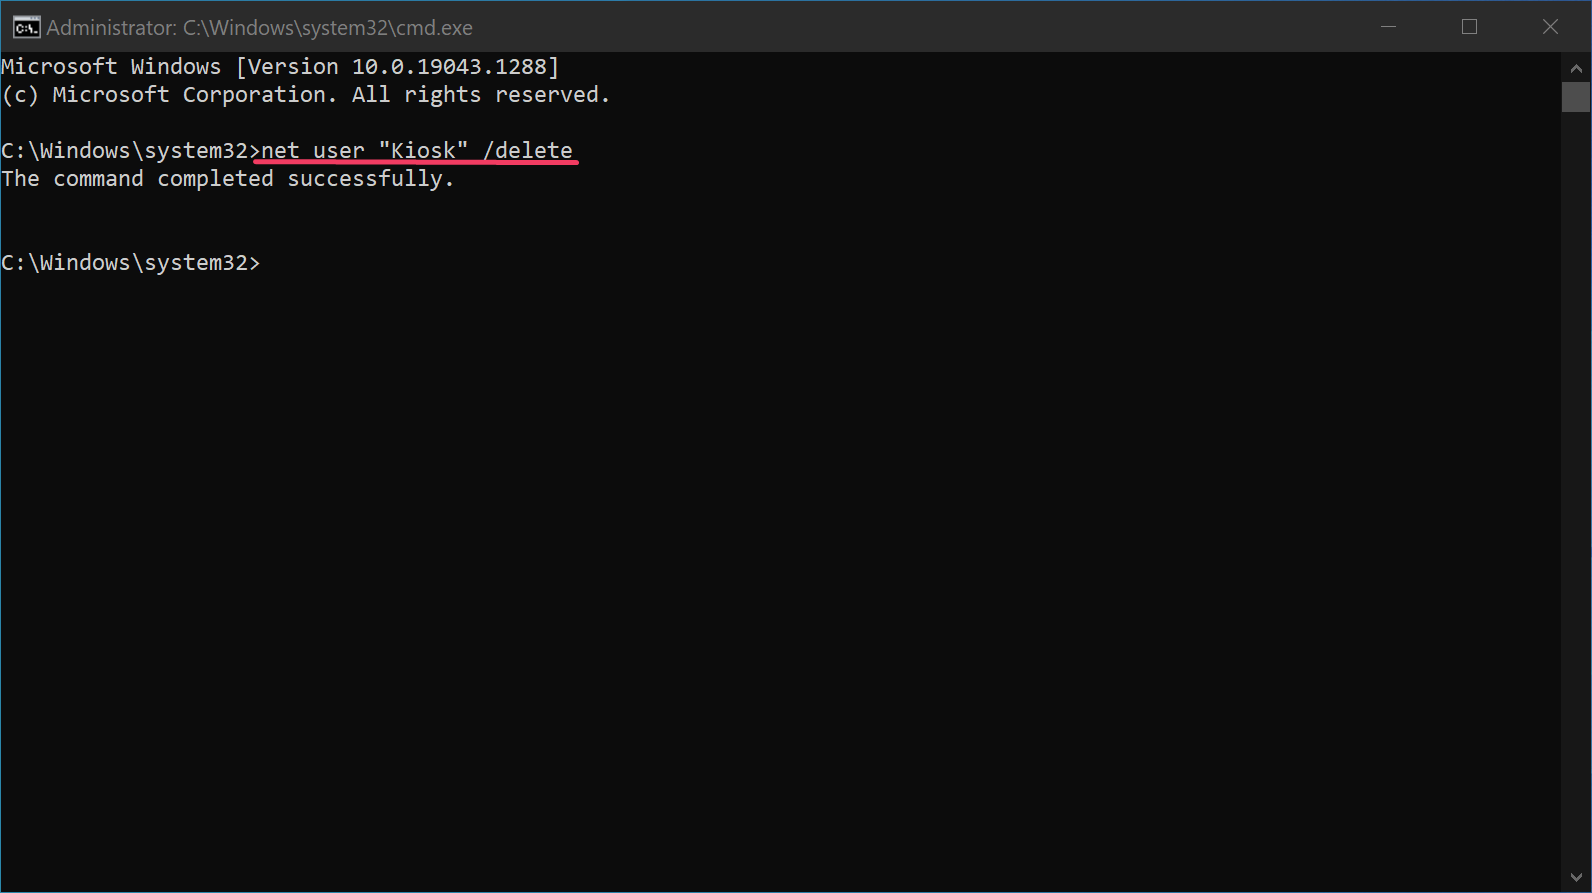
That’s it. Once you complete the above steps, the Kiosk user will not exist on your computer.
Conclusion
In conclusion, Assigned Access or Kiosk Mode in Windows 10 is a powerful feature that allows administrators to limit computer usage to specific applications and purposes. With this mode, a Windows 10 device can be converted into a kiosk device that restricts access to only one app at a time while also preventing users from viewing the desktop or making any changes. To set up Kiosk Mode, a standard user account needs to be created on the device first. Once this is done, Kiosk Mode can be configured by selecting the desired app and specifying additional settings. To change or remove the app or Kiosk Mode entirely, the user can follow the steps provided in this guide. Overall, Kiosk Mode can be a useful tool for managing and securing public-facing or shared devices in various environments.