As Windows 11 is getting old, Microsoft is adding new features. Microsoft recently added a new feature, “Optimizations for windowed games,” to Windows 11. This new feature will allow users to improve performance for a windowed game. Whether you are playing a minimalist or high-end game, you can enable or disable the “Optimizations for windowed games” feature for a particular or all game.
What is a windowed game?
Windowed game is such a game on your computer that it does not cover your entire screen. If required, you can drag the window around the screen or resize it to reveal other areas. So, a game that doesn’t take the entire screen to run on the PC and runs in a window is called a windowed game. Similarly, if an app doesn’t require the whole screen to run on your PC and runs in a window is called a windowed app.
Sometimes your computer’s graphics might not comply with the game window, and you might face issues such as lagging, hanging, etc. Even you can see an FPS drop issue while playing the game on your PC. Microsoft included the “Optimizations for windowed games” feature in the Windows 11 Settings panel to fix such problems.
This gearupwindows article will guide you on enabling and disabling the “Optimizations for windowed games” in Windows 11.
How to Turn On “Optimizations for windowed games” in Windows 11?
To enable the “Optimizations for windowed games” in your Windows 11 machine, use the following steps:-
Step 1. First, open the Settings app.
Step 2. Then, select System in the left side pane of the Settings window.

Step 3. After that, choose the Display tab on the right sidebar.
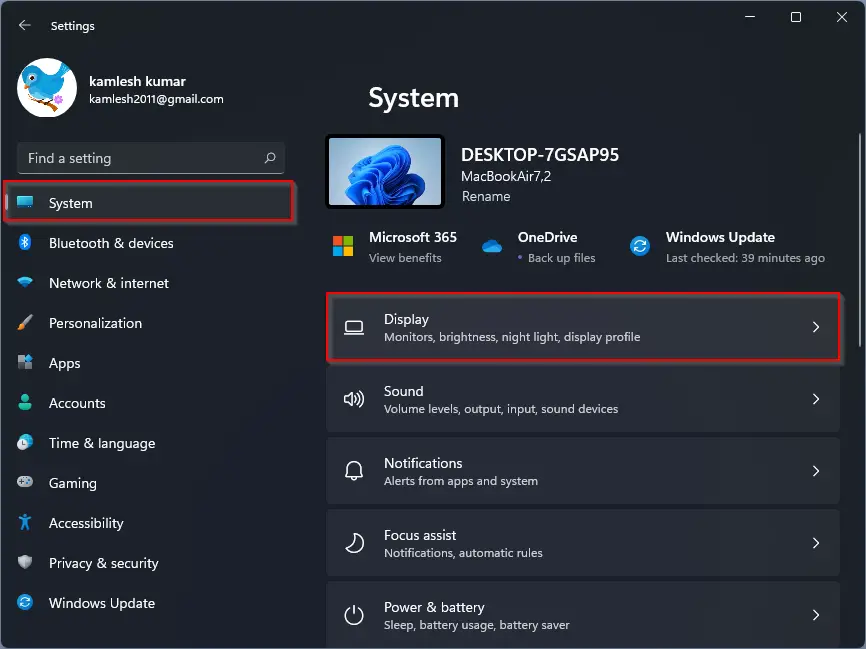
Step 4. Next, click on the Graphics option under the “Related settings” section.
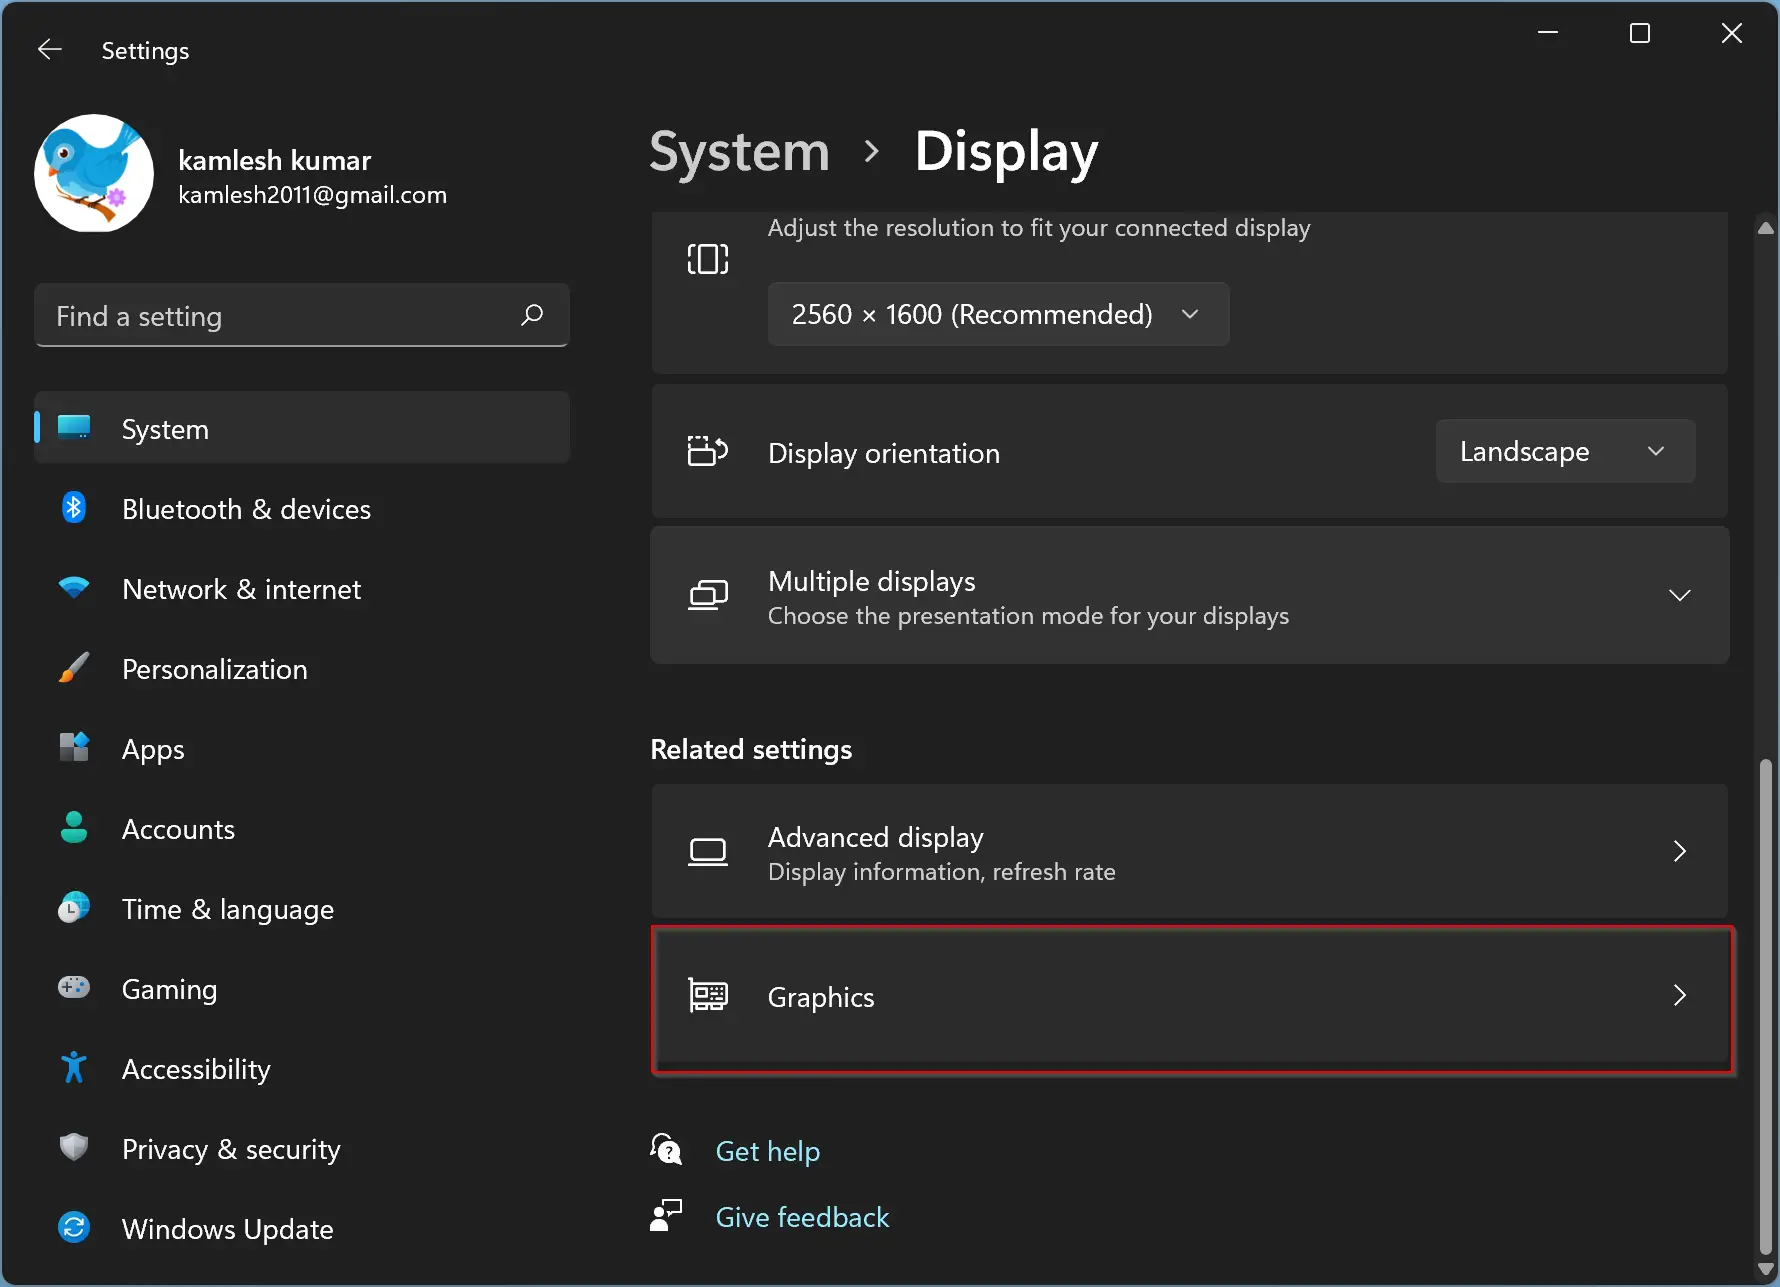
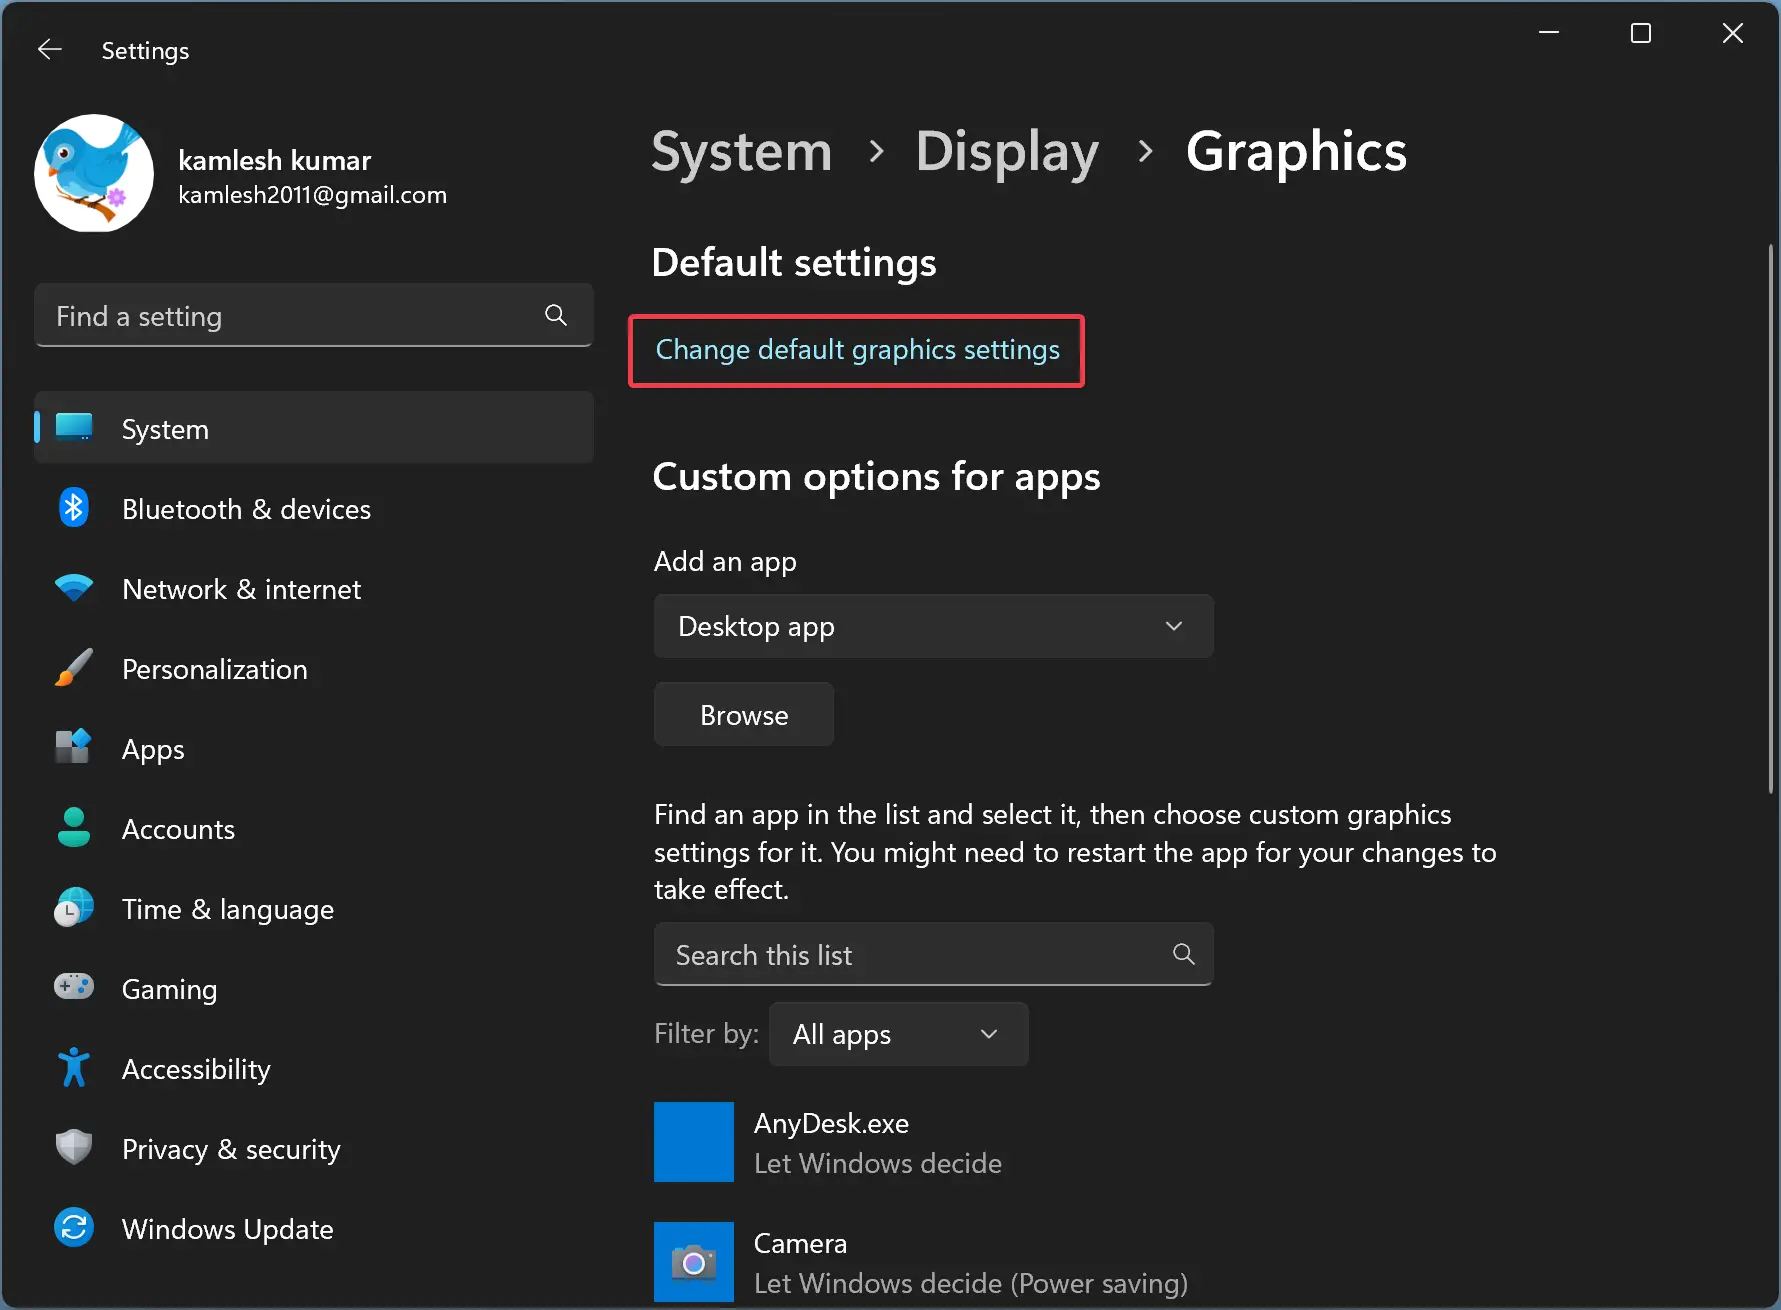
Step 5. In the following screen, click the link Change default graphics settings under the “Default settings” section.
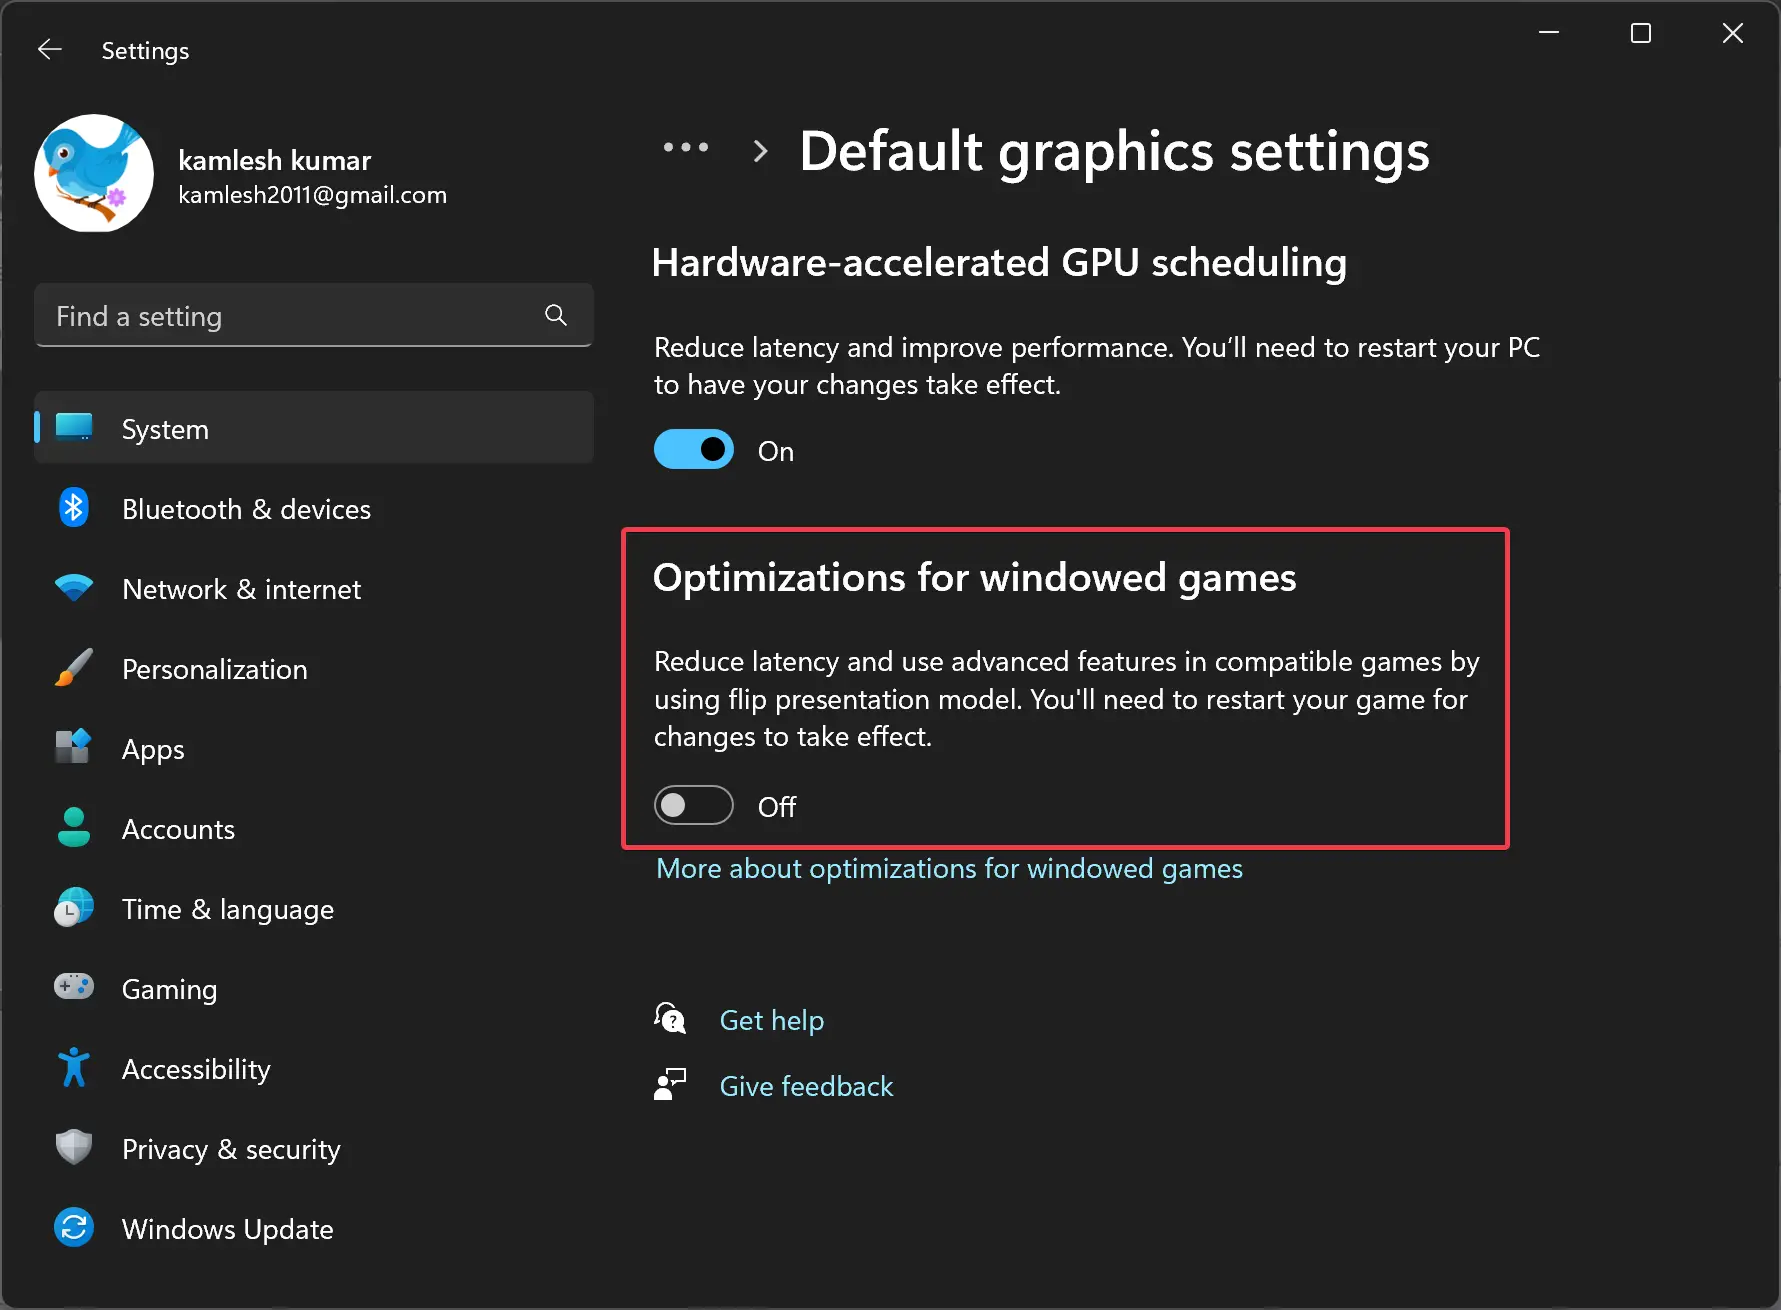
Step 6. Finally, turn on the toggle switch “Optimizations for windowed games.”

How to Turn Off “Optimizations for windowed games” in Windows 11?
To disable the “Optimizations for windowed games” in your Windows 11 machine, use the following steps:-
Step 1. First, open the Settings app.
Step 2. Then, select System in the left side pane of the Settings window.
Step 3. After that, choose the Display tab on the right sidebar.
Step 4. Next, click on the Graphics option under the “Related settings” section.
Step 5. In the following screen, click the link Change default graphics settings under the “Default settings” section.
Step 6. Finally, turn off the toggle switch “Optimizations for windowed games.”
How to Enable “Optimizations for windowed game” for a specific app?
To enable “Optimizations for windowed game” for a specific game or app, follow these steps:-
Step 1. First, open the Settings app.
Step 2. Then, select System in the left side pane of the Settings window.
Step 3. After that, choose the Display tab on the right sidebar.
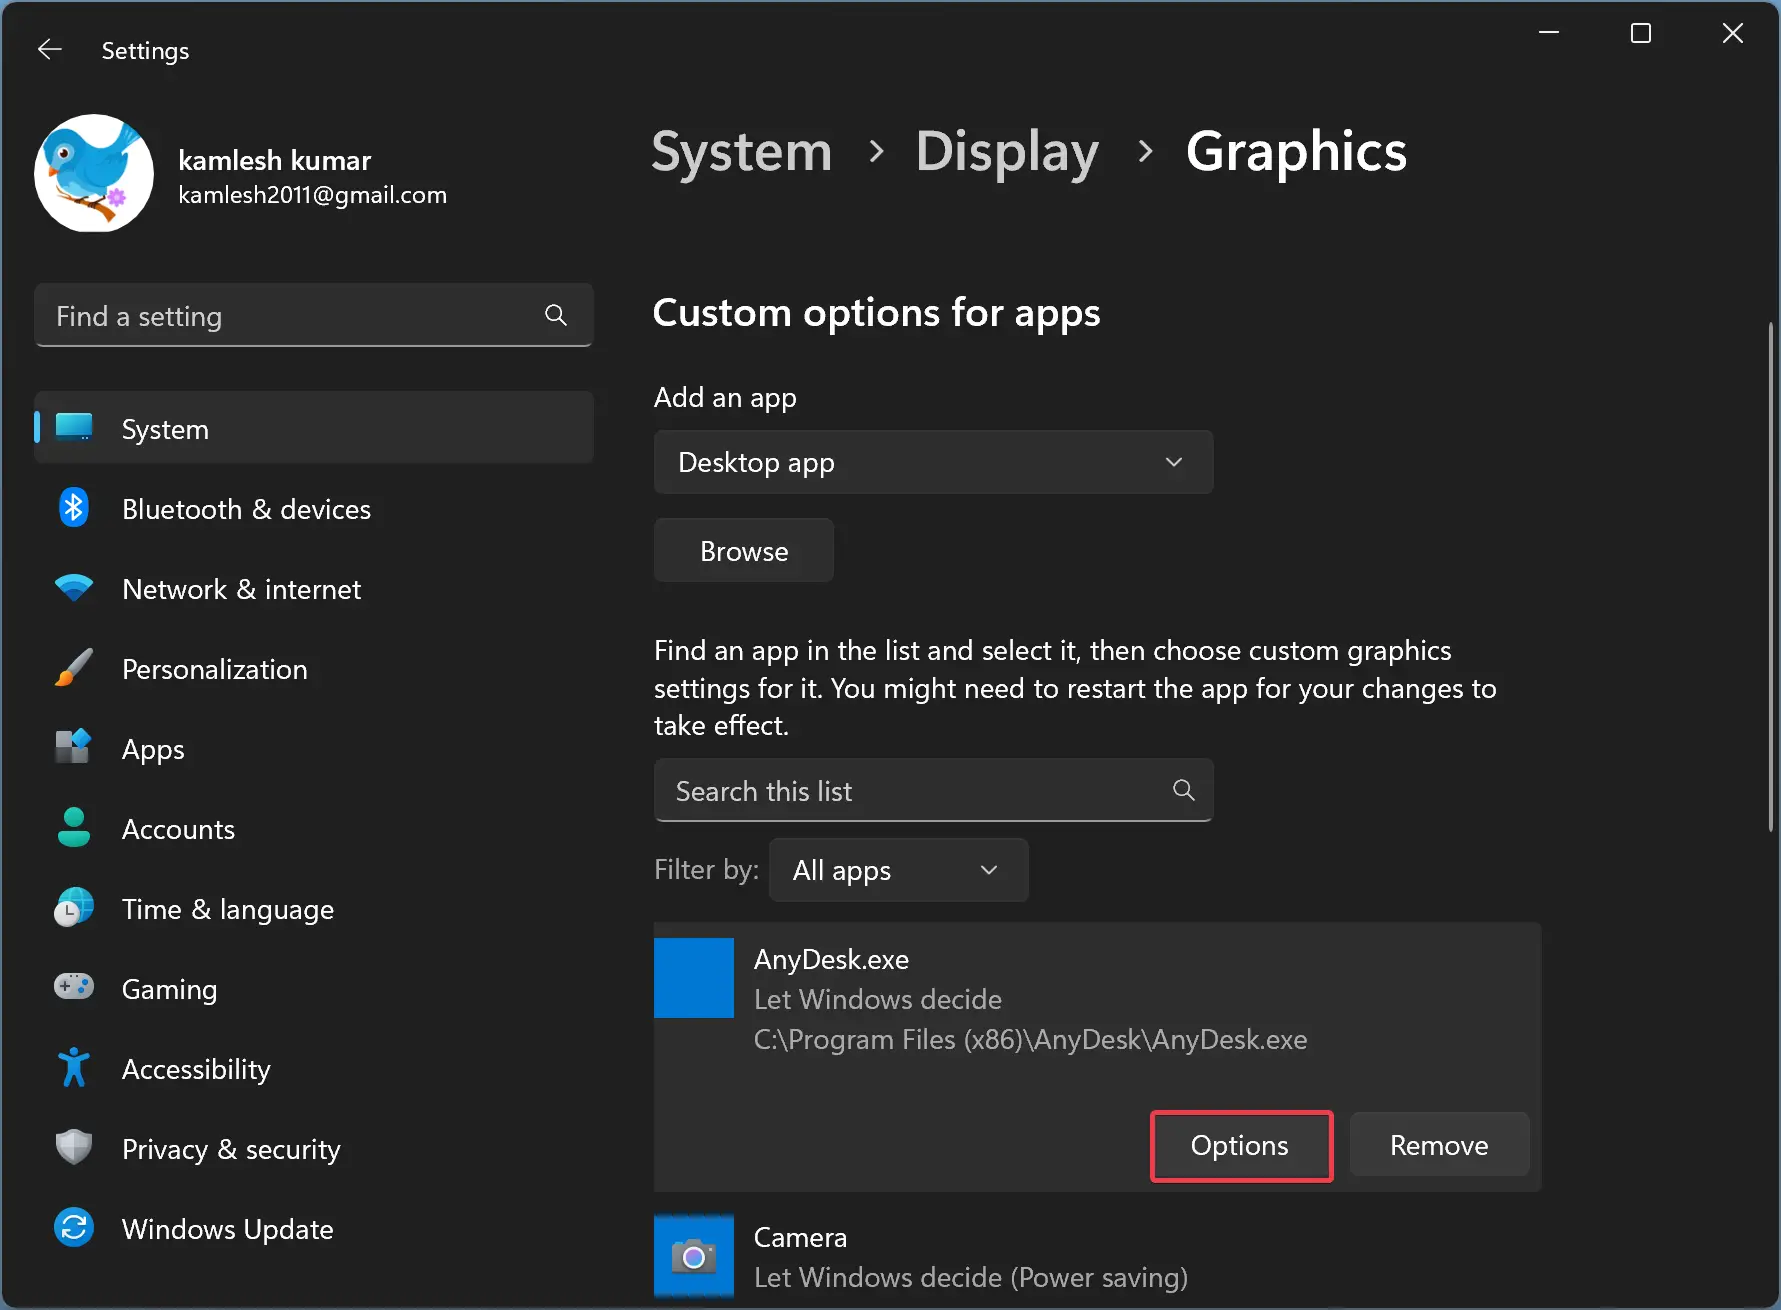
Step 4. Next, click on the Graphics option under the “Related settings” section.
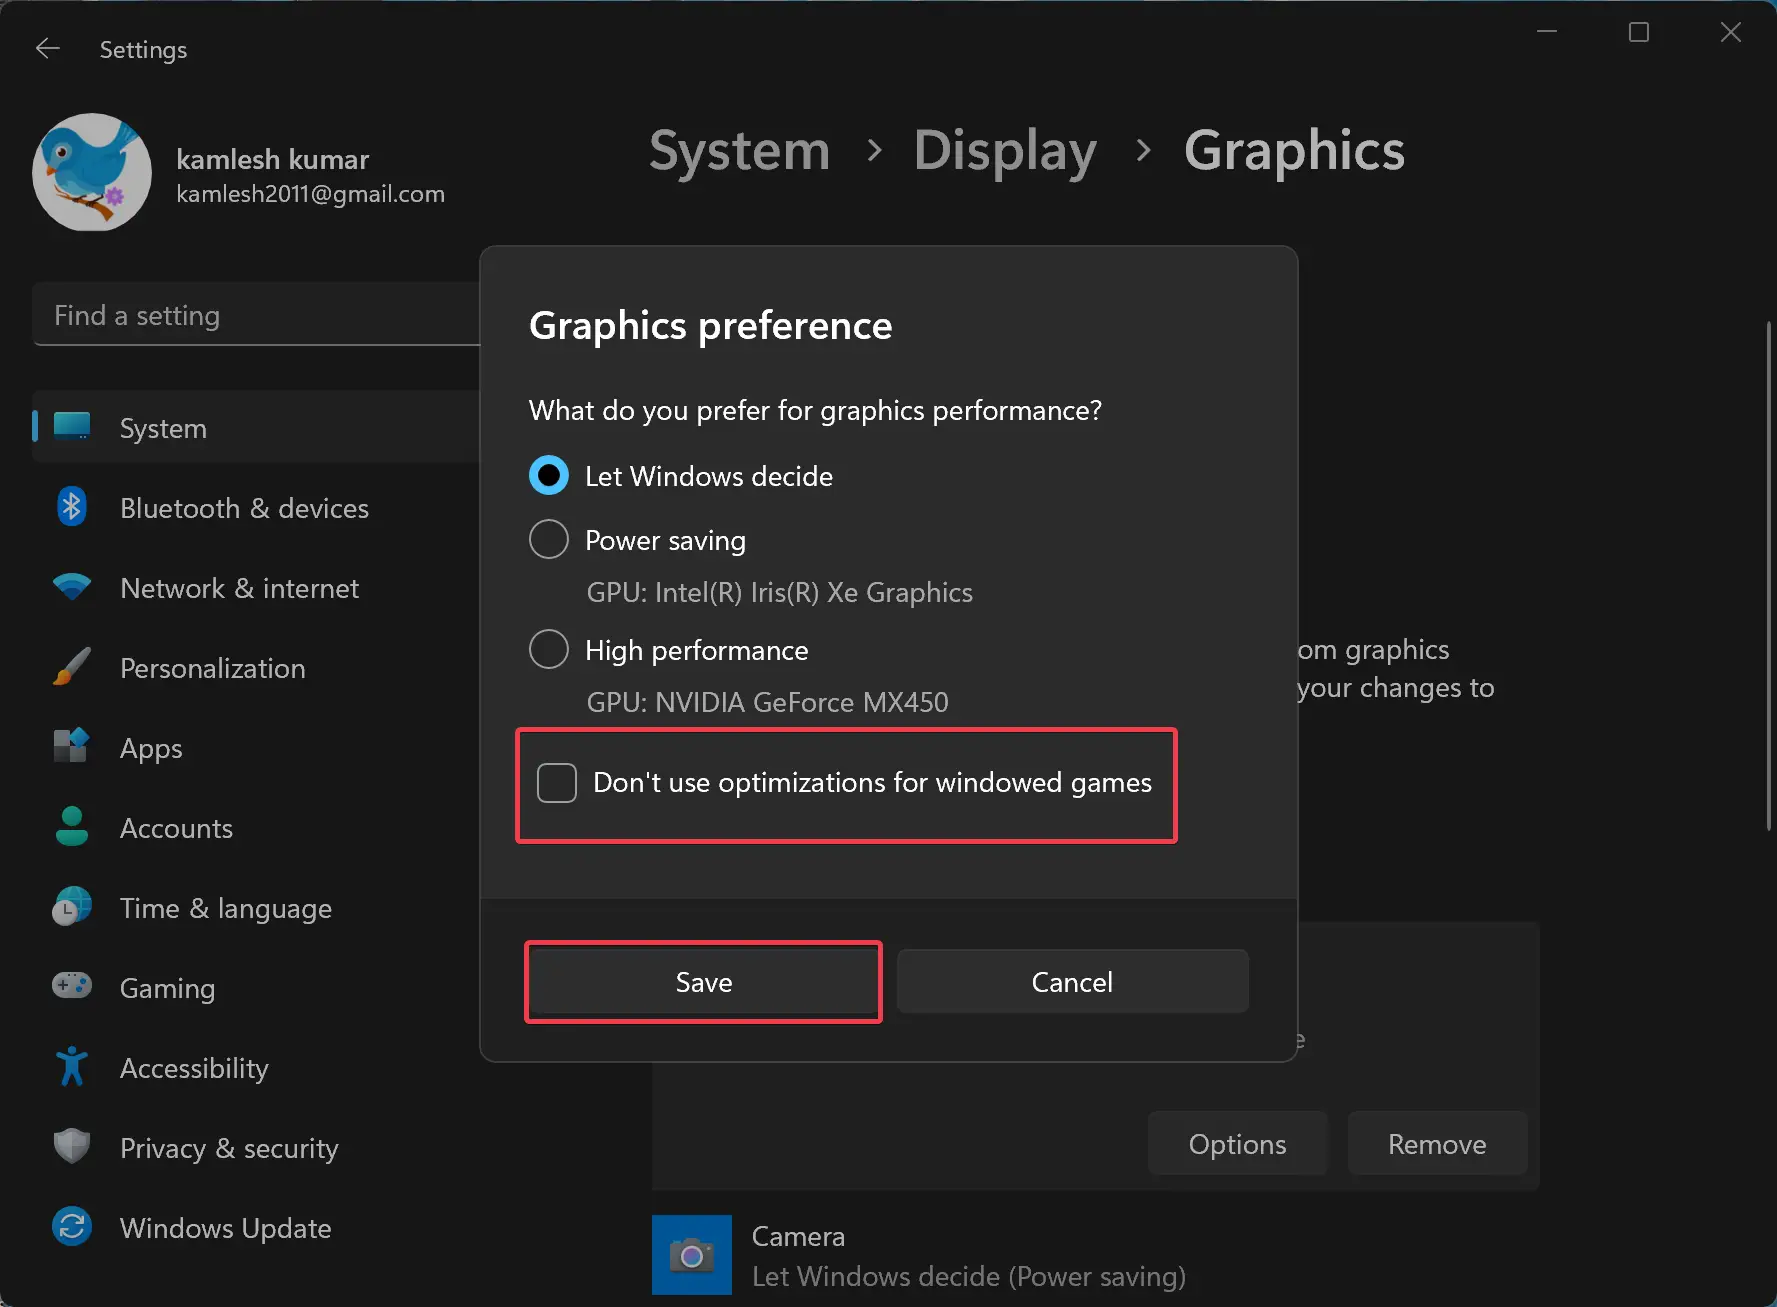
Step 5. Click on the app name and hit the Options button on the following screen.
Step 6. Uncheck the option “Don’t use optimizations for windowed games” and click the Save button.
How to Disable “Optimizations for windowed game” for a specific app?
To disable “Optimizations for windowed game” for a specific game or app, follow these steps:-
Step 1. First, open the Settings app.
Step 2. Then, select System in the left side pane of the Settings window.
Step 3. After that, choose the Display tab on the right sidebar.
Step 4. Next, click on the Graphics option under the “Related settings” section.
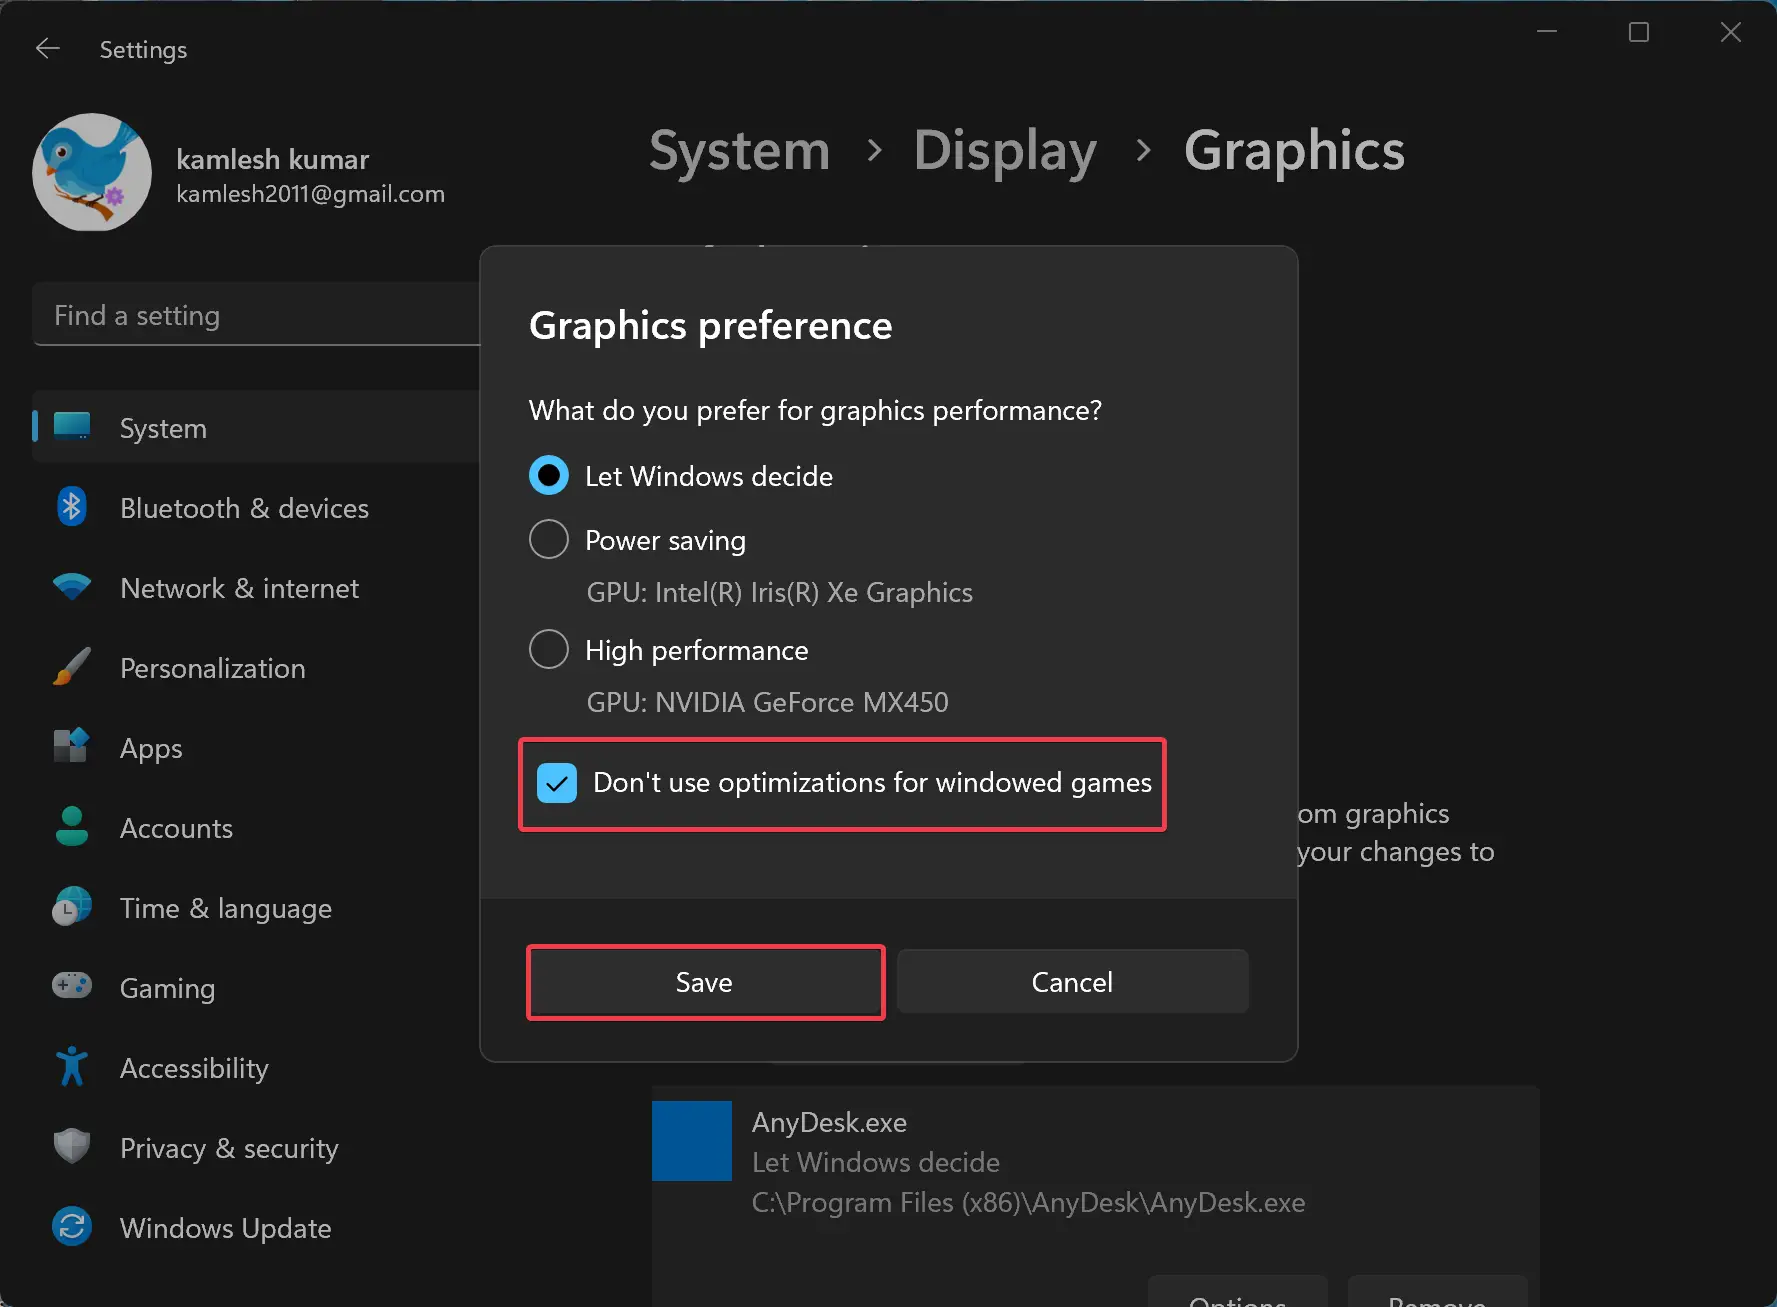
Step 5. Click on the app name and hit the Options button on the following screen.
Step 6. Check the option “Don’t use optimizations for windowed games” and click the Save button.
How to Enable or Disable “Optimizations for windowed games” using Registry Editor?
If you prefer to use Windows Registry to tune your Windows 11 settings, then use these steps:-
Step 1. Launch Registry Editor.
Step 2. When Registry Editor opens, navigate to the following key in the left sidebar:-
HKEY_CURRENT_USER\Software\Microsoft\DirectX\GraphicsSettings
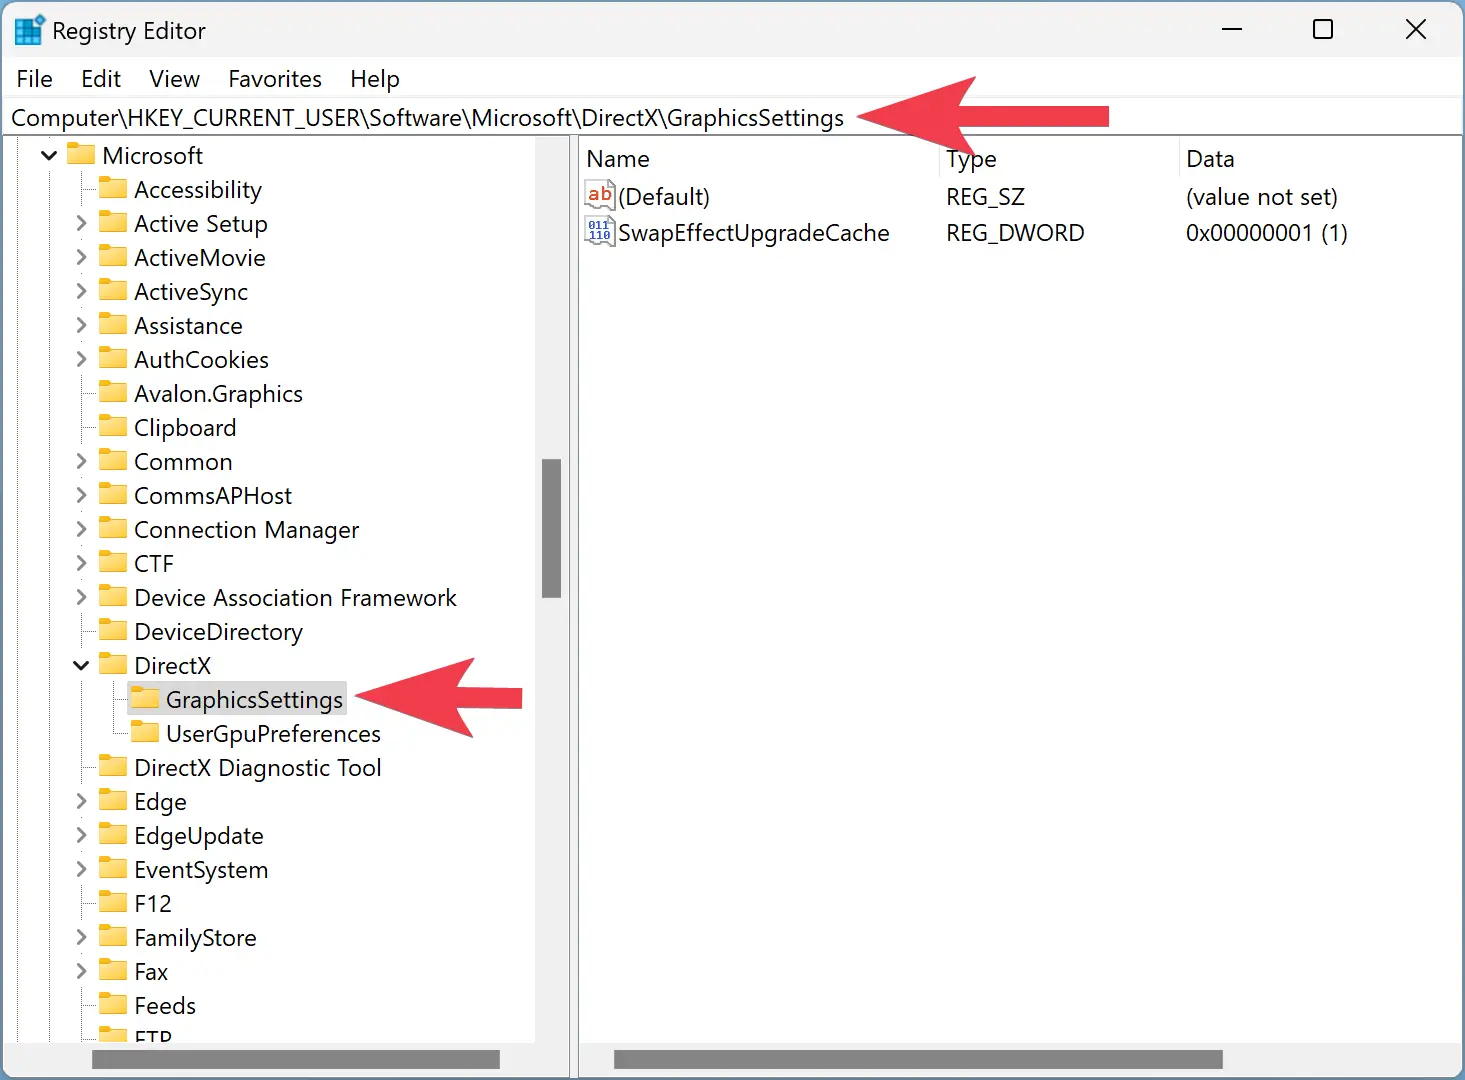
Step 3. Then, right-click on GraphicsSettings and select New > DWORD (32-bit) Value.
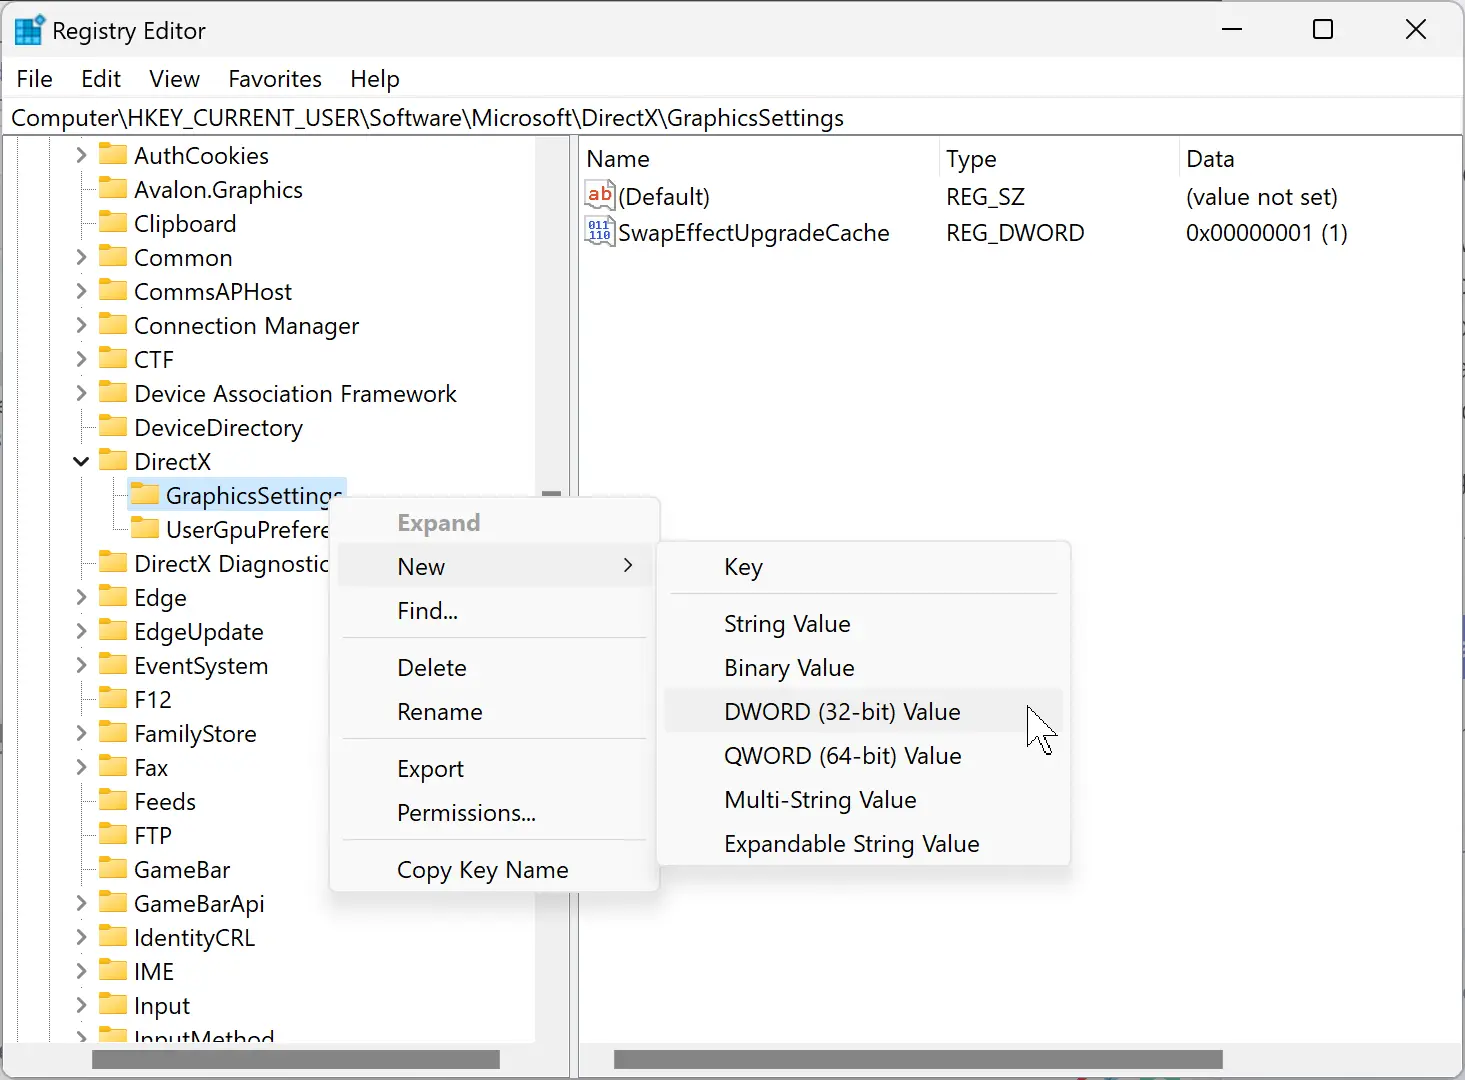
Step 4. Name the newly created REG_DWORD as SwapEffectUpgradeCache.
Quick Note: If SwapEffectUpgradeCache REG_DWORD already exists, skip this step.
Step 5. Double-click on SwapEffectUpgradeCache and set its Value data to 1.
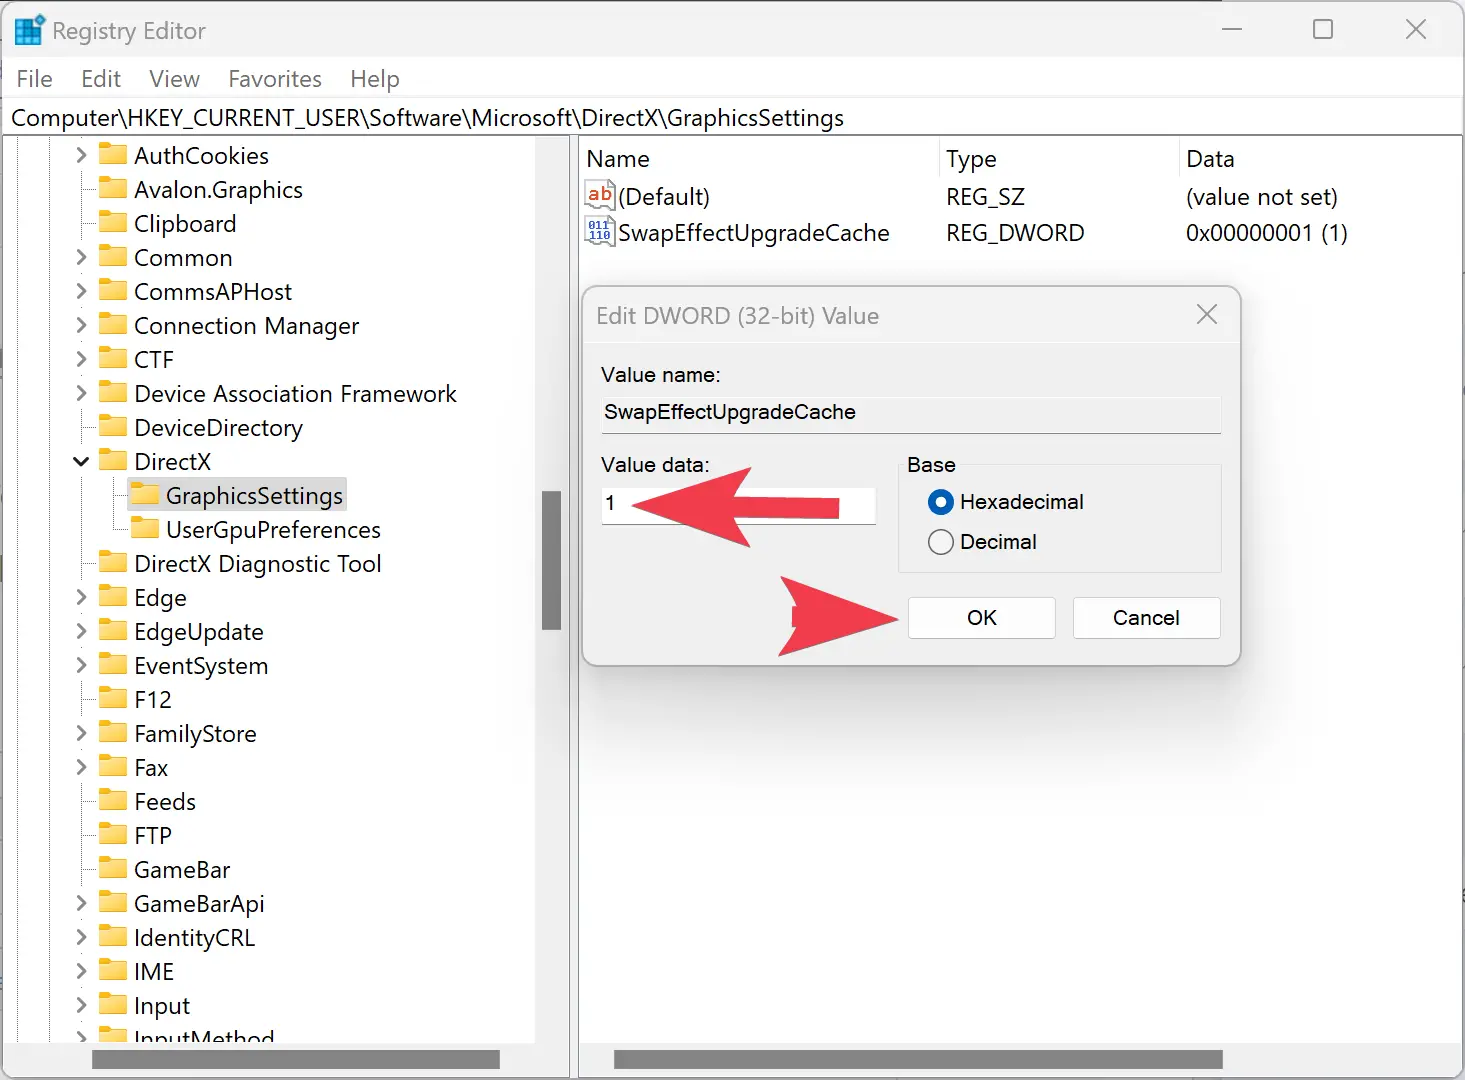
Step 6. Click OK.
Step 7. Then, navigate to the following path in the Registry Editor:-
HKEY_CURRENT_USER\Software\Microsoft\DirectX\UserGpuPreferences
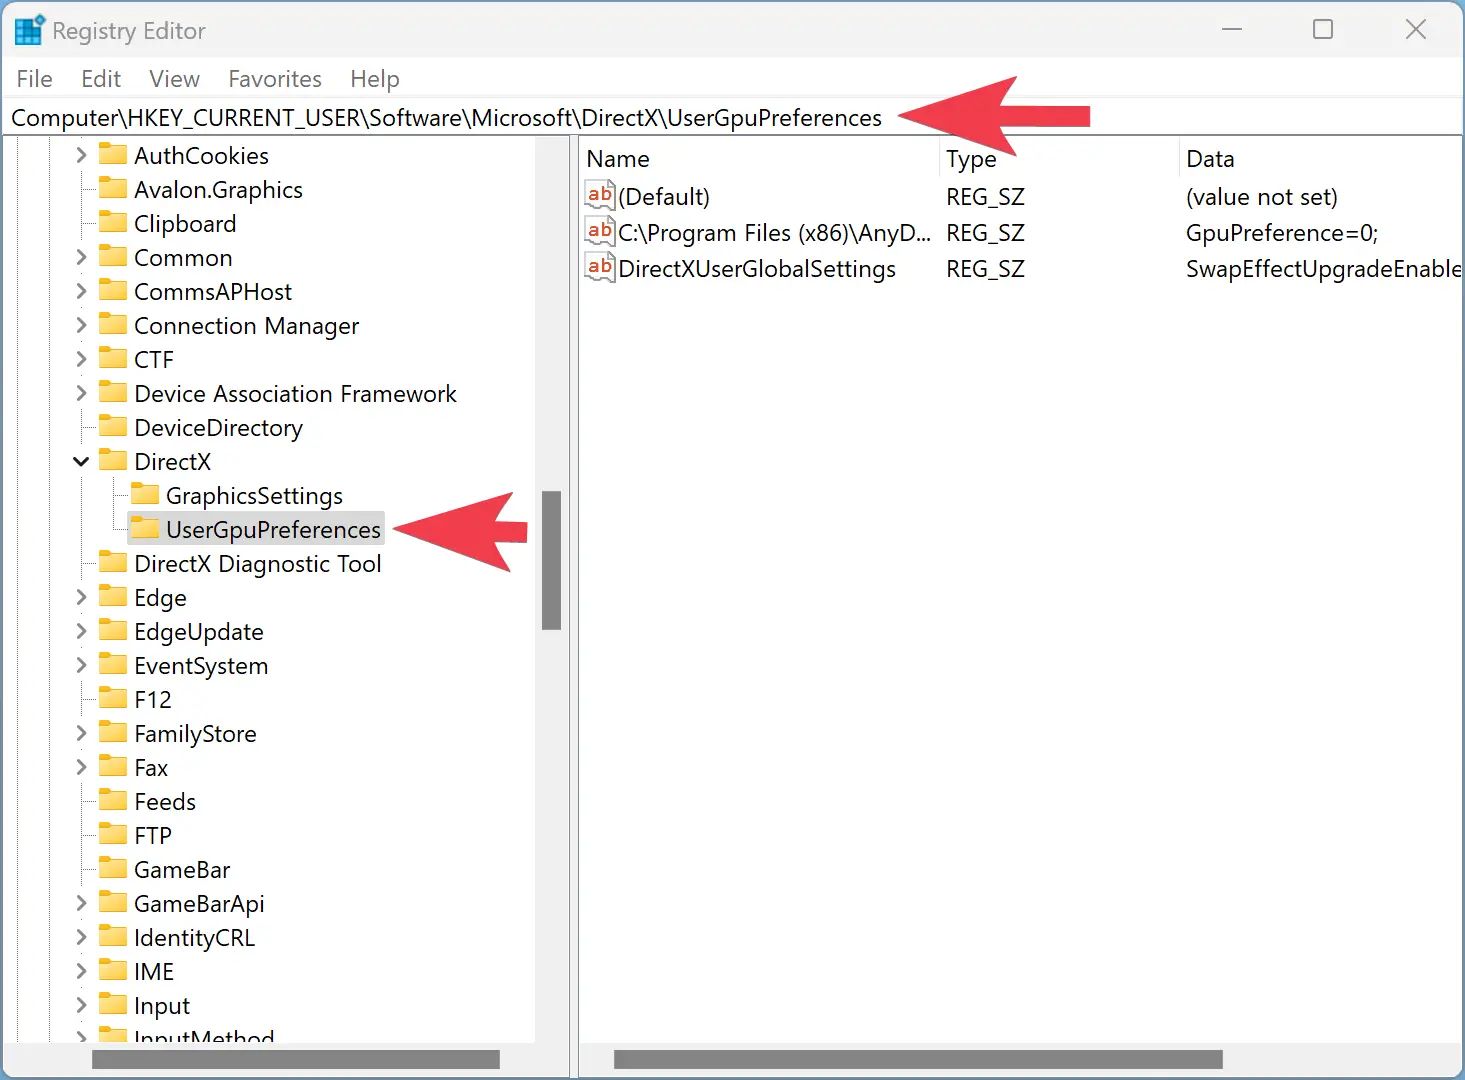
Step 8. On the right side of the UserGpuPreferences folder, double-click the REG_String DirectXUserGlobalSettings and set the Value data as SwapEffectUpgradeEnable=1;.
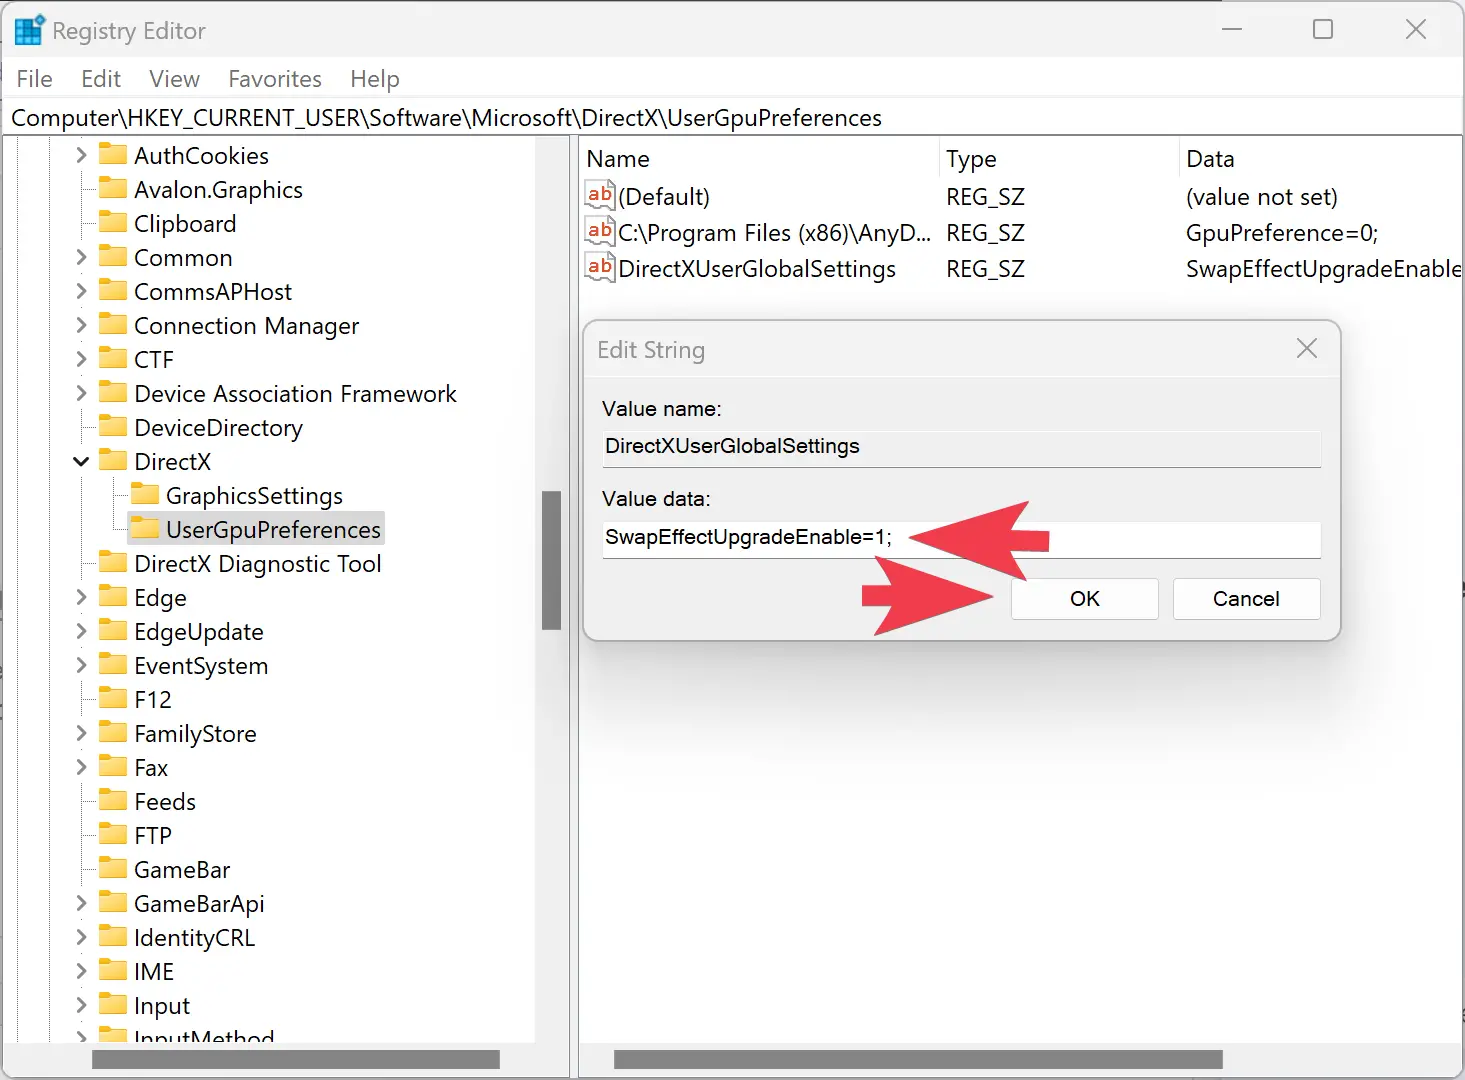
Step 9. Click OK.
Step 10. Restart your computer.
To disable the “Optimizations for windowed games,” set Value data 0 for SwapEffectUpgradeCache in step 5 above and SwapEffectUpgradeEnable=0; for DirectXUserGlobalSettings in step 8 above.
Conclusion
In conclusion, Microsoft has added a new feature to Windows 11 called “Optimizations for windowed games.” This feature is designed to improve the performance of games that run in windowed mode on Windows 11. With this feature, users can enable or disable the optimizations for all or specific windowed games or apps. In addition, users can also use the Registry Editor to enable or disable this feature. These steps will help users to fix issues such as lagging and FPS drops while playing games on their Windows 11 computers. Overall, this is a great addition to Windows 11 that will enhance the gaming experience for users.