Windows may crash at any time, so it is a good idea to create a system image backup just after the installation of Windows. If you have not generated the backup yet, it is high time to make a system image backup. This system image will have a complete backup of your PC’s hard drive, including system files. If you have a system image backup and your Windows crashes, you can restore your full PC at a point in time when the image was created. Usually, a one-time generating system image is enough after installing a new Windows.
Windows 11 comes with a built-in way to create a system image backup. In this gearupwindows article, we will see how to do it.
How to Create Full System Backup in Windows 11?
Follow these steps to create Full System Backup in Windows 11:-
Step 1. Press Windows + I shortcut keys to open the Settings app.

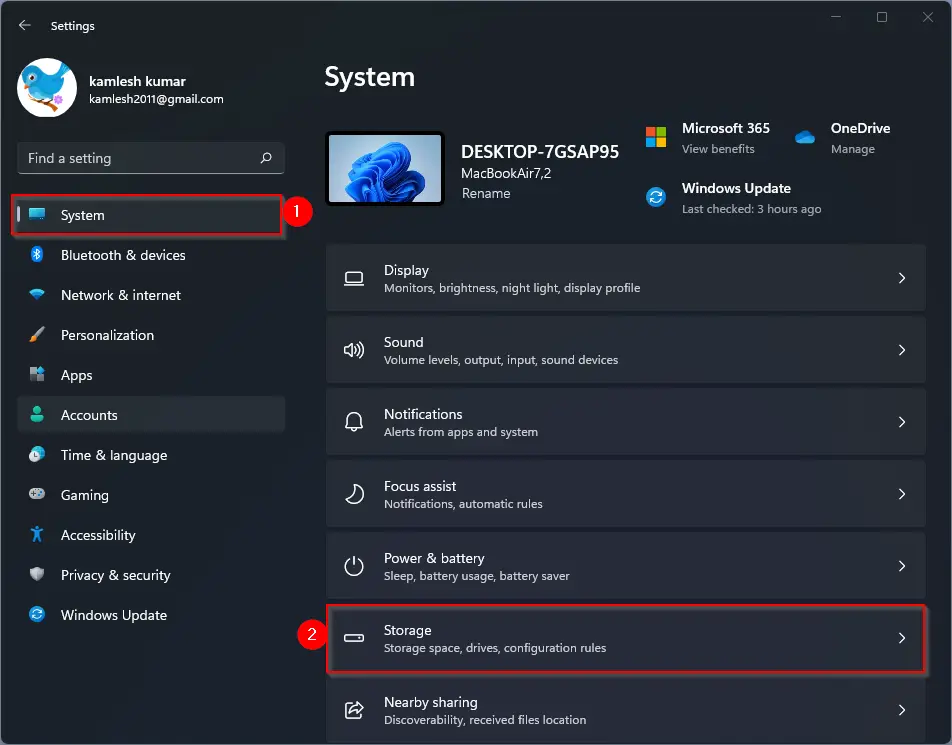
Step 2. Select System in the Windows Settings that opens.
Step 3. On the right side pane of System, click Storage.
Step 4. On the Storage settings, under the Storage management section, select Advanced storage settings to expand it.
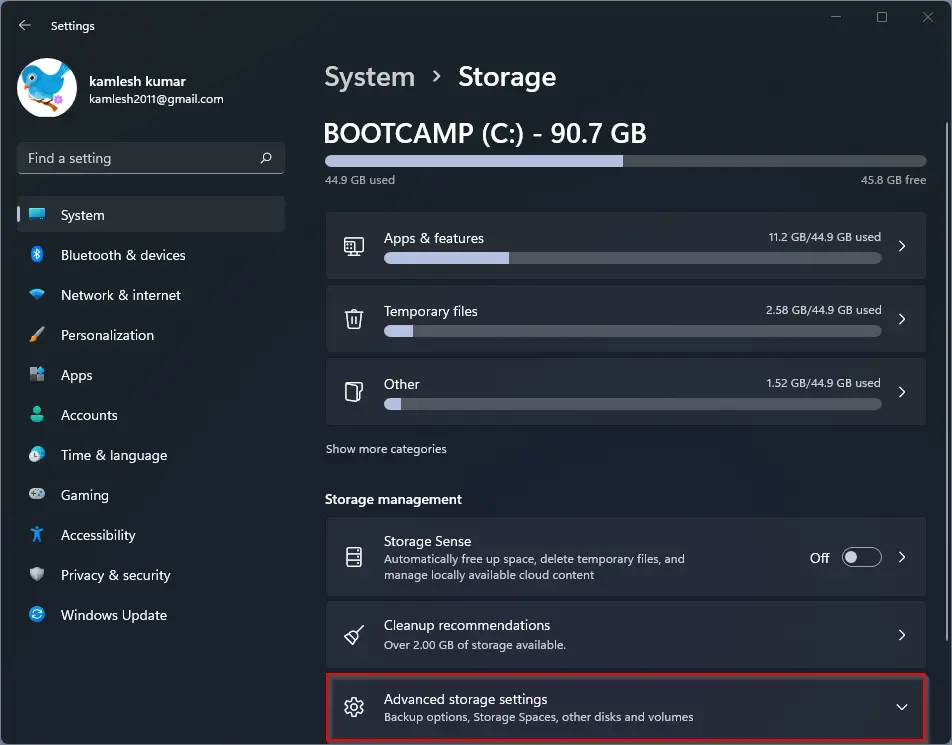
Step 5. When you see several options under “Advanced storage settings,” click the Backup options.
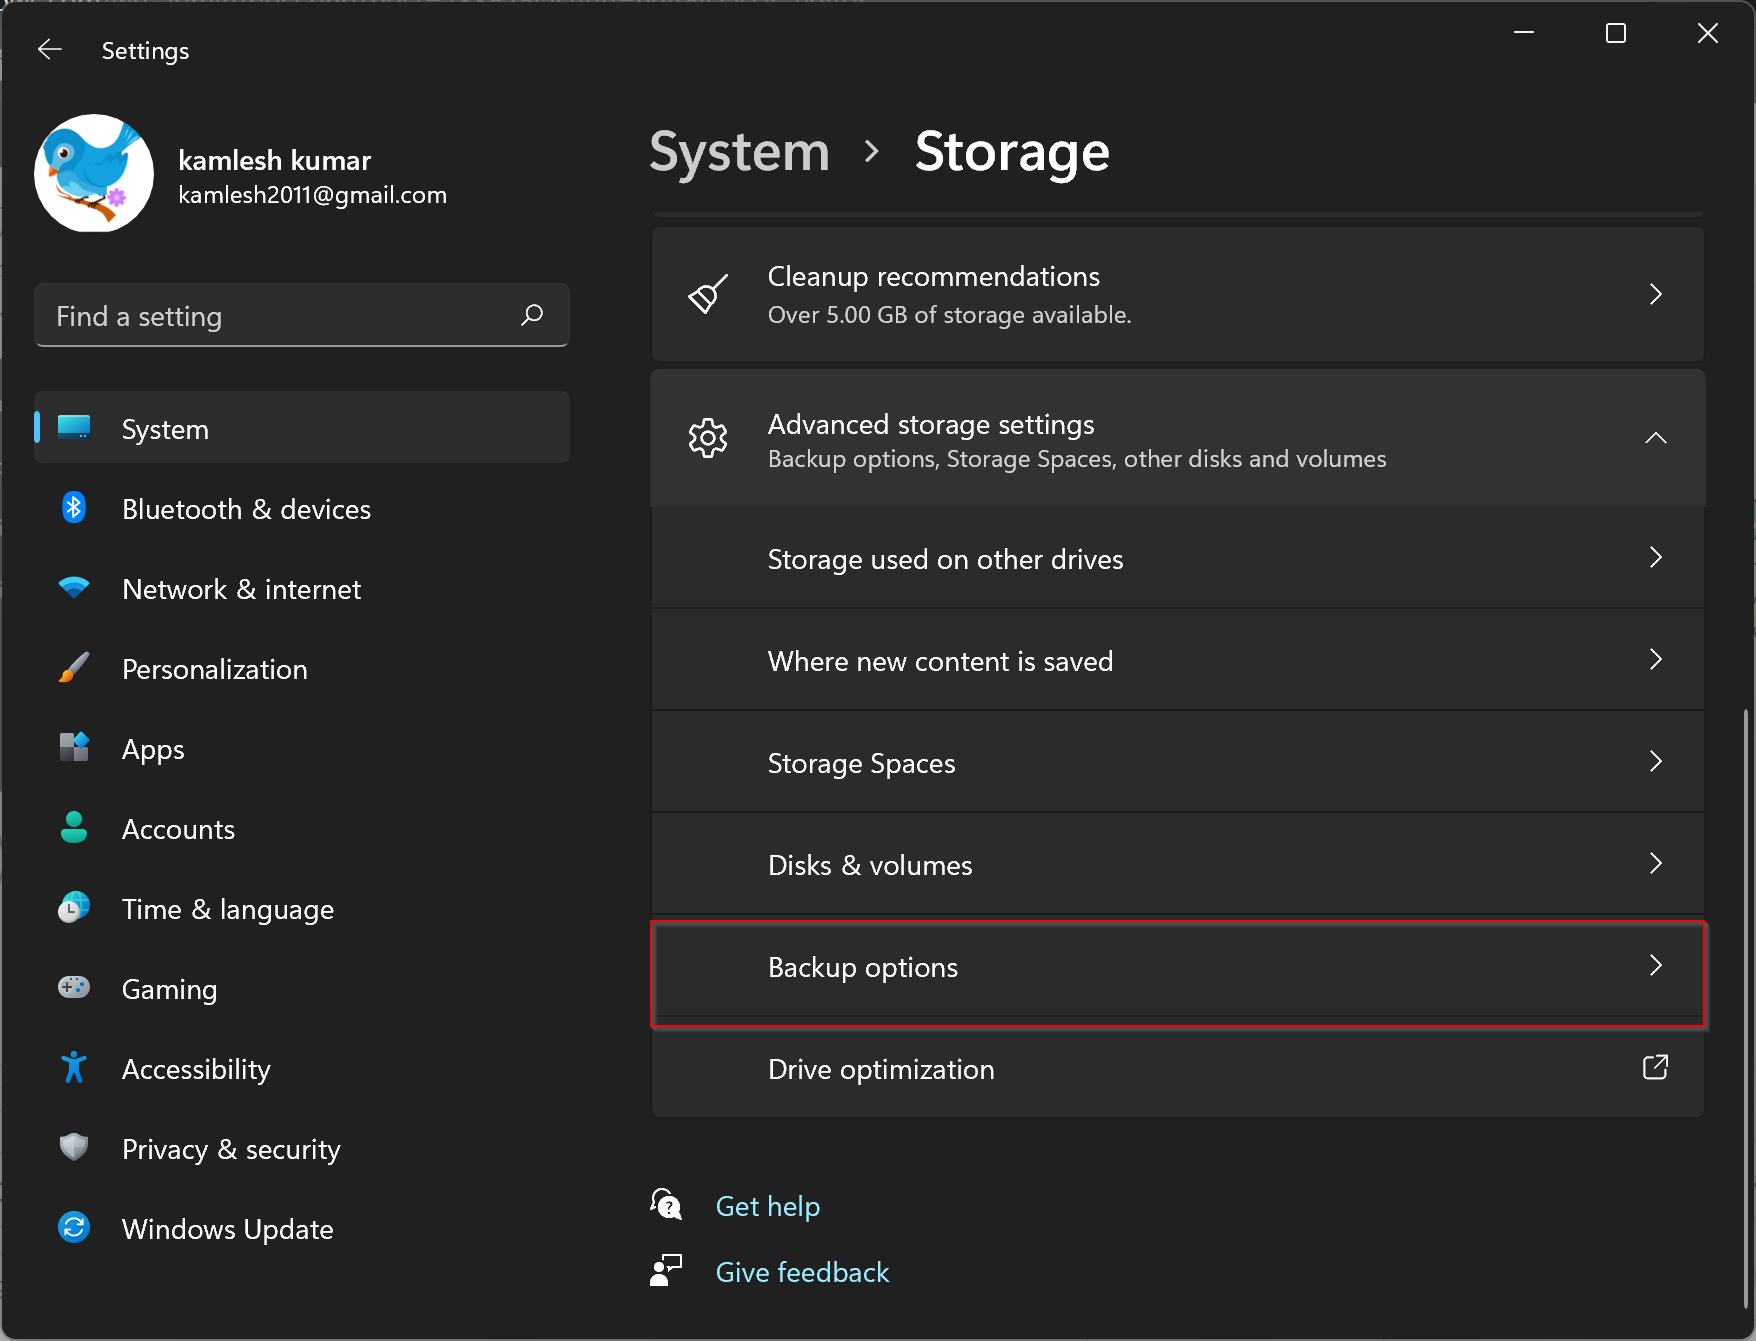
Step 6. In the next window, click the link “Backup and Restore (Windows 7).” Alternatively, you can also open the “Backup and Restore (Windows 7)” window from the Control Panel. To do that, open Control Panel and search for backup.
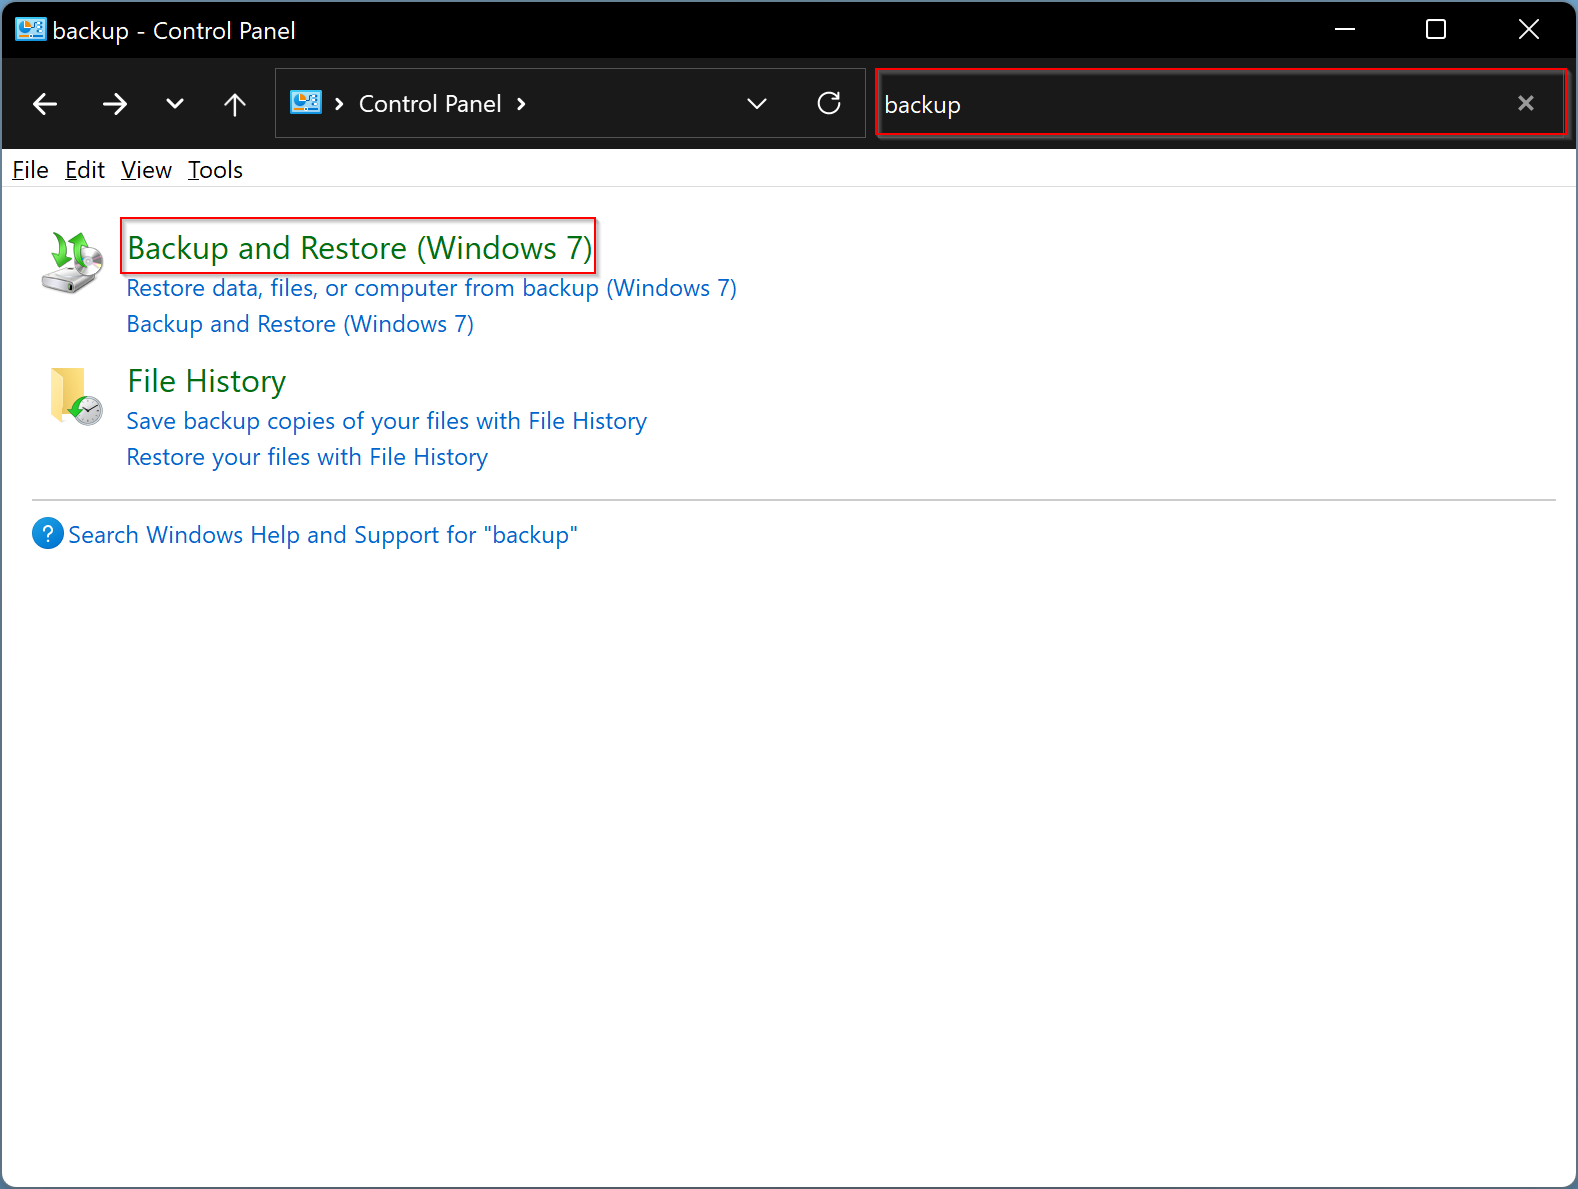
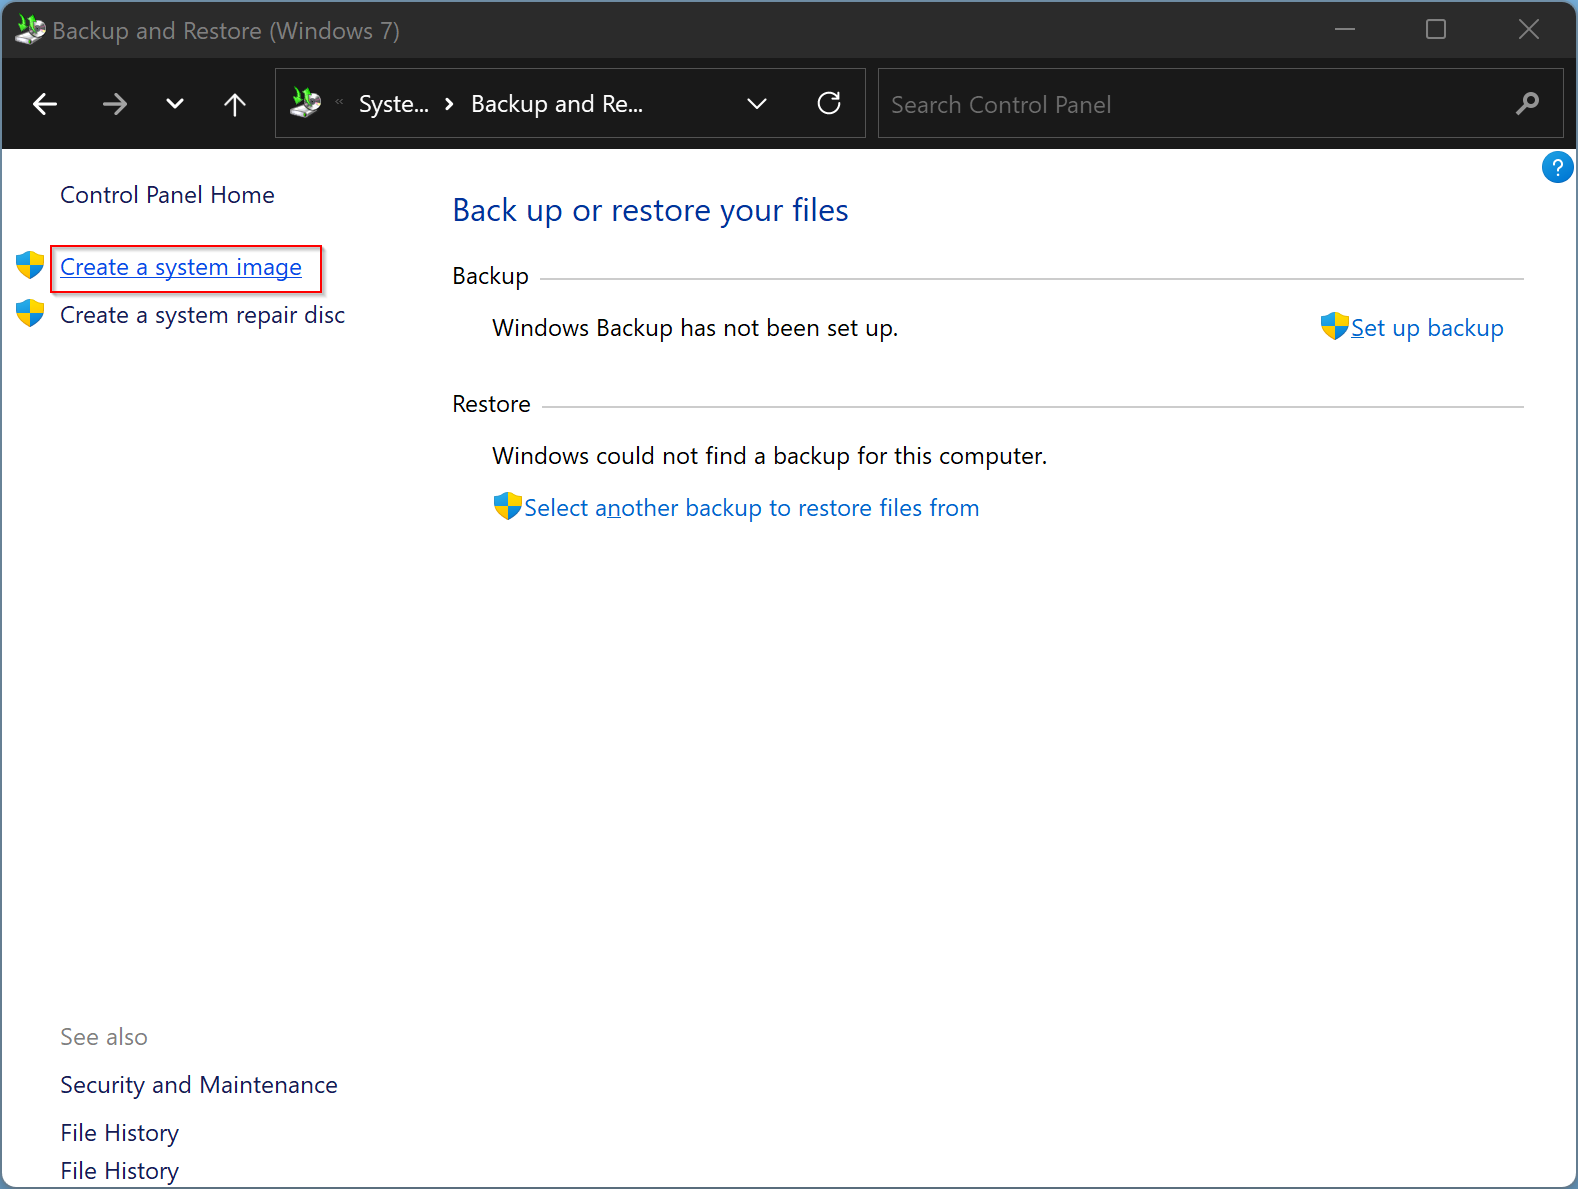
Step 7. Click Backup and Restore (Windows 7).
Step 8. From the left side pane, click the link Create a system image.
Step 9. Then, select the destination drive to save the system image. Although creating a system image on the internal hard disk is possible, it is always recommended to make a backup on an external hard disk or a network location. For my example, we will use an external hard disk to make a system backup.
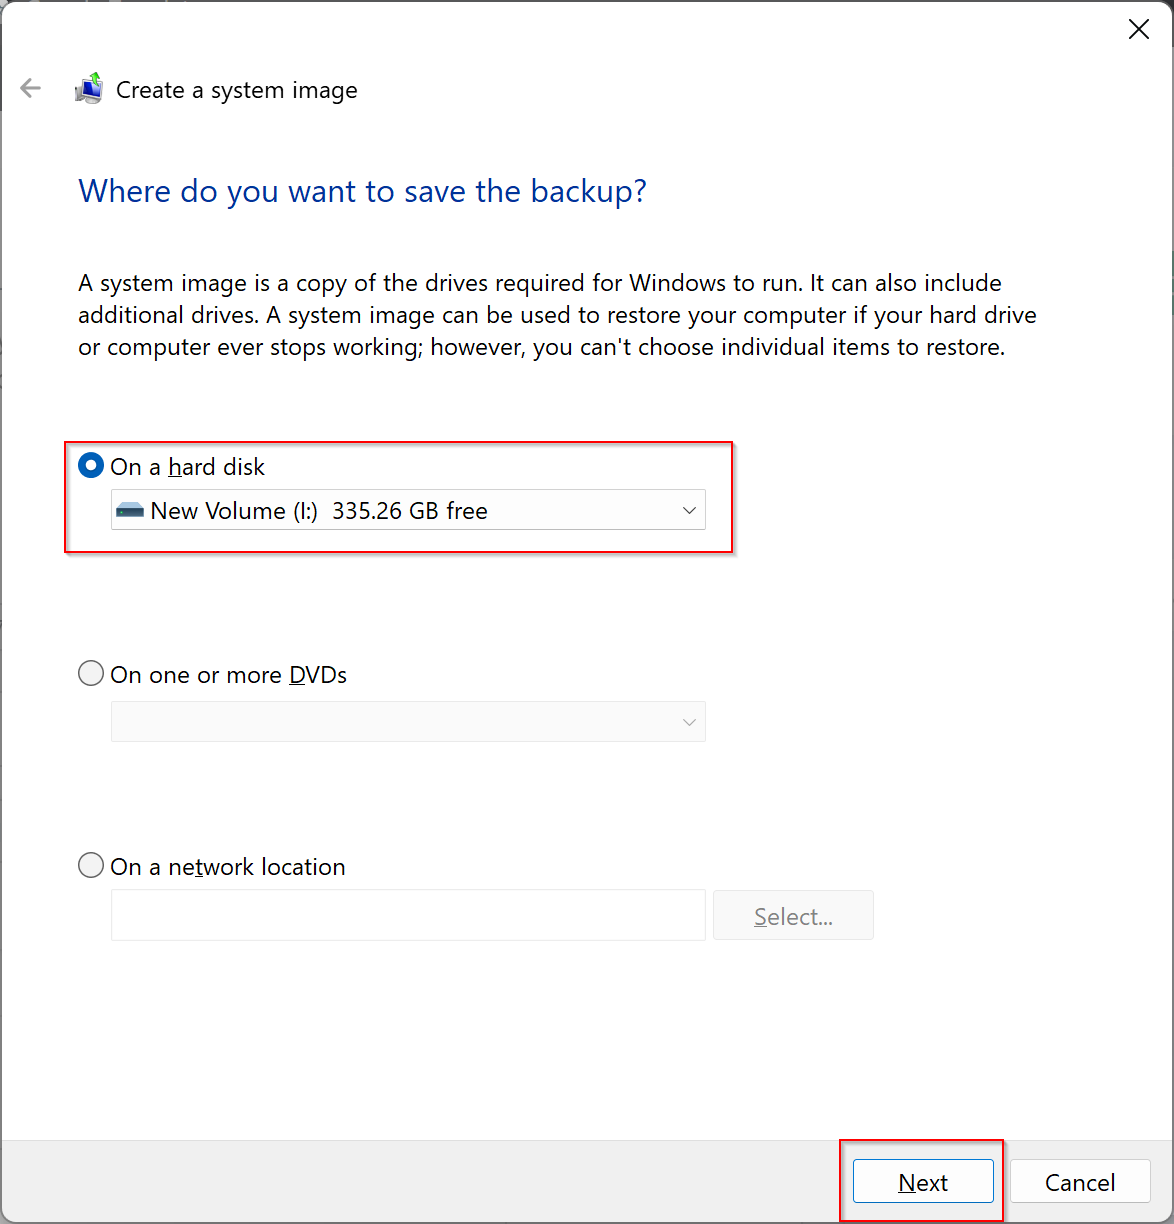
Step 10. Select an external drive and then click the Next button.
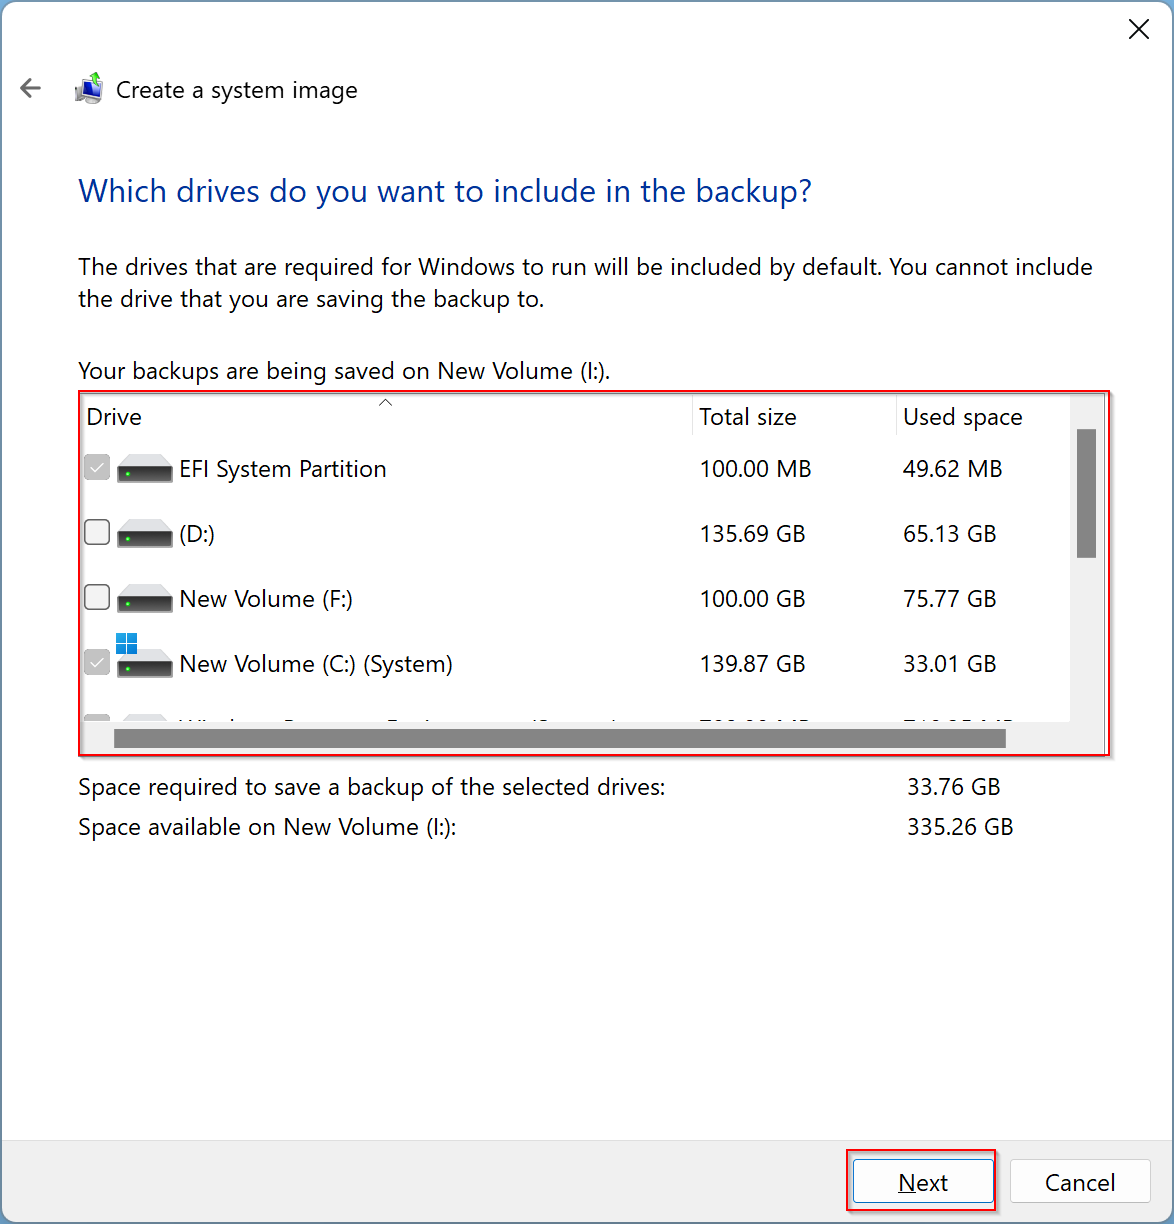
Step 11. By default, system drives will be selected; if you wish, you can also check other internal drives in the backup. When done, click the Next button.
Step 12. Finally, click the Start backup button at the bottom of the screen.
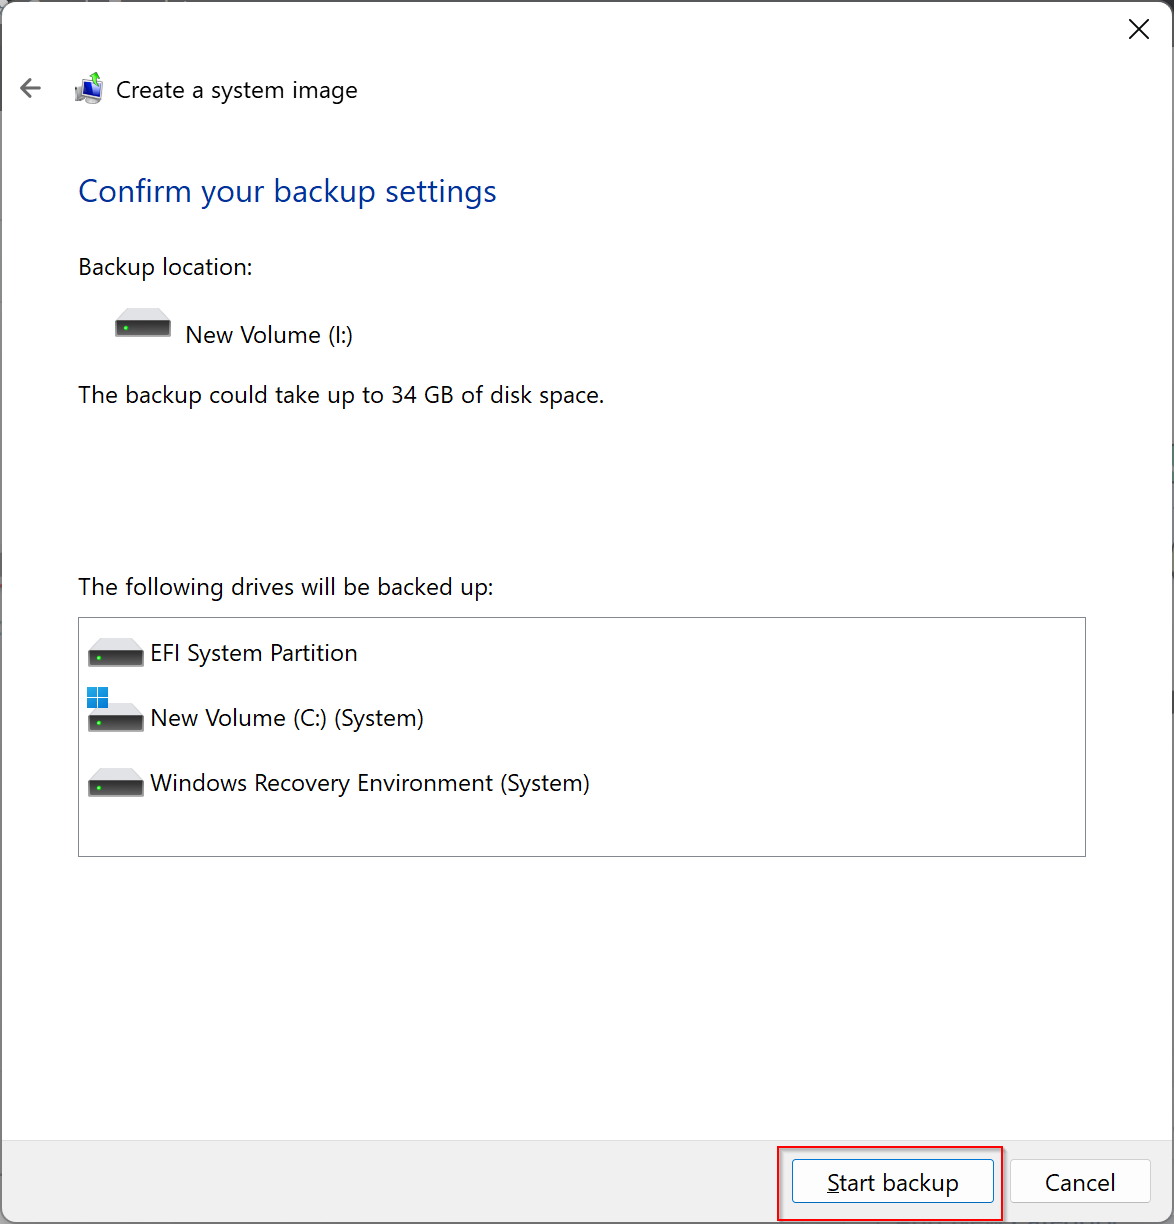
That’s it. Now system image backup will start, and it may take several minutes, depending on the size of the data.
Conclusion
In conclusion, creating a system image backup is a crucial step in safeguarding your computer’s data and ensuring that you can recover your system in the event of a crash. With the built-in backup feature in Windows 11, creating a system image backup has become much easier. By following the simple steps outlined above, you can create a full system backup in no time. Remember to choose an external hard disk or network location to store the backup to ensure that your data is safe from any potential hardware failures. By taking the time to create a system image backup, you can have peace of mind knowing that your data is protected and that you can quickly restore your system in case of a disaster.