Do you need to send a lot of postage letters? You don’t need to write addresses by hand—you can create a label in Word to save time. In general, a label is a sticker with something written on it. These stickers are often glued to envelopes with printed information like addresses. Labels can have either the sender’s or recipient’s address. You can also use Word to design name tags and product labels.
To get started, use the gearupwindows steps below to learn how to create and print labels in Word.
In MS Word, how to create and print labels?
Here are the steps you need to follow in order to create and print labels in MS Word:-
Step 1. Open a new Microsoft Word document.
Step 2. Then, click on Mailings in the top menu bar.
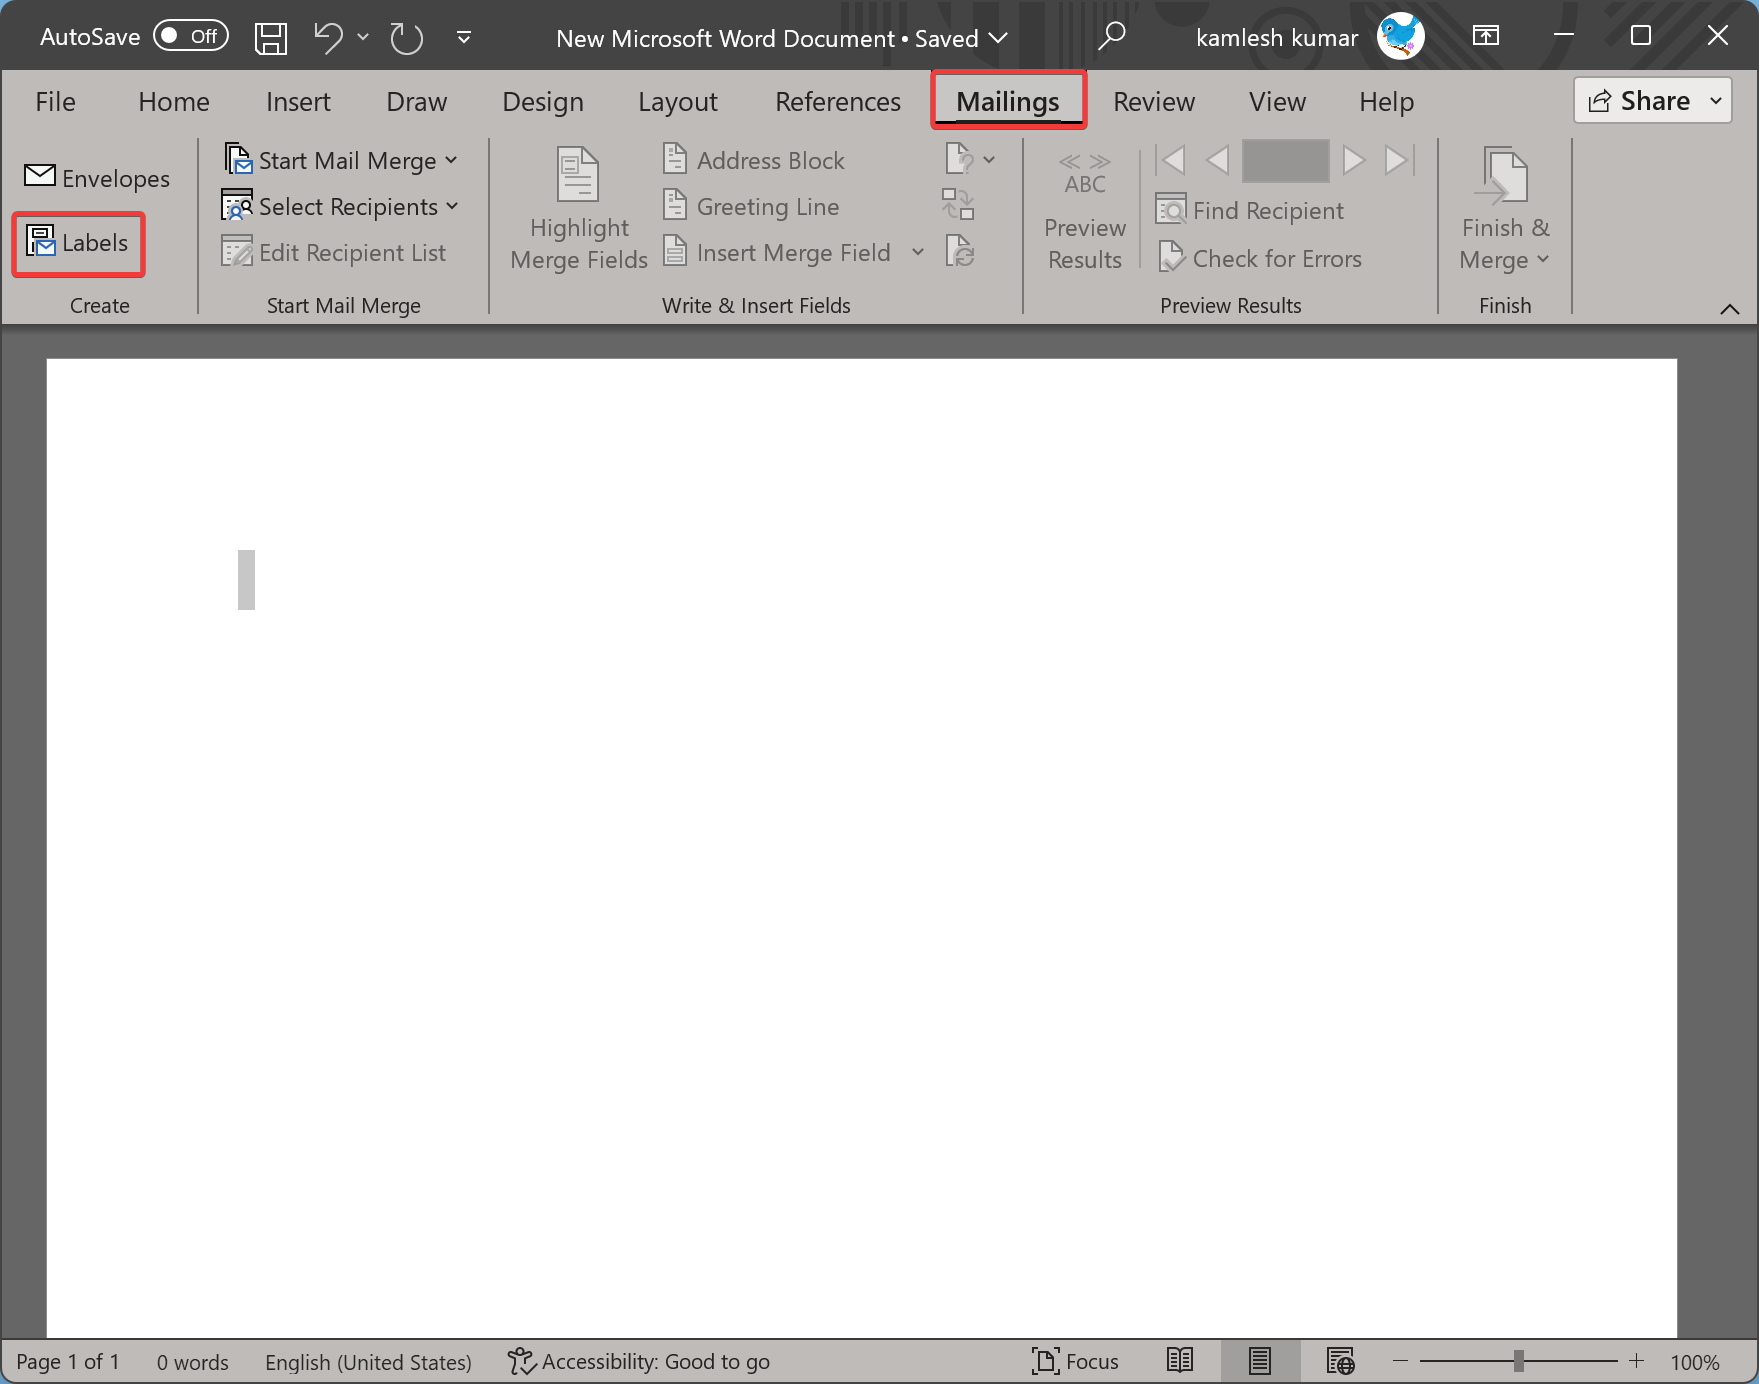
Step 3. After that, click on the Labels button to open the Envelopes and Labels dialog.
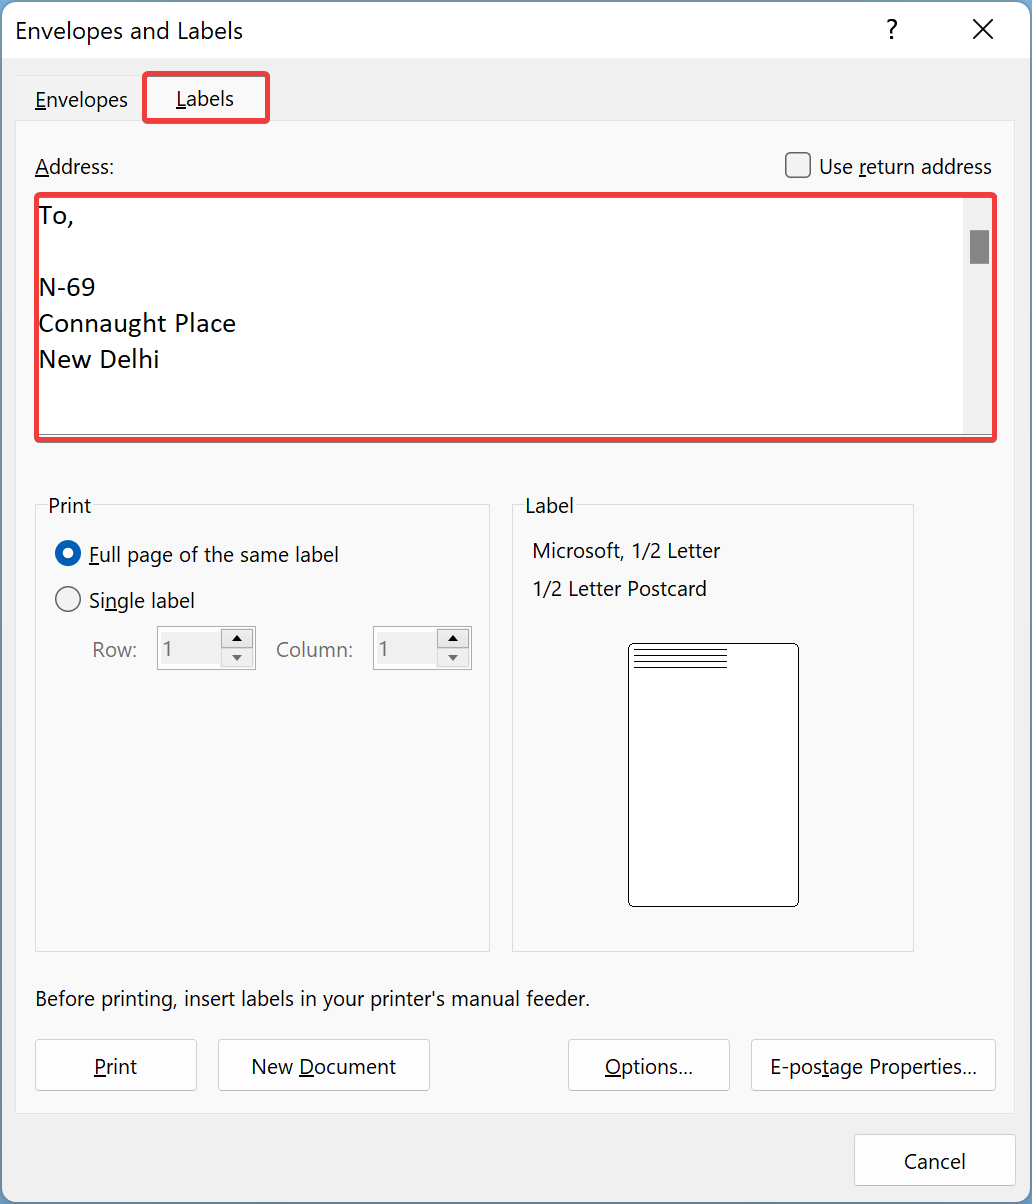
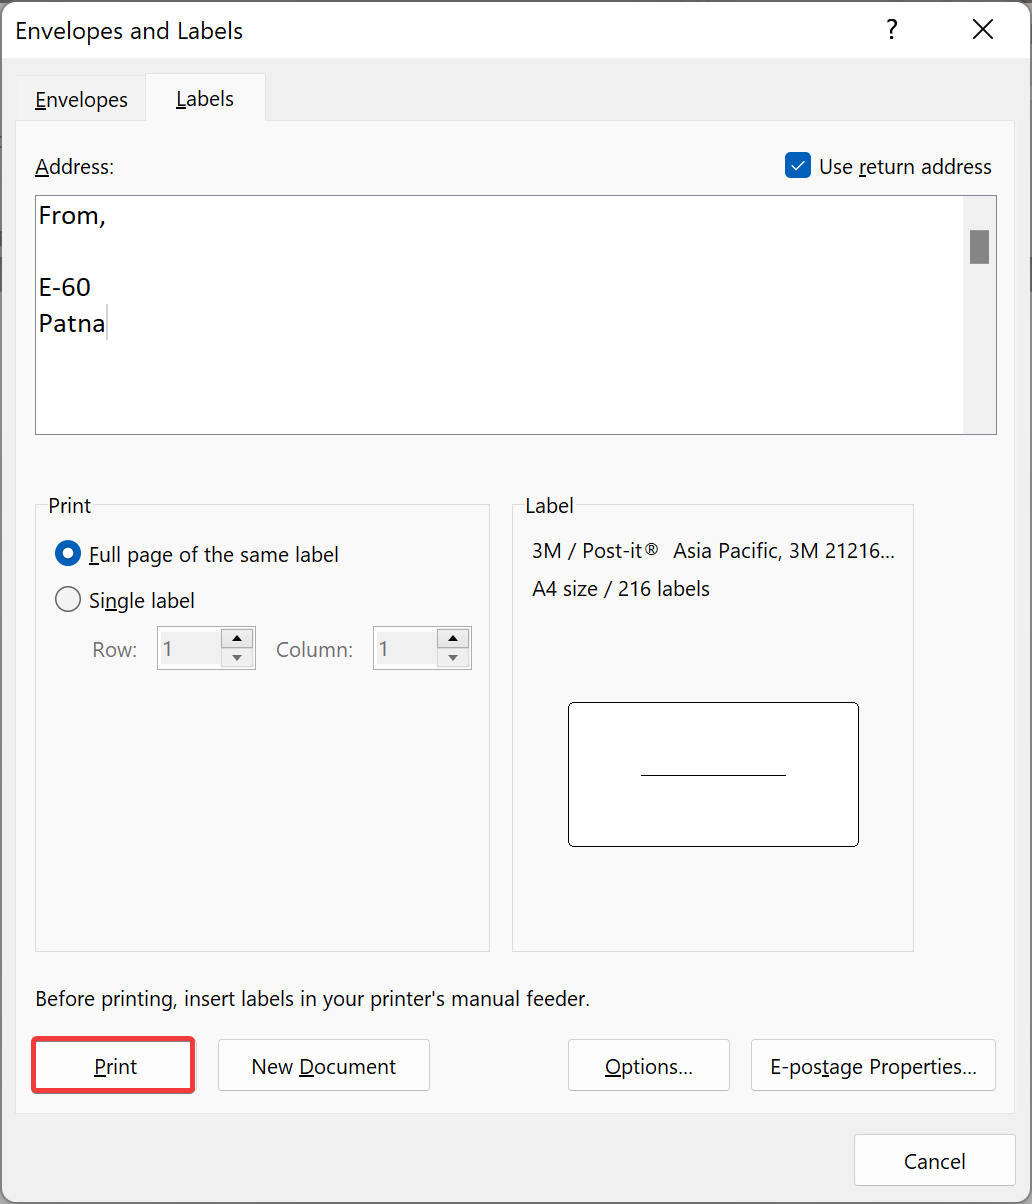
Step 4. Select the Labels tab in the Envelopes and Labels dialog box.
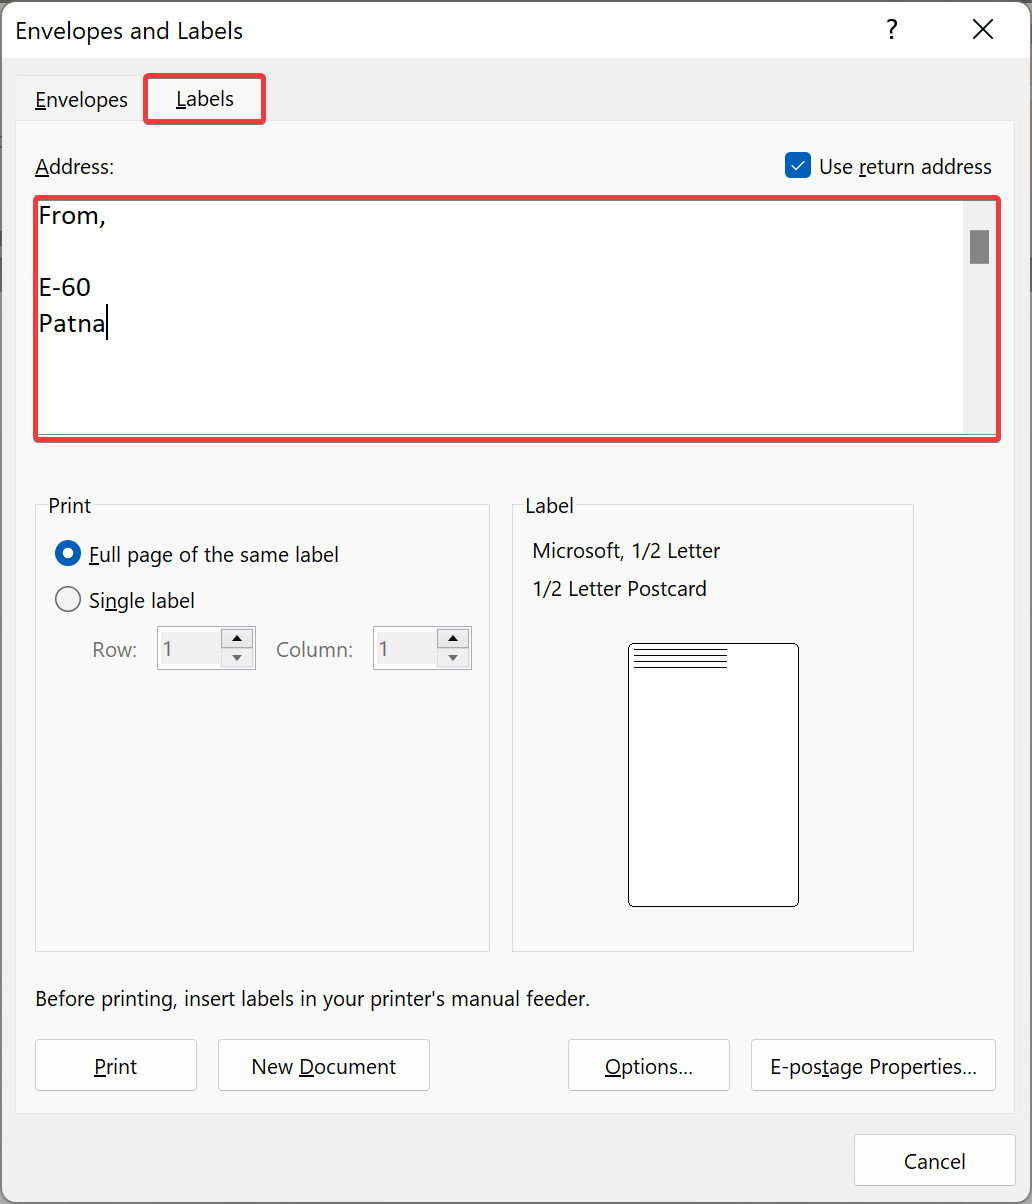
Step 5. However, if you have already created envelopes earlier, and wish to use the return address (sender’s address), simply click on the Use return address checkbox. Now, type the return address in the Address box.
Step 6. After entering the correct address, click on “Full page of the same label” in the Print section if you want to print only one label. On the other hand, if you want to print several labels on one page, select the number of rows and columns you need by clicking on the Single label option.

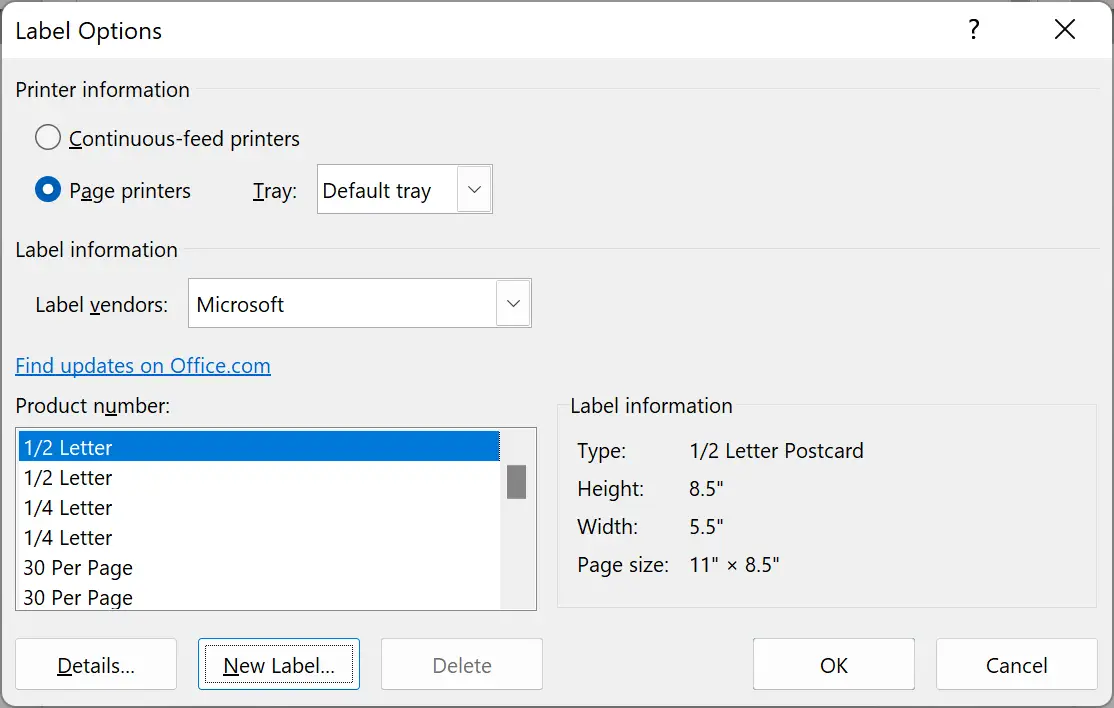
Step 7. Now, you need to set up the paper size. The following tips will help you customize your labels and get the most out of them:-
- Select Options to open the Label Options dialog. Under the Printer Information section, you can select “Continuous-feed printers” or “Page printers,” and also the type of Tray for the printing.
- Sticky papers are available from several vendors; click on the down arrow on “Label vendors,” and choose the vendor you wish to select.
- Depending on the vendor you selected, you can select the “Product number” from their list.
- Choosing the paper size for printing labels is done here. Label information is displayed on the right side for a particular product number.
- The Details tab displays additional settings for printing labels, including measurements.
- When you click on the New Label button, Word allows you to define your own measurements, which you can adjust to your preference.
- If you are satisfied with your settings, click OK to exit the dialog and return to the Envelopes and Labels window.
Step 8. Make sure your printer is turned on and label papers are in your printer. Click the Print button to begin printing.
That’s it.
Conclusion
In conclusion, creating and printing labels in MS Word is a simple and efficient way to save time when sending a lot of postage letters. With just a few easy steps, you can design and print stickers with sender or recipient addresses, name tags, or product labels. Following the guidelines mentioned above, you can customize the label size and type, select the printer information and paper size, and print your labels with ease. By using Word to create and print labels, you can streamline your mailing process and ensure that your envelopes are properly addressed, making your work more efficient and professional.