AutoText entries are a handy feature in Microsoft Office Word that allows users to insert frequently used text or graphics into their documents quickly. With AutoText, you can save time and effort by avoiding the need to type out the same content over and over again repeatedly. By creating an AutoText entry, you can store a block of text, a sentence, or even an entire document and then insert it into any new document with just a few clicks.
In this guide, we’ll take a closer look at how to create and use AutoText entries in Microsoft Office Word. We’ll walk you through the process of inserting an AutoText entry into your document and how to make adjustments to the entry as needed. So, whether you’re a frequent Word user or just getting started, this guide will help you streamline your workflow and save valuable time.
How to Create a New AutoText Entry in Microsoft Office Word Document?
Follow these steps to create a new AutoText entry in Microsoft Office Word Document:-
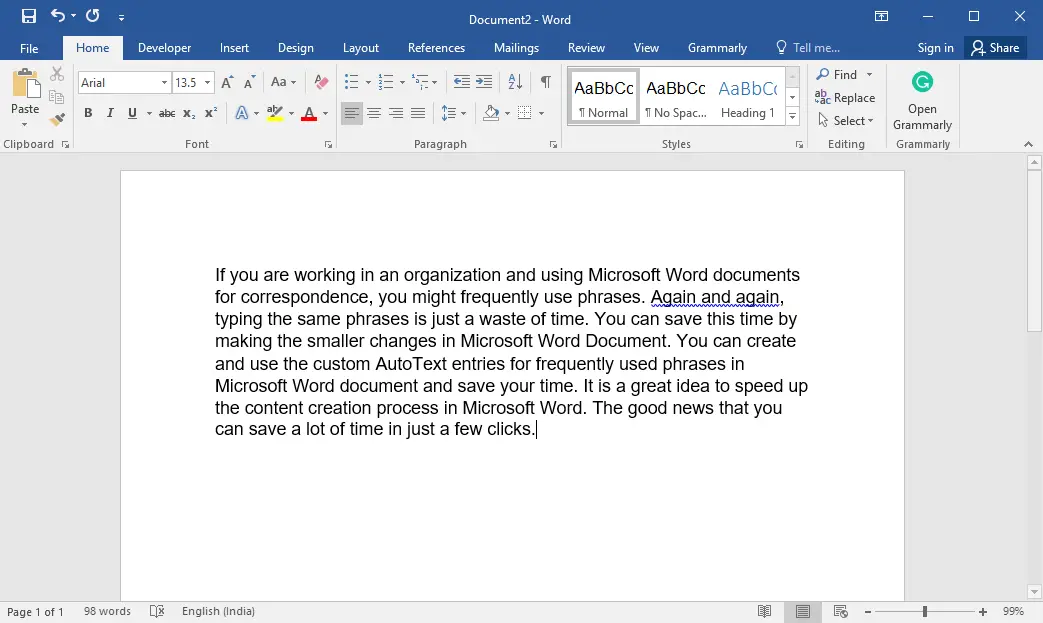
Step 1. To create a new AutoText entry in an MS Office Word document, open a blank Word document and type the content you want to use regularly.
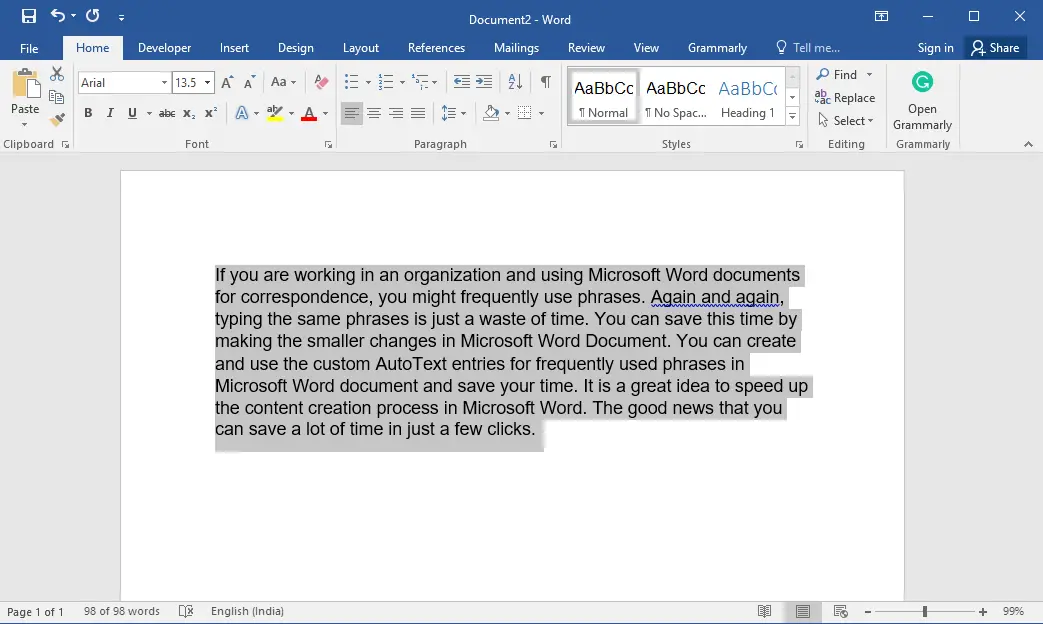
Step 2. Select all the content that you want to rewrite automatically in a new Word document.
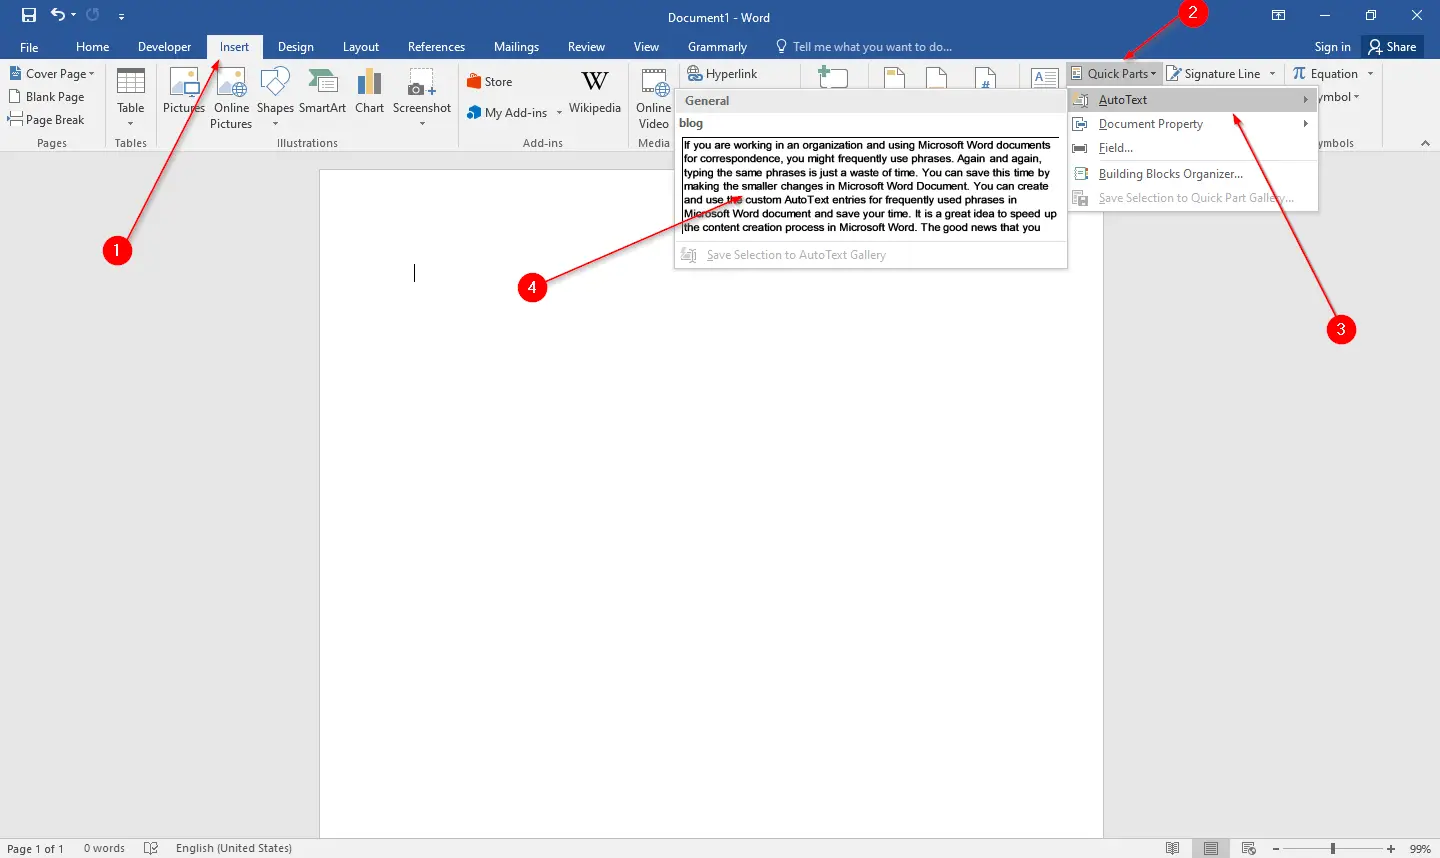
Step 3. Click on the Insert tab. From the “Text” group, click on “Quick Parts.”
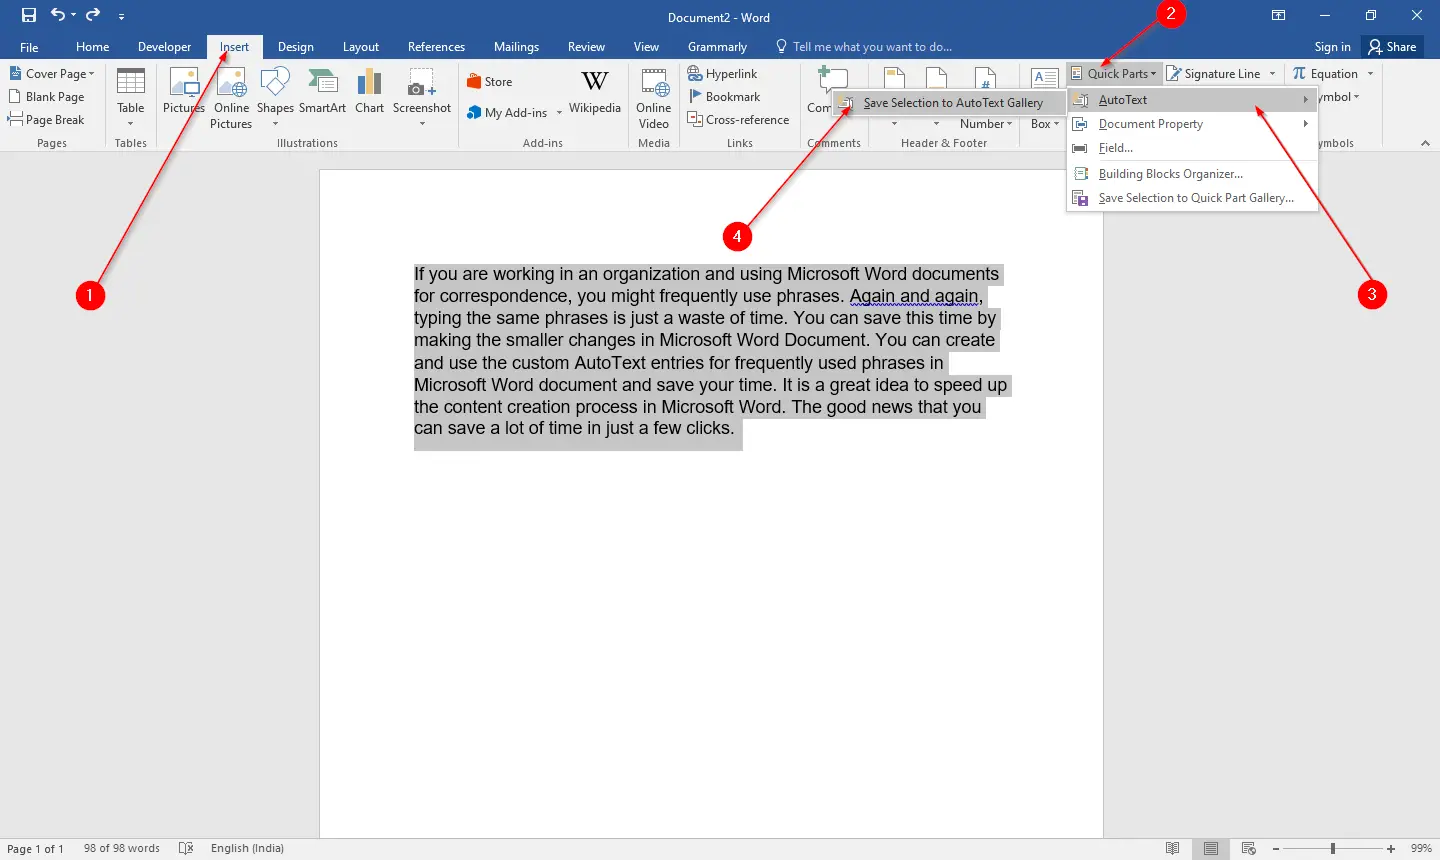
Step 4. Select “AutoText” and then click on “Save Selection to AutoText Gallery.”
Step 5. A new dialog box, “Create New Building Block,” will open.
Alternatively, by pressing Alt + F3 keys from the keyboard “Create New Building Block” window will open.
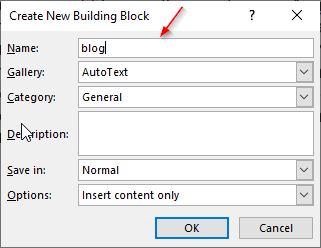
Step 6. Write a useful name on the Name field that you can remember.
Step 7. Finally, click the OK button to save the new AutoText entry.
Once you click on the OK button, your AutoText entry is now saved.
How to Use an AutoText Entry in Microsoft Office Word Document?
Follow these steps to use an AutoText entry in Microsoft Office Word Document:-
Step 1. To use your AutoText entry, open an MS Word document. Place your cursor where you want to insert the text in your Word document. Navigate to the “Insert” tab and click the “Quick Parts” icon in the “Text” group. Then, select AutoText.
Step 2. A list of AutoText entries appears; select the one you want to use. Since we have created only one AutoText entry with the name blog, it appears there.
Step 3. Click on the AutoText entry, and that content will be immediately copied into your Word document with the same formatting.
Alternatively, type the name of the AutoText entry on an MS Word document where you want to paste the content. Once you have typed the name of the AutoText entry, press Enter or F3 from the keyboard (In MS Office 2016, by pressing the Enter/F3 from the keyboard, you can paste the AutoText paragraphs. However, in MS Word 2007, you need to press F3 by keeping the cursor within the text or beside the text.). For my example, we have created an AutoText entry with the name of the blog. We will just write the blog and press Enter from the keyboard. The whole paragraph I wrote on the blog AutoText will be copied into the MS Word Document immediately.
How to Delete an AutoText Entry in Microsoft Office Word Document?
Follow these steps to delete an AutoText entry in Microsoft Office Word Document:-
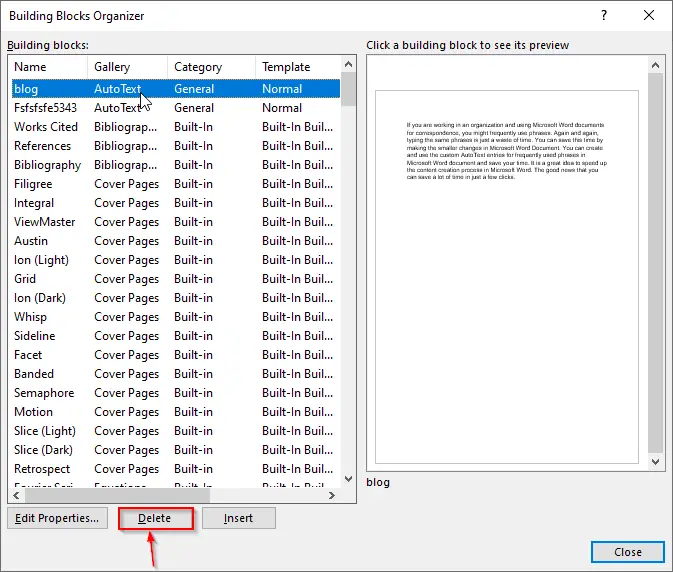
Step 1. To delete an AutoText entry from the Microsoft Office Word document, open an MS Word document.
Step 2. Navigate to the Insert tab, click the “Quick Parts” icon, and then hover over “AutoText.”
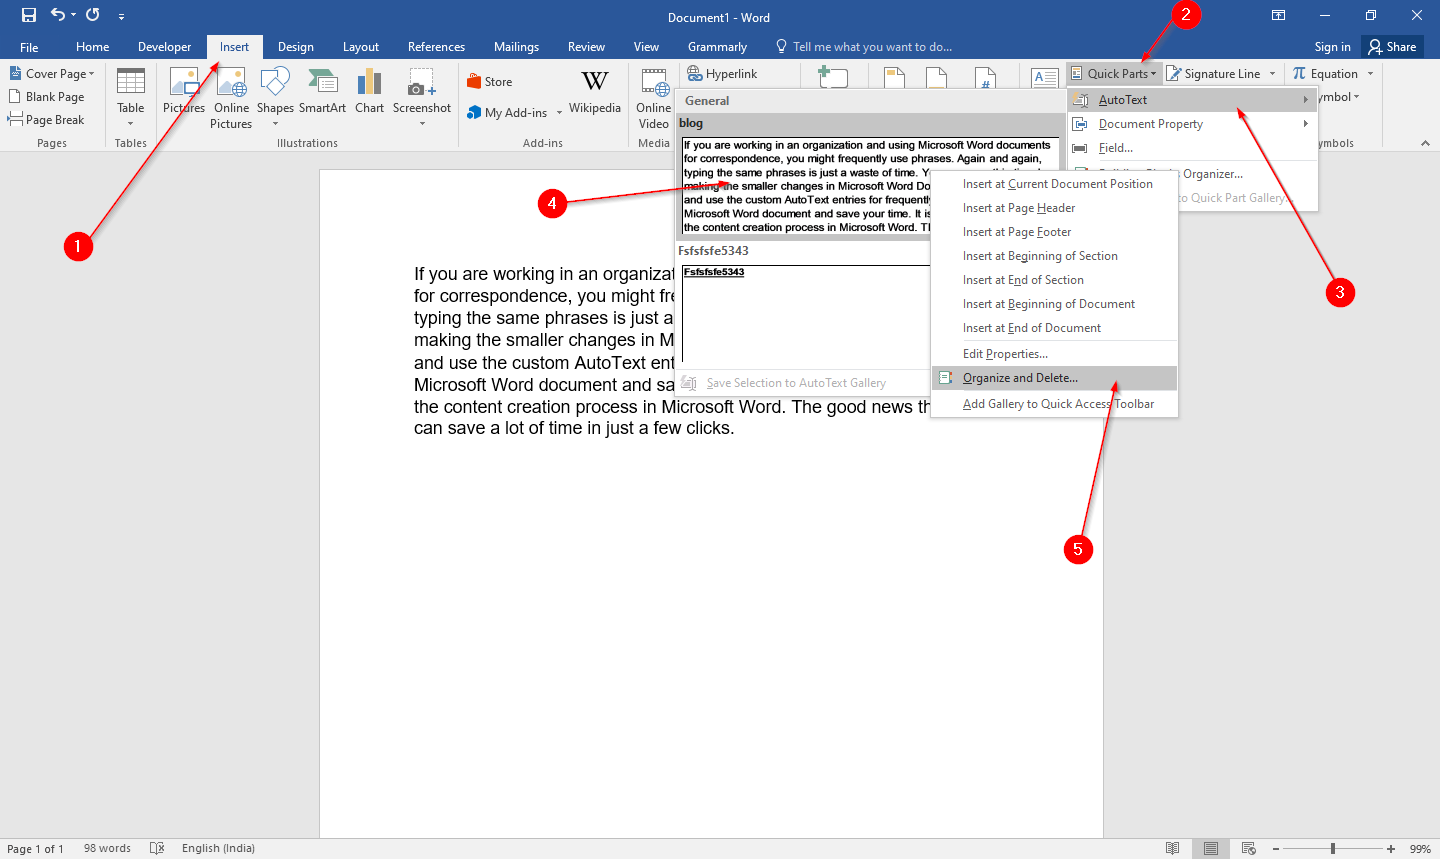
Step 3. The “Building Blocks Organizer” window will appear, and the AutoText entry you right-clicked will be highlighted.
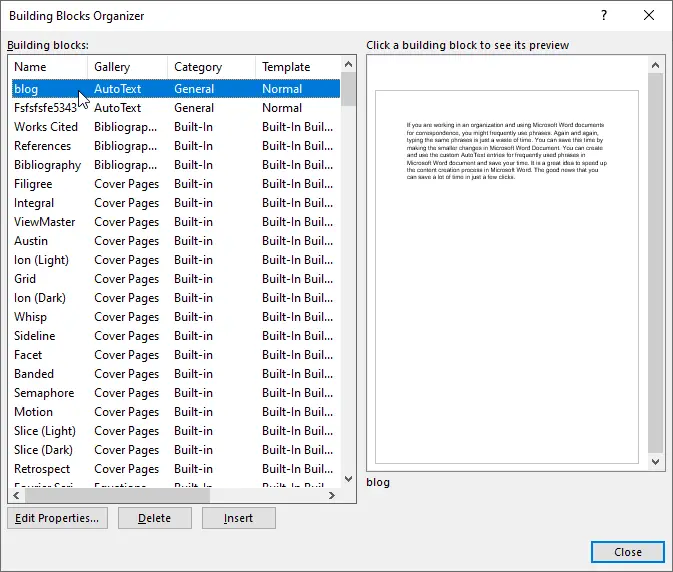
Step 4. At the bottom of the window, click the “Delete” button to delete the AutoText entry.
Step 5. A message will appear to confirm that you would like to delete this entry; click “Yes” to delete the same.
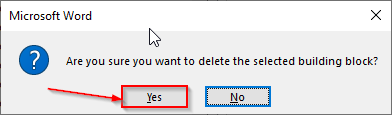
The selected AutoText entry is deleted now.
Conclusion
In conclusion, AutoText entries are an incredibly useful feature in Microsoft Office Word that can save time and increase productivity for users. By creating and saving frequently used text or graphics as AutoText entries, users can easily insert them into new documents with just a few clicks rather than having to type them out each time. With the step-by-step guide provided above, creating, using, and deleting AutoText entries in Microsoft Office Word is a simple process that anyone can master. By incorporating this feature into your workflow, you can streamline your document creation and focus on other important tasks.