In a Word document, a cross-reference allows a reader to jump directly to a particular section or object in the document by clicking on it. Cross-references are useful for referring to related information elsewhere within the document. This way, the reader can navigate through lengthy documents, and the author or reviewer can track changes to headings, pictures, or table numbers, automatically updating the document structure.
When a cross-referenced page number changes, the cross-reference will automatically update. For example, if the referenced content on page 5 moves to page 15, the cross-reference will change to “Page 15.”.
In this gearupwindows article, you’ll learn how to add or remove a cross-reference in your Word document.
How to Insert a Cross-reference in Word?
Follow these steps to add a cross-reference in Word:-
Step 1. Open your Word document.
Step 2. Click within the document where you want to add a reference.
Step 3. Click the Insert tab in the menu bar.
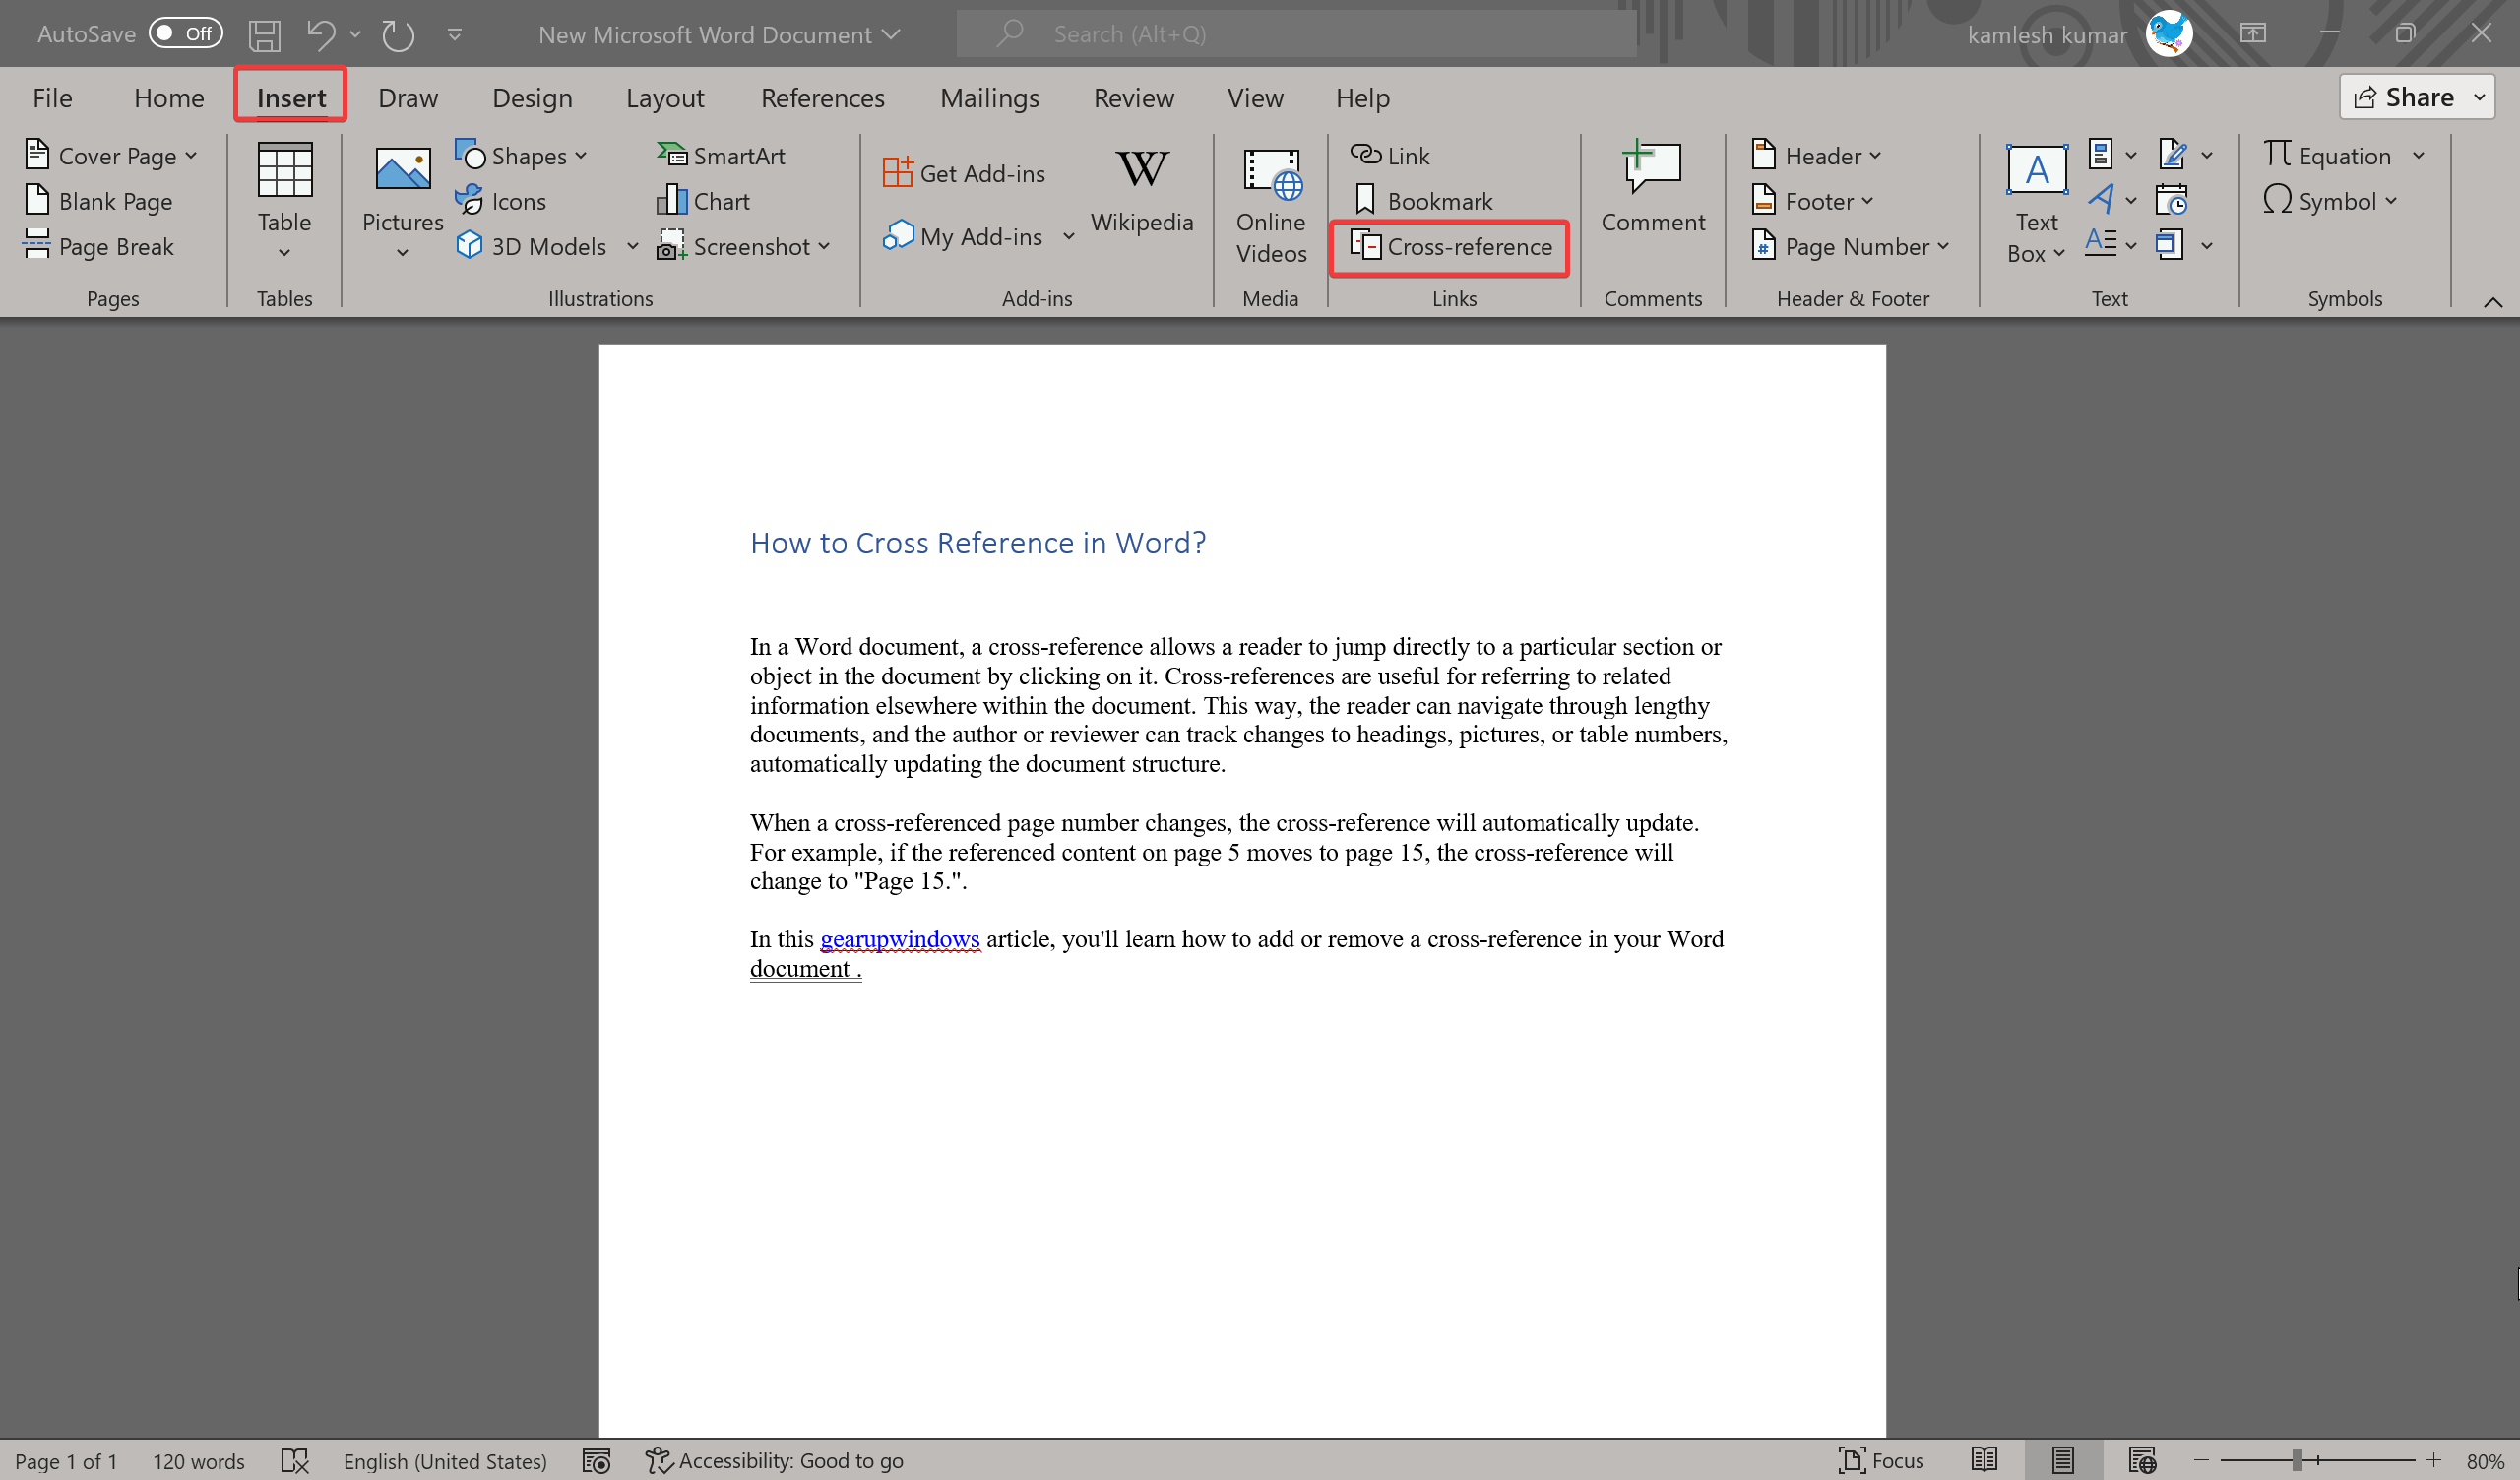
Step 4. Under the Links group, click the Cross-reference button to open the Cross-reference dialog.
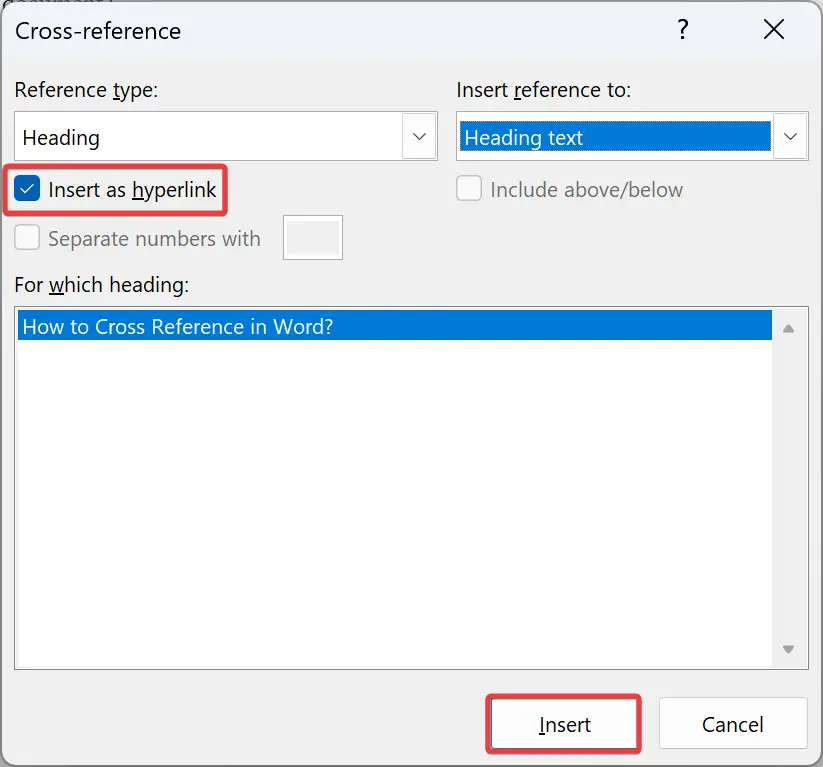
Step 5. In the Cross-Reference window, choose the “Reference type” from the drop-down list. Here, you can select a numbered item, heading, bookmark, footnote, endnote, equation, figure, or table. For this example, we’ll use a Heading.

Step 6. Next, select what the link will appear as using the “Insert reference to” drop-down box. The options that appear here depend on the “Reference type” you choose. For example, you can select the heading text, page number, heading number, etc.
Step 7. Then, check the box “Insert as hyperlink” if it’s not already marked, and then click the Insert button to add the cross-reference.
Step 8. Click the Close button.
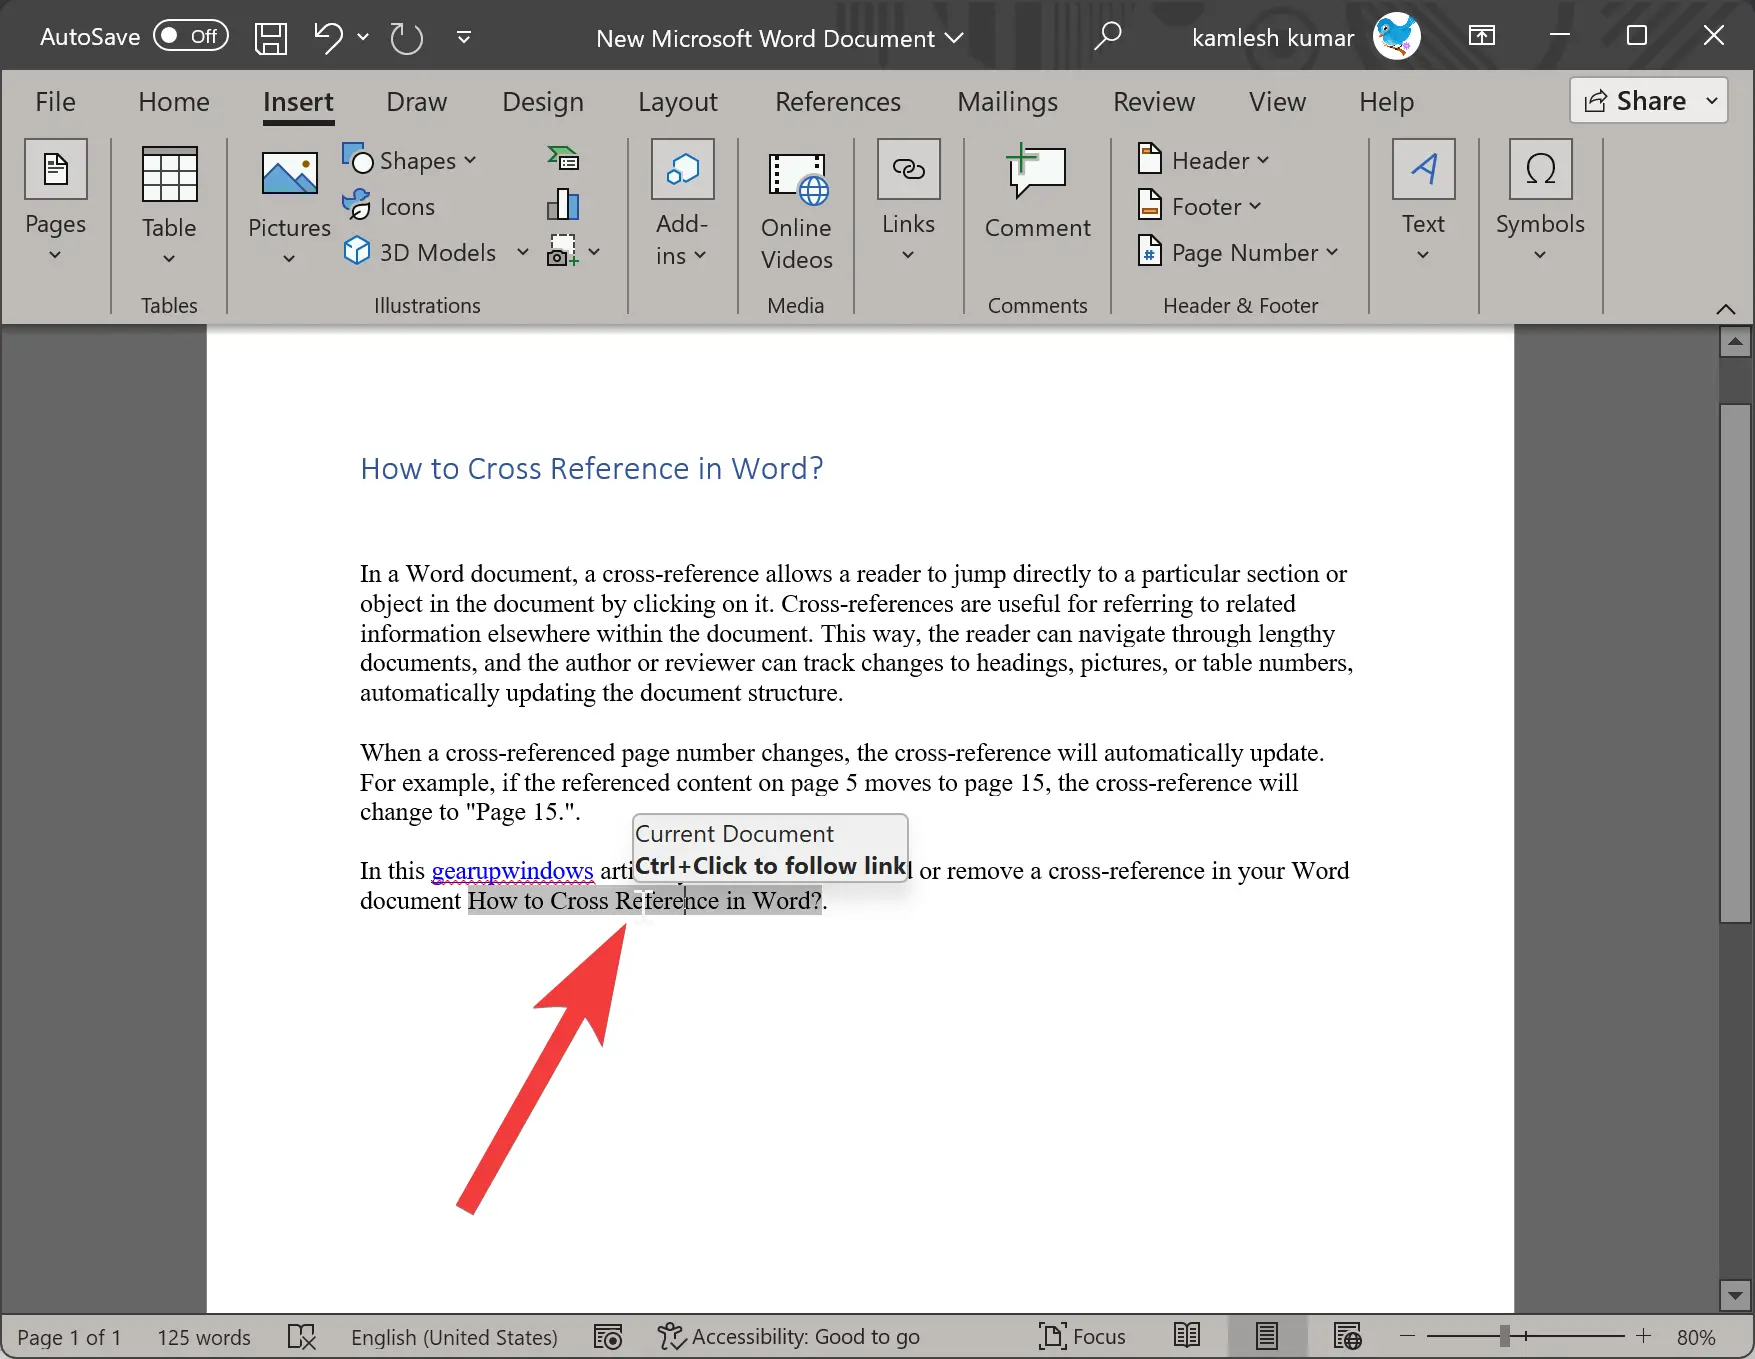
Now that hyperlinked cross-reference has been inserted into a document; you can navigate to that hyperlinked cross-reference by holding the Ctrl key and clicking it.
How to Remove a Cross-reference in Word?
Follow these steps to remove a cross-reference in Word:-
Step 1. Open your Word document.
Step 2. Select the cross-reference text.
Step 3. Press Delete to remove the cross-reference.
Conclusion
In conclusion, adding cross-references in Word documents can make it easier for readers to navigate through lengthy documents, and authors can easily update references to headings, pictures, or table numbers. With just a few clicks, you can insert a hyperlinked cross-reference that will automatically update if the referenced content changes. Conversely, removing a cross-reference in Word is also a simple process that involves selecting the text and pressing the delete key. By mastering the skill of adding and removing cross-references in Word, you can make your documents more reader-friendly and easily editable.