Windows 11 is Microsoft’s latest operating system that comes with a lot of new features and improvements. One of the features that many users have been concerned about is the automatic updates. While it’s important to keep your system up-to-date with the latest security patches and bug fixes, some users prefer to have more control over the updates.
Fortunately, Windows 11 provides several ways to disable automatic updates, and in this article, we’ll walk you through each of them. We’ll cover the settings app, group policy, and registry methods, so you can choose the one that works best for you.
How to Disable Automatic Updates on Windows 11?
Method 1: Using the Settings App
The first method to disable automatic updates on Windows 11 is by using the settings app. Here’s how to do it:-
Step 1. Open the Settings app by pressing Win + I keys.
Step 2. Click on “Windows Update” in the left-hand menu.
Step 3. In the right pane, use the drop-down menu labeled “Pause updates” and select a time frame of 1, 2, 3, 4, or 5 weeks to temporarily pause the automatic updates.
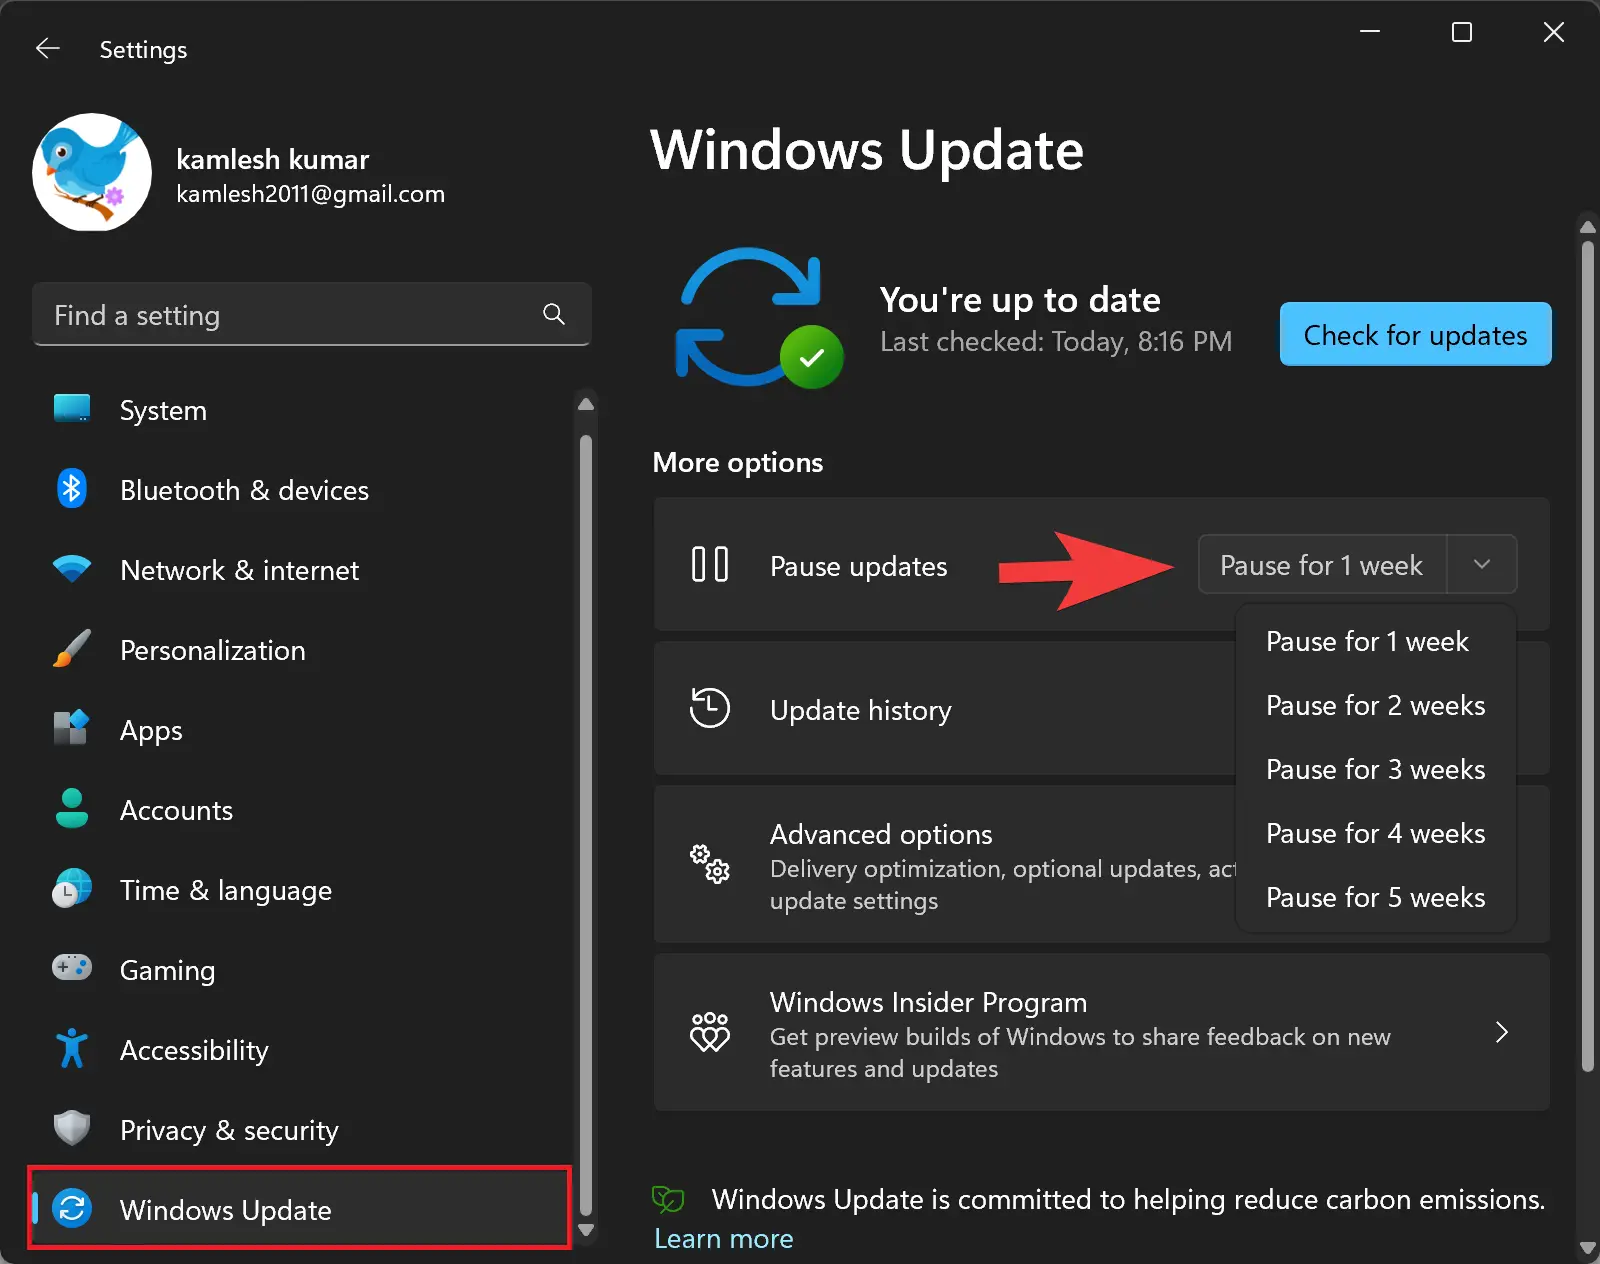
Please note that after the specified time frame, Windows 11 will resume receiving updates automatically.
Method 2: Using Group Policy
The second method to disable automatic updates on Windows 11 is by using the Group Policy Editor. This method is only available in the Windows 11 Pro, Enterprise, and Education editions. Here’s how to do it:-
Step 1. Press Win + R keys to open the Run dialog box.
Step 2. Type “gpedit.msc” and press Enter to open the Group Policy Editor.
Step 3. Navigate to the following folder in the left sidebar of Local Group Policy Editor:-
Computer Configuration > Administrative Templates > Windows Components > Windows Update > Manage end user experience
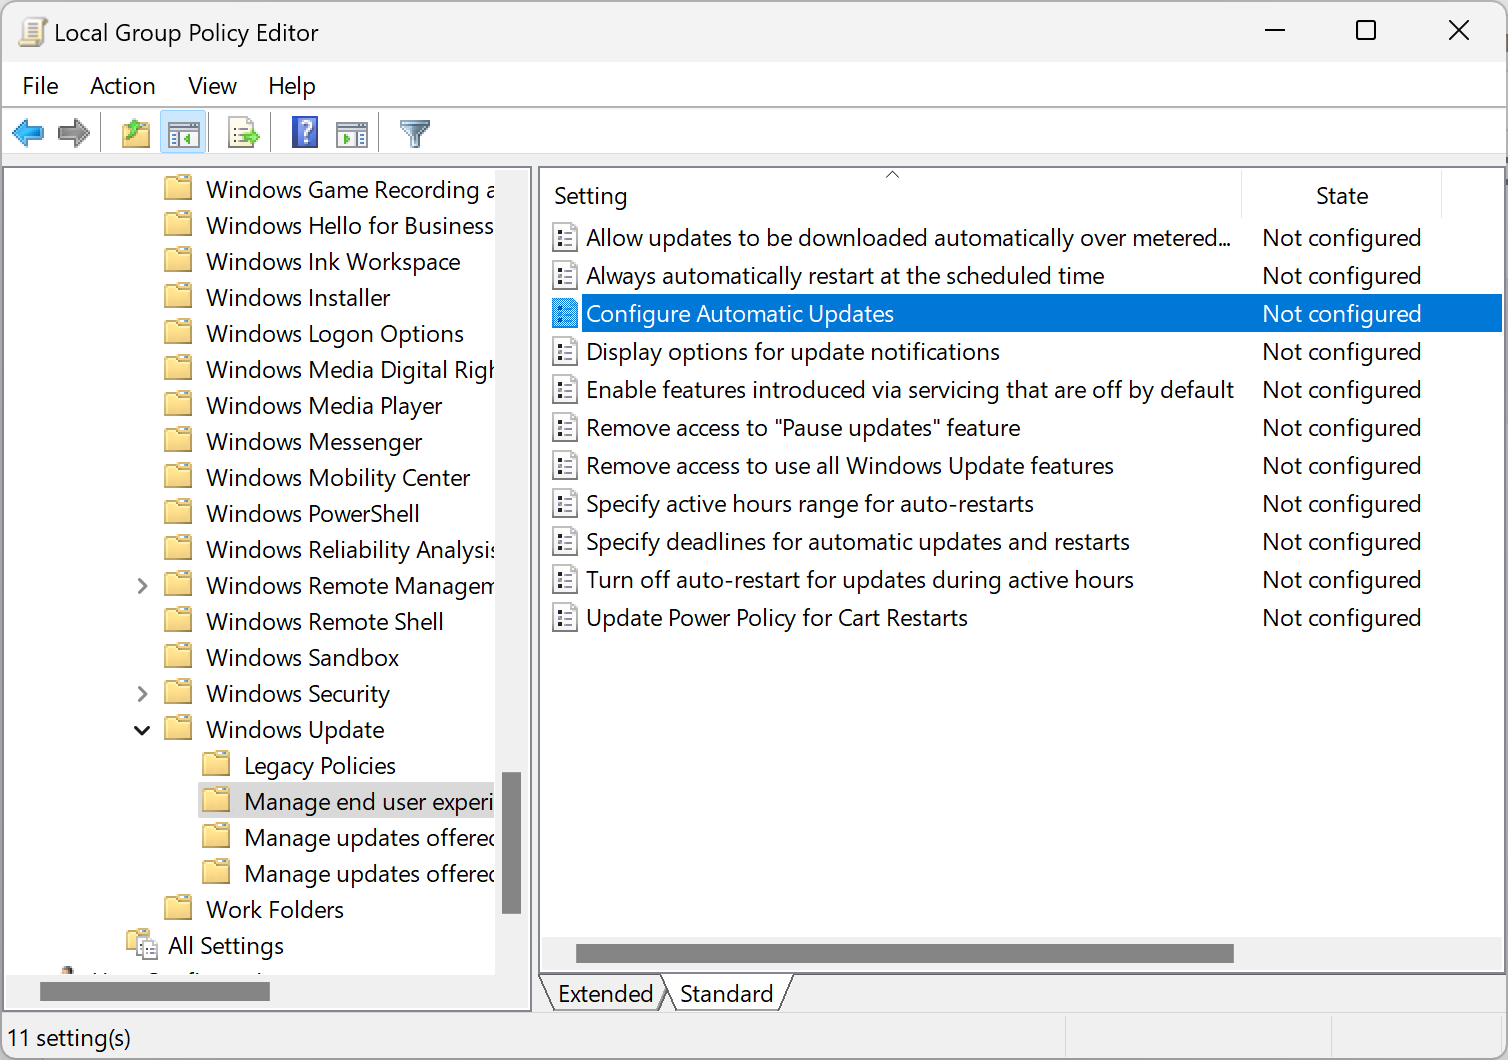
Step 4. Double-click on “Configure Automatic Updates.”
Step 5. Select “Disabled.”
Step 6. Click on “Apply” and then “OK” to save the changes.
Method 3: Using Registry Editor
The third method to disable automatic updates on Windows 11 is by using the Registry Editor. This method is available on all editions of Windows 11. Here’s how to do it:-
Step 1. Press Win + R keys to open the Run dialog box.
Step 2. Type “regedit” and press Enter to open the Registry Editor.
Step 3. Navigate to the following in the left sidebar of Registry Editor:-
HKEY_LOCAL_MACHINE\SOFTWARE\Policies\Microsoft\Windows\WindowsUpdate

Step 4. Right-click on the WindowsUpdate folder and select “New” > “Key.”
Step 5. Name the new key “AU.”
Step 6. Right-click on the AU folder and select “New” > “DWORD (32-bit) Value.”

Step 7. Set the name NoAutoUpdate.
Step 8. Double-click on “NoAutoUpdate” and change the value data to “1.”
Step 7. Click on “OK” to save the changes.
Conclusion
In conclusion, these are the three methods you can use to disable automatic updates on Windows 11. Whether you prefer to use the settings app, Group Policy Editor, or Registry Editor, you can choose the method that best suits your needs. However, keep in mind that disabling automatic updates can leave your system vulnerable to security threats, so it’s recommended to keep your system up-to-date whenever possible.
