Windows 11 has introduced a helpful feature called Copilot, which serves as a virtual chatbot AI designed to assist users with various tasks and queries. While this feature is undoubtedly convenient, it might not be everyone’s cup of tea. If you’re one of those users who prefer not to have Copilot actively engaged on your system, you’re in the right place. In this article, we’ll walk you through three different methods to disable Copilot on Windows 11, depending on your edition of Windows 11 and your preferences.

How to Disable Copilot on Windows 11?
Method 1: Disabling Copilot via Group Policy Editor (Windows 11 Pro, Enterprise, or Education)
For users on Windows 11 Pro, Enterprise, or Education editions, the Group Policy Editor offers an efficient way to disable Copilot. Here’s how:-
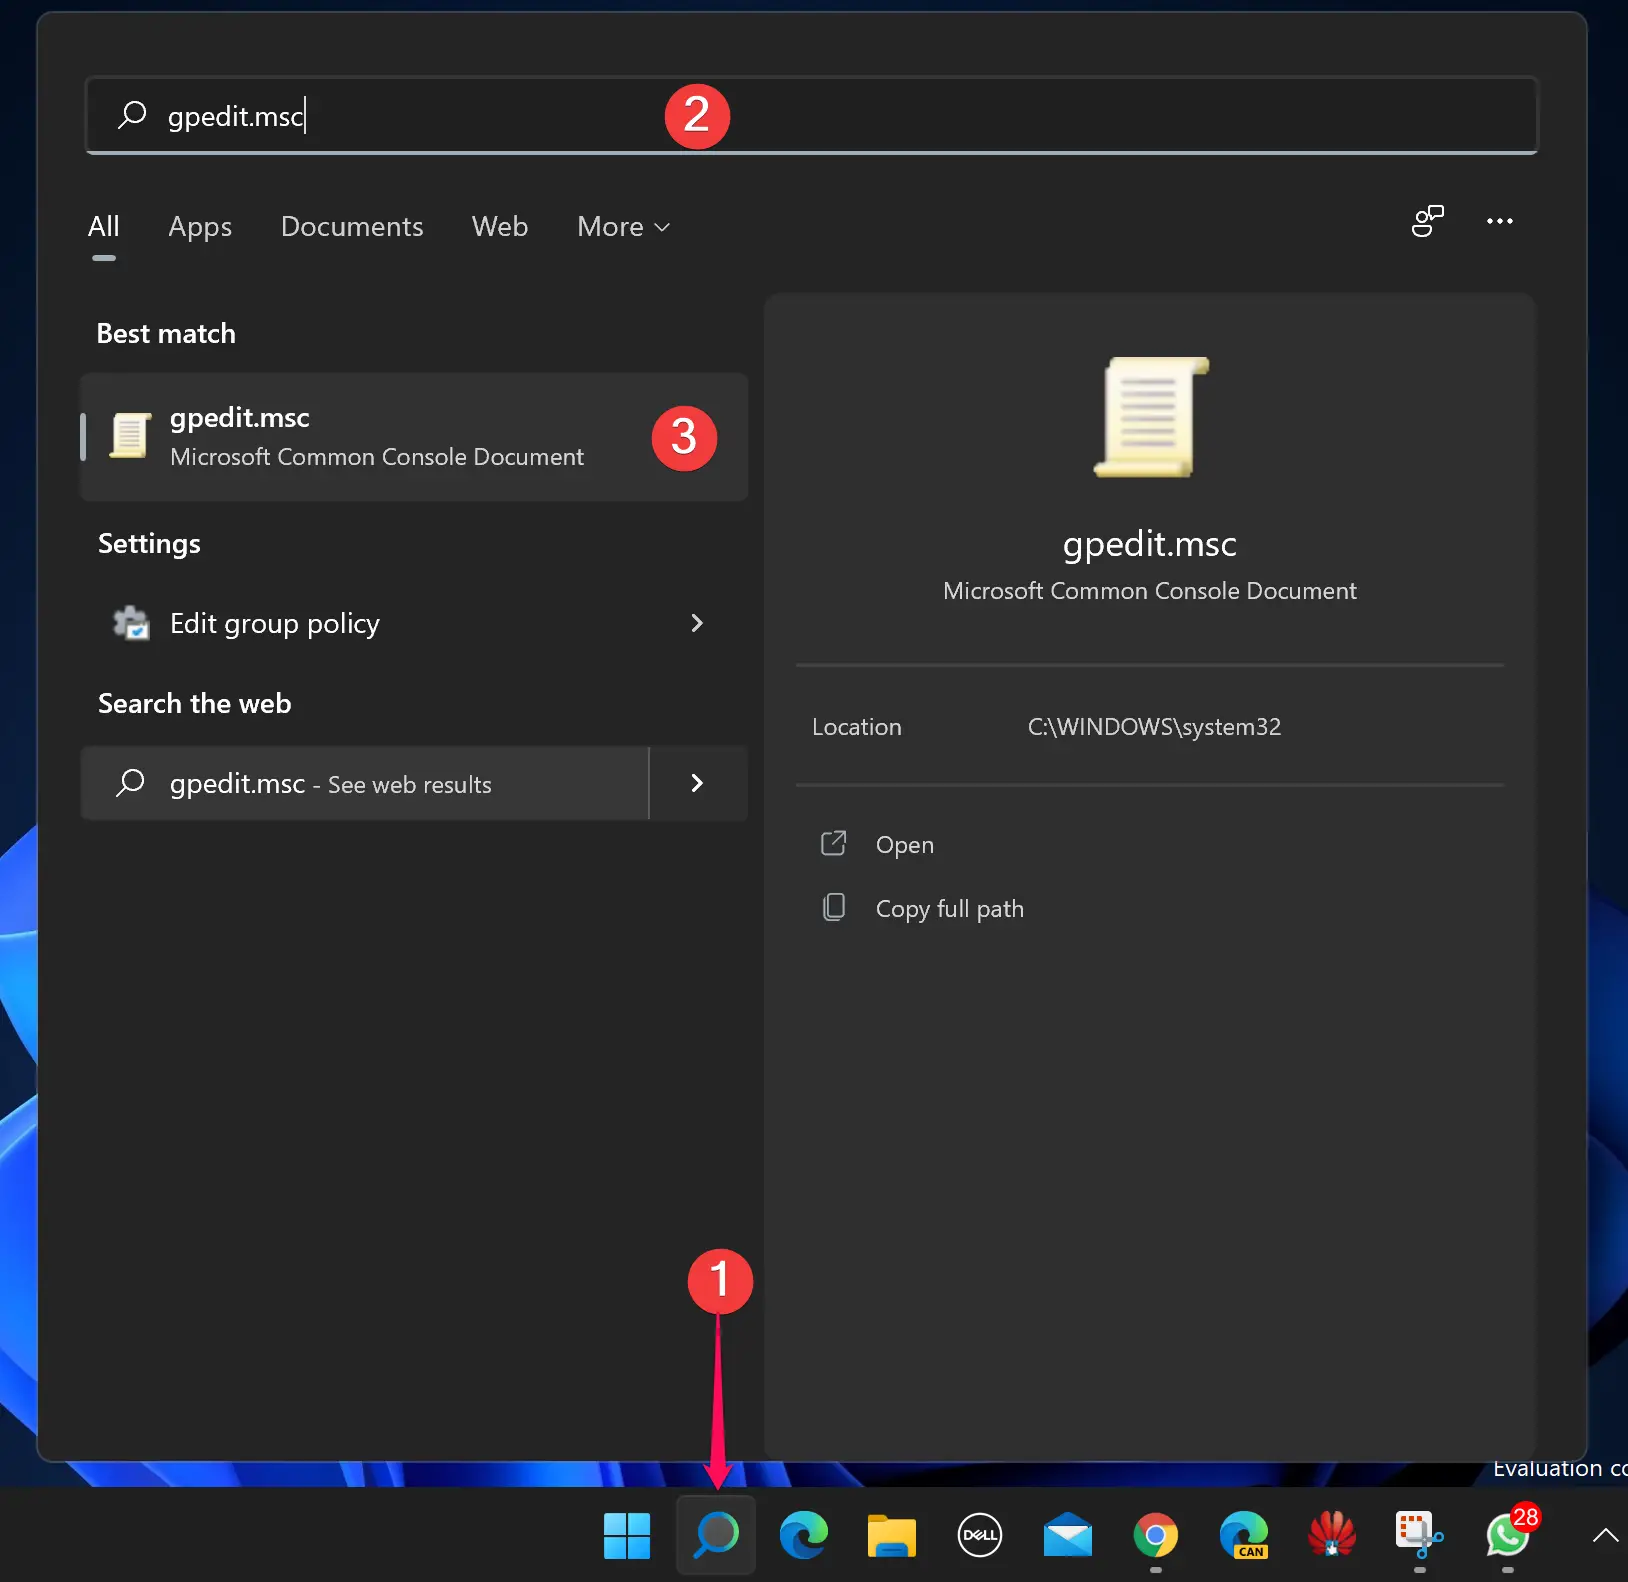
Step 1. To begin, open the Search menu and search for “gpedit.msc” Click on the top result to launch the Group Policy Editor.
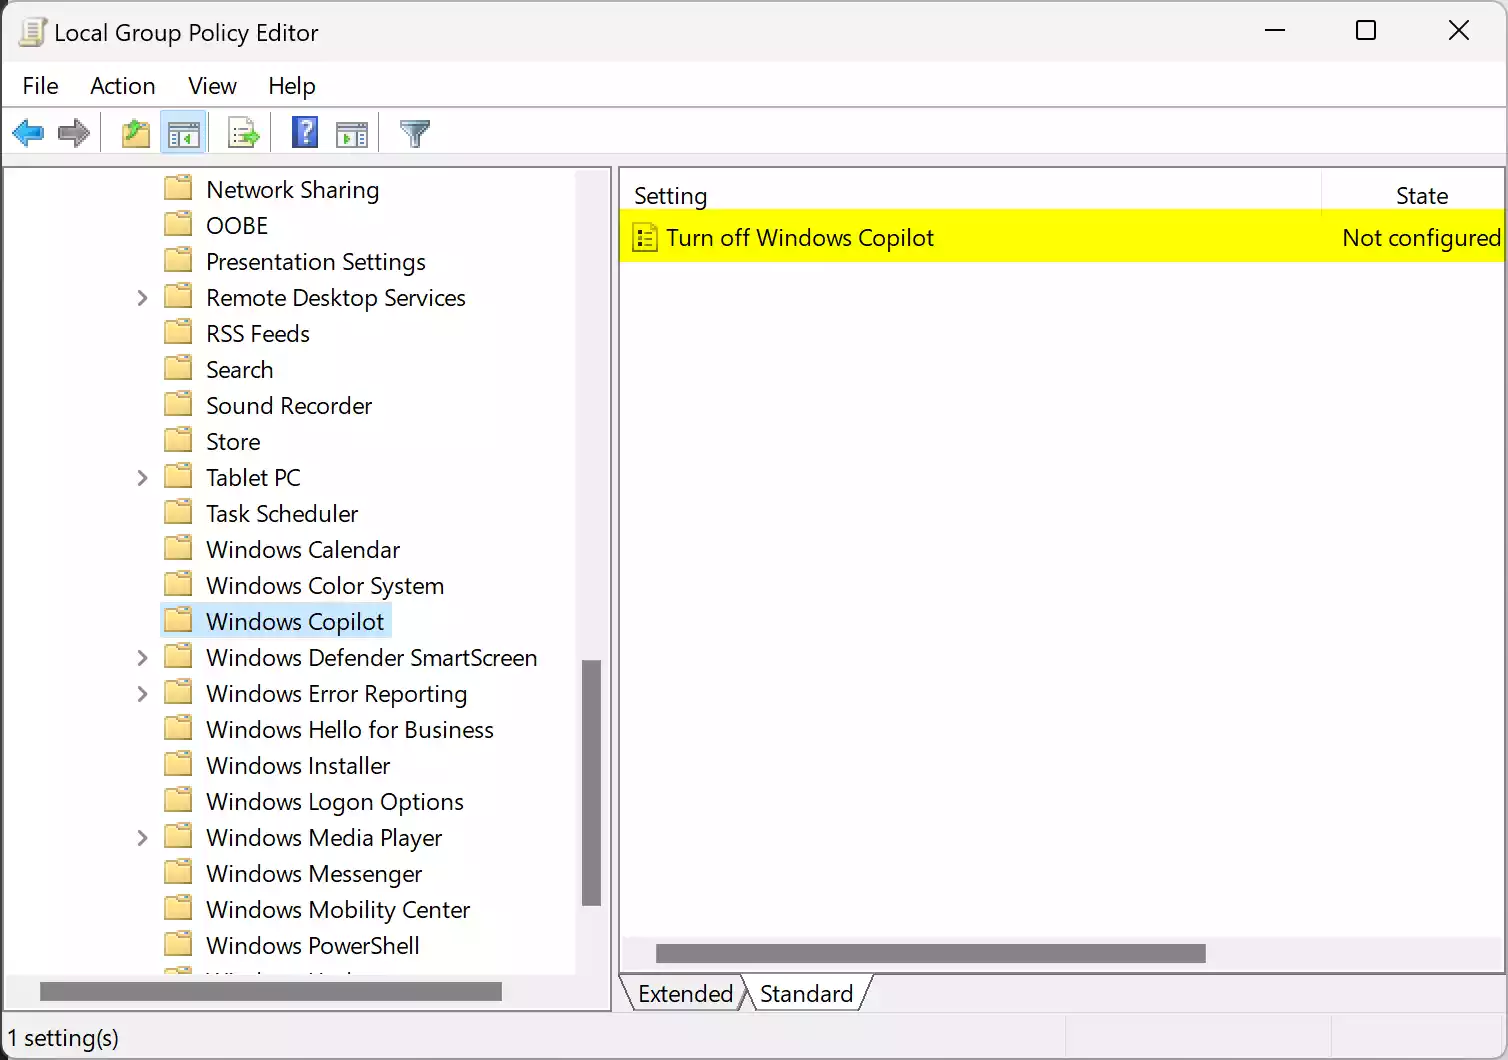
Step 2. In the Group Policy Editor, follow this path:-
User Configuration > Administrative Templates > Windows Components > Windows Copilot
Step 3. Double-click the “Turn off Windows Copilot” policy on the right sidebar. A settings window will appear. Select the “Enabled” option and click “Apply” to save your changes. Click OK to exit.
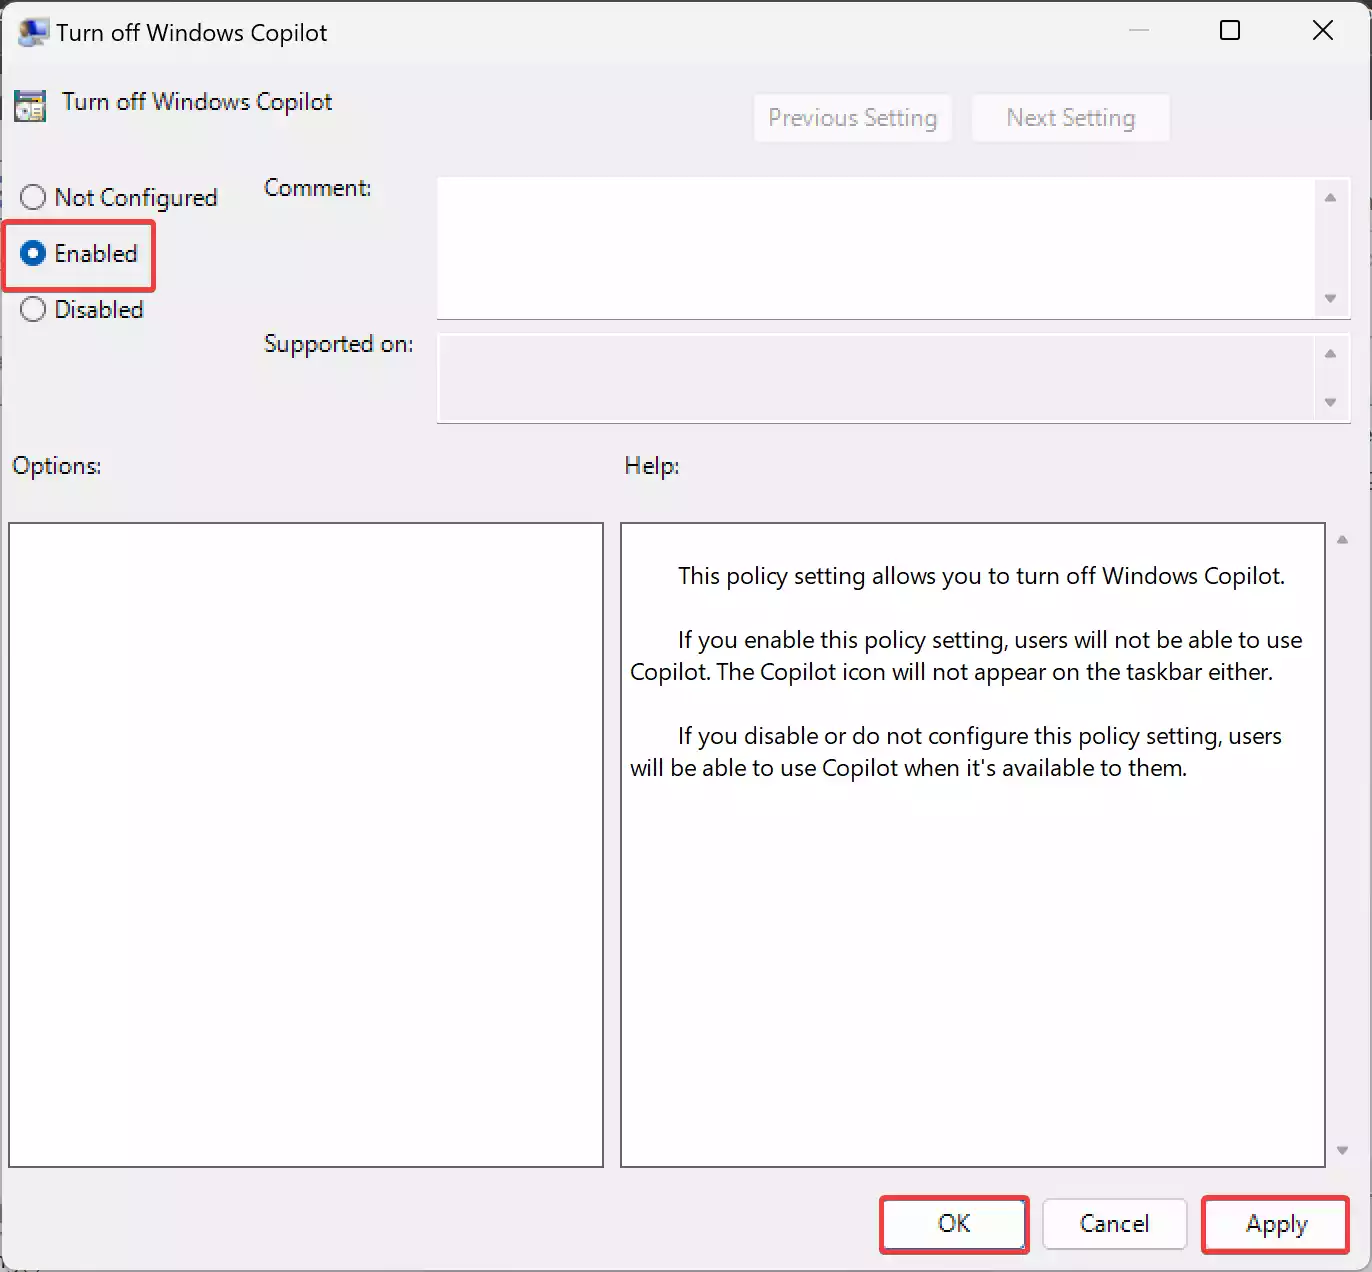
Step 4. To ensure the changes take effect, restart your computer.
After completing these steps, Copilot will be entirely disabled, and you won’t see the Copilot button on the Taskbar or be able to access it using the “Windows key + C” shortcut.
Method 2: Disabling Copilot via the Registry Editor (Windows 11 Home, or any edition)
If you’re using Windows 11 Home or prefer using the Registry Editor, you can disable Copilot using this method:-
Step 1. Open the Start/Start menu, search for “regedit,” and click on the top result to open the Registry Editor.
Step 2. In the Registry Editor, go to the following path:-
HKEY_CURRENT_USER\Software\Policies\Microsoft\Windows\WindowsCopilot
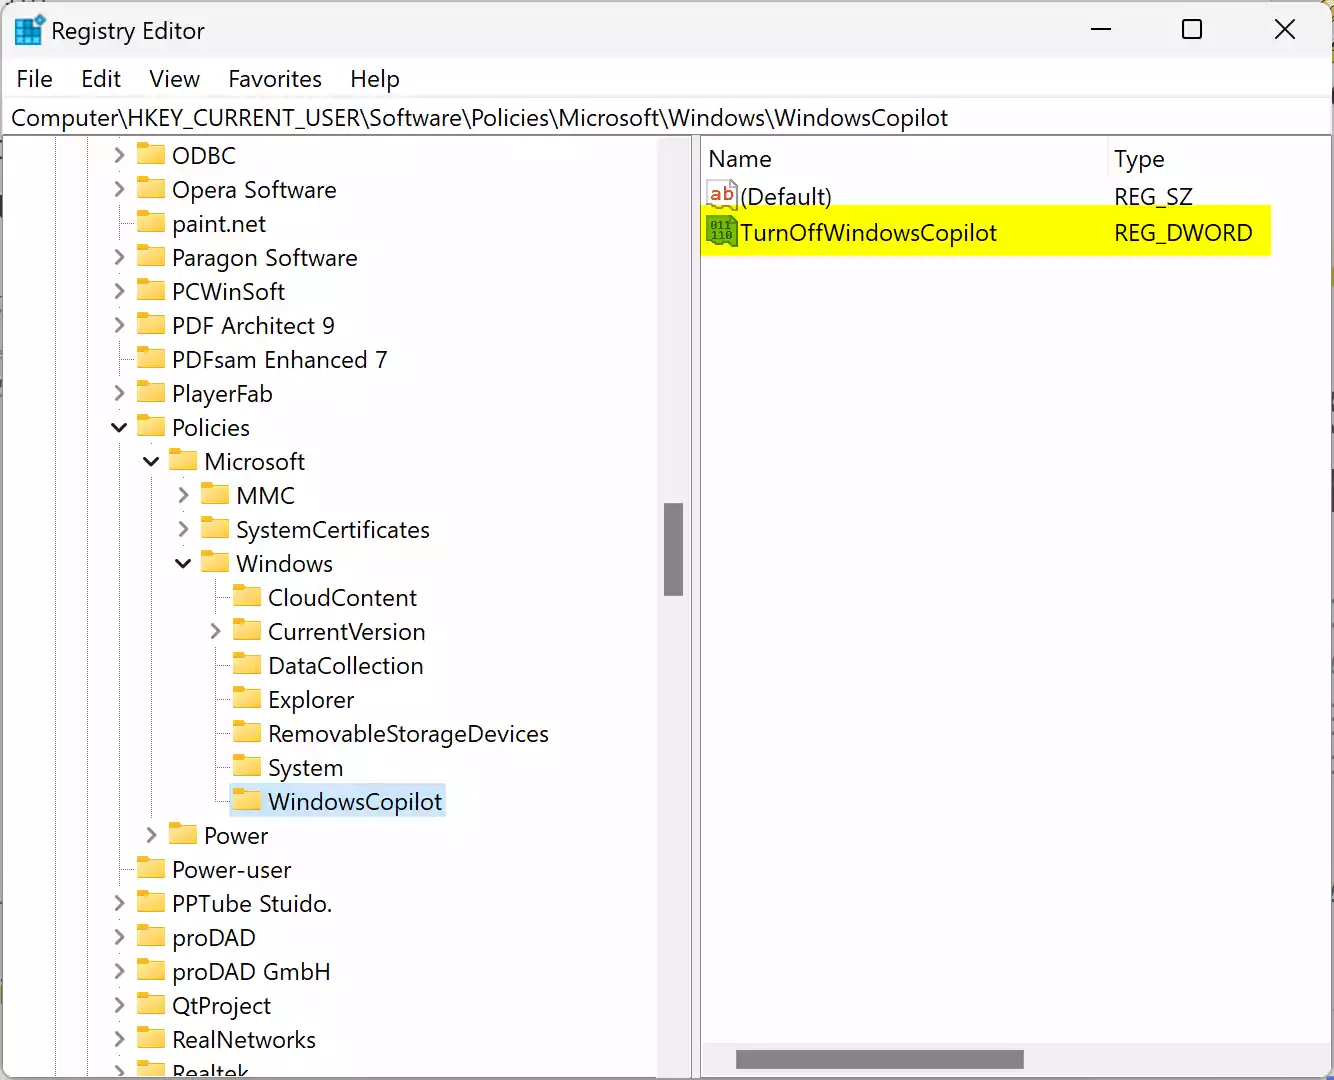
Step 3. Locate the “TurnOffWindowsCopilot” REG_DWORD on the right sidebar. Double-click on it to modify its “Value data.” Change the value from 0 to 1 and click “OK.”
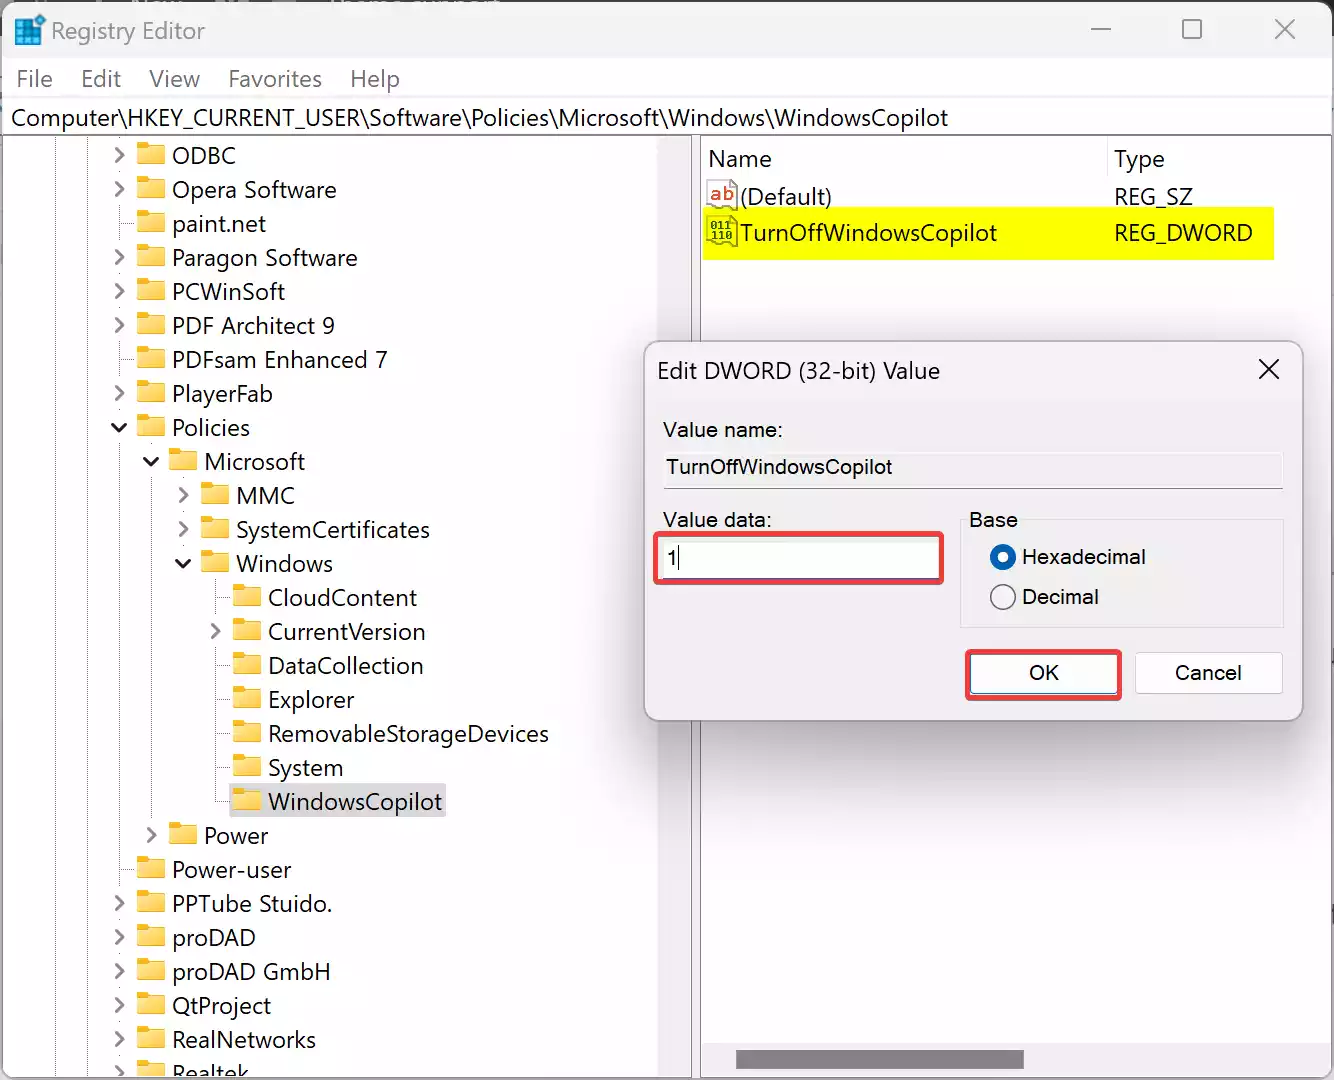
By making these changes, Copilot will be completely disabled on your Windows 11 system. To re-enable Copilot, follow the same steps but set the “TurnOffWindowsCopilot” value back to “0” (zero).
Method 3: Removing the Copilot Button from the Taskbar
If you want to retain the option to use Copilot but remove or hide its presence from the Taskbar, follow these steps:-
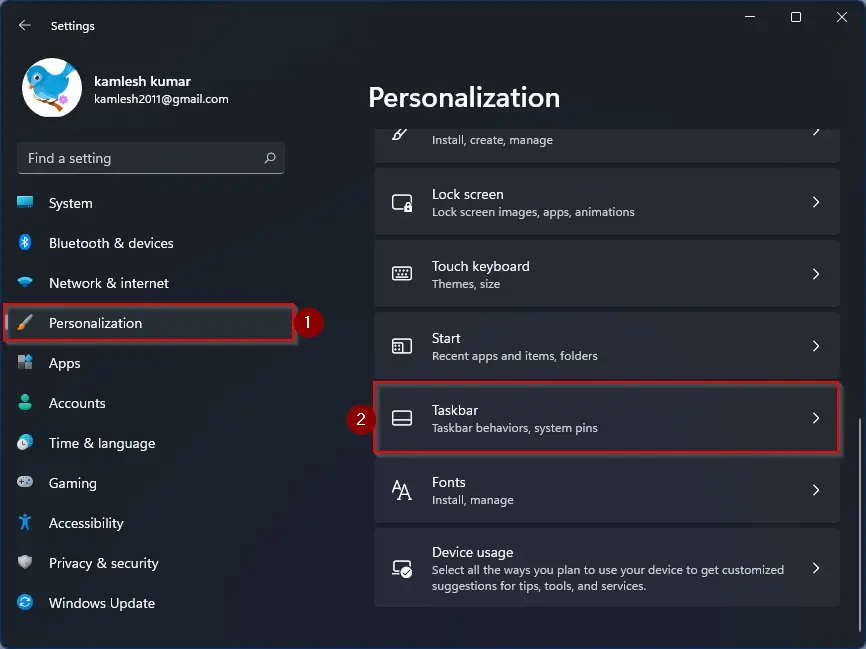
Step 1. Click on the Start button and select “Settings” (the gear-shaped icon). This will open Windows 11 Settings.
Step 2. Inside the Settings window, click on “Personalization,” and in the left sidebar, select the “Taskbar” tab on the right sidebar.
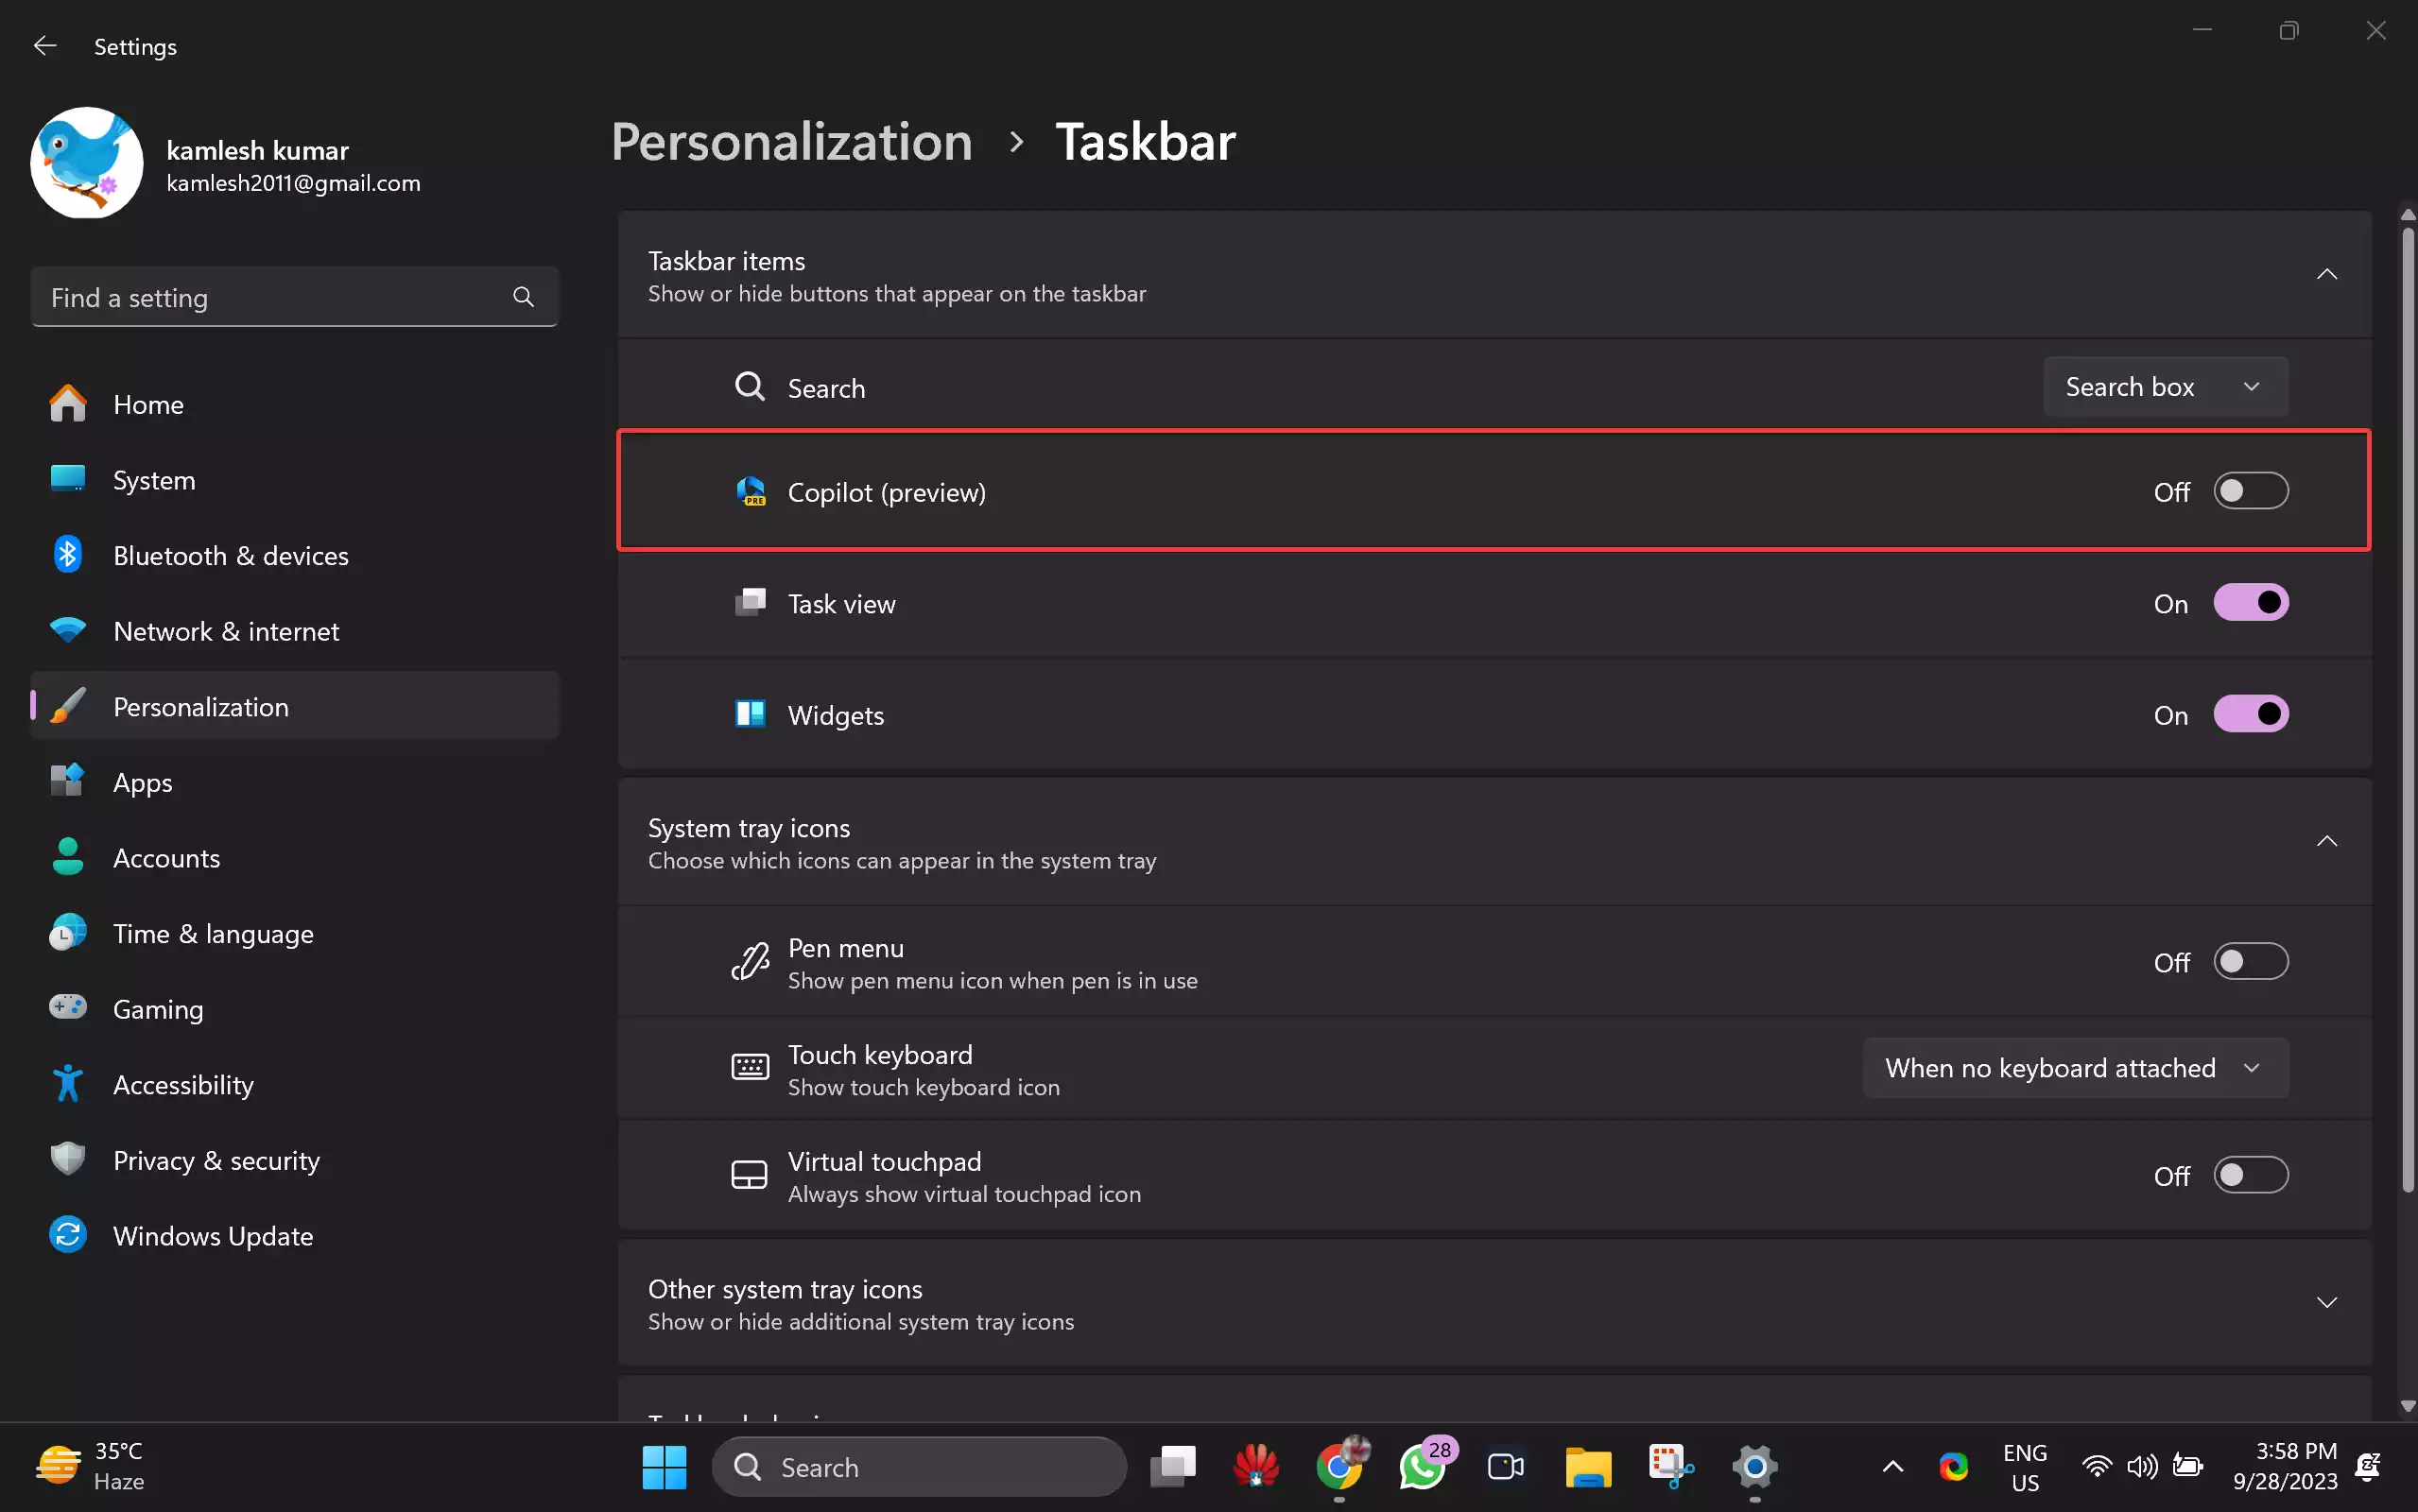
Step 3. Under the “Taskbar items” section, locate the “Copilot” toggle switch. Turn it off.
Conclusion
Whether you want to completely disable Copilot on Windows 11 or simply remove its Taskbar presence while keeping it accessible via keyboard shortcuts, this guide has you covered. Use the method that suits your preferences and edition of Windows 11 to enjoy a more customized user experience.
Also Read: How to Hide or Unhide the Bing Chat button in Microsoft Edge?
