Microsoft Excel is a powerful tool for managing and analyzing data, and one of its most useful features is the ability to work with multiple worksheets within a single workbook. These worksheets allow you to organize and structure your data effectively. However, there may come a time when you need to move or copy a worksheet to a different location within the same workbook or to another workbook. In this gearupwindows article, we’ll explore how to easily move or copy a worksheet in Microsoft Excel.
Why Move or Copy a Worksheet?
Before we delve into the process of moving or copying worksheets, it’s important to understand why you might need to do this in the first place. There are several scenarios where this skill can come in handy:-
1. Data Organization: You may want to reorganize your data, and moving or copying worksheets can help you achieve this by grouping related data together.
2. Creating a Backup: Making a copy of a worksheet is a great way to create a backup before making significant changes, ensuring you can always return to the original data.
3. Sharing Data: If you need to share specific data with others, copying a worksheet into a new workbook can make it easier to distribute the necessary information.
4. Data Consolidation: Moving worksheets can be helpful when consolidating data from various sources or combining multiple smaller workbooks into a single, comprehensive one.
Now that we understand the why, let’s move on to the how.
How to Easily Move or Copy a Worksheet in Microsoft Excel?
Moving a Worksheet
To move a worksheet from one location to another within the same workbook, follow these steps:-
Step 1. Open your Excel workbook and navigate to the worksheet you want to move.
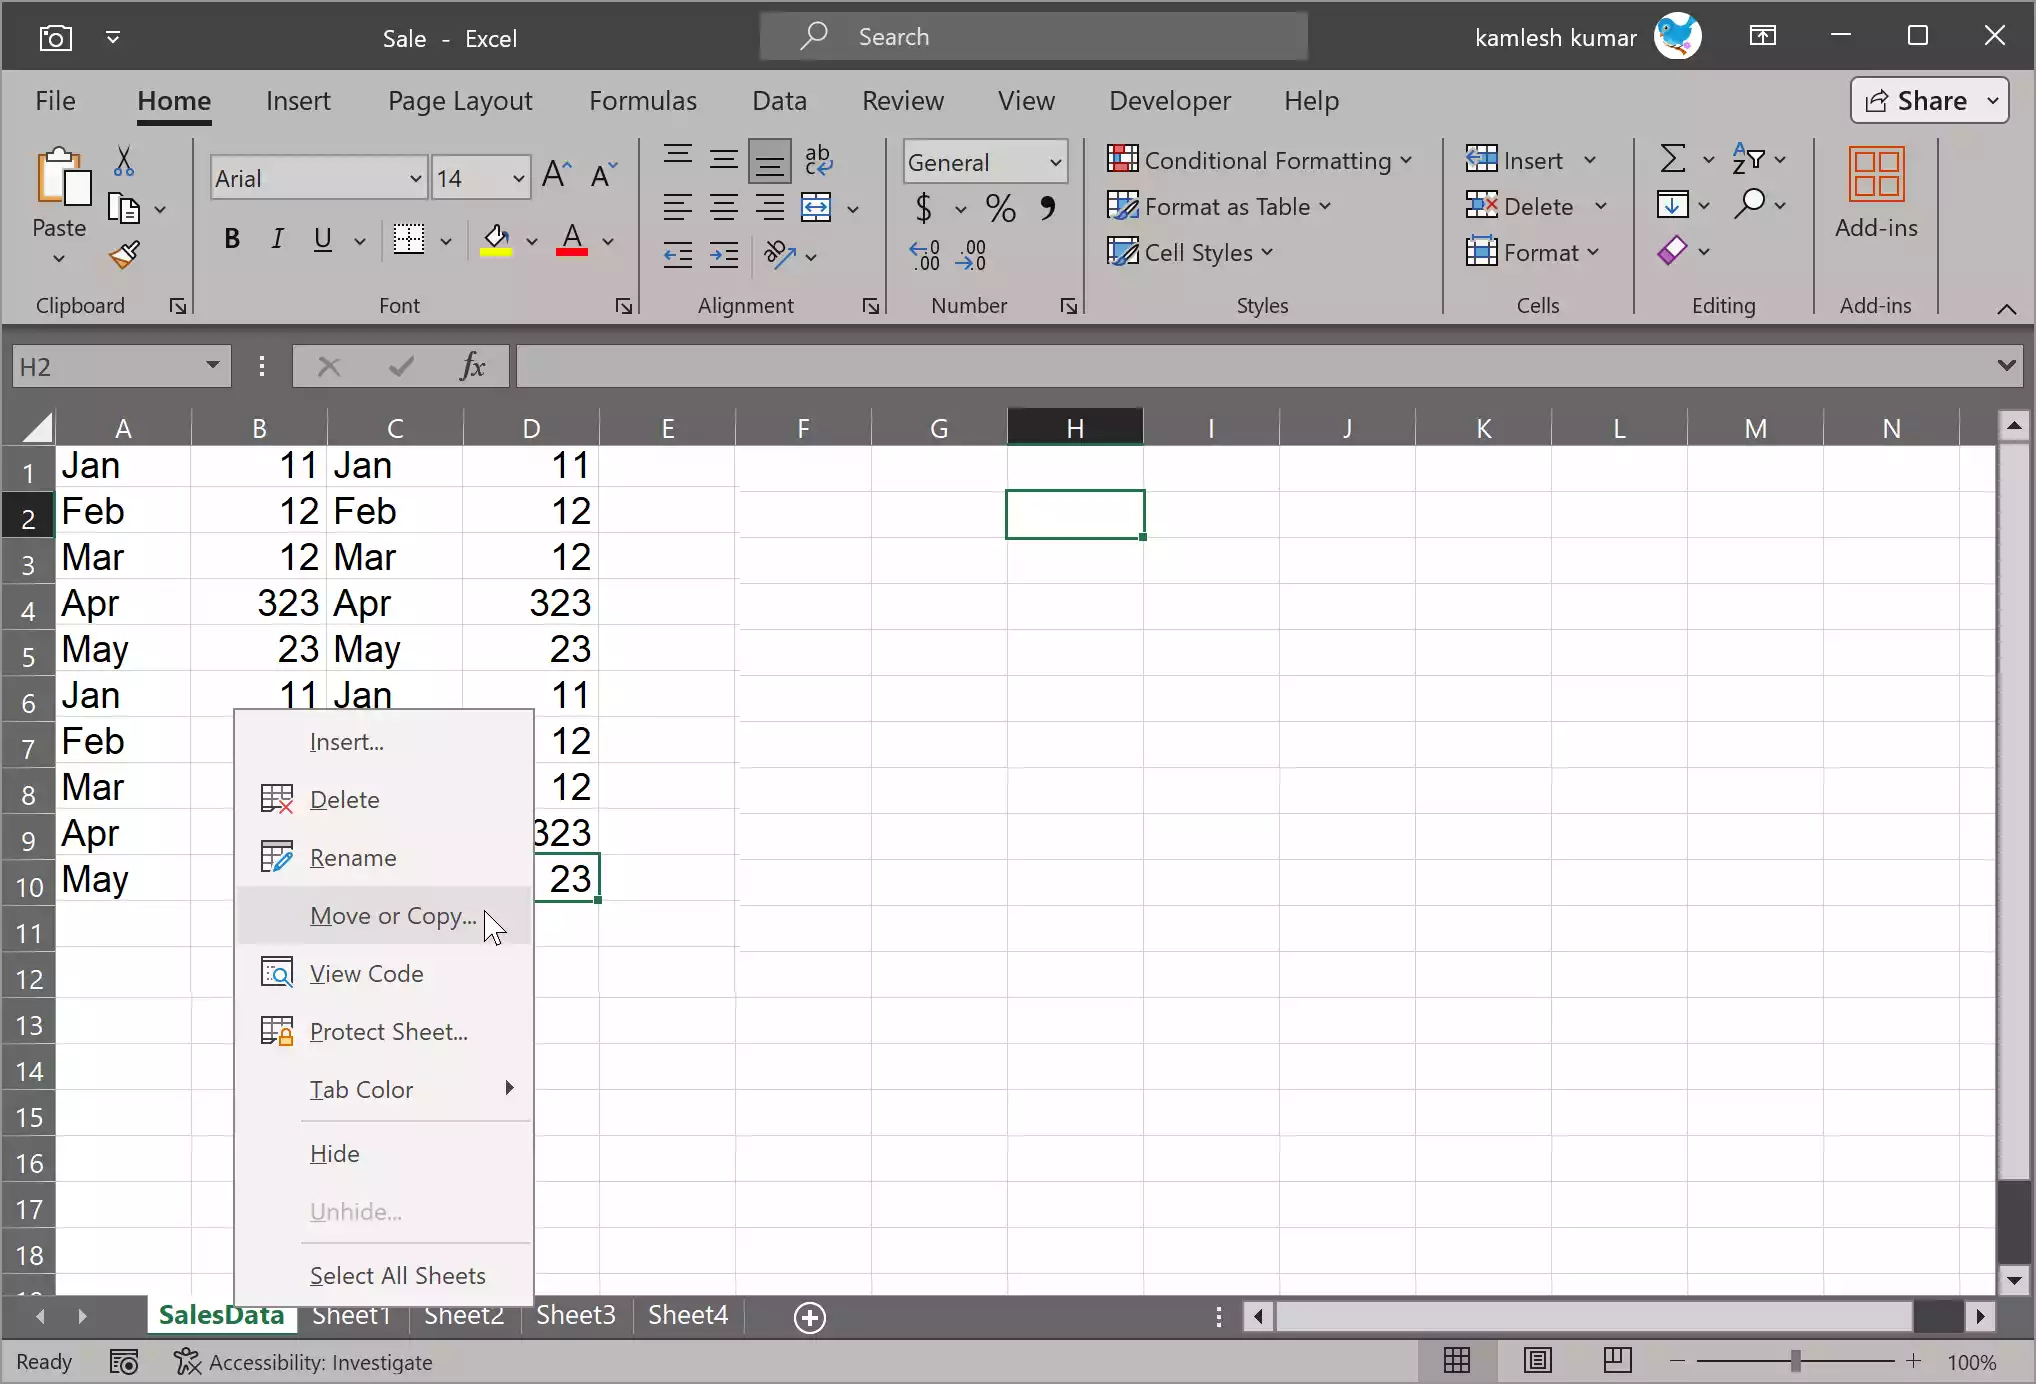
Step 2. Right-click on the sheet tab at the bottom of the Excel window. This will display a context menu.
Step 3. From the context menu, choose the “Move or Copy” option.
Step 4. In the “Move or Copy” dialog box that appears, select the destination for your worksheet. You can choose to move it to the beginning or end of the current workbook or to another open workbook. If you want to move it to a different location within the same workbook, select the desired sheet from the “To book” drop-down menu.
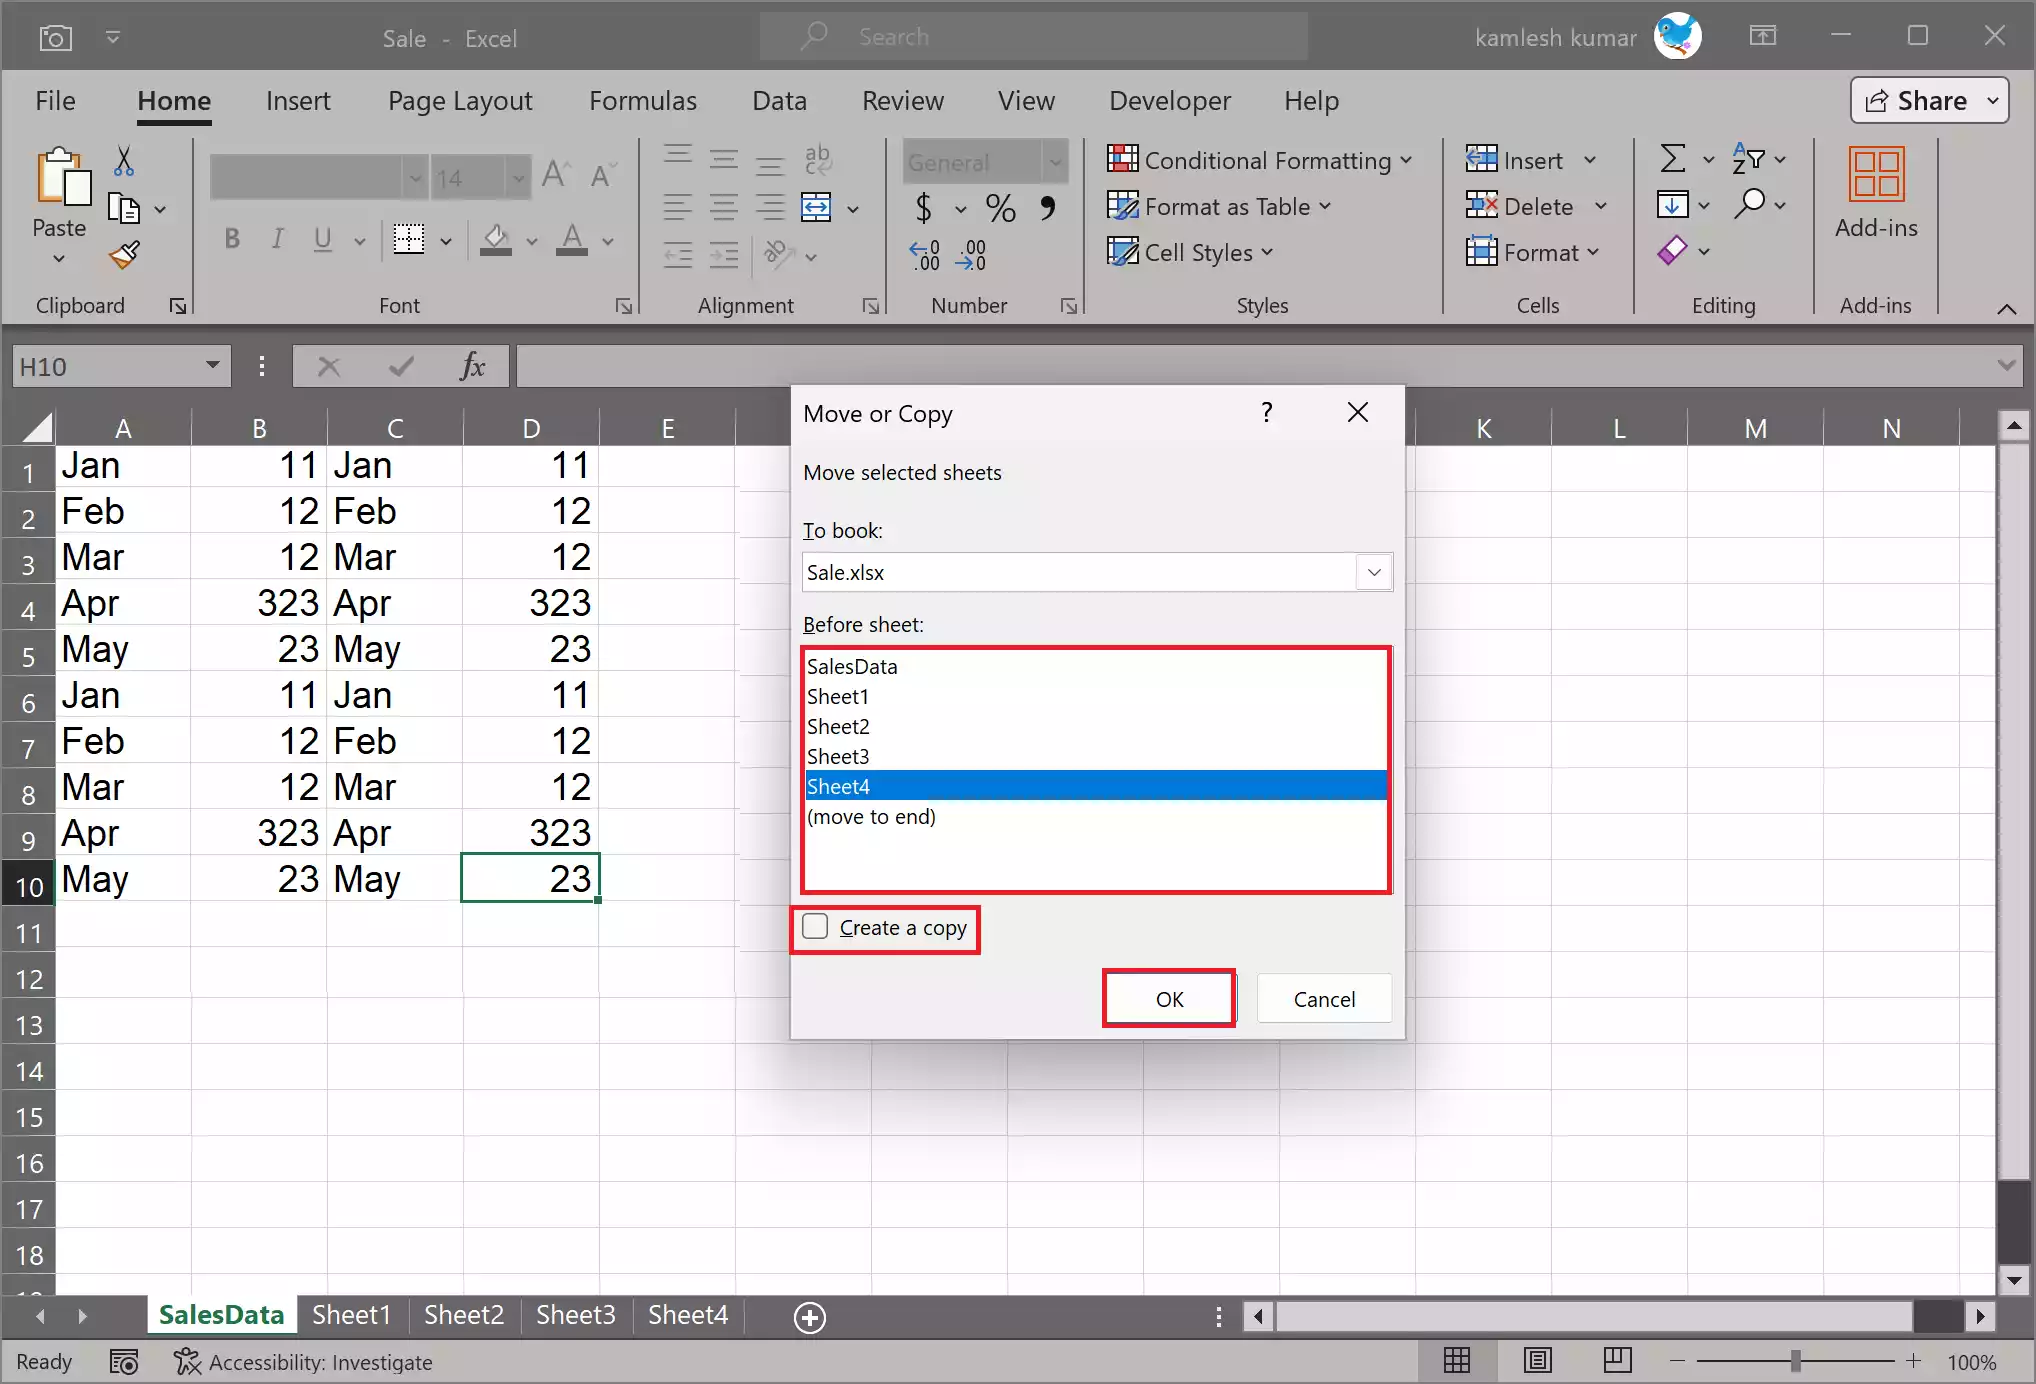
Step 5. Check the “Create a copy” option if you want to create a duplicate of the worksheet at the new location.
Step 6. Click “OK,” and your worksheet will be moved to the selected location or copied if you selected that option.
Moving or Copying a Worksheet by Dragging and Dropping
In Microsoft Excel, you can easily move a worksheet within the same workbook or to another workbook by dragging and dropping the sheet tab. Here’s how you can do it:-
Step 1. Open your Excel workbook and locate the sheet tab you want to move.
Step 2. Click and hold the sheet tab with your left mouse button.
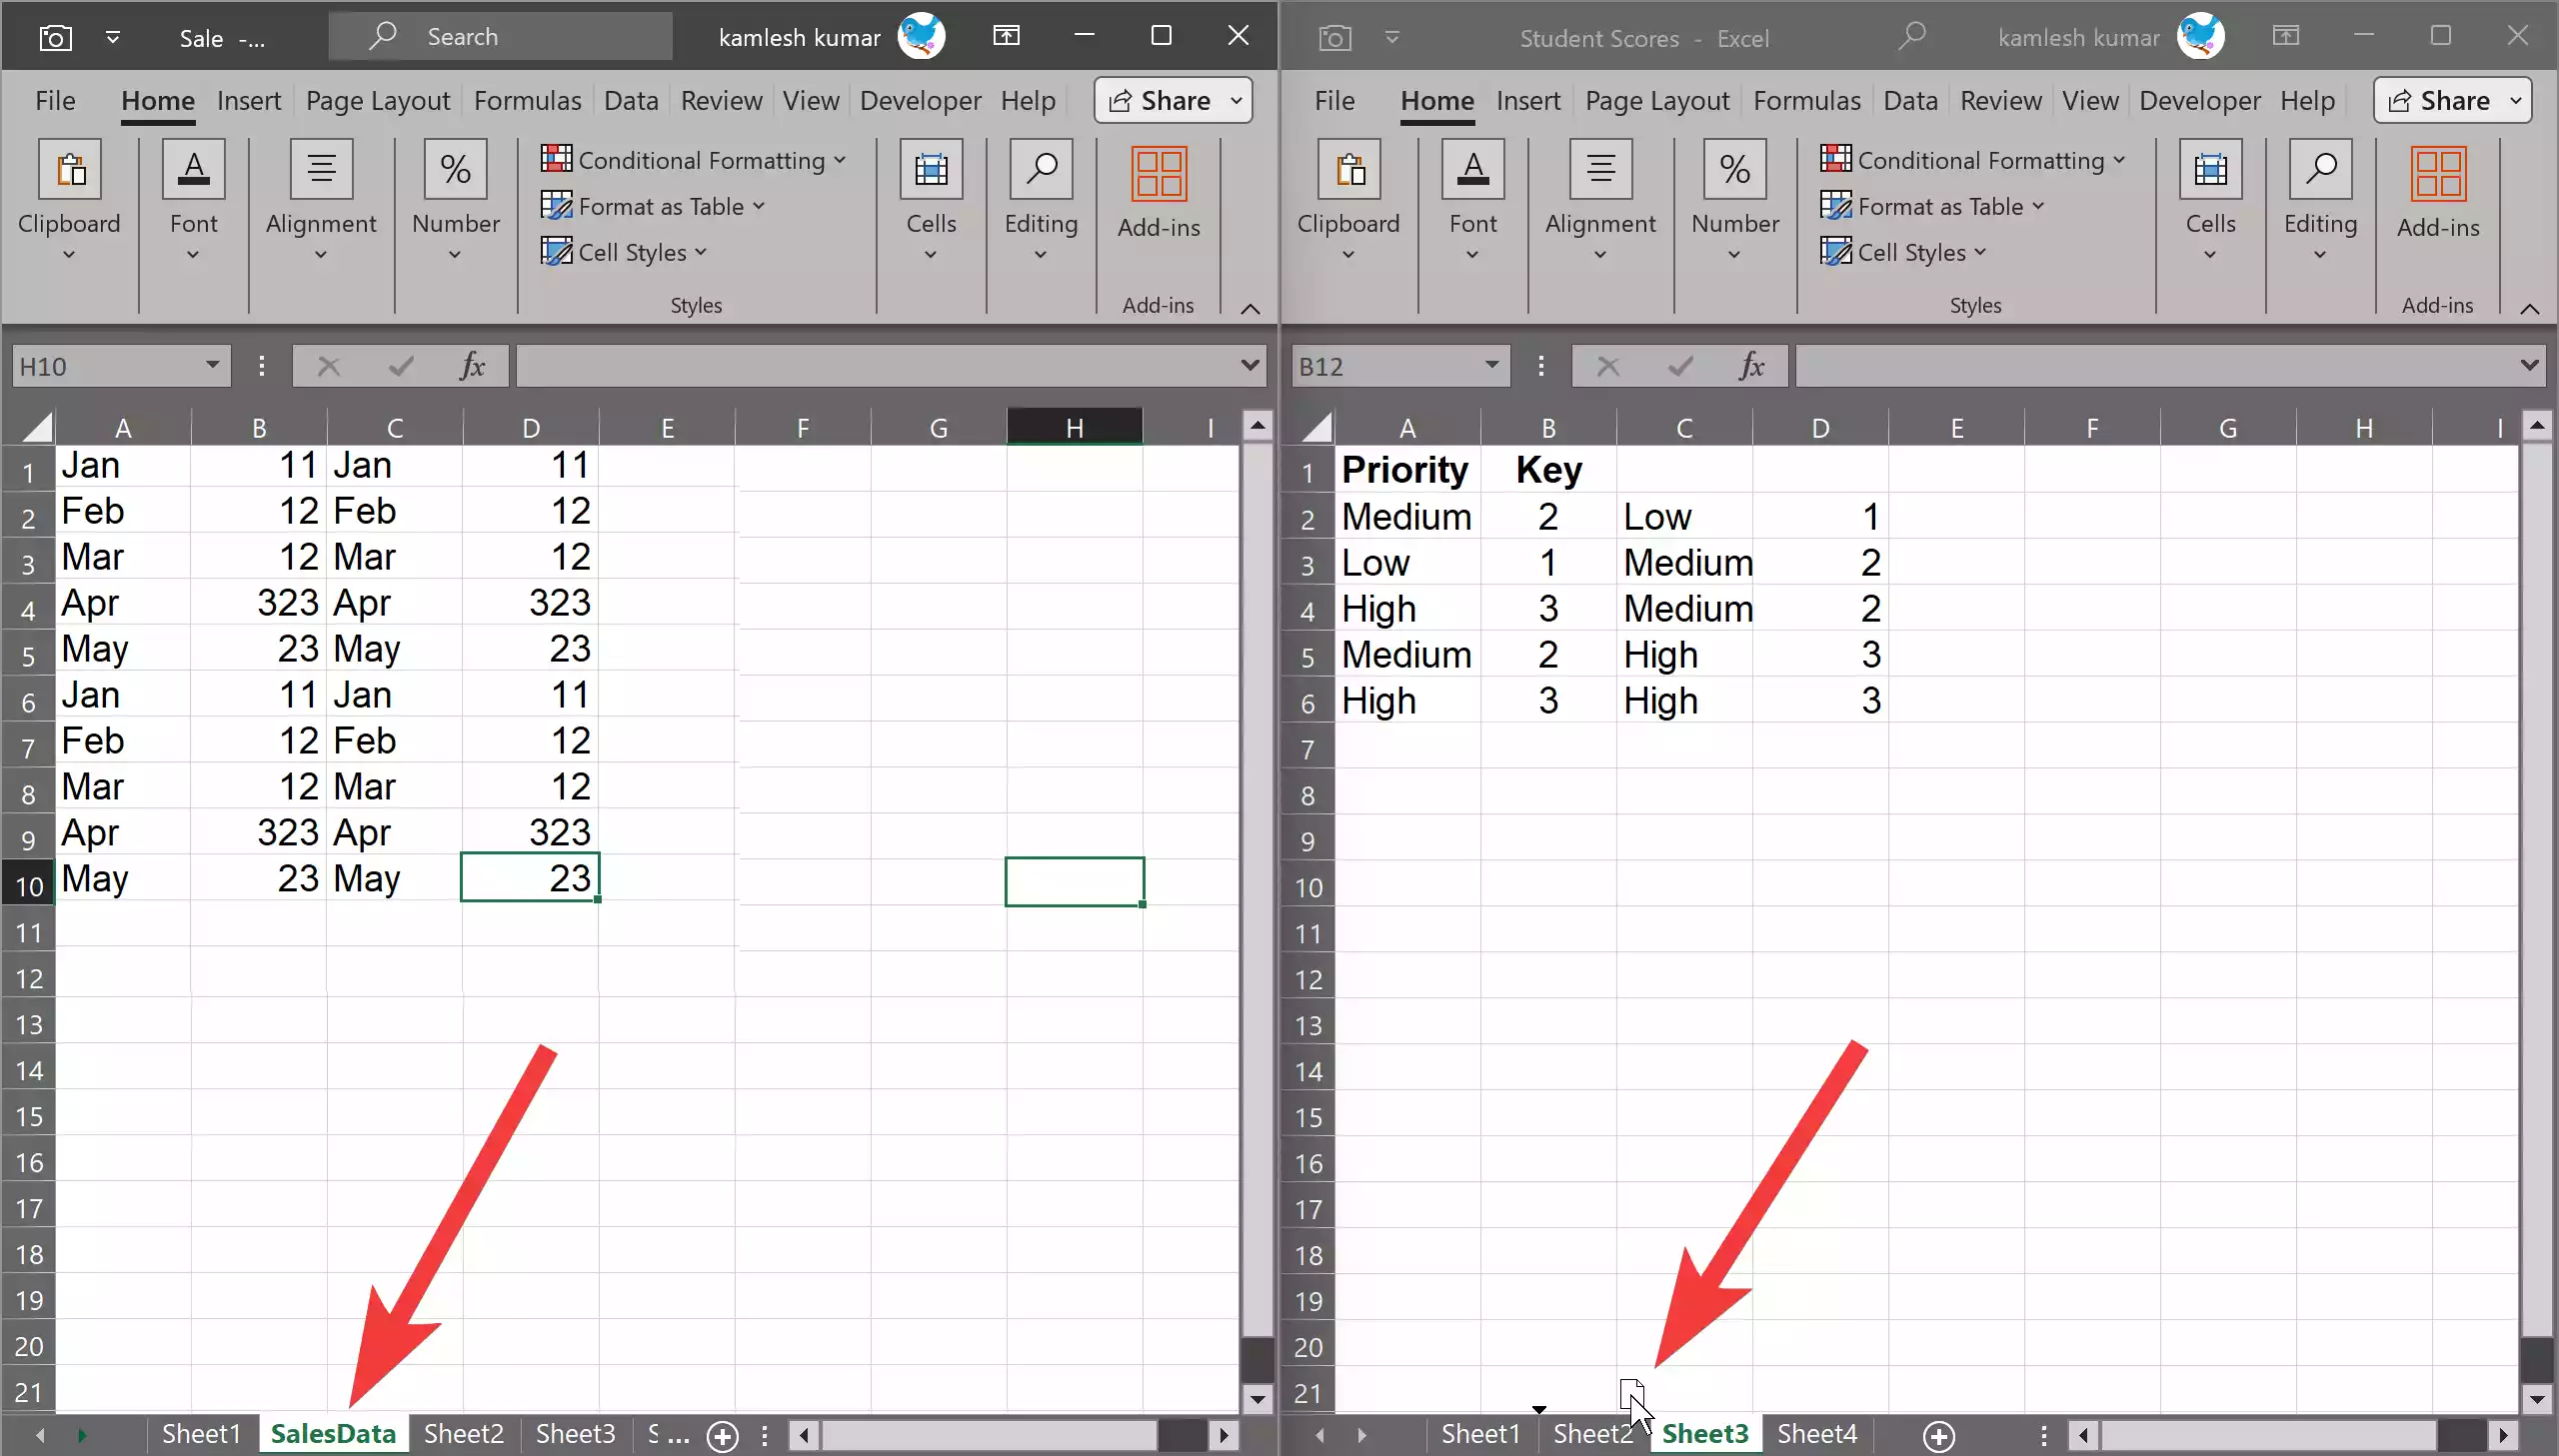
Step 3. While holding the tab, drag it to the desired location within the same workbook or to another open workbook. As you drag the tab, you’ll see a faint outline of the tab, indicating where it will be placed.
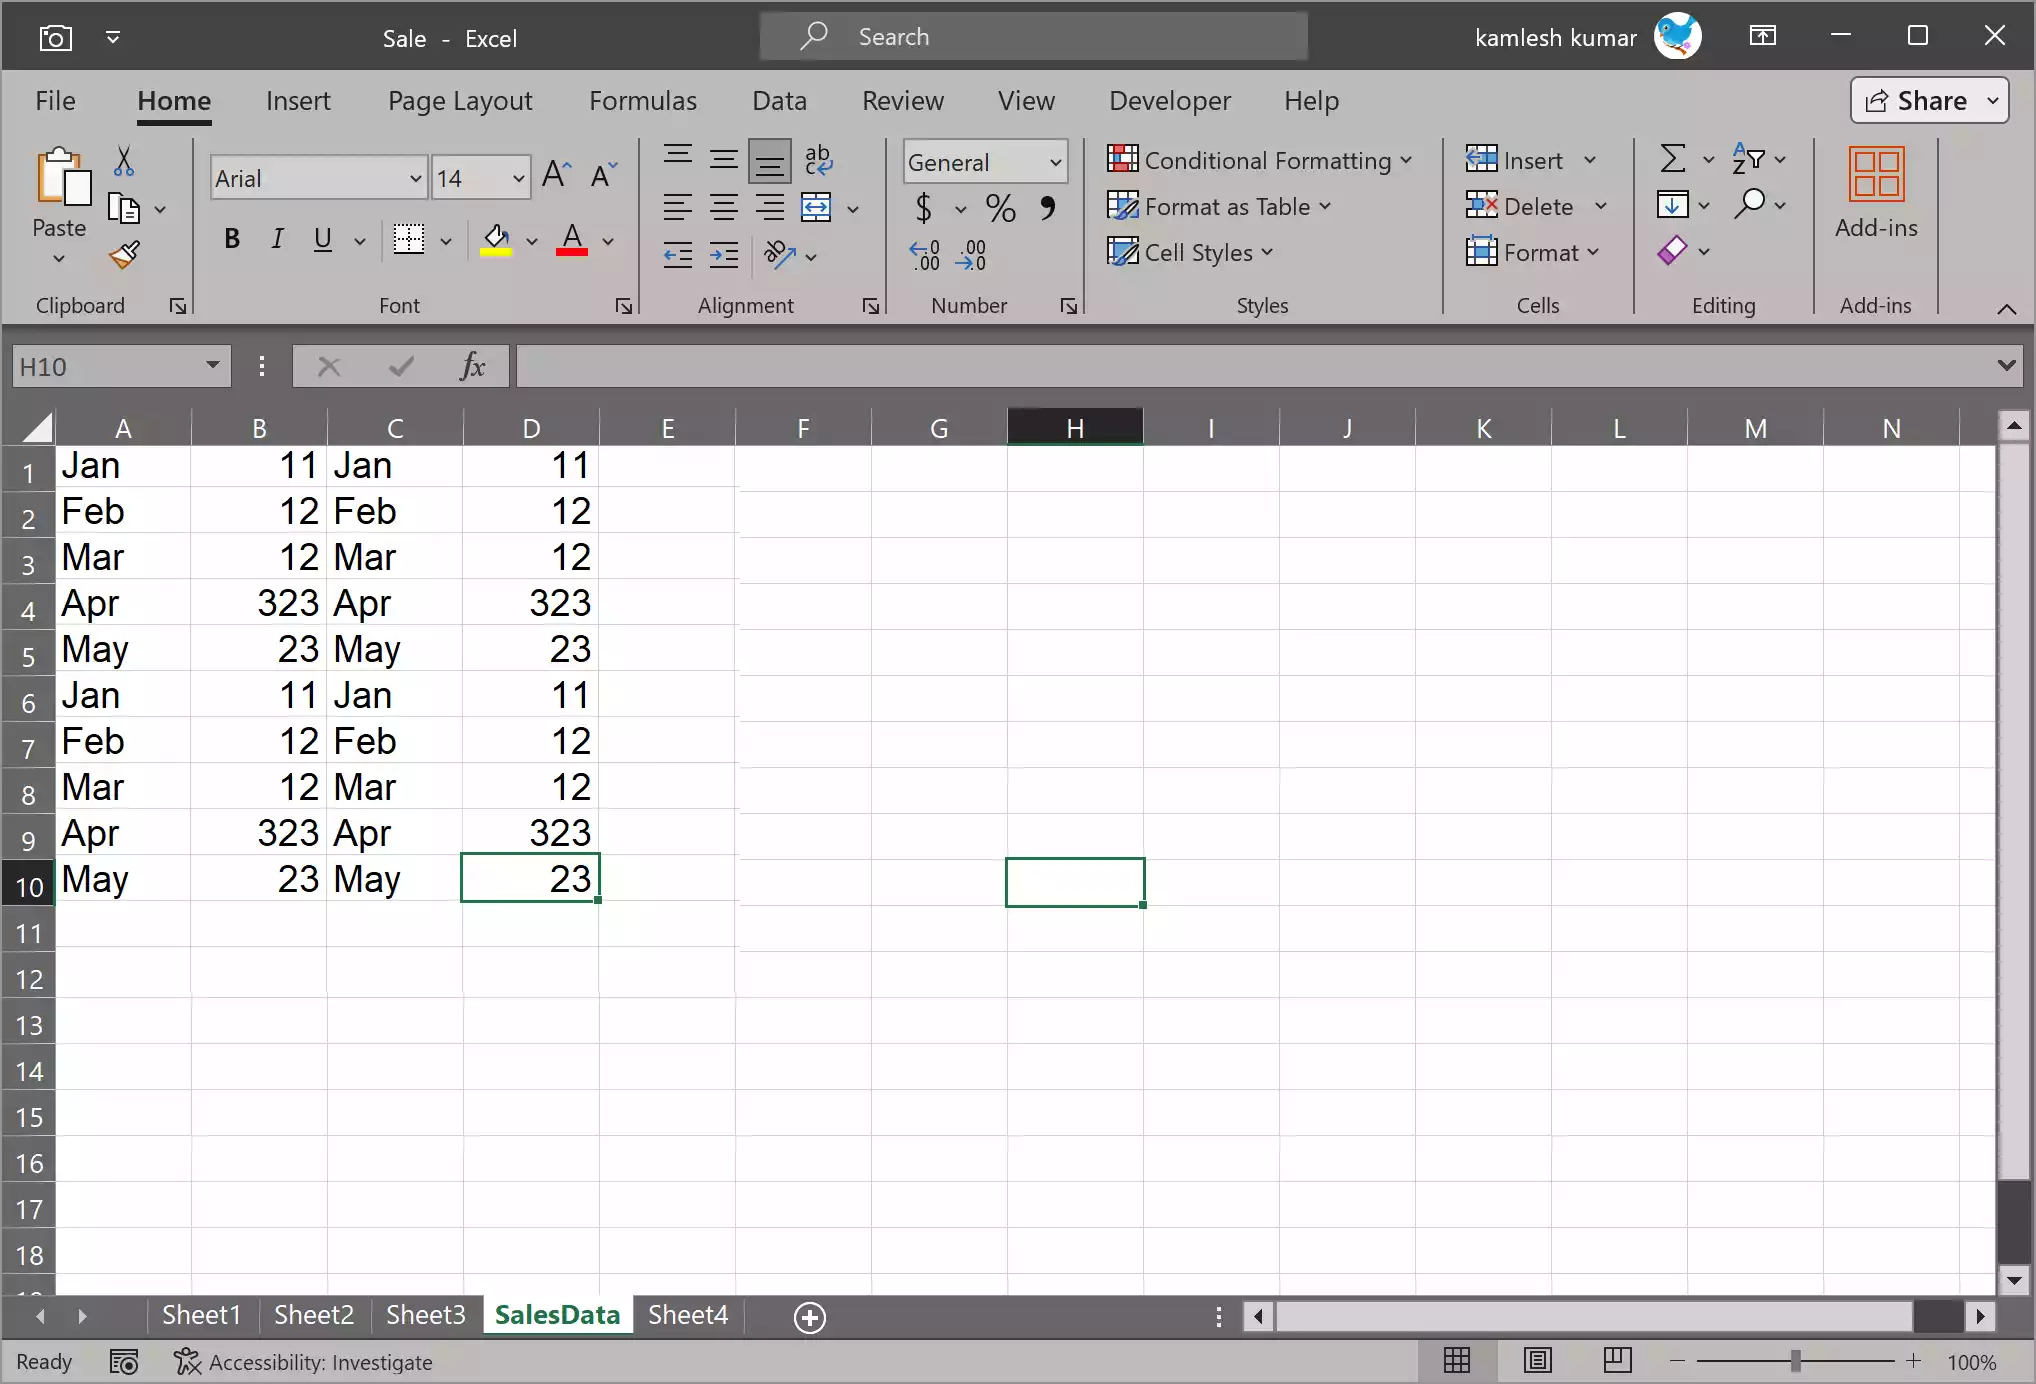
Step 4. Release the mouse button when you have positioned the sheet tab where you want it to be. The worksheet will be moved to the new location.
If you want to copy the worksheet instead of moving it, hold down the `Ctrl` key while dragging the sheet tab. This will create a copy of the worksheet in the new location, leaving the original sheet in place.
Using the drag-and-drop method is a quick and intuitive way to rearrange your worksheets, and it’s particularly useful when you want to move sheets within the same workbook.
Copying a Worksheet
Copying a worksheet is a very similar process to moving one. To copy a worksheet within the same workbook or to another workbook, follow these steps:-
Step 1. Open your Excel workbook and navigate to the worksheet you want to copy.
Step 2. Right-click on the sheet tab at the bottom of the Excel window.
Step 3. From the context menu, choose the “Move or Copy” option.
Step 4. In the “Move or Copy” dialog box, select the destination for your copied worksheet. Choose the workbook you want to copy to from the “To book” drop-down menu. If you want to copy it within the same workbook, select the desired location from the “Before sheet” option.
Step 5. Make sure to check the “Create a copy” option.
Step 6. Click “OK,” and a copy of your worksheet will be created in the selected location.
Tips and Tricks
1. Worksheet Renaming: If you want to rename the worksheet while moving or copying it, simply double-click the sheet tab in the “Move or Copy” dialog box and enter the desired name.
2. Keyboard Shortcut: You can use a keyboard shortcut to quickly access the “Move or Copy” dialog. Press `Alt` + `H`, `O`, `M`.
3. Hidden Sheets: Be cautious when moving or copying hidden worksheets. Make sure they are visible before performing these actions.
4. Protecting Worksheets: If the worksheet you want to move or copy is protected, you’ll need to unprotect it first.
Conclusion
In conclusion, moving or copying worksheets in Microsoft Excel is a straightforward process that can greatly improve your data management and organizational skills. Whether you’re reorganizing data, creating backups, sharing information, or consolidating data, Excel provides the flexibility to handle these tasks with ease. By following the steps outlined in this article, you can confidently manipulate your worksheets to meet your specific needs, all while harnessing the power of Excel’s versatile data management capabilities.