Microsoft Excel is a powerful tool for organizing, analyzing, and managing data. However, when working with sensitive or confidential information, it’s essential to take extra precautions to protect your data from unauthorized access. Password protecting an Excel sheet is an effective way to safeguard your data, and in this gearupwindows article, we will provide a step-by-step guide on how to do just that.
How to Password Protect Excel Sheet?
Method 1: Using the “Protect Sheet” Option in the “Review” Tab
Step 1. First, open Microsoft Excel and load the spreadsheet you want to protect with a password. Ensure that the document contains the data you want to secure.
Step 2. In your Excel workbook, you can have multiple sheets. If you want to protect a specific sheet, click on the sheet’s tab at the bottom of the Excel window.
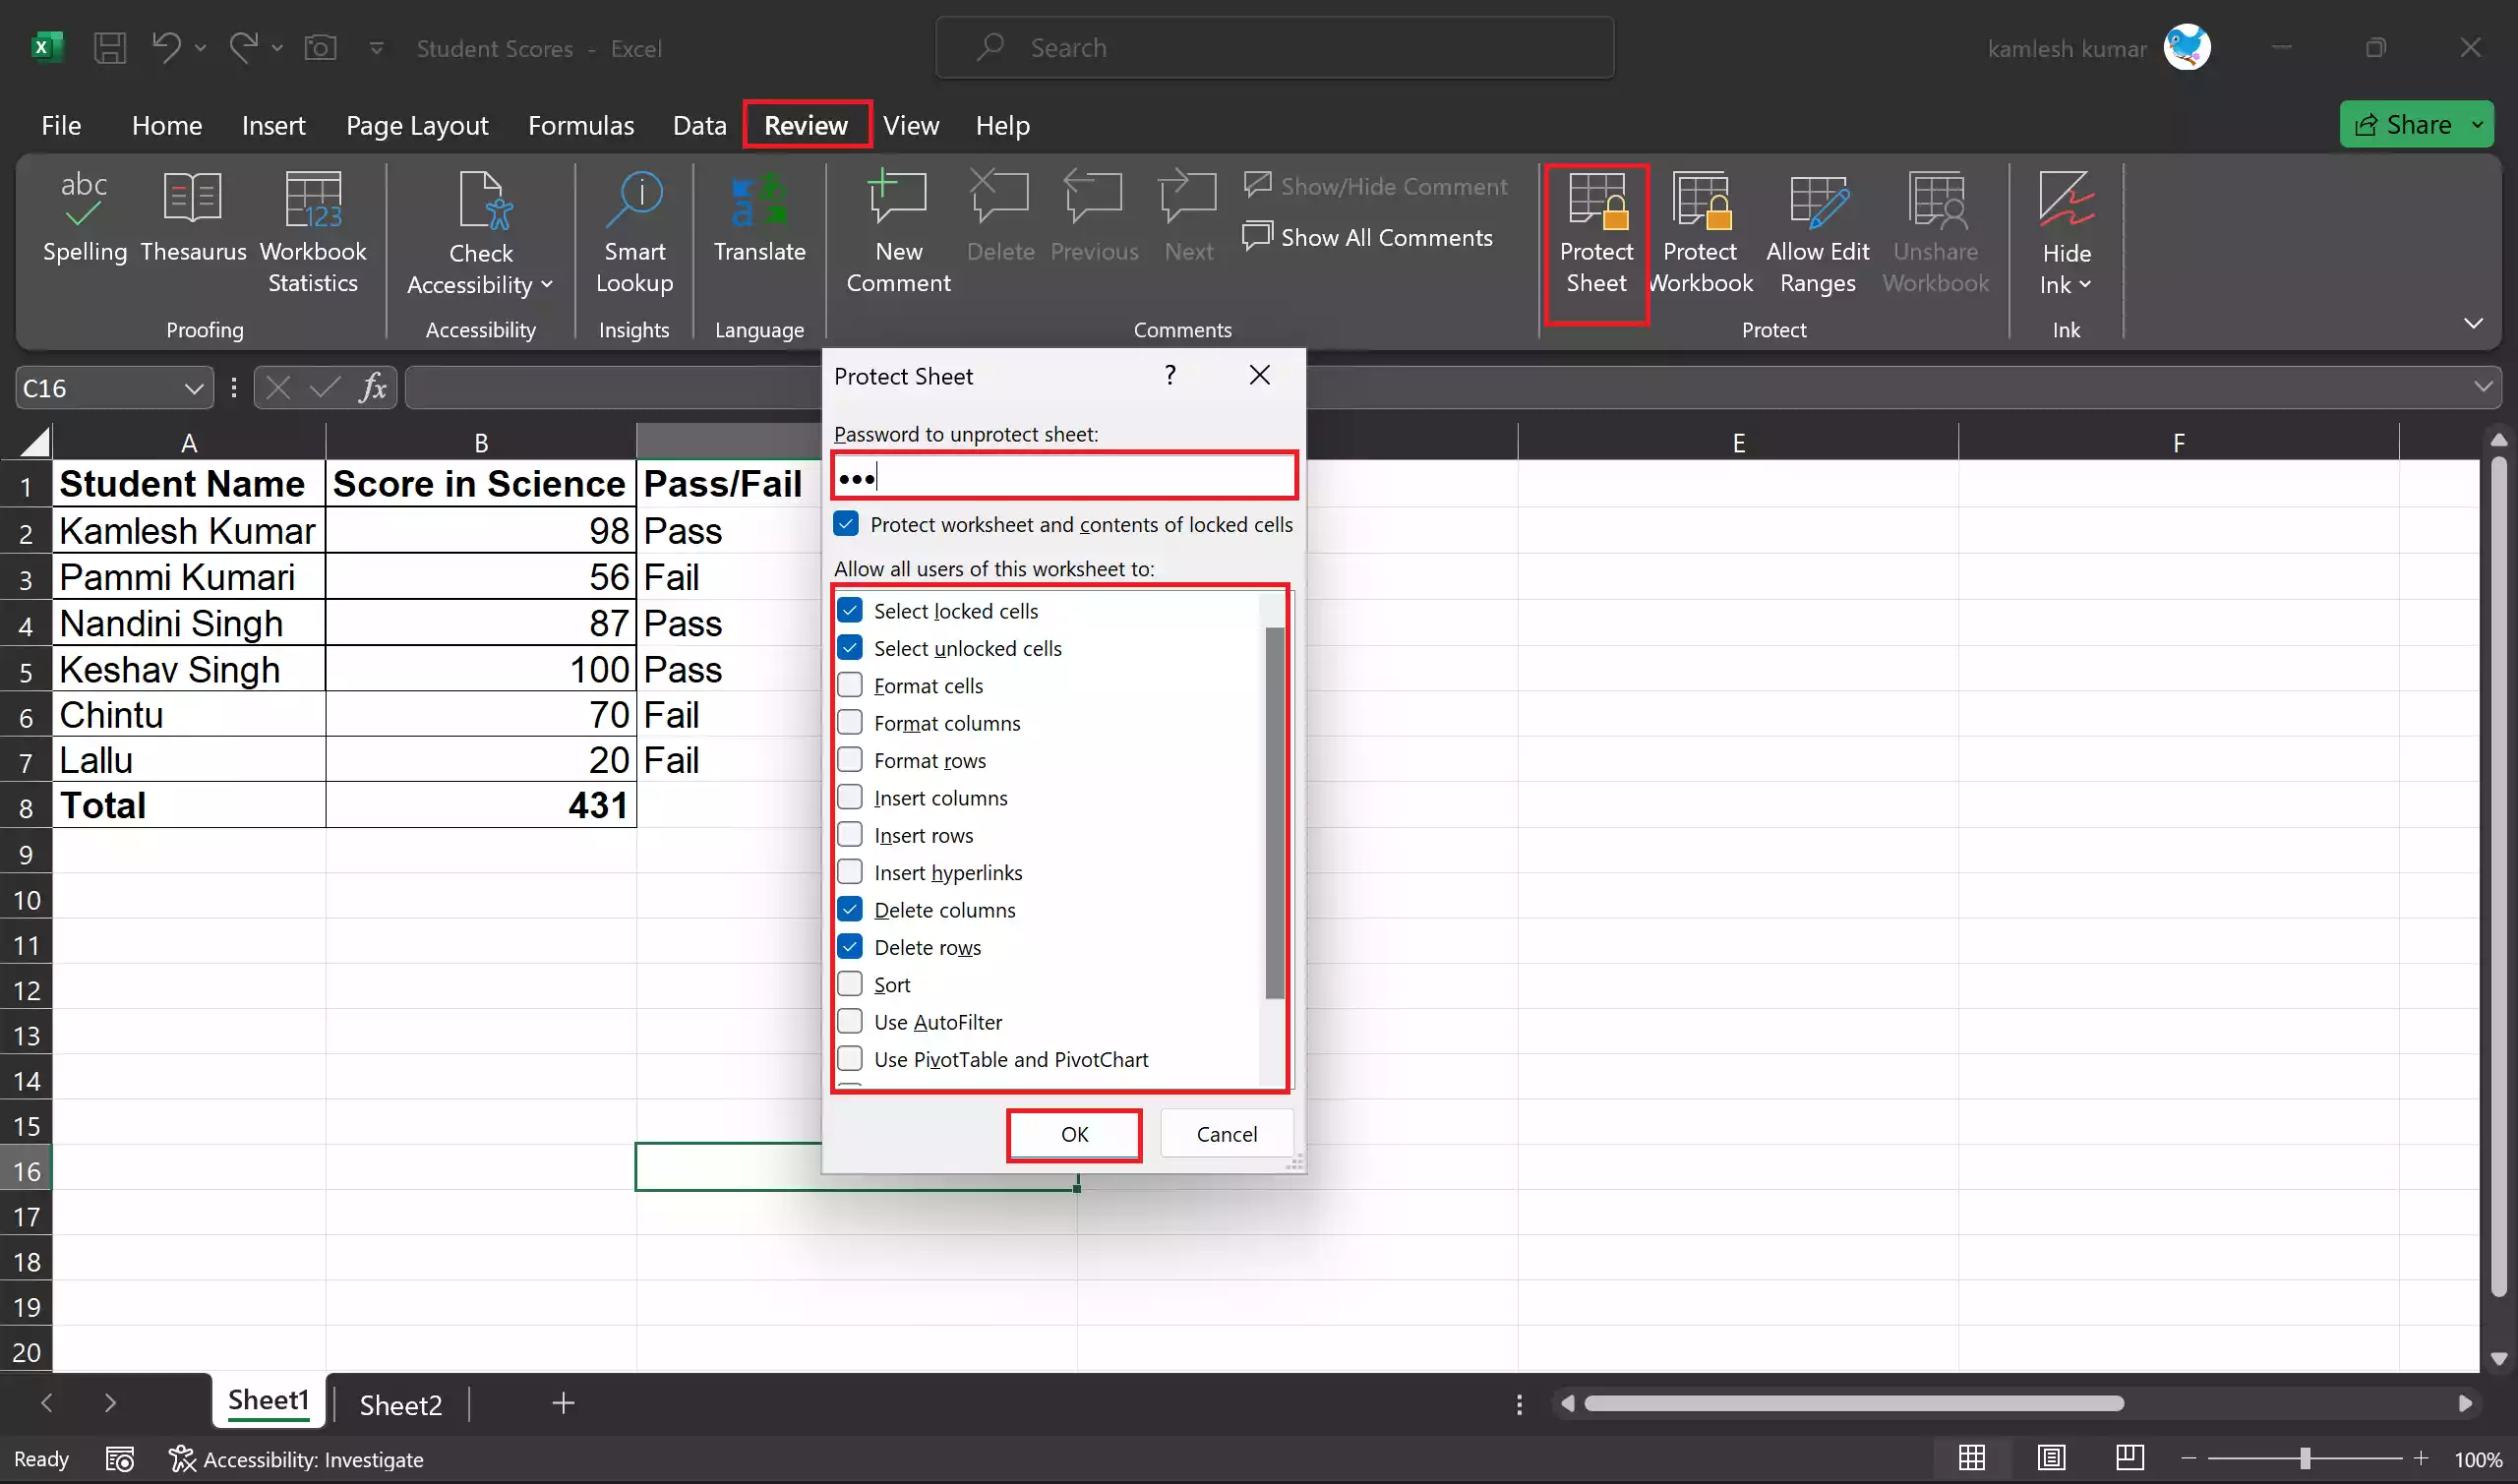
Step 3. To password protect the selected sheet, click on the “Review” tab in the Excel ribbon. This tab contains security and protection-related options.
Step 4. In the “Protect” group, you will find the “Protect Sheet” option. Click on it to open the “Protect Sheet” dialog box.
Step 5. In the dialog box, you can enter a password. This password will be required to unlock the sheet. Make sure to choose a strong and secure password. Excel provides the option to confirm the password, so type it twice to ensure accuracy.
Step 6. You can also specify what actions are allowed or not allowed without the password. For example, you can allow users to select locked cells or format cells without a password. Customize these settings according to your needs.
Step 7. Once you’ve set your preferences, click the “OK” button.
Step 8. After protecting the sheet with a password, make sure to save your workbook to apply the changes permanently. To do this, click “File” and then “Save” or “Save As” if you want to create a new file.
Step 9. It’s essential to test the password protection to ensure it works as intended. Close the Excel file and reopen it. When you try to access the protected sheet, Excel will prompt you to enter the password. If the correct password is entered, you’ll gain access; otherwise, the sheet remains locked.
Method 2: Right-Clicking on the Sheet Tab
There is another method to password protect an Excel sheet by right-clicking on the sheet tab at the bottom of the Excel window. Here’s how to do it:-
Step 1. Open Microsoft Excel and load the spreadsheet you want to protect with a password.
Step 2. Click on the sheet’s tab at the bottom of the Excel window. To password protect the selected sheet, right-click on the sheet tab at the bottom of the Excel window. A context menu will appear.
Step 3. From the context menu, select “Protect Sheet.” This will open the “Protect Sheet” dialog box.

Step 4. In the dialog box, you can enter a password in the “Password to unprotect sheet” field. This password will be required to unlock the sheet. Make sure to choose a strong and secure password. Excel provides the option to confirm the password, so type it twice to ensure accuracy.
Step 5. You can also specify what actions are allowed or not allowed without the password. For example, you can allow users to select locked cells or format cells without a password. Customize these settings according to your needs.
Step 6. Once you’ve set your preferences, click the “OK” button.
Step 7. After protecting the sheet with a password, make sure to save your workbook to apply the changes permanently. To do this, click “File” and then “Save” or “Save As” if you want to create a new file.
Step 8. It’s essential to test the password protection to ensure it works as intended. Close the Excel file and reopen it. When you try to access the protected sheet, Excel will prompt you to enter the password. If the correct password is entered, you’ll gain access; otherwise, the sheet remains locked.
This method provides a more direct way to protect an Excel sheet by right-clicking on the sheet tab, but it essentially achieves the same result as described in method 1 above. Make sure to follow the important tips and considerations mentioned in the next section for effective password protection and data security.
Important Tips and Considerations
Remember Your Password: If you forget the password, there is no way to recover it, and you won’t be able to access the protected sheet. Ensure you keep a secure record of your password.
Choose a Strong Password: A strong password should be a combination of letters (both uppercase and lowercase), numbers, and special characters. Avoid using easily guessable passwords like “123456” or “password.”
Backup Your Data: Always maintain a backup of your Excel files, especially when using password protection. In case you forget the password or encounter technical issues, a backup copy of your data will be invaluable.
Regularly Update Passwords: If you share your password with others or feel that the security of your data has been compromised, consider changing the password regularly.
Conclusion
Password protecting an Excel sheet is a simple yet effective way to safeguard your data from unauthorized access. By following the step-by-step guide outlined in this article, you can add an extra layer of security to your sensitive or confidential information stored in Excel. However, remember to use strong passwords, maintain backups, and be diligent in protecting your passwords to ensure the security of your data.
Also Read:
