Google Chrome is one of the most popular web browsers globally, known for its speed, simplicity, and extensive feature set. While browsing the internet, you may encounter various forms of advertisements. Some users prefer a clutter-free browsing experience and may want to disable ads, while others may want to support websites and content creators by enabling ads. In this gearupwindows article, we will explore how to enable or disable ads in the Chrome browser.
Why Enable or Disable Ads?
Before diving into the process of enabling or disabling ads in Chrome, it’s essential to understand why you might want to do so.
1. Privacy and Security: Some users disable ads to enhance their online privacy and security. Advertisements often rely on tracking your online behavior, which can raise concerns about data privacy and security.
2. Faster Browsing: Ads can slow down web page loading times, so disabling them may result in a faster browsing experience.
3. Support for Content Creators: Many websites rely on advertising revenue to support their content and services. By enabling ads, you help support these creators.
4. Reduced Clutter: Advertisements can make websites appear cluttered and distracting. Disabling them can lead to a cleaner and more enjoyable browsing experience.
How to Enable or Disable Ads in Chrome?
Chrome provides multiple methods to enable or disable ads, depending on your preferences and the extent to which you want to control ads. Here are some of the common methods:-
Method 1. Built-in Chrome Settings
Step 1. Launch the Google Chrome browser on your computer.
Step 2. Click on the three vertical dots (the menu icon) located at the top-right corner of the browser window to open the Chrome menu. From the menu, select “Settings.”

Step 3. On the left side of the Settings menu, click on “Privacy and security.”
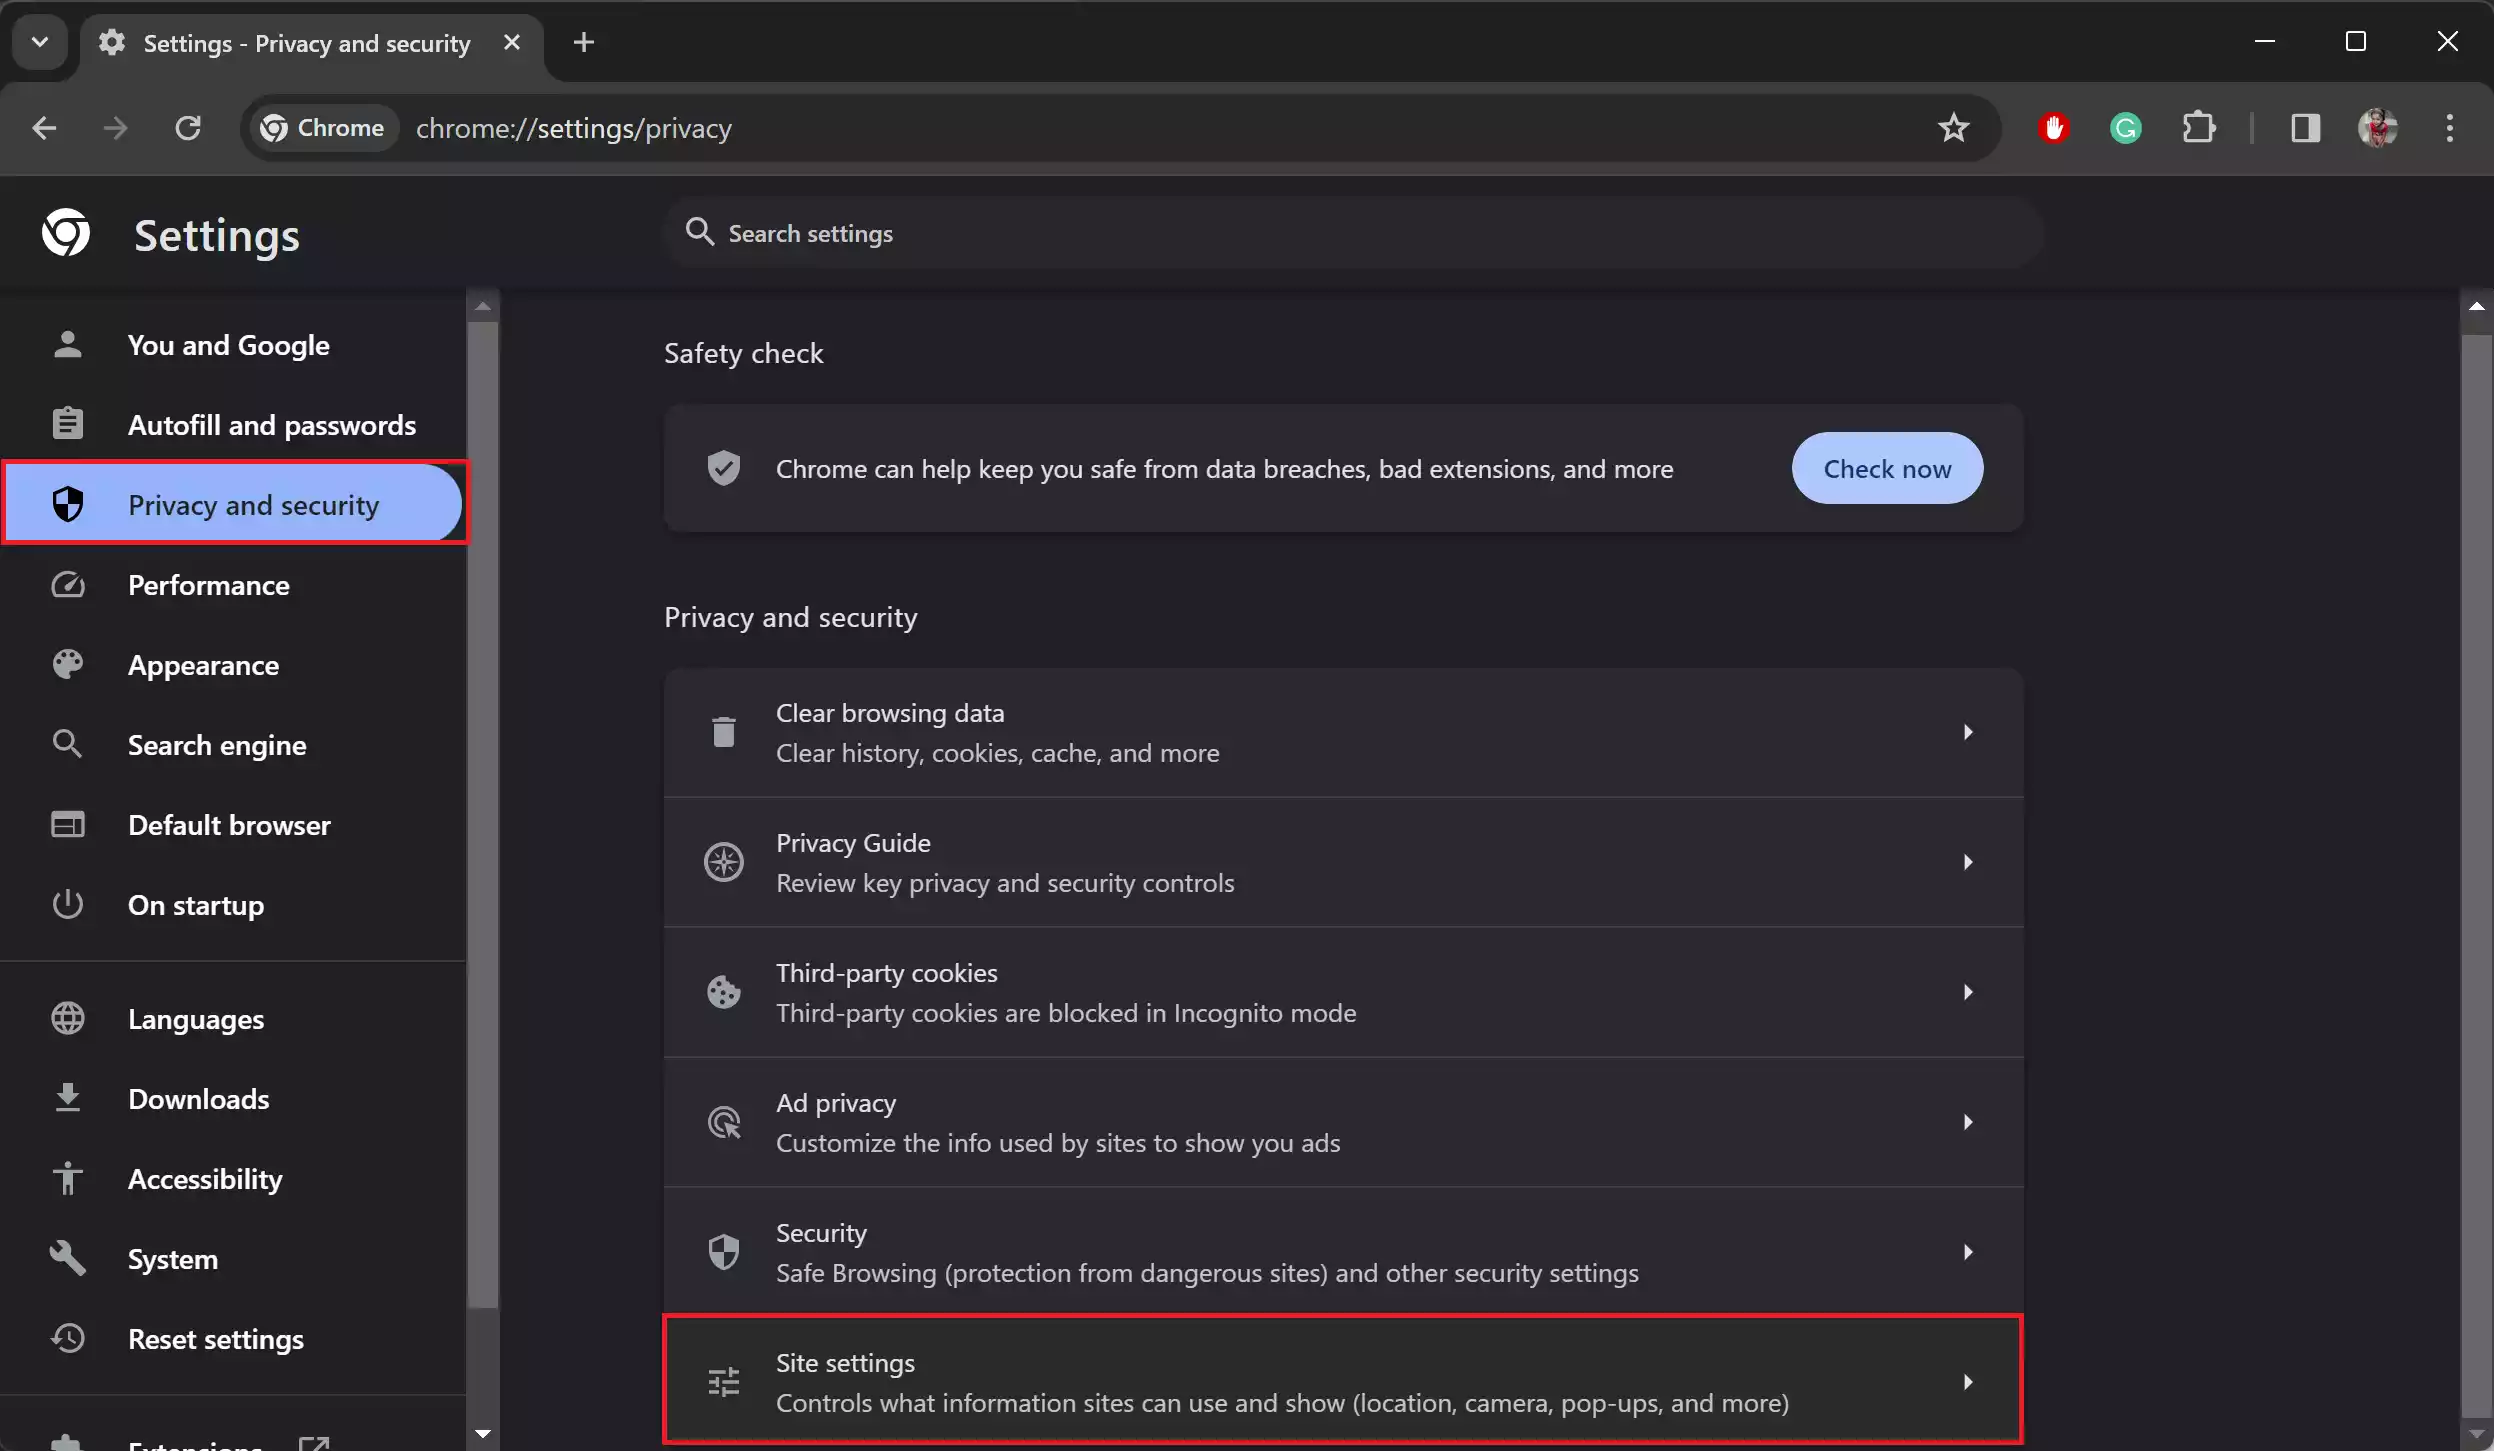
Step 4. Under the “Privacy and security” section, click on “Site settings.”
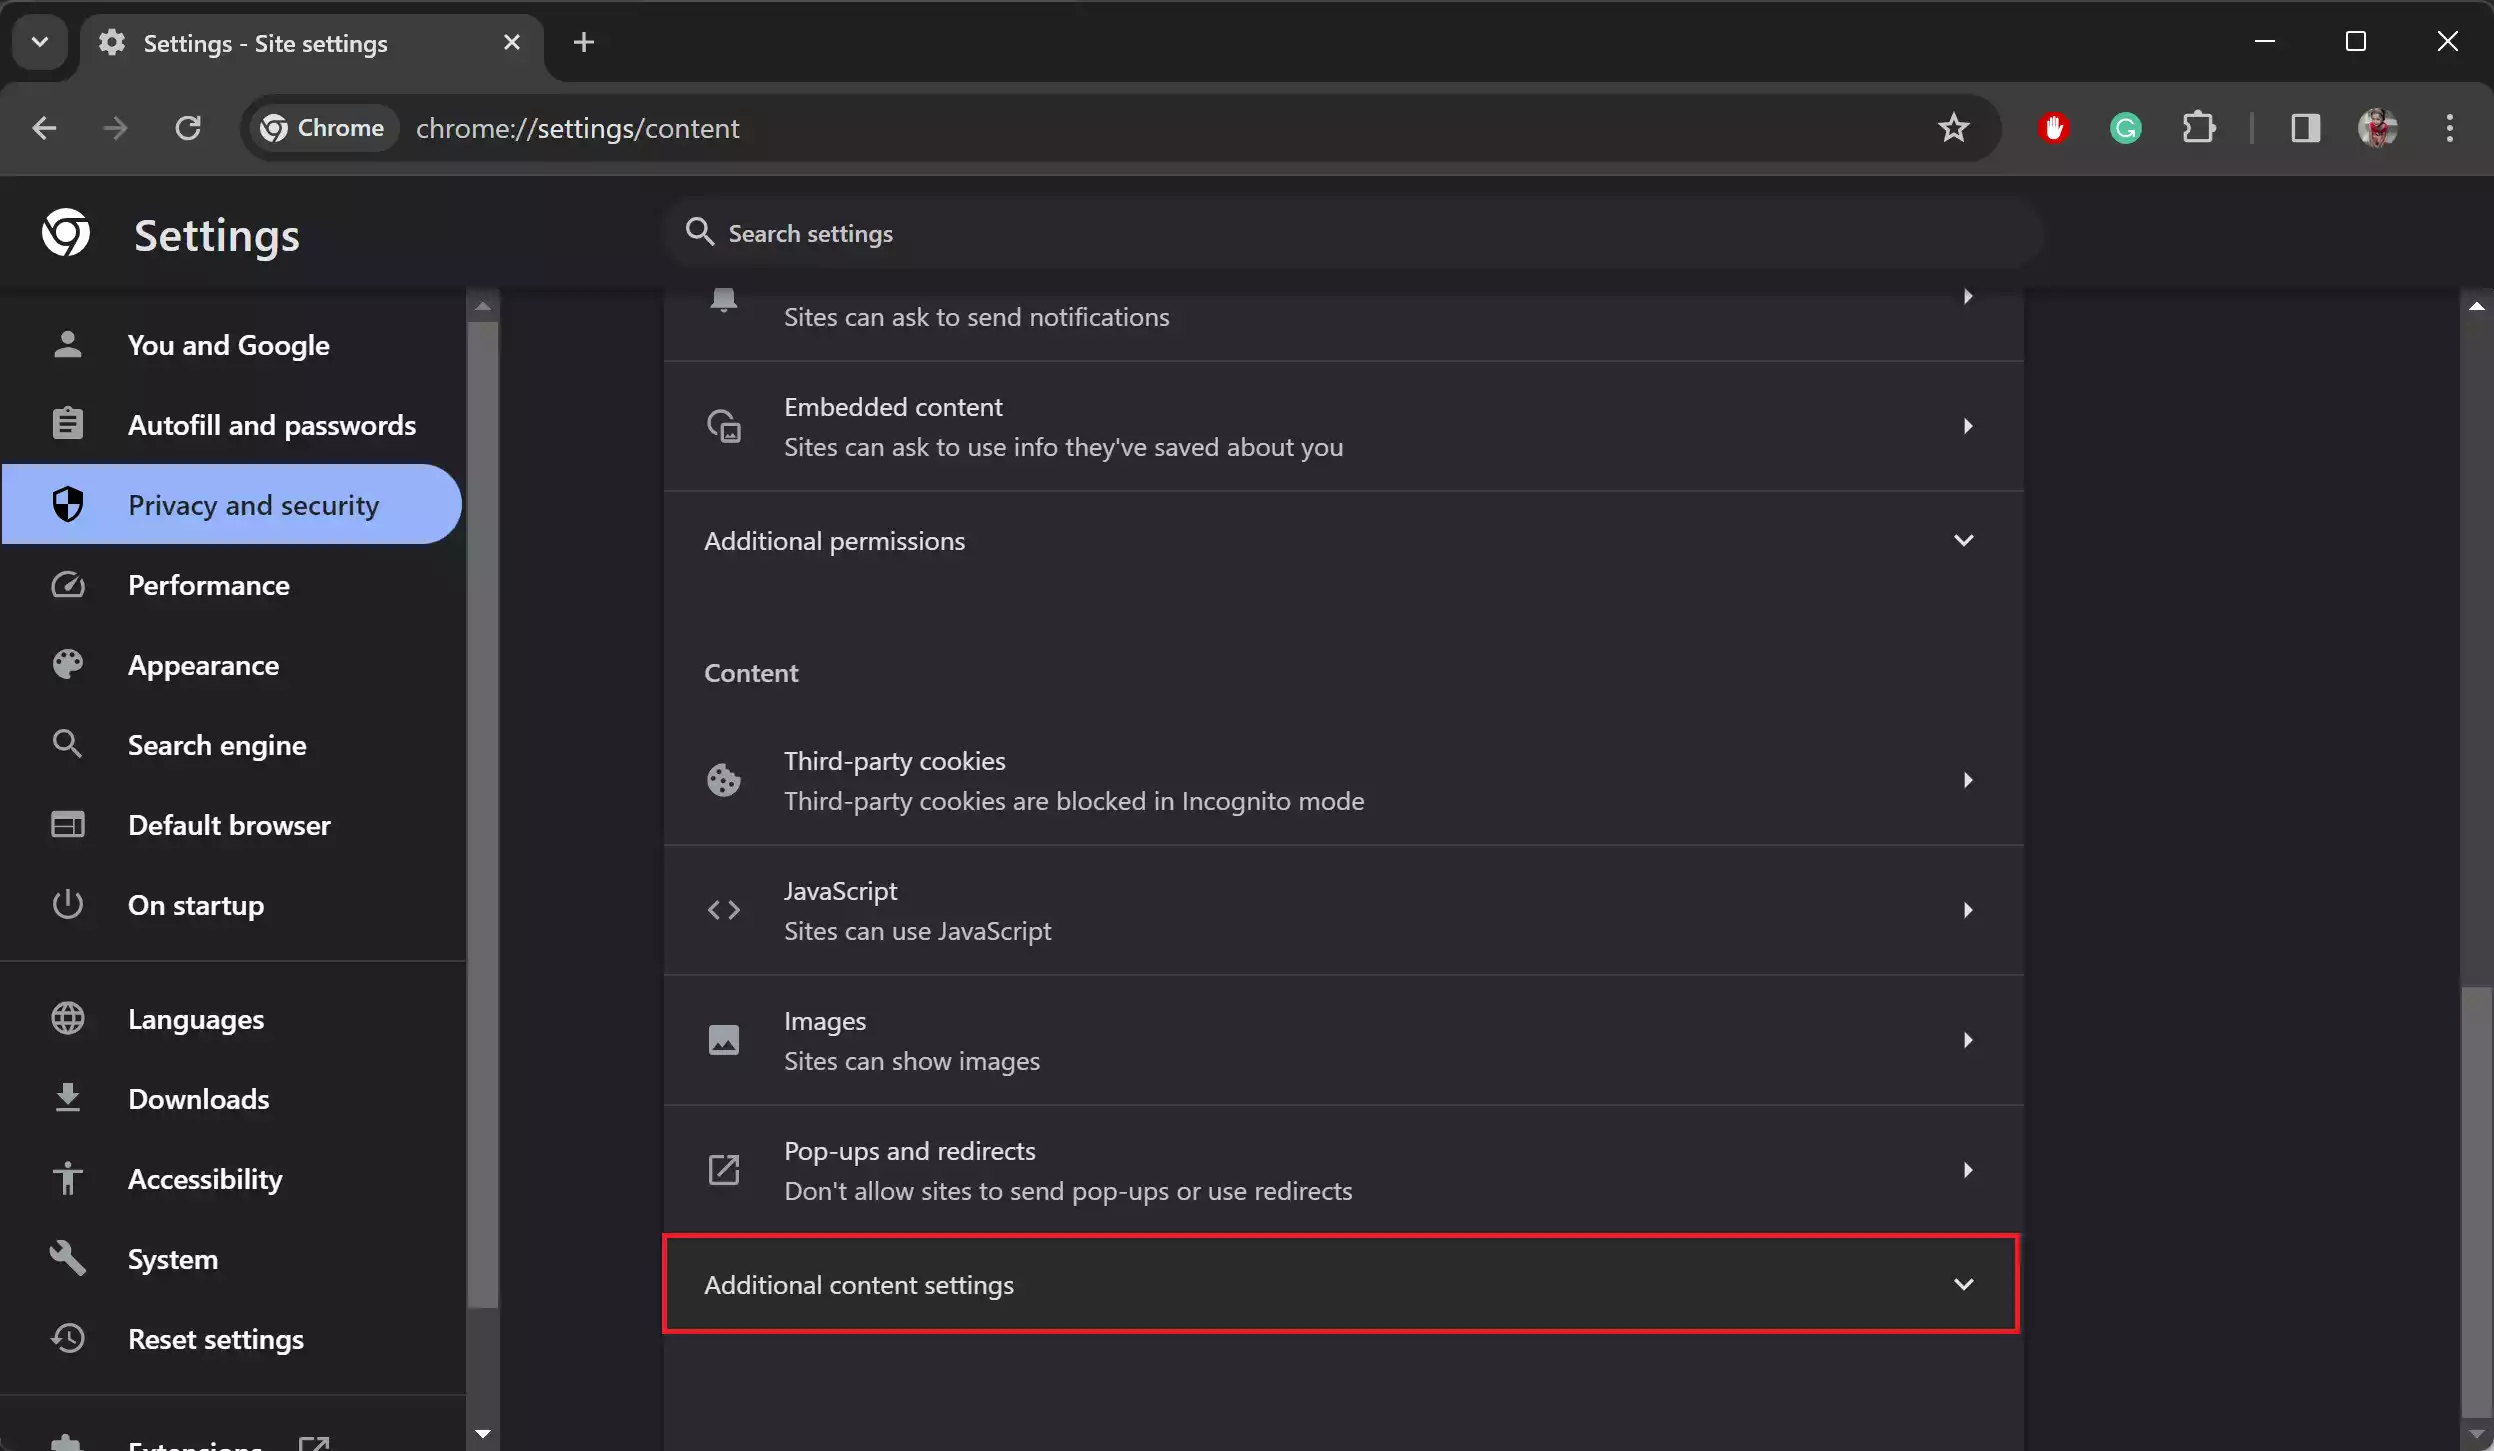
Step 5. Within the “Site settings,” scroll down to the bottom and click on “Additional content settings.”
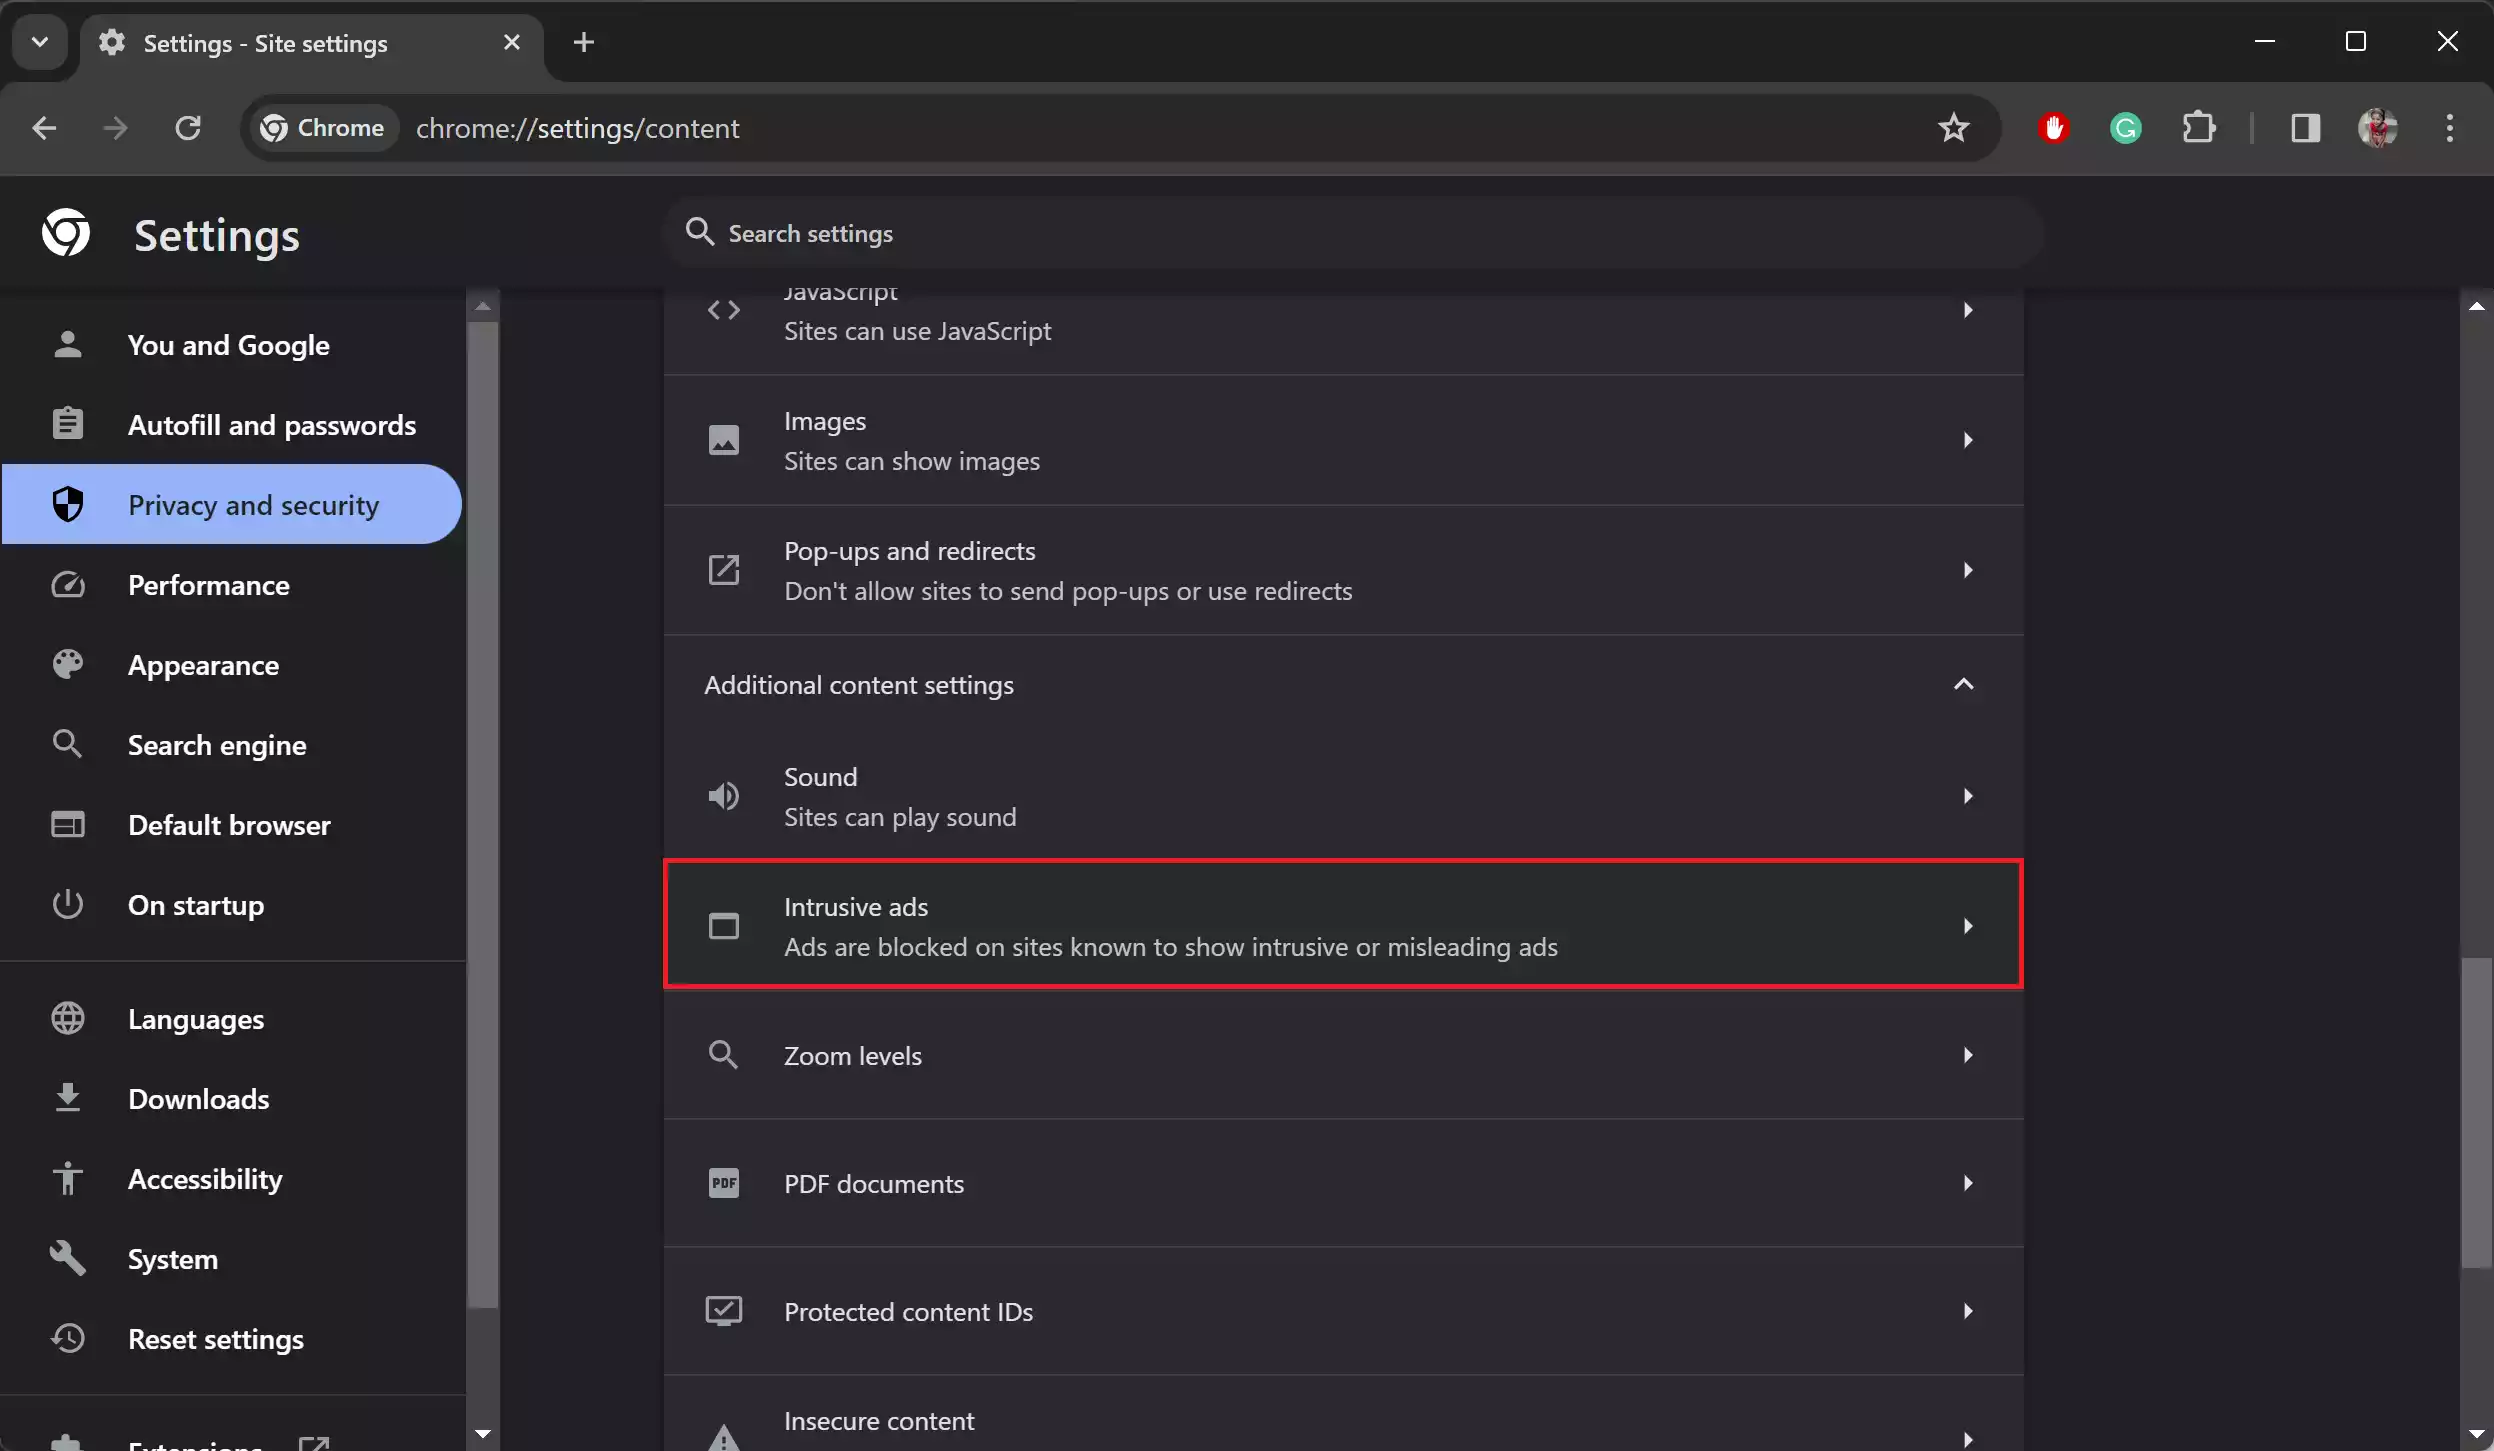
Step 6. Under “Additional content settings,” click on “Intrusive ads.”
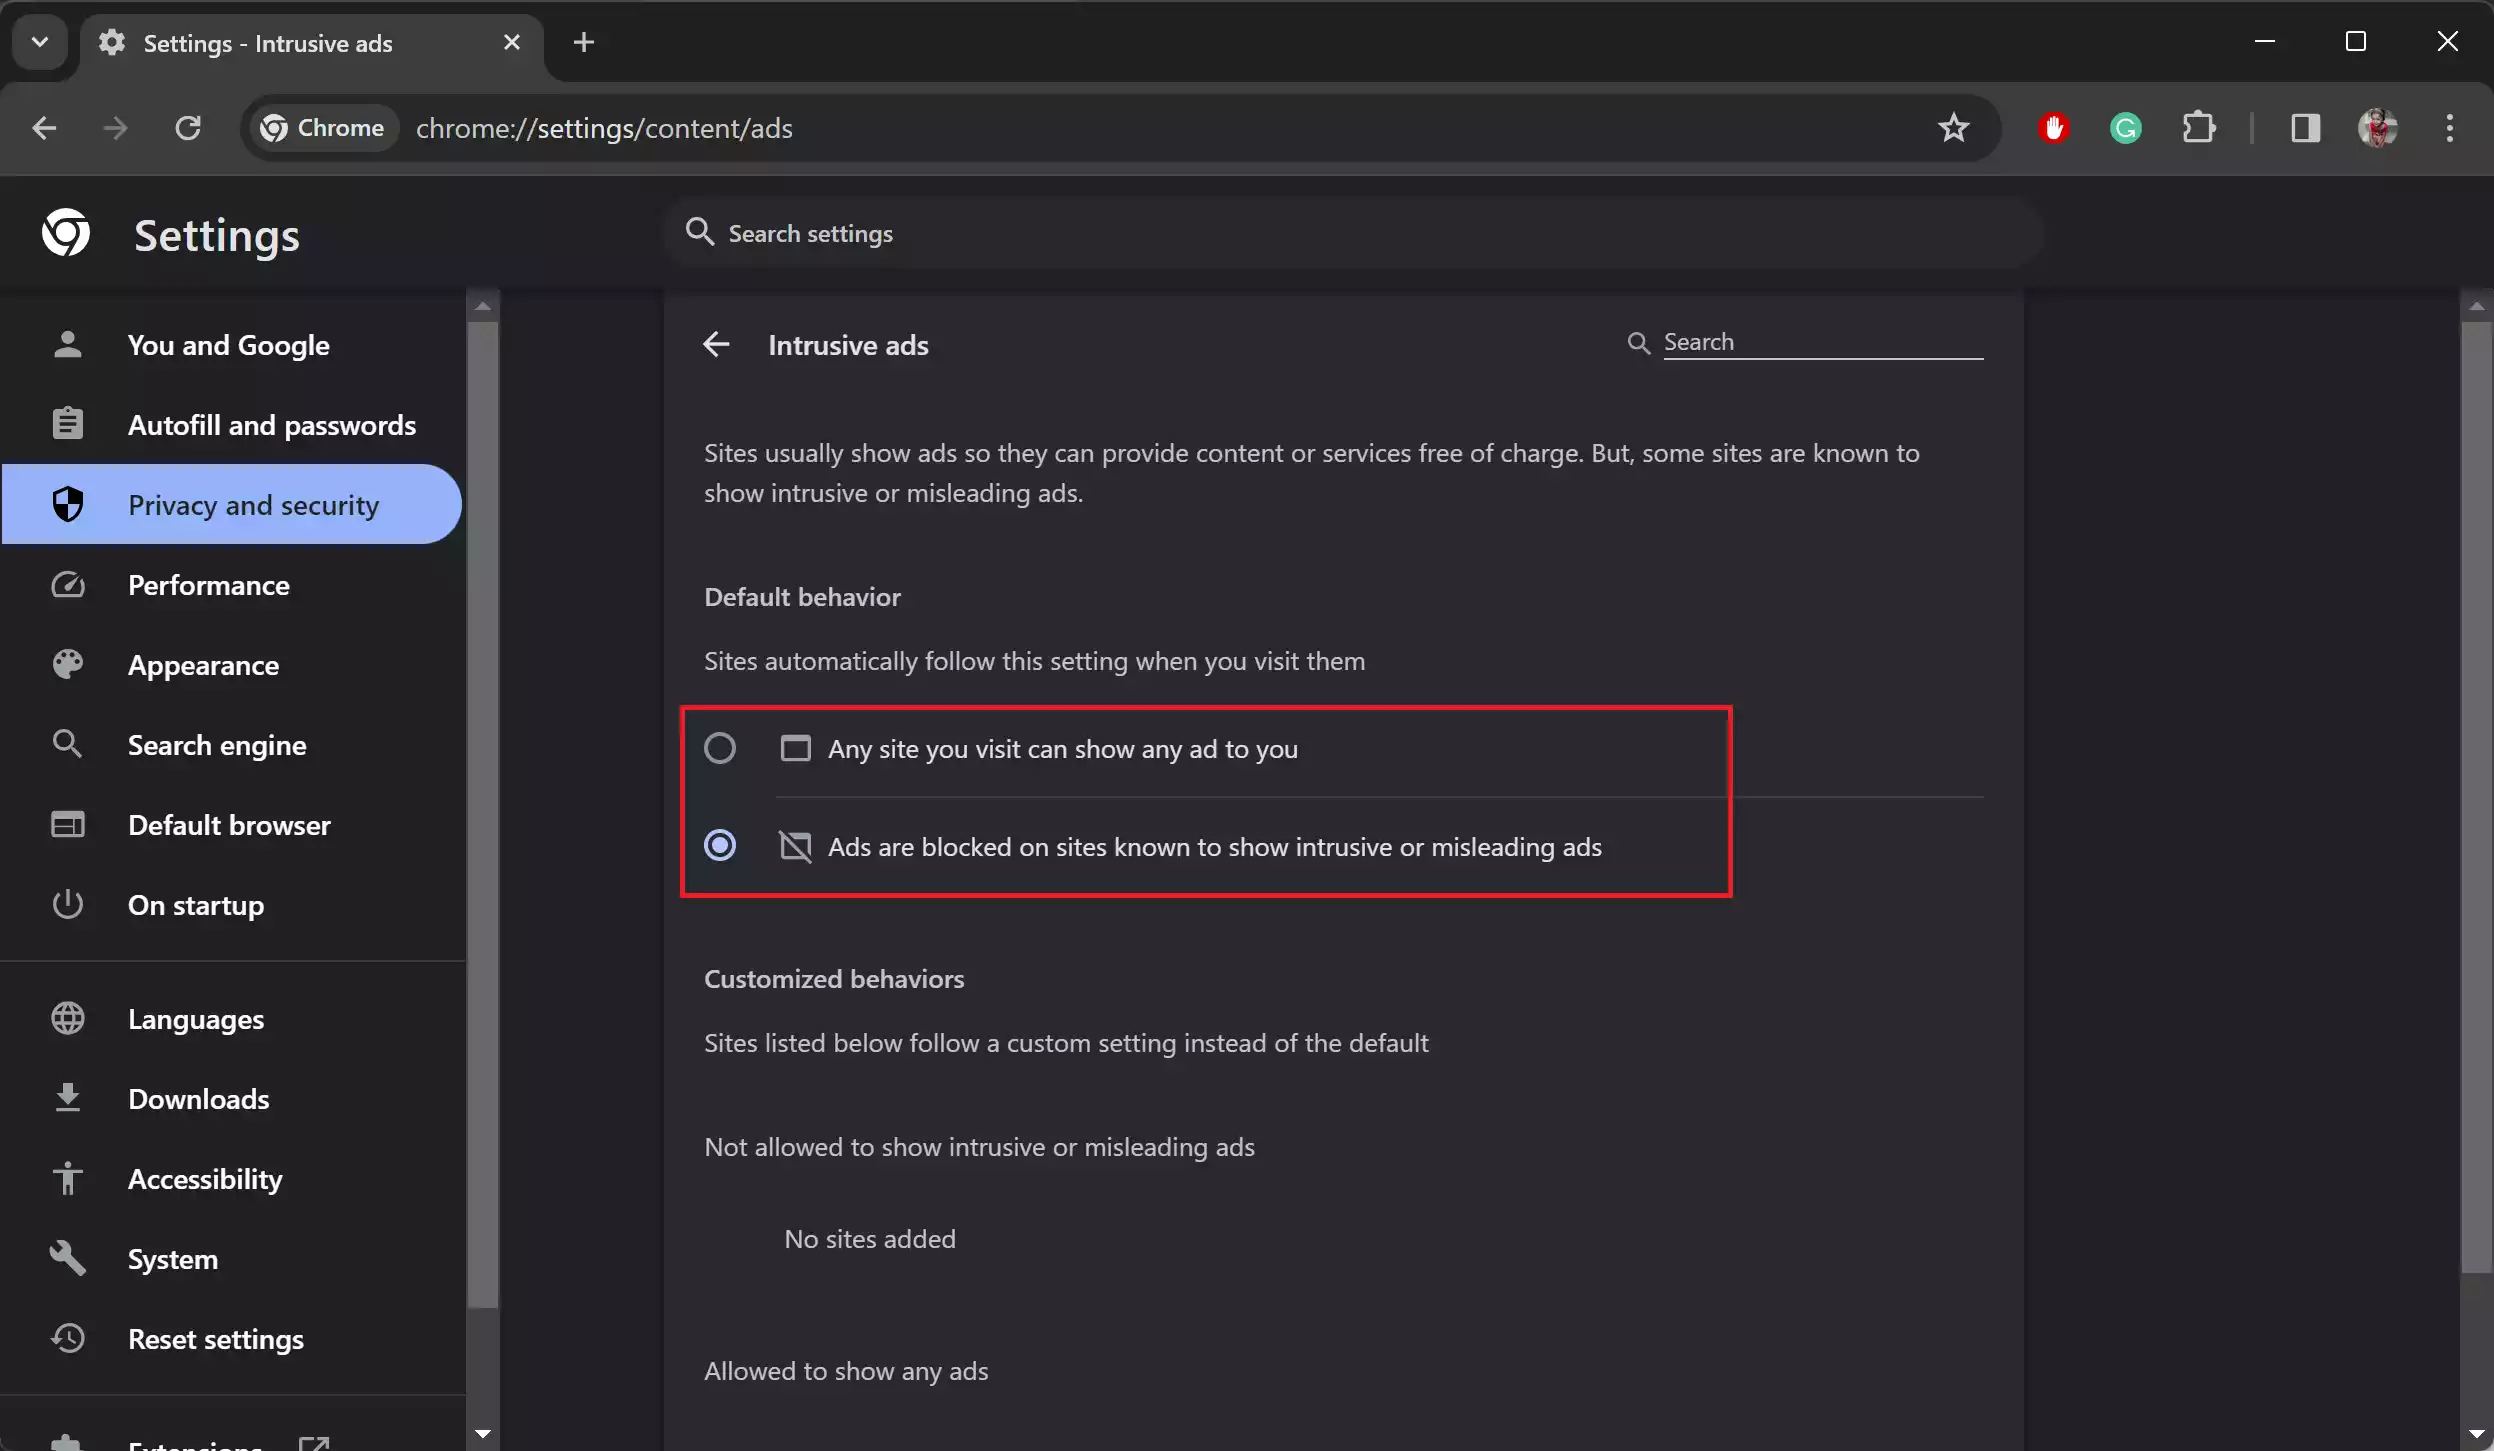
Step 7. Here, under the “Default behavior” section, you will find two options:-
-
- Any site you visit can show any ad to you
- Ads are blocked on sites known to show intrusive or misleading ads
Toggle the switch next to “Ads are blocked on sites known to show intrusive or misleading ads” to disable ads in the Chrome browser. If you want to display all types of ads on your Chrome browser, select the first option, “Any site you visit can show any ad to you.”
Method 2. Use Chrome Extensions
There are various Chrome extensions available, such as Adblock Plus, uBlock Origin, and AdGuard, that allow you to block ads. These extensions provide more advanced ad-blocking features and customizability.
To use an ad-blocking extension, visit the Chrome Web Store, search for your preferred ad-blocker, and click “Add to Chrome.” Follow the installation instructions.
Conclusion
Whether you want to enhance your privacy, speed up your browsing experience, support content creators, or reduce clutter, Google Chrome offers various methods for enabling or disabling ads. The method you choose ultimately depends on your personal preferences and the level of control you desire over the advertisements you encounter while browsing the web. By following the steps outlined in this article, you can tailor your Chrome browser to your specific ad-blocking needs.
Also Read: How to Update extensions, add-ons, and plug-ins in Chrome, Edge, and Firefox?
