The Action Center of Windows 10 is known as Quick Settings (Shortcut Keys: Windows + A) in Windows 11. You can open Quick Settings by clicking on a group of icons ( Wi-Fi / Ethernet, Volume, Battery) on the right side of the Taskbar.
The Quick Settings hosts commonly used settings like Volume, Brightness, Wi-Fi, Bluetooth, Airplane mode, Rotation lock, Battery saver, Accessibility, Night light, Mobile hotspot, Nearby sharing, Cast, etc. It is also possible to add, remove or arrange items on the Quick Settings menu simply by editing them. You can also reset Quick Settings if you messed up its settings. Above the Quick Settings, you will find media playback controls when playing music or videos in Microsoft Edge or streaming music in apps like Spotify.
Suppose you have made several changes to your Quick Settings menu and want to stop users from adding, removing, or arranging items. In that case, you can achieve it through two methods: using Local Group Policy Editor or Registry Editor.
In this gearupwindows article, we will guide you on enabling and disabling the editing of Quick Settings in Windows 11.
How to Enable or Disable Editing Quick Settings Using Local Group Policy Editor?
To turn on or off the editing of Quick Settings using Group Policy, do the following:-
Step 1. First, open Local Group Policy Editor.
Step 2. Then, navigate to the following path in the left sidebar of the Local Group Policy Editor window:-
Computer Configuration > Administrative Templates > Start Menu and Taskbar

Step 3. In the right pane of the Start Menu and Taskbar, double-click on the Disable Editing Quick Settings policy to edit it.
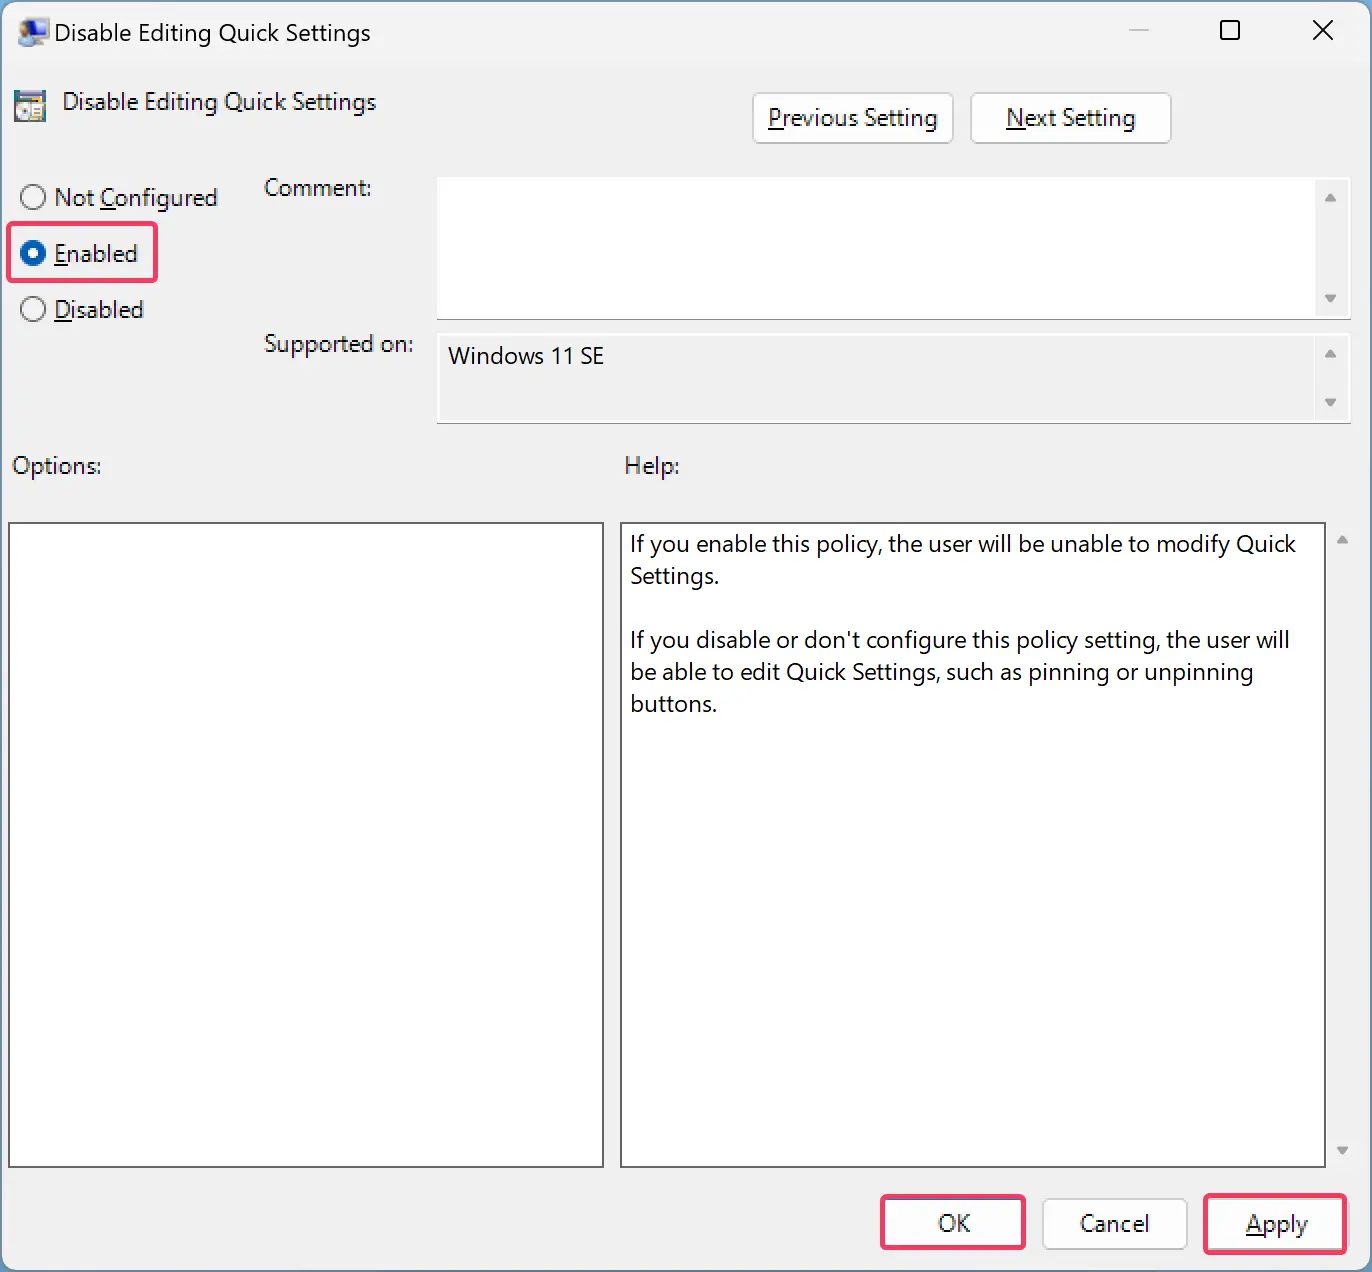
Step 4. Select the Enabled option to prevent editing Quick Settings items.
To allow editing of Quick Settings items, select the Not Configured option.
Step 5. Click Apply.
Step 6. Click OK.
Step 7. At last, reboot your computer to apply the changes.
How to Turn On or Off Editing Quick Settings Using Registry Editor?
To enable or disable editing Quick Settings through Registry Editor, use the following steps:-
Step 1. First, open Registry Editor.
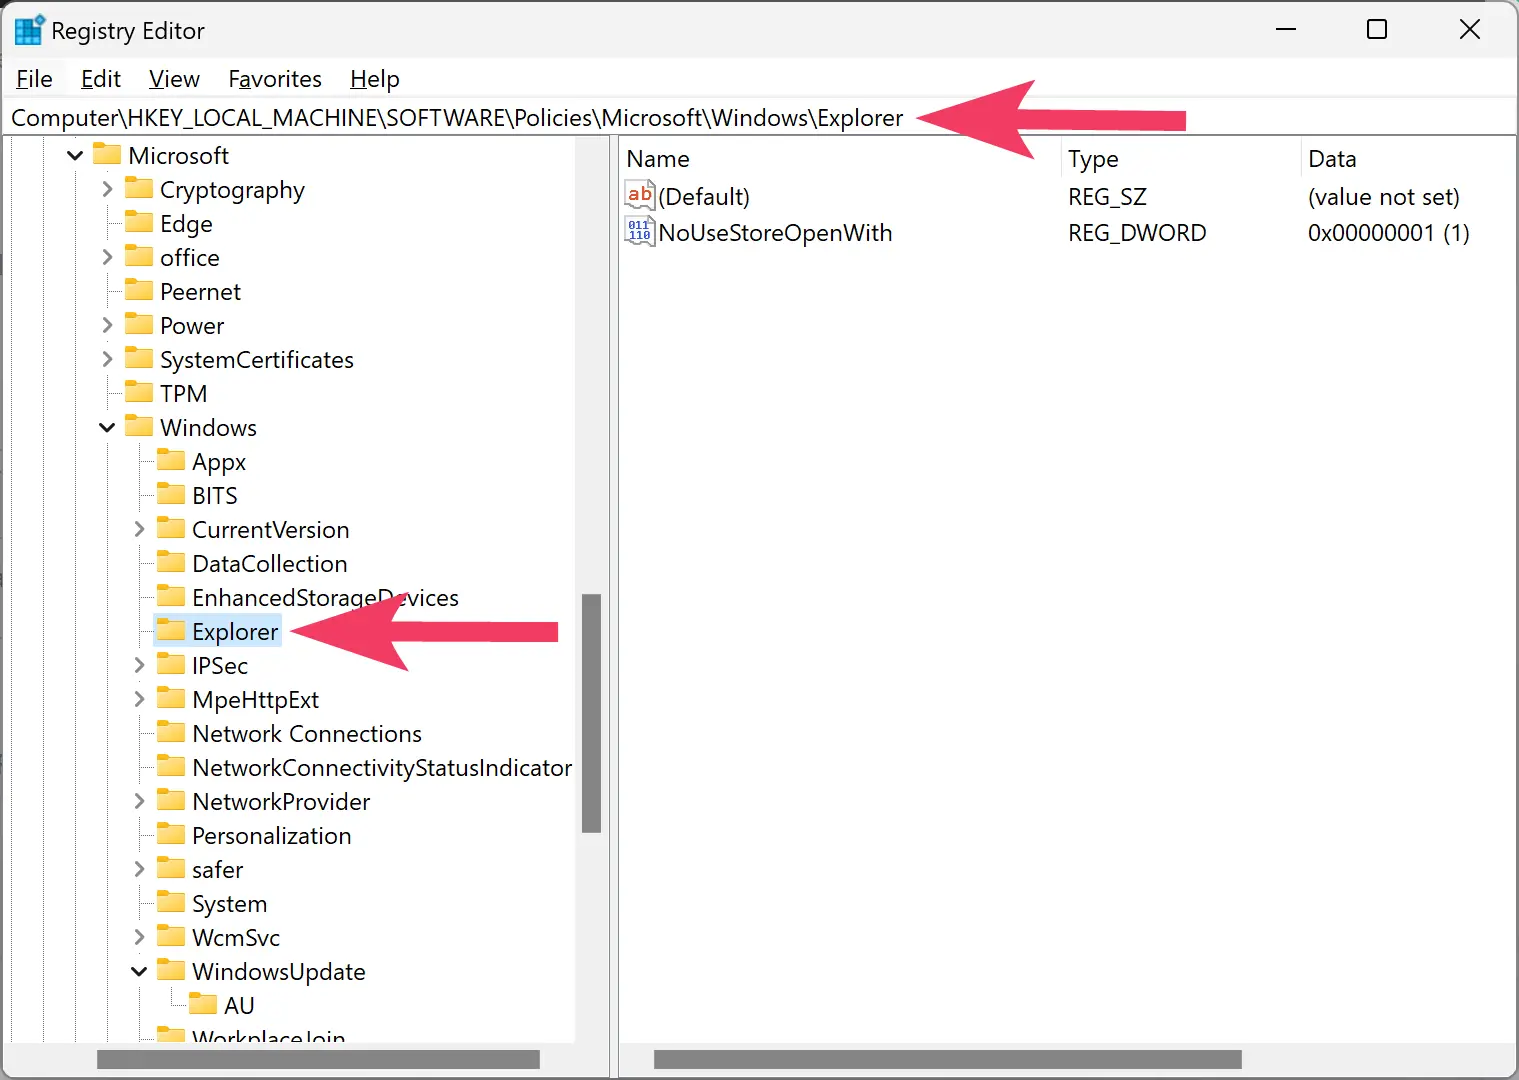
Step 2. Then, navigate to the following key on the left side of the Registry Editor window:-
HKEY_LOCAL_MACHINE\SOFTWARE\Policies\Microsoft\Windows\Explorer
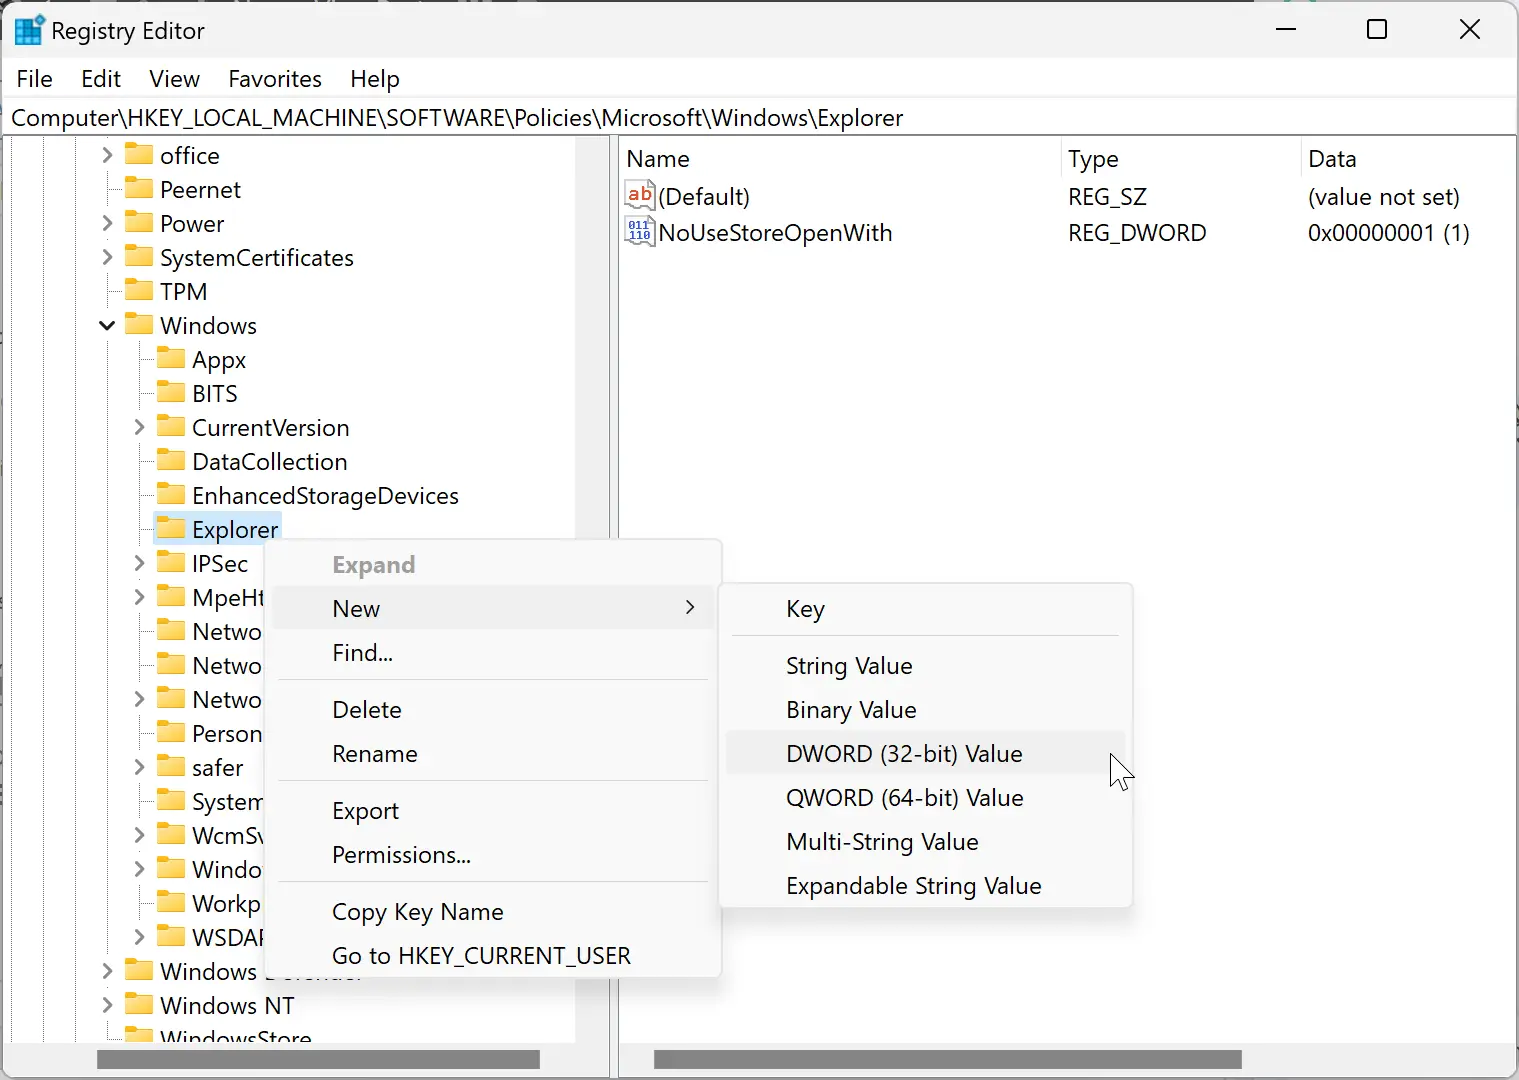
Step 3. Now, right-click on the Explorer folder on the left side and select New > DWORD (32-Bit) Value.
Step 4. Name the newly created REG_DWORD as DisableEditingQuickSettings.
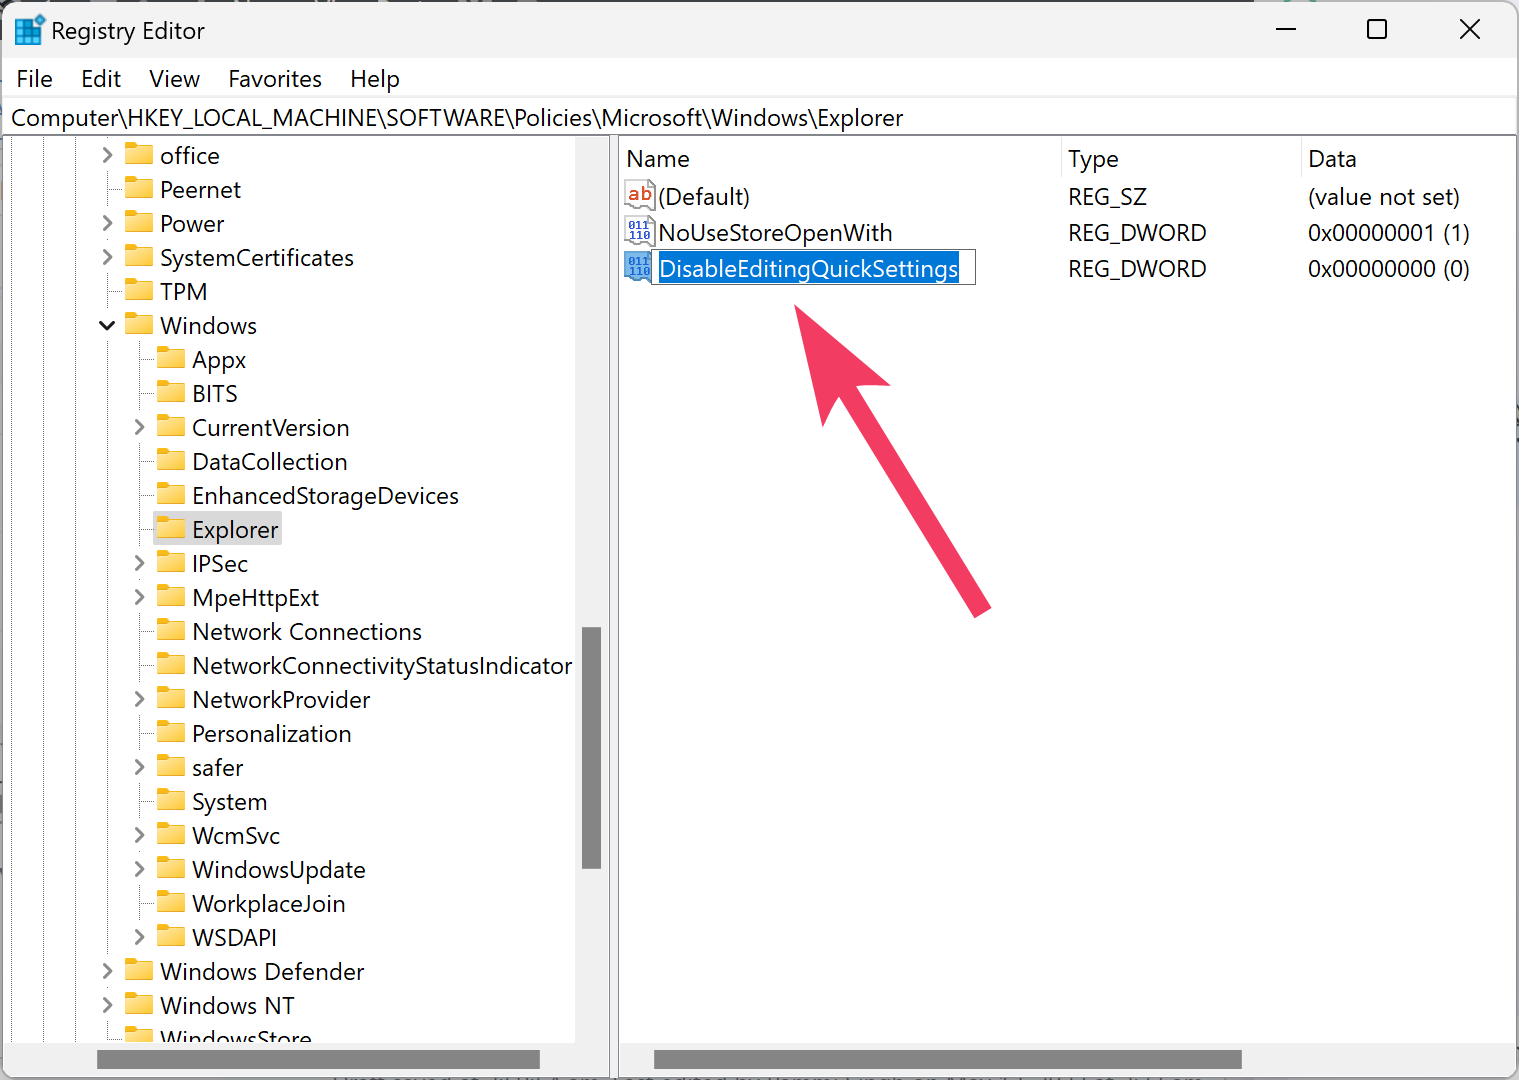
Step 5. Now, double-click on the DisableEditingQuickSettings REG_DWORD and set its “Value data” to 1 to disable editing Quick Settings.
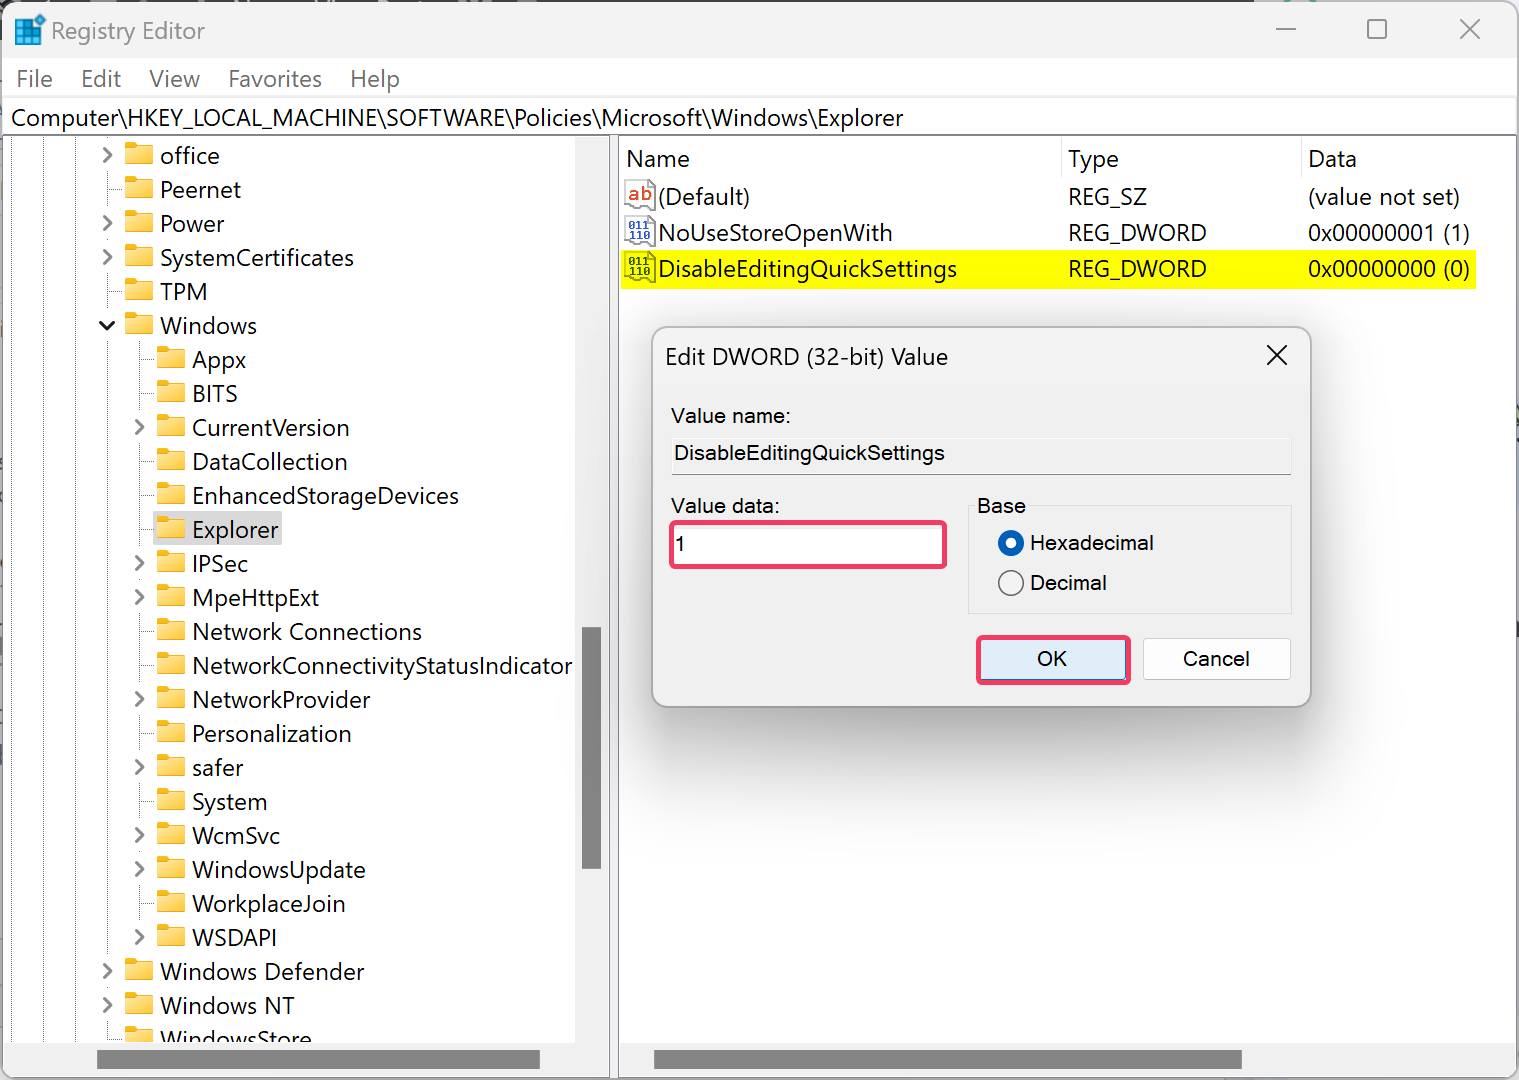
Step 6. Click OK.
Step 7. At last, reboot your PC to apply the changes.
If you want to allow editing Quick Settings in Windows 11, navigate to the following path in the Registry Editor:-
HKEY_LOCAL_MACHINE\SOFTWARE\Policies\Microsoft\Windows\Explorer
Then, right-click on the DisableEditingQuickSettings REG_DWORD and select the Delete option. Select Yes when prompted. Finally, restart your computer to apply the changes.
Conclusion
In conclusion, Quick Settings in Windows 11 is the replacement for the Action Center in Windows 10. It provides quick access to commonly used settings like Volume, Brightness, Wi-Fi, Bluetooth, Airplane mode, and more. You can easily add, remove, or arrange items on the Quick Settings menu. However, if you want to prevent users from editing Quick Settings items, you can do so using either Local Group Policy Editor or Registry Editor. The steps to enable or disable editing Quick Settings using these tools have been explained in detail in this article. It is important to note that you should always be careful when making changes to the registry, as incorrect changes can cause system instability.