Windows 11 comes with many features, and one of those is “Game Mode,” which remains turned on by default. This Game Mode automatically optimizes your system for gaming when your Windows detects a game in progress. Usually, you don’t need to turn it off, but you can disable it if you notice performance issues.
This gearupwindows article will guide you on enabling and disabling the gaming mode on Windows 11 computers. You can achieve this task using the built-in Settings app or tweaking Registry.
What is Game Mode on Windows 11?
The Game Mode feature was first introduced on Windows 10 Creators Update in 2017. The Game Mode on Windows 11 is a special mode to prioritize game processes as and when they run. When this mode is enabled and you play a game, Windows will prioritize resources for game performance. This mode temporarily prevents Windows Update from installing drivers or asking to restart your PC.
How to Turn On or Off Game Mode in Windows 11 Settings?
When you notice performance issues, or due to some reason, you want to disable the Game Mode, make the following changes in Windows 11 Settings:-
Step 1. Open the Settings app by pressing Windows + I keys from the keyboard.
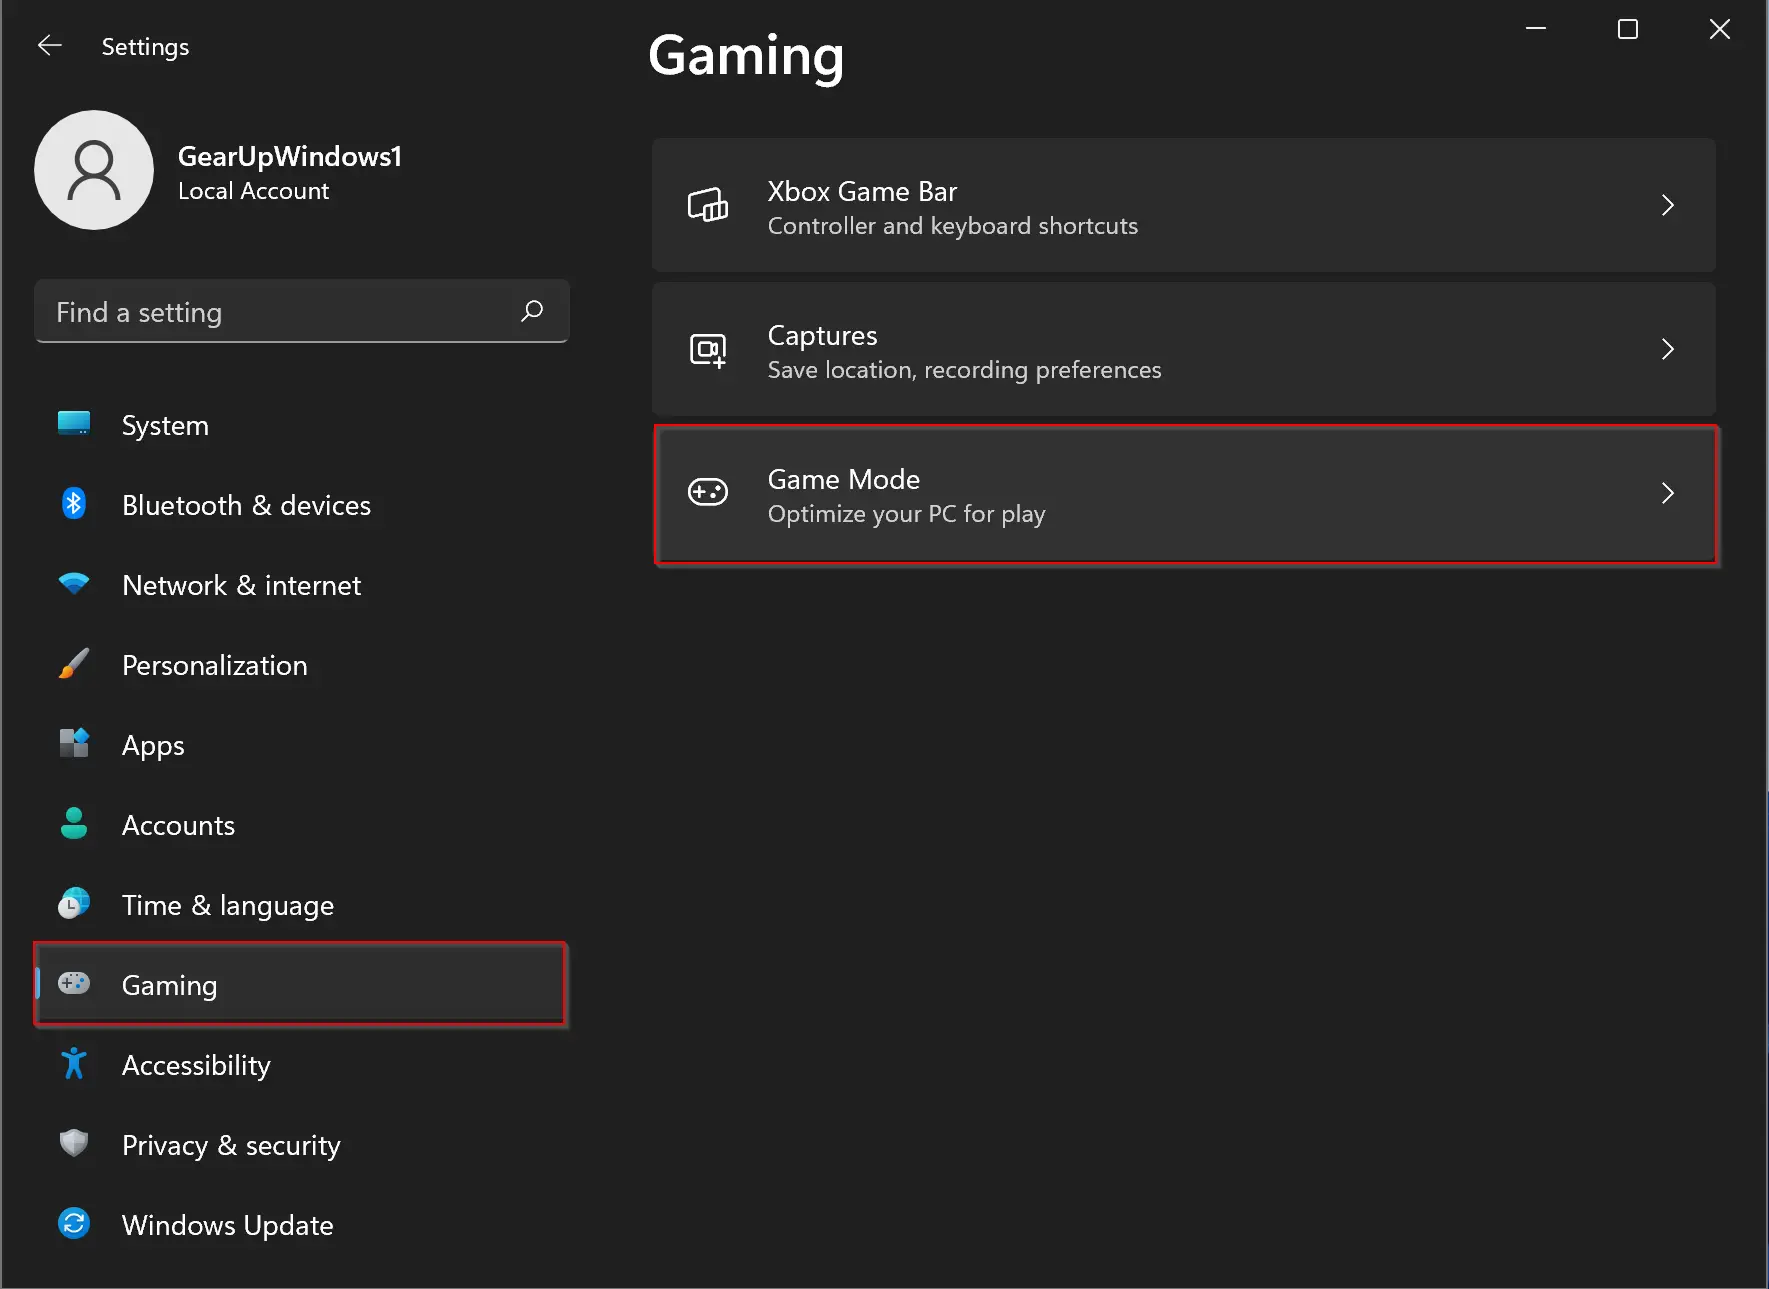
Step 2. Select the Gaming category from the left sidebar when the Settings window opens.
Step 3. Click the Game Mode on the right-side pane.
Step 4. Turn off the toggle switch beside “Game Mode” to the Game Mode settings page to disable it.
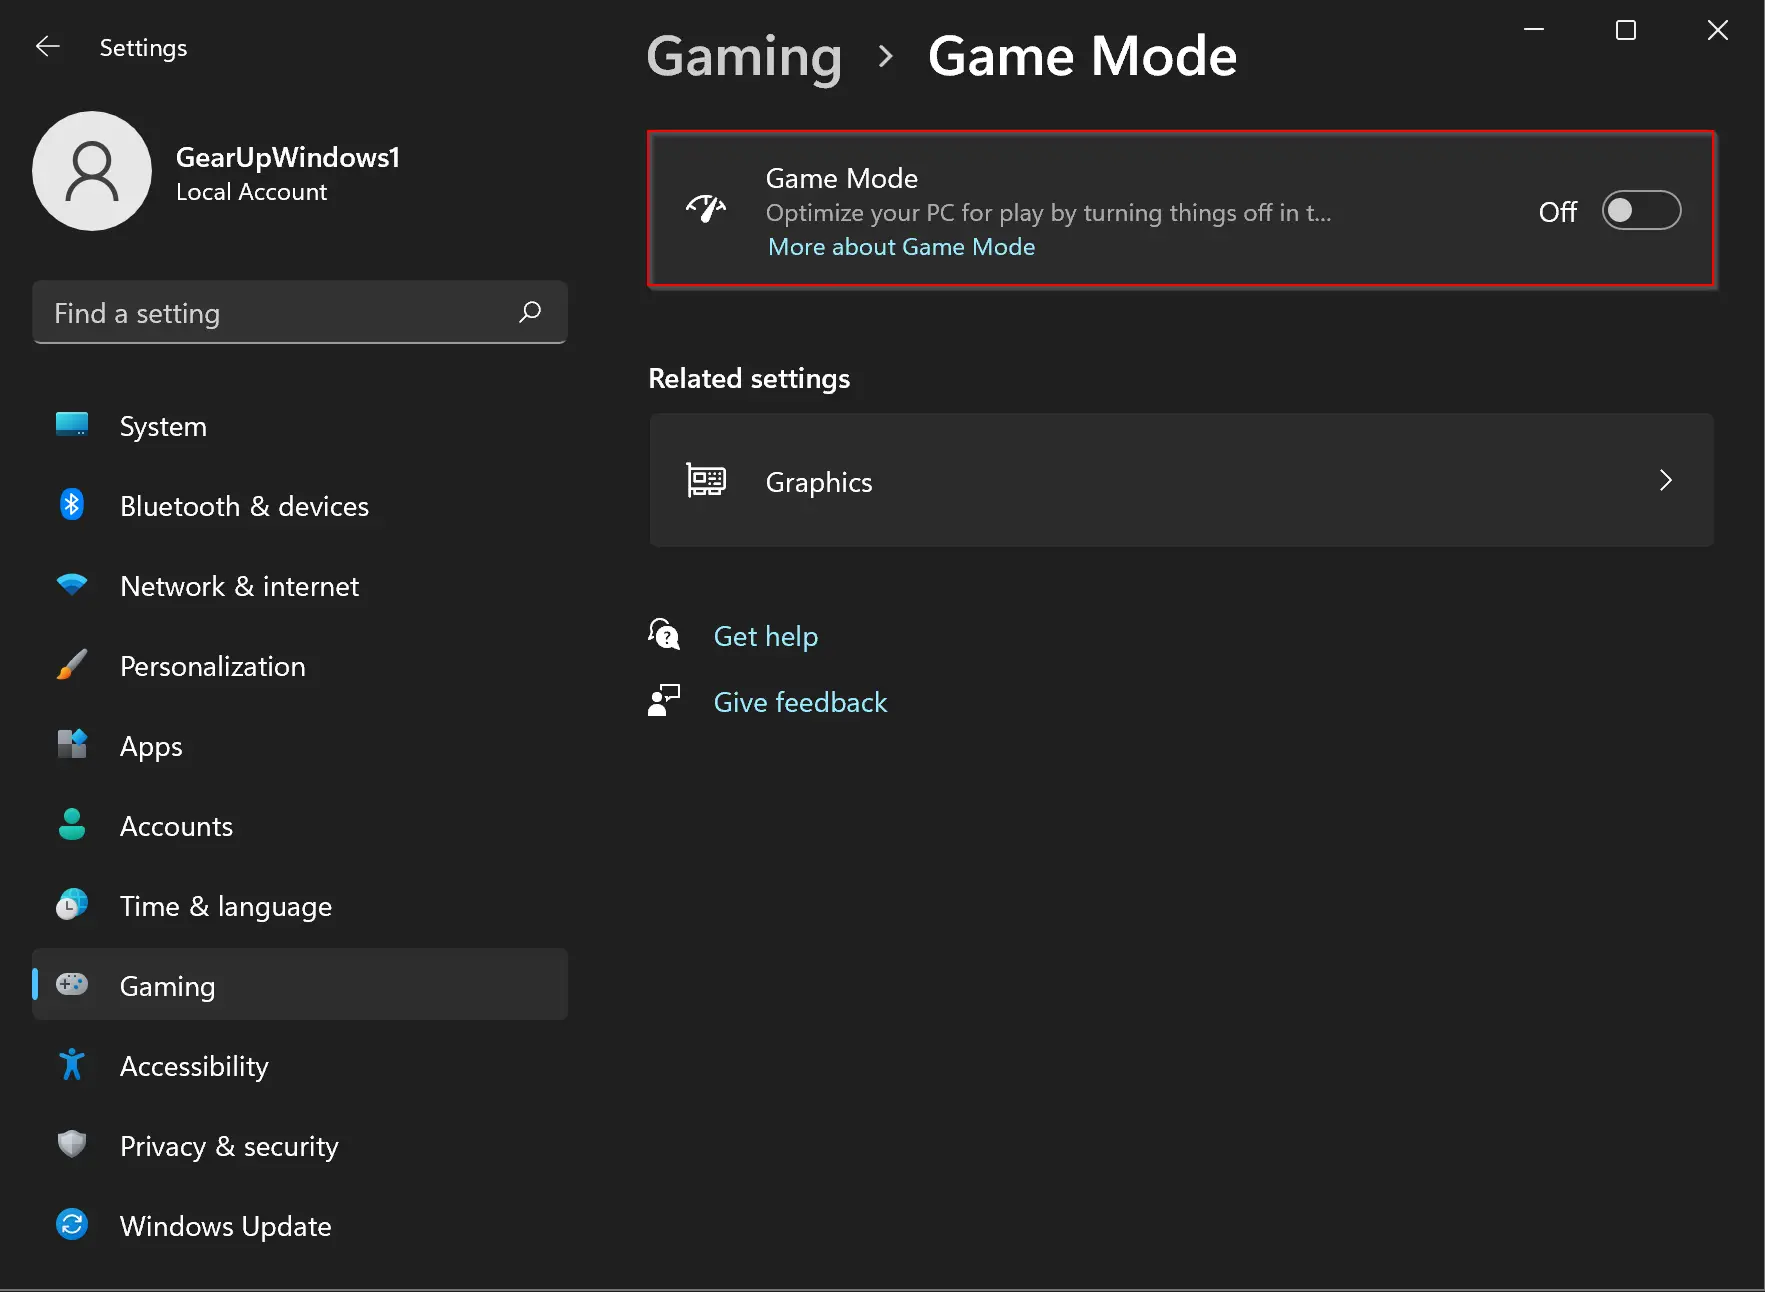
In the future, if you would like to activate Game Mode on the computer, repeat the above steps, and in step 3 above, turn the toggle switch to the On position beside Game Mode.
How to Enable or Disable Game Mode using Registry Editor?
Follow these steps to turn on or off Game Mode on Windows 11 through Registry Editor:-
Step 1. Open Registry Editor.
Step 2. Then, browse to the following key in the left sidebar:-
HKEY_CURRENT_USER\Software\Microsoft\GameBar
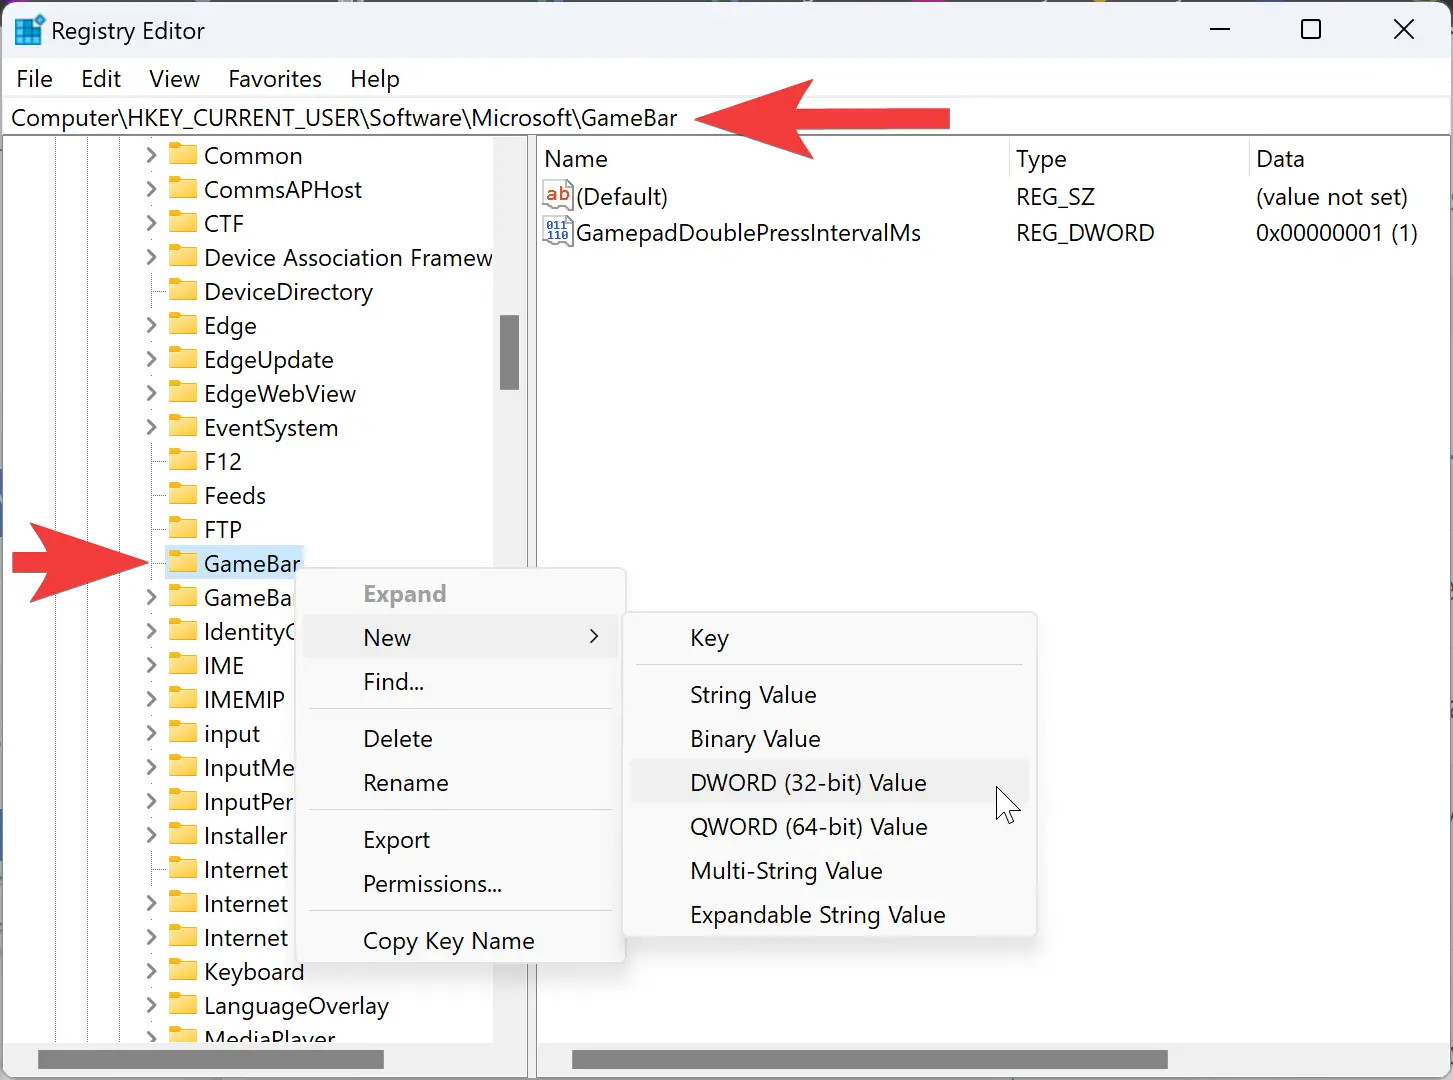
Step 3. Next, right-click on the GameBar key and select New > DWORD (32-bit) Value.
Step 4. Name the newly created REG_DWORD to AutoGameModeEnabled.
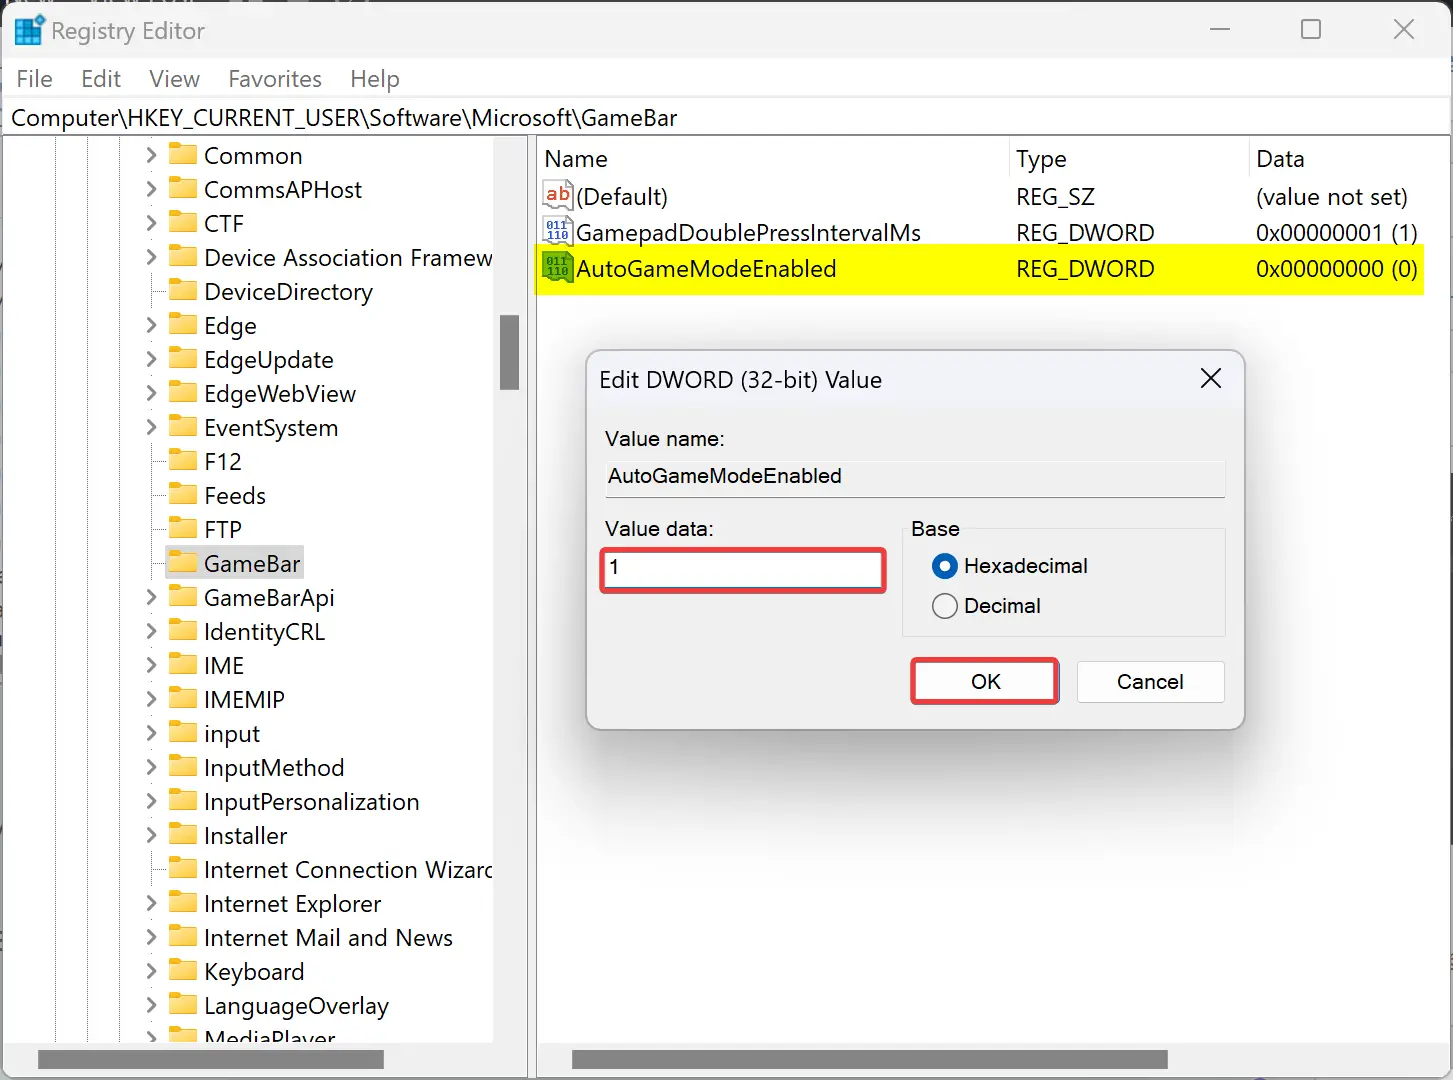
Step 5. Now, double-click on the AutoGameModeEnabled REG_DWORD and set its “Value data” to the following:-
- 0: To disable game mode.
- 1: To enable game mode.
Step 6. Click the OK button.
Step 7. Finally, reboot your PC to apply the changes.
That’s it.
Conclusion
In conclusion, Game Mode on Windows 11 is a useful feature that can enhance your gaming experience by optimizing your system for gaming performance. It prioritizes game processes and temporarily prevents Windows from installing drivers or asking to restart your PC. This article has provided step-by-step instructions on how to enable or disable Game Mode on Windows 11 using the built-in Settings app or the Registry Editor. Whether you want to turn off the Game Mode due to performance issues or enable it for better gaming performance, this guide has got you covered.
