By default, after starting your computer, you see a lock screen background picture before the sign-in screen that you need to dismiss, and then you can log in to Windows. Also, when your Windows 11 PC is locked, you’ll see a lock screen with a background image.
When you start your computer and press the lock screen background image, it blurs, and then you see a sign-in screen. If you wish, you can enable or disable this lock screen background picture on the sign-in screen in Windows 11. When you disable this background image on the sign-in screen, you will see just a black background instead of an image.
How to Turn On/Off Lock Screen Background Picture on Sign-in Screen in Windows 11?
To enable or disable the lock screen background picture on the sign-in screen in Windows 11, do the following:-
Step 1. Press Windows + I keys from the keyboard to open the Settings app.
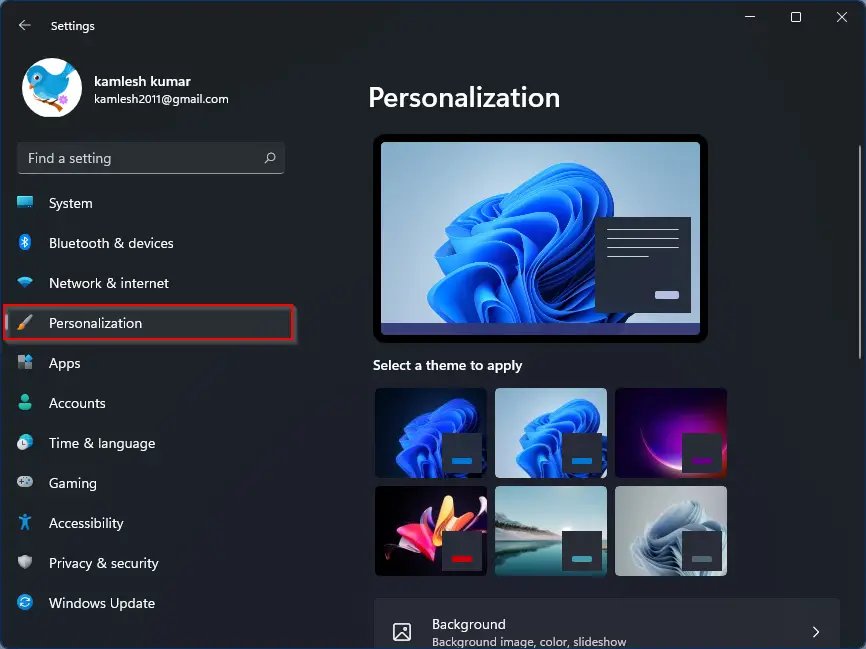
Step 2. When Windows Settings opens, select the Personalization category from the left sidebar.
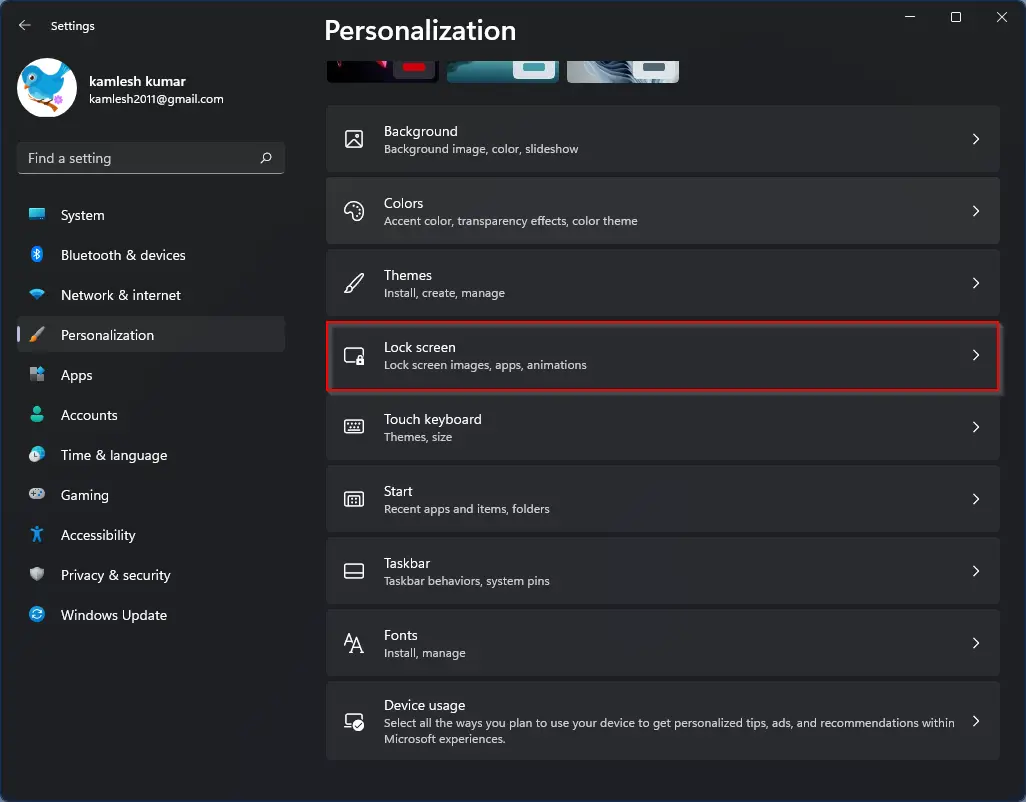
Step 3. Then, select the Lock screen tab on the right sidebar of Personalization.
Step 4. Next, scroll down to the bottom to see the option “Show the lock screen background picture on the sign-in screen.” Use the toggle switch to turn it On/Off according to your need.
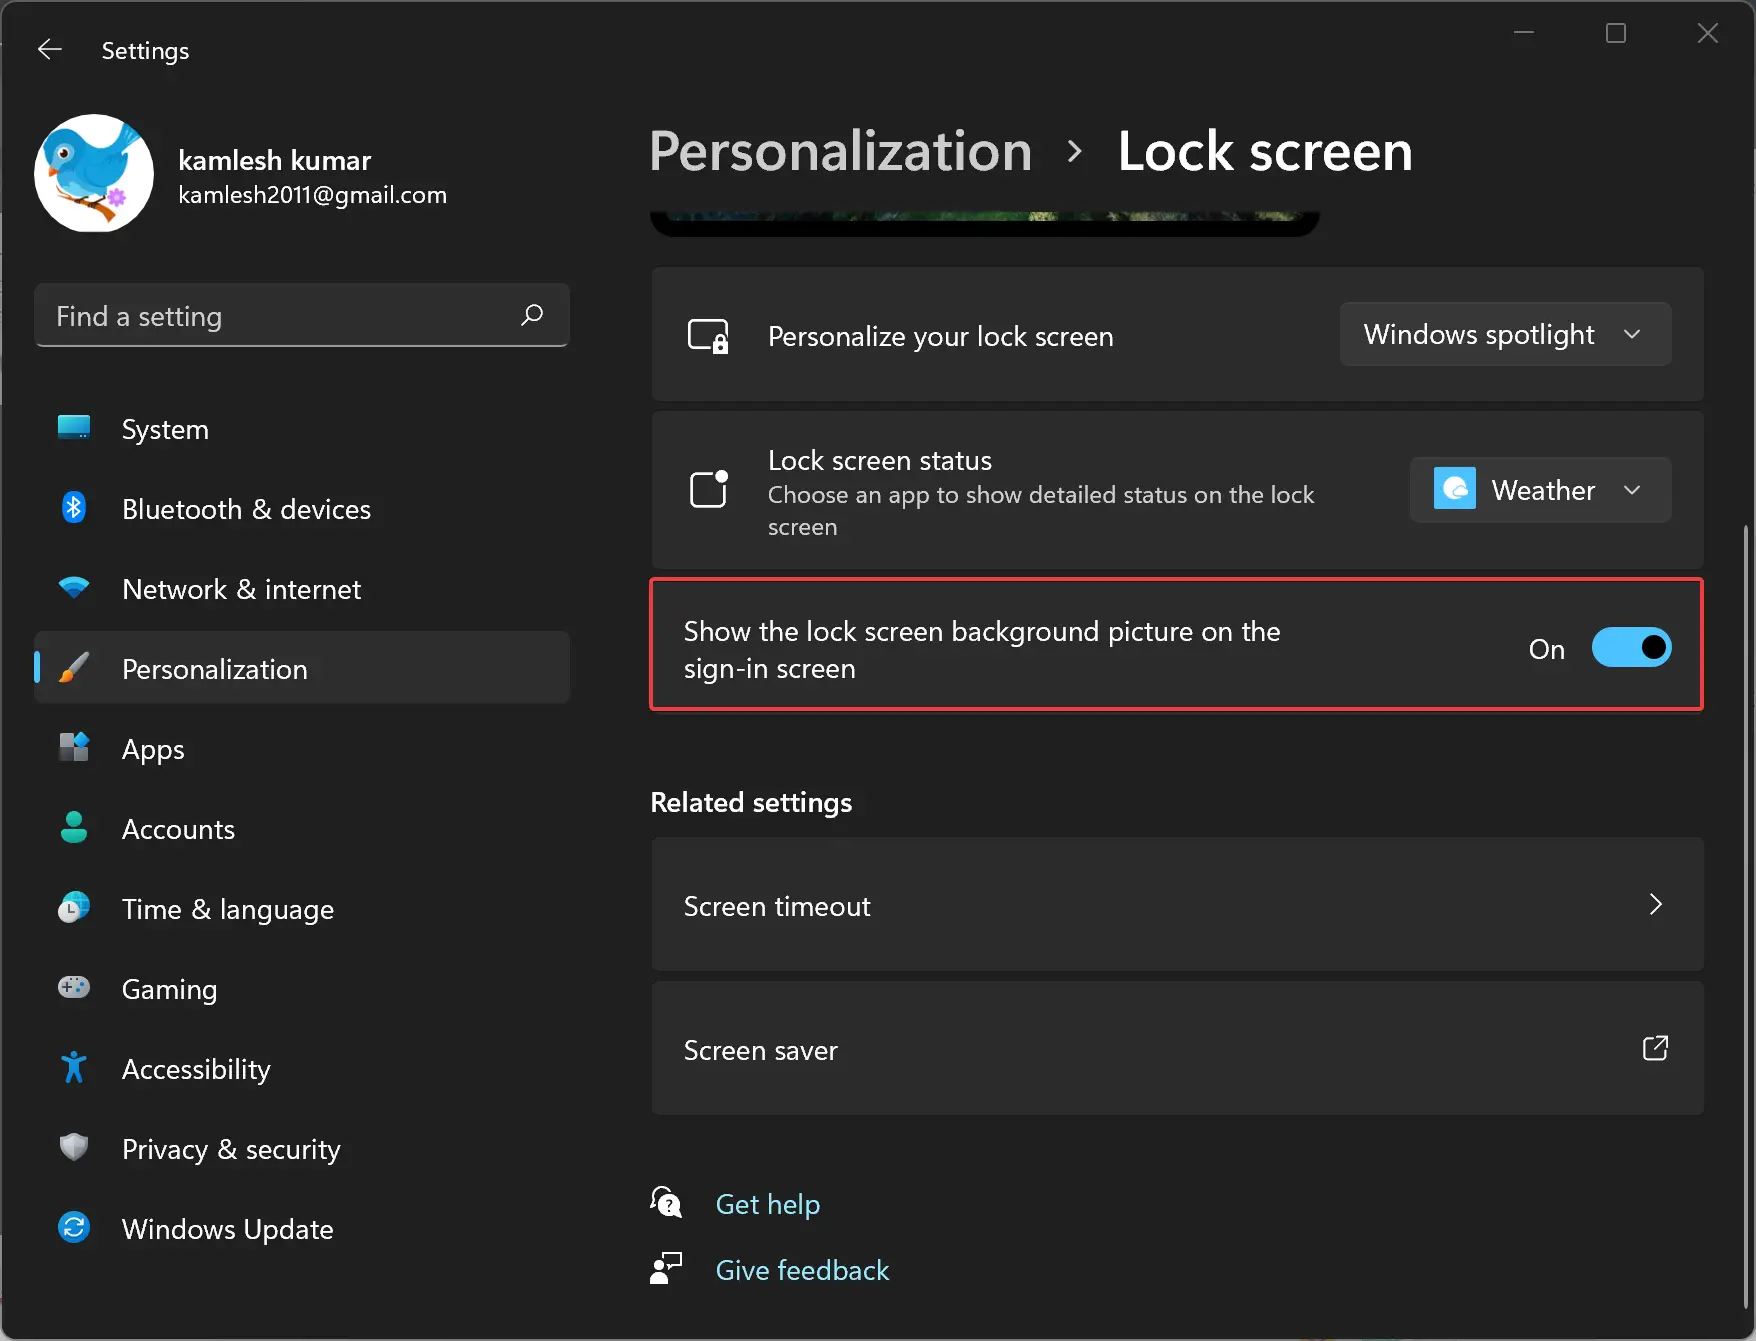
When this option is turned off, you will have a black background on the sign-in screen. If you enable this option, you will see a lock screen background picture.
How to Enable or Disable Lock Screen Background on Sign-in Screen using Registry Editor?
To turn on or off the Lock Screen background on the Sign-in screen using Registry Editor, do the following:-
Step 1. Open Registry Editor.
Step 2. When the Registry Editor window appears on your computer, navigate to the following path in the left sidebar:-
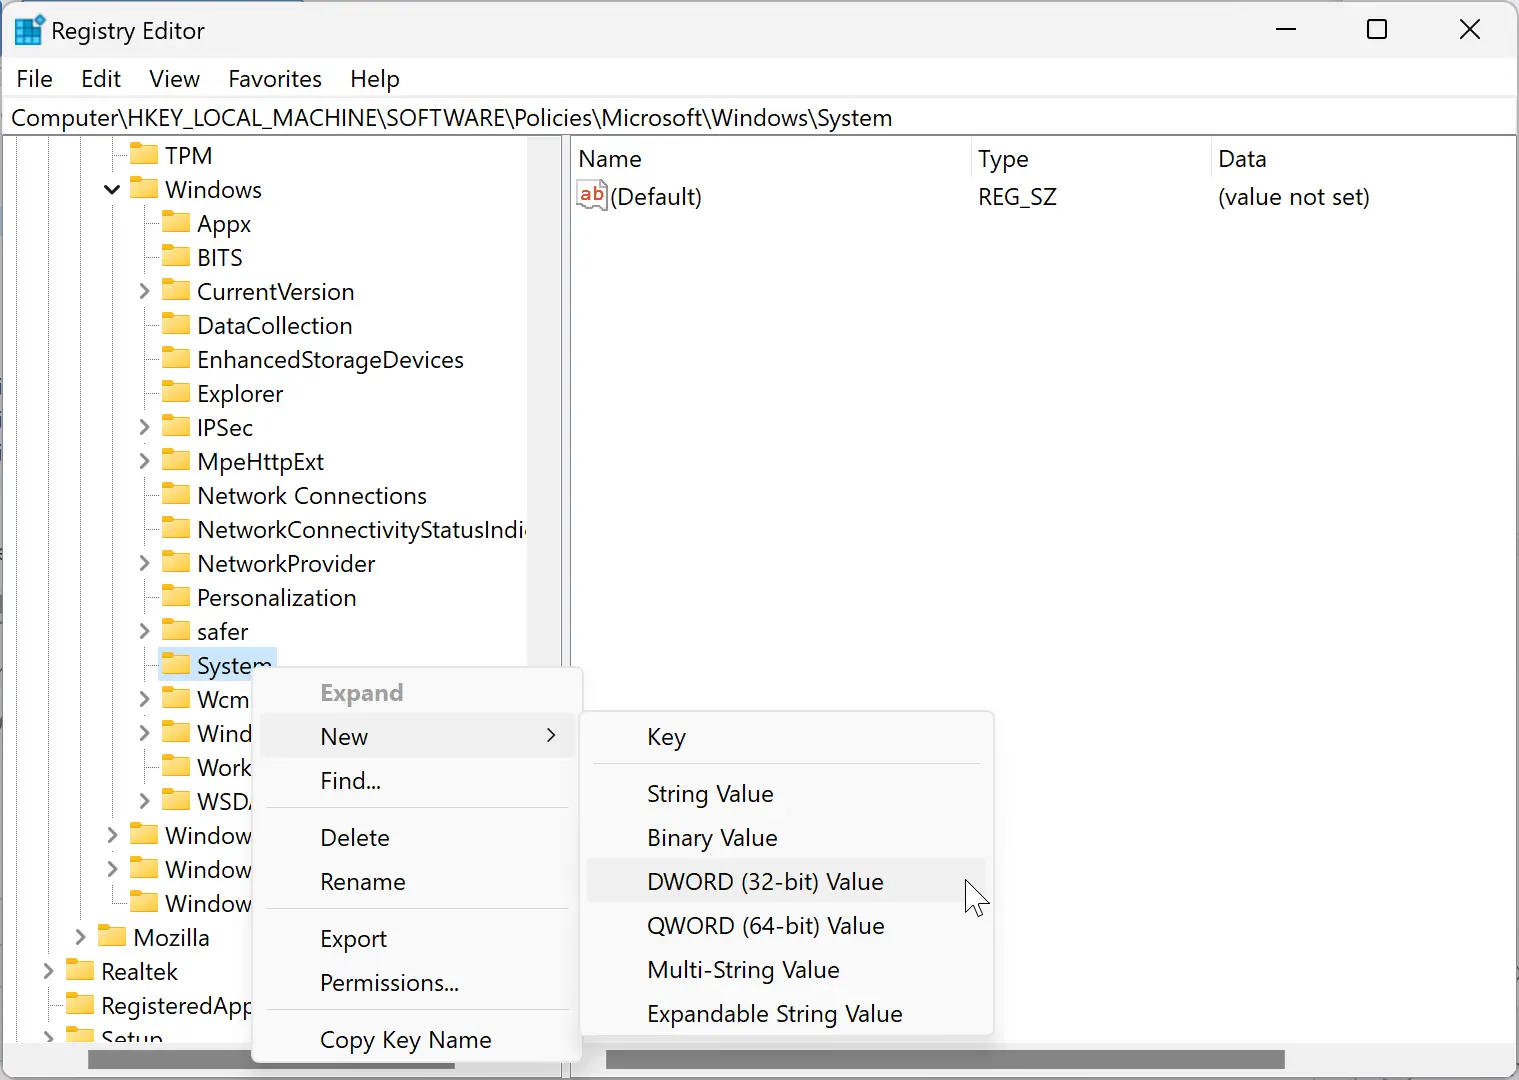
HKEY_LOCAL_MACHINE\SOFTWARE\Policies\Microsoft\Windows\System
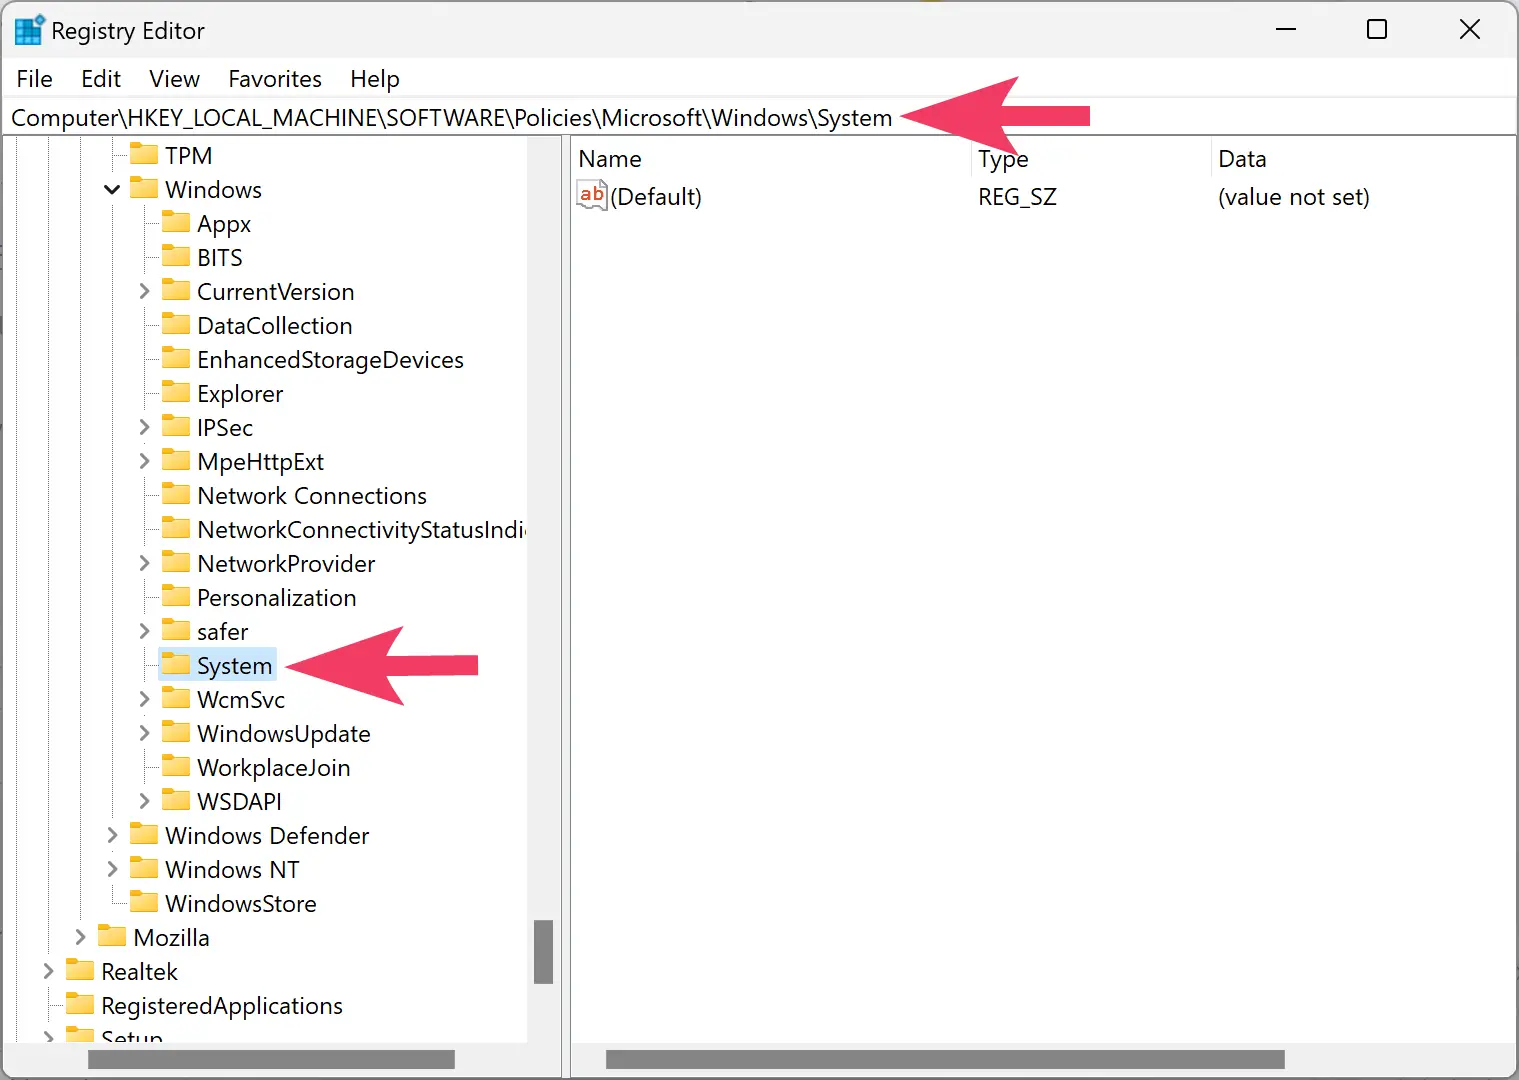
Step 3. Then, right-click on the System folder and select New > DWORD (32-bit) Value in the menu.
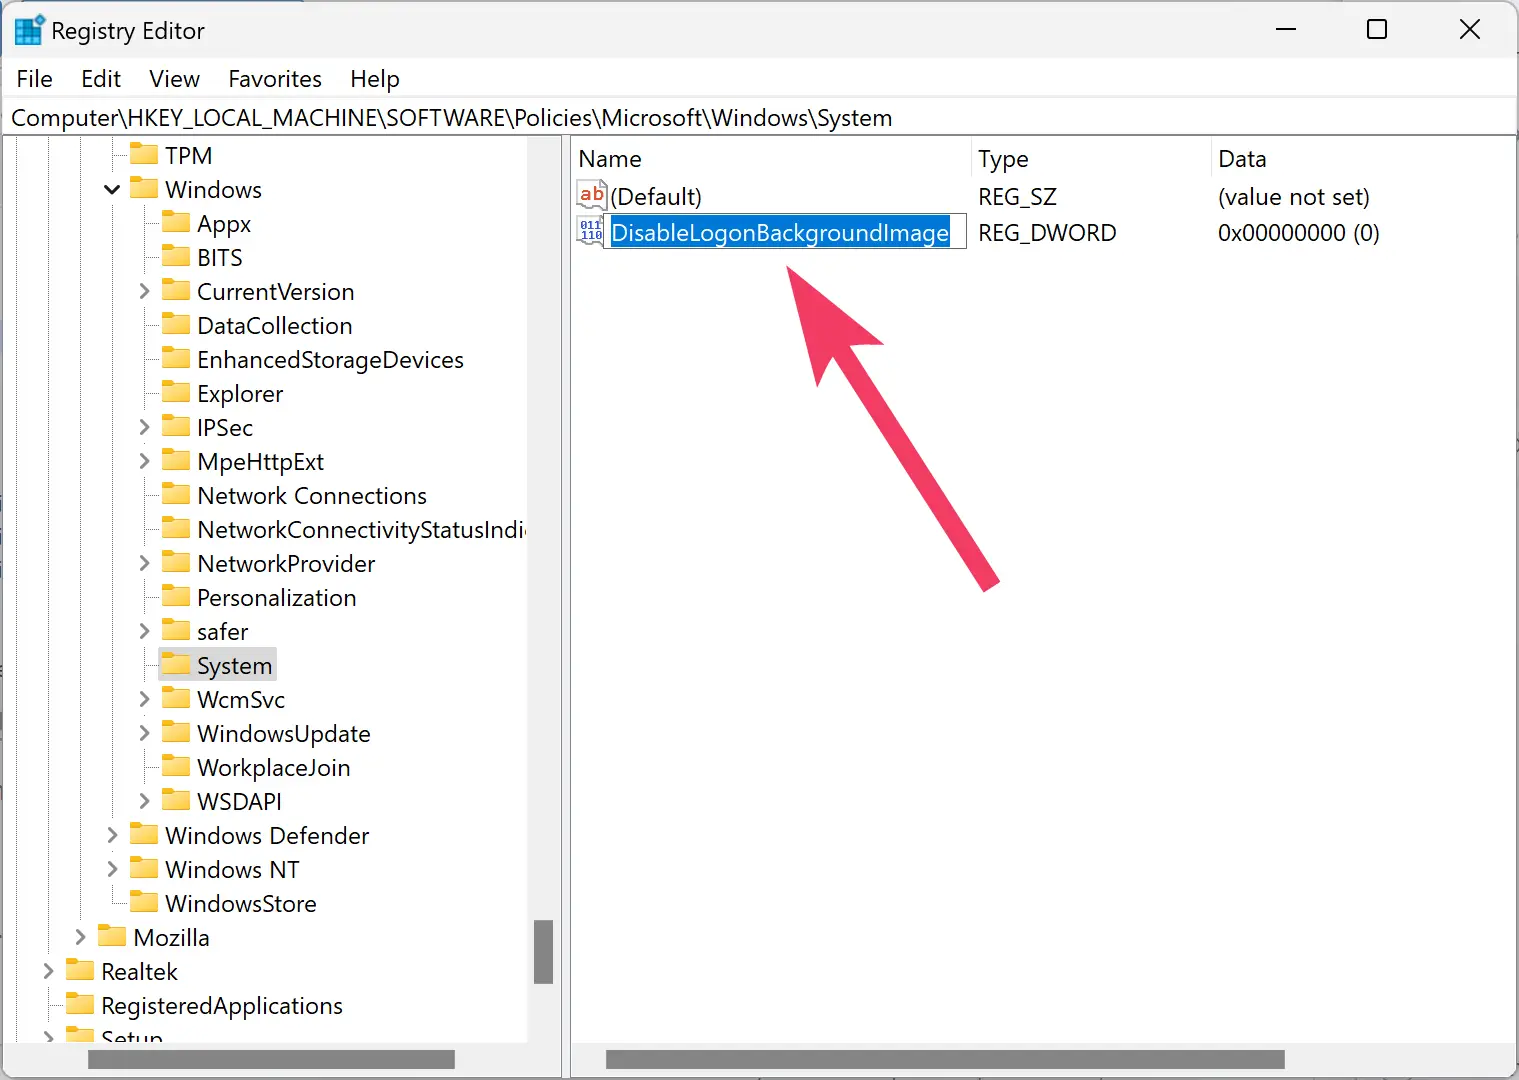
Step 4. Next, name the newly created REG_DWORD as DisableLogonBackgroundImage.
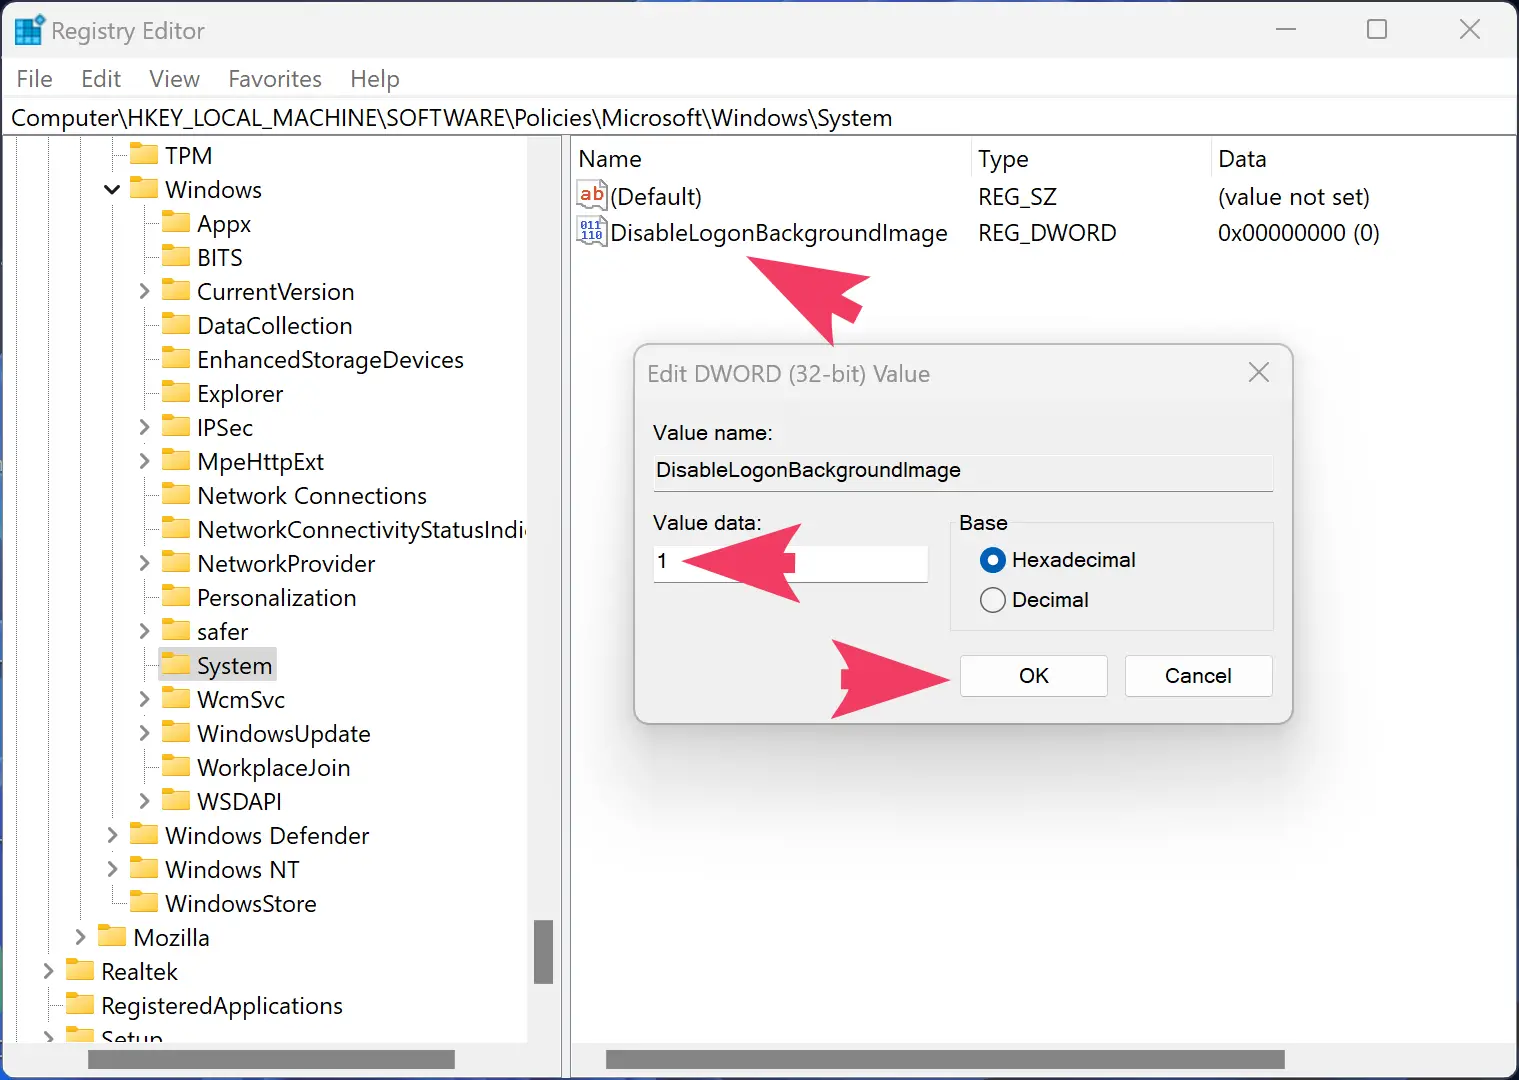
Step 5. Now, double-click on the DisableLogonBackgroundImage REG_DWORD and set its Value data to 1.
Step 6. Restart your Windows 11 machine.
Once you complete the above steps, Windows 11 will no longer have the background picture on the sign-in screen.
To display the background picture on the sign-in screen, open the Registry Editor and navigate to the following path:-
HKEY_LOCAL_MACHINE\SOFTWARE\Policies\Microsoft\Windows\System
On the right side of the System folder, right-click on the DisableLogonBackgroundImage REG_DWORD and select the Delete option. Click the Yes button when prompted. Finally, reboot your computer to see the background image on the sign-in screen.
Conclusion
In conclusion, the lock screen background picture is a nice visual touch that can be customized according to your preferences in Windows 11. You can choose to enable or disable the lock screen background picture on the sign-in screen through the Settings app or the Registry Editor. Disabling the lock screen background picture on the sign-in screen will result in a black background instead of an image. However, if you prefer to see the lock screen background picture on the sign-in screen, you can easily turn it on using the Registry Editor and then restart your computer. Overall, these customization options can help make your Windows 11 experience more personalized and tailored to your liking.