The lock screen slideshow feature on Windows 11 allows you to set up a rotation of your favorite images to display on the lock screen. However, there may be times when you want to disable this feature or enable it again. In this article, we will discuss two methods to enable or disable slideshow on the Windows 11 lock screen.
How to Enable or Disable Slideshow on Windows 11 Lock Screen?
Method 1: Using Local Group Policy Editor
The Local Group Policy Editor is a powerful tool that allows you to modify various settings in Windows. Here’s how to enable or disable slideshow on the lock screen using the Local Group Policy Editor:-
Step 1. Press the Windows key + R on your keyboard to open the Run dialog box.
Step 2. Type “gpedit.msc” and press Enter to open the Local Group Policy Editor.
Step 3. In the left pane of Local Group Policy Editor, navigate to the following path:-
Computer Configuration > Administrative Templates > Control Panel > Personalization
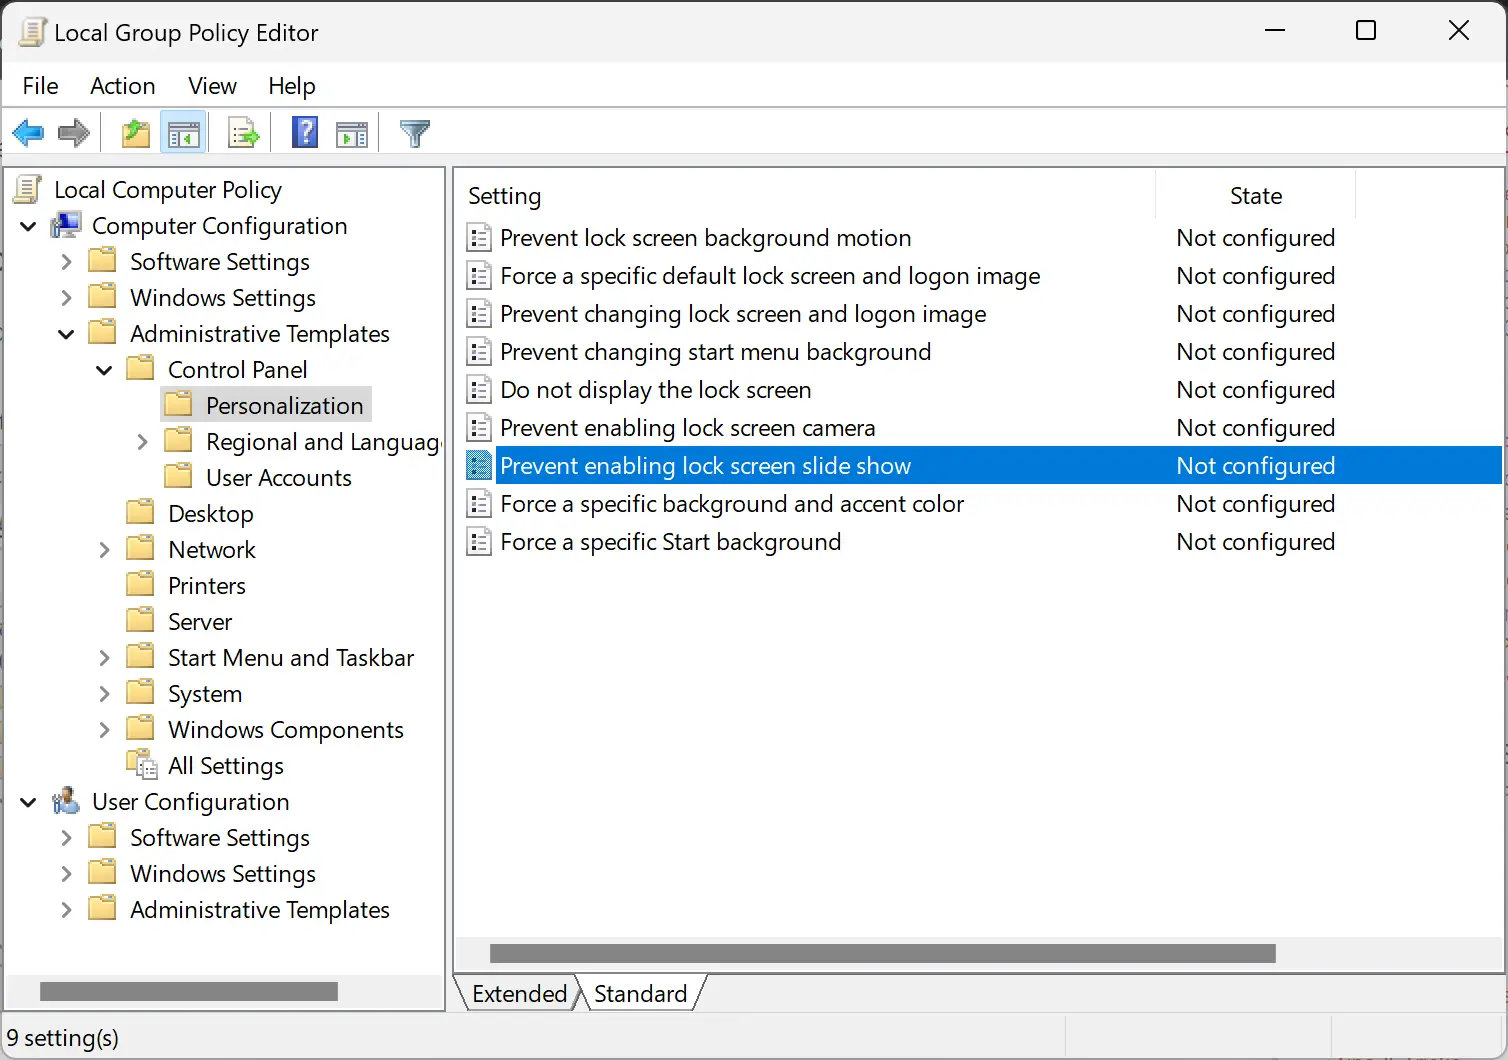
Step 4. In the right pane, double-click the “Prevent enabling lock screen slide show” policy.

Step 5. Choose the “Enabled” option to disable the slideshow feature, or select “Not Configured” to enable it.
Step 6. Click “Apply” and then “OK.”
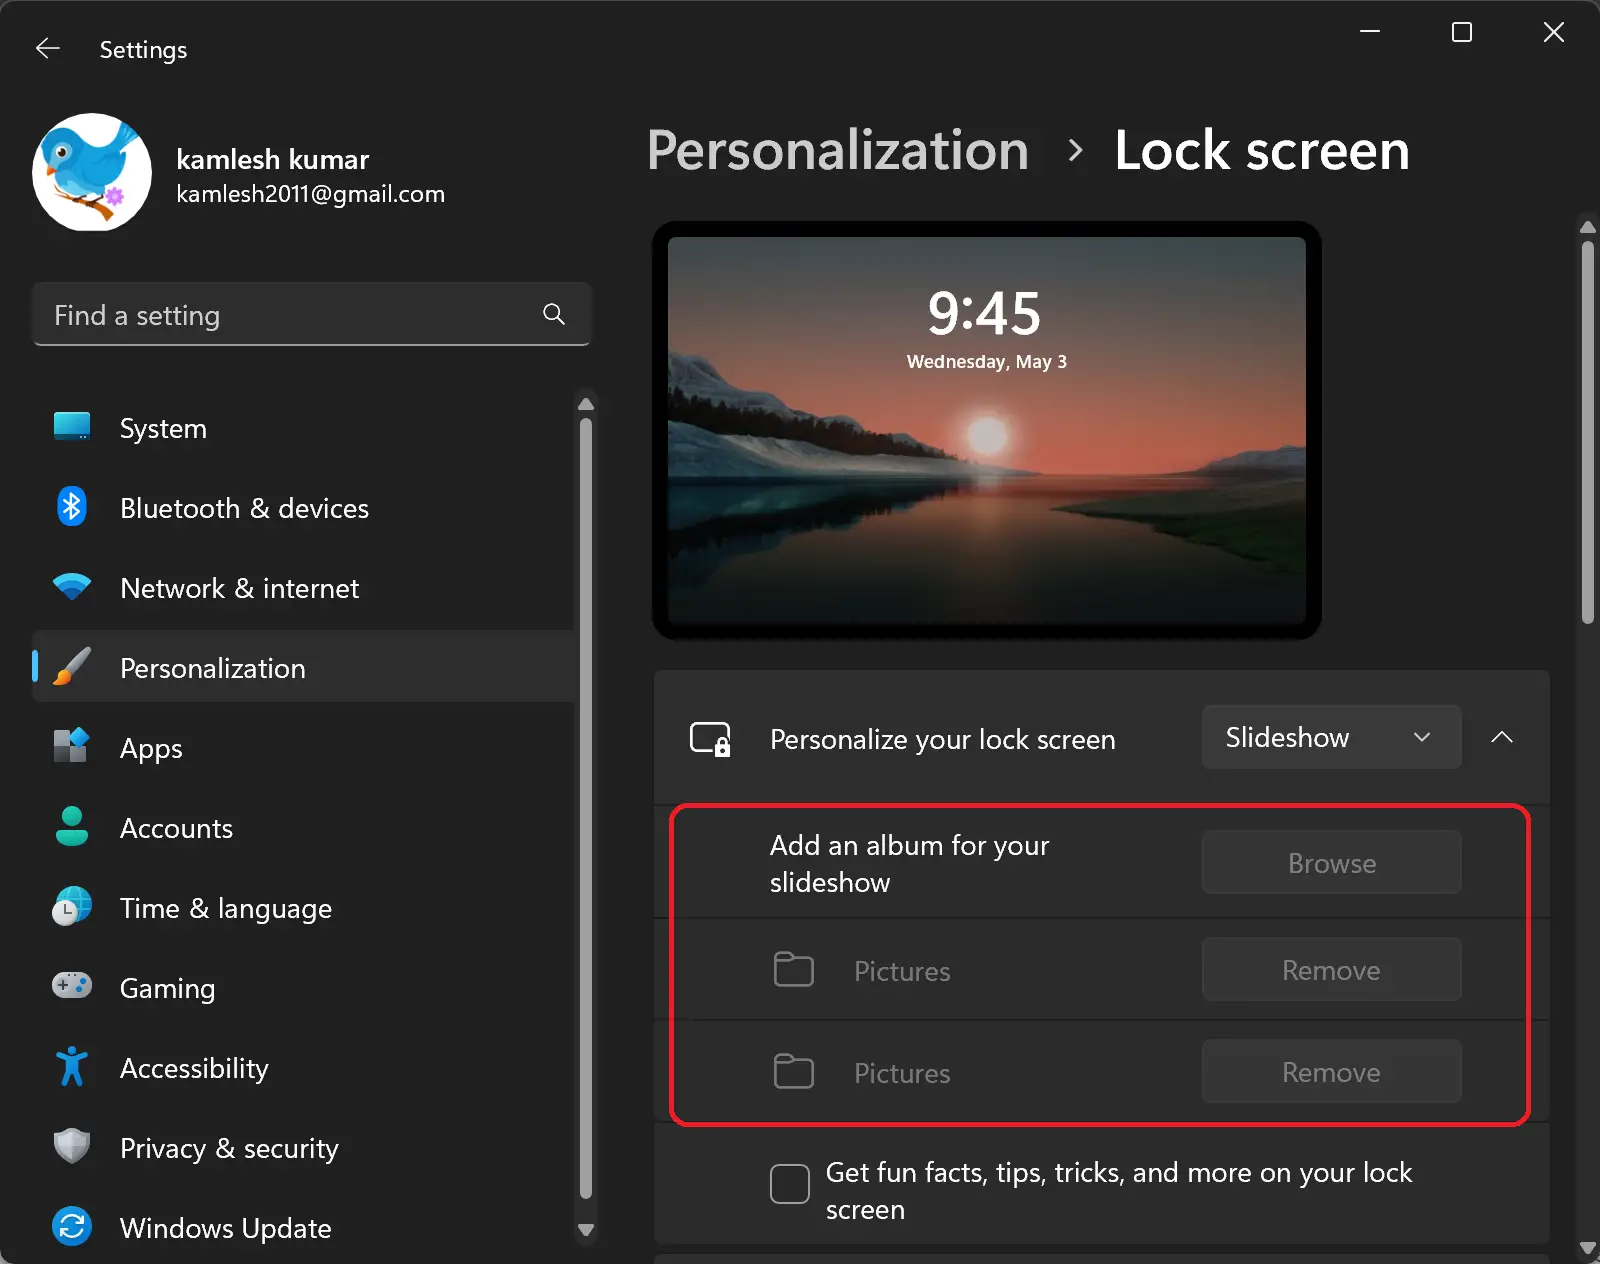
If you have disabled the slideshow feature, open the Settings app, and navigate to Personalization > Lock screen, you’ll find that each slideshow setting is greyed out, and you’re unable to add an album for your slideshow.
Method 2: Using Registry Editor
The Registry Editor is a database of settings and configurations in Windows. You can use it to modify settings that are not available in the Local Group Policy Editor. Here’s how to enable or disable slideshow on the lock screen using the Registry Editor:-
Step 1. Press the Windows key + R on your keyboard to open the Run dialog box.
Step 2. Type “regedit” and press Enter to open the Registry Editor.
Step 3. Navigate to the following key in the left sidebar of Registry Editor:-
HKEY_LOCAL_MACHINE\SOFTWARE\Policies\Microsoft\Windows
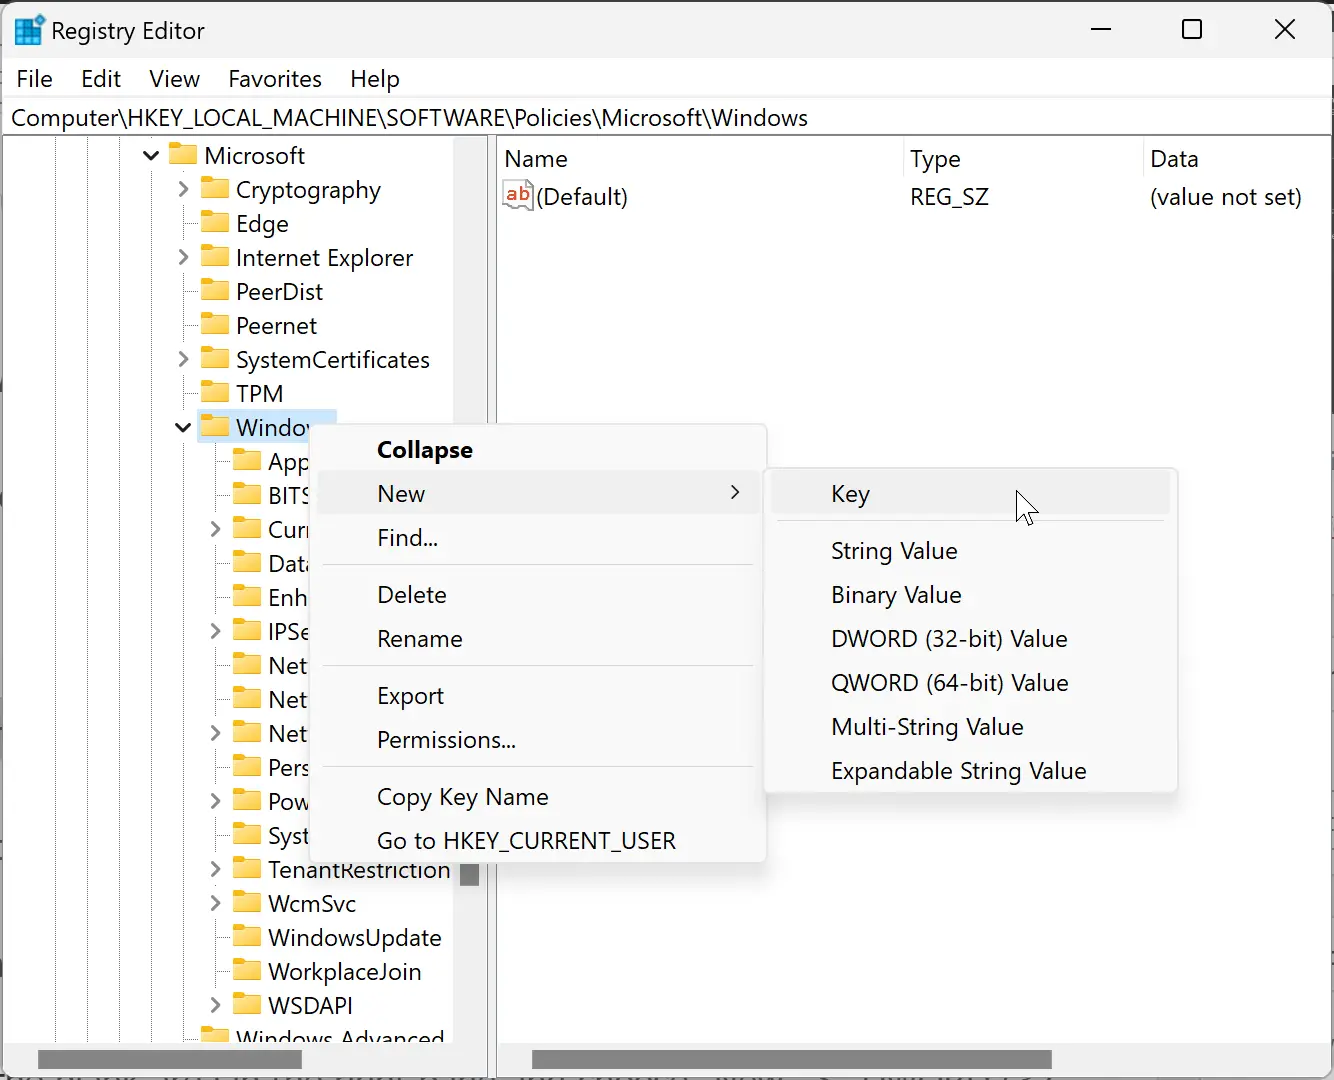
Step 4. Right-click the “Windows” key in the left sidebar and choose New > Key.
Step 5. Name the new key “Personalization.”
Step 6. Right-click the blank area in the right pane of Personalization and choose New > DWORD (32-bit) Value.
Step 7. Name the REG_DWORD “NoLockScreenSlideshow.”
Step 8. Double-click “NoLockScreenSlideshow” REG_DWORD and set its Value data to 1. This will disable the slideshow feature and prevent a slideshow from playing on the lock screen.
Step 9. To enable the slideshow feature, just delete the “NoLockScreenSlideshow” entry by right-clicking on it and selecting the Delete option.
Conclusion
The lock screen slideshow feature on Windows 11 is a great way to personalize your device. However, there may be times when you want to disable it. The methods discussed in this article should help you to enable or disable the slideshow on the Windows 11 lock screen. Choose the method that works best for you and enjoy a more personalized lock screen experience on your Windows 11 device.