The Snap Layouts feature of Windows 11 allows you to select how to snap the current window, and the Snap windows feature lets you automatically resize and arrange windows on your screen.
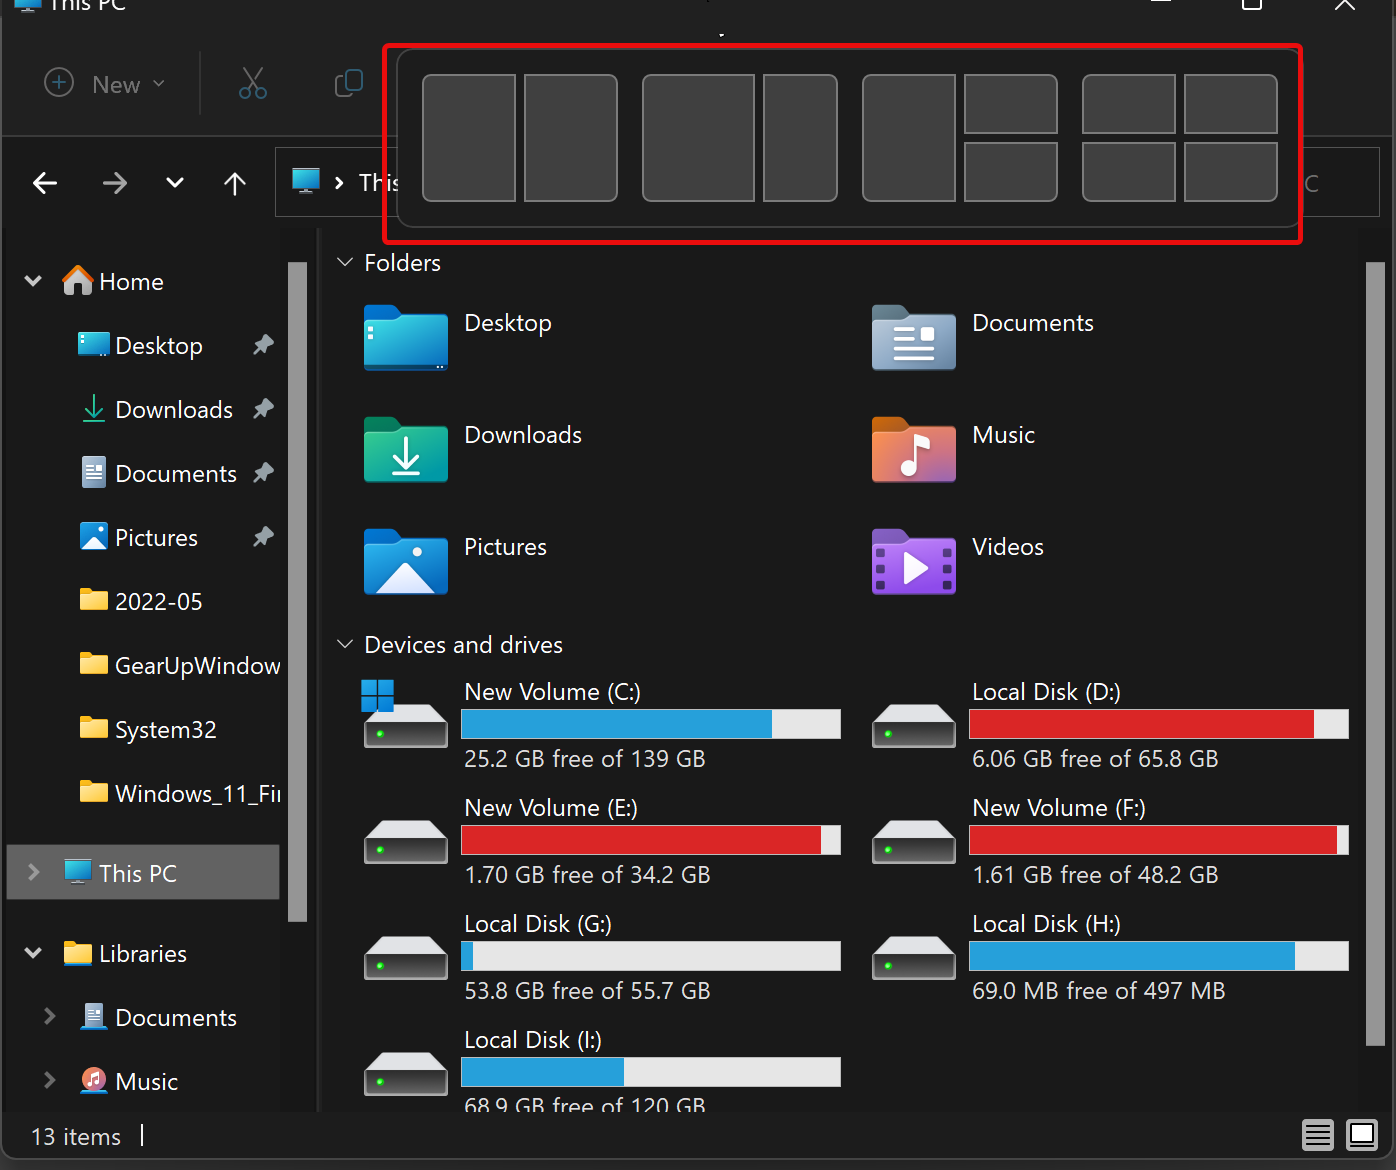
Starting with Windows 11 build 22557, Microsoft added a new way to snap windows into snap layouts. Just drag a window to the top of the screen to reveal the snap layouts, drop the window on top of a zone to snap it, and use snap assist in finishing building the layout you selected.
Although this new feature makes it easier to organize your windows on the screen, not everyone may be happy with this and might want to disable it. If you are one of those Windows 11 users who prefer to turn off Snap Layouts on top of the screen, this gearupwindows will guide you.
How to Enable or Disable Snap Layouts on Top of Screen in Windows 11 using Settings?
To turn on or off Snap Layouts on top of the screen in Windows 11 using Settings, use these steps:-
Step 1. Open the Settings app.
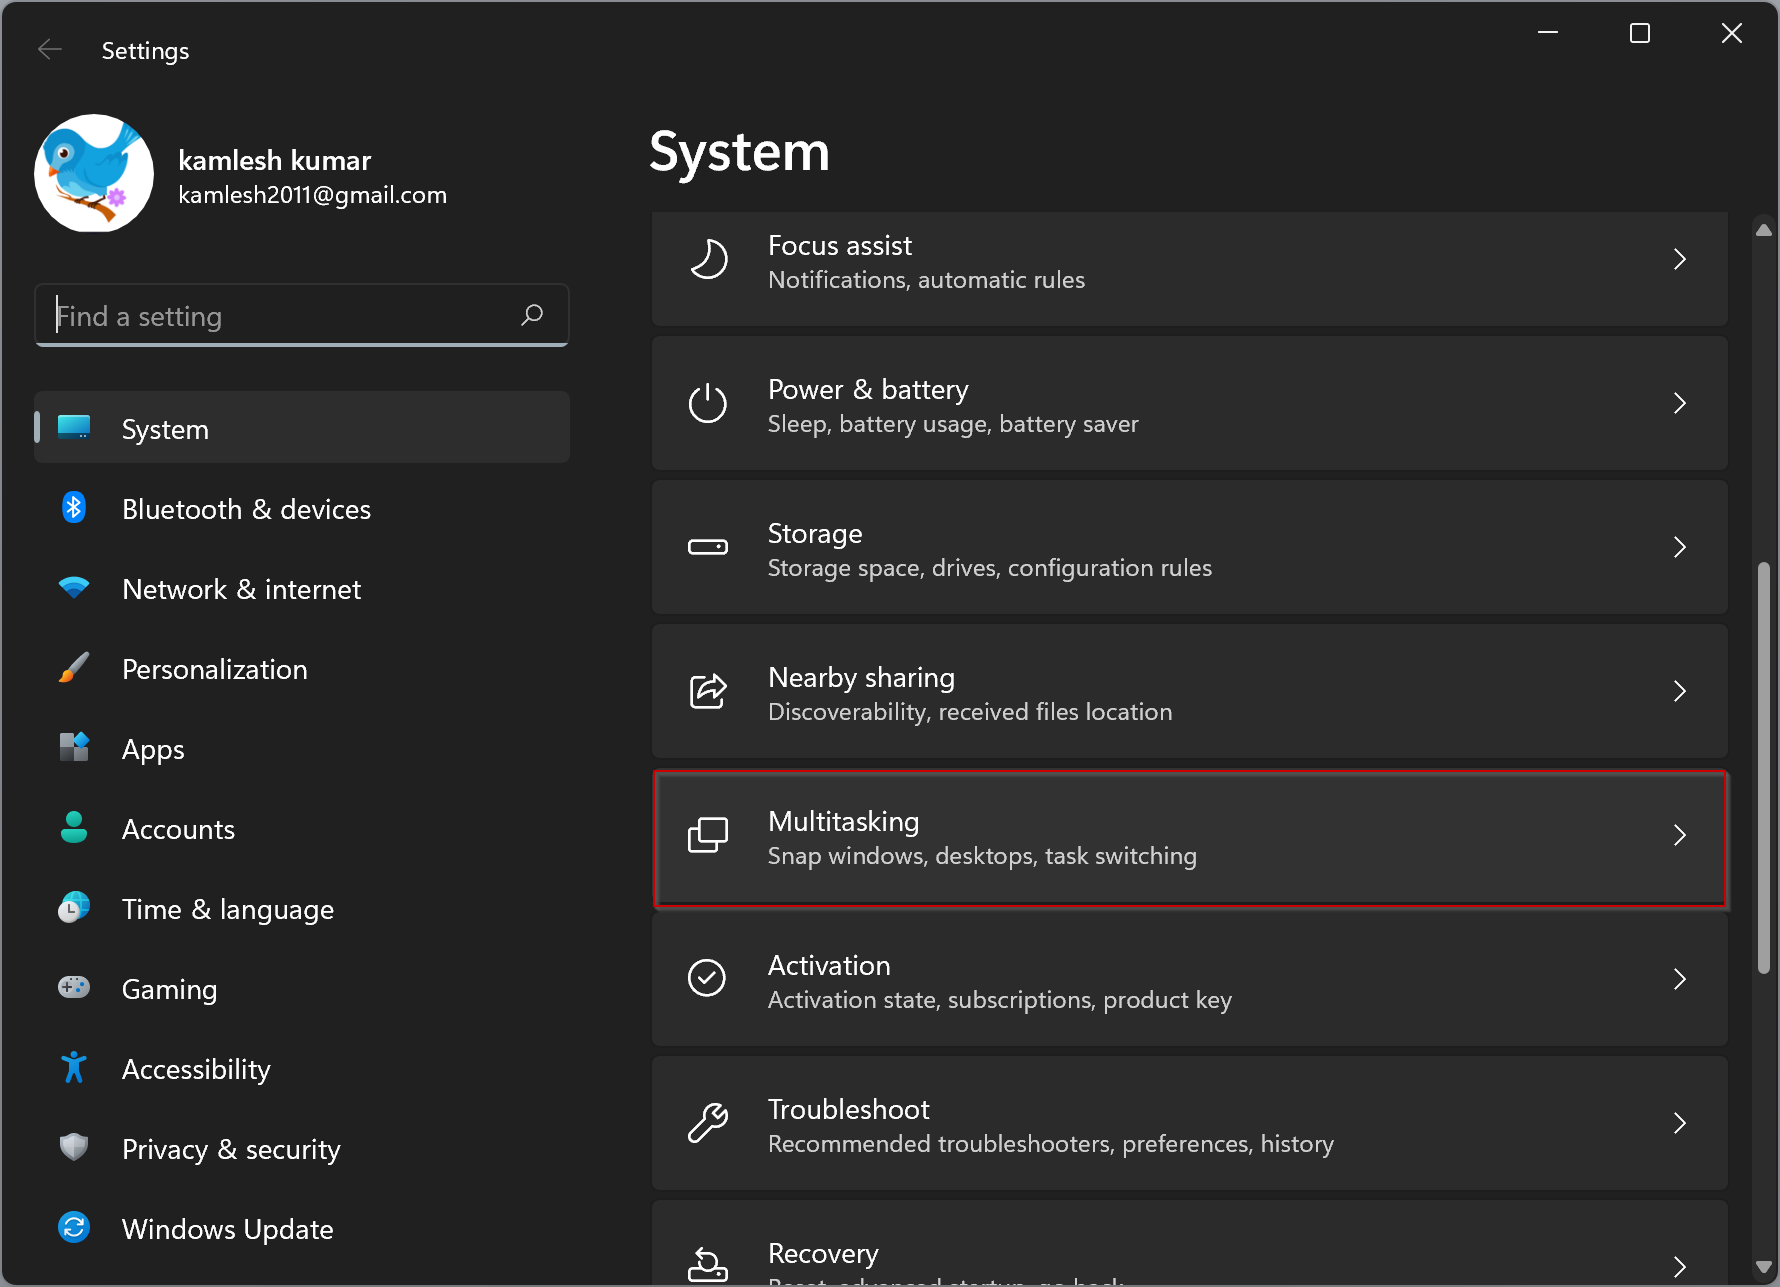
Step 2. Then, click the System on the left side.

Step 3. On the right side of “System,” click on the Multitasking option.
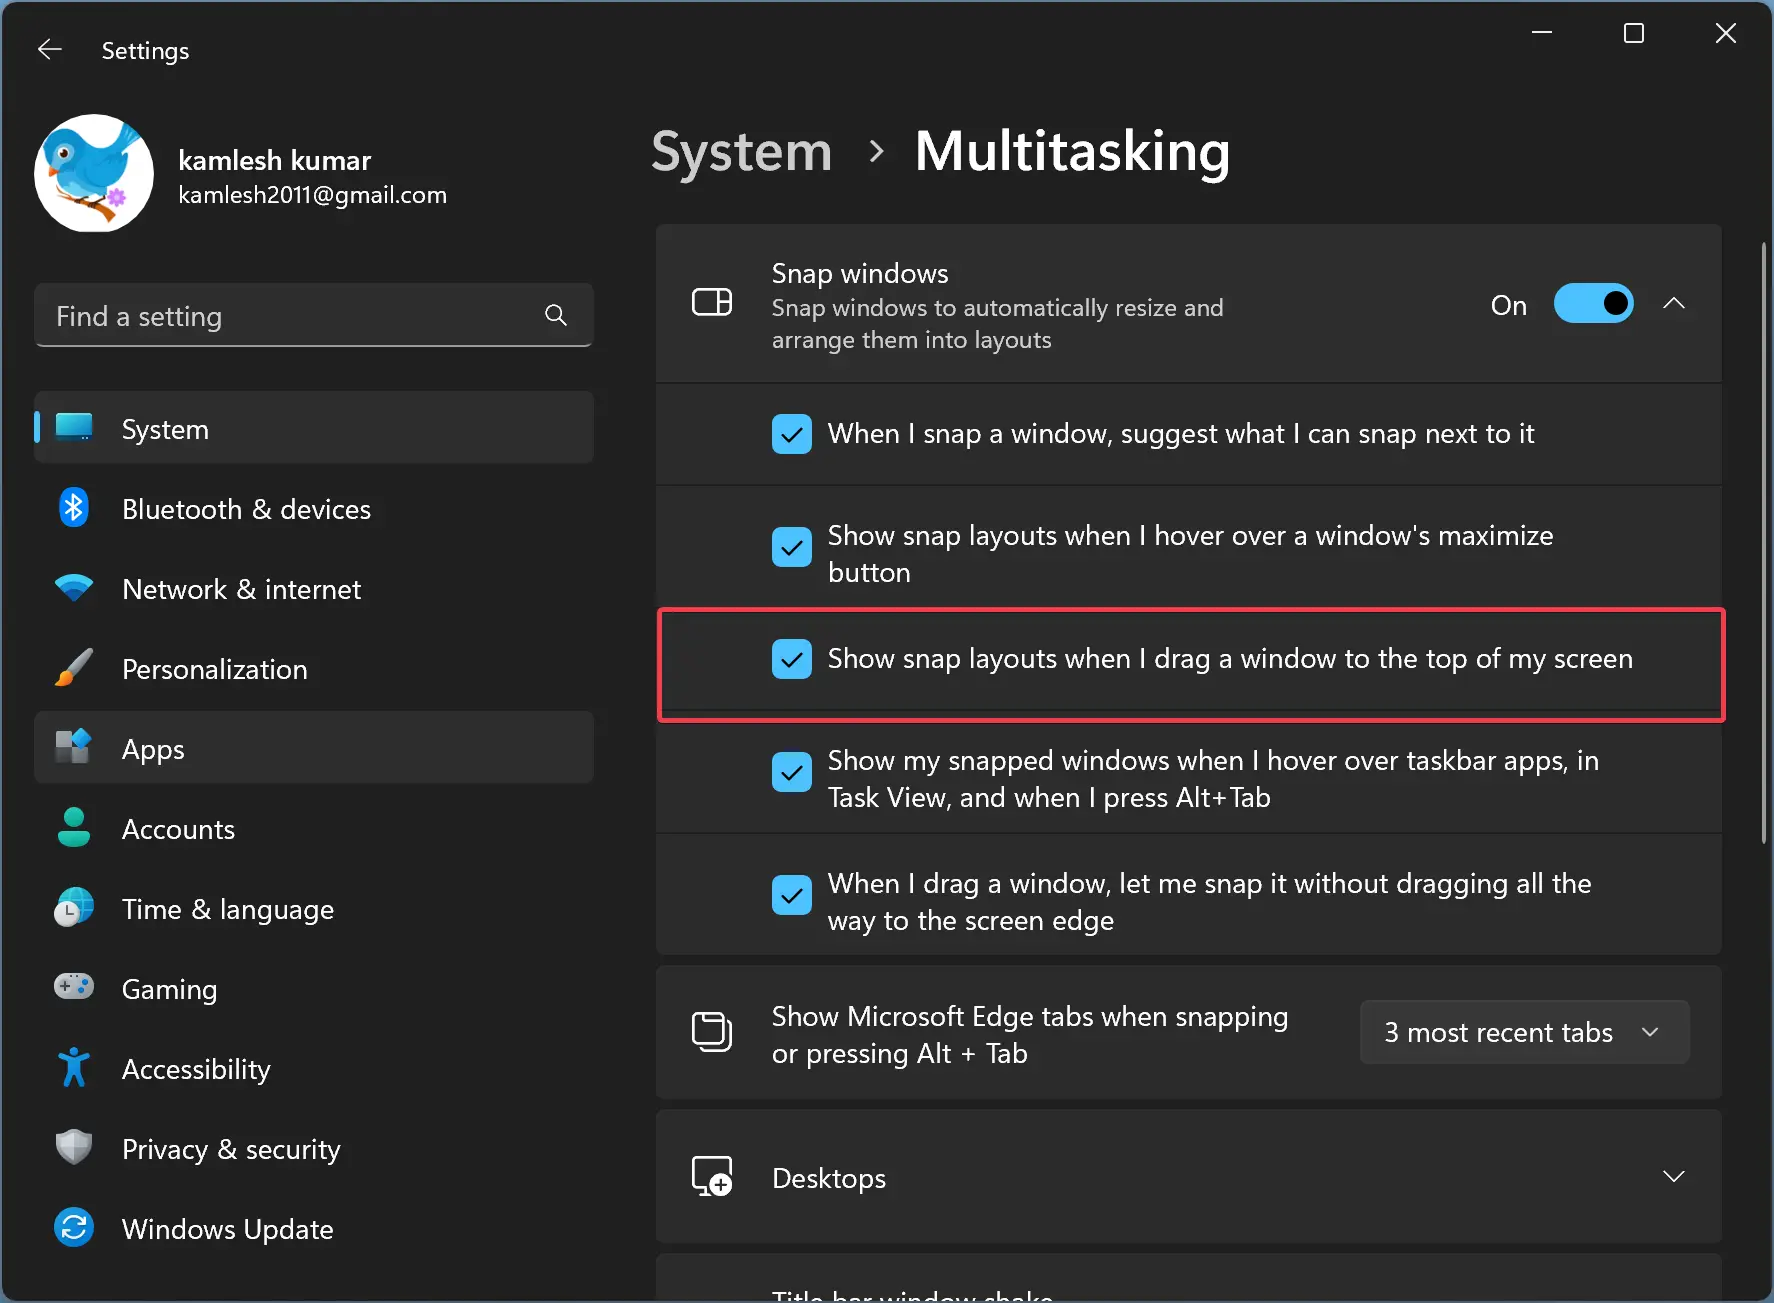
Step 4. Turn the toggle Snap windows On and then click on the Snap windows header to expand it.

Step 5. In the following screen, check or uncheck the option “Show snap layouts when I drag a window to the top of my screen” to enable or disable this feature respectively.
How to Turn On or Off Snap Layouts on Top of the Screen in Windows 11 using Registry Editor?
To enable or disable Snap Layouts on top of the screen in Windows 11 using Registry Editor, do the following:-
Step 1. Open Registry Editor.
Step 2. Then, browse to the following key on the left side of Registry Editor:-
Computer\HKEY_CURRENT_USER\Control Panel\Desktop
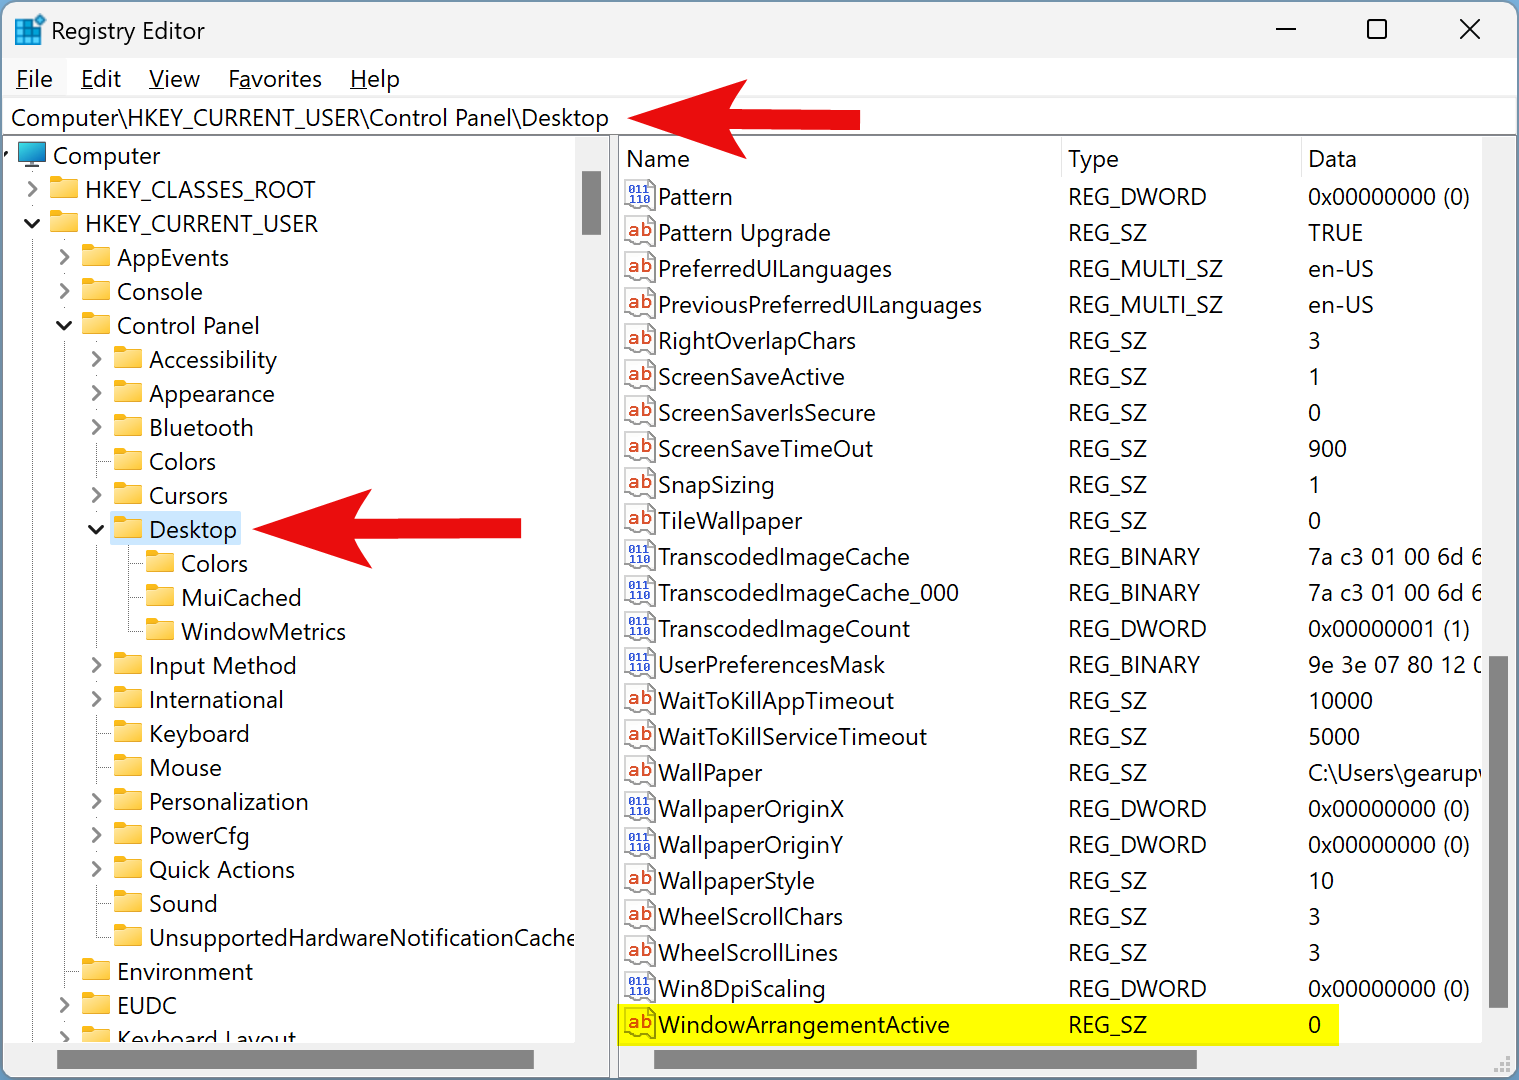
Step 3. On the right side of the “Desktop” folder, double-click on WindowArrangementActive REG_SZ and set its “Value data” to 1.
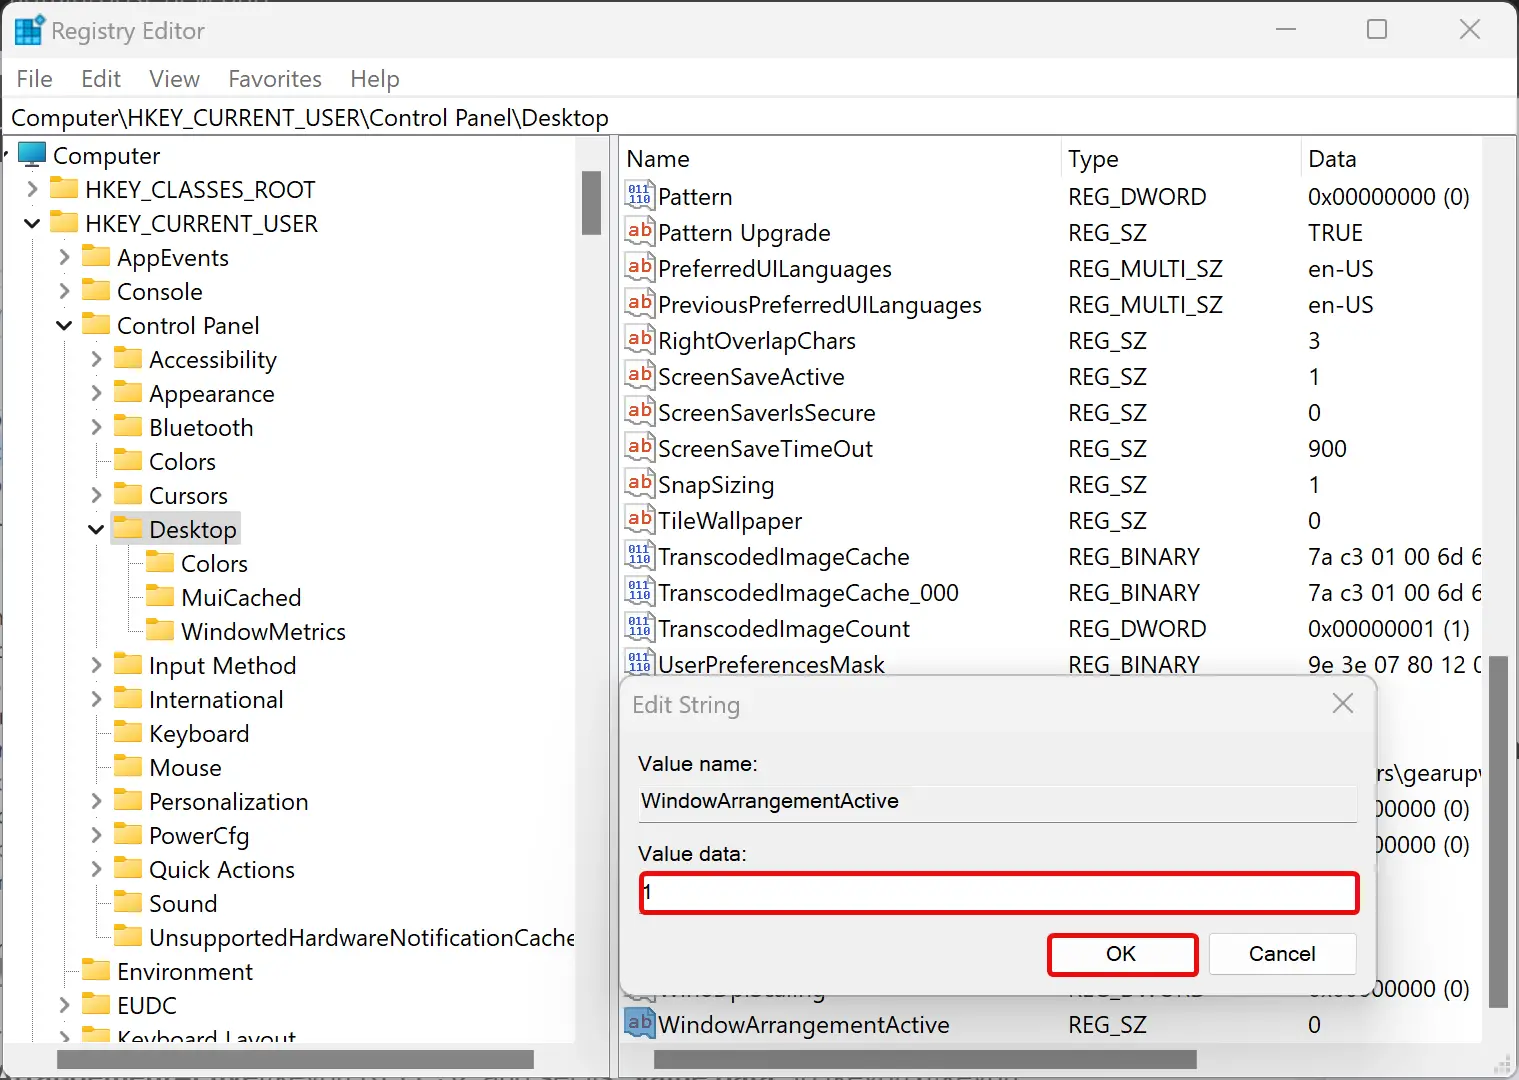
Step 4. Click OK.
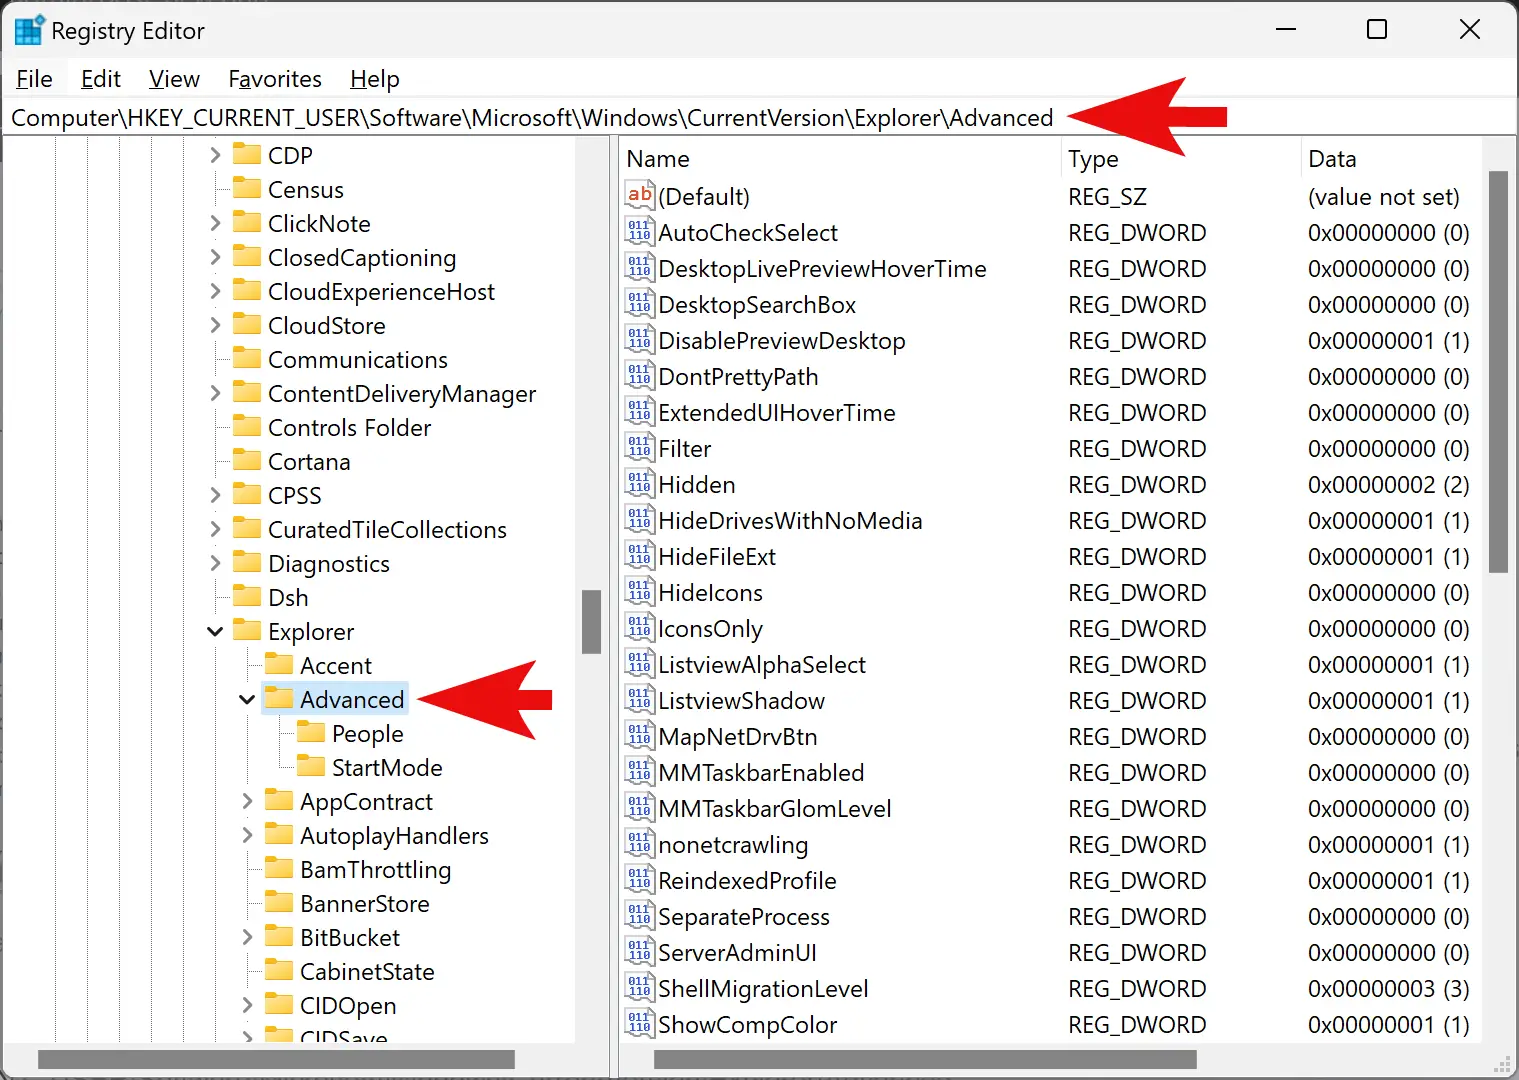
Step 5. Now, navigate to the following key on the left side of Registry Editor:-
HKEY_CURRENT_USER\Software\Microsoft\Windows\CurrentVersion\Explorer\Advanced
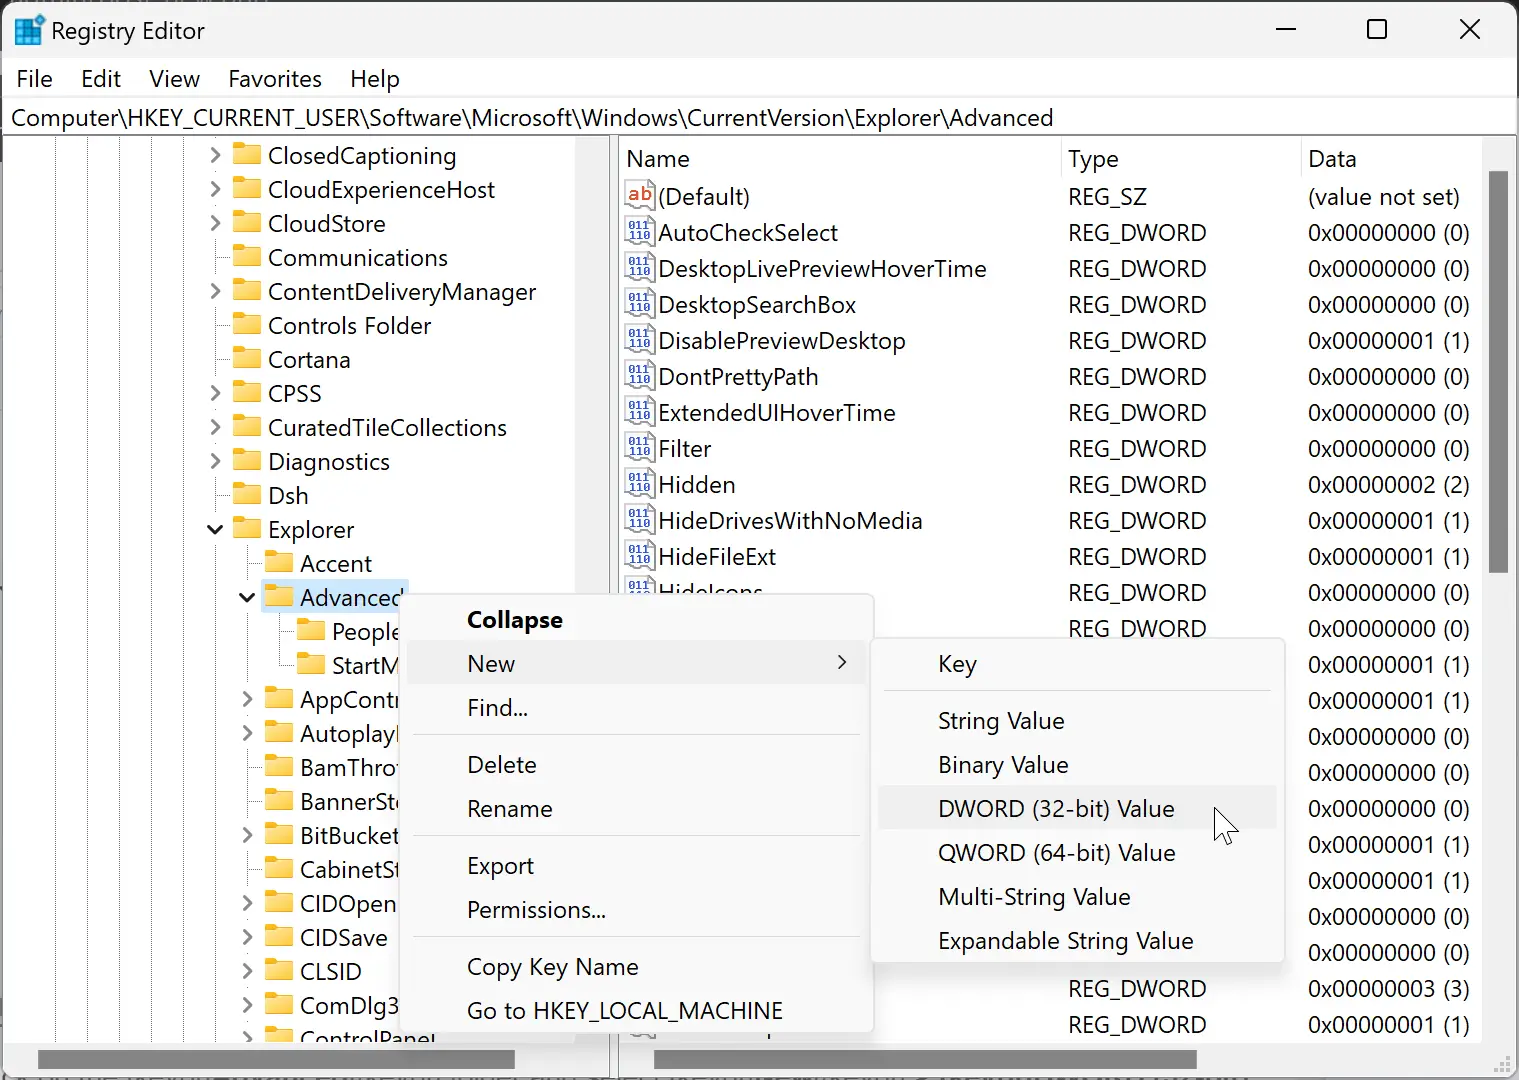
Step 6. Right-click on the Advanced folder and select New > DWORD (32-bit) Value.
Step 7. Name the newly created REG_DWORD as EnableSnapBar.
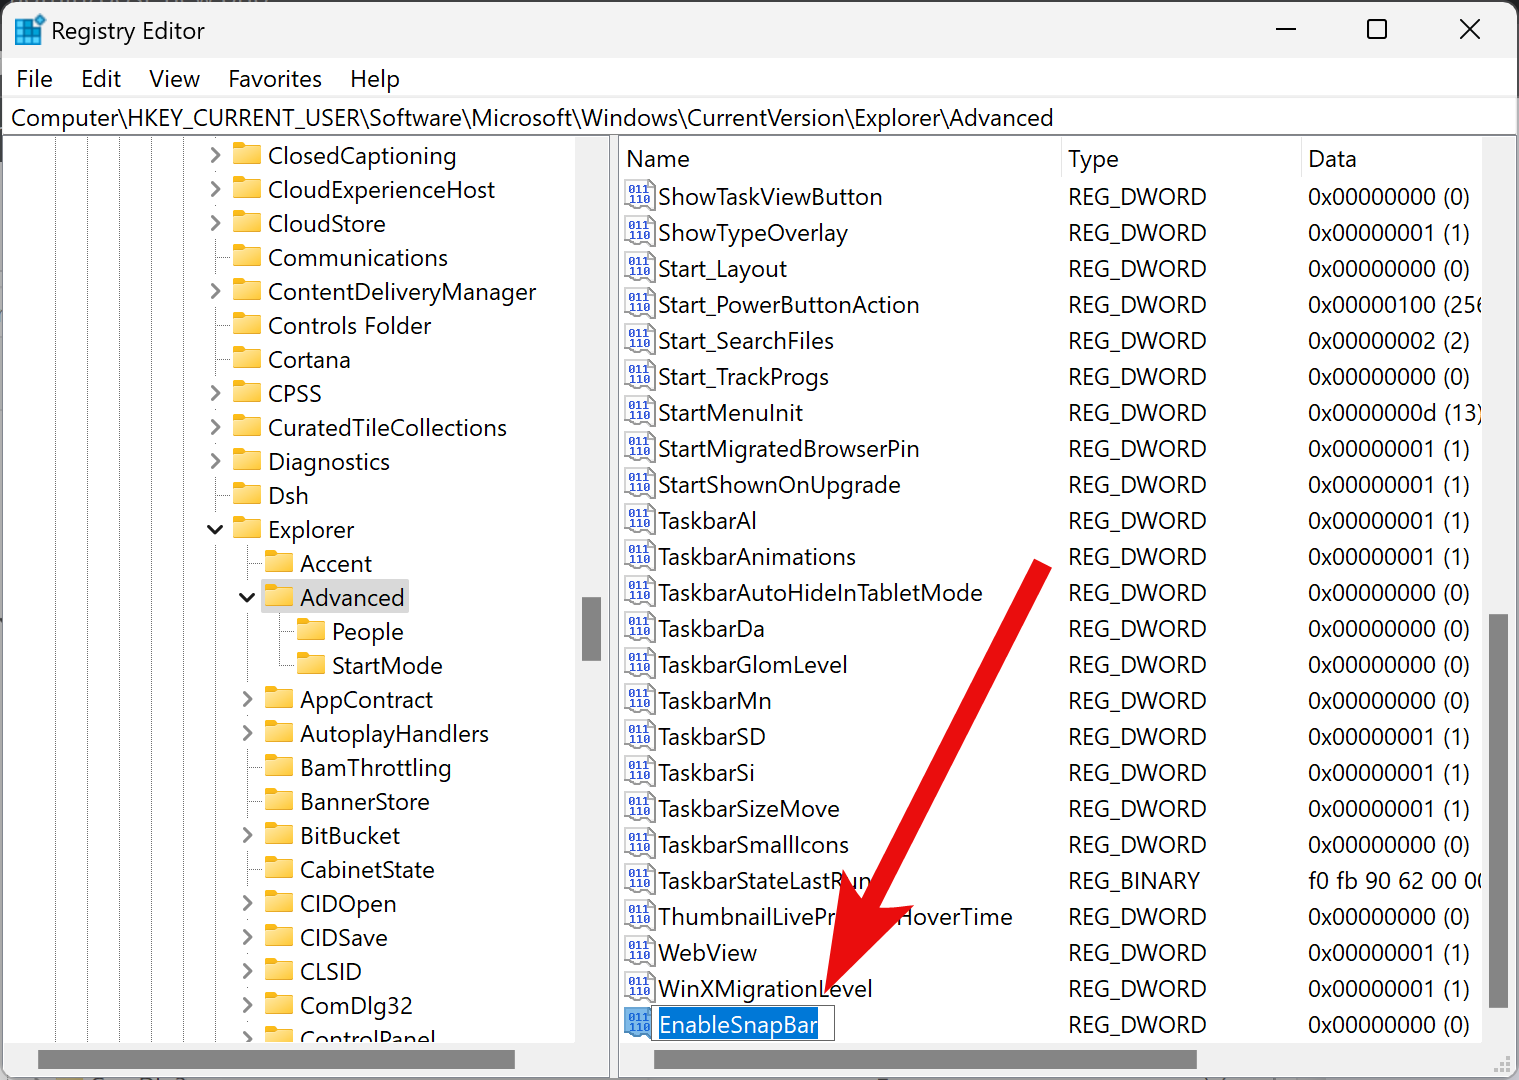
Step 8. Double-click on EnableSnapBar REG_DWORD and set its “Value data” as follows:-
- 0: Disable Snap Layouts on Top of Screen.
- 1: Enable Snap Layouts on Top of Screen.
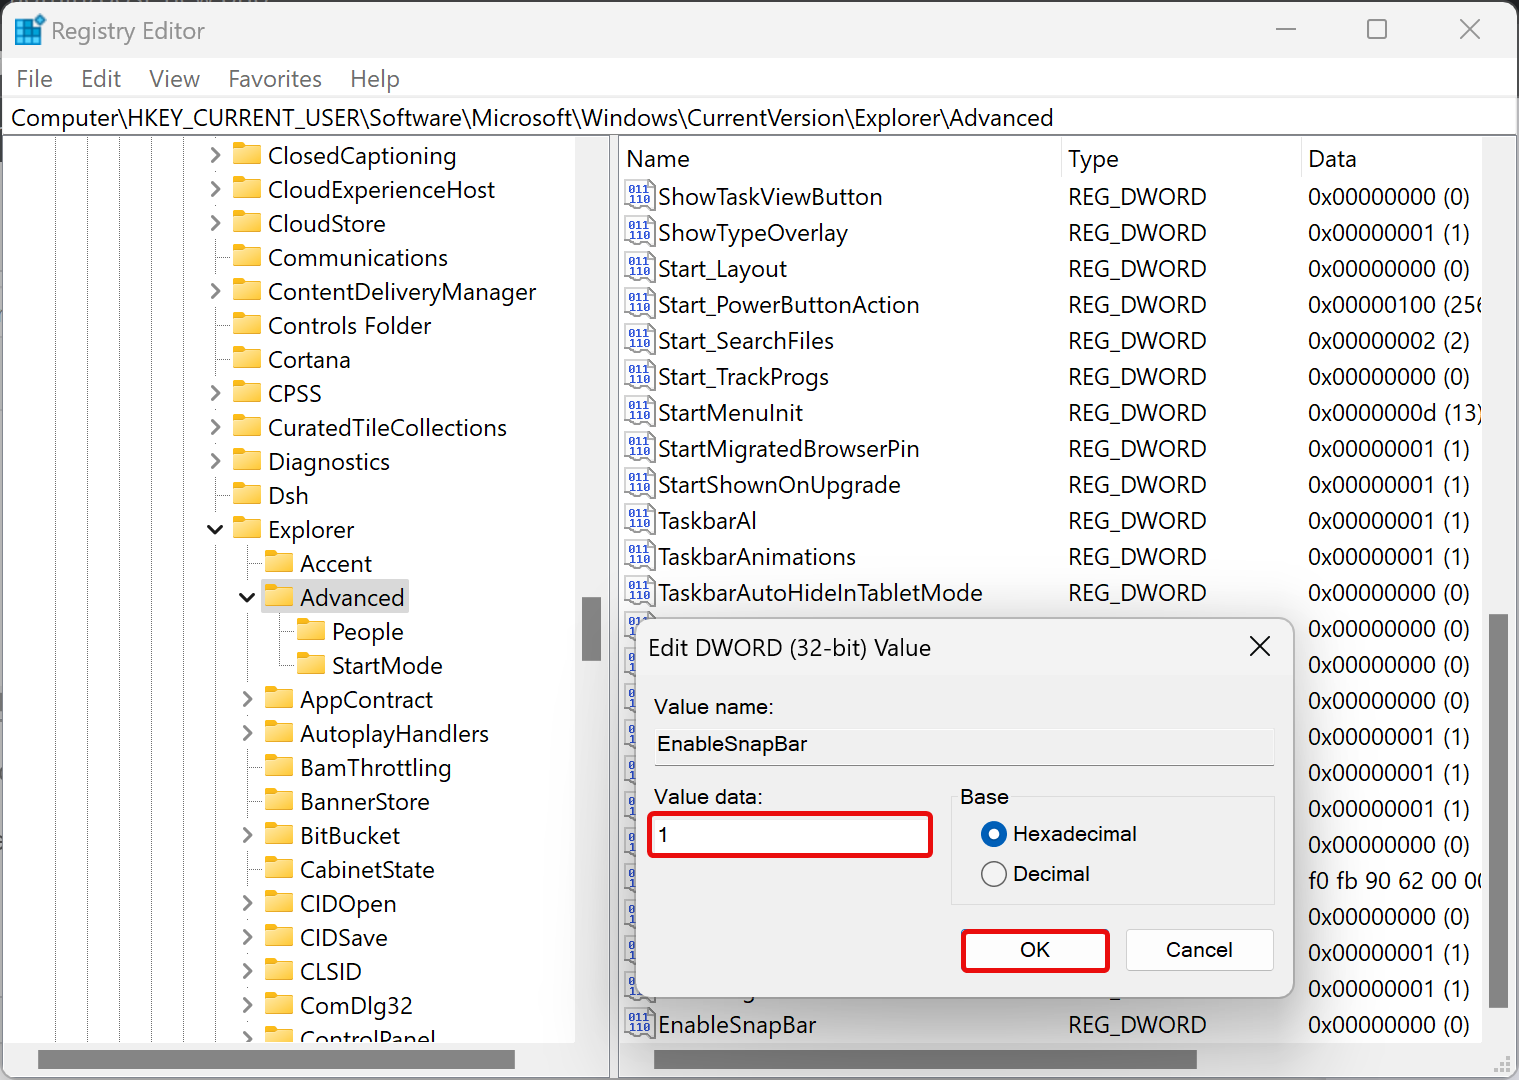
Step 9. Click OK.
Step 10. Finally, reboot your computer to apply the changes.
Conclusion
In conclusion, the Snap Layouts and Snap windows features in Windows 11 make it easy to organize and manage multiple windows on your screen. With Snap Layouts, you can select how to snap your current window, and with Snap windows, you can automatically resize and arrange your windows. However, if you prefer not to use Snap Layouts, it is possible to disable it by following the steps provided in this guide using either the Settings app or the Registry Editor. Ultimately, the choice is up to you as to how you prefer to manage your windows in Windows 11.