The Remote Desktop feature has been part of the Windows operating system since the launch of Windows XP, and it is still available in the latest version of Windows 11. This handy feature allows you to control other computers remotely. It is widely used in organizations to perform administrative tasks by system administrators. However, this feature remains disabled by default.
In this gearupwindows post, we will guide you through enabling remote desktops in Windows 8 / 10. Once the remote desktop is enabled, you or your system administrator can control a Windows machine remotely.
How to Enable Remote Desktop in Windows 10 Settings?
To turn on Remote Desktop in Windows 10, use these steps:-
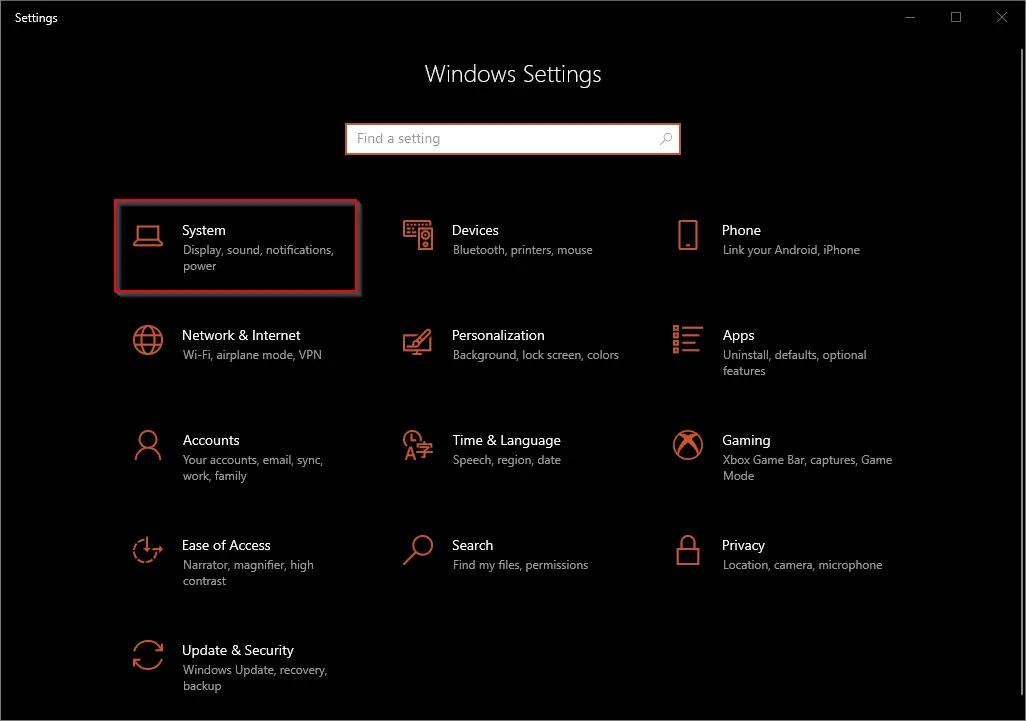
Step 1. Open the Settings app by pressing the Windows logo + I keys or any other method.
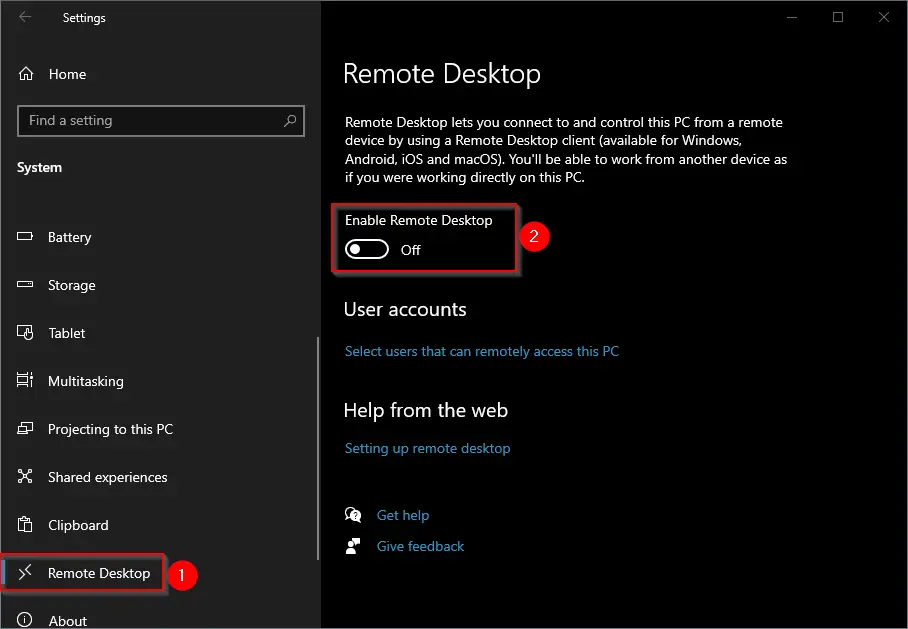
Step 2. Under System, scroll down from the left side pane and then click on Remote Desktop. On the right side of it, turn the toggle switch to the On or Off position next to Enable Remote Desktop to enable or disable the remote desktop on your PC.
How to Turn On Remote Desktop in Windows 11, 10, or 8?
To enable the Remote Desktop in Windows 11, 10, or 8, use these steps:-
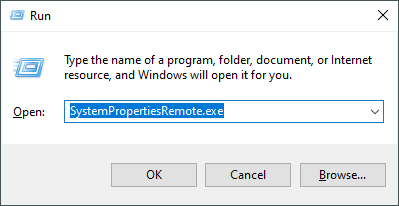
Step 1. Simultaneously press the Windows logo + R keys to open the Run dialog box.
Step 2. In the Run dialog box, type the following and hit Enter from the keyboard to open the System Properties window:-
SystemPropertiesRemote.exe
Step 3. In the System Properties window that opens, navigate to the Remote tab. Then, under the “Remote Desktop” section, select the radio button “Allow remote connections to this computer.”
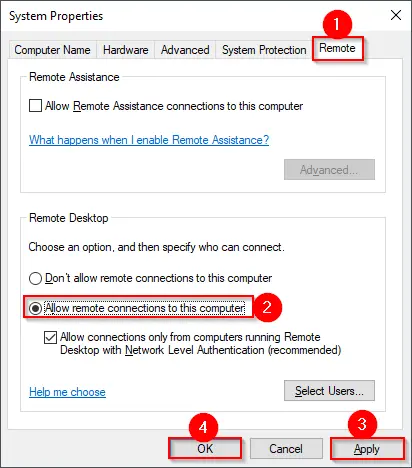
Step 4. Click Apply.
Step 5. Click OK.
After executing the above steps, the Remote Desktop feature is enabled on your PC. To access your Windows 11/10 or 8 computer remotely, type in mstsc in the Run command box from a remote computer and hit the Enter key on the keyboard. Remote Desktop Connection will open.
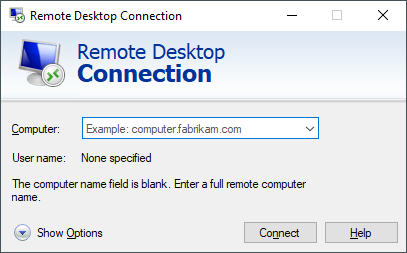
Type your PC name in the Computer field and then click the Connect button. That’s all!!
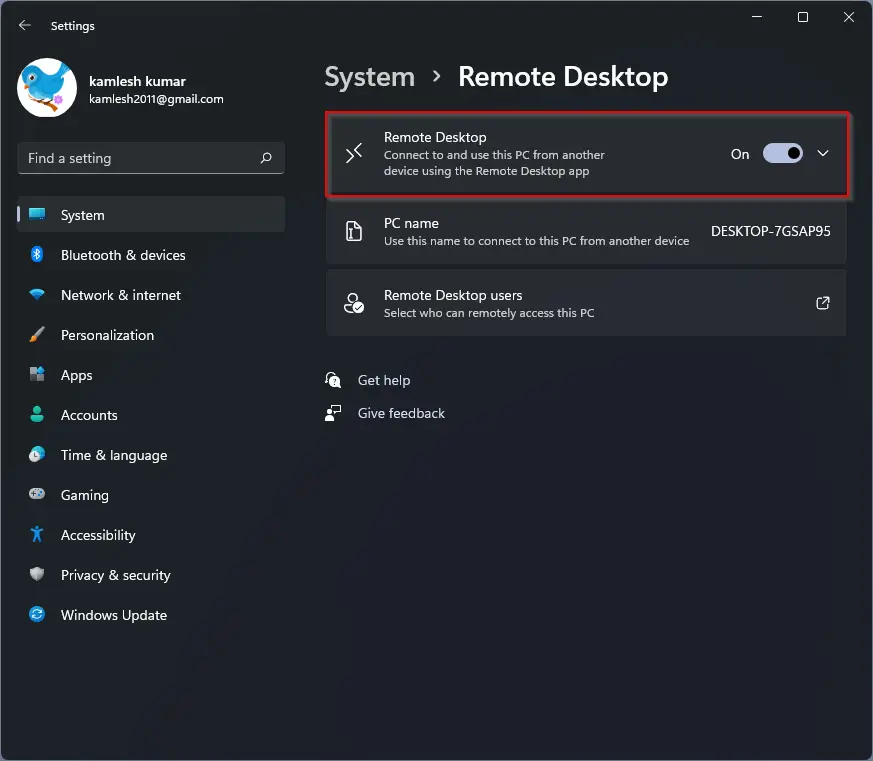
How to Enable Remote Desktop in Windows 11 Settings?
To turn on Remote Desktop in Windows 11, use these steps:-
Step 1. Open the Settings app by pressing Windows + I keys from the keyboard.
Step 2. In the Settings window that opens after performing the above step, click on the System category from the left side pane.

Step 3. On the System’s right side, click on the Remote Desktop tab.

Step 4. Now, turn On the toggle switch next to the Remote Desktop option.
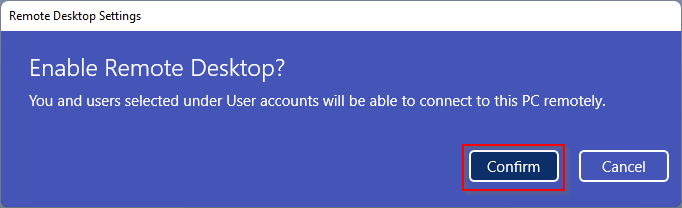
Once you turn on the toggle switch of Remote Desktop, a pop-up window will appear; click on the Confirm button.
If you would like to disable the Remote Desktop feature on your PC, repeat the above steps, and in step 4, turn Off the toggle switch next to the Remote Desktop option.
Conclusion
In conclusion, enabling Remote Desktop in Windows can be a useful feature for both personal and professional use. It allows users to remotely access their computers and perform administrative tasks. The steps to enable Remote Desktop may vary slightly depending on the version of Windows, but they are generally straightforward and easy to follow. It is important to note that Remote Desktops should be used with caution and proper security measures in place to protect against unauthorized access. By following the steps outlined in this post, users can enable or disable Remote Desktop on their Windows 11, 10, or 8 computers according to their needs.