Windows 11, the latest operating system from Microsoft, offers an impressive array of features designed to enhance productivity and multitasking. One such feature is Split Screen, which allows users to run multiple applications side by side on the same monitor, making it easier to work on two programs simultaneously. In this gearupwindows article, we’ll walk you through the step-by-step process of enabling Split Screen on Windows 11.
How to Enable Snap Layouts on Windows 11?
Before you use the split screen feature on Windows 11, you need to turn on Snap Layouts. Here’s how to enable Snap Layouts:-
Step 1. Press the Windows key and “I” simultaneously to launch the Settings app. Alternatively, you can click on the Start button and then select “Settings.”
Step 2. Inside the Settings app, you’ll find several categories on the left sidebar. Click on “System” to access the display and multitasking settings.

Step 3. In the System category, you’ll notice a list of options on the right. Scroll down until you see “Multitasking.” Click on it to reveal the multitasking settings.
Step 4. In the Multitasking settings, you’ll see a toggle switch next to “Snap windows.” By default, Snap Layouts is enabled. To confirm or re-enable it, ensure that the toggle switch is turned on (the switch will be blue when enabled).

With Snap Layouts enabled, you’re ready to make the most of your screen space. When you drag a window to the edge of your screen, you’ll see a visual guide that helps you choose the layout you prefer. Simply release the window, and it will snap into place.
How to Use Split Screen on Windows 11?
Once you’ve enabled Snap Layouts on Windows 11, follow these steps to make the most of Snap Layouts multitasking feature:-
Step 1. To use Split Screen, you’ll need to have at least two applications or windows open. Open the applications you want to work on simultaneously.
Step 2. Hover your mouse cursor over the maximize button (the square icon in the top-right corner) of one of the open windows. When you do this, you’ll notice a set of layout options appear on your screen.
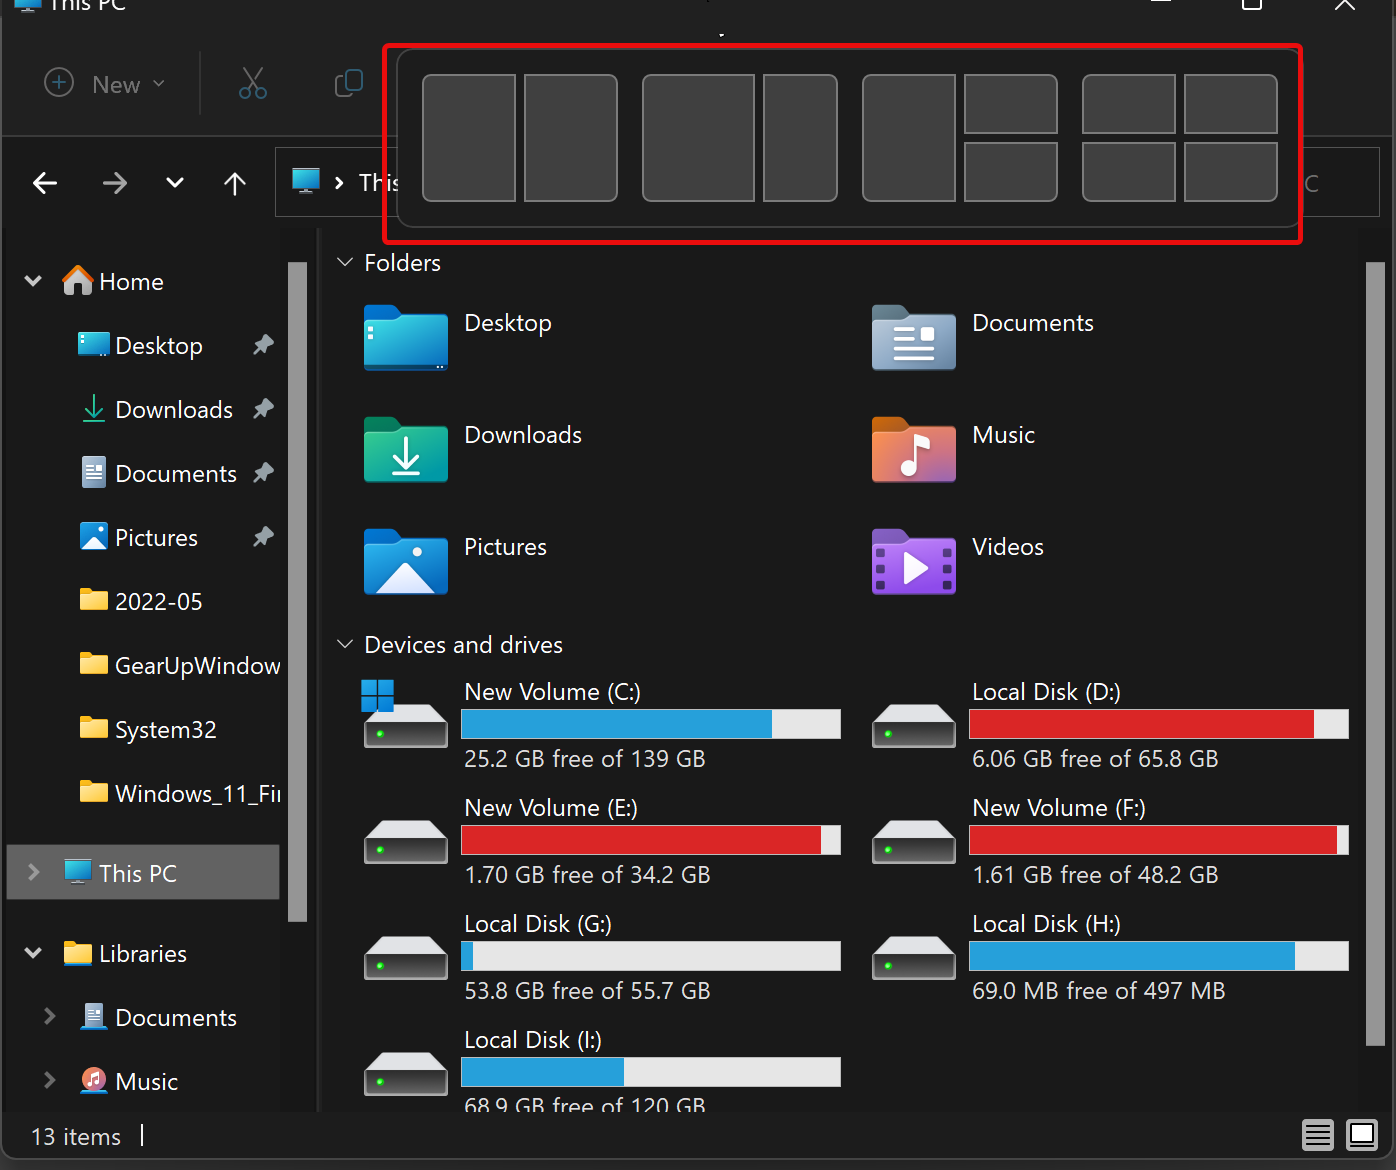
Step 3. Click on one of the layout options that appear. These layouts vary depending on the number of open applications and your monitor’s size. Common layouts include side-by-side, stacked, or four-quadrant layouts.
Step 4. Windows 11 will automatically arrange your open applications based on your selected layout. You can adjust the position of each window by dragging them to your preferred locations within the layout.
Step 5. If you have more than two applications open and wish to split your screen further, you can repeat the process by hovering over the maximize button of another window and selecting a different layout.
Step 6. You can also fine-tune the size of the windows within the split screen by clicking and dragging the divider between them to adjust the width of each window.
Step 7. If you want to return to a single application in full screen mode, simply click the maximize button of that application, and it will expand to occupy your entire monitor.
Keyboard Shortcuts for Split Screen
Windows 11 offers a few convenient keyboard shortcuts for managing split screen:-
– Win + Left Arrow: Snap the current window to the left side of the screen.
– Win + Right Arrow: Snap the current window to the right side of the screen.
– Win + Up Arrow: Maximize the current window.
– Win + Down Arrow: Minimize or restore the current window.
– Win+Z: Display the Snap layouts.
Conclusion
Windows 11’s Split Screen feature, enabled through Snap Layouts, provides an efficient way to multitask and improve your workflow. By following the simple steps outlined in this guide, you can make the most of your screen real estate and increase your productivity. Whether you’re working on a research project, comparing documents, or simply organizing your workspace, Split Screen on Windows 11 is a valuable tool that can enhance your computing experience. Try it out and streamline your multitasking with ease!
