If you want to add or upgrade RAM (Random Access Memory) in your Windows 11 or 10 computer, you need to know how many memory slots are available on the motherboard.
You can check the available memory slot by viewing device documentation online or opening the computer case. In this gearupwindows article, we will guide you with different tools (such as Task Manager, Command Prompt, or PowerShell) to check whether the motherboard still has some slots available.
How to Check Available Memory Slots on Windows 11 or 10 using Task Manager?
To know whether your laptop or computer has available memory slots, use these steps:-
Step 1. Open Task Manager.
To do that, use the Ctrl + Shift + Esc shortcut keys on the keyboard. Alternatively, click on the Search button and type Task Manager. In the available search results, click on its entry.
Step 2. Next, navigate to the Performance tab and then click on the Memory option.
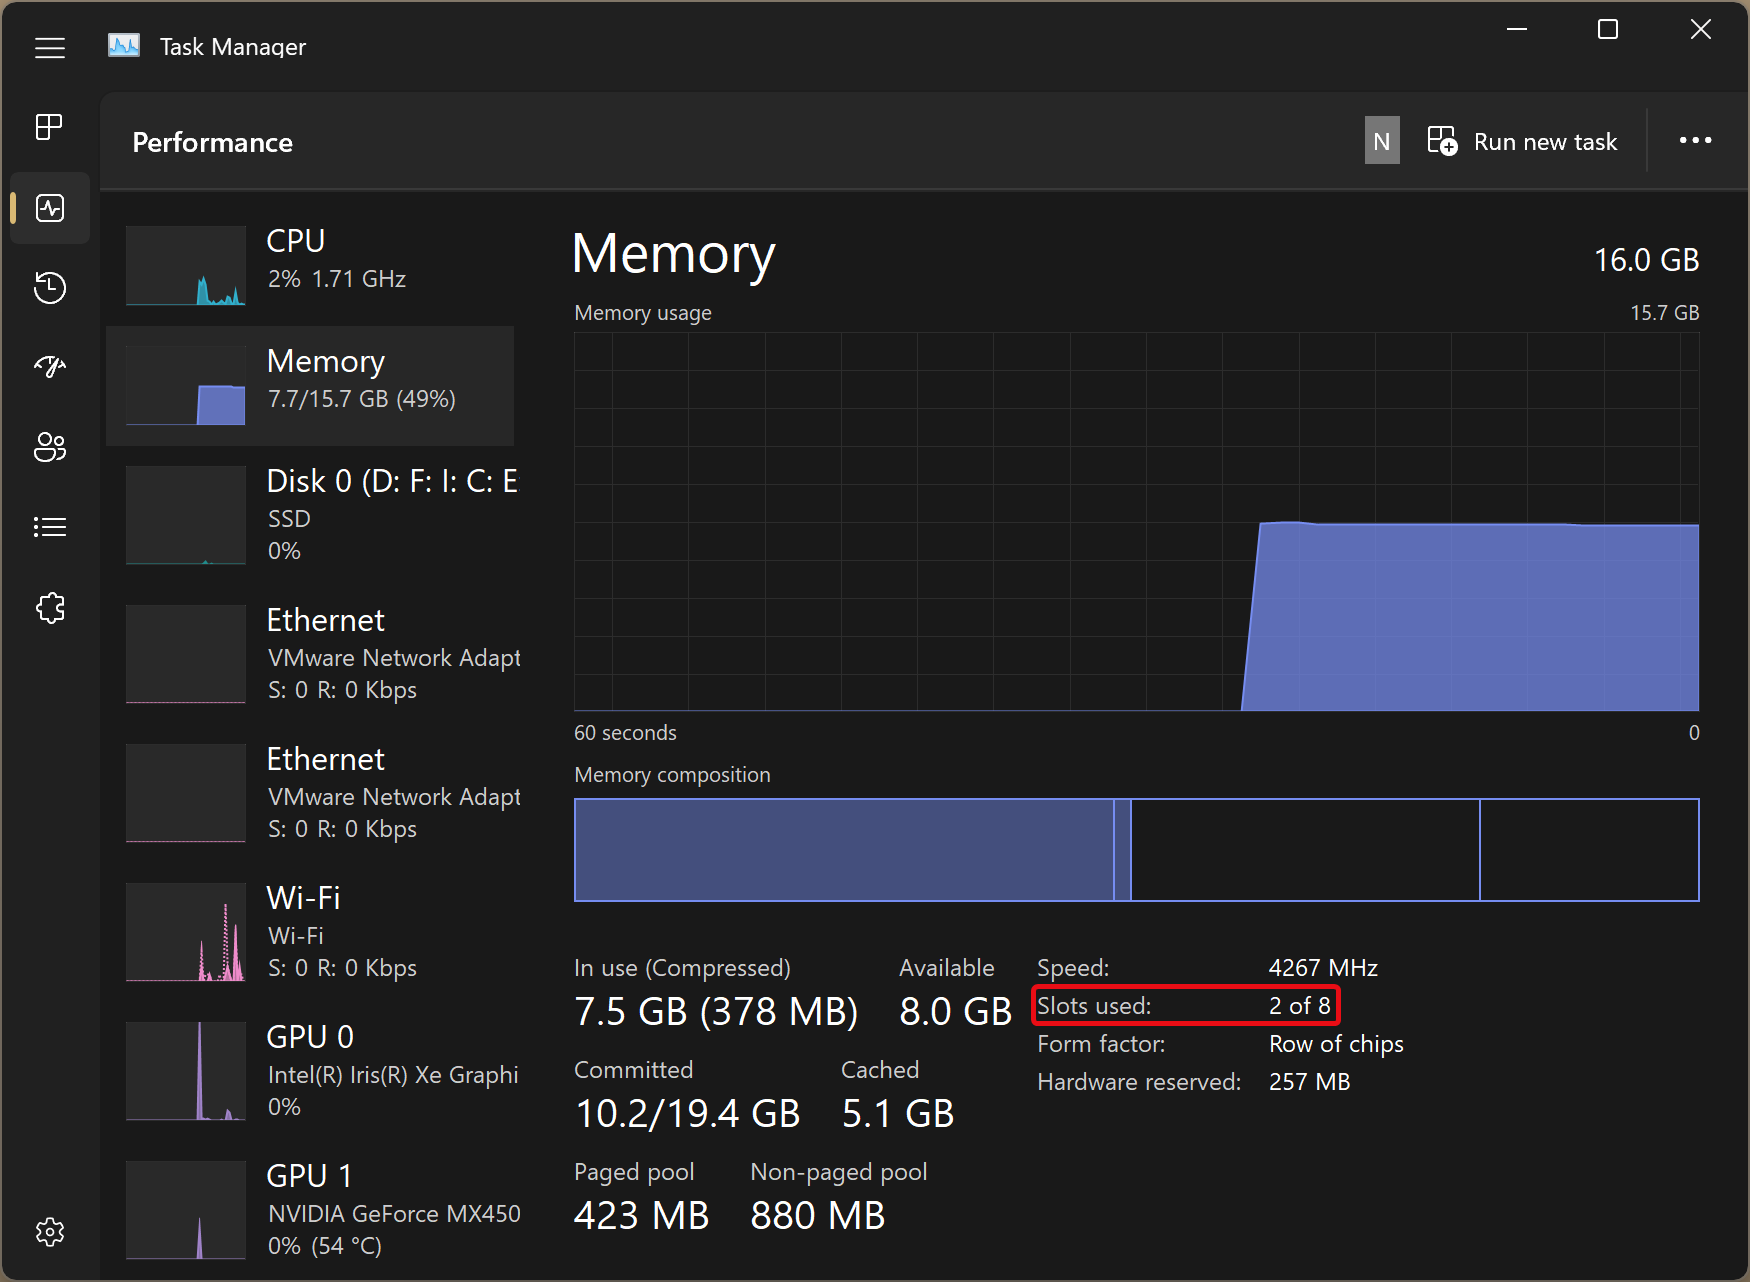
On the opposite side, you can view the Slots used and left. In our PC, out of 8, only two slots are used.
How to Find Available Memory Slots on Windows 11 or 10 through Command Prompt?
To view the available memory slots on Windows 11 or 10 using Command Prompt, use these steps:-
Step 1. Open Command Prompt.
To do that, press the Windows + R keys on the keyboard. In the Run box, type cmd and press Enter key on the keyboard.
Step 2. Then, type the following and hit the Enter key on the keyboard to determine available slots in the motherboard:-
wmic Memphysical get MaxCapacity, MemoryDevices

Step 3. For used memory slots, type the following and hit the Enter key on the keyboard:-
wmic MemoryChip get BankLabel, DeviceLocator, Capacity
How to Find Available Memory Slots on Windows 11 or 10 by PowerShell?
To see available memory slots on Windows 11 or 10 using PowerShell, use these steps:-
Step 1. Open Windows PowerShell.
To do that, click on the Search button and type PowerShell. In the available top search results, click on its entry.
Step 2. Then, type the following command and press the Enter key on the keyboard to determine the total slots available in the motherboard:-
Get-WmiObject -Class "Win32_PhysicalMemoryArray"

Step 3. To confirm the used memory slots, type the following command and press the Enter key on the keyboard:-
Get-WmiObject -Class "Win32_PhysicalMemory" | Format-Table BankLabel
Conclusion
In conclusion, adding or upgrading RAM on a Windows 11 or 10 computer requires knowledge of how many memory slots are available on the motherboard. There are several ways to check available memory slots on a computer, including using Task Manager, Command Prompt, or PowerShell. By following the steps provided in this gearupwindows article, users can easily determine how many memory slots are used and left on their motherboard, ensuring that they purchase the right amount of RAM for their upgrade.
