Do you want to run macOS Big Sur on a Windows 11/10 PC? If you can’t afford to purchase an Apple Macbook, you can use it on a virtual machine using VirtualBox.
Before installing macOS Big Sur on a Windows PC, let you know; it is not a tough job. VirtualBox has made everything easy for you. With VirtualBox, you can install multiple operating systems on a single computer and seamlessly switch between them when you desire. The guest operating systems run within an application, virtualizing the hardware, and the OS doesn’t know the difference. In this gearupwindows article, we will guide you on installing macOS Big Sur on a Windows machine.
What are the requirements to run macOS in VirtualBox?
Before you get started, you’ll need to download the following files:-
How to Install macOS Big Sur Using VirtualBox on Windows 11/10?
Once you have downloaded the files as mentioned earlier on your Windows machine, do the following steps:-
Step 1. Install VirtualBox and then its Extension Pack, which you already downloaded.
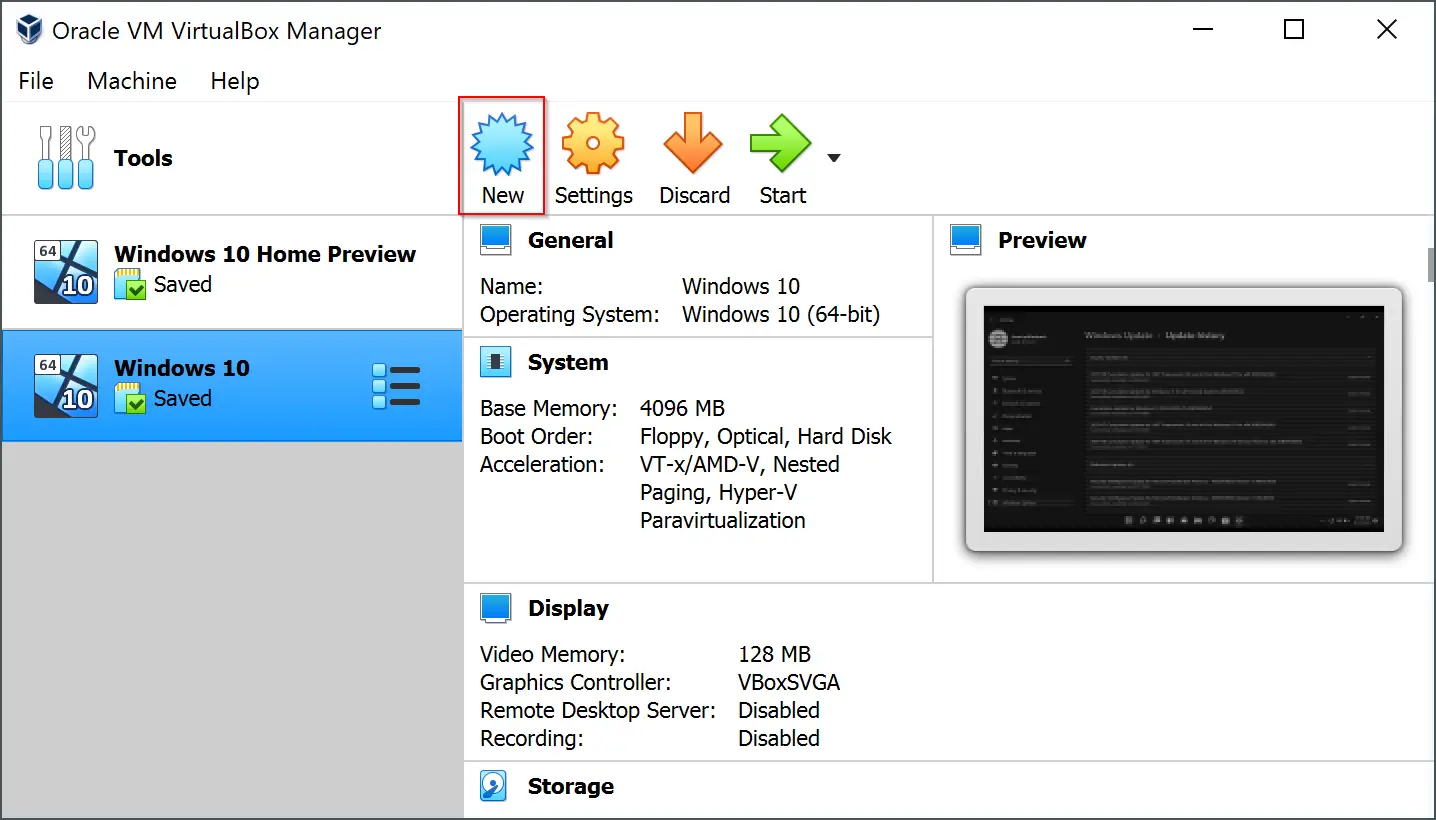
Step 2. Now, open Oracle VM VirtualBox from its desktop shortcut by double-clicking on it.
Step 3. Click New.
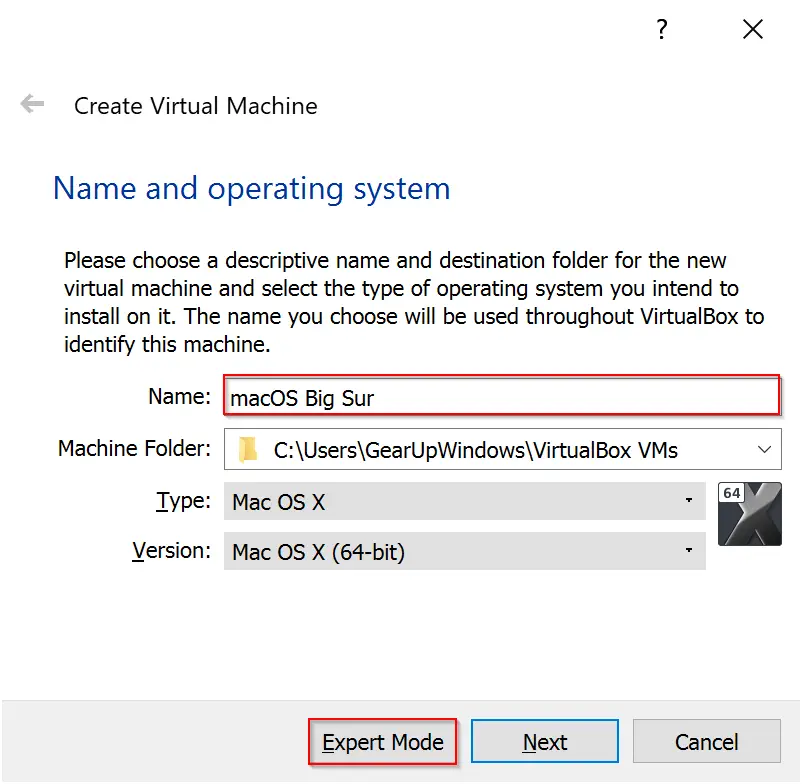
Step 3. Type macOS Big Sur for the virtual machine name and then click the Expert Mode button.
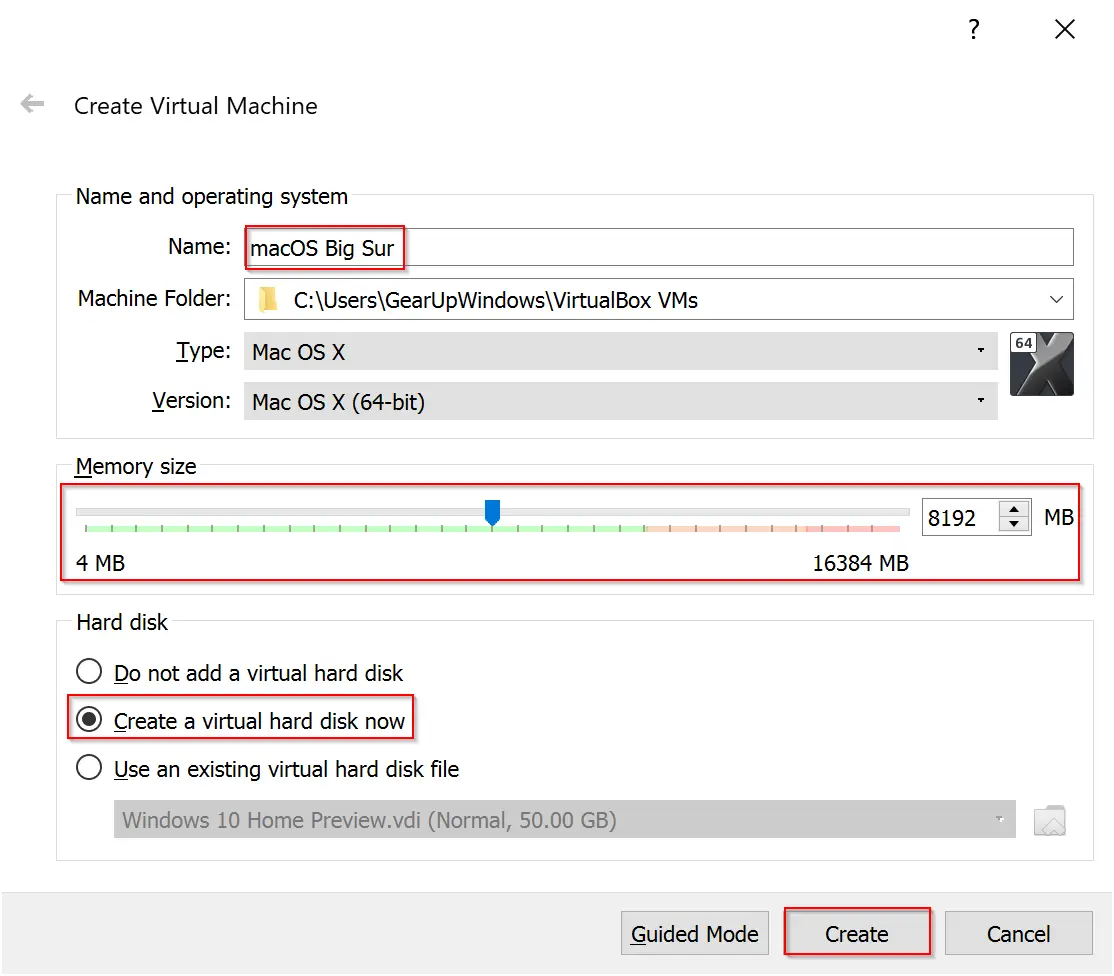
Step 4. Next, name the operating System macOS Big Sur. Use the slider to increase the memory size up to 8GB if your PC allows it. If not, then let at least 50% of physical RAM. Then make sure “Create a virtual hard disk now” is selected and click on the Create button.
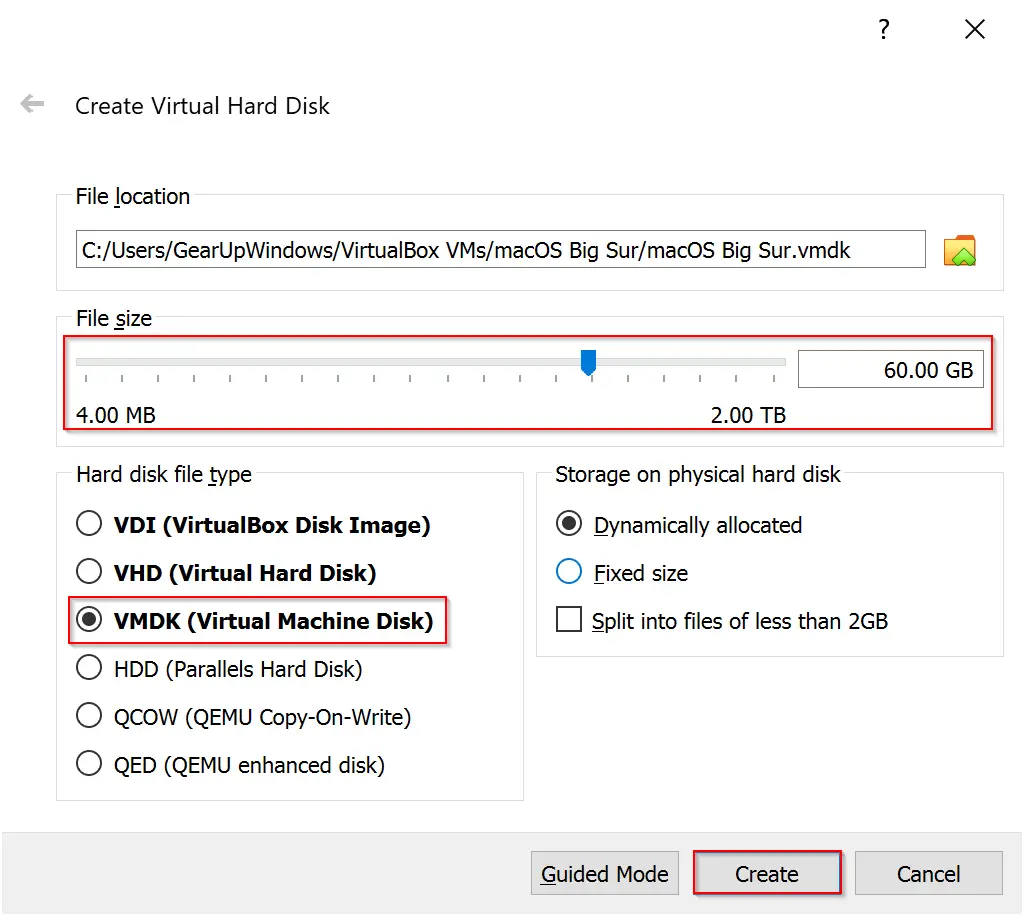
Step 5. Again use the slider to set the virtual hard disk size according to your preference. Although this depends on how much free storage space you have on your computer, we recommend allocating 60 GB for the virtual machine. Select VMDK (Virtual Machine Disk) for the hard disk file type and click the Create button.
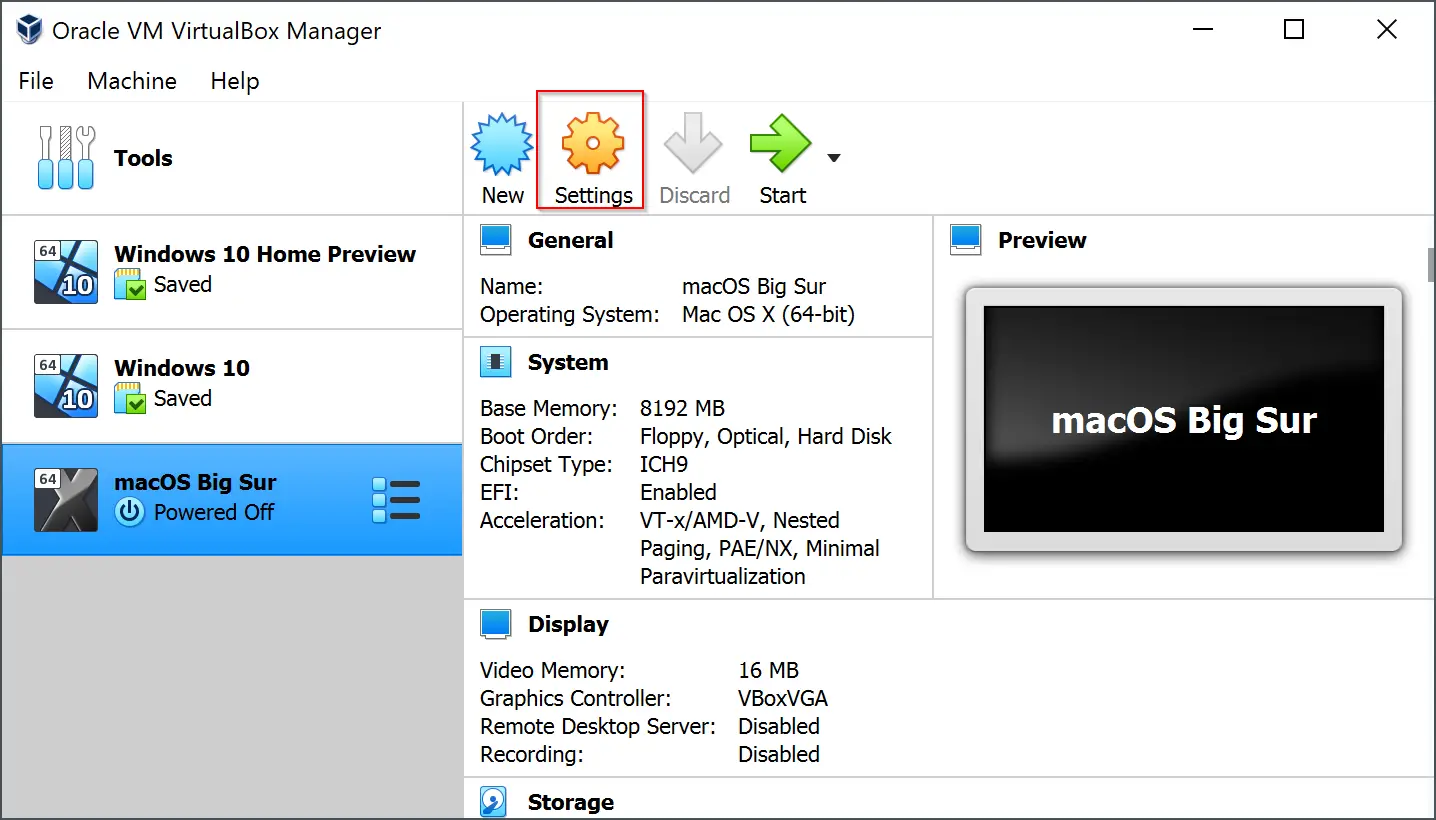
Step 6. When you’re done, click Settings.
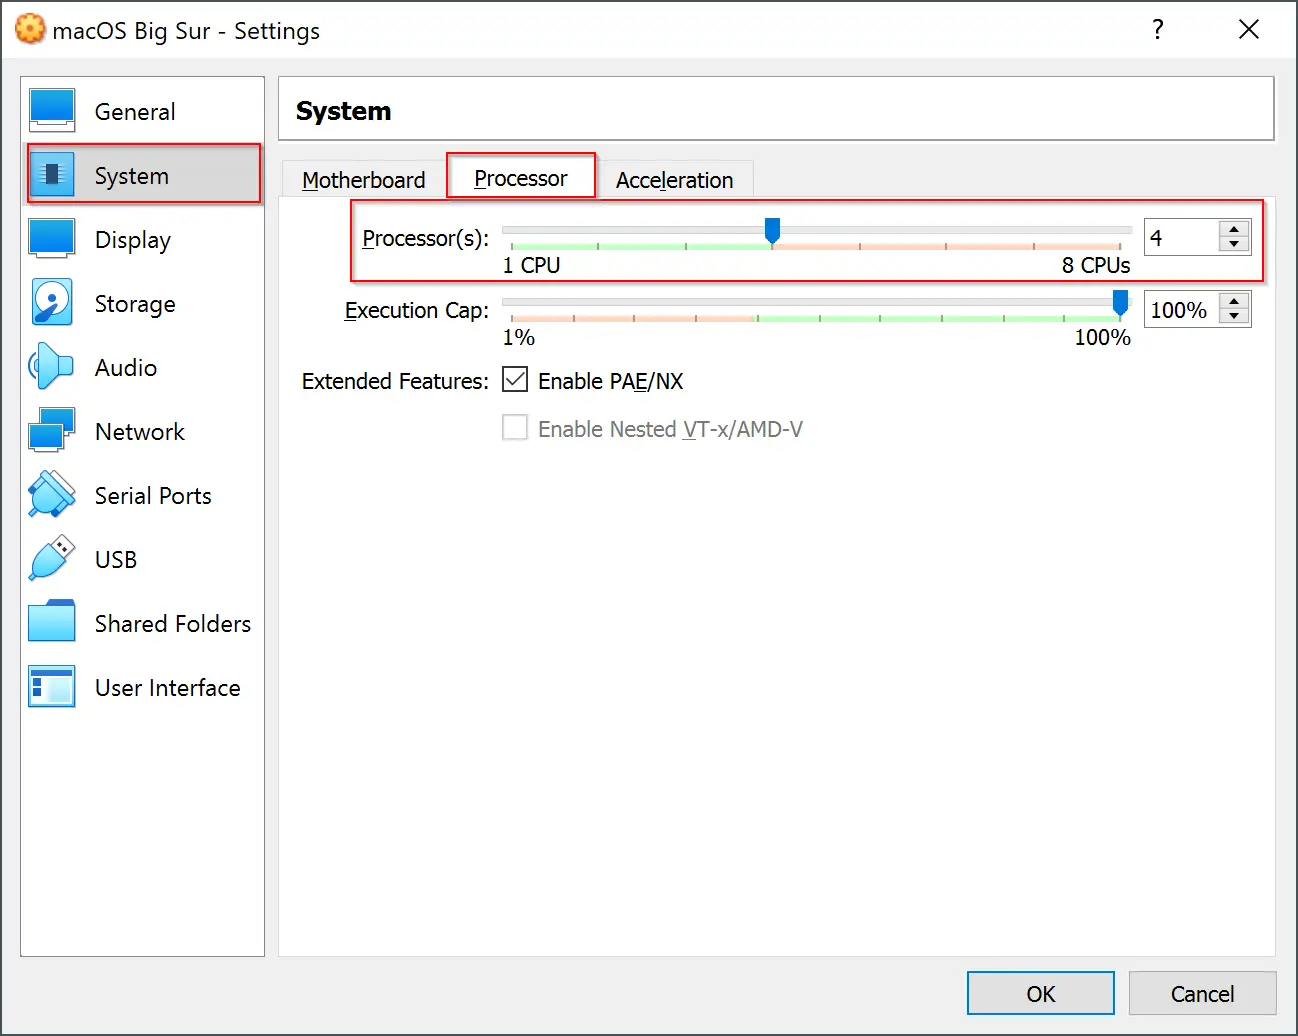
Step 7. Select the System category and then click the Processor from the top menu. Again use the slider to adjust the Processor allocation. It’s recommended to allocate half of your Processor’s core count for the virtual machine.
Note: If you have a 4-core/8-thread processor, it will appear in VirtualBox as 8 CPU cores. In that case, you can set 4-cores for processor allocation.
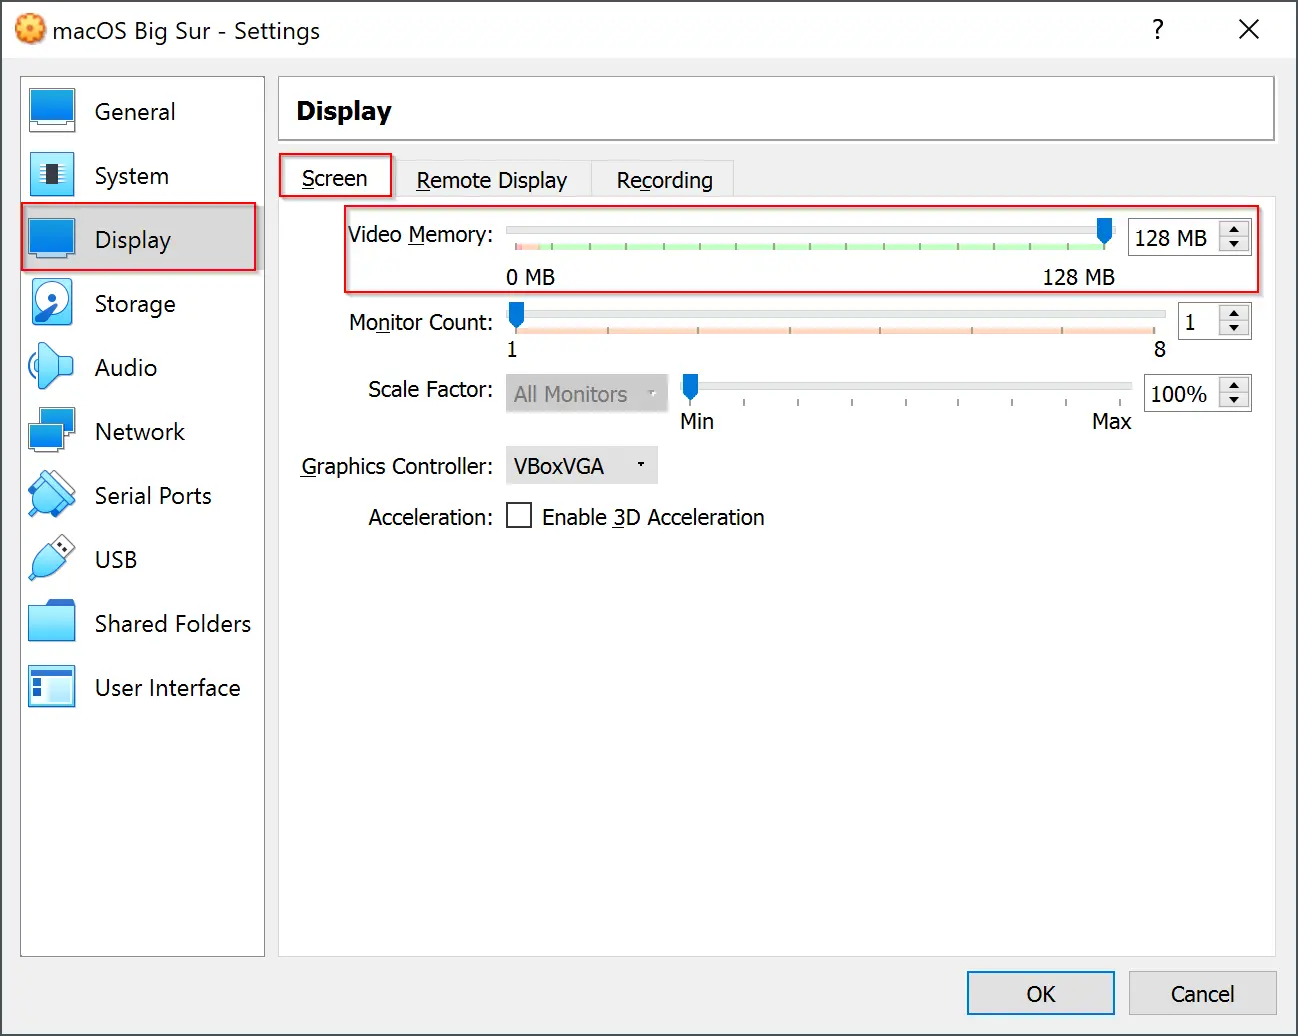
Step 8. Now, click the Display category from the left sidebar. On the right sidebar, move the slider under the “Screen” tab of “Video Memory.”
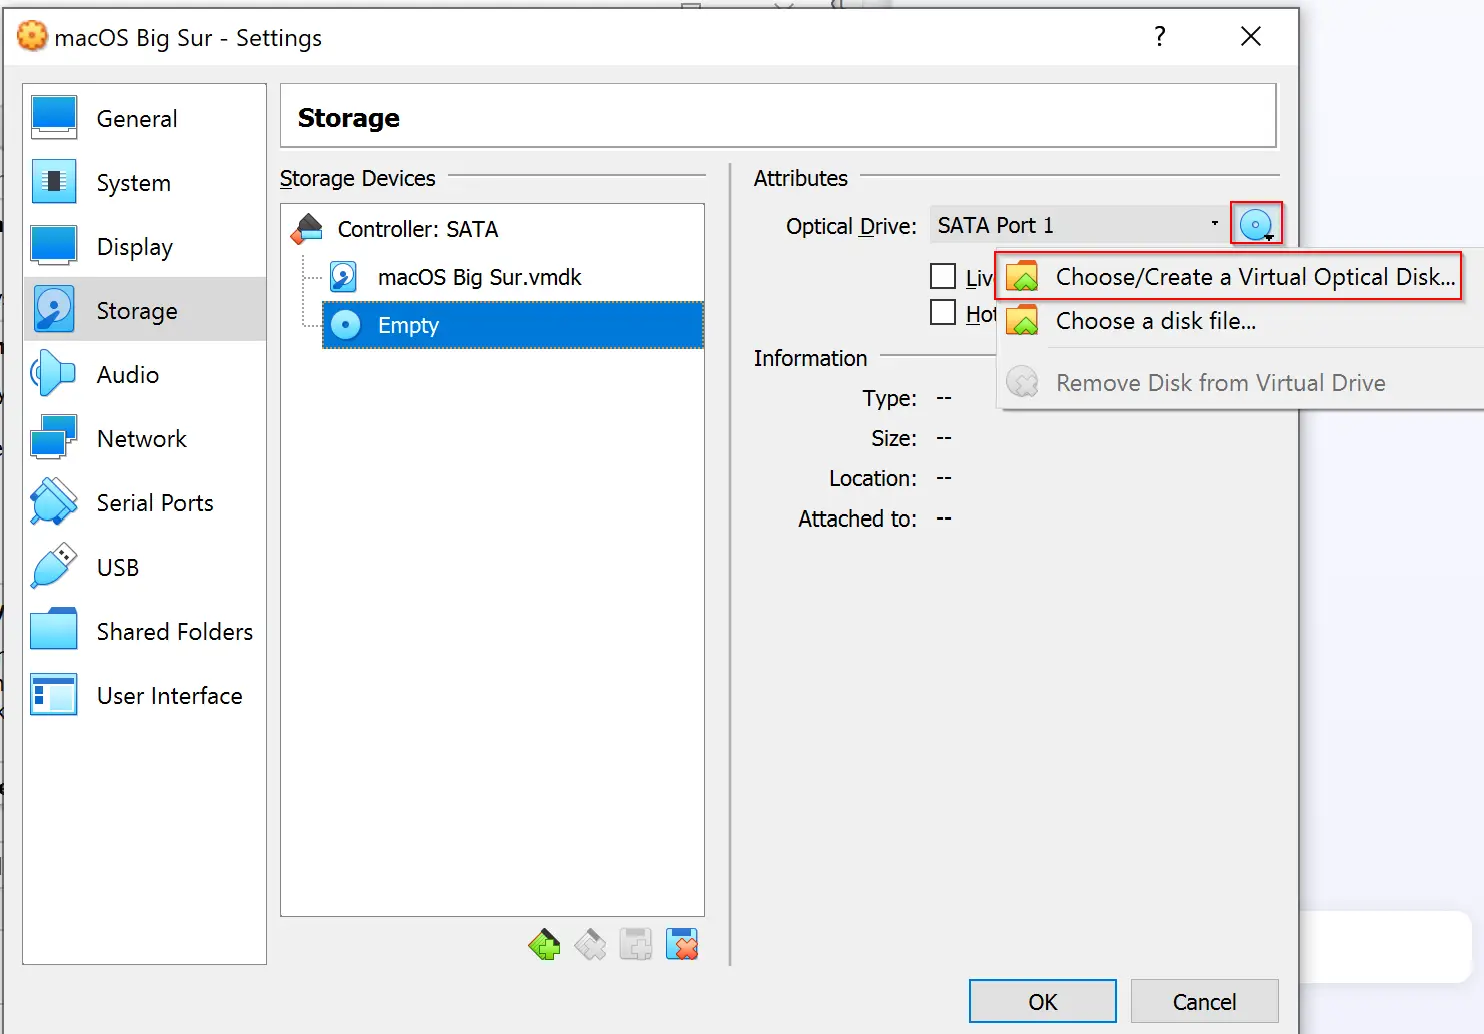
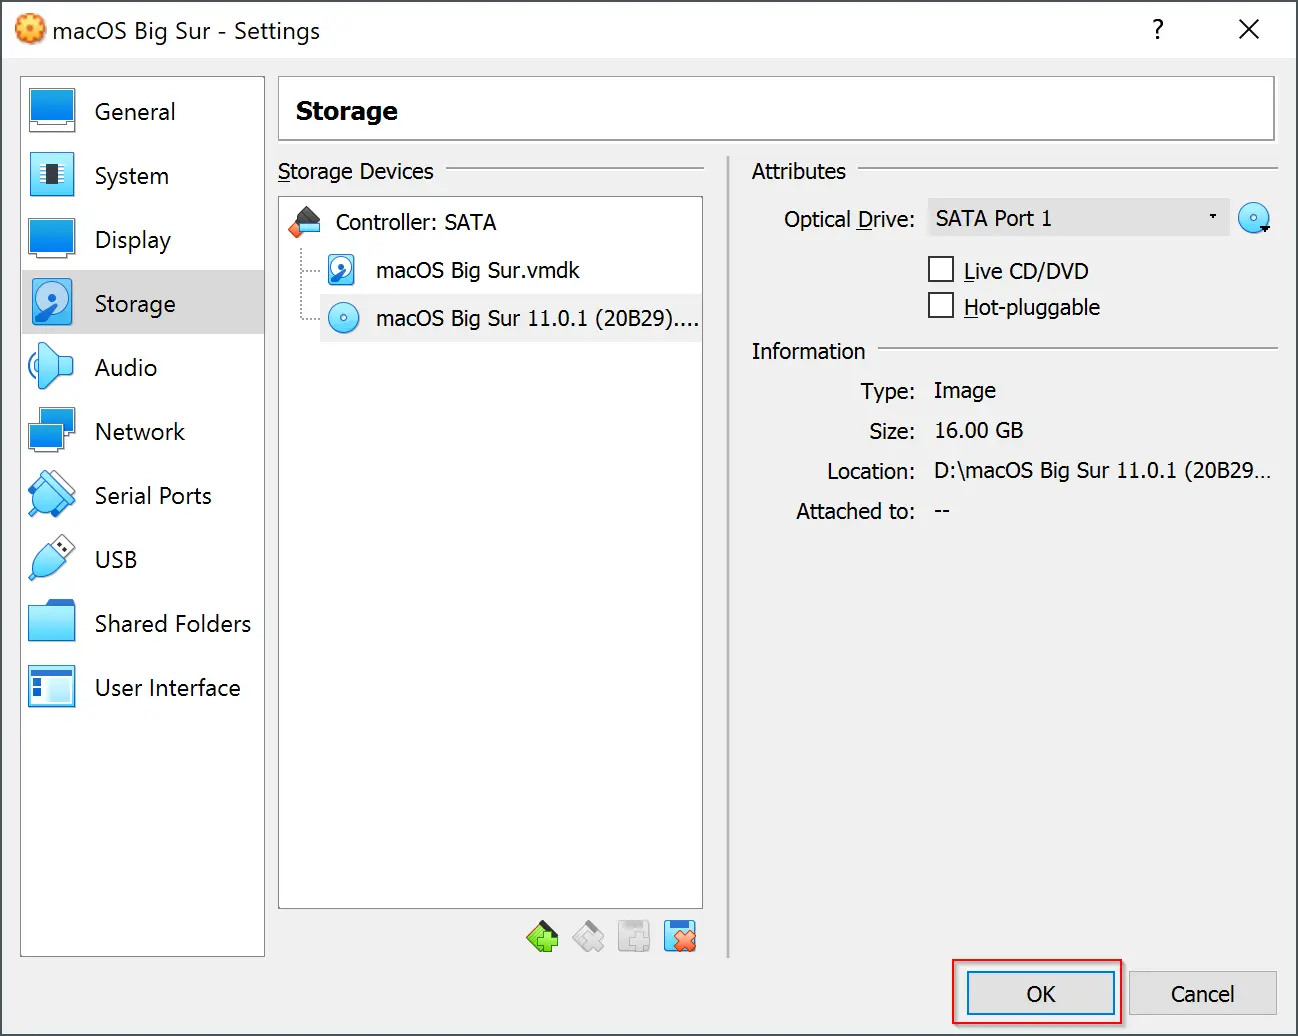
Step 9. Now, select the “Storage” category and click on Empty under the Storage Devices section.
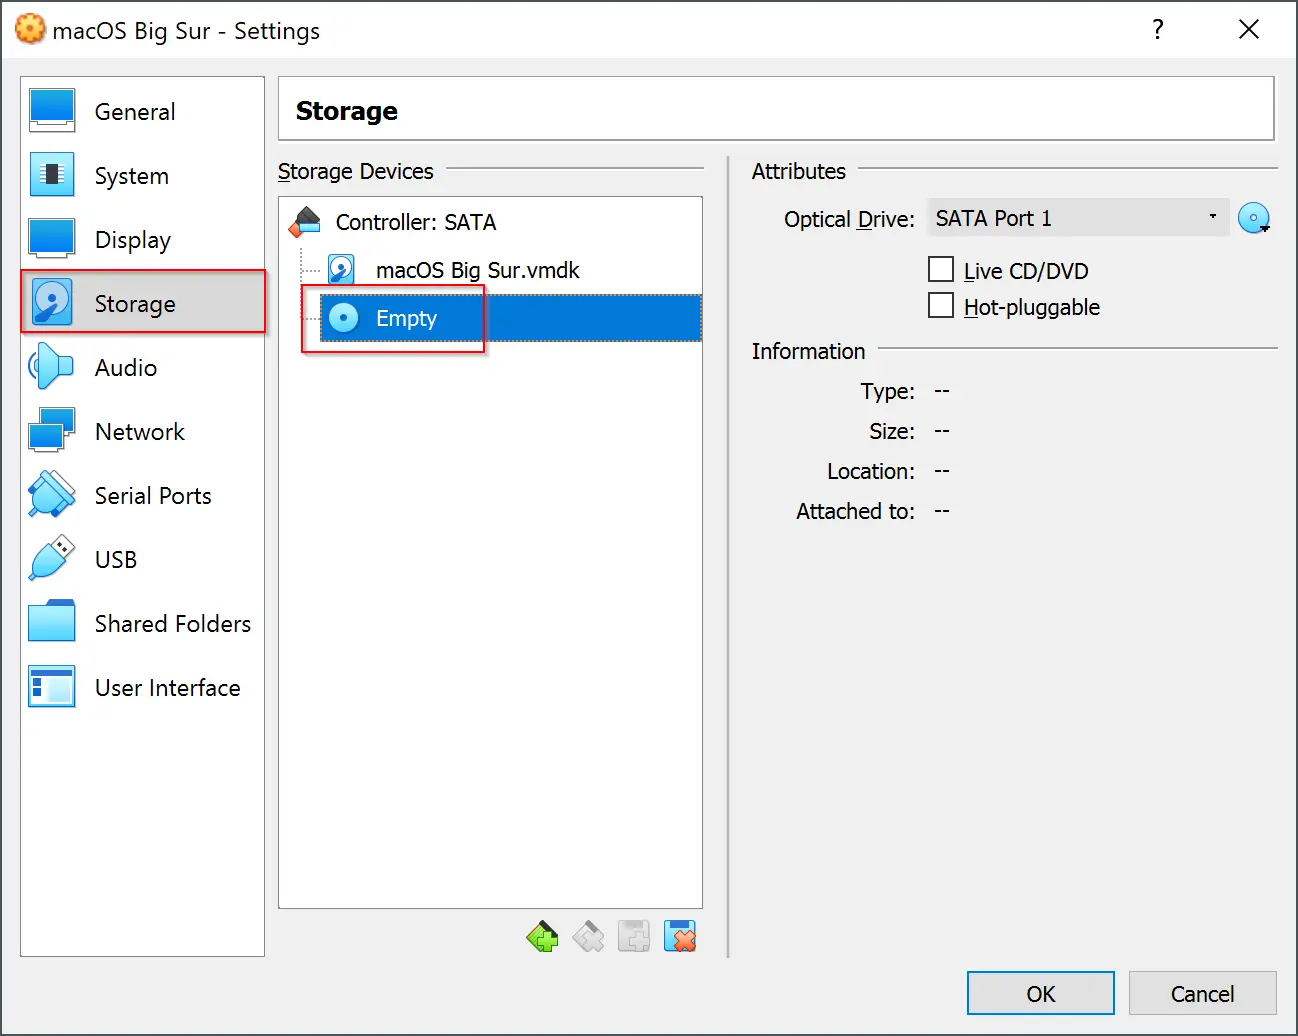
Step 10. Click on the optical disk icon on the right sidebar and choose “Create a Virtual Optical Disk” from the dropdown menu.
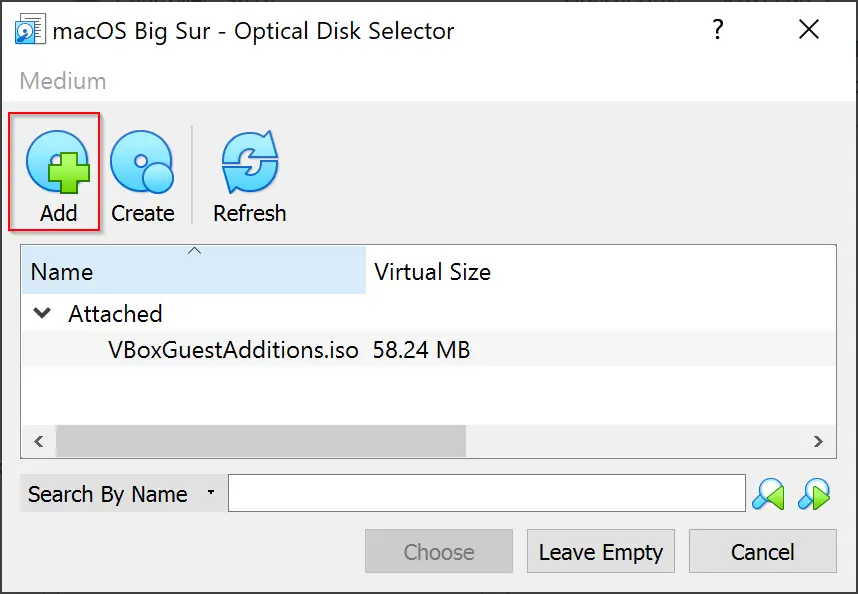
Step 11. Click the Add button to browse the macOS Big Sur ISO from the File Explorer that you already downloaded.
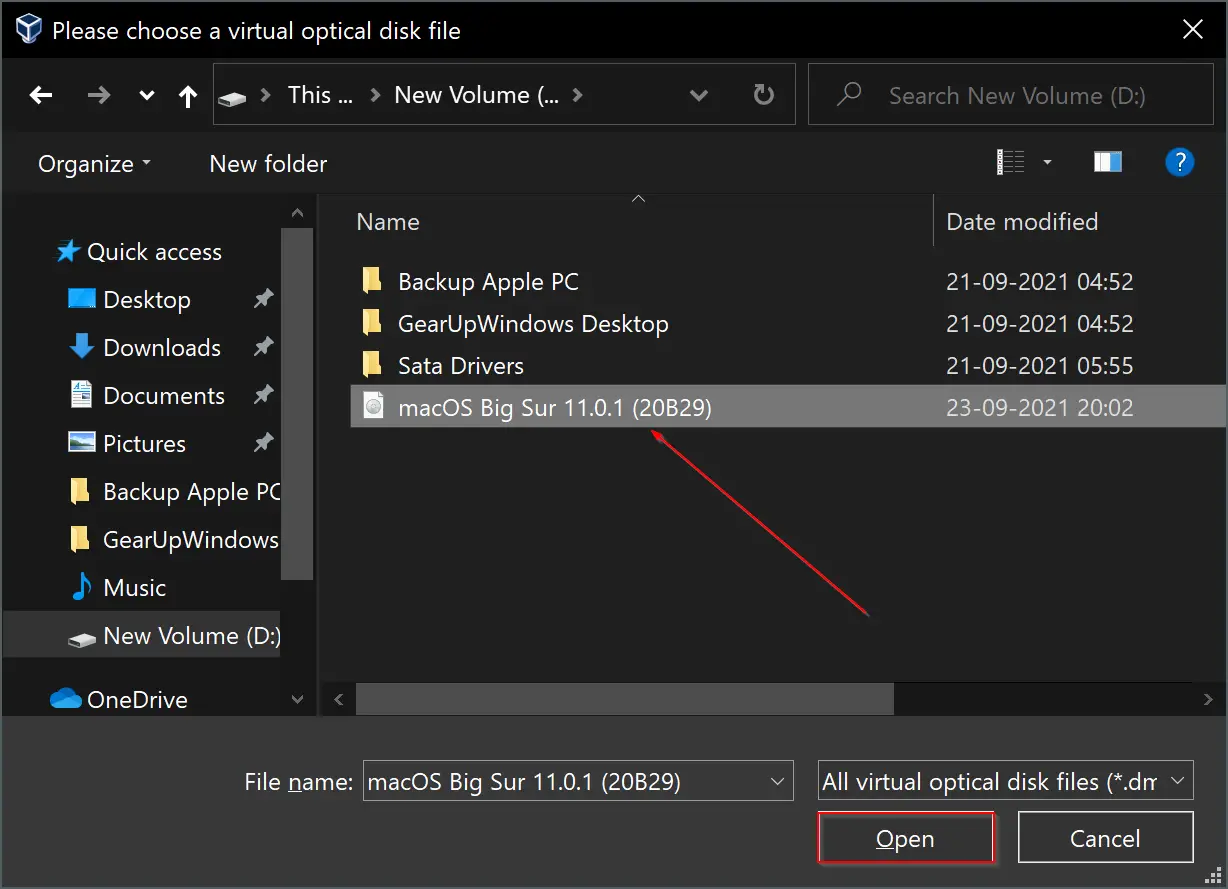
Step 12. Select the macOS Big Sur ISO file in the File Explorer and click the Open button.
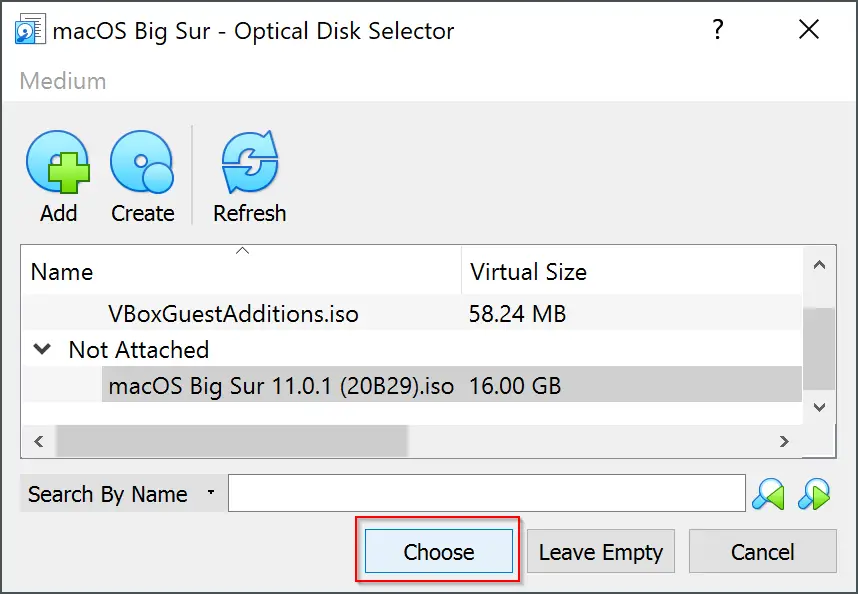
Step 13. Click the Choose button.
Step 14. Finally, click the OK button.
Step 15. Now, close the VirtualBox window.
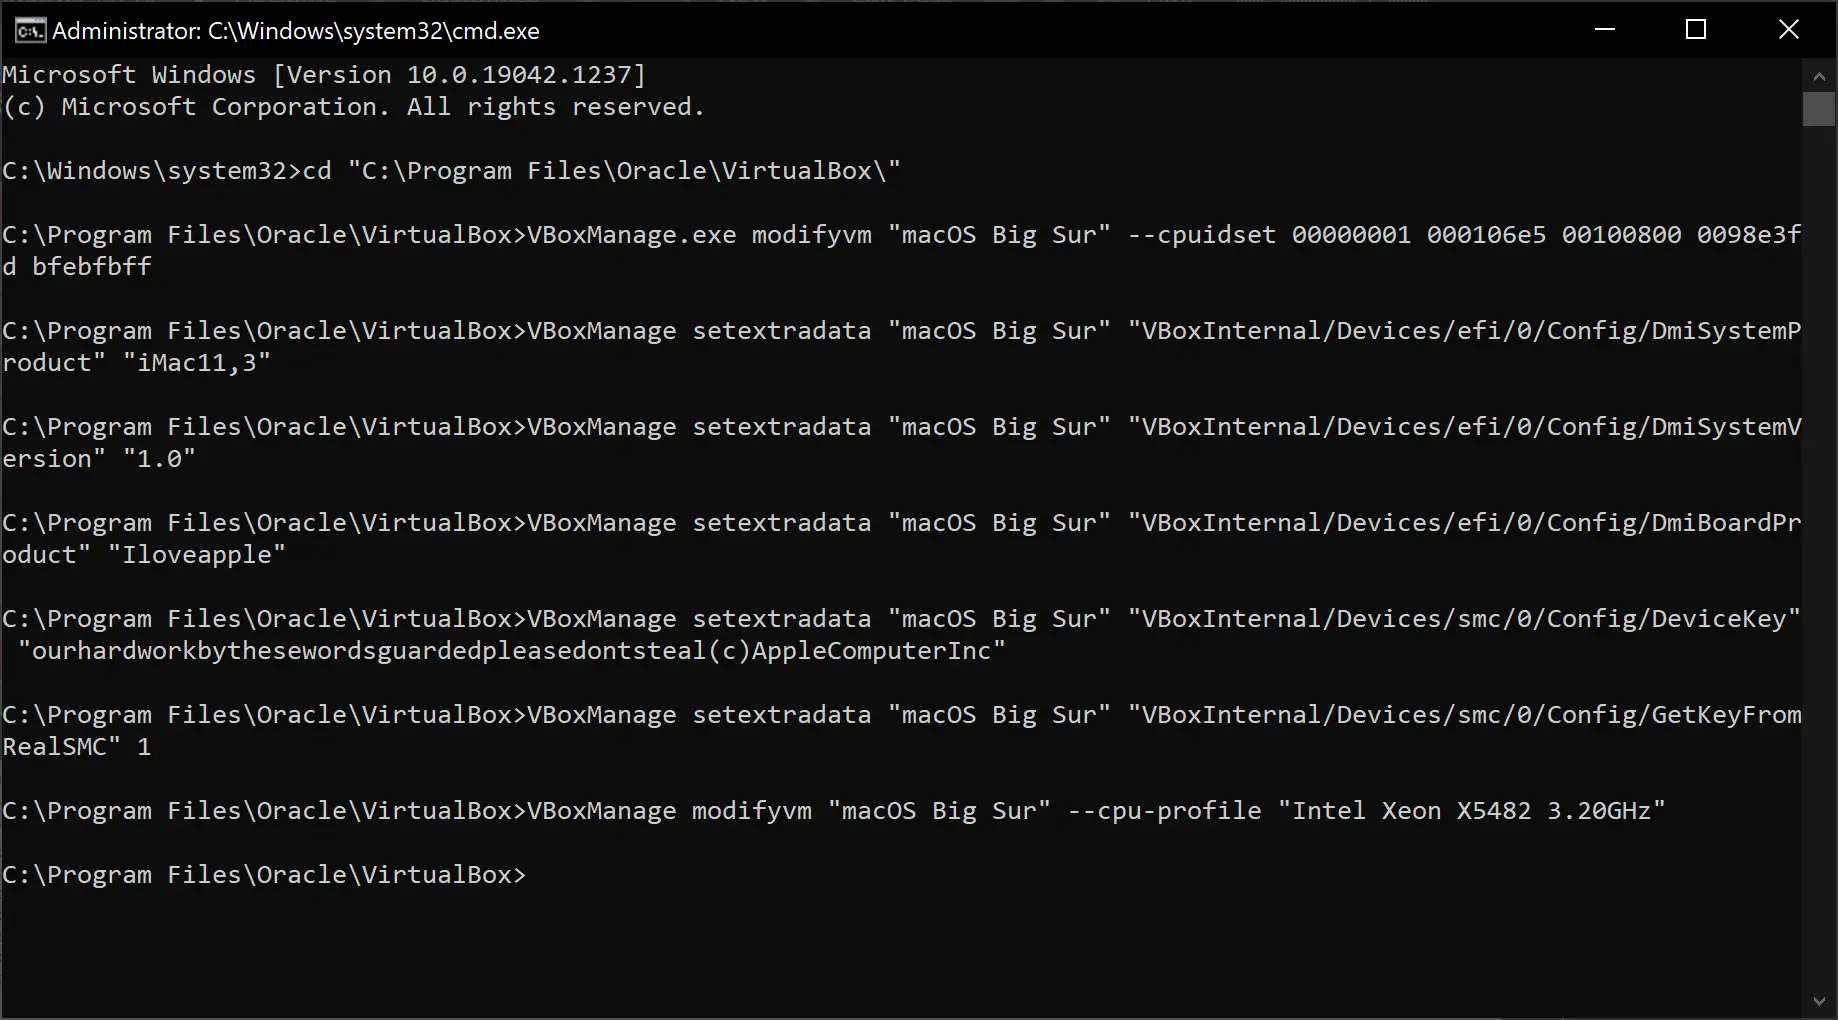
Step 16. Open Command Prompt as administrator.
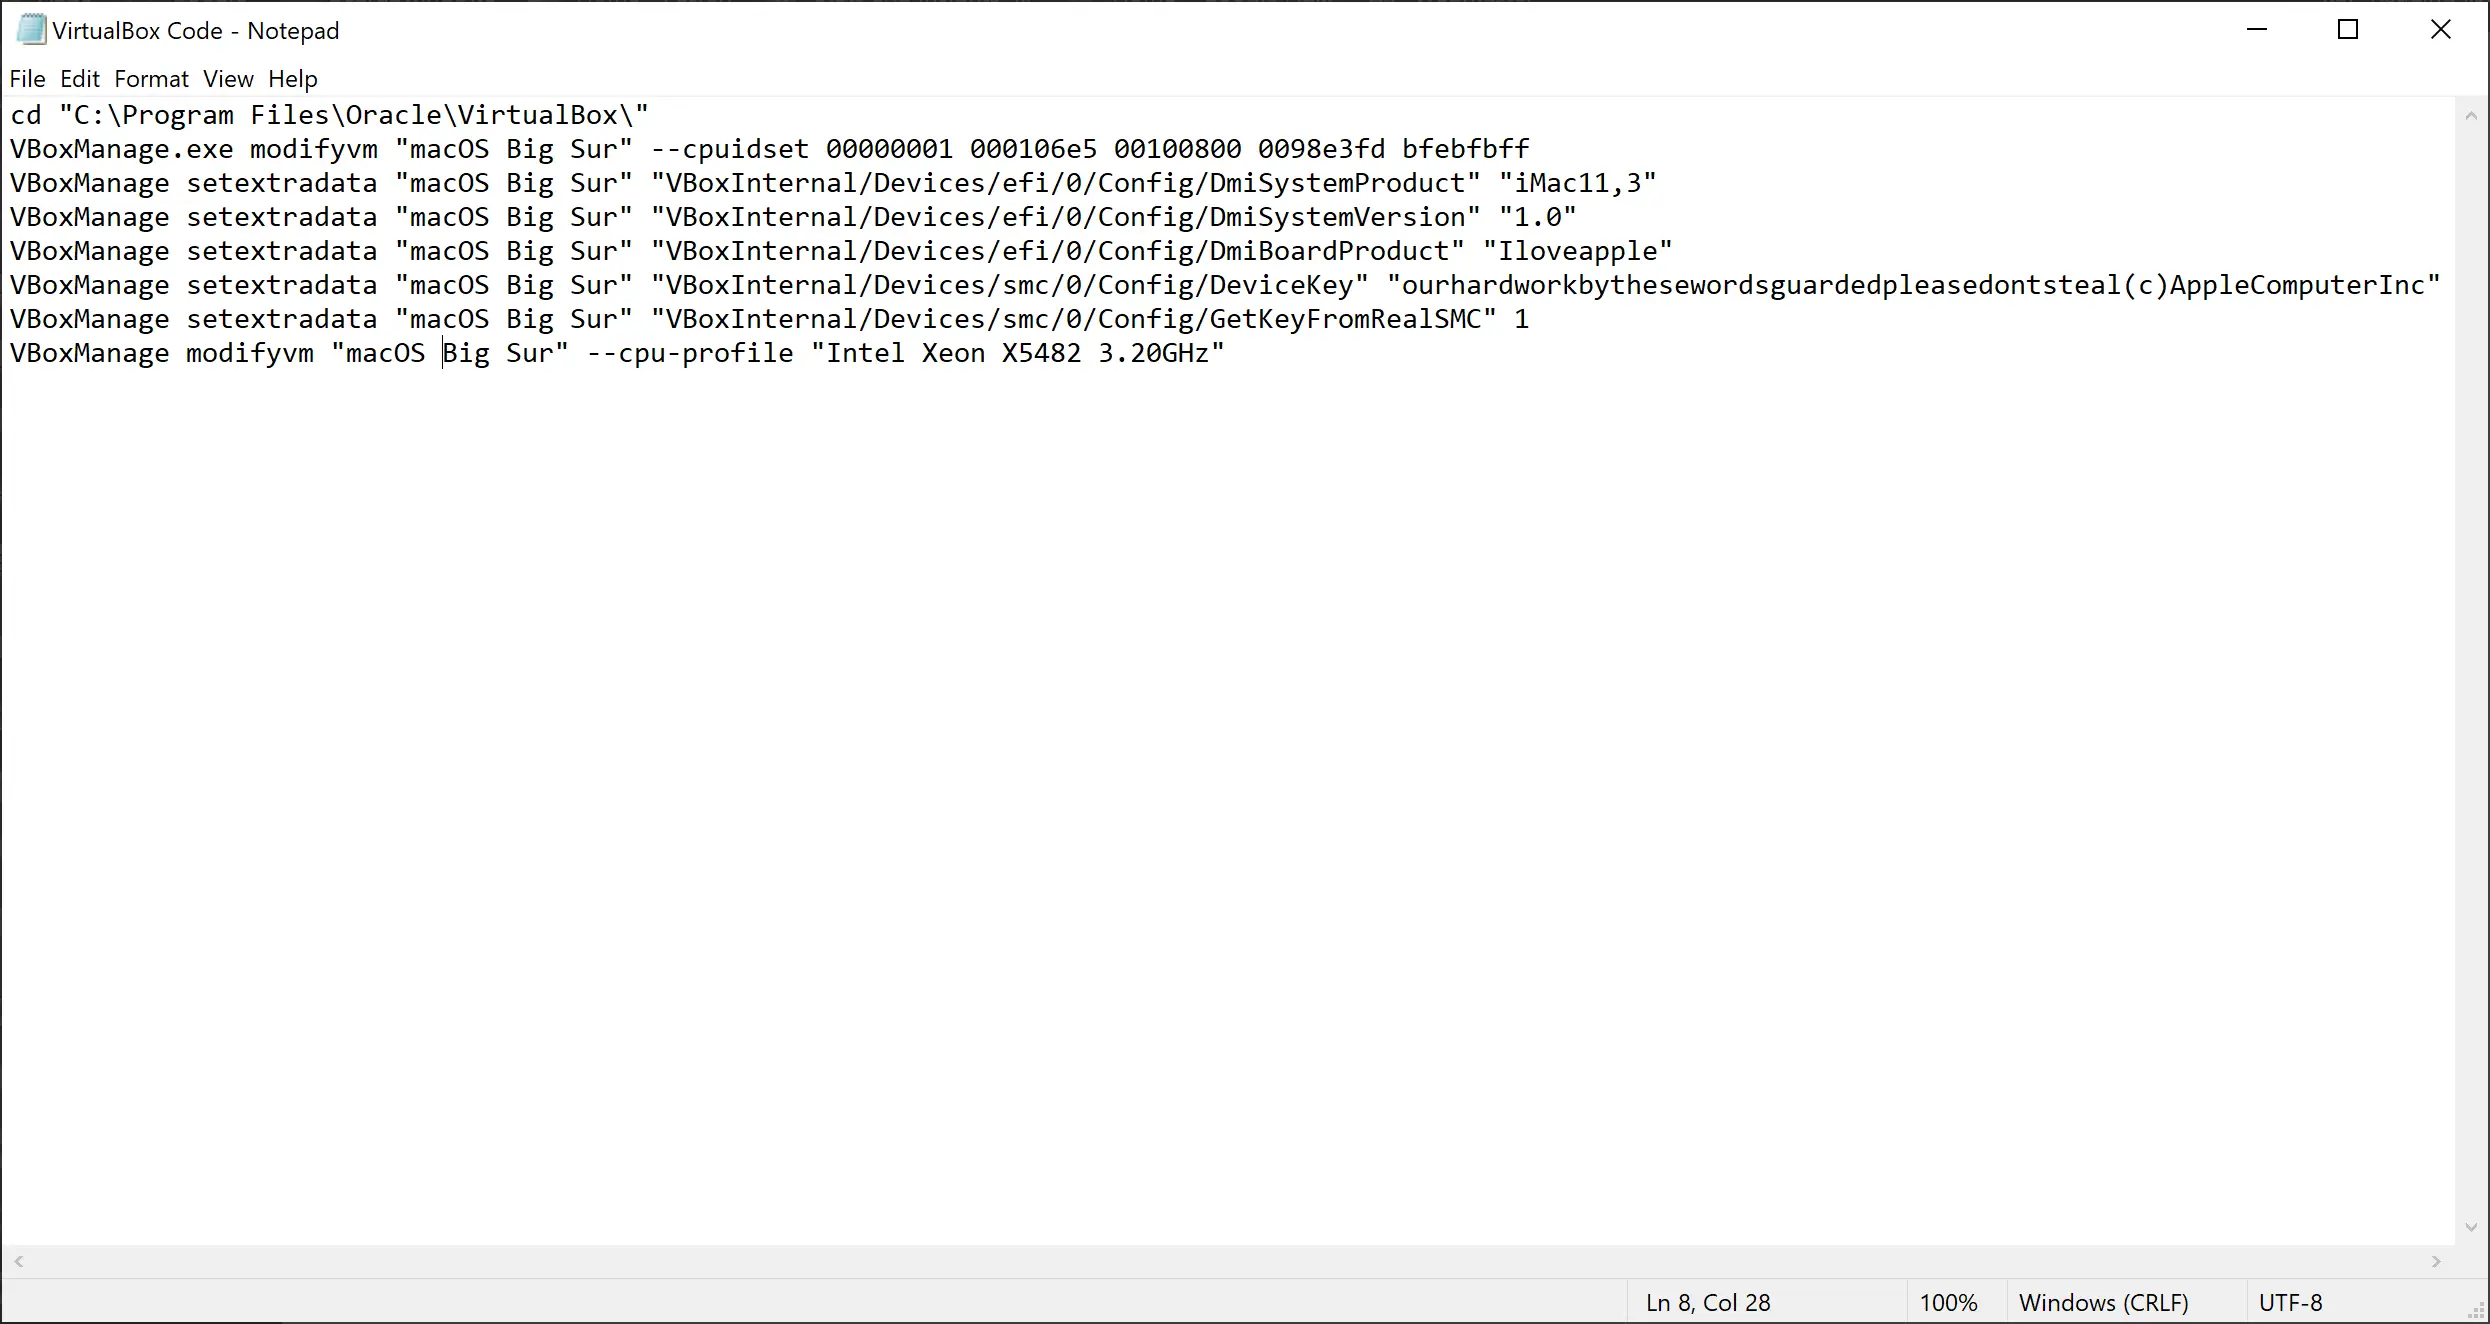
Step 17. Copy and paste the following lines into a notepad file:-
cd "C:\Program Files\Oracle\VirtualBox\"
VBoxManage.exe modifyvm "macOS Big Sur" --cpuidset 00000001 000106e5 00100800 0098e3fd bfebfbff
VBoxManage setextradata "macOS Big Sur" "VBoxInternal/Devices/efi/0/Config/DmiSystemProduct" "iMac11,3"
VBoxManage setextradata "macOS Big Sur" "VBoxInternal/Devices/efi/0/Config/DmiSystemVersion" "1.0"
VBoxManage setextradata "macOS Big Sur" "VBoxInternal/Devices/efi/0/Config/DmiBoardProduct" "Iloveapple"
VBoxManage setextradata "macOS Big Sur" "VBoxInternal/Devices/smc/0/Config/DeviceKey" "ourhardworkbythesewordsguardedpleasedontsteal(c)AppleComputerInc"
VBoxManage setextradata "macOS Big Sur" "VBoxInternal/Devices/smc/0/Config/GetKeyFromRealSMC" 1
VBoxManage modifyvm "macOS Big Sur" --cpu-profile "Intel Xeon X5482 3.20GHz"
Step 18. Now, copy all the lines and paste them into the Command prompt, and then hit Enter from the keyboard to execute it. Alternatively, you can execute every line one by one.
Step 19. Now, again open VirtualBox and click on Start.
Step 20. In the next screen, select Language.
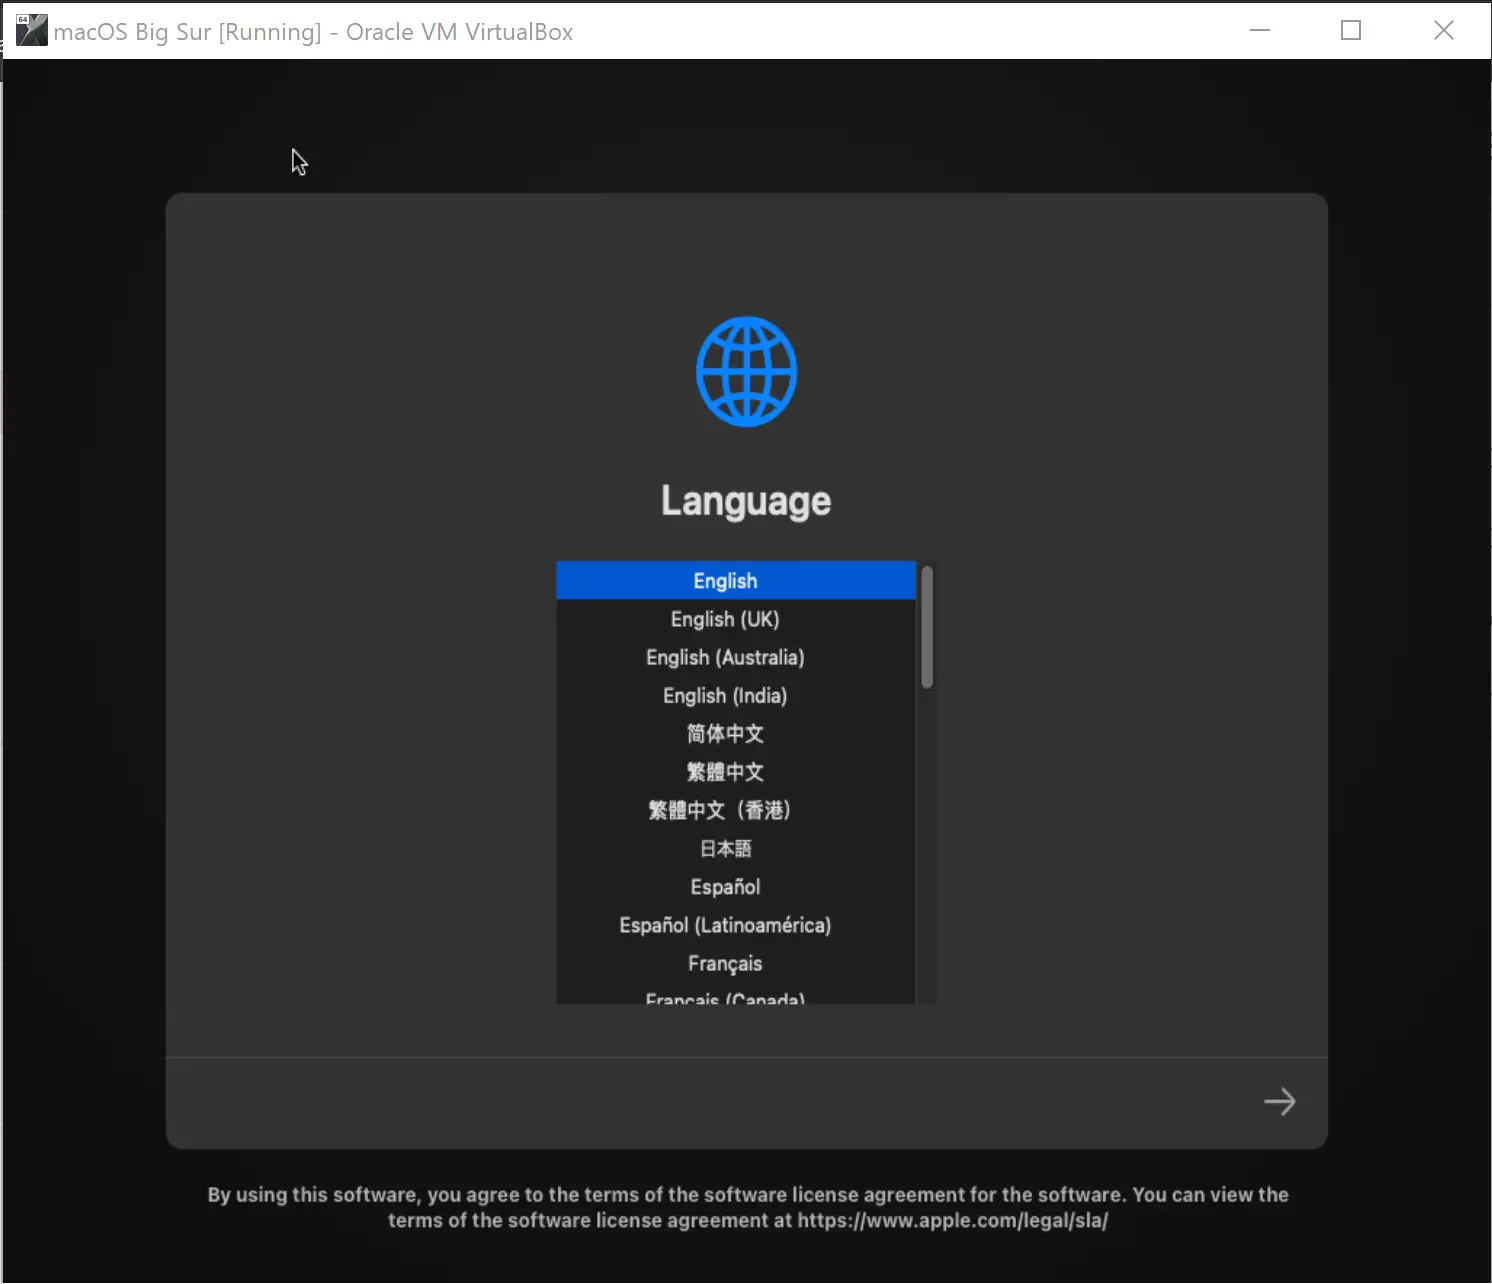
Step 21. Then click the right arrow button at the bottom right corner.
Step 22. Select the Disk Utility option.
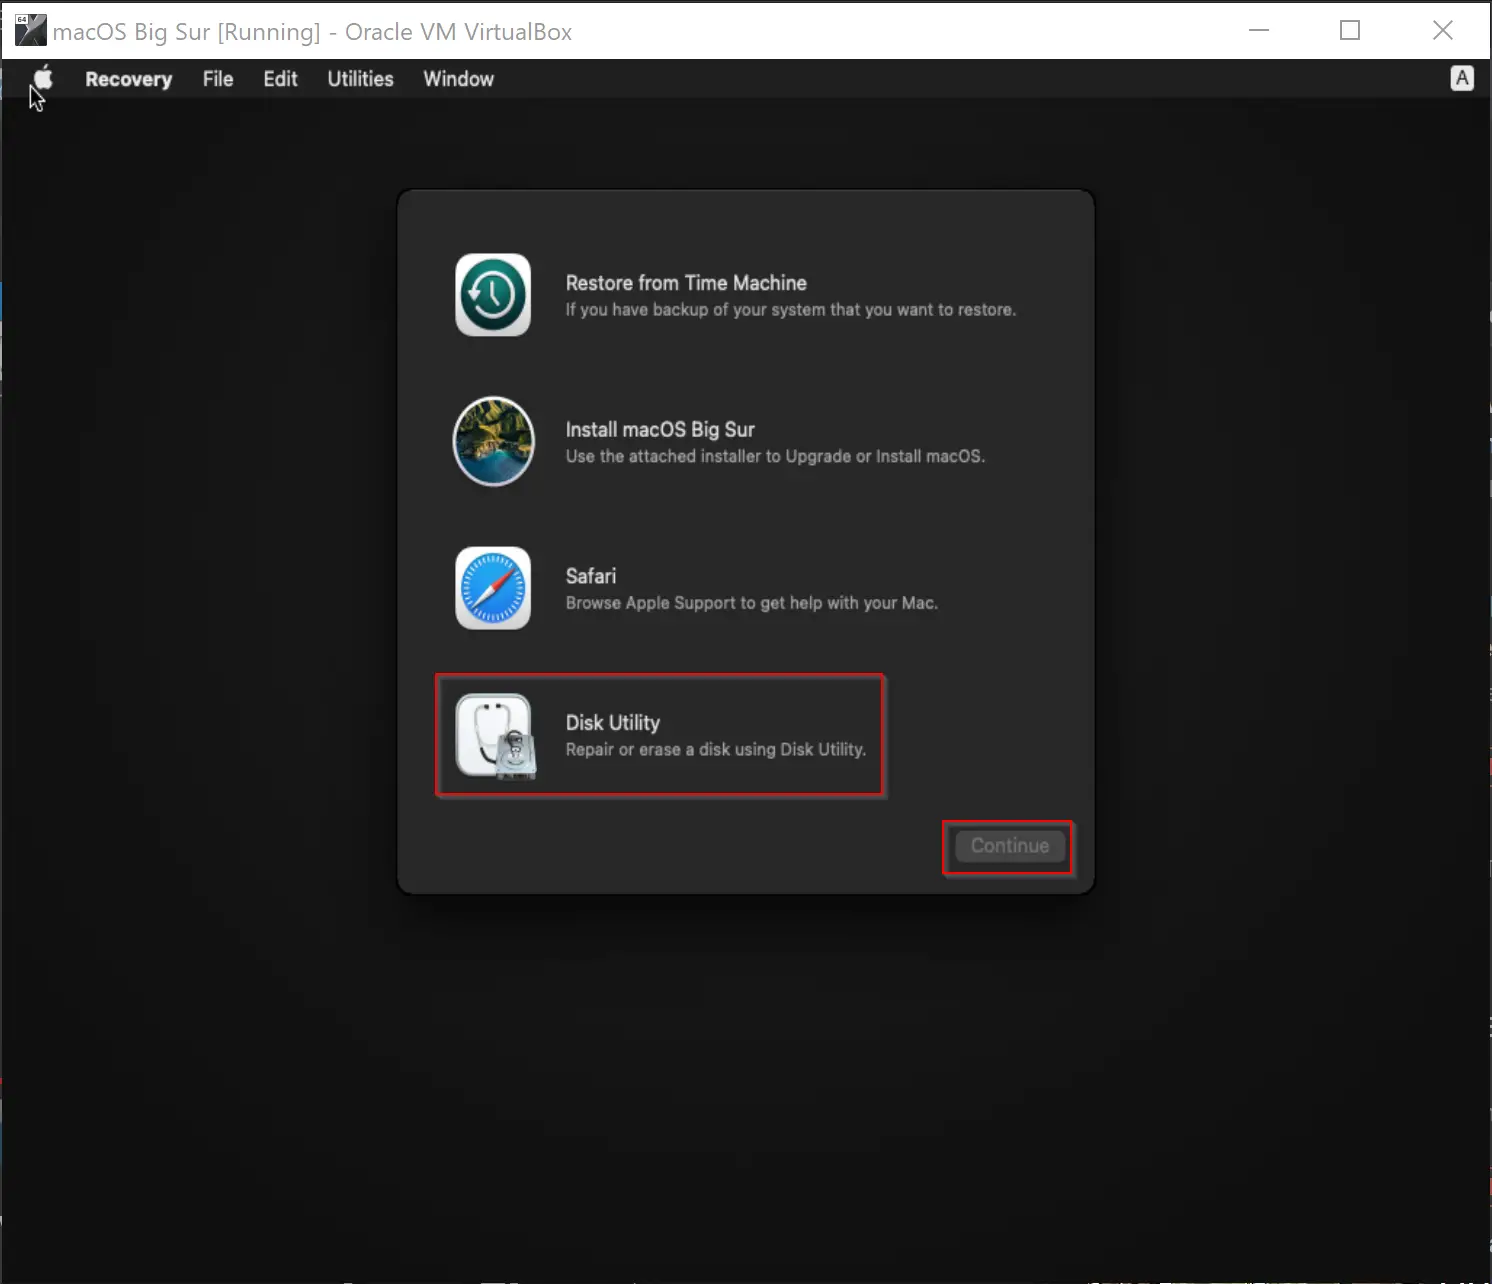
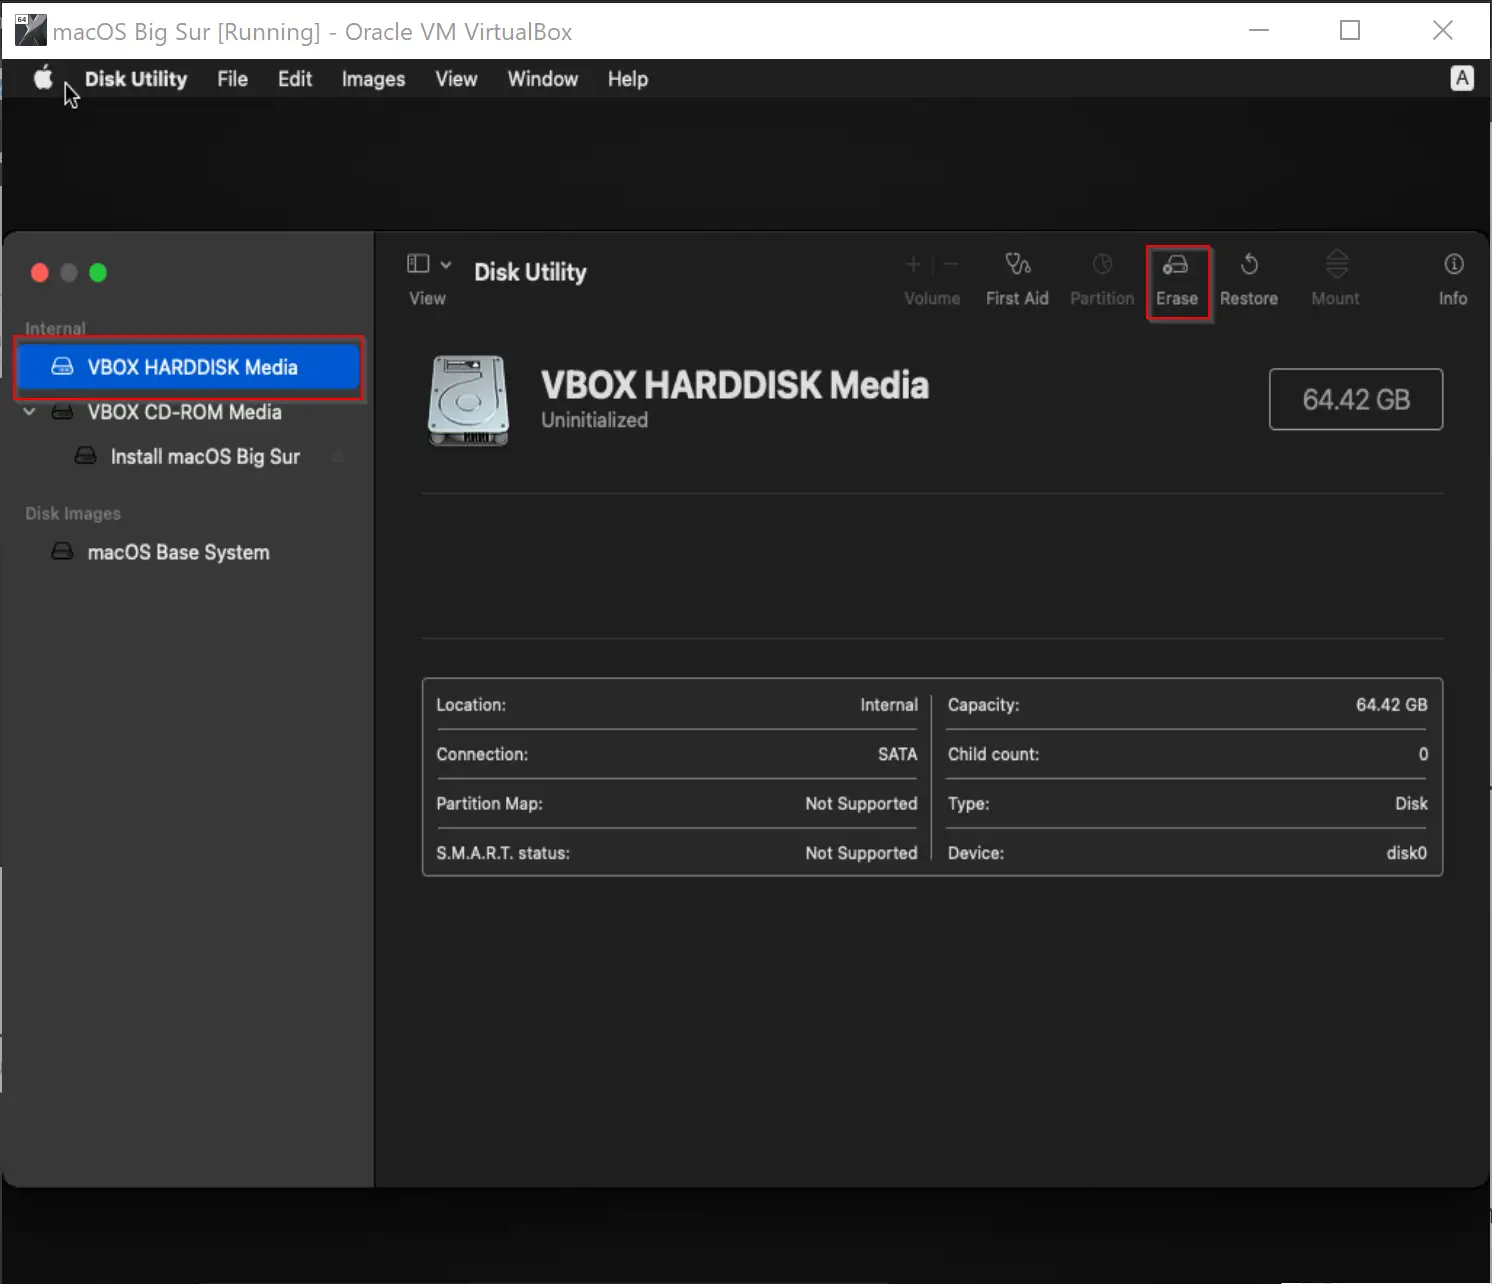
Step 23. Select VBOX HARDDISK Media from the left sidebar and click the Erase option.
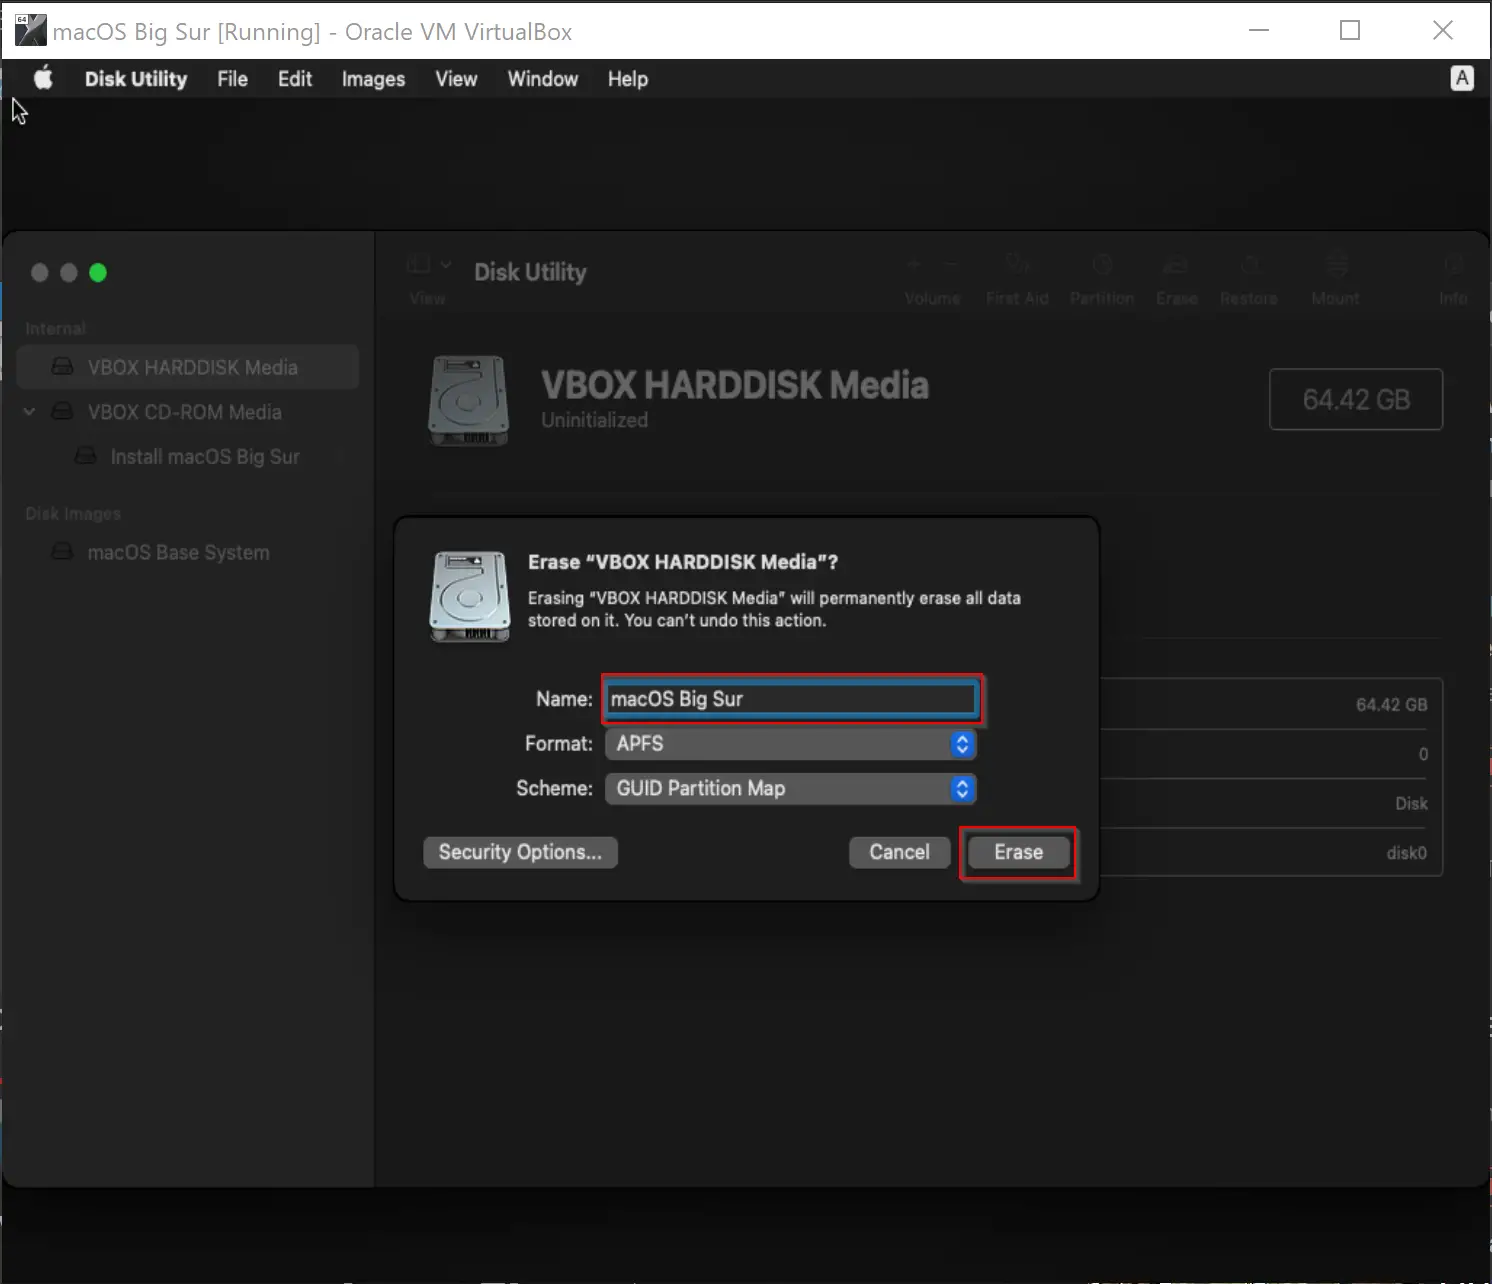
Step 24. Name the hard disk as macOS Big Sur and click the Erase button.
Step 25. Click the Done button when the hard disk is erased.

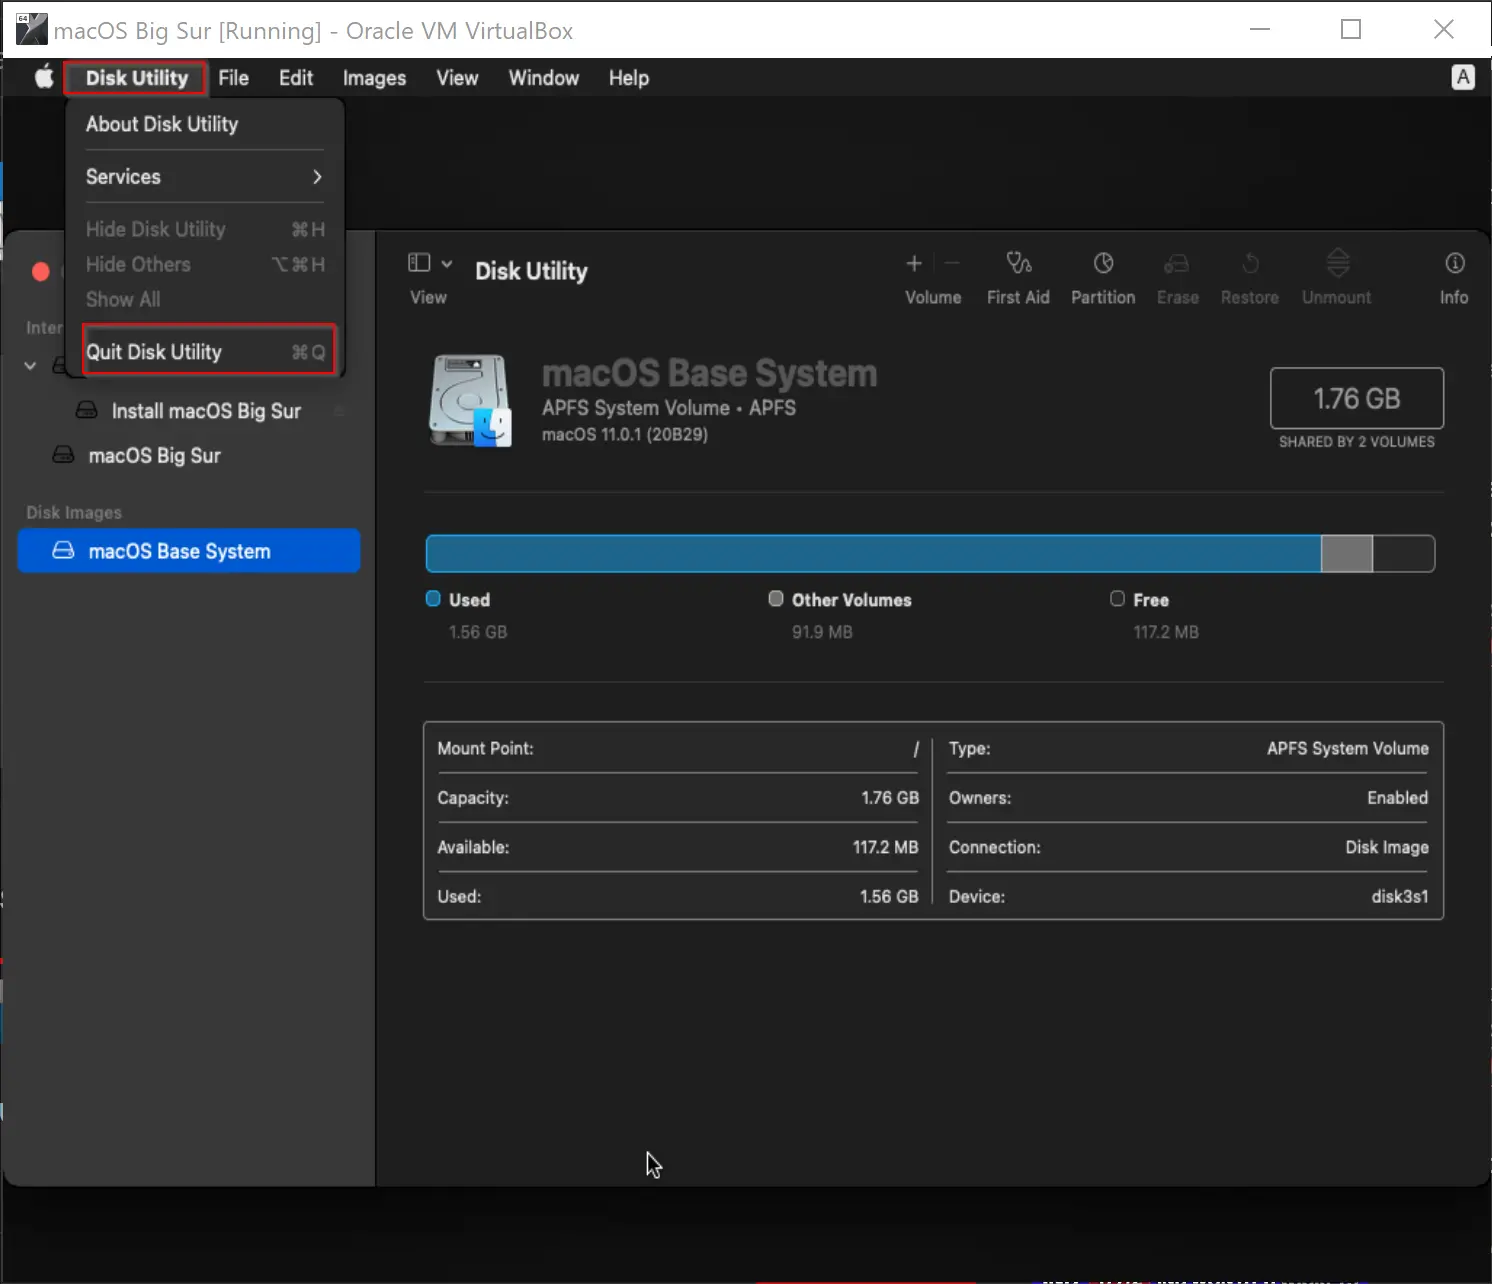
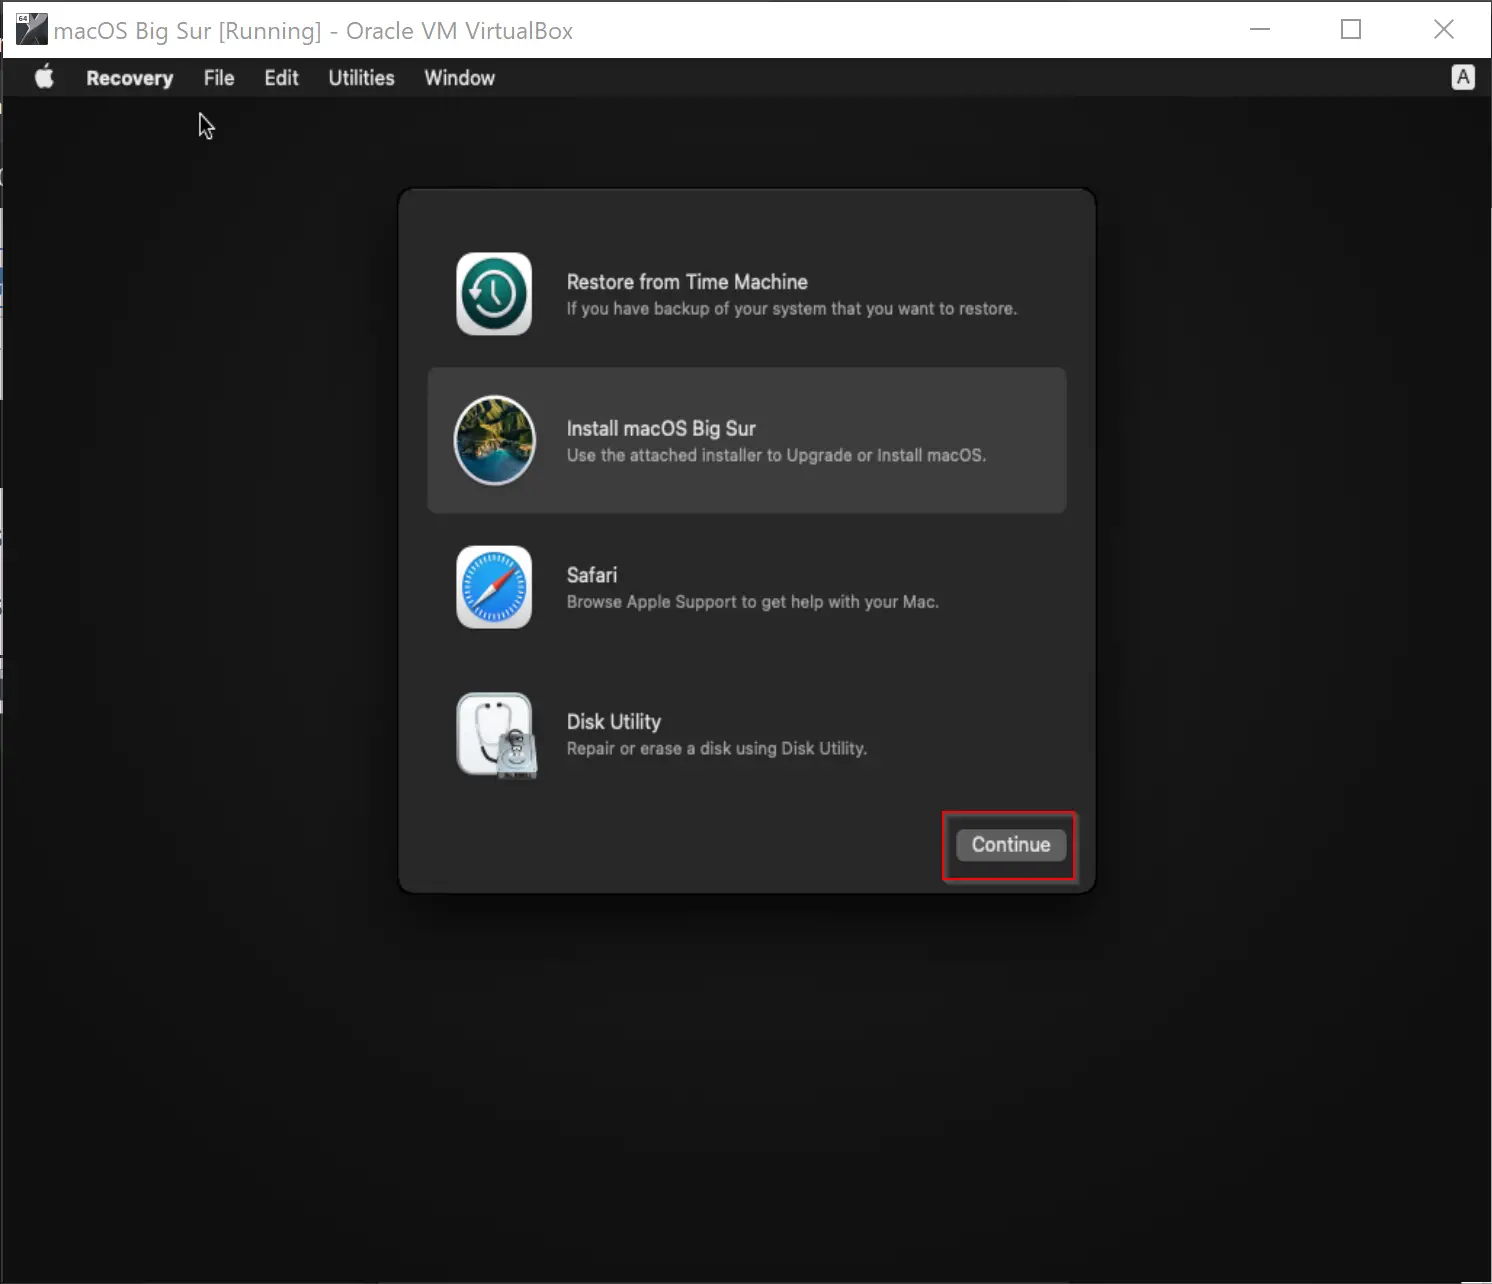
Step 26. Now, select Disk Utility from the menu and click the Quit Disk Utility option.
Step 27. Select Install macOS Big Sur option.

Step 28. Click the Continue button.
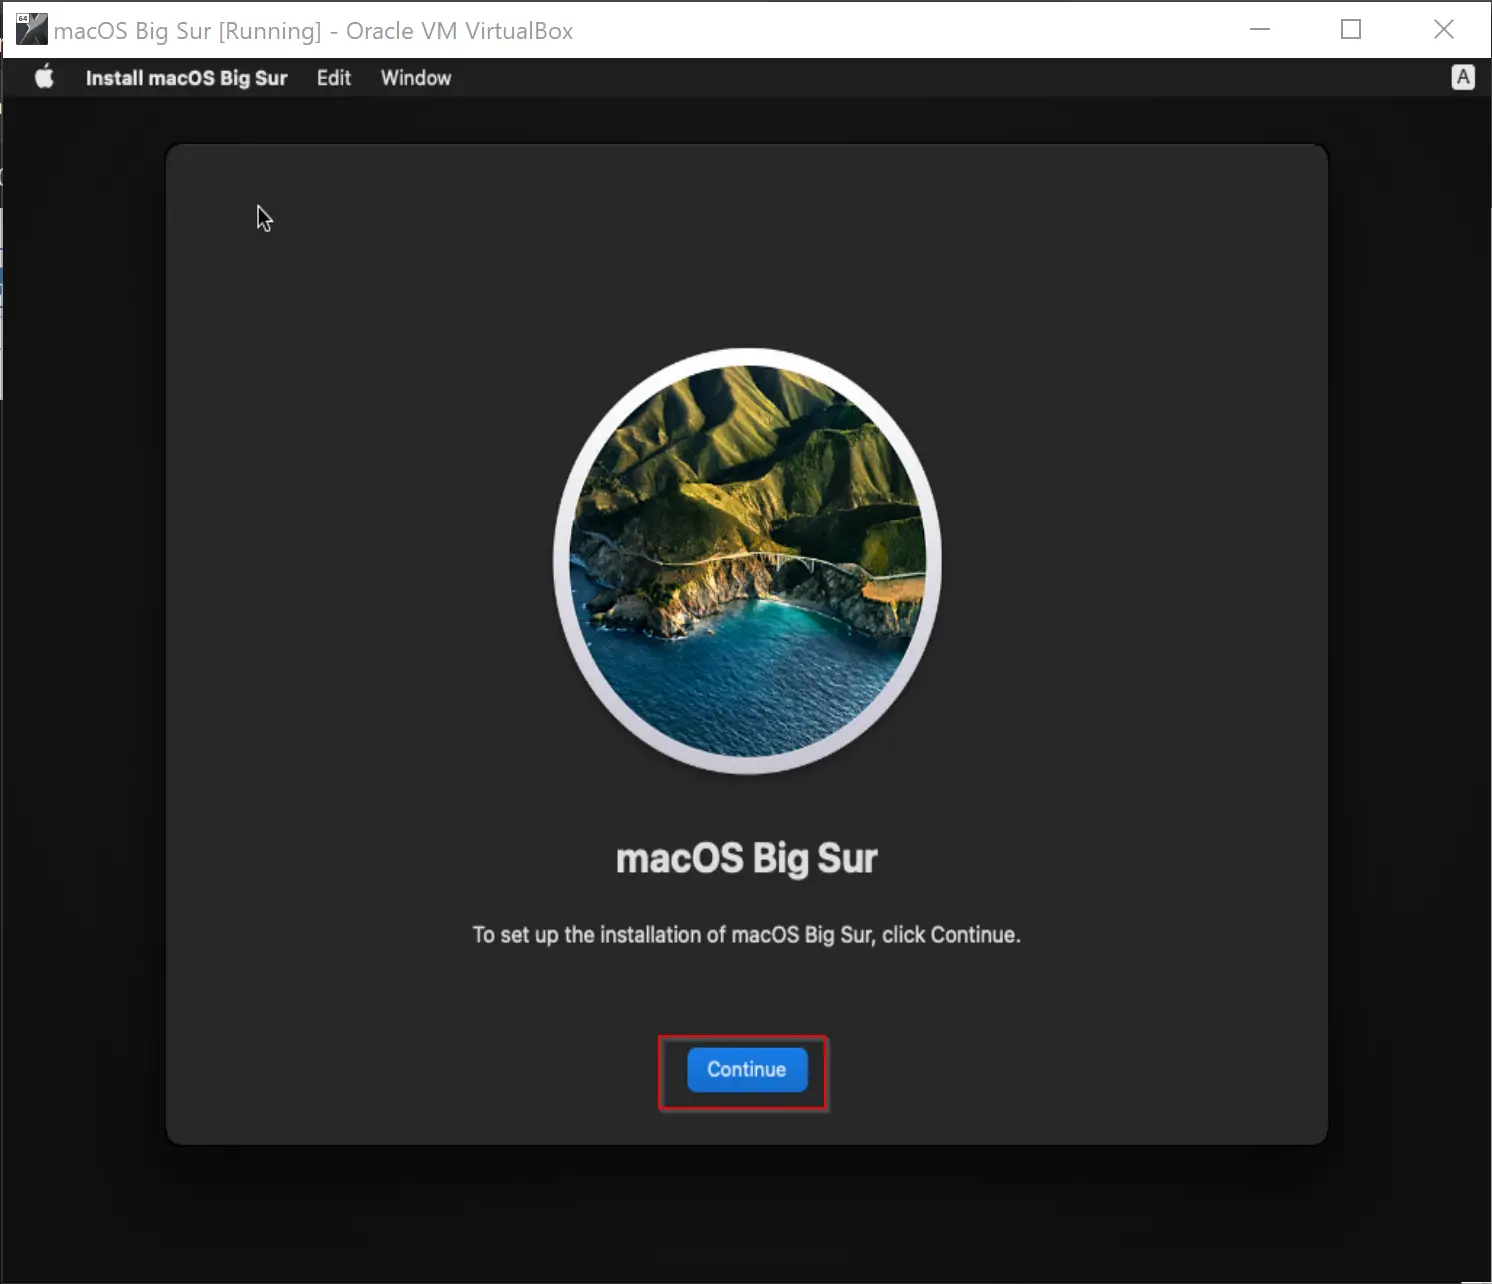
Step 29. Again click the Continue button.
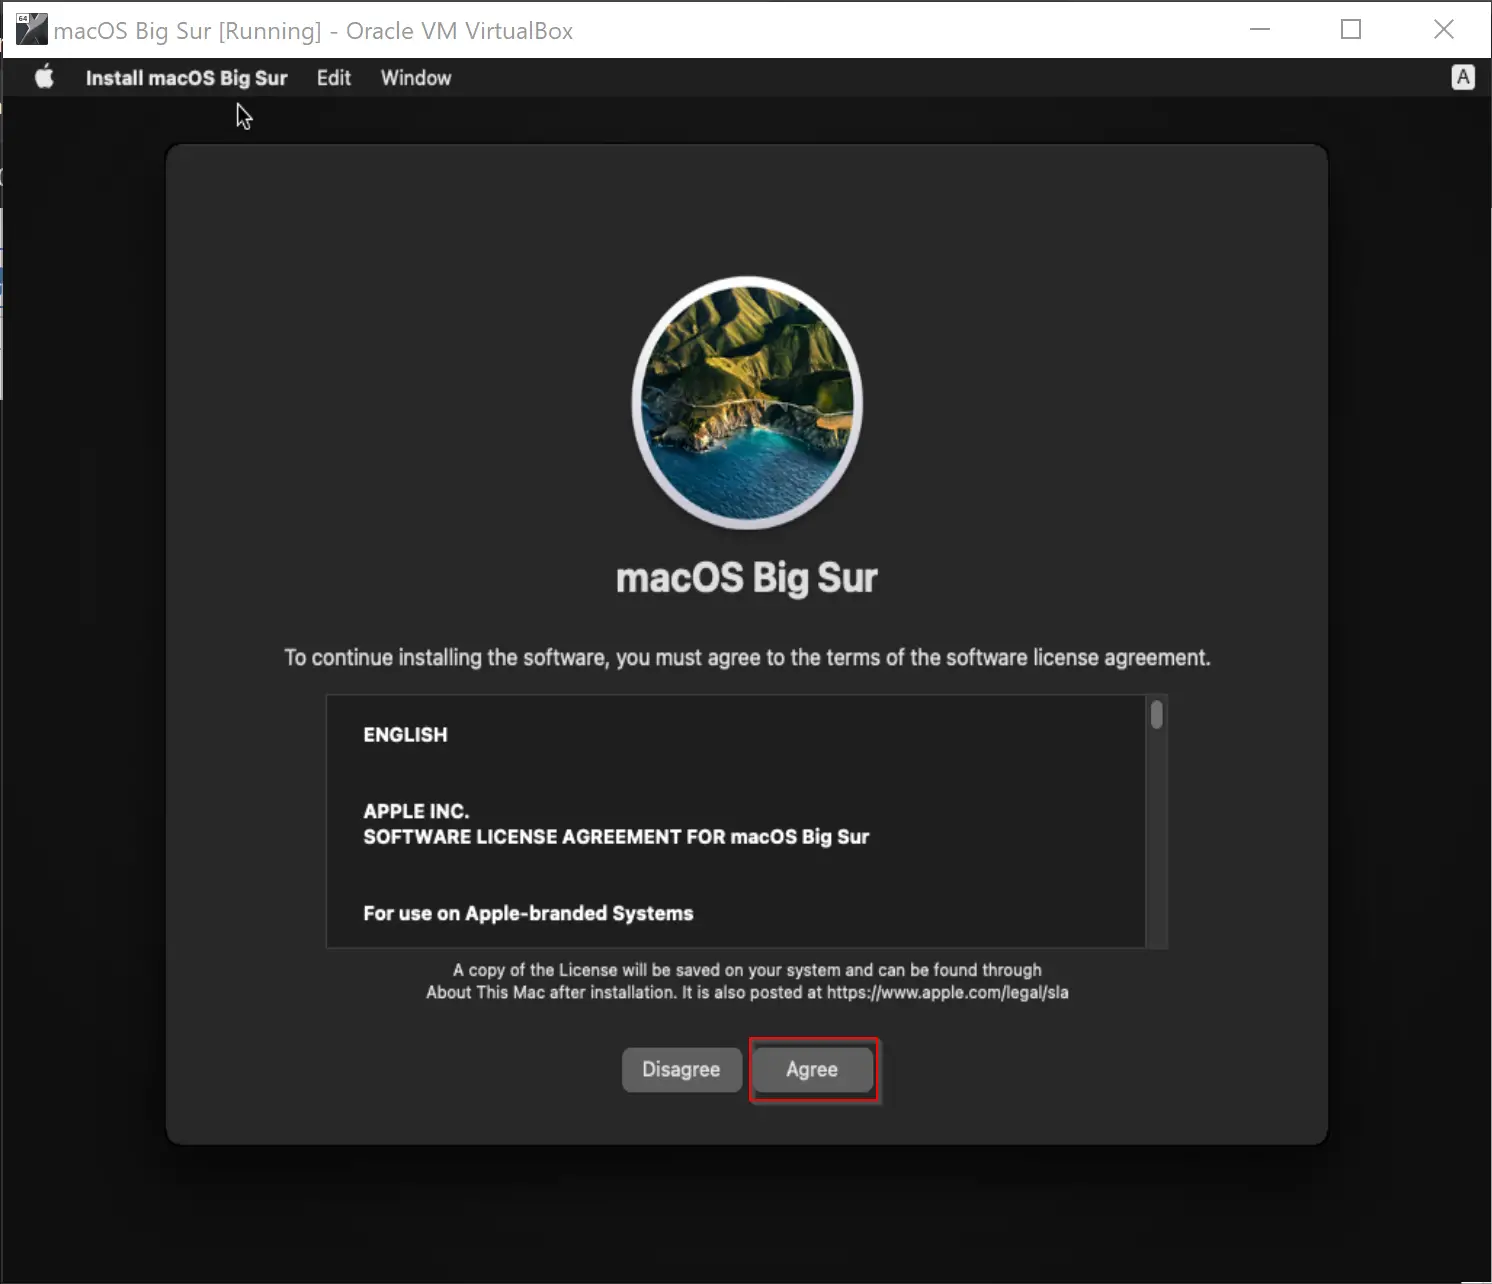
Step 30. On the license agreement page, select the Agree button.
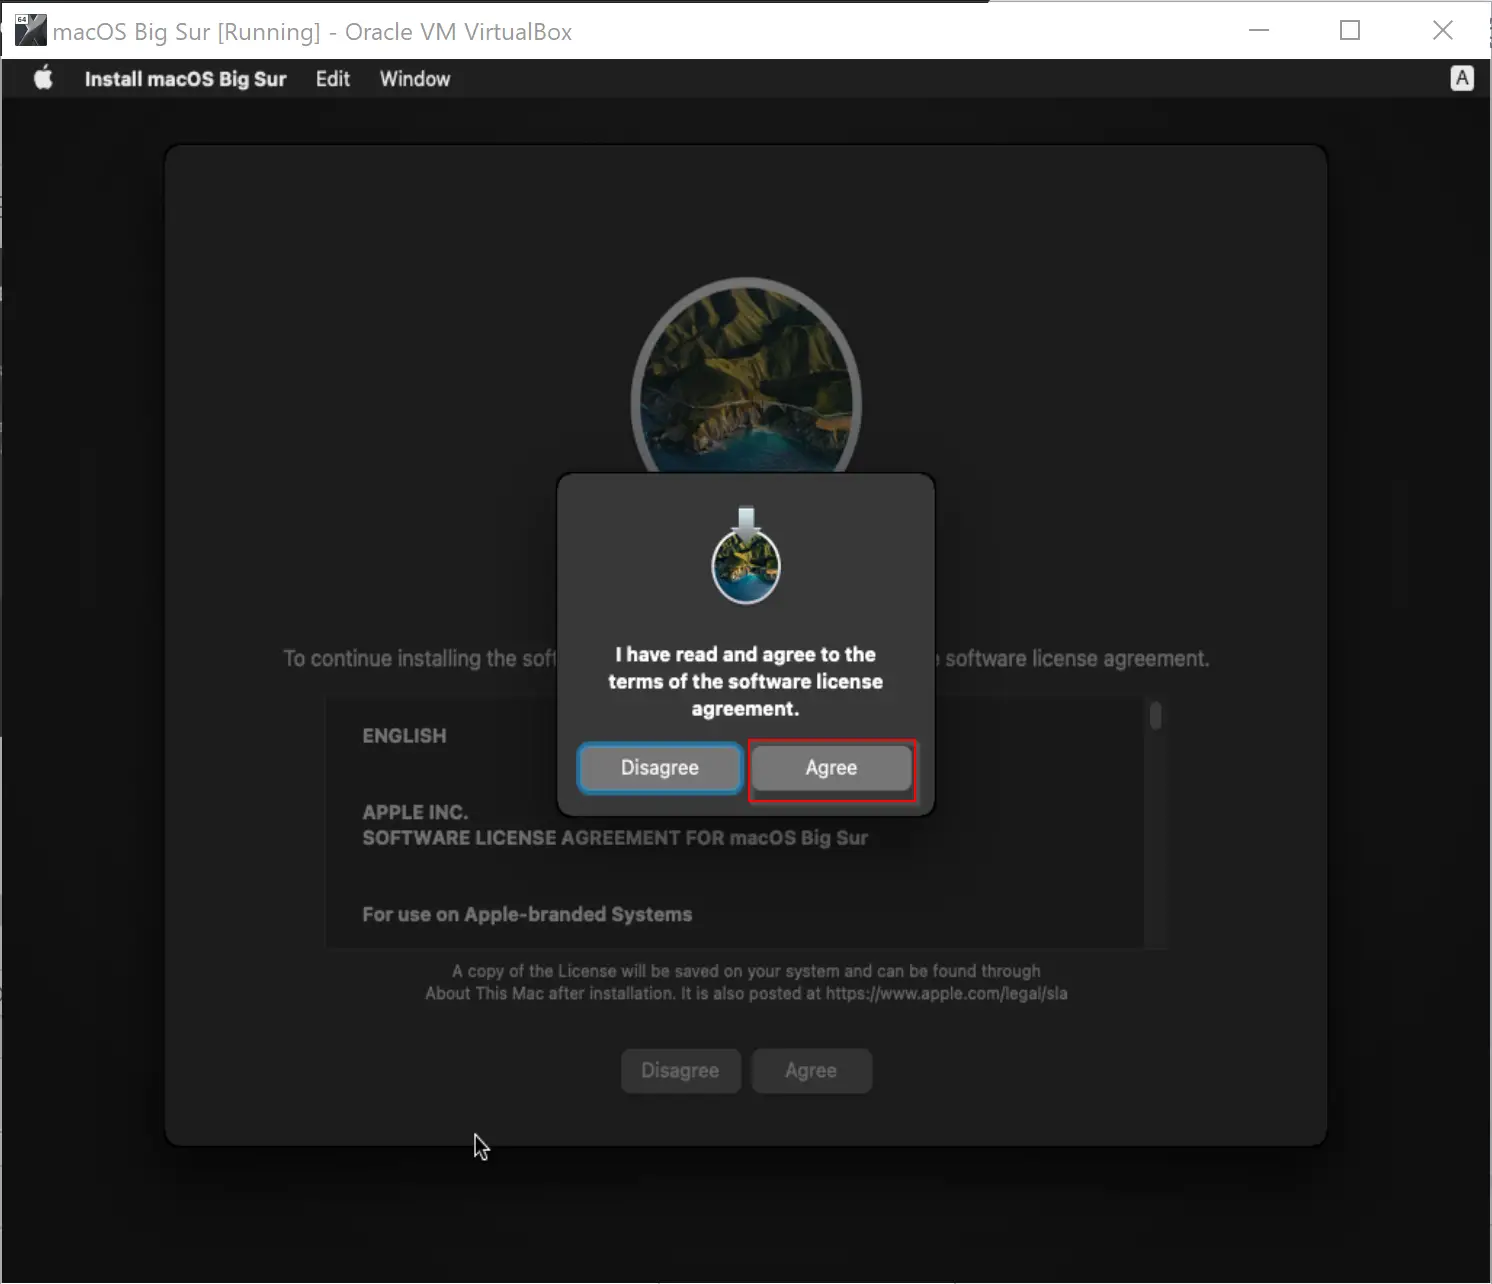
Step 31. Again click Agree on the pop-up window.
Step 32. Select the hard disk and then click the Continue button.
![]()
Step 33. Now macOS Big Sur will start installing on your Windows machine. It may take several minutes, depending on the resources you have provided in the virtual box. Furthermore, note that during the installation period, your virtual machine may restart several times.
When you see “Select Your Country or Region,” click the country name from the list and click the Continue button.
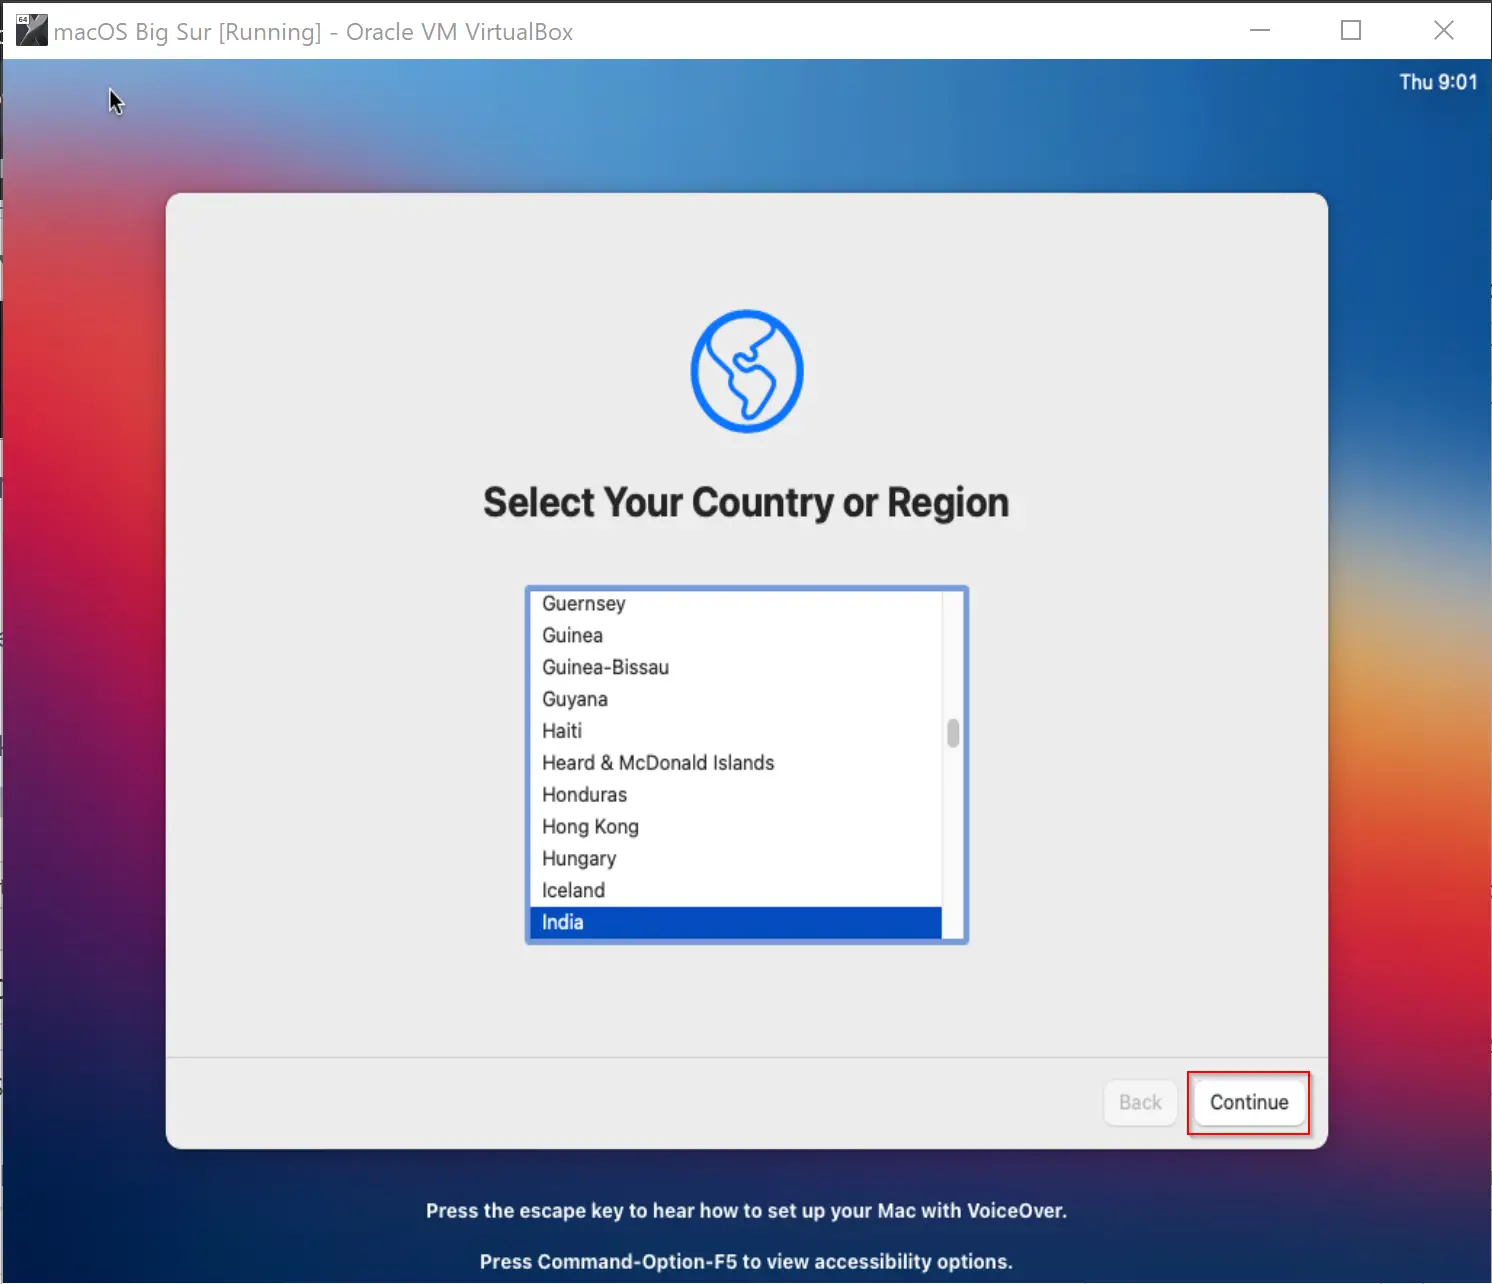
Step 34. Click Continue.
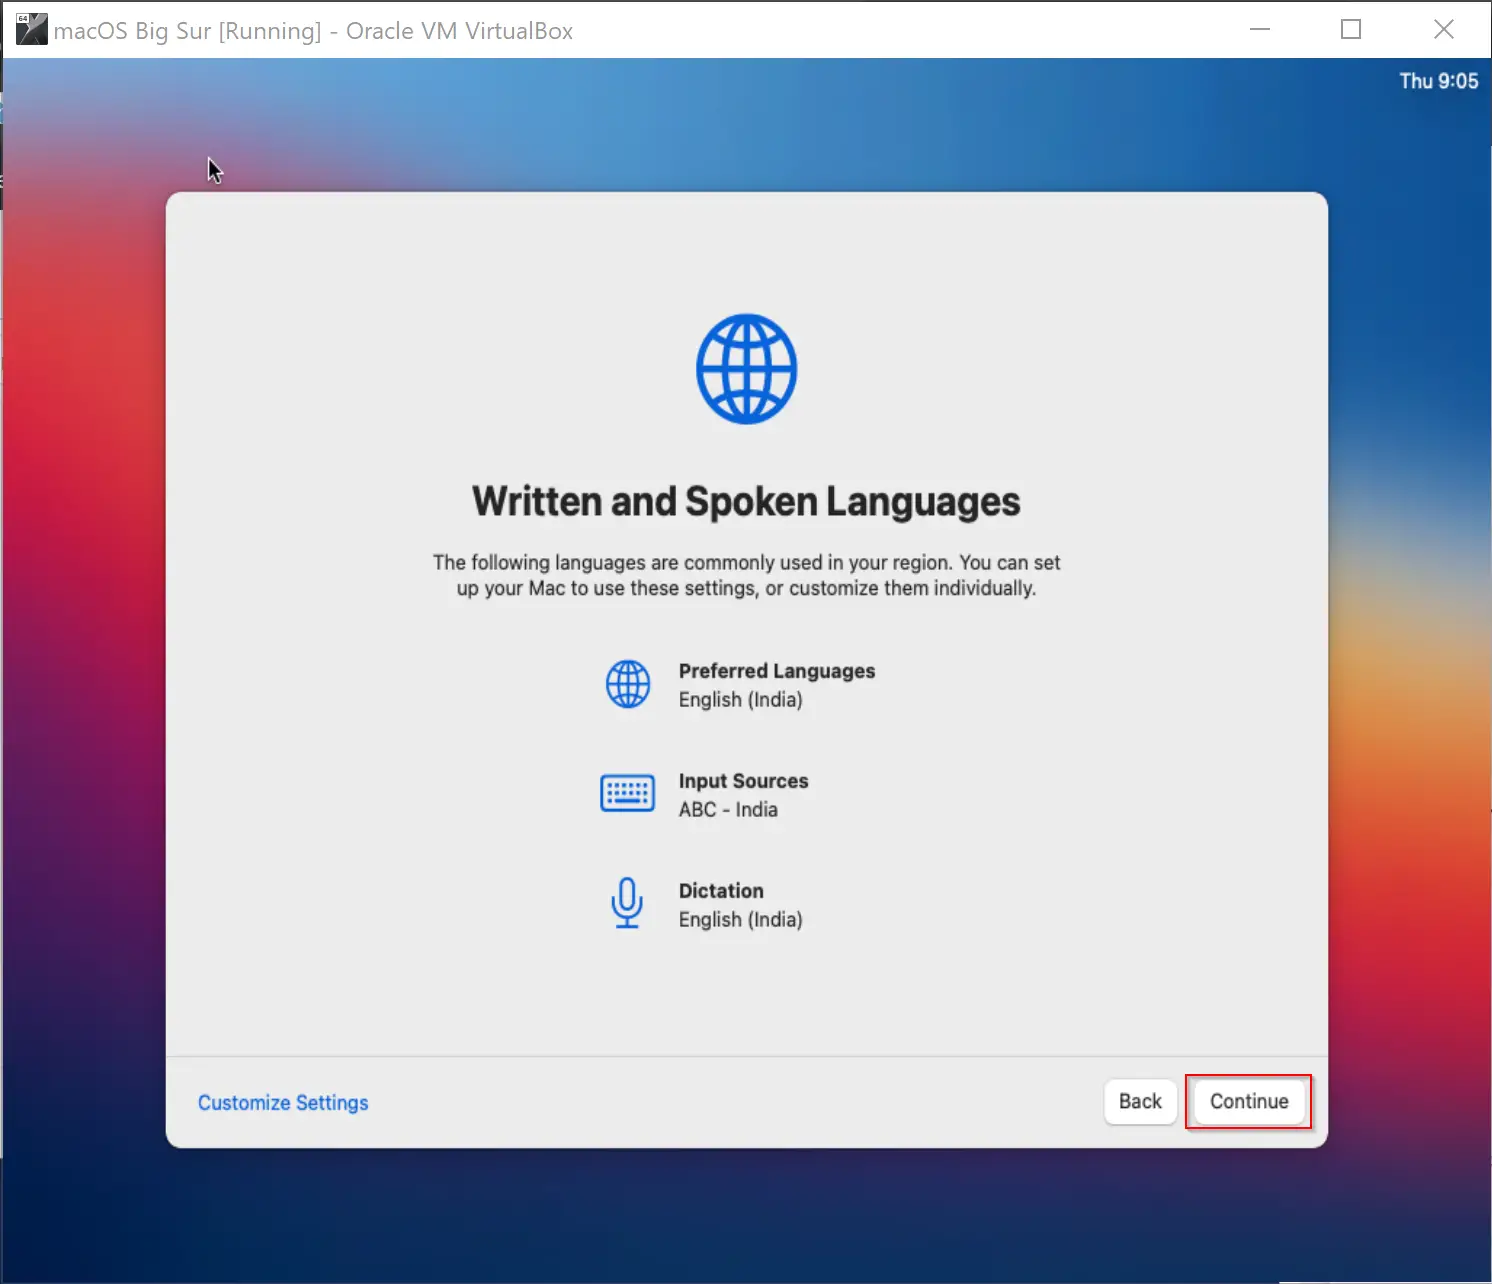
Step 35. Click the Not Now button.

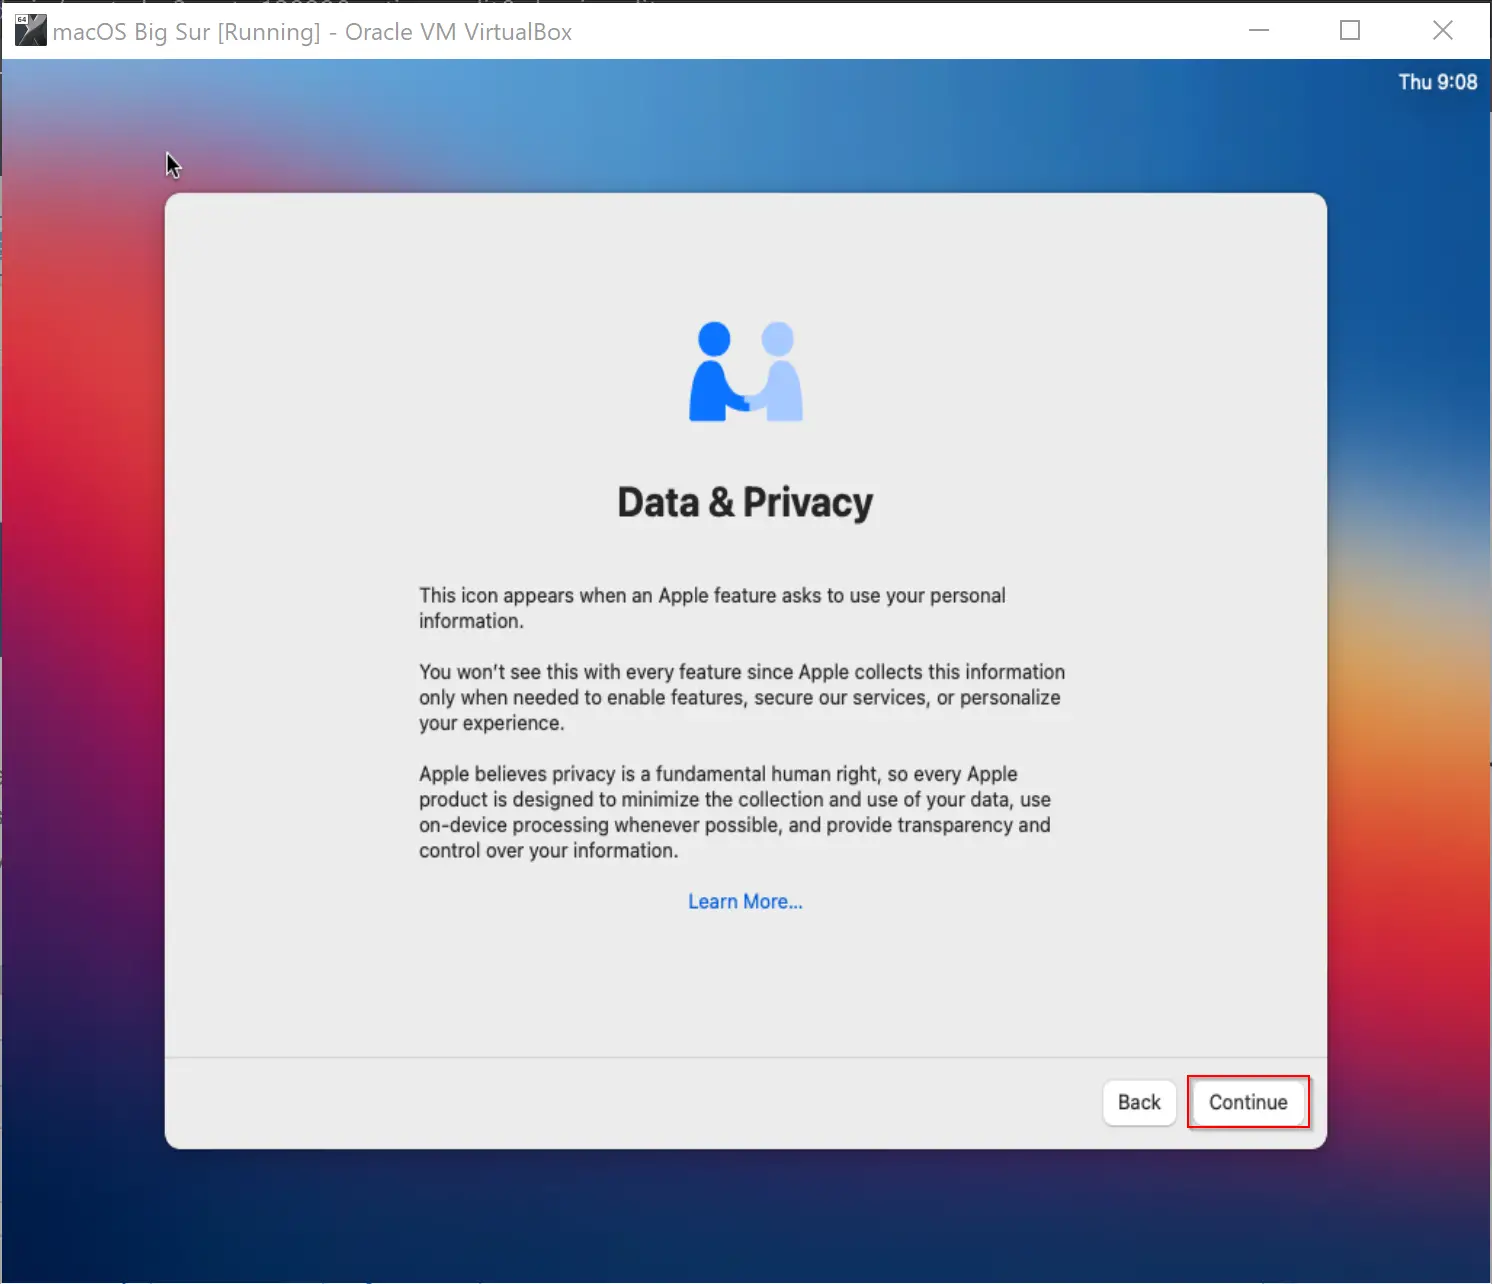
Step 36. On the Data & Privacy window, click the Continue button.
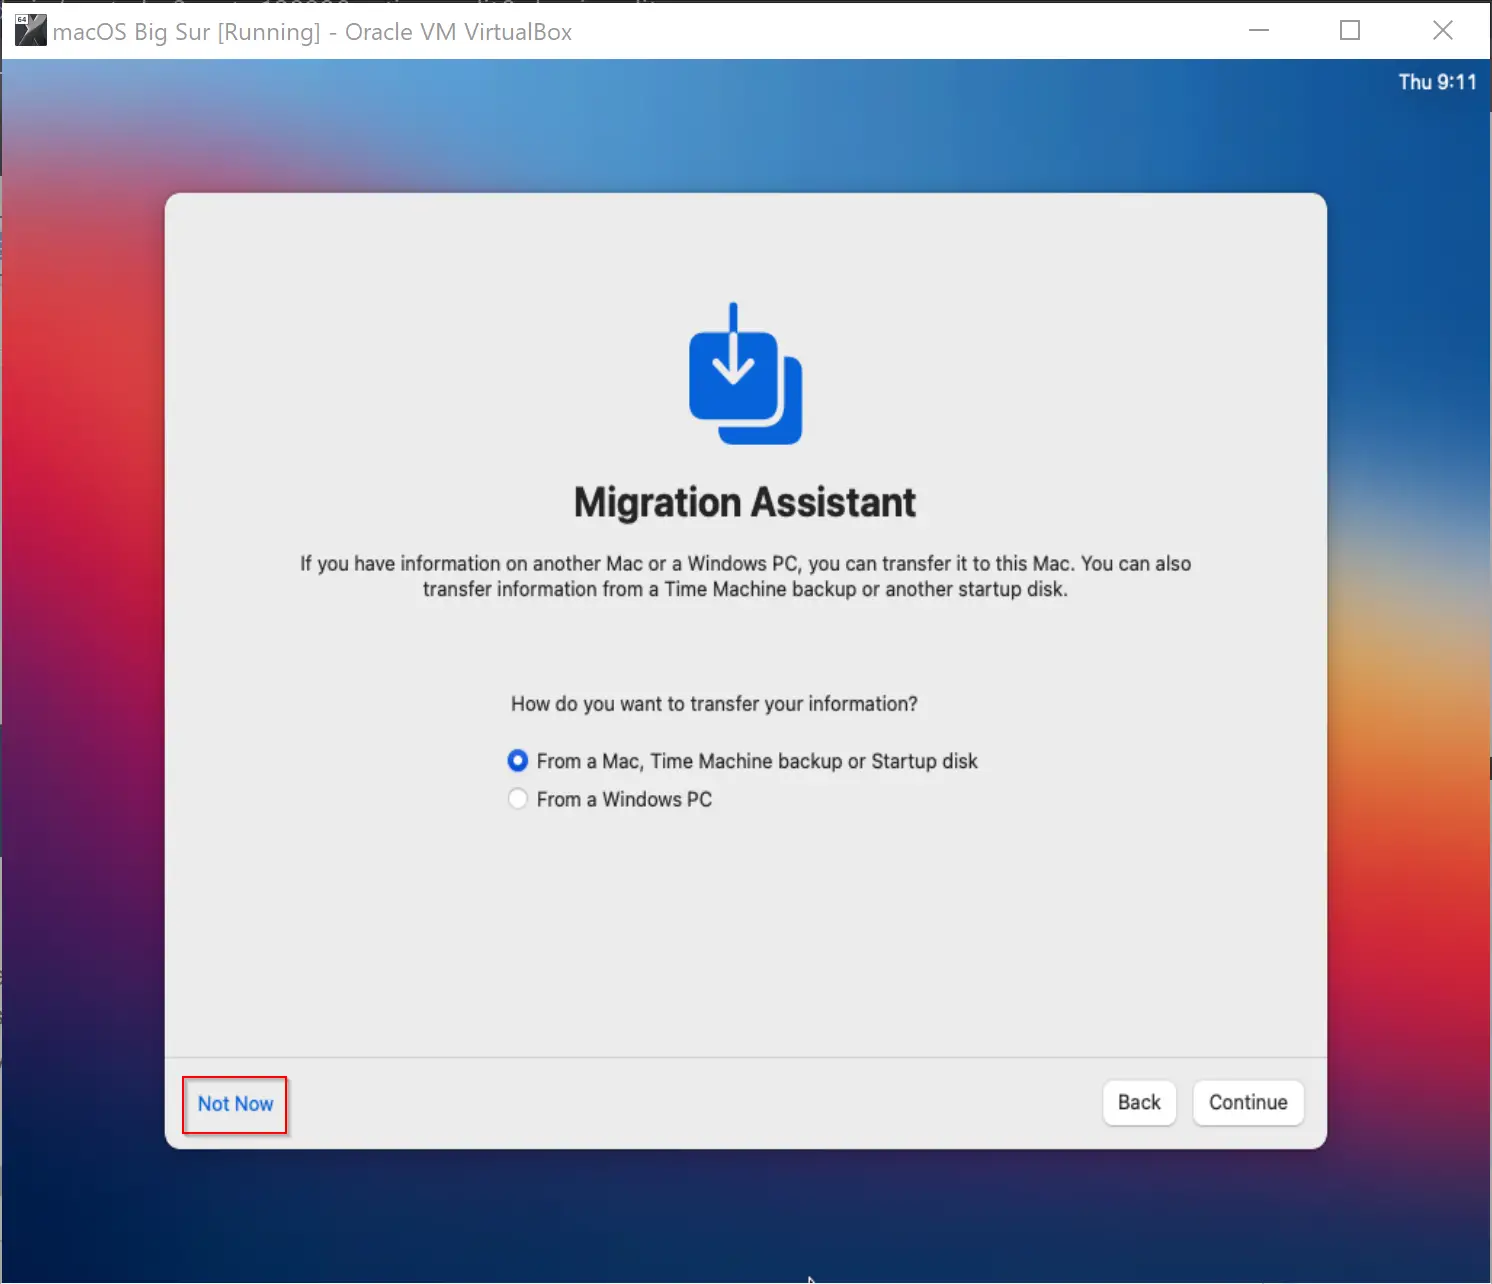
Step 37. In the Migration Assistant window, click the link Not Now.
Step 38. Click the link Set Up Later.

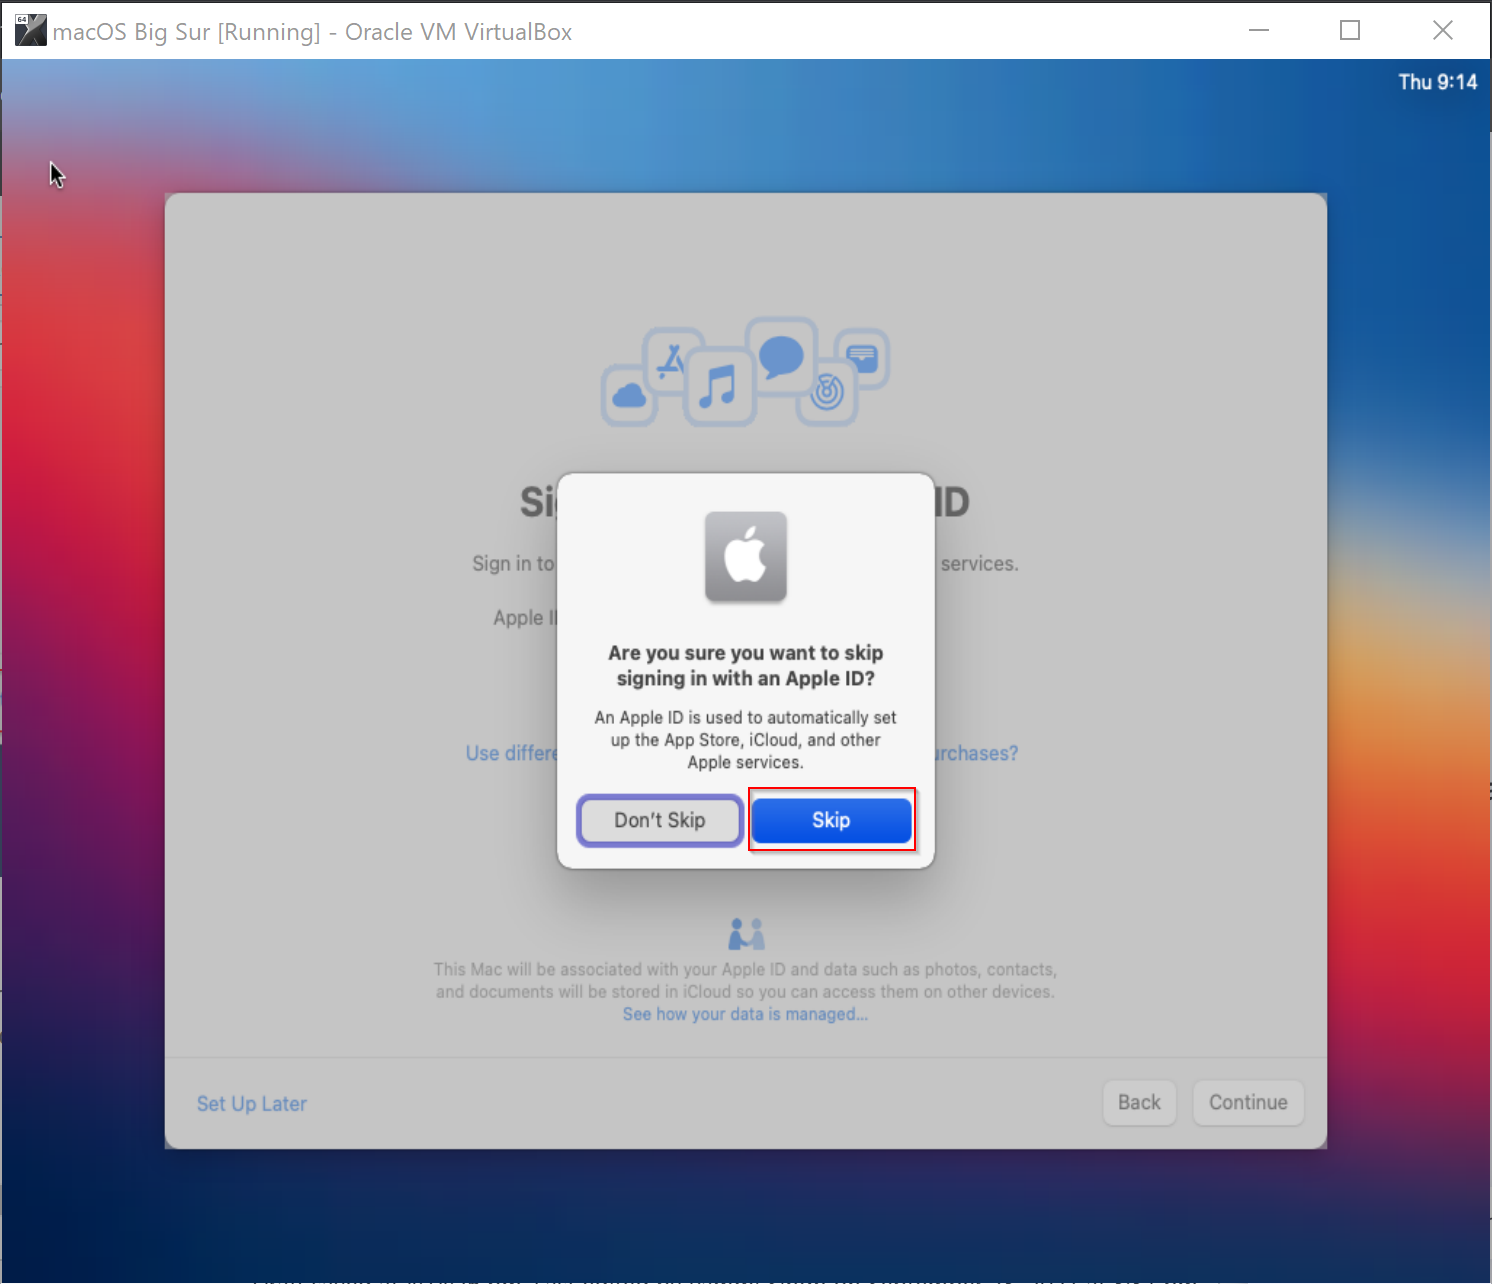
Step 39. Select Skip.
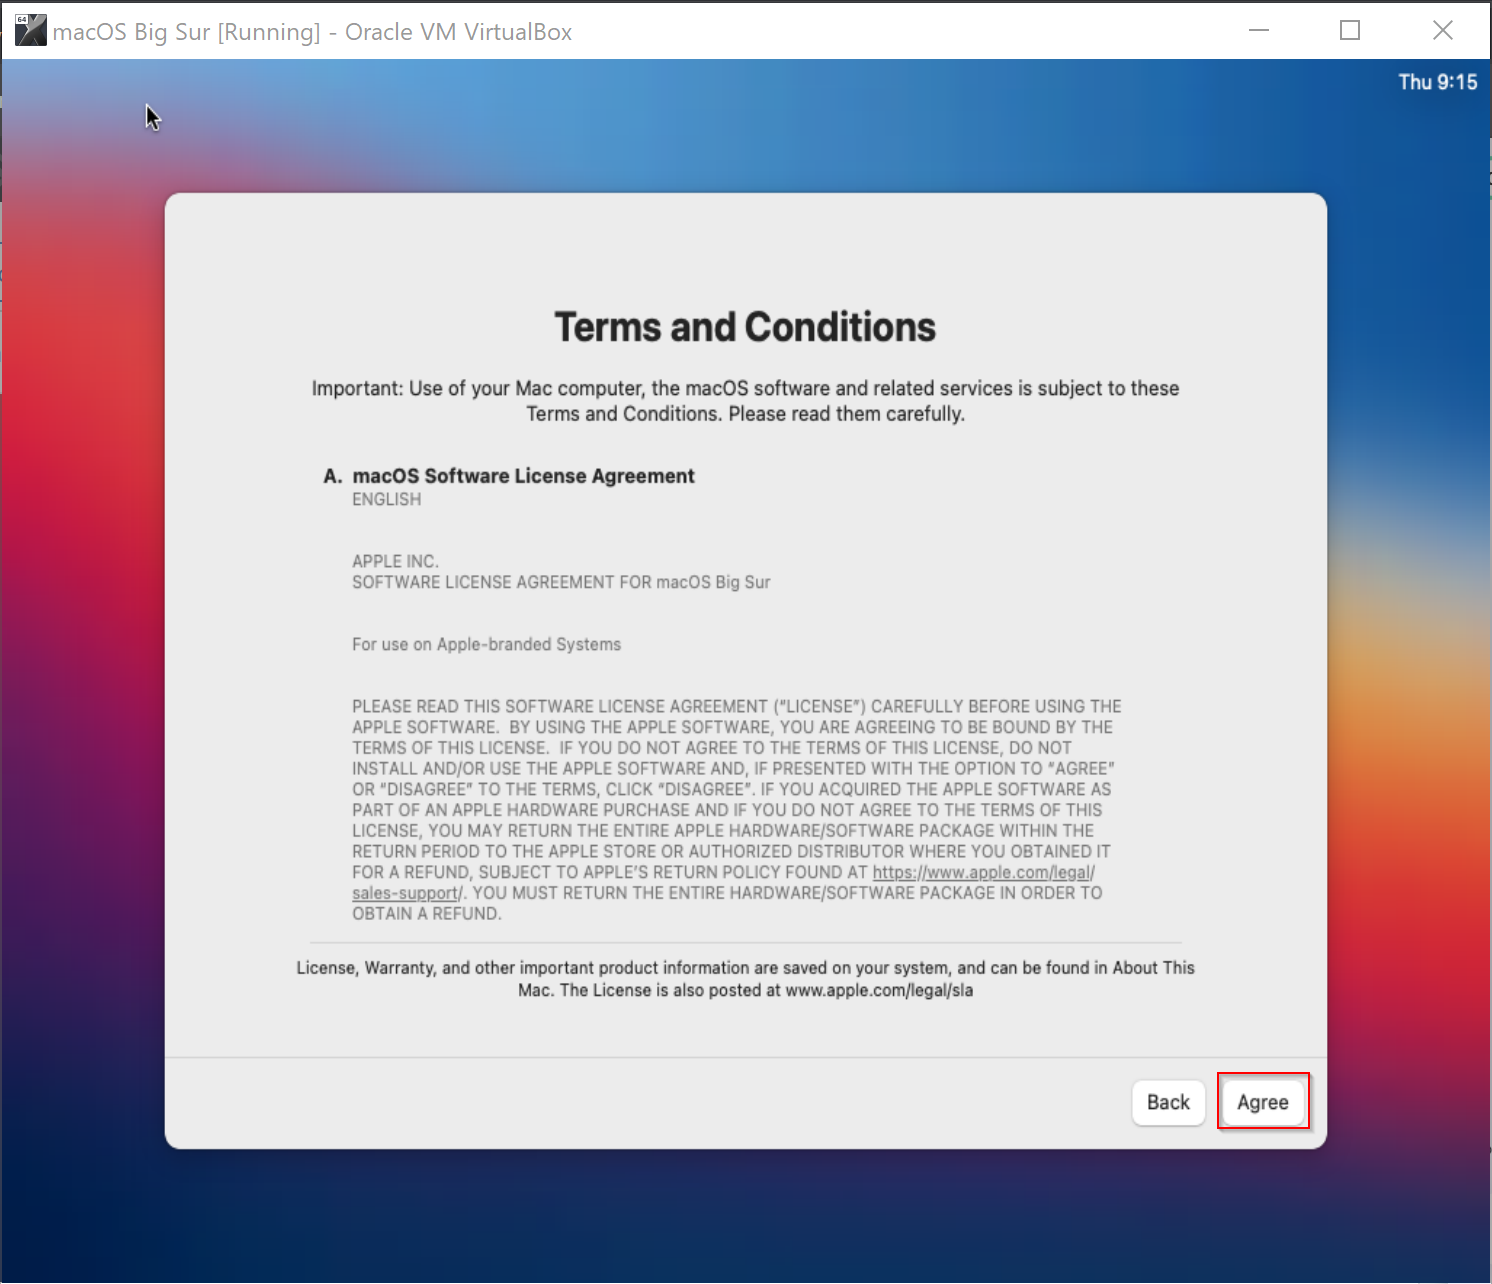
Step 40. On the Terms and Conditions window, click Agree.
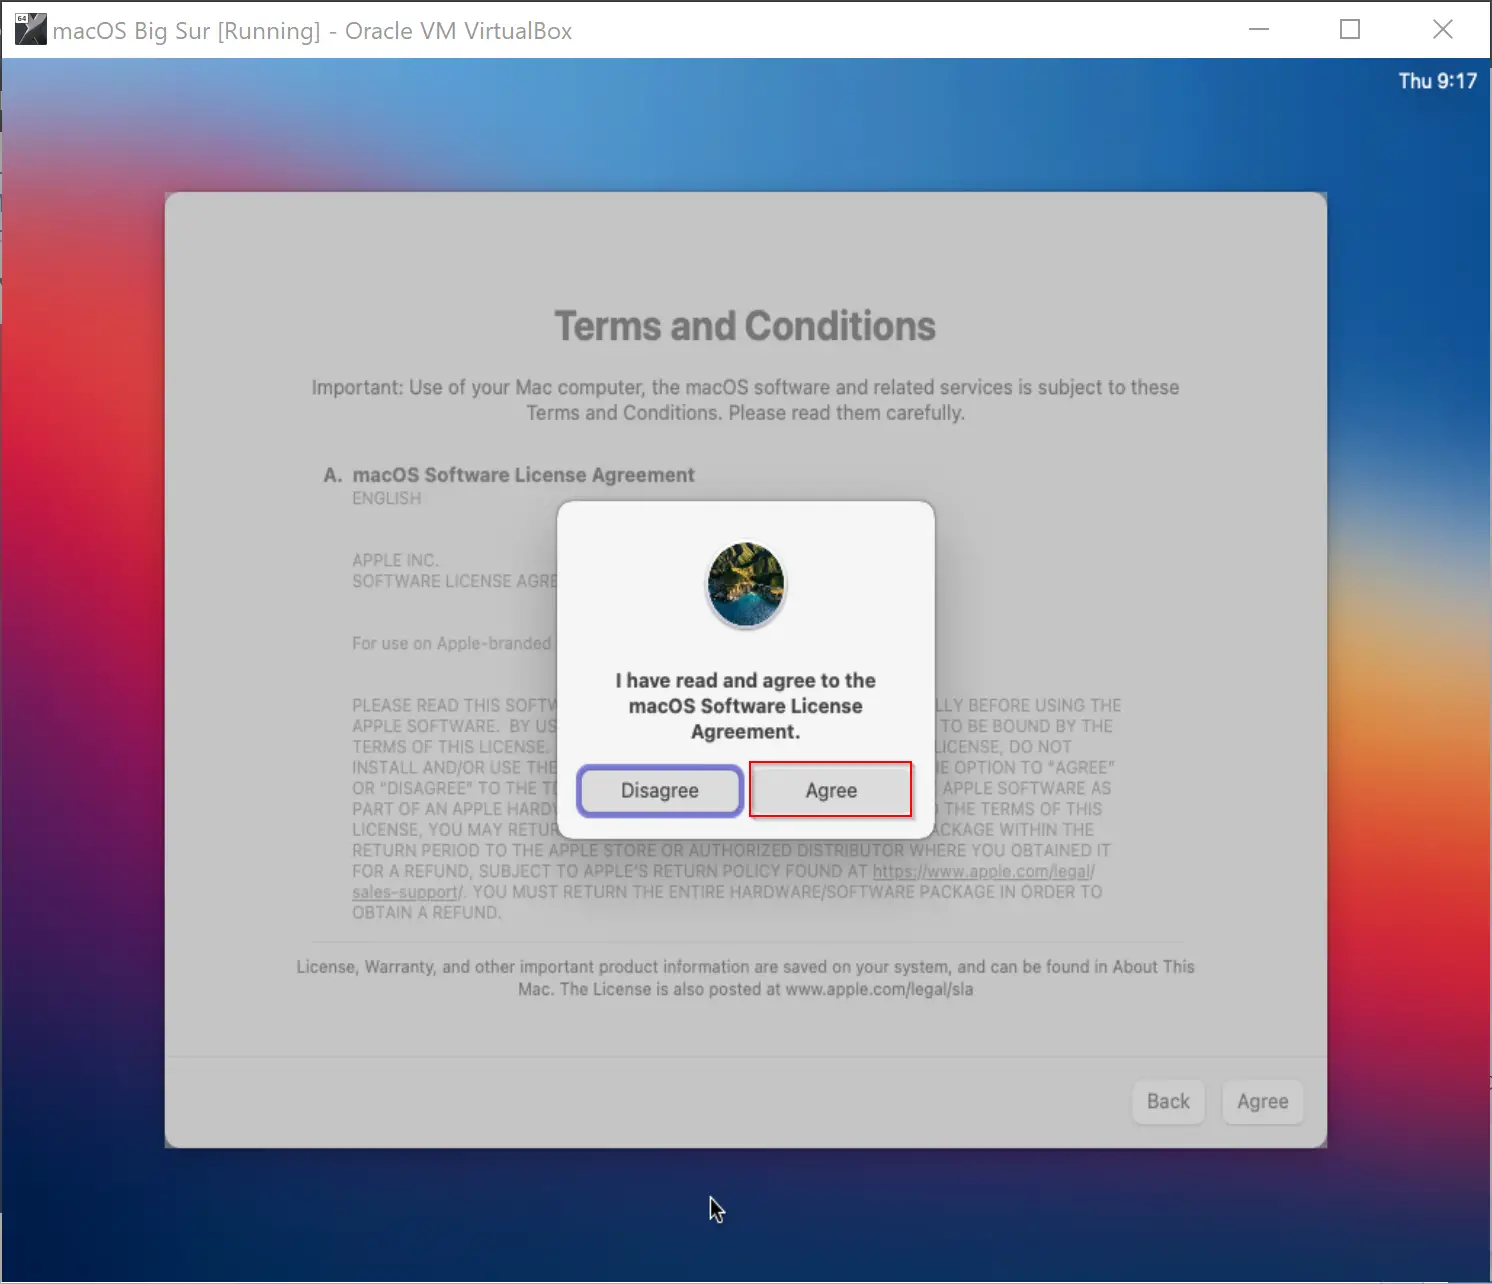
Step 41. Again click the Agree button on the pop-up window that opens.
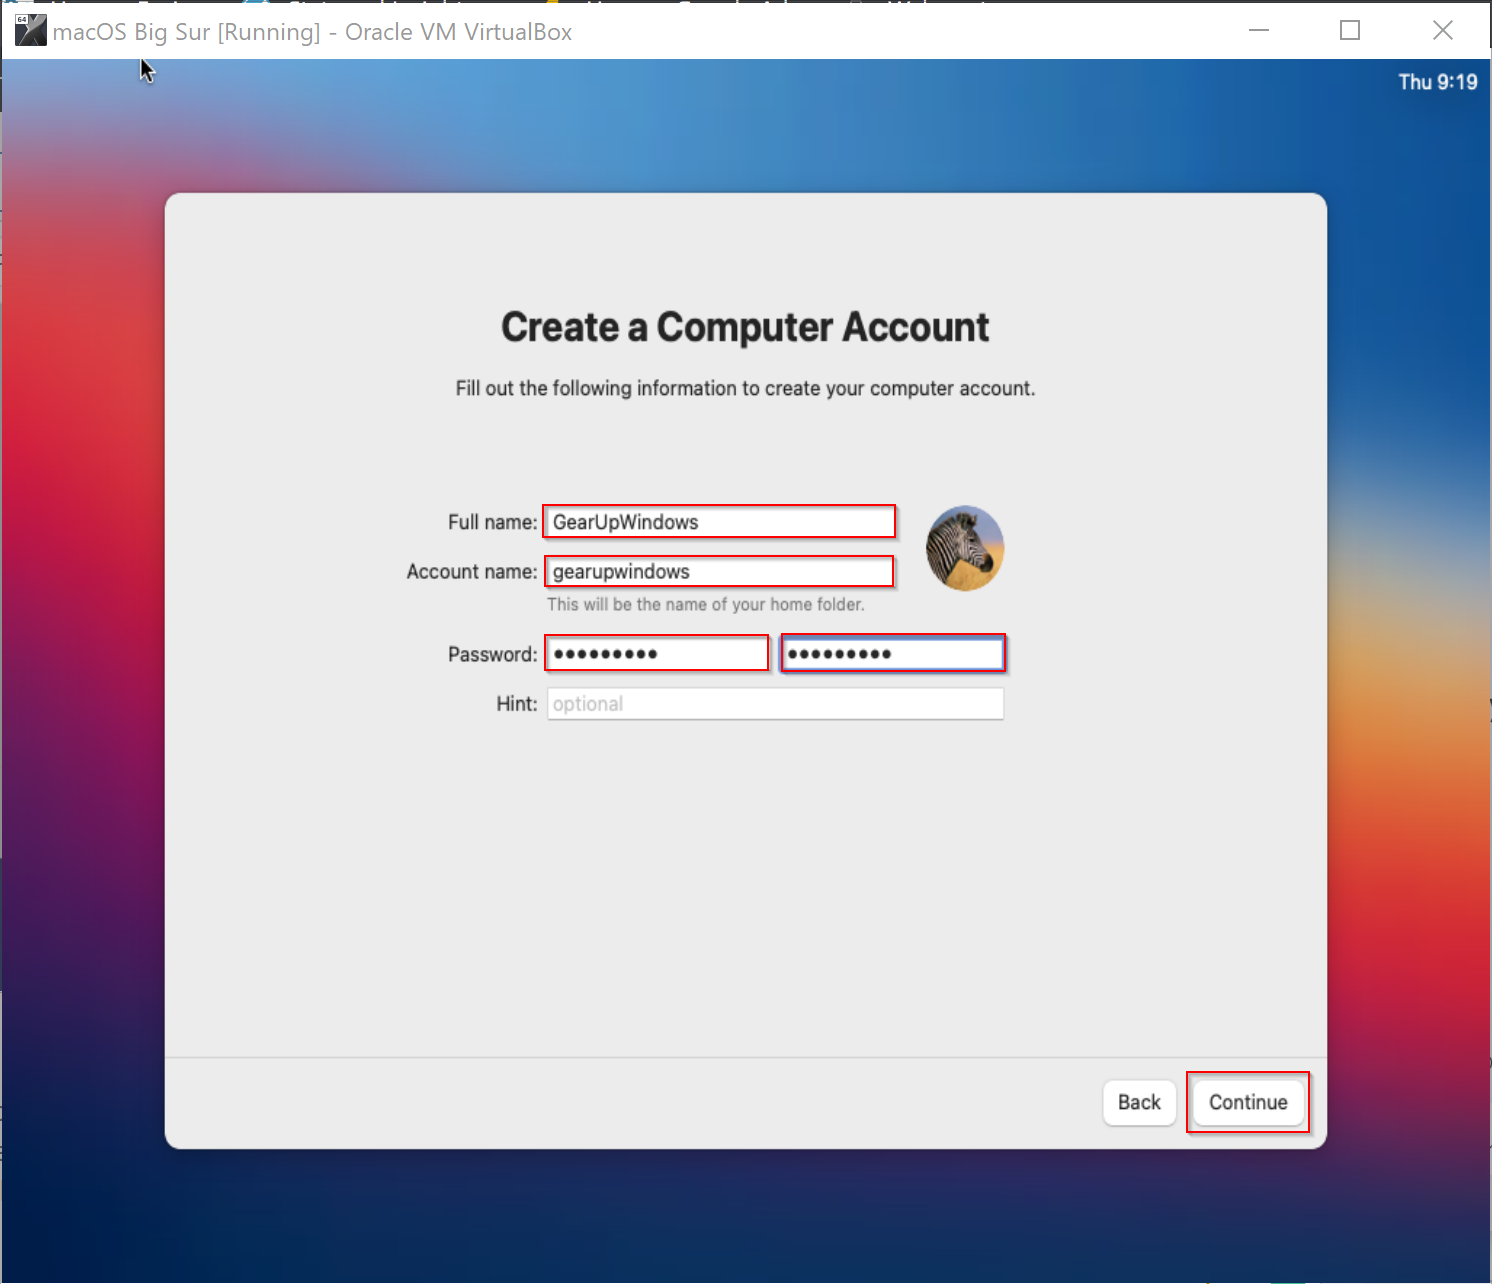
Step 42. Now fill in the full name, account name, password, and then verify the password. When done, click the Continue button.
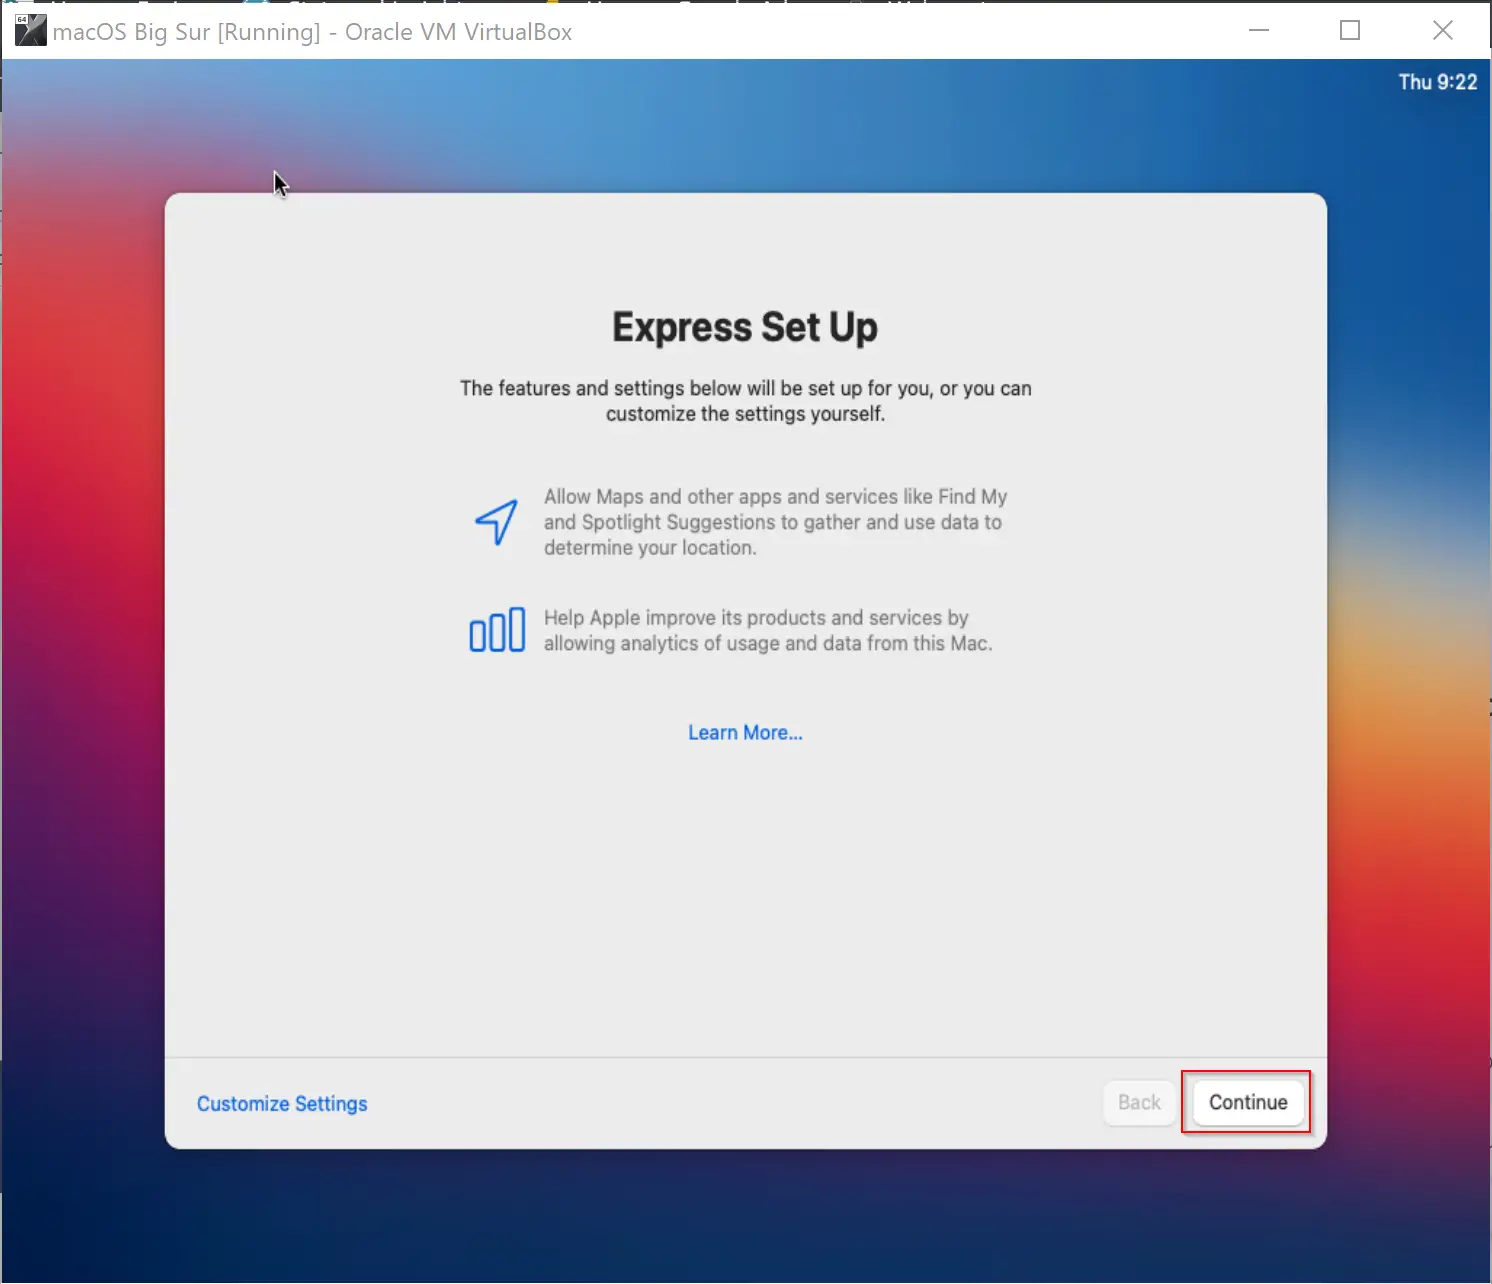
Step 43. Click the Continue button in Express Set Up.
Step 44. Click Continue on Analytics.

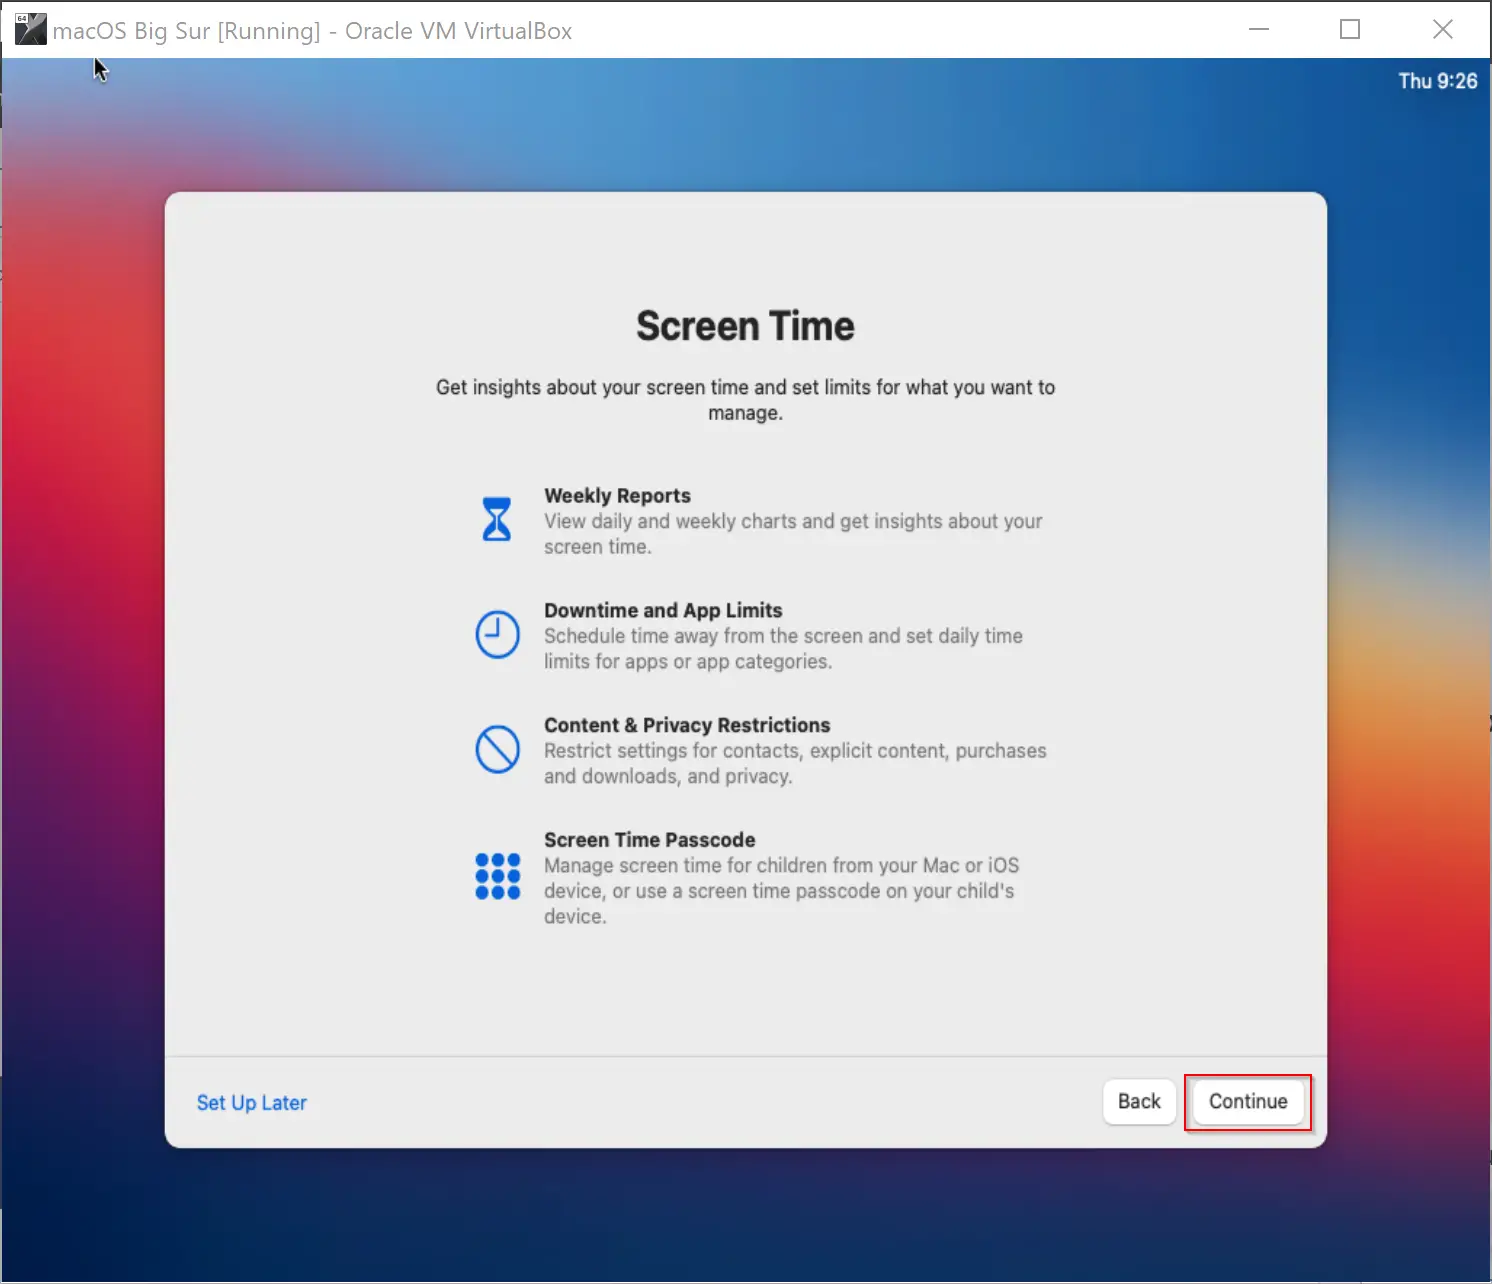
Step 45. Click Continue on the Screen Time window.
Step 46. Click Continue on Siri.

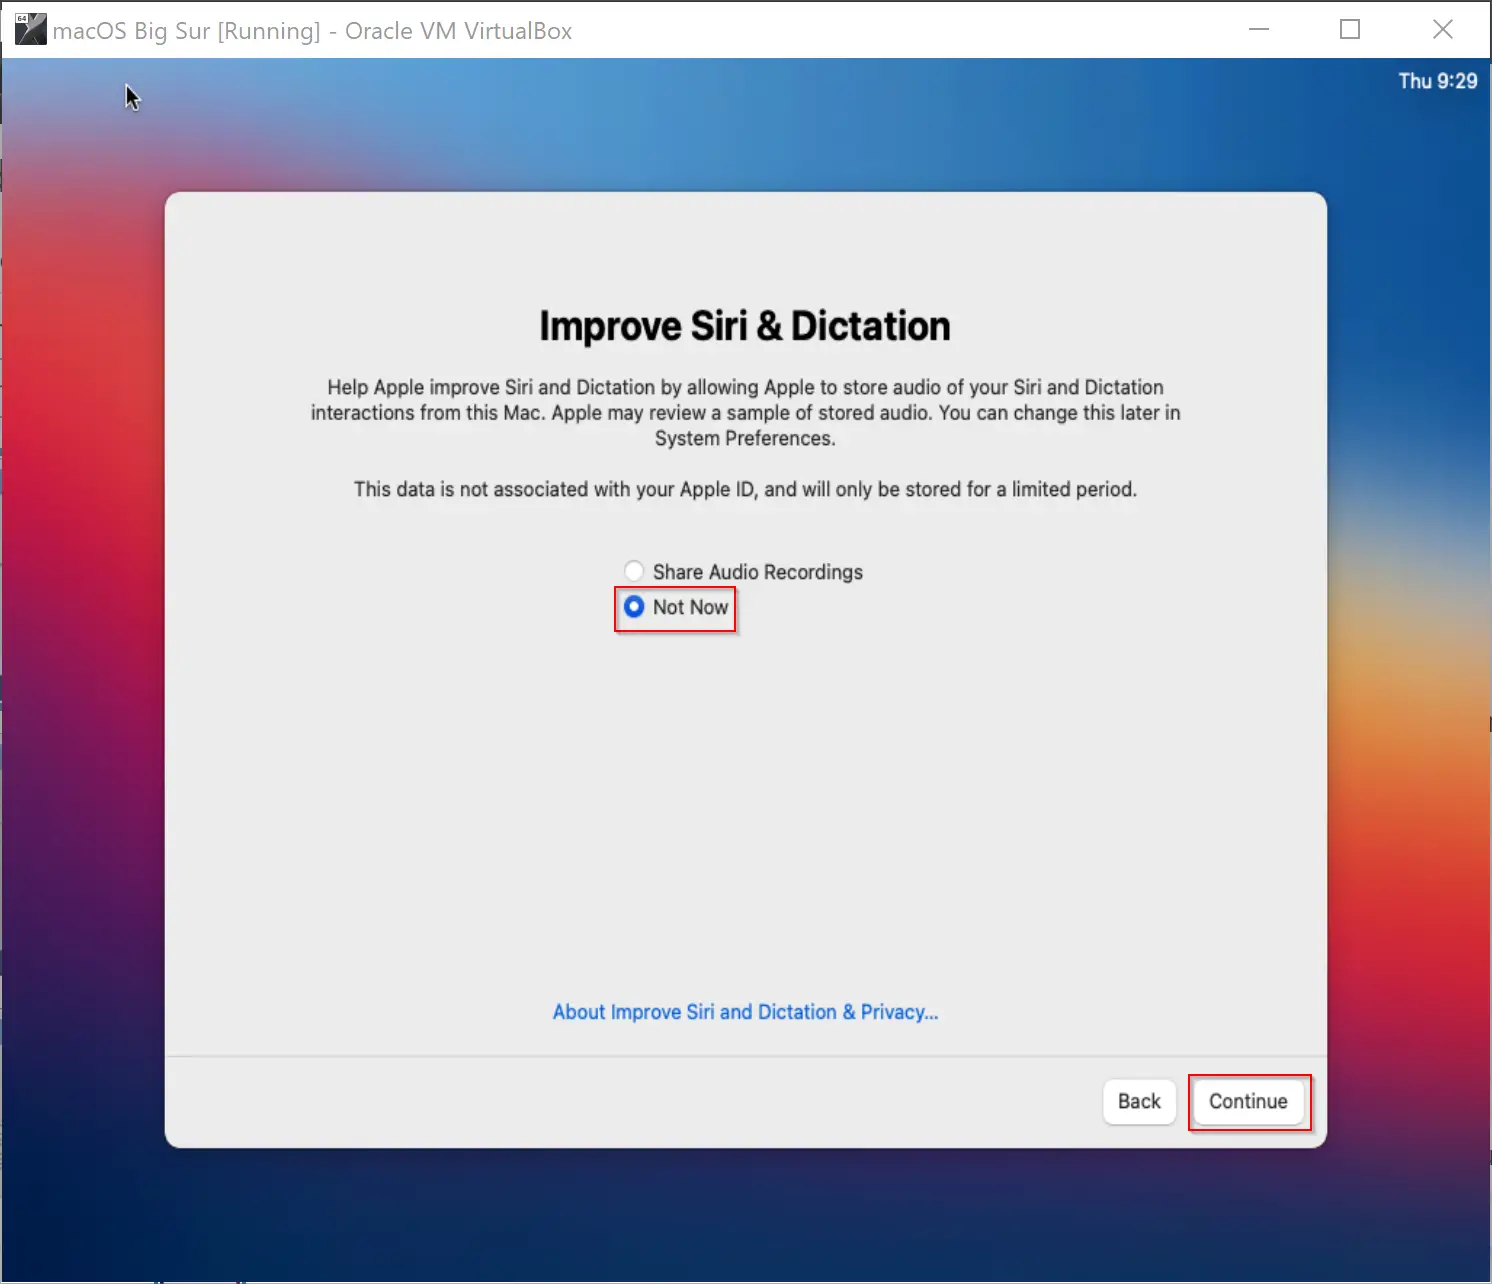
Step 47. Select the Not Now option and then click Continue.
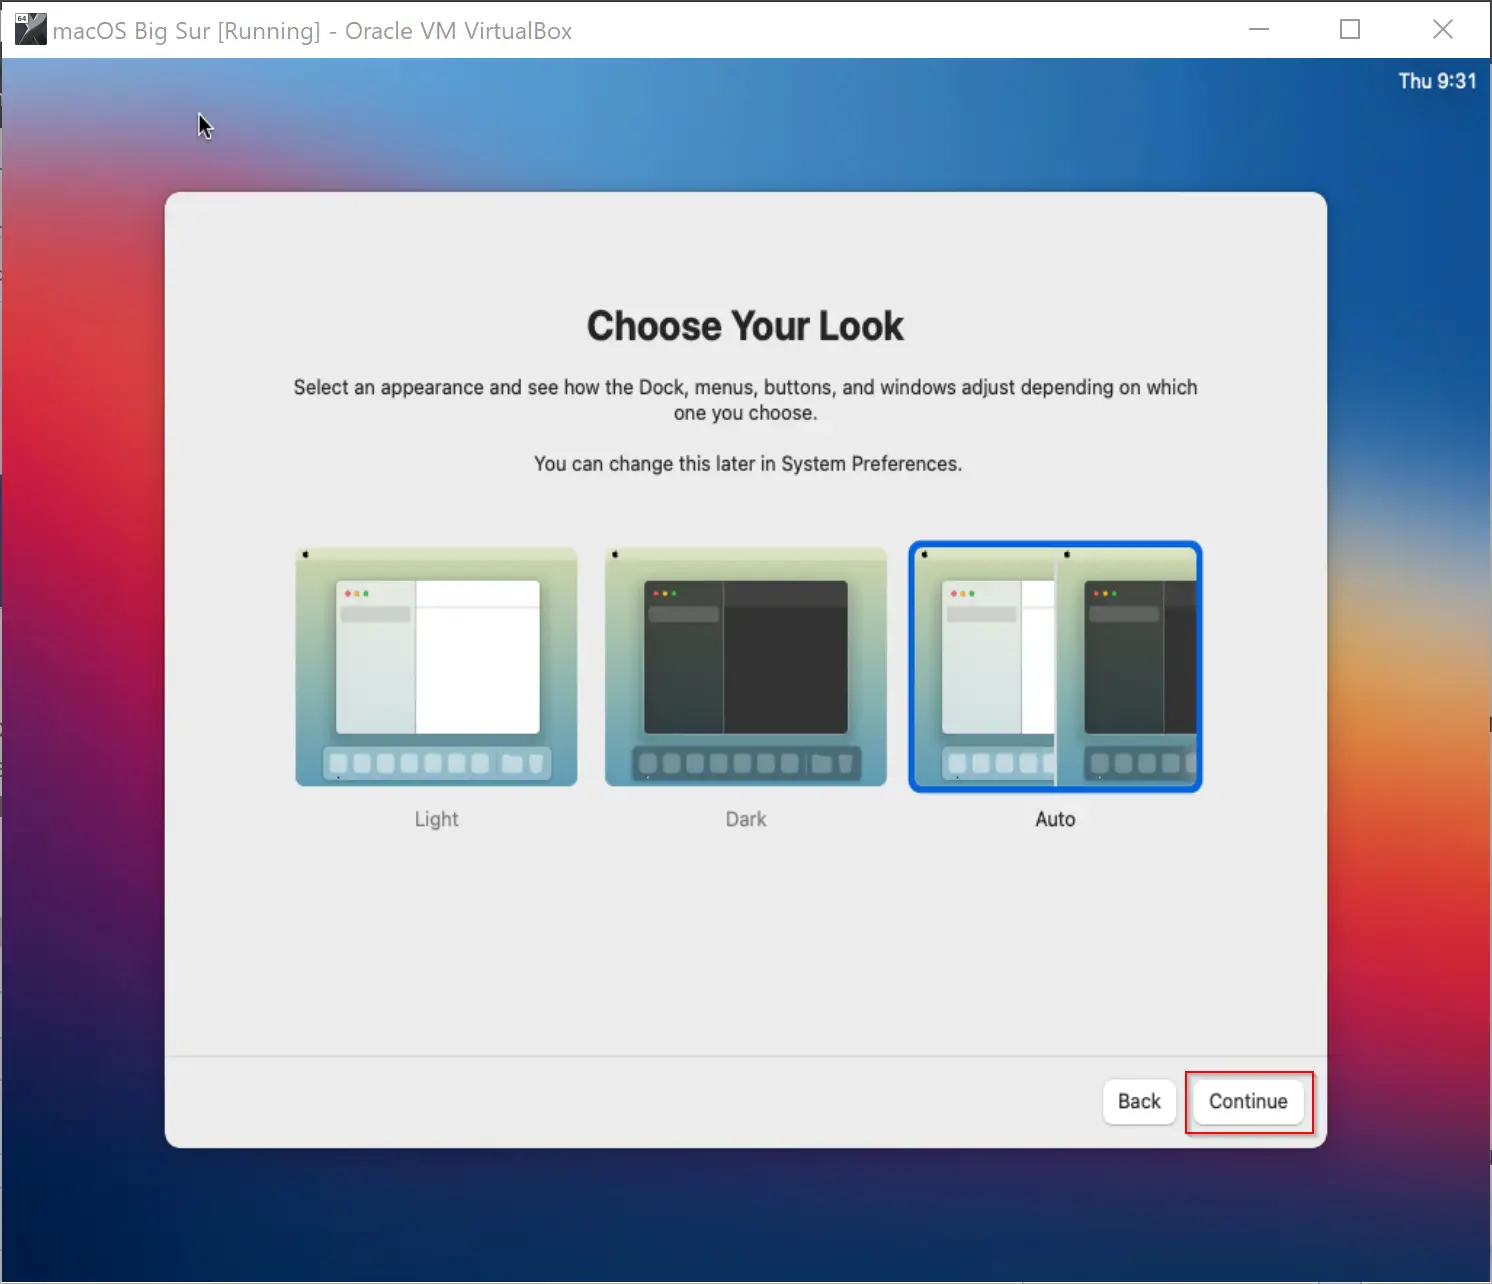
Step 48. Select appearance from Light, Dark, and Auto options, and click Continue.
Step 49. Click Continue on the Keyboard Setup Assistant window. Then follow the on-screen instruction to calibrate the keyboard.
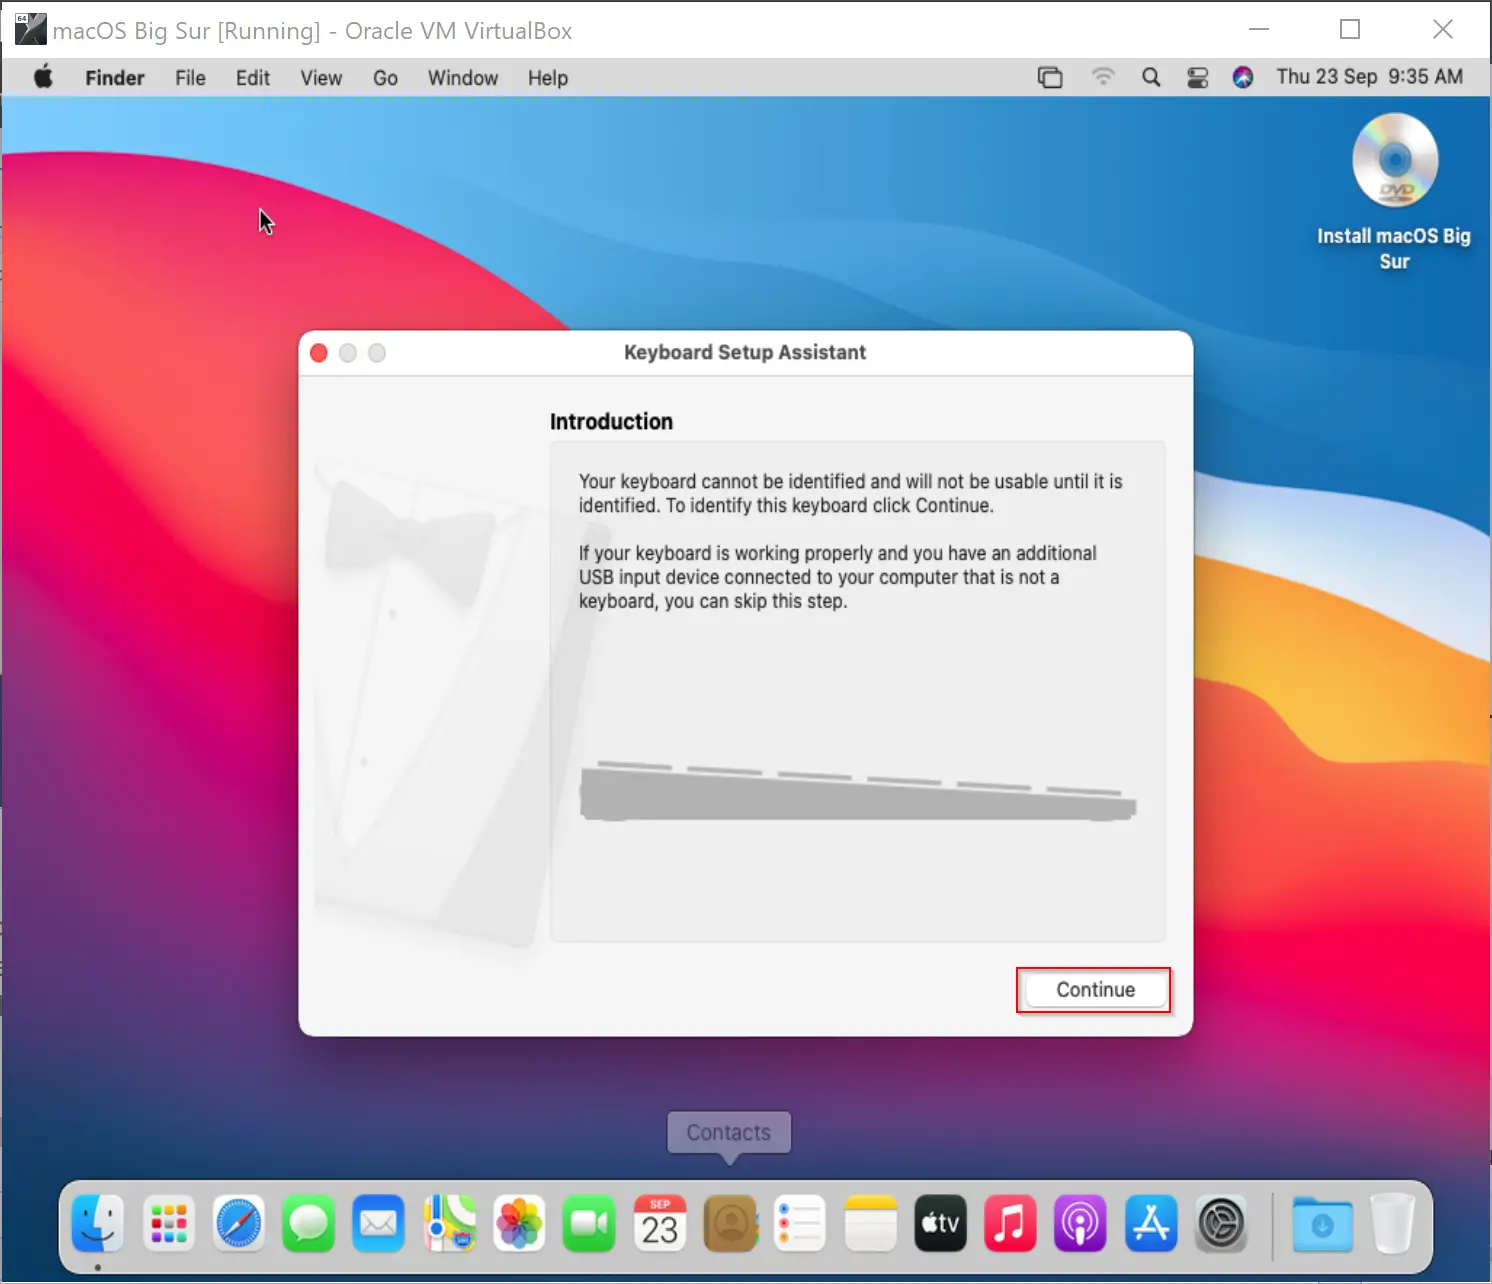
Now, you have successfully installed macOS Big Sur on your virtual machine.
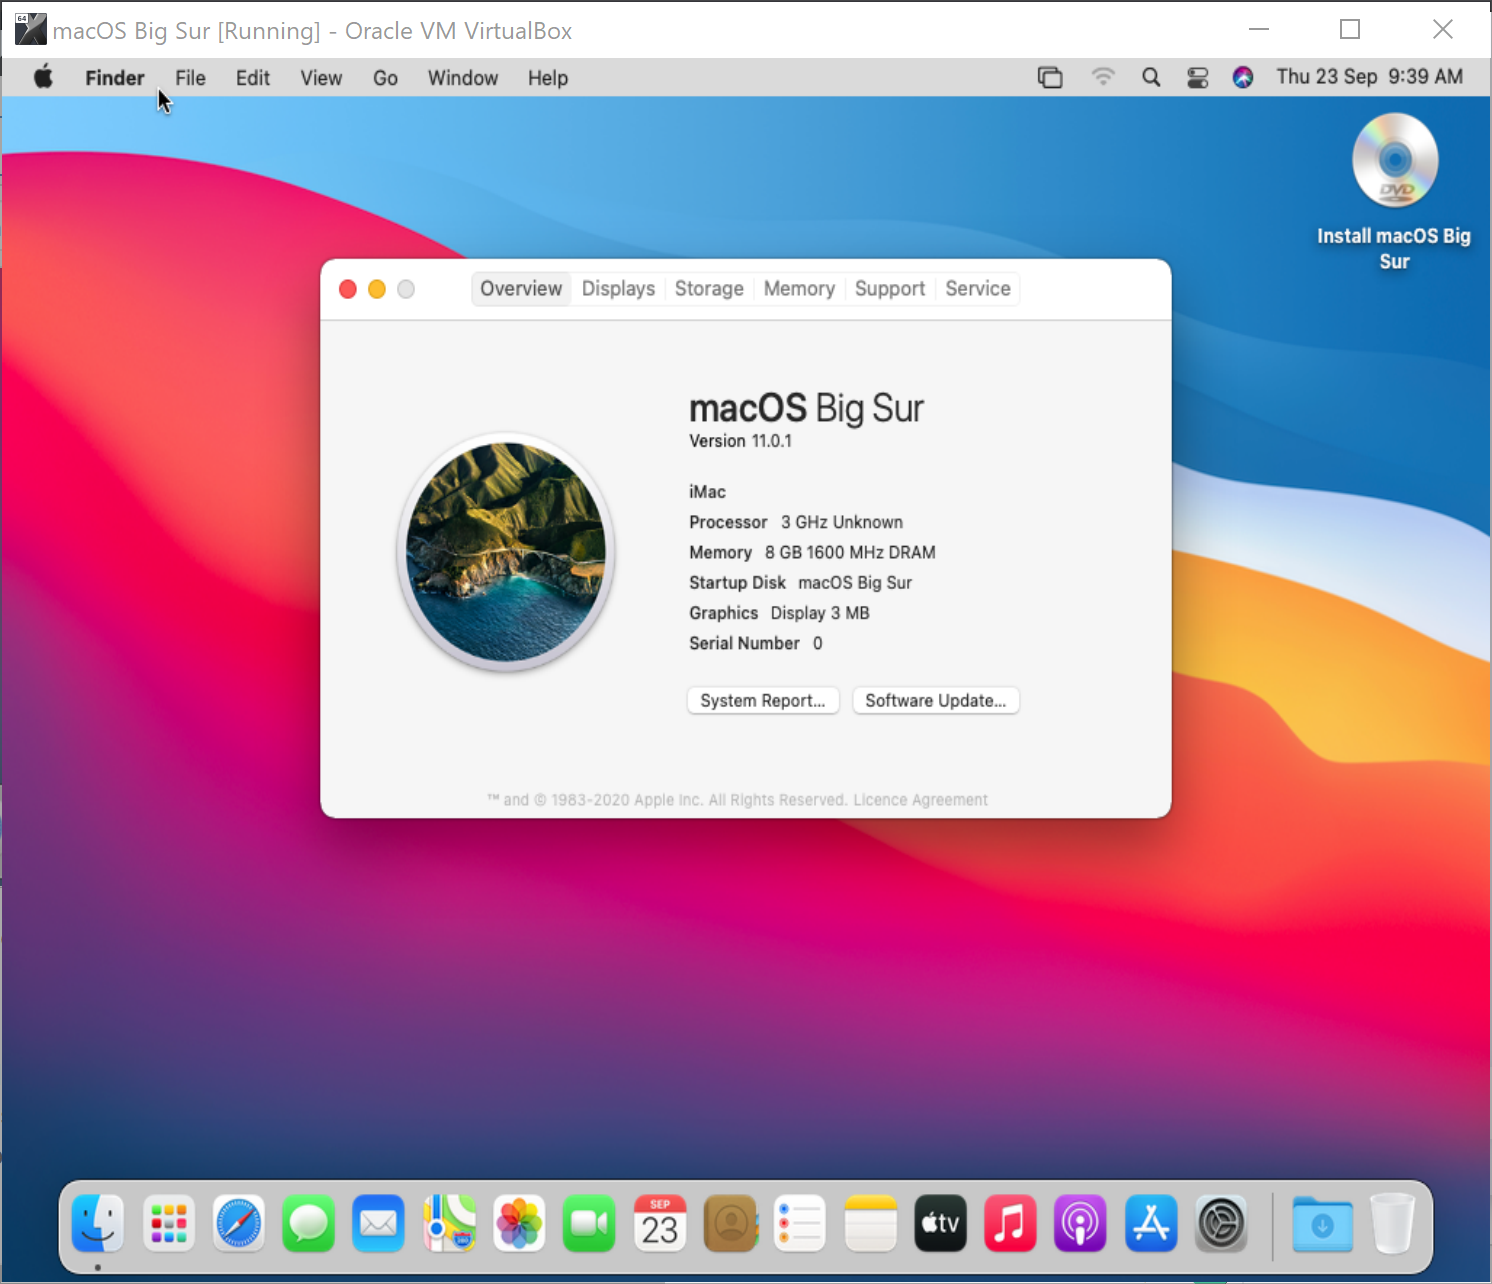
Although the procedure mentioned above primarily focuses on macOS Big Sur, you can use the same method for other recent releases of macOS. You can update your macOS installed in your virtual machine to the latest software, just like you usually would on an actual Mac.
Good luck!
Conclusion
In conclusion, running macOS Big Sur on a Windows 11/10 PC is not impossible with VirtualBox. With this application, you can install multiple operating systems on a single computer and switch between them with ease. However, before you start installing macOS, make sure to download the necessary files, including VirtualBox for Windows, VirtualBox Extension Pack, and macOS Big Sur ISO. Following the step-by-step guide provided, you can successfully install macOS Big Sur on your Windows PC using VirtualBox. By doing this, you can experience the features of macOS Big Sur without having to purchase an Apple MacBook. However, keep in mind that running macOS on a virtual machine may not provide you with the same level of performance as running it natively on an Apple device.
Error installing after selection of iso
Failed to open a session for the virtual machine Big Sur.
Failed to query SMC value from the host (VERR_INVALID_HANDLE).
Result Code: E_FAIL (0x80004005)
Component: ConsoleWrap
Interface: IConsole {872da645-4a9b-1727-bee2-5585105b9eed}
kindly resolve
This is not working on AMD machines.
When I click ‘Start”, I get
Failed to query SMC value from the host (VERR_INVALID_HANDLE).
change the smc value from 1 to 0 to get this to work.
I would love for that to work, what is that
Can’t sign into icloud with this installed on Virtual Box
Unsupported_Icloud_device ??? Googled around , says license was possibly black listed. Any ideas how to get around this?
For those running into the “Failed to query SMC value from the host (VERR_INVALID_HANDLE).”
Close Virtual box and open cmd prompt as an admin
cd into the virtualbox directory
cd “C:\Program Files\Oracle\VirtualBox\”
Enter the following command
VBoxManage setextradata “macOS Big Sur” “VBoxInternal/Devices/smc/0/Config/GetKeyFromRealSMC” 0
Open virtual box and start the VM
On Windows 11 I had some trouble getting the OS to run with the same “Failed to query SMC value from the host (VERR_INVALID_HANDLE).” error.
From:
https://osxdaily.com/2021/07/15/how-install-macos-virtualbox-windows/
This comment fixed my issues:
Viktar Ktl says:
”
March 12, 2022 at 12:23 am
My OS is Windows 11. CPU is Tiger Lake.
Did not help me:
VBoxManage setextradata “vbname” “VBoxInternal/Devices/smc/0/Config/GetKeyFromRealSMC” 0
Steps that helped me:
1. Install vbox 6.1.10 (didn’t need to)
2. Go to Windows Security -> Device security -> Core isolation details. Disable Memory integrity.
3. Open command line as admin and run command: bcdedit /set hypervisorlaunchtype off
4. Restart PC
5. MacOs should run successfully
6. Update VirtualBox to the latest version 6.1.32 (didn’t need to)
”
For me it was the disabling memory integrity setting which I had manually set to on, as well as the guidance from Brett above.
macOS Update: how can I stop the update of macOS Big Sur during the installation, since it takes more than 8 hours and I can go further now